stop start FIAT LINEA 2007 1.G Owners Manual
[x] Cancel search | Manufacturer: FIAT, Model Year: 2007, Model line: LINEA, Model: FIAT LINEA 2007 1.GPages: 230, PDF Size: 3.31 MB
Page 8 of 230
7
SAFETY
DEVICES
CORRECT USE
OF THE
CAR
WARNING
LIGHTS AND
MESSAGES
IN AN
EMERGENCY
CAR
MAINTENANCE
TECHNICAL
SPECIFICATIONS
INDEX
DASHBOARD
AND CONTROLS
In this case, turn the key to STOPand
then back to MAR; try with the other
keys provided if the problem persists.
Contact a Fiat Dealership if you still can-
not start the engine.
IMPORTANT Each key has its own code
which must be stored by the system ECU.
Contact a Fiat Dealership to have new
keys (up to eight) stored. Warning light Ycoming on when driving
❒If the warning light Yturns on, this
means that the system is running a self-
test (for example for a voltage drop).
❒If the warning light Ystays on, con-
tact a Fiat Dealership.
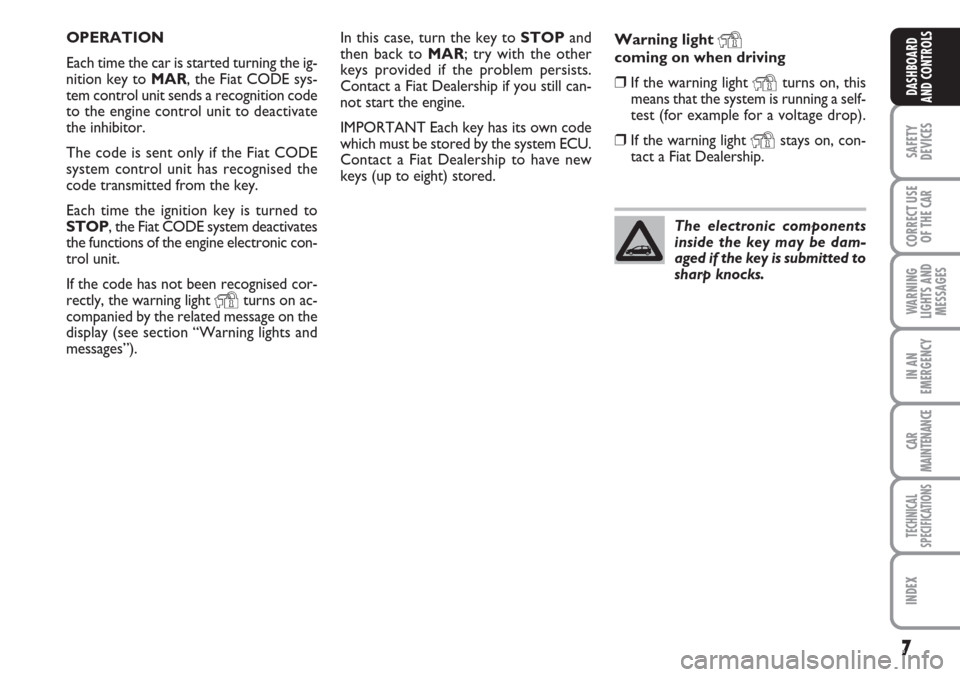
The electronic components
inside the key may be dam-
aged if the key is submitted to
sharp knocks.
OPERATION
Each time the car is started turning the ig-
nition key to MAR, the Fiat CODE sys-
tem control unit sends a recognition code
to the engine control unit to deactivate
the inhibitor.
The code is sent only if the Fiat CODE
system control unit has recognised the
code transmitted from the key.
Each time the ignition key is turned to
STOP, the Fiat CODE system deactivates
the functions of the engine electronic con-
trol unit.
If the code has not been recognised cor-
rectly, the warning light
Yturns on ac-
companied by the related message on the
display (see section “Warning lights and
messages”).
Page 14 of 230
13
SAFETY
DEVICES
CORRECT USE
OF THE
CAR
WARNING
LIGHTS AND
MESSAGES
IN AN
EMERGENCY
CAR
MAINTENANCE
TECHNICAL
SPECIFICATIONS
INDEX
DASHBOARD
AND CONTROLS
IGNITION
DEVICE
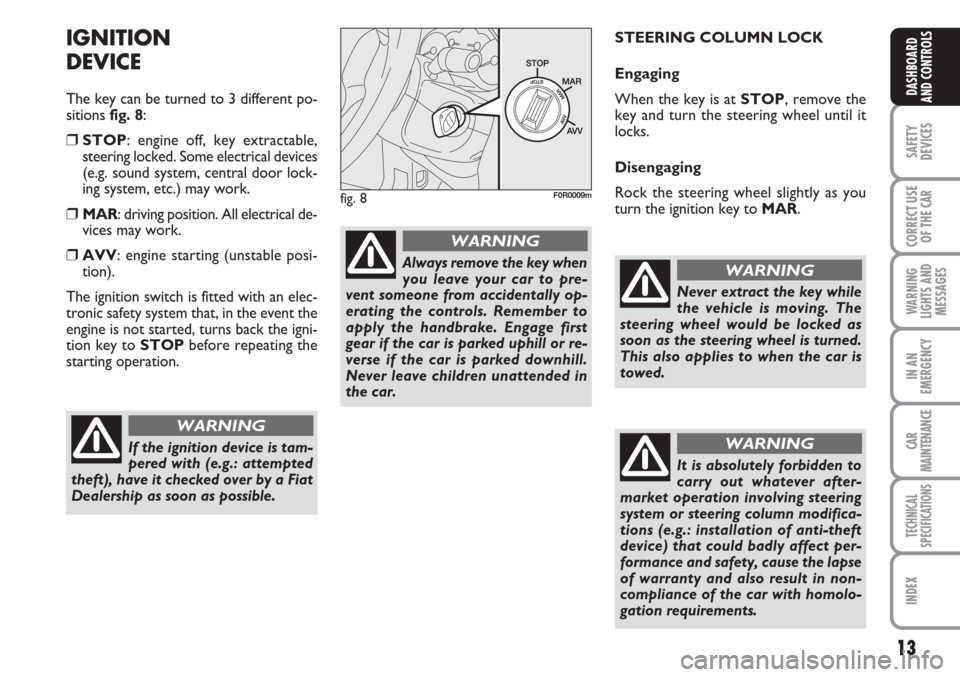
The key can be turned to 3 different po-
sitions fig. 8:
❒STOP: engine off, key extractable,
steering locked. Some electrical devices
(e.g. sound system, central door lock-
ing system, etc.) may work.
❒MAR: driving position. All electrical de-
vices may work.
❒AVV: engine starting (unstable posi-
tion).
The ignition switch is fitted with an elec-
tronic safety system that, in the event the
engine is not started, turns back the igni-
tion key to STOPbefore repeating the
starting operation.STEERING COLUMN LOCK
Engaging
When the key is at STOP, remove the
key and turn the steering wheel until it
locks.
Disengaging
Rock the steering wheel slightly as you
turn the ignition key to MAR.
If the ignition device is tam-
pered with (e.g.: attempted
theft), have it checked over by a Fiat
Dealership as soon as possible.
WARNING
Always remove the key when
you leave your car to pre-
vent someone from accidentally op-
erating the controls. Remember to
apply the handbrake. Engage first
gear if the car is parked uphill or re-
verse if the car is parked downhill.
Never leave children unattended in
the car.
WARNING
fig. 8F0R0009m
Never extract the key while
the vehicle is moving. The
steering wheel would be locked as
soon as the steering wheel is turned.
This also applies to when the car is
towed.
WARNING
It is absolutely forbidden to
carry out whatever after-
market operation involving steering
system or steering column modifica-
tions (e.g.: installation of anti-theft
device) that could badly affect per-
formance and safety, cause the lapse
of warranty and also result in non-
compliance of the car with homolo-
gation requirements.
WARNING
Page 21 of 230
20
SAFETY
DEVICES
CORRECT USE
OF THE
CAR
WARNING
LIGHTS AND
MESSAGES
IN AN
EMERGENCY
CAR
MAINTENANCE
TECHNICAL
SPECIFICATIONS
INDEX
DASHBOARD
AND CONTROLS
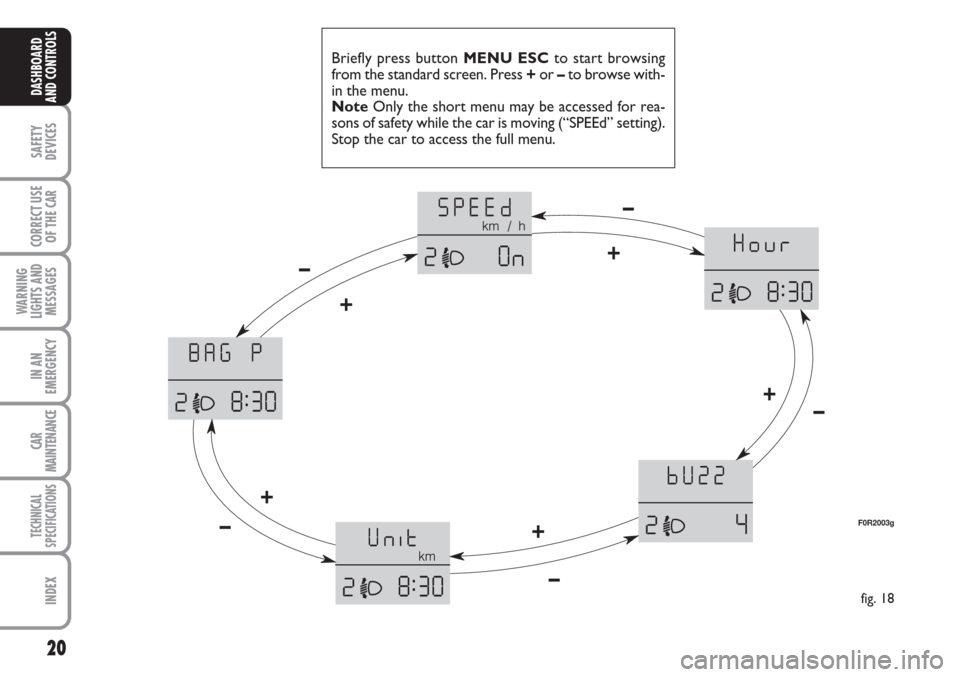
Briefly press button MENU ESCto start browsing
from the standard screen. Press +or –to browse with-
in the menu.
NoteOnly the short menu may be accessed for rea-
sons of safety while the car is moving (“SPEEd” setting).
Stop the car to access the full menu.
fig. 18
F0R2003g
+ –
+
–
+
–+
– +–
Page 35 of 230
34
SAFETY
DEVICES
CORRECT USE
OF THE
CAR
WARNING
LIGHTS AND
MESSAGES
IN AN
EMERGENCY
CAR
MAINTENANCE
TECHNICAL
SPECIFICATIONS
INDEX
DASHBOARD
AND CONTROLS
Example:Day
YearMonth TürkNederlands
Español
Português
Français
Polski
Italiano
Deutsch
BELT BUZZERRAIN SENSOR
(where provided)
TRIP B DATA
SET DATE
FIRST PAGE
SEE RADIO
AUTOCLOSE
UNIT LANGUAGE BUZZER VOL. BUTTON VOL.
MENU ESC
briefly press
MENU ESC
briefly press
fig. 25
SERVICE
F0R2005g
SET TIME SPEED BEEP
EXIT MENU
PASSENGER BAG
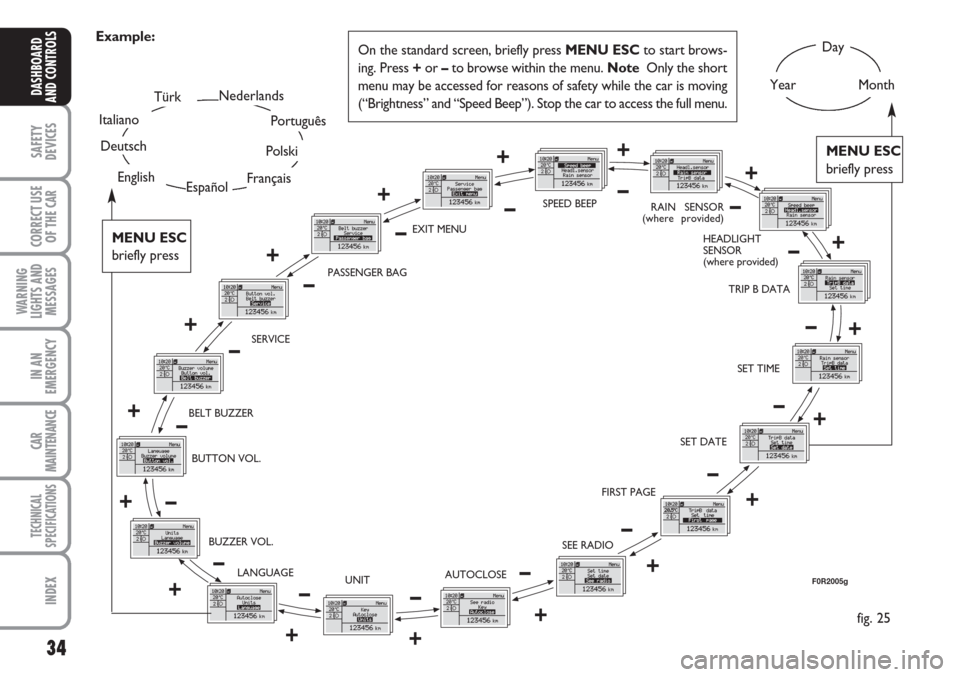
EnglishOn the standard screen, briefly press MENU ESCto start brows-
ing. Press +or –to browse within the menu. Note Only the short
menu may be accessed for reasons of safety while the car is moving
(“Brightness” and “Speed Beep”). Stop the car to access the full menu.
HEADLIGHT
SENSOR
(where provided)– +++
+
+
+
+
+
+
+
+ + + ++++–
––
–– –
–
–
–
– –
– ––––
Page 53 of 230
52
SAFETY
DEVICES
CORRECT USE
OF THE
CAR
WARNING
LIGHTS AND
MESSAGES
IN AN
EMERGENCY
CAR
MAINTENANCE
TECHNICAL
SPECIFICATIONS
INDEX
DASHBOARD
AND CONTROLS
FRONT WINDOW FAST
DEMISTING/
DEFROSTING (WINDSCREEN
AND SIDE WINDOWS)
Proceed as follows:
❒turn knob Ato the red sector;
❒switch internal air recirculation off;
❒turn knob Cto -;
❒knob Bturned to 4 -(max. fan
speed).
After demisting/defrosting, operate the
controls to restore the required comfort.Window demisting
In the event of considerable outside mois-
ture and/or rain and/or considerable dif-
ferences in temperature inside and outside
the passenger compartment, perform the
following preventive demisting procedure:
❒turn knob Ato the red sector;
❒switch internal air recirculation off;
❒turn knob Cto -. Change it to posi-
tion con
®if demisting is insufficient;
❒turn knob Bto 2ndspeed.HEATED REAR WINDOW
AND DOOR MIRROR
DEMISTING/DEFROSTING
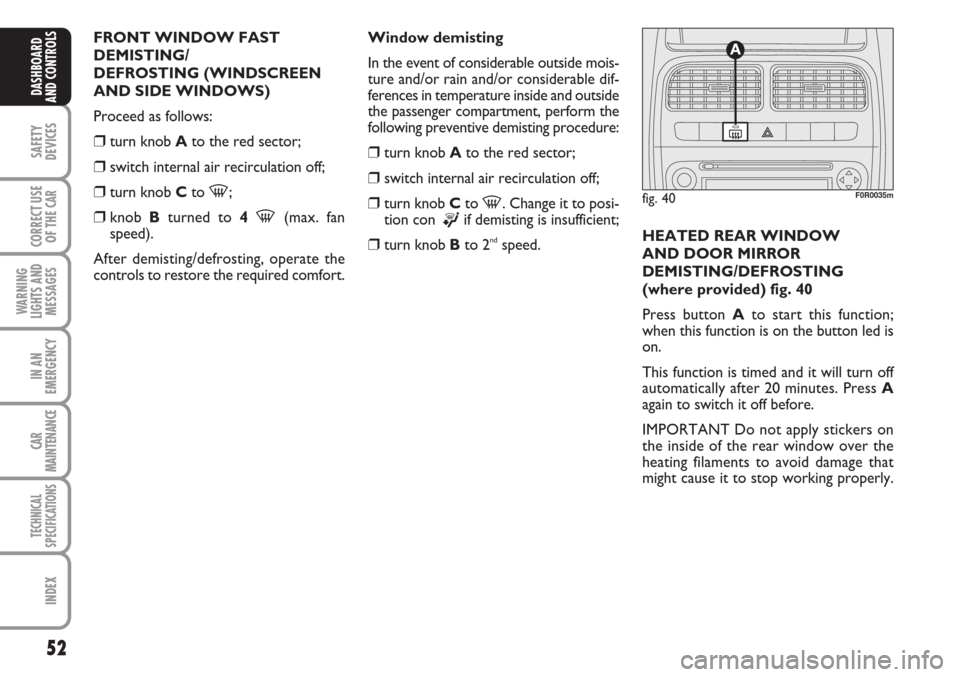
(where provided) fig. 40
Press button Ato start this function;
when this function is on the button led is
on.
This function is timed and it will turn off
automatically after 20 minutes. Press A
again to switch it off before.
IMPORTANT Do not apply stickers on
the inside of the rear window over the
heating filaments to avoid damage that
might cause it to stop working properly.
fig. 40F0R0035m
Page 58 of 230
57
SAFETY
DEVICES
CORRECT USE
OF THE
CAR
WARNING
LIGHTS AND
MESSAGES
IN AN
EMERGENCY
CAR
MAINTENANCE
TECHNICAL
SPECIFICATIONS
INDEX
DASHBOARD
AND CONTROLS
Window demisting
In the event of considerable outside mois-
ture and/or rain and/or considerable dif-
ferences in temperature inside and outside
the passenger compartment, perform the
following preventive demisting procedure:
❒turn knob Ato the red sector;
❒switch internal air recirculation off;
❒turn knob Cto -and change it back
to
®if demisting does not improve;
❒turn knob Bto 2ndspeed.
IMPORTANT The climate control system
is very useful to prevent window misting
up in presence of high humidity since it
dries the air.HEATED REAR WINDOW AND
DOOR MIRROR DEMISTING/
DEFROSTING (where provided)
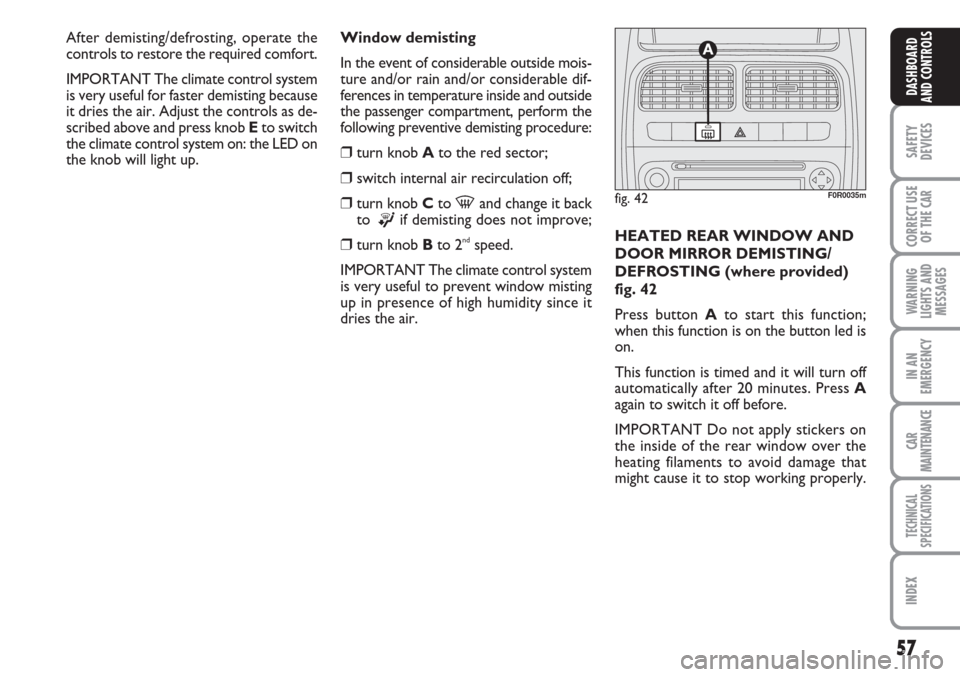
fig. 42
Press button Ato start this function;
when this function is on the button led is
on.
This function is timed and it will turn off
automatically after 20 minutes. Press A
again to switch it off before.
IMPORTANT Do not apply stickers on
the inside of the rear window over the
heating filaments to avoid damage that
might cause it to stop working properly.
fig. 42F0R0035m
After demisting/defrosting, operate the
controls to restore the required comfort.
IMPORTANT The climate control system
is very useful for faster demisting because
it dries the air. Adjust the controls as de-
scribed above and press knob Eto switch
the climate control system on: the LED on
the knob will light up.
Page 62 of 230
61
SAFETY
DEVICES
CORRECT USE
OF THE
CAR
WARNING
LIGHTS AND
MESSAGES
IN AN
EMERGENCY
CAR
MAINTENANCE
TECHNICAL
SPECIFICATIONS
INDEX
DASHBOARD
AND CONTROLS
USING THE CLIMATE
CONTROL SYSTEM
The system can be started in different
ways, but it is advisable to start by press-
ing the AUTObutton and then turning
the knobs to set the temperature required
on the display.
The system will start running automatically
in this way and the set comfortable tem-
perature will be reached as quickly as pos-
sible. The system will adjust the temper-
ature, the quantity and the distribution of
the air introduced into the passenger com-
partment and will manage the recircula-
tion function and the compressor.
Manual intervention is only required for
the following functions during fully auto-
matic operation.
❒Tair recirculation, to keep the
function always either on or off;
❒Zto speed up demisting/defrosting of
windscreen, rear window and exter-
nal rearview mirrors;During completely automatic system op-
eration, you can vary the set temperature,
the air distribution and the fan speed us-
ing the corresponding buttons or knobs
at any time: the system will automatically
change settings to adapt to the new re-
quest.
During fully automatic operation (FULL
AUTO), the word FULLwill disappear
if the air distribution, air speed, compres-
sor and/or recirculation settings are
changed. In this way, the functions will
switch from automatic to manual control
until AUTOis pressed again. With on or
more manually set functions, the intro-
duced air temperature is still managed au-
tomatically by the system, except for when
the compressor is off: in the case, the air
introduced into the passenger compart-
ment cannot be cooler than the outside
air.Air temperature adjustment
knob (I)
Turn the knob either clockwise or anti-
clockwise to increase or lower the re-
quested temperature in the passenger
compartment. The set temperature is
shown on the display.
Turn the knob either all to the right or
all to the left to the extreme HIor LO
position to use the maximum heating or
maximum cooling functions:
❒HI function (maximum heating):
select by turning the temperature knob
clockwise over the maximum value
(32 °C).
This function may be used to heat up the
passenger compartment exploiting the
system potential to the maximum. In this
condition, the system stop controlling
temperature automatically and sets air
mixing to maximum heating. The air speed
and distribution are fixed.
Specifically, if the heating fluid is not suffi-
ciently warm, the fan will not start up at
the maximum speed immediately to limit
introducing excessively cool air into the
passenger compartment.
All manual settings will be allowed when
this function is on.
Page 65 of 230
64
SAFETY
DEVICES
CORRECT USE
OF THE
CAR
WARNING
LIGHTS AND
MESSAGES
IN AN
EMERGENCY
CAR
MAINTENANCE
TECHNICAL
SPECIFICATIONS
INDEX
DASHBOARD
AND CONTROLS
Climate control compressor
enabling button (F)
Press √to switch the climate control
compressor off (if on). The icon on the
display will go out.
Press the button when the LED is off to
restore automatically system control
and use of the compressor. The icon
will light up on the display in this case.
The system will switch recirculation off
when the compressor is switched off to
prevent misting up. Although the system
is capable of maintaining the required tem-
perature, the word FULLwill disappear
from the display. If on the other hand the
system cannot maintain the required tem-
perature, the digits will blink and the word
AUTOwill disappear.IMPORTANT With the compressor off,
it is not possible to introduced air cooler
than ambient temperature into the pas-
senger compartment. Furthermore, in
certain conditions, the windows could
mist up rapidly because the air is not de-
humidified.The switching off of the climate
control compressor remains in storage
even when the engine has been stopped.
To restore automatic compressor control,
press √again (in this case, the system will
only work as a heater) or press AUTO.
With climate control compressor off, the
fan speed can be set to zero manually (no
bar shown).
With the compressor enabled and the en-
gine started, the fan speed may be reduced
to the minimum setting (only one bar
shown).Fast window demisting/defrosting
button (D)
Press this button: the climate control sys-
tem will automatically switch on all the
functions required for fast windscreen and
front side window demisting/defrosting,
that is:
❒switches on climate control compres-
sor when climatic conditions are suit-
able;
❒air recirculation off;
❒maximum air temperature HI on both
areas;
❒operates proper fan speed according
to engine coolant temperature to lim-
it the flow into the passenger com-
partment of air not warm enough to
demist the windows;
❒directs air flow to windscreen and
front side windows vents;
❒heated rear window on.
Page 69 of 230
68
SAFETY
DEVICES
CORRECT USE
OF THE
CAR
WARNING
LIGHTS AND
MESSAGES
IN AN
EMERGENCY
CAR
MAINTENANCE
TECHNICAL
SPECIFICATIONS
INDEX
DASHBOARD
AND CONTROLS
WINDOW WASHING
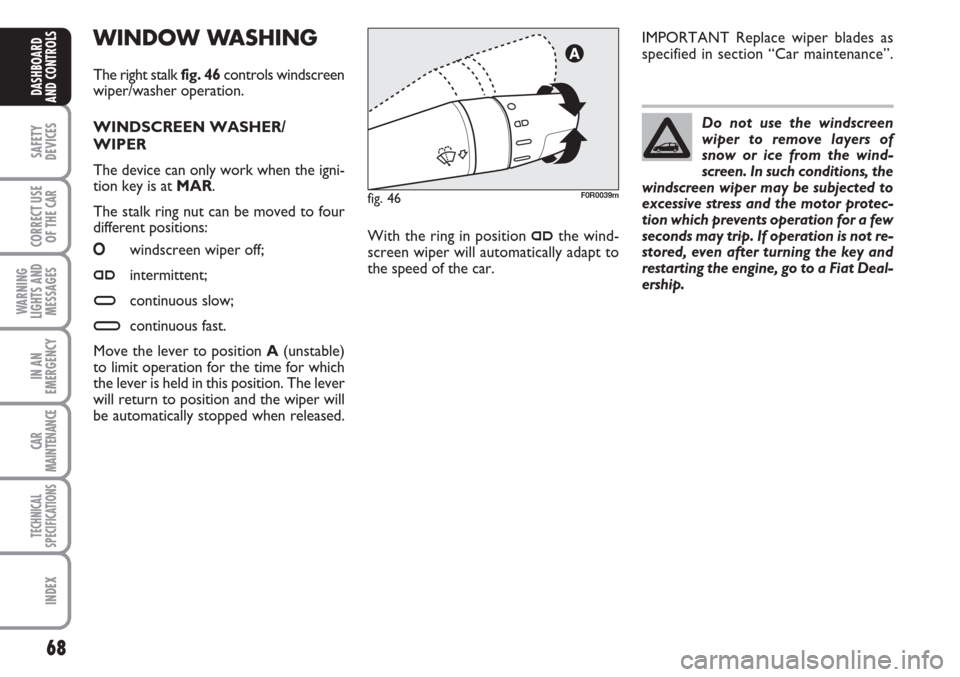
The right stalk fig. 46controls windscreen
wiper/washer operation.
WINDSCREEN WASHER/
WIPER
The device can only work when the igni-
tion key is at MAR.
The stalk ring nut can be moved to four
different positions:
Owindscreen wiper off;
≤intermittent;
≥continuous slow;
¥continuous fast.
Move the lever to position A(unstable)
to limit operation for the time for which
the lever is held in this position. The lever
will return to position and the wiper will
be automatically stopped when released.Do not use the windscreen
wiper to remove layers of
snow or ice from the wind-
screen. In such conditions, the
windscreen wiper may be subjected to
excessive stress and the motor protec-
tion which prevents operation for a few
seconds may trip. If operation is not re-
stored, even after turning the key and
restarting the engine, go to a Fiat Deal-
ership.
With the ring in position
≤the wind-
screen wiper will automatically adapt to
the speed of the car.IMPORTANT Replace wiper blades as
specified in section “Car maintenance”.
fig. 46F0R0039m
Page 70 of 230
69
SAFETY
DEVICES
CORRECT USE
OF THE
CAR
WARNING
LIGHTS AND
MESSAGES
IN AN
EMERGENCY
CAR
MAINTENANCE
TECHNICAL
SPECIFICATIONS
INDEX
DASHBOARD
AND CONTROLS
RAIN SENSOR
(where provided)
The rain sensor is located behind the dri-
ving mirror in contact with the windscreen
and has the purpose of automatically ad-
just, during the intermittent operation, the
frequency of the windscreen wiper
strokes as to the rain intensity.
IMPORTANT Keep clean the glass in the
sensor area.
Activation
Move the right-hand stalk knurled ring to
≤fig. 46.
The activation of the rain sensor is sig-
nalled by a control acquisition “stroke”.
Through the set up menu it is possible to
increase the sensitivity of the rain sensor.
The increase of the sensitivity of the rain
sensor is signalled by a control and acqui-
sition “stroke”.
Operating the windscreen washer with
the rain sensor activated the normal wash-
ing cycle is performed at the end of which
the rain sensor resumes its normal auto-
matic function.Deactivation
Change the stalk knurled ring position
from
≤fig. 46or turn the ignition key
to STOP.
At the next start-up (key at MAR), the
sensor will not be reactivated even if the
knurled ring is at
≤fig. 46. To reacti-
vate the sensor, move the ring from po-
sition
≤to any other position and then
return it to position
≤.
Rain sensor activation will be indicated by
at least one wiper “stroke” even if the
windscreen is dry.
The rain sensor is able to recognize and
automatically adjust itself in the presence
of the following particular conditions:
❒presence of dirt on the controlled sur-
face (salt, dirt, etc.);
❒difference between day and night.
IMPORTANT Streaks of water may cause
unnecessary blade moving. “Smart washing” function
Pull the stalk towards the steering wheel
(unstable position) to operate the wind-
screen washer.
Keeping the stalk pulled for more than half
a second, with just one movement it is
possible to operate the washer jet and the
wiper at the same time.
The wiper stops working three strokes af-
ter releasing the stalk.
A further stroke after 6 seconds com-
pletes the wiping operation.