key FIAT MULTIPLA 2004 1.G Connect NavPlus Manual
[x] Cancel search | Manufacturer: FIAT, Model Year: 2004, Model line: MULTIPLA, Model: FIAT MULTIPLA 2004 1.GPages: 202, PDF Size: 2.22 MB
Page 111 of 202
110
CONNECT NAV
NAVIGATOR
Switching the track playing
time/number display on and off
Proceed as follows to display the
playing track number:
1)in CD-Changer (where fitted)
mode, press MEN (10), the display will
show the CD-Changer setup menu
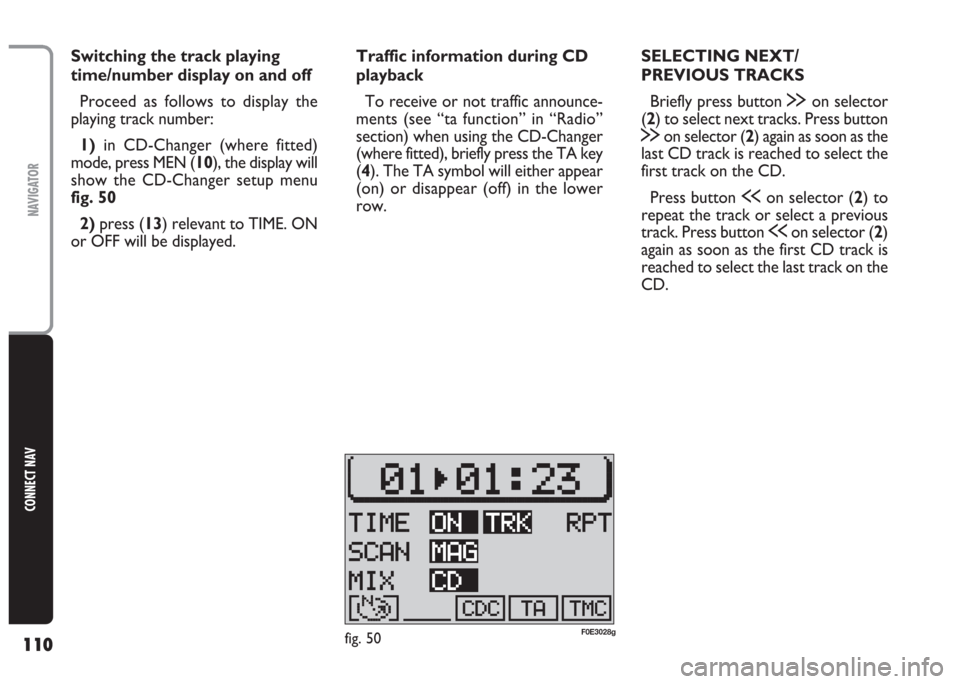
fig. 50
2)press (13) relevant to TIME. ON
or OFF will be displayed. Traffic information during CD
playback
To receive or not traffic announce-
ments (see “ta function” in “Radio”
section) when using the CD-Changer
(where fitted), briefly press the TA key
(4). The TA symbol will either appear
(on) or disappear (off) in the lower
row.SELECTING NEXT/
PREVIOUS TRACKS
Briefly press button §on selector
(2) to select next tracks. Press button
§on selector (2) again as soon as the
last CD track is reached to select the
first track on the CD.
Press button ùon selector (2) to
repeat the track or select a previous
track. Press button ùon selector (2)
again as soon as the first CD track is
reached to select the last track on the
CD.
fig. 50F0E3028g
Page 114 of 202
113
CONNECT NAV
NAVIGATOR
Program FUNCTION
(programming the track
sequence)
You can programme your favourite
track sequence and skip the tracks you
do not like.
Setting the required sequence
Proceed as follows to set the re-
quired sequence:
1)select the required CD
2)press SRC (17) to display the CD-
Changer functions menu fig. 52
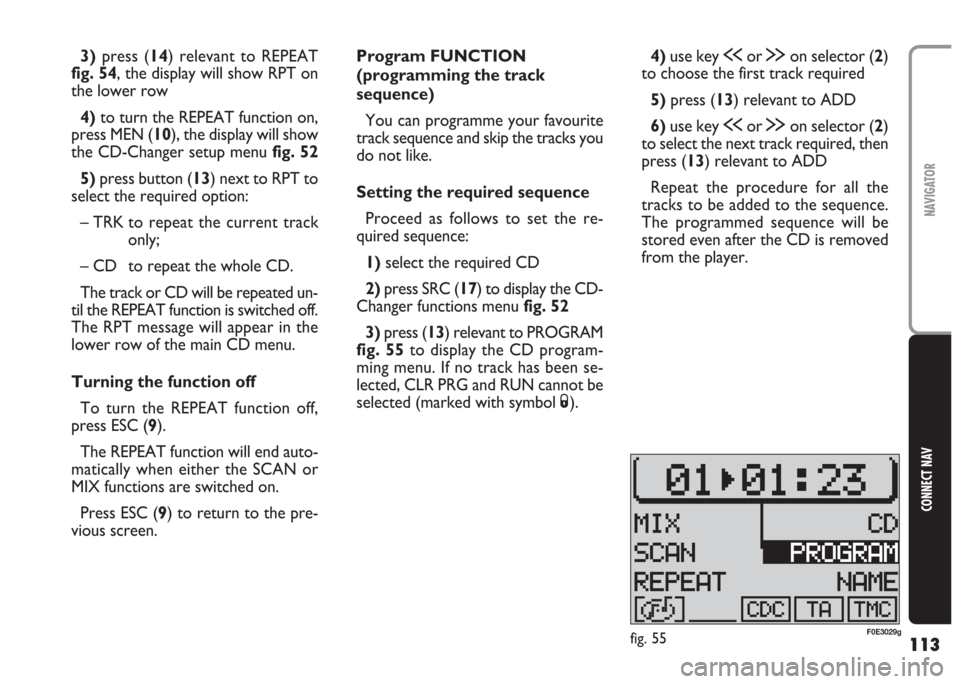
3) press (13) relevant to PROGRAM
fig. 55to display the CD program-
ming menu. If no track has been se-
lected, CLR PRG and RUN cannot be
selected (marked with symbol S).4)use key ùor §on selector (2)
to choose the first track required
5) press (13) relevant to ADD
6)use key ùor §on selector (2)
to select the next track required, then
press (13) relevant to ADD
Repeat the procedure for all the
tracks to be added to the sequence.
The programmed sequence will be
stored even after the CD is removed
from the player. 3)press (14) relevant to REPEAT
fig. 54, the display will show RPT on
the lower row
4) to turn the REPEAT function on,
press MEN (10), the display will show
the CD-Changer setup menu fig. 52
5) press button (13) next to RPT to
select the required option:
– TRK to repeat the current track
only;
– CD to repeat the whole CD.
The track or CD will be repeated un-
til the REPEAT function is switched off.
The RPT message will appear in the
lower row of the main CD menu.
Turning the function off
To turn the REPEAT function off,
press ESC (9).
The REPEAT function will end auto-
matically when either the SCAN or
MIX functions are switched on.
Press ESC (9) to return to the pre-
vious screen.
fig. 55F0E3029g
Page 115 of 202
114
CONNECT NAV
NAVIGATOR
Running/stopping the track
sequence
After entering the required tracks in
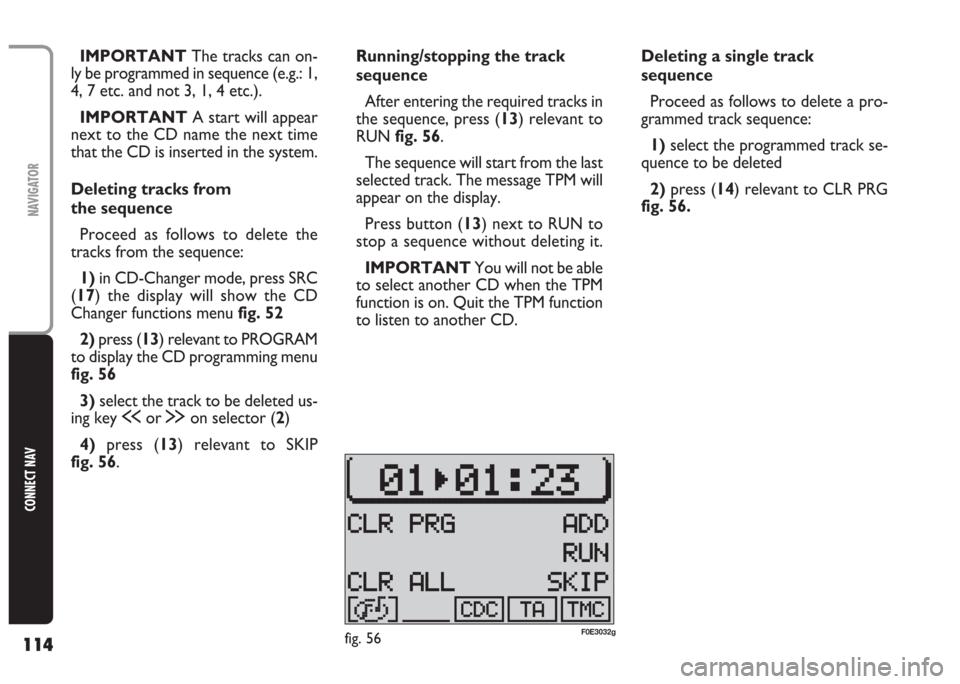
the sequence, press (13) relevant to
RUN fig. 56.
The sequence will start from the last
selected track. The message TPM will
appear on the display.
Press button (13) next to RUN to
stop a sequence without deleting it.
IMPORTANT You will not be able
to select another CD when the TPM
function is on. Quit the TPM function
to listen to another CD. IMPORTANT The tracks can on-
ly be programmed in sequence (e.g.: 1,
4, 7 etc. and not 3, 1, 4 etc.).
IMPORTANT A start will appear
next to the CD name the next time
that the CD is inserted in the system.
Deleting tracks from
the sequence
Proceed as follows to delete the
tracks from the sequence:
1) in CD-Changer mode, press SRC
(17) the display will show the CD
Changer functions menu fig. 52
2) press (13) relevant to PROGRAM
to display the CD programming menu
fig. 56
3) select the track to be deleted us-
ing key ùor §on selector (2)
4) press (13) relevant to SKIP
fig. 56.Deleting a single track
sequence
Proceed as follows to delete a pro-
grammed track sequence:
1)select the programmed track se-
quence to be deleted
2) press (14) relevant to CLR PRG
fig. 56.
fig. 56F0E3032g
Page 118 of 202
117
CONNECT NAV
NAVIGATOR
S S
A A
T T
E E
L L
L L
I I
T T
E E
N N
A A
V V
I I
G G
A A
T T
I I
O O
N N
The system will help you reach desti-
nations rapidly and safely. After switch-
ing the navigation function on, voice
messages will guide you to your desti-
nation. Driving advice, distances and es-
timated time required to reach the des-
tination will be shown on the display.
The car’s position is defined on the
basis of the electronic speedometer
signal, of a gyroscope and of the sig-
nals transmitted by the GPS (Global
Positioning System) satellites.
The system compares the data
against the maps stored on the navi-
gation CD-ROM and calculates both
the position and the routes to reach
the destination.ROUTE GUIDANCE
Proceed as follows:
1) insert the CD ROM specific to the
country you are travelling in
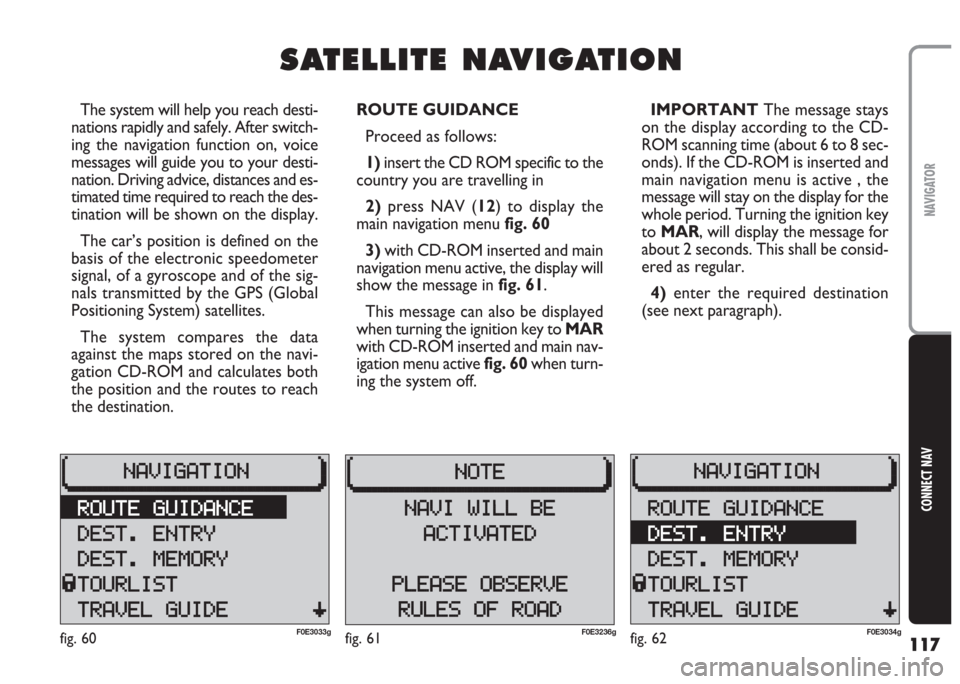
2)press NAV (12) to display the
main navigation menu fig. 60
3) with CD-ROM inserted and main
navigation menu active, the display will
show the message in fig. 61.
This message can also be displayed
when turning the ignition key to MAR
with CD-ROM inserted and main nav-
igation menu active fig. 60when turn-
ing the system off.IMPORTANT The message stays
on the display according to the CD-
ROM scanning time (about 6 to 8 sec-
onds). If the CD-ROM is inserted and
main navigation menu is active , the
message will stay on the display for the
whole period. Turning the ignition key
to MAR, will display the message for
about 2 seconds. This shall be consid-
ered as regular.
4) enter the required destination
(see next paragraph).
fig. 60F0E3033gfig. 62F0E3034gfig. 61F0E3236g
Page 133 of 202
132
CONNECT NAV
NAVIGATOR
CHANGING THE
AUDIO SOURCE
You can change the audio source
during active navigation at any mo-
ment, proceed as follows:
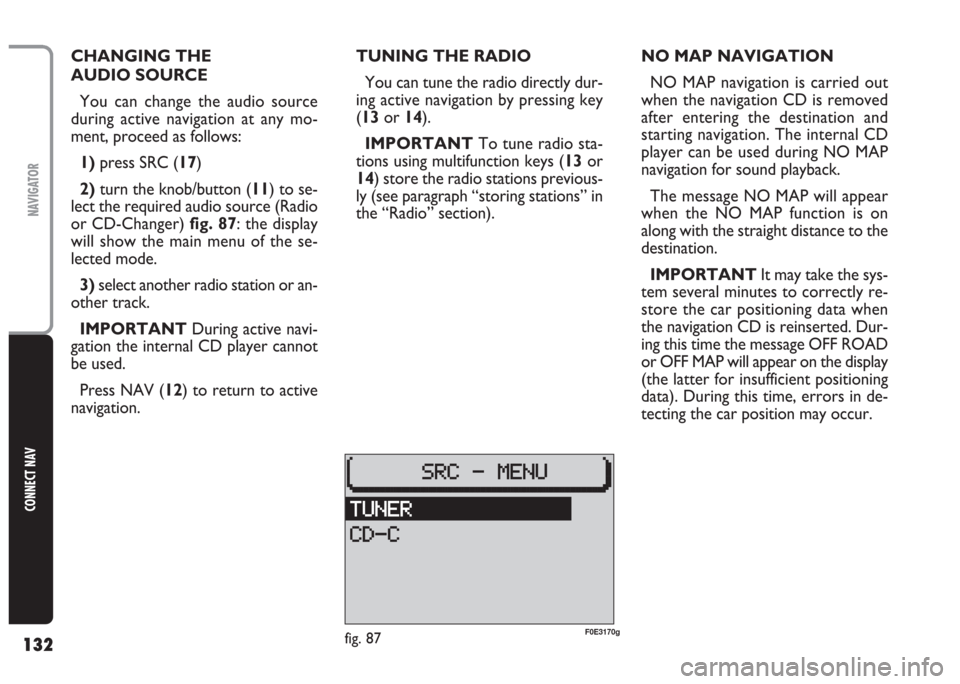
1)press SRC (17)
2)turn the knob/button (11) to se-
lect the required audio source (Radio
or CD-Changer) fig. 87: the display
will show the main menu of the se-
lected mode.
3)select another radio station or an-
other track.
IMPORTANT During active navi-
gation the internal CD player cannot
be used.
Press NAV (12) to return to active
navigation.TUNING THE RADIO
You can tune the radio directly dur-
ing active navigation by pressing key
(13or 14).
IMPORTANT To tune radio sta-
tions using multifunction keys (13or
14) store the radio stations previous-
ly (see paragraph “storing stations” in
the “Radio” section).NO MAP NAVIGATION
NO MAP navigation is carried out
when the navigation CD is removed
after entering the destination and
starting navigation. The internal CD
player can be used during NO MAP
navigation for sound playback.
The message NO MAP will appear
when the NO MAP function is on
along with the straight distance to the
destination.
IMPORTANT It may take the sys-
tem several minutes to correctly re-
store the car positioning data when
the navigation CD is reinserted. Dur-
ing this time the message OFF ROAD
or OFF MAP will appear on the display
(the latter for insufficient positioning
data). During this time, errors in de-
tecting the car position may occur.
fig. 87F0E3170g
Page 165 of 202
164
CONNECT NAV
NAVIGATOR
GENERAL INFORMATION
This telephone can be used to make
the same telephone connections of a
portable cellular phone. Therefore, to
make a telephone call you need a SIM
card and you must be in a place served
by the GSM 900/1800 network, with
enough signal intensity.
IMPORTANT The network ser-
vices described in this section (e.g. in-
coming call) are managed by the tele-
phone, but their availability depends
on the network and the type of con-
tract agreed with the network
provider.
IMPORTANT If power supply is
lower than the minimum preset
threshold, phone call quality is not as-
sured. For this reason, turning the en-
gine on during a telephone call might
interrupt it.TURNING THE phone on
To activate the phone, if a valid SIM
card has been inserted, press
£(15).
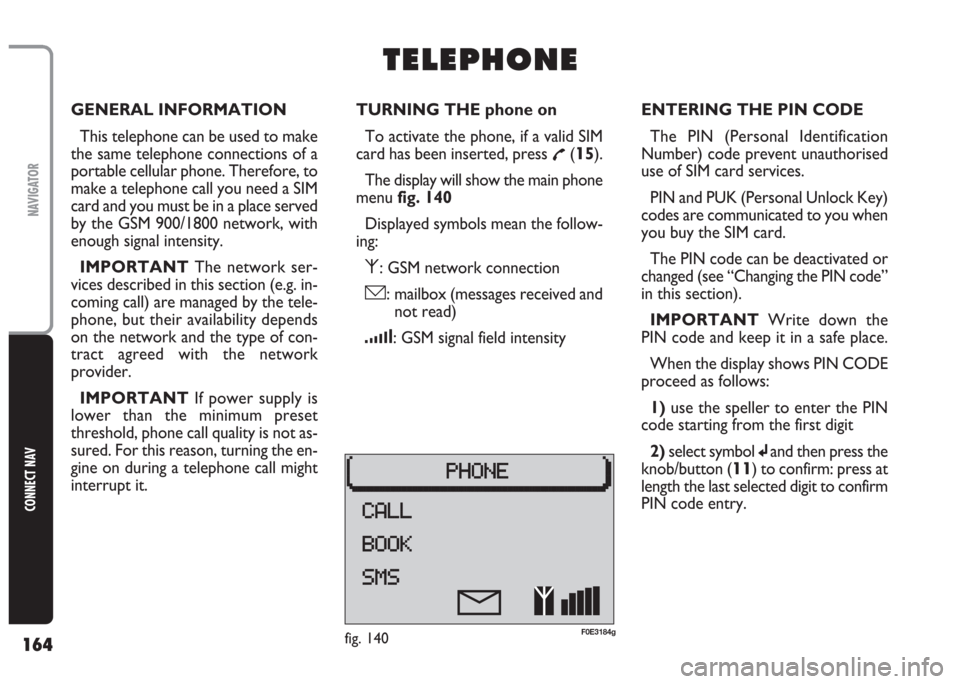
The display will show the main phone
menu fig. 140
Displayed symbols mean the follow-
ing:
⁄: GSM network connection
ó: mailbox (messages received and
not read)
¿: GSM signal field intensity
T T
E E
L L
E E
P P
H H
O O
N N
E E
ENTERING THE PIN CODE
The PIN (Personal Identification
Number) code prevent unauthorised
use of SIM card services.
PIN and PUK (Personal Unlock Key)
codes are communicated to you when
you buy the SIM card.
The PIN code can be deactivated or
changed (see “Changing the PIN code”
in this section).
IMPORTANT Write down the
PIN code and keep it in a safe place.
When the display shows PIN CODE
proceed as follows:
1) use the speller to enter the PIN
code starting from the first digit
2)select symbol
jand then press the
knob/button (
11) to confirm: press at
length the last selected digit to confirm
PIN code entry.
fig. 140F0E3184g
Page 167 of 202
166
CONNECT NAV
NAVIGATOR
SIM CARD UNLOCKING
After three unsuccessful PIN code
entries, the SIM card is locked. To un-
lock the SIM card, enter the PUK code
(Personal Unlock Key).
The eight-digit PUK code is commu-
nicated when buying the SIM card.
IMPORTANT The PUK code can-
not be changed.
When inserting a locked SIM card in-
side the GSM module, the display will
show an error message and ask you to
enter the PUK code. To enter the
PUK code press the knob/ button
(11).Entering the PUK code
Proceed as follows:
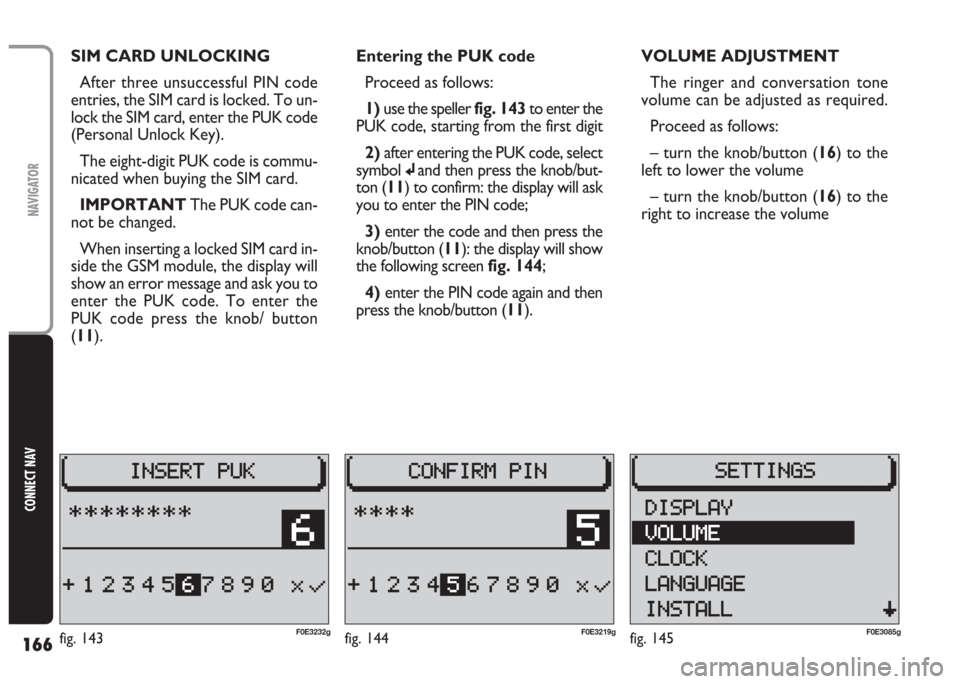
1) use the speller fig. 143to enter the
PUK code, starting from the first digit
2) after entering the PUK code, select
symbol
jand then press the knob/but-
ton (11) to confirm: the display will ask
you to enter the PIN code;
3)enter the code and then press the
knob/button (11): the display will show
the following screen fig. 144;
4) enter the PIN code again and then
press the knob/button (11).VOLUME ADJUSTMENT
The ringer and conversation tone
volume can be adjusted as required.
Proceed as follows:
– turn the knob/button (16) to the
left to lower the volume
– turn the knob/button (16) to the
right to increase the volume
fig. 144F0E3219gfig. 145F0E3085gfig. 143F0E3232g