warning FIAT MULTIPLA 2004 1.G Connect NavPlus Manual
[x] Cancel search | Manufacturer: FIAT, Model Year: 2004, Model line: MULTIPLA, Model: FIAT MULTIPLA 2004 1.GPages: 202, PDF Size: 2.22 MB
Page 95 of 202
94
CONNECT NAV
NAVIGATOR
TA FUNCTION
(Traffic Announcement)
This function can be switched on on-
ly in Radio mode in the FM waveband.
When listening to the CD source,
the CD changer (where fitted) or
when the navigation system is on and
the TA button (4) is pressed, the ra-
dio will switch to the FM waveband in
background and activate the TA func-
tion. This will not change the sound
source and the message “TA” will ap-
pear on the display.
When the TA function is on, you can
listen to traffic announcements even
when the CD player or CD changer
(where fitted) is on or in navigation
mode. The system will automatically
switch to the station broadcasting the
traffic announcement. At the end of
the announcement, the system will au-
tomatically return to the previous
source.
Press the TA button (4) to switch
the TA function off.IMPORTANT In Radio mode, with
the TA function on, a beep will be
heard if you leave the area where the
station broadcasting traffic announce-
ments can be received. In this case, an
automatic TP (Traffic Program) search
will be started.
Interrupting traffic
announcements
When the TA function is on, press
either TA (4) or MEN (10) or change
station to interrupt the traffic an-
nouncement. Alarm messages
When the PTY function is on, the
system can receive alarm messages
(example: weather conditions). In this
case, the warning message will appear
on the display and the announcement
will be made at the volume set for traf-
fic announcements.
To stop the alarm message, press ei-
ther MEN (10) or ESC (9).
Page 100 of 202
99
CONNECT NAV
NAVIGATOR
C C
O O
M M
P P
A A
C C
T T
D D
I I
S S
C C
P P
L L
A A
Y Y
E E
R R
( (
C C
D D
) )
A symbol indicating the audio CD,
the CD programmed sequence, the
current sound source (CD), and the
TA and TMC functions status will ap-
pear in the lower row of the display.
INSERTING AND
EJECTING A CD
Proceed as follows to insert a CD:
1)press button T(1) to open the
front panel
2)press button ı(19) to eject an in-
serted CD, if any
3) place the audio CD with the la-
bel facing upwards in the groove on
the open front panel edge
4) delicately push the CD in the slot
until the automatic mechanism takes
the CD into the player
5) close the front panel. Audio CDs can be played with the in-
ternal CD player or with the CD-
Changer (where fitted).
During CD playback, either the track
number and the playing time, or the
track number only, will appear on the
display (according to the settings, see
“CD functions” in this section).
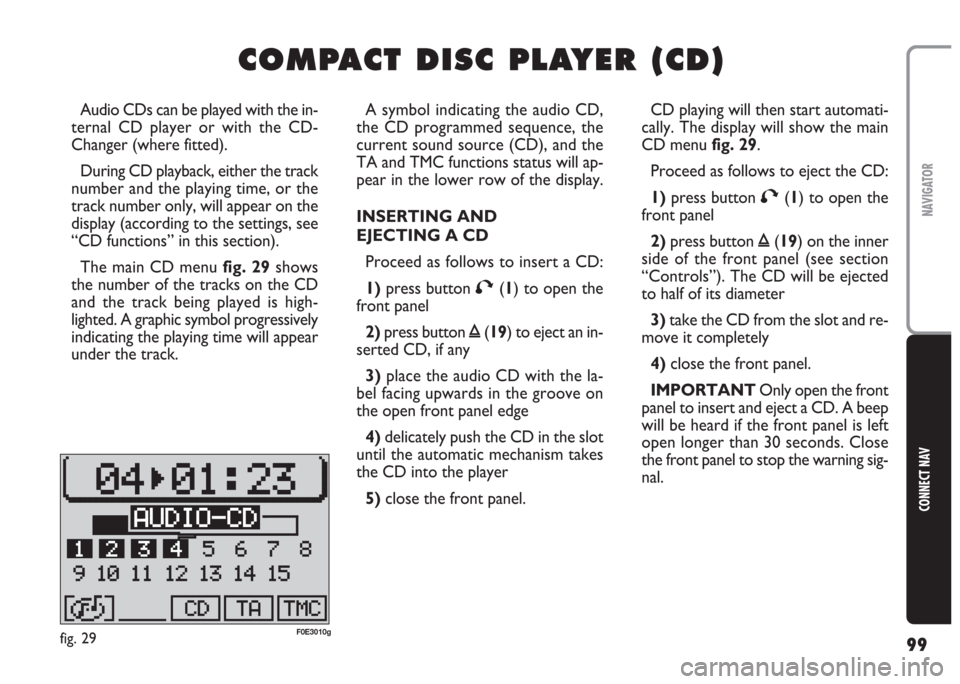
The main CD menu fig. 29shows
the number of the tracks on the CD
and the track being played is high-
lighted. A graphic symbol progressively
indicating the playing time will appear
under the track.CD playing will then start automati-
cally. The display will show the main
CD menu fig. 29.
Proceed as follows to eject the CD:
1)press button T(1) to open the
front panel
2)press button ı(19) on the inner
side of the front panel (see section
“Controls”). The CD will be ejected
to half of its diameter
3)take the CD from the slot and re-
move it completely
4)close the front panel.
IMPORTANT Only open the front
panel to insert and eject a CD. A beep
will be heard if the front panel is left
open longer than 30 seconds. Close
the front panel to stop the warning sig-
nal.
fig. 29F0E3010g
Page 101 of 202
100
CONNECT NAV
NAVIGATOR
PLAYING A CD
(internal player)
Playback will start automatically as
soon as a CD is inserted.
With Navigation mode on
Proceed as follows:
1) press SRC (17)
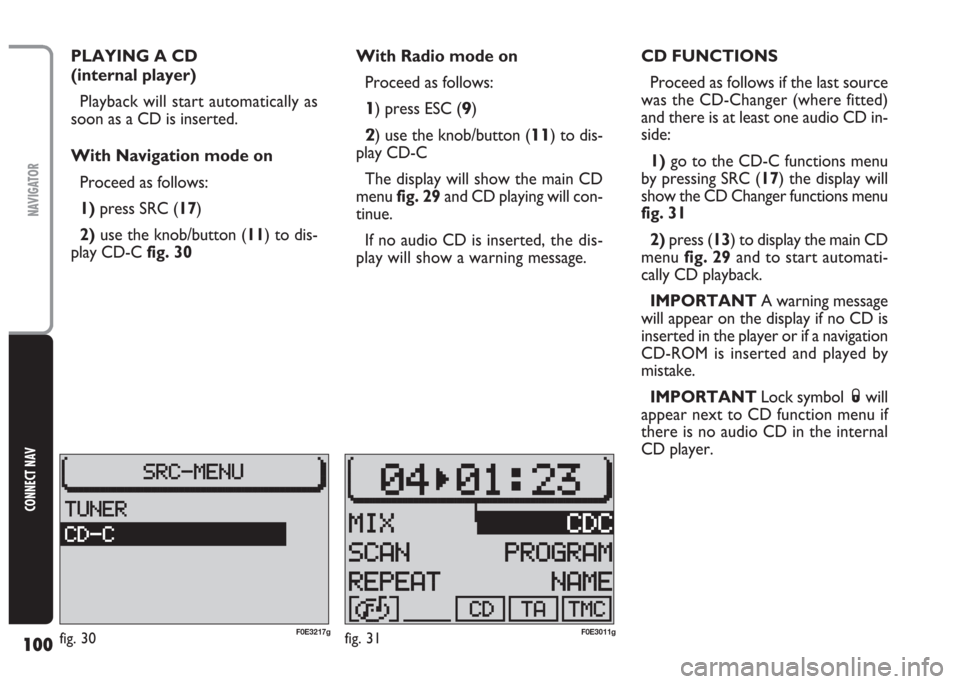
2)use the knob/button (11) to dis-
play CD-Cfig. 30With Radio mode on
Proceed as follows:
1) press ESC (9)
2) use the knob/button (11) to dis-
play CD-C
The display will show the main CD
menu fig. 29and CD playing will con-
tinue.
If no audio CD is inserted,the dis-
play will show a warning message.CD FUNCTIONS
Proceed as follows if the last source
was the CD-Changer (where fitted)
and there is at least one audio CD in-
side:
1)go to the CD-C functions menu
by pressing SRC (17) the display will
show the CD Changer functions menu
fig. 31
2)press (13) to display the main CD
menu fig. 29and to start automati-
cally CD playback.
IMPORTANT A warning message
will appear on the display if no CD is
inserted in the player or if a navigation
CD-ROM is inserted and played by
mistake.
IMPORTANT Lock symbol Swill
appear next to CD function menu if
there is no audio CD in the internal
CD player.
fig. 30F0E3217gfig. 31F0E3011g
Page 109 of 202
108
CONNECT NAV
NAVIGATOR
With Radio mode on
To play an audio CD inserted in the
CD-Changer when the Radio is on,
proceed as follows:
1) press ESC (9)
2)turn the knob/button (11) to dis-
play CD-Cfig. 46
3)press the knob/button (11) to
confirm
The system will automatically start
playing the audio CD in the internal
CD player if this was the last source
and the CD is still inside. Otherwise,
the last played CD or the first CD in
the CD-Changer will be played.TURNING ON THE
CD Changer (where fitted)
IMPORTANT The system will au-
tomatically start playing the audio CD
in the internal CD player if this was the
last source and the CD is still inside.
Proceed as follows if there is an au-
dio CD in the internal player:
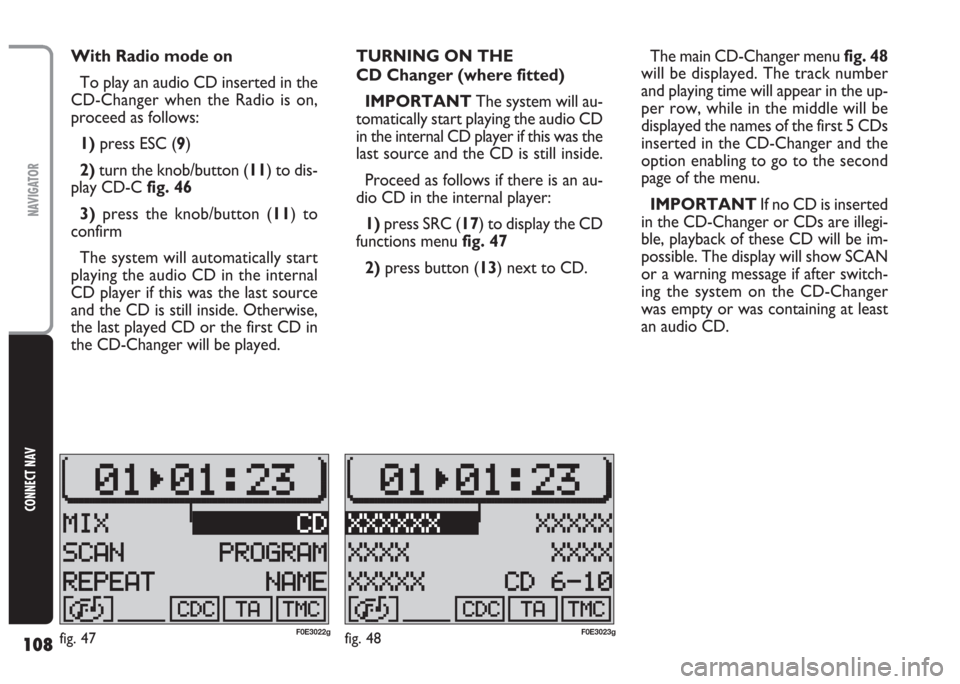
1)press SRC (17) to display the CD
functions menu fig. 47
2)press button (13) next to CD.The main CD-Changer menu fig. 48
will be displayed. The track number
and playing time will appear in the up-
per row, while in the middle will be
displayed the names of the first 5 CDs
inserted in the CD-Changer and the
option enabling to go to the second
page of the menu.
IMPORTANT If no CD is inserted
in the CD-Changer or CDs are illegi-
ble, playback of these CD will be im-
possible. The display will show SCAN
or a warning message if after switch-
ing the system on the CD-Changer
was empty or was containing at least
an audio CD.
fig. 48F0E3023gfig. 47F0E3022g
Page 157 of 202
156
CONNECT NAV
NAVIGATOR
Calls for medical advice
or road assistance
For both MEDICAL ADVICE and
ROAD ASSIST., if transmission of the
telematic call to Targa Infomobili-
tycentre is not successful, a warning
message appears on the display ask-
ing the user if he/she wants to call the
Targa Infomobility(*) centre any-
way to communicate the need for as-
sistance (call will be forwarded only if
that area is covered by the GSM
900/1800 network) (**).
(*) In this case the operating centre
will no longer be able to locate the car.
(**)The call will be made using a toll-
free number. In particular situations
the Customer might be charged with
the call according to the type of tele-
phone operator used or the roaming
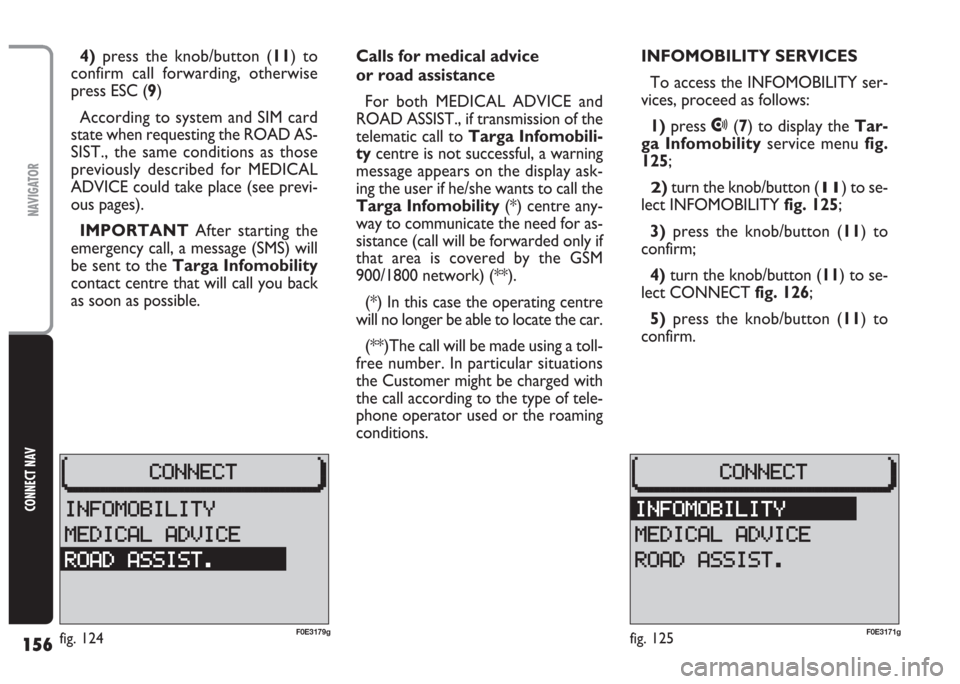
conditions.INFOMOBILITY SERVICES
To access the INFOMOBILITY ser-
vices, proceed as follows:
1) press
•(7) to display the Tar-
ga Infomobilityservice menu fig.
125;
2)turn the knob/button (11) to se-
lect INFOMOBILITY fig. 125;
3)press the knob/button (11) to
confirm;
4)turn the knob/button (11) to se-
lect CONNECT fig. 126;
5)press the knob/button (11) to
confirm. 4)press the knob/button (11) to
confirm call forwarding, otherwise
press ESC (9)
According to system and SIM card
state when requesting the ROAD AS-
SIST., the same conditions as those
previously described for MEDICAL
ADVICE could take place (see previ-
ous pages).
IMPORTANT After starting the
emergency call, a message (SMS) will
be sent to the Targa Infomobility
contact centre that will call you back
as soon as possible.
fig. 125F0E3171gfig. 124F0E3179g
Page 158 of 202
157
CONNECT NAV
NAVIGATOR
These pay services run by Targa In-
fomobility are available only upon
subscription. If the user has not yet
subscribed to them or subscription
has expired, the associated functions
will be disabled and the display will
show a warning message.
The user can call the Targa Info-
mobilityoperator by phone to have
information regarding his/her sub-
scription and reactivate the service, if
required.
If subscription has expired, it is still
possible to consult stored information.
INFOMOBILITY functions are de-
scribed in the following paragraphs. The Targa Infomobilityoperator
will call you back as soon as possible
to give you the required information
(e.g.: the closest hotel, restaurant, etc
…) and, if required, he/she will send
a message with route indications to
reach destination.
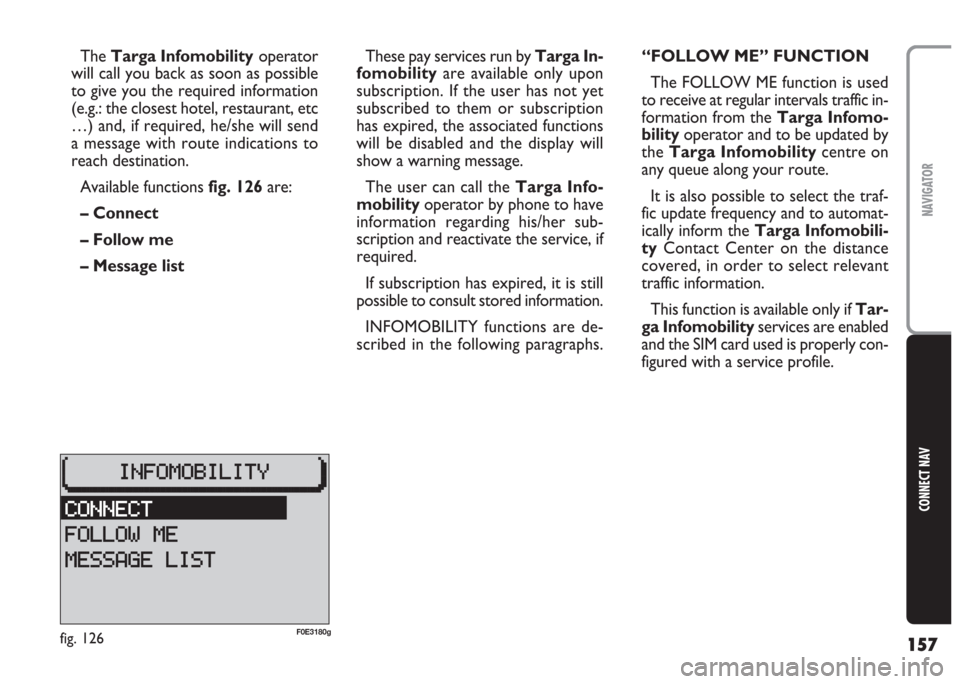
Available functions fig. 126are:
– Connect
– Follow me
– Message list“FOLLOW ME” FUNCTION
The FOLLOW ME function is used
to receive at regular intervals traffic in-
formation from the Targa Infomo-
bilityoperator and to be updated by
the Targa Infomobilitycentre on
any queue along your route.
It is also possible to select the traf-
fic update frequency and to automat-
ically inform the Targa Infomobili-
tyContact Center on the distance
covered, in order to select relevant
traffic information.
This function is available only if Tar-
ga Infomobilityservices are enabled
and the SIM card used is properly con-
figured with a service profile.
fig. 126F0E3180g
Page 174 of 202
173
CONNECT NAV
NAVIGATOR
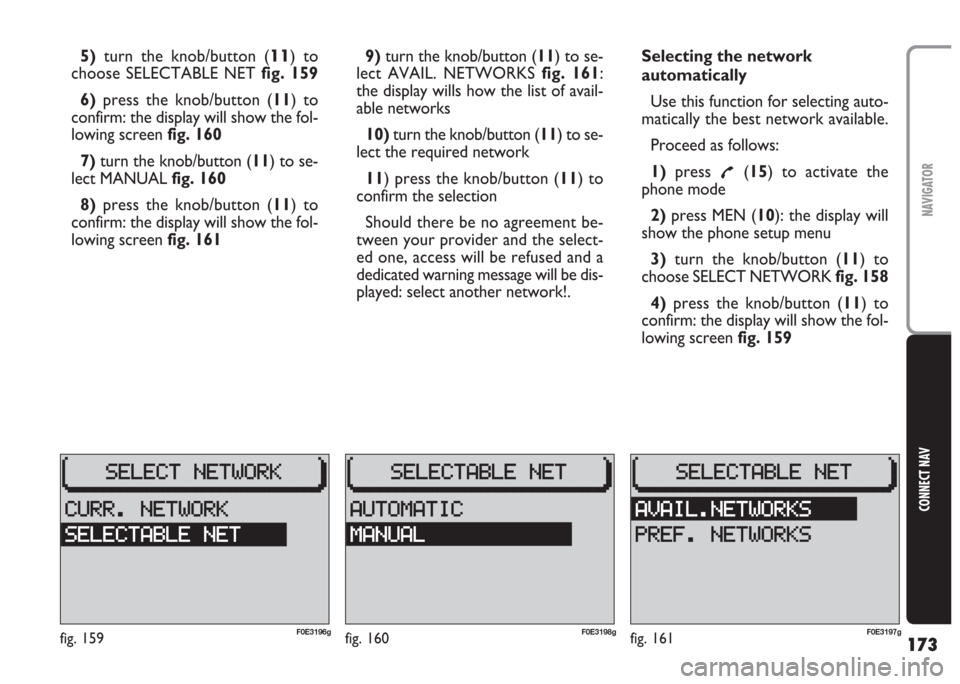
5)turn the knob/button (11) to
choose SELECTABLE NET fig. 159
6) press the knob/button (11) to
confirm: the display will show the fol-
lowing screen fig. 160
7)turn the knob/button (11) to se-
lect MANUAL fig. 160
8)press the knob/button (11) to
confirm: the display will show the fol-
lowing screen fig. 1619)turn the knob/button (11) to se-
lect AVAIL. NETWORKS fig. 161:
the display wills how the list of avail-
able networks
10)turn the knob/button (11) to se-
lect the required network
11) press the knob/button (11) to
confirm the selection
Should there be no agreement be-
tween your provider and the select-
ed one, access will be refused and a
dedicated warning message will be dis-
played: select another network!.Selecting the network
automatically
Use this function for selecting auto-
matically the best network available.
Proceed as follows:
1)press
£(15) to activate the
phone mode
2)press MEN (10): the display will
show the phone setup menu
3)turn the knob/button (11) to
choose SELECT NETWORK fig. 158
4)press the knob/button (11) to
confirm: the display will show the fol-
lowing screen fig. 159
fig. 159F0E3196gfig. 160F0E3198gfig. 161F0E3197g
Page 176 of 202
175
CONNECT NAV
NAVIGATOR
10)press the knob/button (11) to
confirm: the display will show the list
of the available networks
11) turn the knob/button (11) to se-
lect the required network
12)press the knob/button (11) to
confirm the selection
Should the selected network be not
available (e.g.: overload or poor signal),
the display will show a dedicated
warning message.
In this case another network shall be
selected.Displaying the selected
network
Use this function to display the se-
lected network.
Proceed as follows:
1)press
£(15) to activate the
phone mode
2) press MEN (10): the display will
show the phone setup menu
3)turn the knob/button (11) to
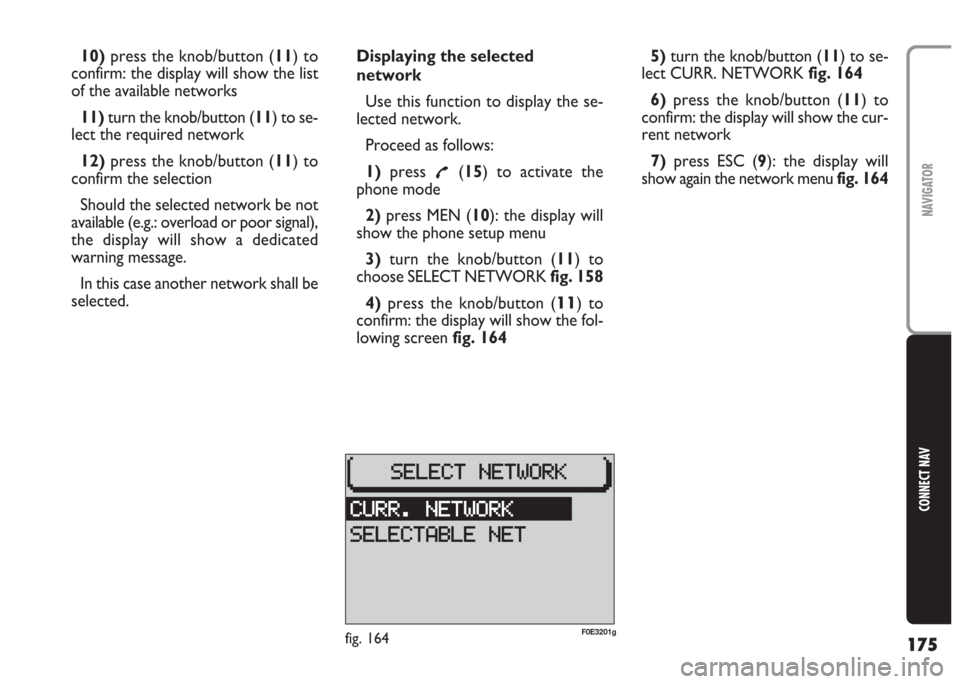
choose SELECT NETWORK fig. 158
4) press the knob/button (
11) to
confirm: the display will show the fol-
lowing screen fig. 1645)turn the knob/button (11) to se-
lect CURR. NETWORK fig. 164
6) press the knob/button (11) to
confirm: the display will show the cur-
rent network
7)press ESC (9): the display will
show again the network menu fig. 164
fig. 164F0E3201g
Page 186 of 202
185
CONNECT NAV
NAVIGATOR
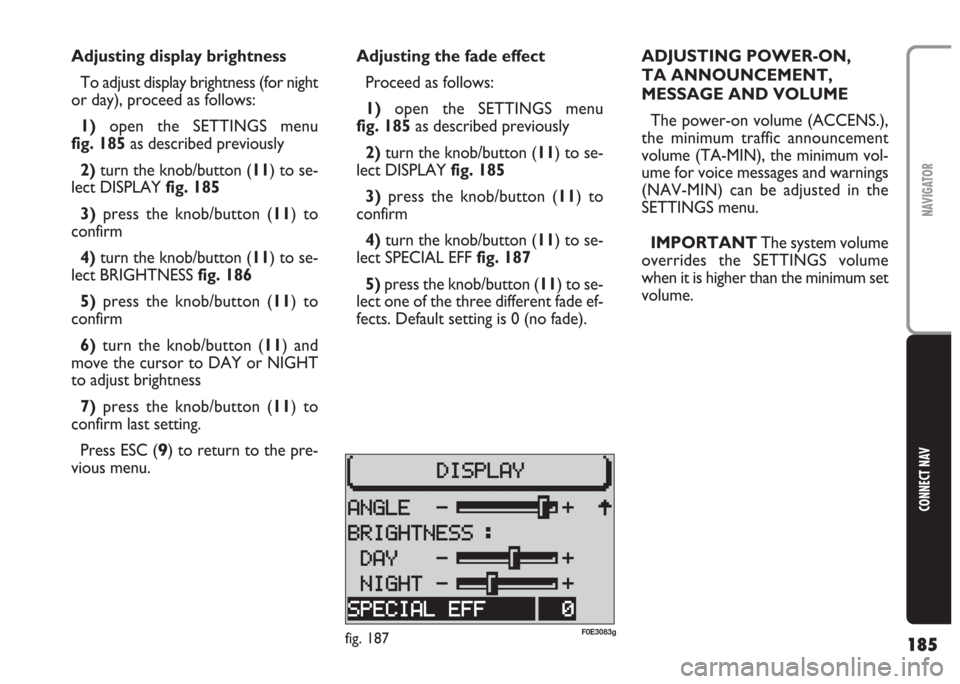
Adjusting the fade effect
Proceed as follows:
1) open the SETTINGS menu
fig. 185as described previously
2)turn the knob/button (11) to se-
lect DISPLAY fig. 185
3)press the knob/button (11) to
confirm
4) turn the knob/button (11) to se-
lect SPECIAL EFF fig. 187
5) press the knob/button (11) to se-
lect one of the three different fade ef-
fects. Default setting is 0 (no fade). Adjusting display brightness
To adjust display brightness (for night
or day), proceed as follows:
1)open the SETTINGS menu
fig. 185as described previously
2)turn the knob/button (11) to se-
lect DISPLAY fig. 185
3)press the knob/button (11) to
confirm
4) turn the knob/button (11) to se-
lect BRIGHTNESS fig. 186
5)press the knob/button (11) to
confirm
6)turn the knob/button (11) and
move the cursor to DAY or NIGHT
to adjust brightness
7)press the knob/button (11) to
confirm last setting.
Press ESC (
9) to return to the pre-
vious menu.ADJUSTING POWER-ON,
TA ANNOUNCEMENT,
MESSAGE AND VOLUME
The power-on volume (ACCENS.),
the minimum traffic announcement
volume (TA-MIN), the minimum vol-
ume for voice messages and warnings
(NAV-MIN) can be adjusted in the
SETTINGS menu.
IMPORTANT The system volume
overrides the SETTINGS volume
when it is higher than the minimum set
volume.
fig. 187F0E3083g
Page 187 of 202
186
CONNECT NAV
NAVIGATOR
IMPORTANT The minimum
volume is a form of limitation. If the
volume was lower than the minimum
set volume when the system was
switched off this will override the
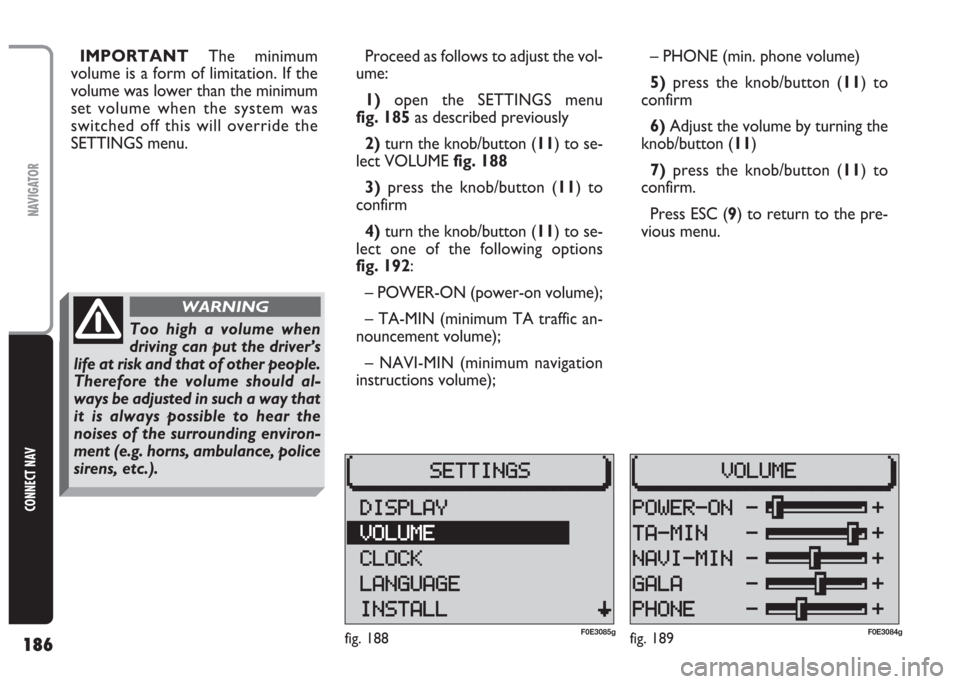
SETTINGS menu.Proceed as follows to adjust the vol-
ume:
1) open the SETTINGS menu
fig. 185as described previously
2)turn the knob/button (11) to se-
lect VOLUME fig. 188
3)press the knob/button (11) to
confirm
4) turn the knob/button (11) to se-
lect one of the following options
fig. 192:
– POWER-ON (power-on volume);
– TA-MIN (minimum TA traffic an-
nouncement volume);
– NAVI-MIN (minimum navigation
instructions volume);– PHONE (min. phone volume)
5)press the knob/button (11) to
confirm
6) Adjust the volume by turning the
knob/button (11)
7) press the knob/button (11) to
confirm.
Press ESC (9) to return to the pre-
vious menu.
fig. 188F0E3085gfig. 189F0E3084g
Too high a volume when
driving can put the driver’s
life at risk and that of other people.
Therefore the volume should al-
ways be adjusted in such a way that
it is always possible to hear the
noises of the surrounding environ-
ment (e.g. horns, ambulance, police
sirens, etc.).
WARNING