turn signal FIAT MULTIPLA 2004 1.G Connect NavPlus Manual
[x] Cancel search | Manufacturer: FIAT, Model Year: 2004, Model line: MULTIPLA, Model: FIAT MULTIPLA 2004 1.GPages: 202, PDF Size: 2.22 MB
Page 18 of 202
17
CONNECT NAV
NAVIGATOR
IMPORTANTOnly stations
broadcasting traffic announcements
will be stored when the TA function
is on (TP message on the display).
Manual tuning
To manually tuning to a station, pro-
ceed as follows:
1) switch the RDS function off (see
RDS FUNCTION in this chapter) to
display the frequencies
2) in Radio mode, press the MEN
button (10), the Radio menu will ap-
pear on the display fig. 14
3) press the (14) button next to
CERCA (SEARCH) until
§appears
4) press either
§or ùon the
switch (2) to start the manual station
search.
The frequency will gradually change
in 100 kHz steps in the FM waveband
and in 9 kHz steps in the MW wave-
band.STORING THE STATIONS
Up to 24 FM stations in the fours
wavebands (FM1, FM2, FMT and FMC)
and six MW stations can be stored.
Manual storage
Proceed as follows to manually store
the stations:
1) in Radio mode, press the TU but-
ton (17). The Radio functions menu
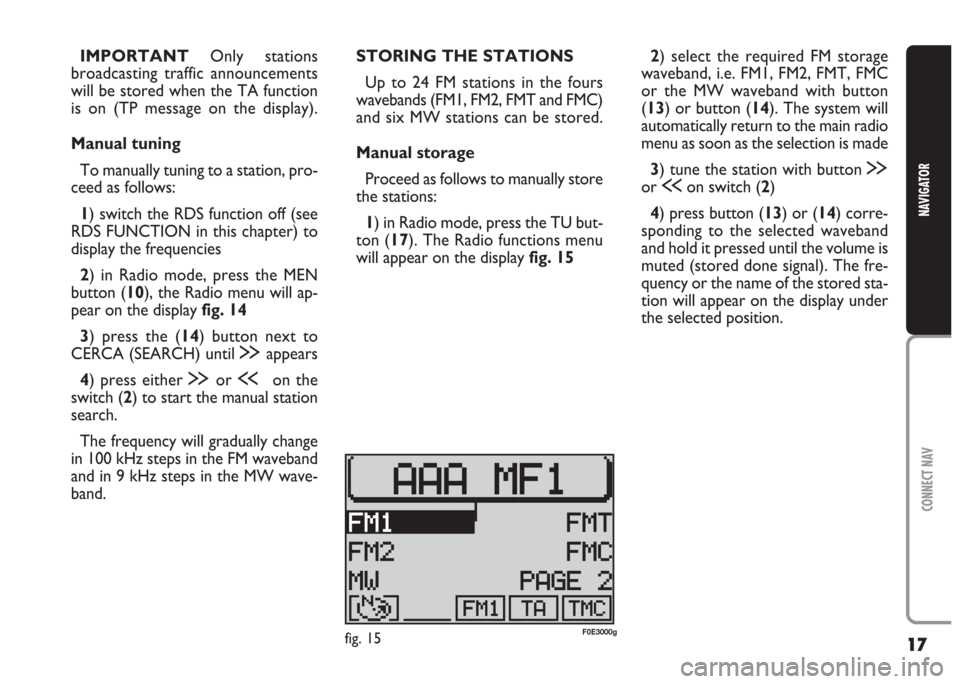
will appear on the display fig. 152) select the required FM storage
waveband, i.e. FM1, FM2, FMT, FMC
or the MW waveband with button
(13) or button (14). The system will
automatically return to the main radio
menu as soon as the selection is made
3) tune the station with button
§
or ùon switch (2)
4) press button (13) or (14) corre-
sponding to the selected waveband
and hold it pressed until the volume is
muted (stored done signal). The fre-
quency or the name of the stored sta-
tion will appear on the display under
the selected position.
fig. 15F0E3000g
Page 63 of 202
62
CONNECT NAV
NAVIGATOR
4) when you have finished defining
the position, press the knob/button
(11) for longer than two seconds to
confirm or select the (
j) symbol and
confirm. The main navigation menu
will appear on the display.
IMPORTANT Certain road inter-
sections (e.g. straight road intersection
with loop road) are not suitable for in-
dicating the car position. NAVIGATION SIMULATION
The sound/navigation system can
simulate a trip. The device simulates
navigation by providing realistic visual
instructions, voice messages and
acoustic signals.
Proceed as follows to start a simu-
lation:
1) enter a destination (see “Destina-
tion entry” in the “Satellite navigation”
chapter)
2) press the MEN button (10) in the
main navigation menu or in the route
guidance menu to open the navigation
setup menu 3) select DIMOSTRAZIONE (NAVI
SIMULAT.) by turning the knob/but-
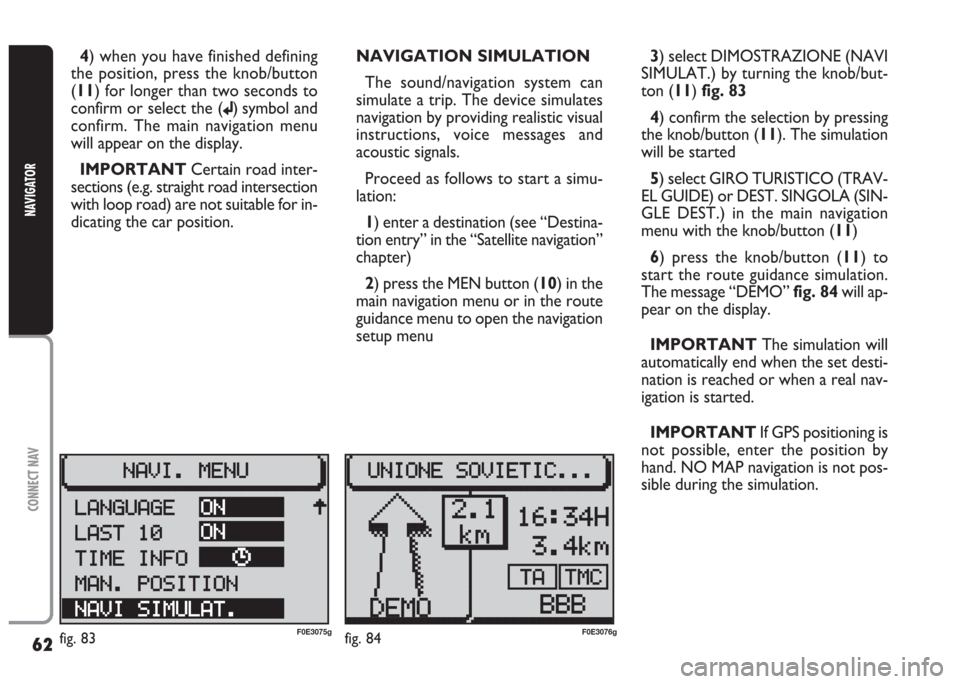
ton (11) fig. 83
4) confirm the selection by pressing
the knob/button (11). The simulation
will be started
5) select GIRO TURISTICO (TRAV-
EL GUIDE) or DEST. SINGOLA (SIN-
GLE DEST.) in the main navigation
menu with the knob/button (11)
6) press the knob/button (11) to
start the route guidance simulation.
The message “DEMO” fig. 84will ap-
pear on the display.
IMPORTANT The simulation will
automatically end when the set desti-
nation is reached or when a real nav-
igation is started.
IMPORTANT If GPS positioning is
not possible, enter the position by
hand. NO MAP navigation is not pos-
sible during the simulation.
fig. 83F0E3075gfig. 84F0E3076g
Page 70 of 202
69
CONNECT NAV
NAVIGATOR
Switching the time status
on and off
Proceed as follows to switch the
time status function on and off:
1) open the IMPOSTAZIONI (SET-
TINGS) menu fig. 85as shown above
2) select OROLOGIO (CLOCK) by
turning the knob/button (11)
3) press the knob/button (11) to
confirm the selection
4) select VISUALIZZA (DISPLAY) by
turning the knob/button (11)
5) press the knob/button (11) to se-
lect ON or OFF
Setting the exact time
manually
Proceed as follows to set manually
the exact time (e.g.: when no GPS
satellite signal is received):1) open the IMPOSTAZIONI (SET-
TINGS) menu fig. 85as shown above
2) select OROLOGIO (CLOCK) by
turning the knob/button (11)
3) press the knob/button (11) to
confirm the selection
4) select IMPOSTAZIONI (SET-
TINGS) by turning the knob/button
(11)
5) select ORA SISTEM. (SYS. TIME)
by turning the knob/button (11)
6) press the knob/button (11) to
confirm the selection: hours are dis-
played with reverse writing
7) turn the knob/button (11) to set
hours
8) press the knob/button (11) to
confirm the selection: minutes are dis-
played with reverse writing
9) turn the knob/button (11) to set
minutes
10) press the knob/button (11) to
confirm the selectionSELECTING THE LANGUAGE
You can select the language for mes-
sages on the display. “Metric” (dis-
tances in kilometres) and “imperial”
(distances in miles) versions are of-
fered for English
1) open the IMPOSTAZIONI (SET-
TINGS) menu fig. 85as shown above
2) select LINGUA (LANGUAGE) by
turning the knob/button (11)
3) press the knob/button (11) to
confirm the selection. A list of avail-
able languages will be displayed
IMPORTANT For certain coun-
tries (e.g. Denmark, Sweden and Por-
tugal), the voice messages related to
Navigation are in English whereas dis-
played messages are written in the lan-
guage of each country.
Page 90 of 202
89
CONNECT NAV
NAVIGATOR
2) select the required FM storage
waveband, i.e. FM1, FM2, FMT, FMC
or the MW waveband with button
(
13) or (14).;The system will auto-
matically return to the main radio
menu as soon as the selection is made
3) tune the station with button §
or ùon selector (2)
4) press button (13) or (14) corre-
sponding to the selected waveband
and hold it pressed until the volume is
muted (stored done signal). The fre-
quency or the name of the stored sta-
tion will appear on the display under
the selected position.T-STORE automatic storage
The system can automatically store
the six strongest stations in the FMT
storage waveband.
With TA function (Traffic An-
nouncement) on, only the stations
with the strongest signal (broadcast-
ing traffic bulletins) are stored.
IMPORTANT The T-STORE func-
tion will replace the previously stored
stations.
Proceed as follows to start the T-
STORE automatic storage procedure:
1) in Radio mode, press SRC (17).
The Radio function menu will appear
on the display
2)press the (13) button next to
PAGE 23)press key (14) to display T-
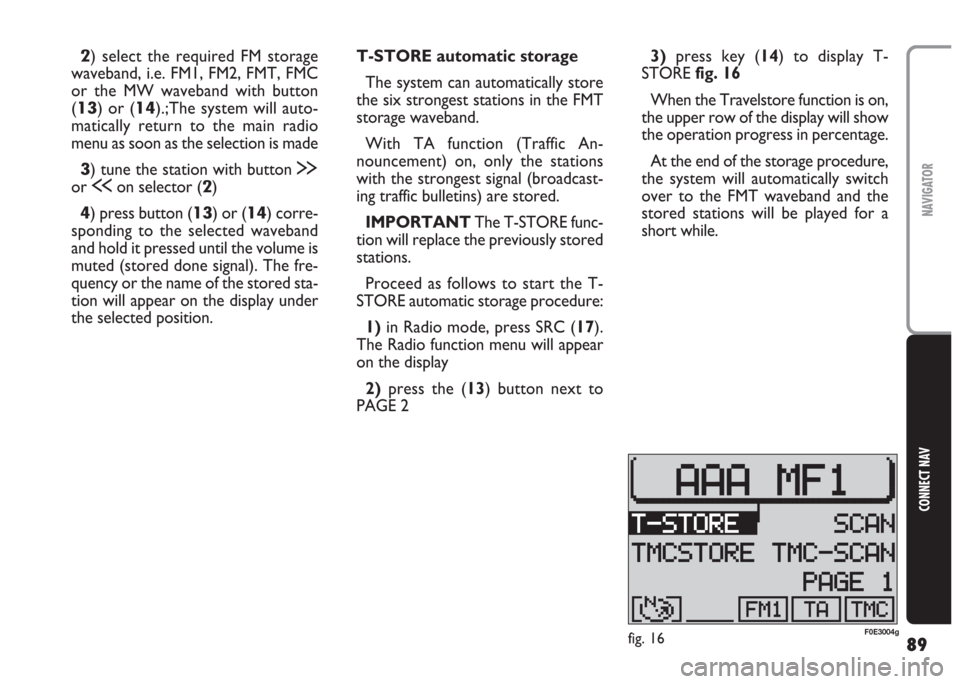
STORE fig. 16
When the Travelstore function is on,
the upper row of the display will show
the operation progress in percentage.
At the end of the storage procedure,
the system will automatically switch
over to the FMT waveband and the
stored stations will be played for a
short while.
fig. 16F0E3004g
Page 118 of 202
117
CONNECT NAV
NAVIGATOR
S S
A A
T T
E E
L L
L L
I I
T T
E E
N N
A A
V V
I I
G G
A A
T T
I I
O O
N N
The system will help you reach desti-
nations rapidly and safely. After switch-
ing the navigation function on, voice
messages will guide you to your desti-
nation. Driving advice, distances and es-
timated time required to reach the des-
tination will be shown on the display.
The car’s position is defined on the
basis of the electronic speedometer
signal, of a gyroscope and of the sig-
nals transmitted by the GPS (Global
Positioning System) satellites.
The system compares the data
against the maps stored on the navi-
gation CD-ROM and calculates both
the position and the routes to reach
the destination.ROUTE GUIDANCE
Proceed as follows:
1) insert the CD ROM specific to the
country you are travelling in
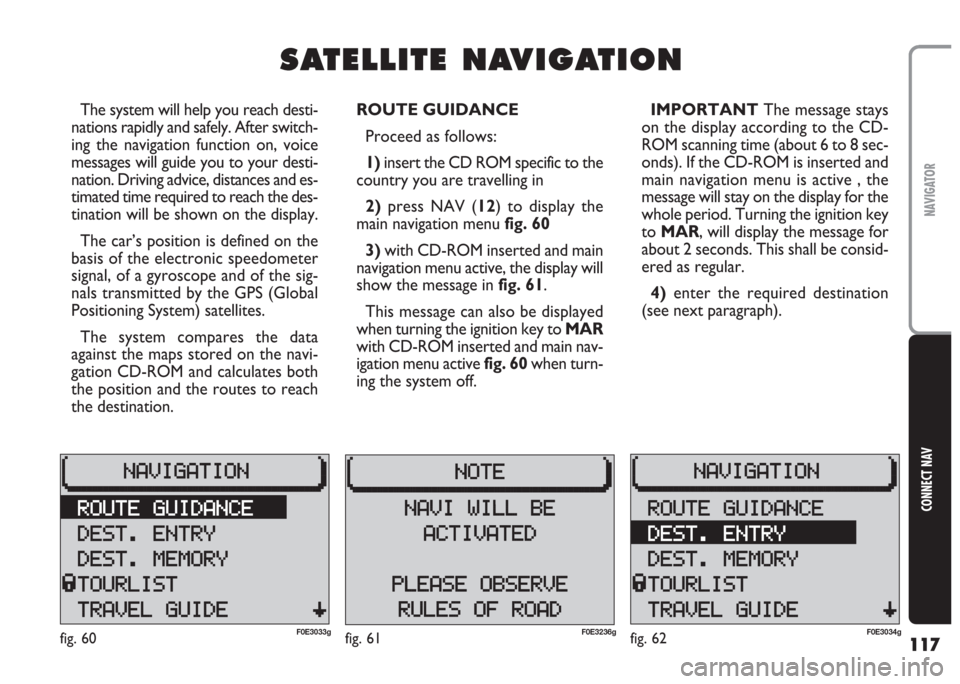
2)press NAV (12) to display the
main navigation menu fig. 60
3) with CD-ROM inserted and main
navigation menu active, the display will
show the message in fig. 61.
This message can also be displayed
when turning the ignition key to MAR
with CD-ROM inserted and main nav-
igation menu active fig. 60when turn-
ing the system off.IMPORTANT The message stays
on the display according to the CD-
ROM scanning time (about 6 to 8 sec-
onds). If the CD-ROM is inserted and
main navigation menu is active , the
message will stay on the display for the
whole period. Turning the ignition key
to MAR, will display the message for
about 2 seconds. This shall be consid-
ered as regular.
4) enter the required destination
(see next paragraph).
fig. 60F0E3033gfig. 62F0E3034gfig. 61F0E3236g
Page 147 of 202
146
CONNECT NAV
NAVIGATOR
SWITCHING ROUTE TIME
INFORMATION ON AND OFF
This function enables to select the
time required to reach the destination
and the estimated and exact time of
arrival.
Proceed as follows to switch the
route time information on and off:
1)press MEN (10) the display will
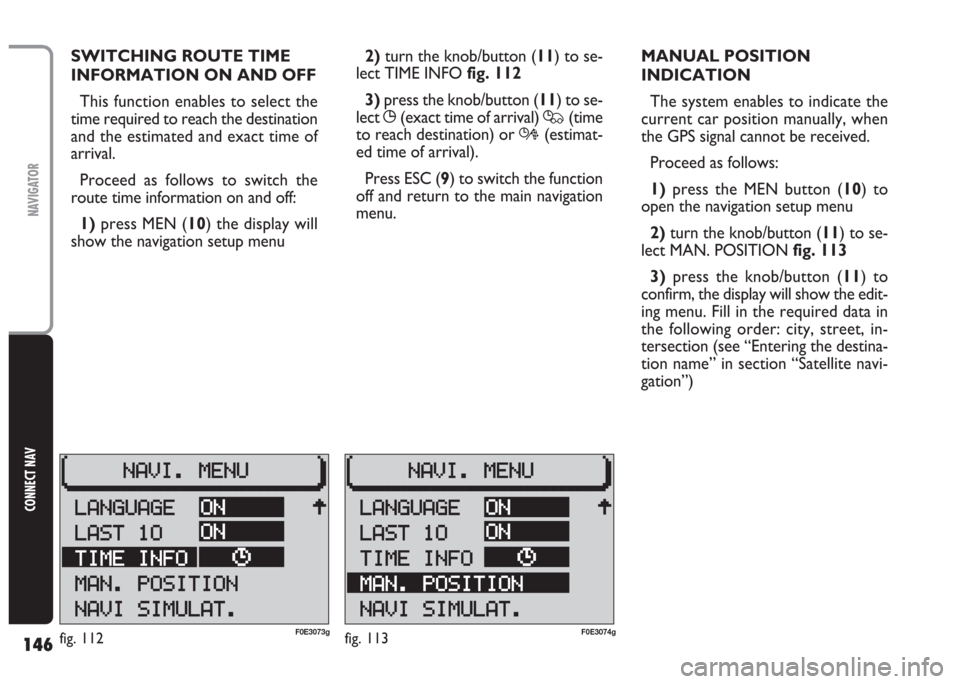
show the navigation setup menu2) turn the knob/button (11) to se-
lect TIME INFO fig. 112
3)press the knob/button (11) to se-
lect
X(exact time of arrival) Q(time
to reach destination) or R(estimat-
ed time of arrival).
Press ESC (9) to switch the function
off and return to the main navigation
menu.MANUAL POSITION
INDICATION
The system enables to indicate the
current car position manually, when
the GPS signal cannot be received.
Proceed as follows:
1)press the MEN button (10) to
open the navigation setup menu
2) turn the knob/button (11) to se-
lect MAN. POSITION fig. 113
3)press the knob/button (11) to
confirm, the display will show the edit-
ing menu. Fill in the required data in
the following order: city, street, in-
tersection (see “Entering the destina-
tion name” in section “Satellite navi-
gation”)
fig. 112F0E3073gfig. 113F0E3074g
Page 148 of 202
147
CONNECT NAV
NAVIGATOR
4)after completing the above oper-
ation, press the knob/button (11) for
over 2 seconds to confirm or select
symbol (
j) and confirm: the display will
show the main navigation menu.
IMPORTANT Certain road inter-
sections (e.g. straight road intersection
with loop road) are not suitable for in-
dicating the car position. NAVIGATION SIMULATION
The system can simulate a trip. The
system simulates navigation by pro-
viding realistic visual instructions, voice
messages and acoustic signals.
Proceed as follows to start a simu-
lation:
1)press the MEN button (10) to
open the navigation setup menu
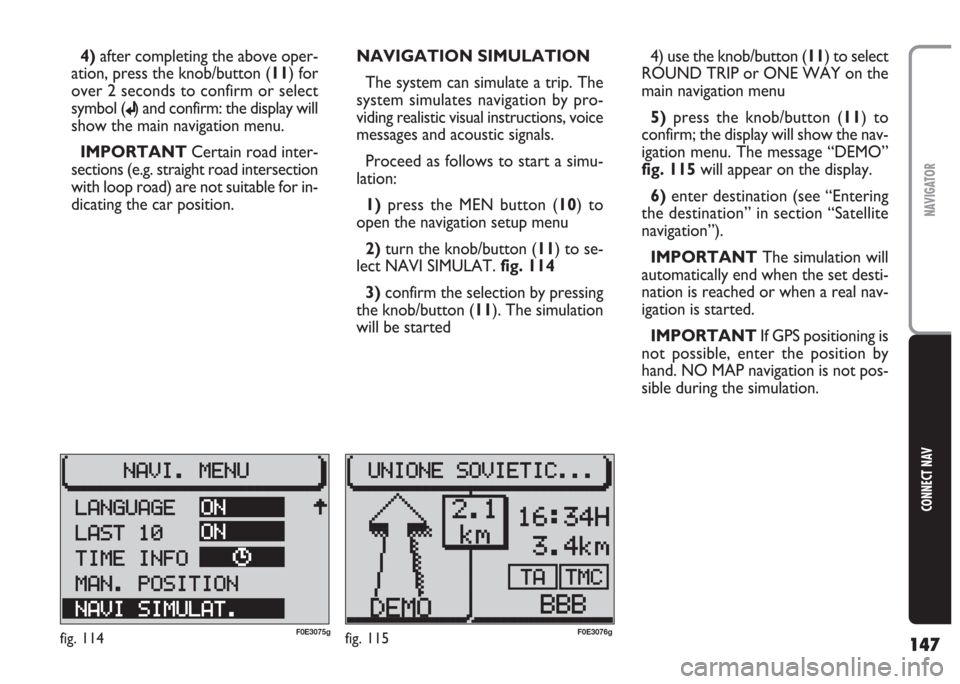
2) turn the knob/button (11) to se-
lect NAVI SIMULAT. fig. 114
3)confirm the selection by pressing
the knob/button (11). The simulation
will be started4) use the knob/button (11) to select
ROUND TRIP or ONE WAY on the
main navigation menu
5) press the knob/button (11) to
confirm; the display will show the nav-
igation menu. The message “DEMO”
fig. 115 will appear on the display.
6)enter destination (see “Entering
the destination” in section “Satellite
navigation”).
IMPORTANT The simulation will
automatically end when the set desti-
nation is reached or when a real nav-
igation is started.
IMPORTANT If GPS positioning is
not possible, enter the position by
hand. NO MAP navigation is not pos-
sible during the simulation.
fig. 114F0E3075gfig. 115F0E3076g
Page 165 of 202
164
CONNECT NAV
NAVIGATOR
GENERAL INFORMATION
This telephone can be used to make
the same telephone connections of a
portable cellular phone. Therefore, to
make a telephone call you need a SIM
card and you must be in a place served
by the GSM 900/1800 network, with
enough signal intensity.
IMPORTANT The network ser-
vices described in this section (e.g. in-
coming call) are managed by the tele-
phone, but their availability depends
on the network and the type of con-
tract agreed with the network
provider.
IMPORTANT If power supply is
lower than the minimum preset
threshold, phone call quality is not as-
sured. For this reason, turning the en-
gine on during a telephone call might
interrupt it.TURNING THE phone on
To activate the phone, if a valid SIM
card has been inserted, press
£(15).
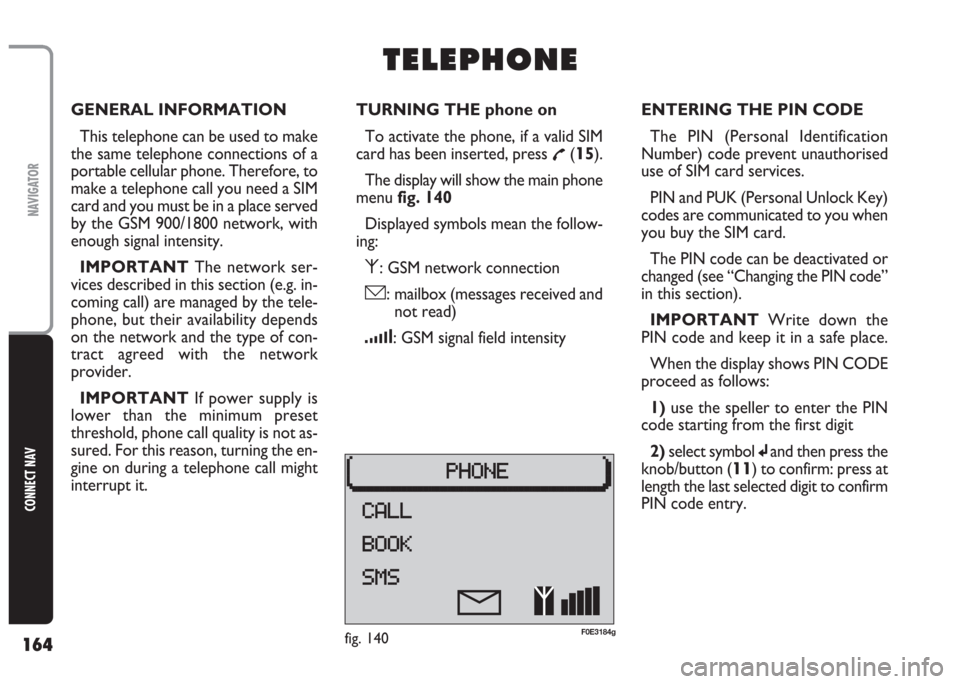
The display will show the main phone
menu fig. 140
Displayed symbols mean the follow-
ing:
⁄: GSM network connection
ó: mailbox (messages received and
not read)
¿: GSM signal field intensity
T T
E E
L L
E E
P P
H H
O O
N N
E E
ENTERING THE PIN CODE
The PIN (Personal Identification
Number) code prevent unauthorised
use of SIM card services.
PIN and PUK (Personal Unlock Key)
codes are communicated to you when
you buy the SIM card.
The PIN code can be deactivated or
changed (see “Changing the PIN code”
in this section).
IMPORTANT Write down the
PIN code and keep it in a safe place.
When the display shows PIN CODE
proceed as follows:
1) use the speller to enter the PIN
code starting from the first digit
2)select symbol
jand then press the
knob/button (
11) to confirm: press at
length the last selected digit to confirm
PIN code entry.
fig. 140F0E3184g
Page 171 of 202
170
CONNECT NAV
NAVIGATOR
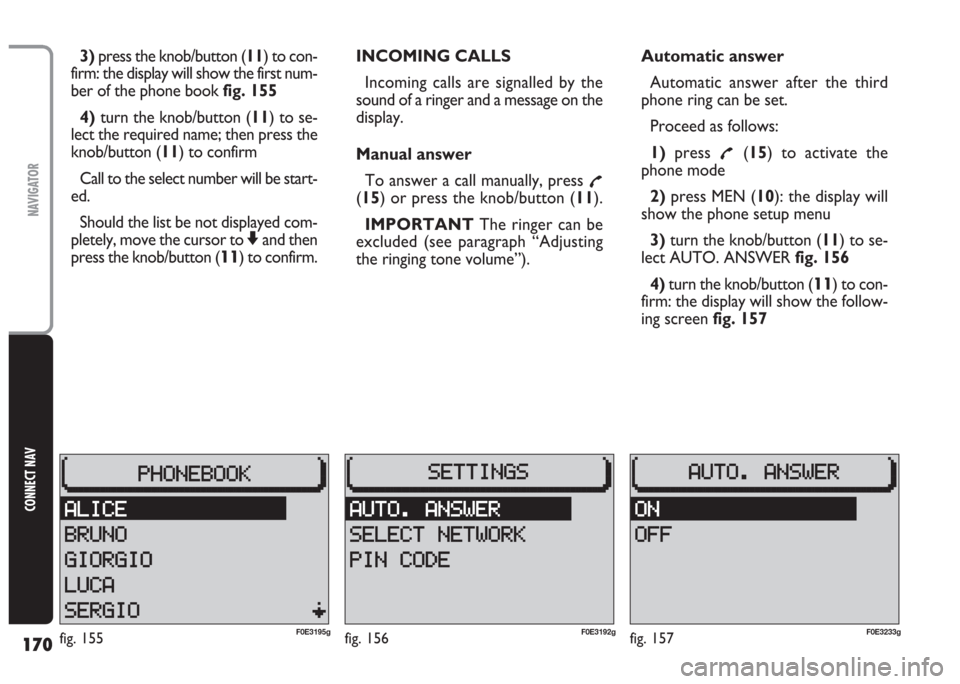
3)press the knob/button (11) to con-
firm: the display will show the first num-
ber of the phone book fig. 155
4) turn the knob/button (11) to se-
lect the required name; then press the
knob/button (11) to confirm
Call to the select number will be start-
ed.
Should the list be not displayed com-
pletely, move the cursor to
Zand then
press the knob/button (
11) to confirm.INCOMING CALLS
Incoming calls are signalled by the
sound of a ringer and a message on the
display.
Manual answer
To answer a call manually, press
£(15) or press the knob/button (11).
IMPORTANT The ringer can be
excluded (see paragraph “Adjusting
the ringing tone volume”).Automatic answer
Automatic answer after the third
phone ring can be set.
Proceed as follows:
1)press
£(15) to activate the
phone mode
2)press MEN (10): the display will
show the phone setup menu
3)turn the knob/button (11) to se-
lect AUTO. ANSWER fig. 156
4)turn the knob/button (
11) to con-
firm: the display will show the follow-
ing screen fig. 157
fig. 156F0E3192gfig. 155F0E3195gfig. 157F0E3233g
Page 176 of 202
175
CONNECT NAV
NAVIGATOR
10)press the knob/button (11) to
confirm: the display will show the list
of the available networks
11) turn the knob/button (11) to se-
lect the required network
12)press the knob/button (11) to
confirm the selection
Should the selected network be not
available (e.g.: overload or poor signal),
the display will show a dedicated
warning message.
In this case another network shall be
selected.Displaying the selected
network
Use this function to display the se-
lected network.
Proceed as follows:
1)press
£(15) to activate the
phone mode
2) press MEN (10): the display will
show the phone setup menu
3)turn the knob/button (11) to
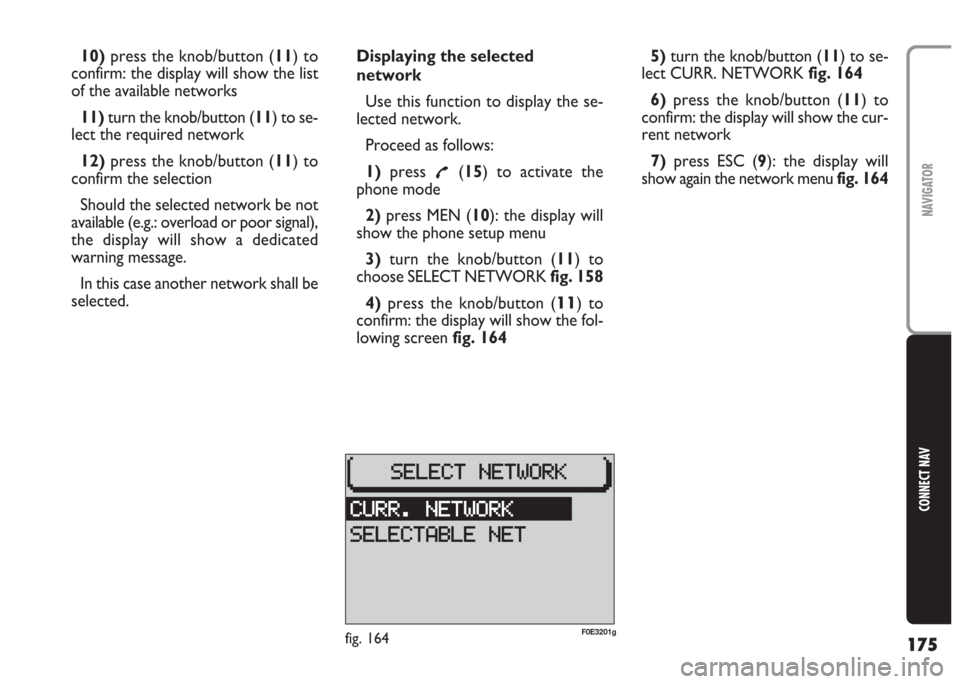
choose SELECT NETWORK fig. 158
4) press the knob/button (
11) to
confirm: the display will show the fol-
lowing screen fig. 1645)turn the knob/button (11) to se-
lect CURR. NETWORK fig. 164
6) press the knob/button (11) to
confirm: the display will show the cur-
rent network
7)press ESC (9): the display will
show again the network menu fig. 164
fig. 164F0E3201g