fog light FIAT PANDA 2018 Owner handbook (in English)
[x] Cancel search | Manufacturer: FIAT, Model Year: 2018, Model line: PANDA, Model: FIAT PANDA 2018Pages: 228, PDF Size: 17.05 MB
Page 20 of 228
Deactivation:keep the stalk pulled
towards the steering wheel for more
than two seconds.
REAR FOG LIGHTS
Press the
button, on the dashboard,
to switch on the rear fog lights.
With rear fog lights on, the
warning
light on the instrument panel will come
on at the same time.
FRONT/REAR FOG
LIGHTS
(for versions/markets, where provided)
The fog lights can be activated only
when the dipped beam headlights are
on.
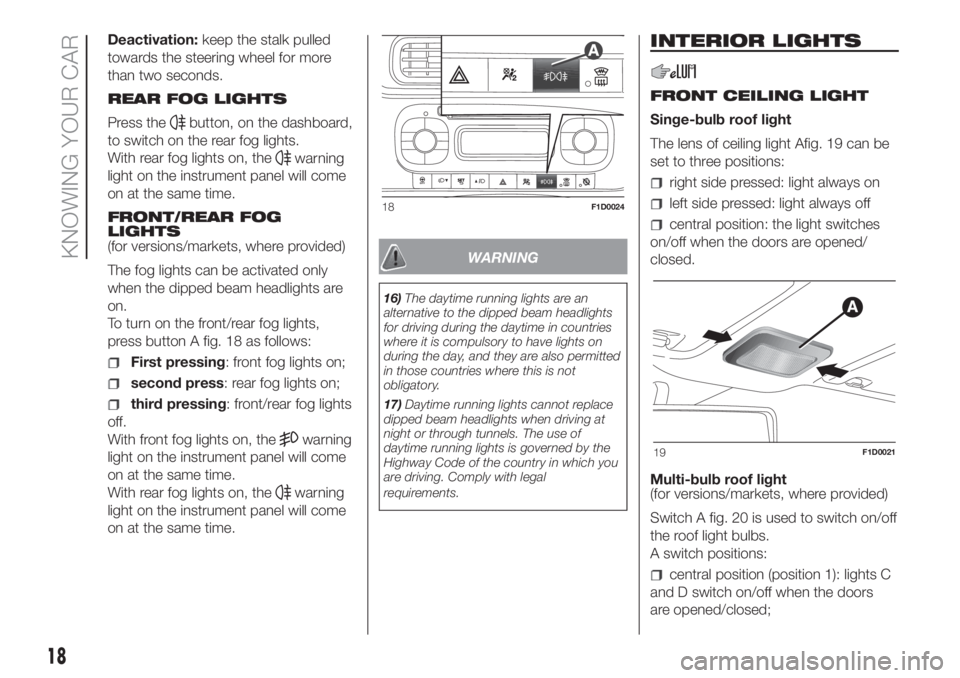
To turn on the front/rear fog lights,
press button A fig. 18 as follows:
First pressing: front fog lights on;
second press: rear fog lights on;
third pressing: front/rear fog lights
off.
With front fog lights on, the
warning
light on the instrument panel will come
on at the same time.
With rear fog lights on, the
warning
light on the instrument panel will come
on at the same time.
WARNING
16)The daytime running lights are an
alternative to the dipped beam headlights
for driving during the daytime in countries
where it is compulsory to have lights on
during the day, and they are also permitted
in those countries where this is not
obligatory.
17)Daytime running lights cannot replace
dipped beam headlights when driving at
night or through tunnels. The use of
daytime running lights is governed by the
Highway Code of the country in which you
are driving. Comply with legal
requirements.
INTERIOR LIGHTS
FRONT CEILING LIGHT
Singe-bulb roof light
The lens of ceiling light Afig. 19 can be
set to three positions:
right side pressed: light always on
left side pressed: light always off
central position: the light switches
on/off when the doors are opened/
closed.
Multi-bulb roof light
(for versions/markets, where provided)
Switch A fig. 20 is used to switch on/off
the roof light bulbs.
A switch positions:
central position (position 1): lights C
and D switch on/off when the doors
are opened/closed;
18F1D0024
19F1D0021
18
KNOWING YOUR CAR
Page 51 of 228
Warning light What it means
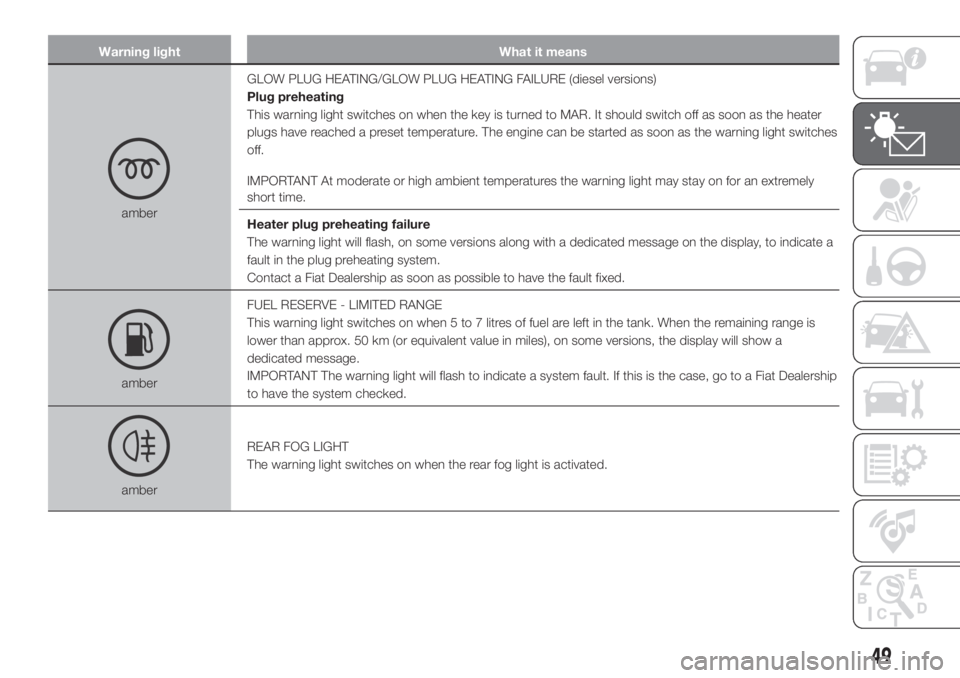
amberGLOW PLUG HEATING/GLOW PLUG HEATING FAILURE (diesel versions)
Plug preheating
This warning light switches on when the key is turned to MAR. It should switch off as soon as the heater
plugs have reached a preset temperature. The engine can be started as soon as the warning light switches
off.
IMPORTANT At moderate or high ambient temperatures the warning light may stay on for an extremely
short time.
Heater plug preheating failure
The warning light will flash, on some versions along with a dedicated message on the display, to indicate a
fault in the plug preheating system.
Contact a Fiat Dealership as soon as possible to have the fault fixed.
amberFUEL RESERVE - LIMITED RANGE
This warning light switches on when 5 to 7 litres of fuel are left in the tank. When the remaining range is
lower than approx. 50 km (or equivalent value in miles), on some versions, the display will show a
dedicated message.
IMPORTANT The warning light will flash to indicate a system fault. If this is the case, go to a Fiat Dealership
to have the system checked.
amberREAR FOG LIGHT
The warning light switches on when the rear fog light is activated.
49
Page 54 of 228
Warning light What it means
amberParking sensor failure
(for versions/markets, where provided)
The warning light switches on, on some versions along with a dedicated message on the display, when a
fault is detected in the parking sensors.
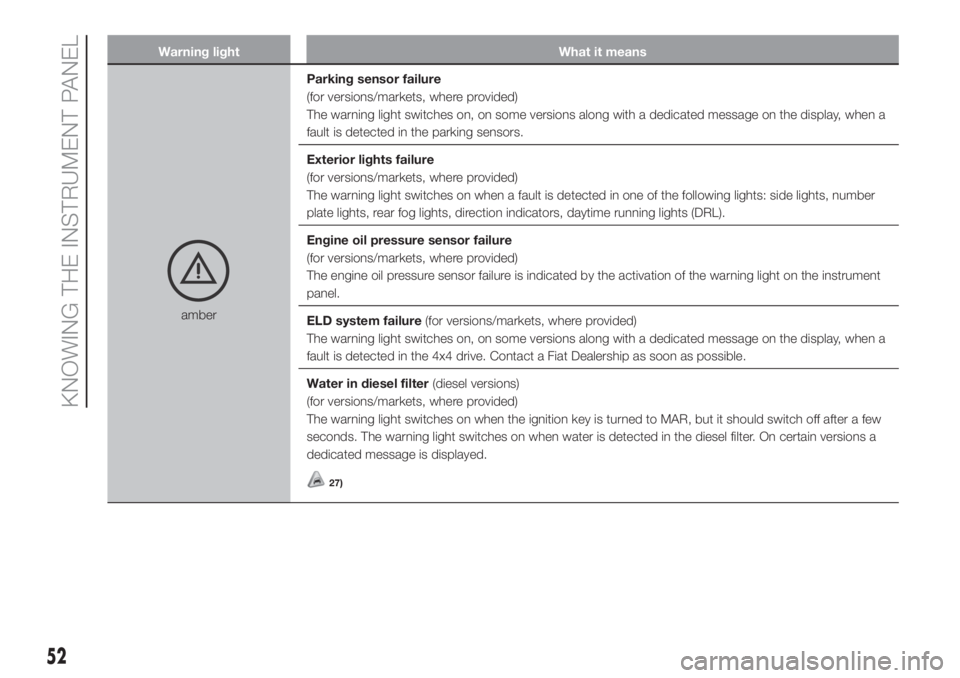
Exterior lights failure
(for versions/markets, where provided)
The warning light switches on when a fault is detected in one of the following lights: side lights, number
plate lights, rear fog lights, direction indicators, daytime running lights (DRL).
Engine oil pressure sensor failure
(for versions/markets, where provided)
The engine oil pressure sensor failure is indicated by the activation of the warning light on the instrument
panel.
ELD system failure(for versions/markets, where provided)
The warning light switches on, on some versions along with a dedicated message on the display, when a
fault is detected in the 4x4 drive. Contact a Fiat Dealership as soon as possible.
Water in diesel filter(diesel versions)
(for versions/markets, where provided)
The warning light switches on when the ignition key is turned to MAR, but it should switch off after a few
seconds. The warning light switches on when water is detected in the diesel filter. On certain versions a
dedicated message is displayed.
27)
52
KNOWING THE INSTRUMENT PANEL
Page 57 of 228
Green warning lights
Warning light What it means
greenELD SYSTEM (for versions/markets, where provided)
The warning light on flashing indicates activation of the electronic locking differential (ELD) function.
greenGRAVITY CONTROL SYSTEM (Panda Cross 4x4 versions)
The warning light on constantly, along with a dedicated message on the display, indicates activation of the
Gravity Control function. Deactivation of the function is signalled by flashing of the warning light, by an
acoustic warning and by a dedicated message on the display.
greenPETROL/LPG SWITCHING
(for versions/markets, where provided)
Warning light on constantly: petrol operation.
Warning light off: LPG operation.
greenPETROL/METHANE SWITCHING
(for versions/markets, where provided)
Warning light on constantly: petrol operation.
Warning light off: Methane operation.
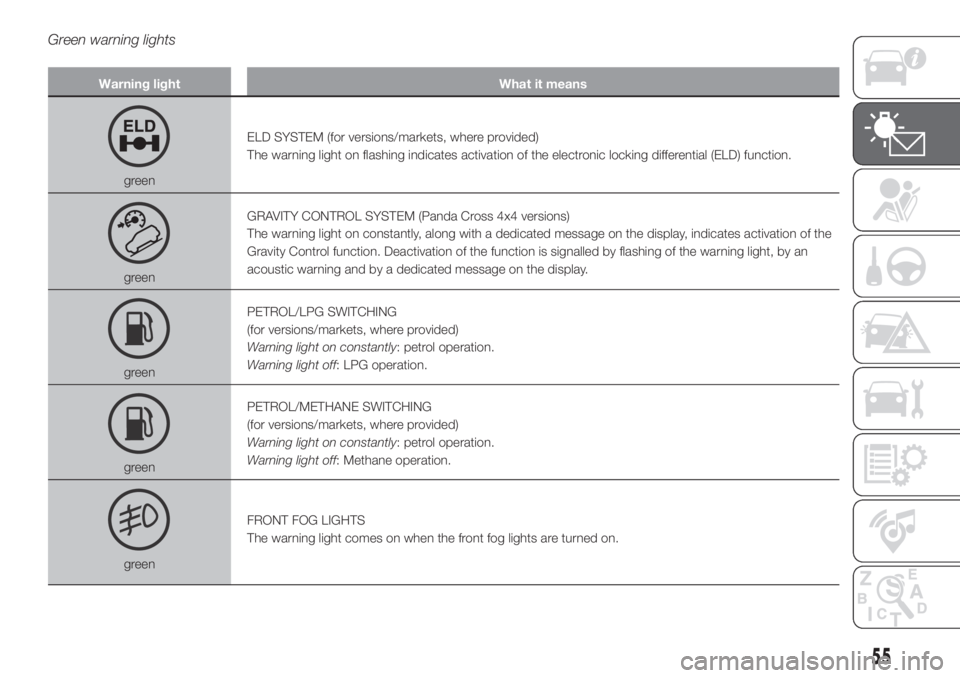
greenFRONT FOG LIGHTS
The warning light comes on when the front fog lights are turned on.
55
Page 71 of 228
71)If the car must be placed on a roller
bench (at a speed within 5 and 30 km/h)
for maintenance interventions or if it is
washed in an automatic roller washing
tunnel with an obstacle in the front part
(e.g. another car, a wall or another
obstacle), the system may detect its
presence and activate. In this case the
system must be deactivated through the
display Setup Menu.
72)If the system signals a pressure
decrease on a specific tyre, it is
recommended to check the pressure on all
four tyres.
73)The iTPMS does not relieve the driver
from the obligation to check the tyre
pressure every month; it is not to
be considered a system to replace
maintenance or a safety system.
74)Tyre pressure must be checked with
tyres cold. Should it become necessary for
whatever reason to check pressure with
warm tyres, do not reduce pressure even
though it is higher than the prescribed
value, but repeat the check when tyres are
cold.
75)The iTPMS cannot indicate sudden
tyre pressure drops (for example when
a tyre bursts). In this case, stop the vehicle,
braking with caution and avoiding abrupt
steering.
76)The system only warns that the tyre
pressure is low: it is not able to inflate
them.
77)Insufficient tyre inflation increases fuel
consumption, reduces the tread duration
and may affect the capacity to drive safely.
WARNING
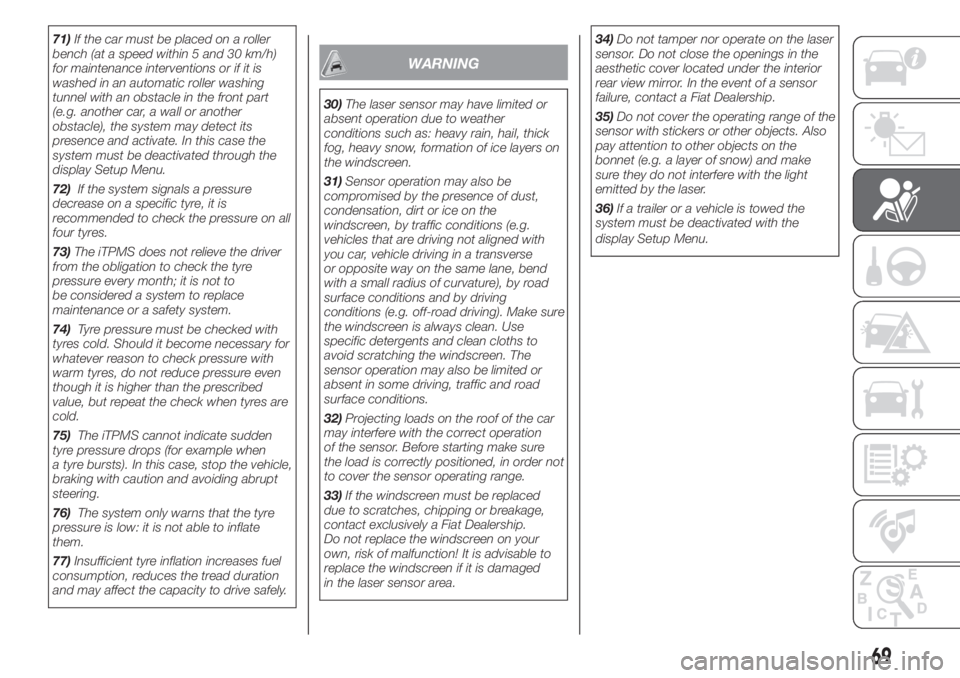
30)The laser sensor may have limited or
absent operation due to weather
conditions such as: heavy rain, hail, thick
fog, heavy snow, formation of ice layers on
the windscreen.
31)Sensor operation may also be
compromised by the presence of dust,
condensation, dirt or ice on the
windscreen, by traffic conditions (e.g.
vehicles that are driving not aligned with
you car, vehicle driving in a transverse
or opposite way on the same lane, bend
with a small radius of curvature), by road
surface conditions and by driving
conditions (e.g. off-road driving). Make sure
the windscreen is always clean. Use
specific detergents and clean cloths to
avoid scratching the windscreen. The
sensor operation may also be limited or
absent in some driving, traffic and road
surface conditions.
32)Projecting loads on the roof of the car
may interfere with the correct operation
of the sensor. Before starting make sure
the load is correctly positioned, in order not
to cover the sensor operating range.
33)If the windscreen must be replaced
due to scratches, chipping or breakage,
contact exclusively a Fiat Dealership.
Do not replace the windscreen on your
own, risk of malfunction! It is advisable to
replace the windscreen if it is damaged
in the laser sensor area.34)Do not tamper nor operate on the laser
sensor. Do not close the openings in the
aesthetic cover located under the interior
rear view mirror. In the event of a sensor
failure, contact a Fiat Dealership.
35)Do not cover the operating range of the
sensor with stickers or other objects. Also
pay attention to other objects on the
bonnet (e.g. a layer of snow) and make
sure they do not interfere with the light
emitted by the laser.
36)If a trailer or a vehicle is towed the
system must be deactivated with the
display Setup Menu.
69
Page 111 of 228
Light bulbs Type Power
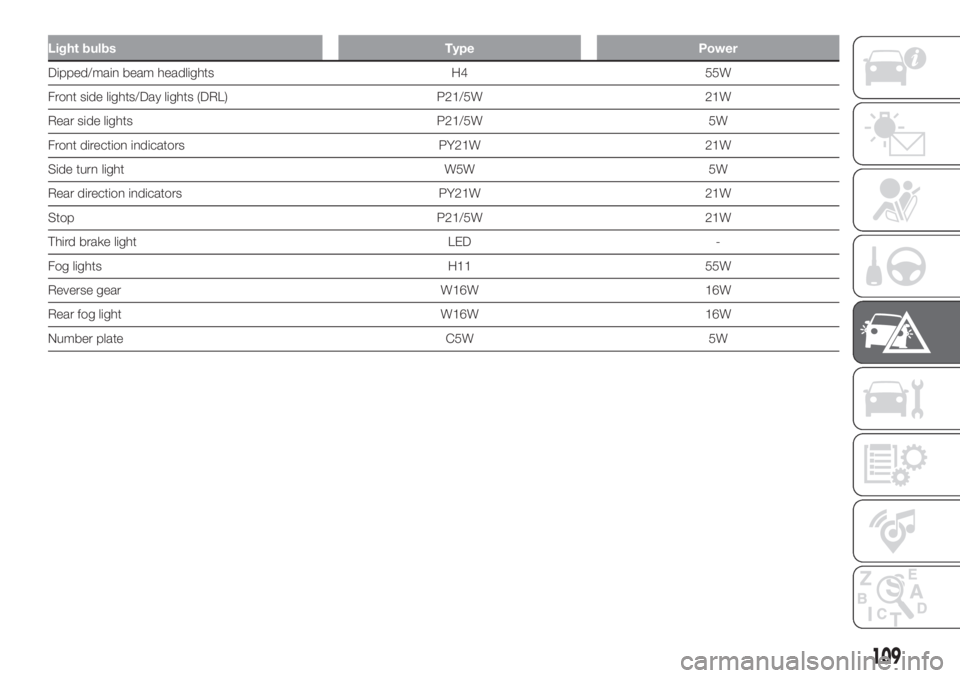
Dipped/main beam headlights H4 55W
Front side lights/Day lights (DRL) P21/5W 21W
Rear side lights P21/5W 5W
Front direction indicators PY21W 21W
Side turn light W5W 5W
Rear direction indicators PY21W 21W
Stop P21/5W 21W
Third brake light LED -
Fog lights H11 55W
Reverse gear W16W 16W
Rear fog light W16W 16W
Number plate C5W 5W
109
Page 112 of 228
FRONT LIGHT CLUSTERS
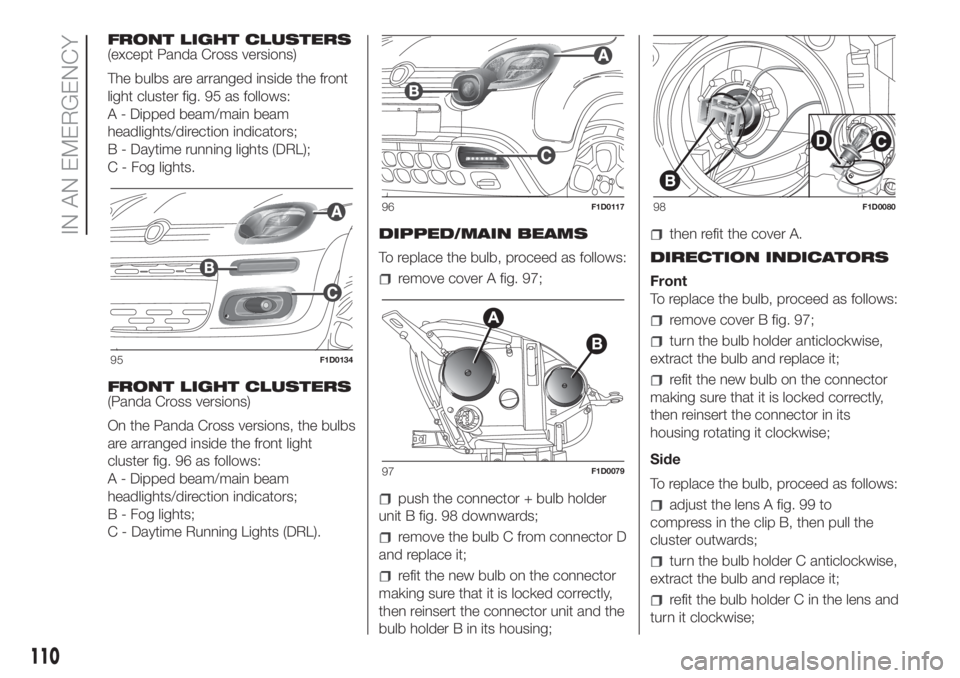
(except Panda Cross versions)
The bulbs are arranged inside the front
light cluster fig. 95 as follows:
A - Dipped beam/main beam
headlights/direction indicators;
B - Daytime running lights (DRL);
C - Fog lights.
FRONT LIGHT CLUSTERS
(Panda Cross versions)
On the Panda Cross versions, the bulbs
are arranged inside the front light
cluster fig. 96 as follows:
A - Dipped beam/main beam
headlights/direction indicators;
B - Fog lights;
C - Daytime Running Lights (DRL).DIPPED/MAIN BEAMS
To replace the bulb, proceed as follows:
remove cover A fig. 97;
push the connector + bulb holder
unit B fig. 98 downwards;
remove the bulb C from connector D
and replace it;
refit the new bulb on the connector
making sure that it is locked correctly,
then reinsert the connector unit and the
bulb holder B in its housing;
then refit the cover A.
DIRECTION INDICATORS
Front
To replace the bulb, proceed as follows:
remove cover B fig. 97;
turn the bulb holder anticlockwise,
extract the bulb and replace it;
refit the new bulb on the connector
making sure that it is locked correctly,
then reinsert the connector in its
housing rotating it clockwise;
Side
To replace the bulb, proceed as follows:
adjust the lens A fig. 99 to
compress in the clip B, then pull the
cluster outwards;
turn the bulb holder C anticlockwise,
extract the bulb and replace it;
refit the bulb holder C in the lens and
turn it clockwise;
95F1D0134
96F1D0117
97F1D0079
98F1D0080
110
IN AN EMERGENCY
Page 113 of 228
refit the cluster making sure that the
internal catch B clips into position.
FRONT FOG LIGHTS
(for versions/markets, where provided -
except Panda Cross versions)
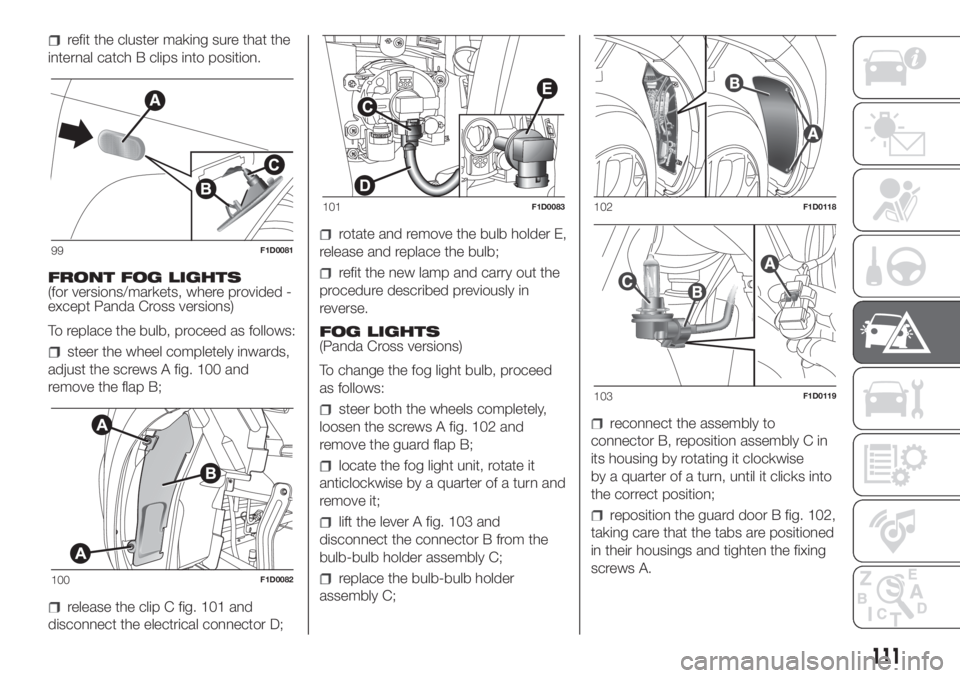
To replace the bulb, proceed as follows:
steer the wheel completely inwards,
adjust the screws A fig. 100 and
remove the flap B;
release the clip C fig. 101 and
disconnect the electrical connector D;
rotate and remove the bulb holder E,
release and replace the bulb;
refit the new lamp and carry out the
procedure described previously in
reverse.
FOG LIGHTS
(Panda Cross versions)
To change the fog light bulb, proceed
as follows:
steer both the wheels completely,
loosen the screws A fig. 102 and
remove the guard flap B;
locate the fog light unit, rotate it
anticlockwise by a quarter of a turn and
remove it;
lift the lever A fig. 103 and
disconnect the connector B from the
bulb-bulb holder assembly C;
replace the bulb-bulb holder
assembly C;
reconnect the assembly to
connector B, reposition assembly C in
its housing by rotating it clockwise
by a quarter of a turn, until it clicks into
the correct position;
reposition the guard door B fig. 102,
taking care that the tabs are positioned
in their housings and tighten the fixing
screws A.
99F1D0081
100F1D0082
101F1D0083102F1D0118
103F1D0119
111
Page 114 of 228
SIDE LIGHTS / DAYTIME
RUNNING LIGHTS (DRL)
(for versions/markets, where provided -
except Panda Cross versions)
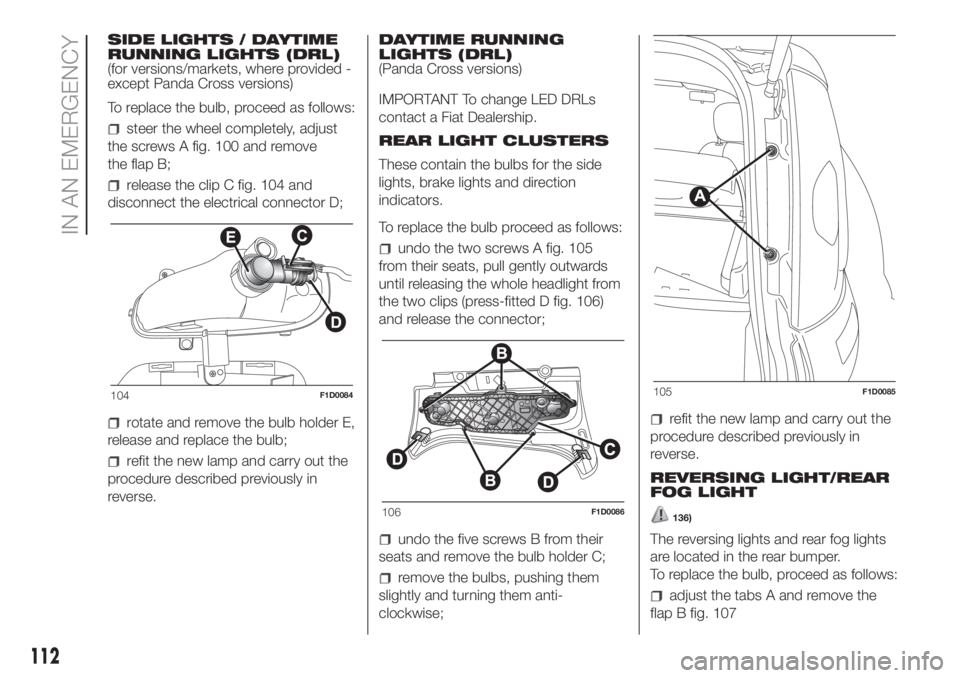
To replace the bulb, proceed as follows:
steer the wheel completely, adjust
the screws A fig. 100 and remove
the flap B;
release the clip C fig. 104 and
disconnect the electrical connector D;
rotate and remove the bulb holder E,
release and replace the bulb;
refit the new lamp and carry out the
procedure described previously in
reverse.DAYTIME RUNNING
LIGHTS (DRL)
(Panda Cross versions)
IMPORTANT To change LED DRLs
contact a Fiat Dealership.
REAR LIGHT CLUSTERS
These contain the bulbs for the side
lights, brake lights and direction
indicators.
To replace the bulb proceed as follows:
undo the two screws A fig. 105
from their seats, pull gently outwards
until releasing the whole headlight from
the two clips (press-fitted D fig. 106)
and release the connector;
undo the five screws B from their
seats and remove the bulb holder C;
remove the bulbs, pushing them
slightly and turning them anti-
clockwise;
refit the new lamp and carry out the
procedure described previously in
reverse.
REVERSING LIGHT/REAR
FOG LIGHT
136)
The reversing lights and rear fog lights
are located in the rear bumper.
To replace the bulb, proceed as follows:
adjust the tabs A and remove the
flap B fig. 107
104F1D0084
106F1D0086
105F1D0085
112
IN AN EMERGENCY
Page 117 of 228
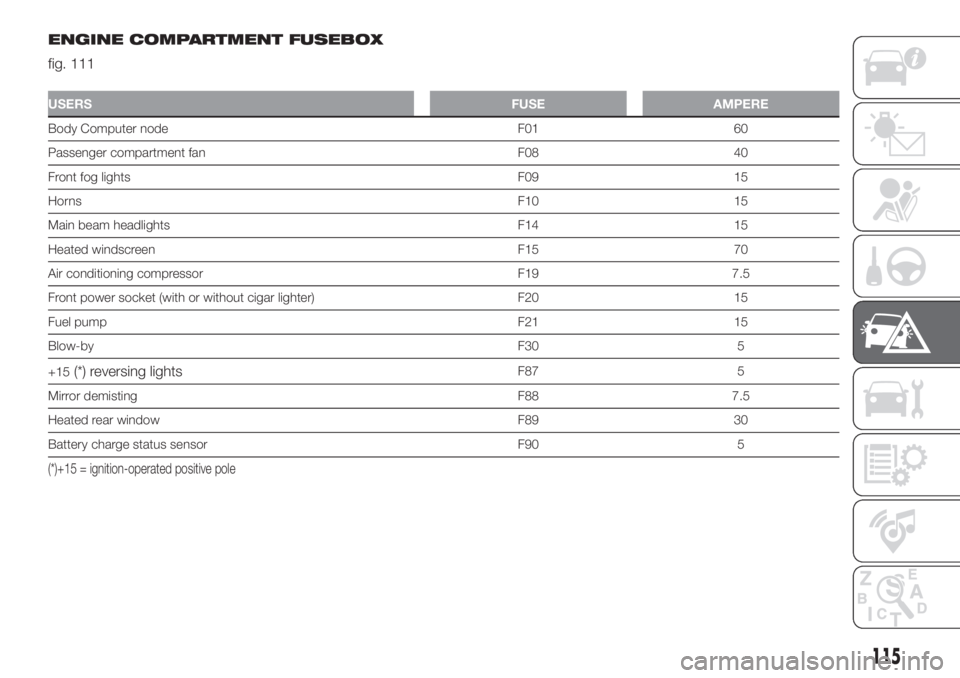
ENGINE COMPARTMENT FUSEBOX
fig. 111
USERSFUSE AMPERE
Body Computer node F01 60
Passenger compartment fan F08 40
Front fog lights F09 15
HornsF10 15
Main beam headlights F14 15
Heated windscreen F15 70
Air conditioning compressor F19 7.5
Front power socket (with or without cigar lighter) F20 15
Fuel pump F21 15
Blow-byF30 5
+15
(*) reversing lightsF87 5
Mirror demisting F88 7.5
Heated rear window F89 30
Battery charge status sensor F90 5
(*)+15 = ignition-operated positive pole
115