check engine FIAT PUNTO 1998 176 / 1.G Workshop Manual
[x] Cancel search | Manufacturer: FIAT, Model Year: 1998, Model line: PUNTO, Model: FIAT PUNTO 1998 176 / 1.GPages: 225, PDF Size: 18.54 MB
Page 165 of 225
7A«4 Manual transmission
33 Remove lha air cleaner front section and air ducting with reference to Chapter 4C. Also disconnect the injection pump vacuum pipe from the clips on the left-hand end of the cylinder head. This work is necessary in order to fit the engine hoist 34 Support the weight of the engine using a hoist attached to the engine lifting eyes, or alternatively use a trolley Jack and block of wood beneath the engine. 35 Unscrew the nuts securing the downpipe to the exhaust manifold, then lower it and support on an axle stand. Recover the gasket. 36 Unscrew the starter motor mounting bolts and support the starter motor to one side. 37 Disconnect the wiring from the reversing light switch on the front of the transmission. 38 Unscrew the nut and disconnect the earth cable from its stud. 39 Trace the wiring back from the electronic speedometer sensor and disconnect the connector located on the left-hand side ot the engine. If a mechanical speedometer Is fitted unscrew the knurled collar and disconnect the cabte from the transmission. 40 Unbolt and remove the transmission lower cover. 41 Using an Allen key unscrew the bolts securing the inner end of the left-hand driveshaft to the transmission flange. Remove the bolts and recover the spacer plates. Support the driveshaft on an axle stand. 42 Unscrew and remove the bolts securing the left-hand swivel hub assembly to the front suspension strut, then separate the components and support the swivel hub on an axle stand. 43 Move the swrvel hub assembly outwards and support the driveshaft away from Ihe transmission. 44 Using an Allen key unscrew the bolts securing the Inner end of the right-hand driveshaft to the intermediate shaft flange. Remove the bolts and recover the spacer plates. Support the driveshaft on an axle stand. 45 Remove the intermediate driveshaft with reference to Chapter 8. 46 Working beneath the vehicle, unscrew the bolts securing the rear engine mounting to the underbody then unscrew the bolts securing the mounting to the transmission and withdraw the mounting assembly from under the vehicle.
47 Unscrew the bolts securing the left-hand engine/transmission mounting to the body then unscrew Ihe bolts from the transmission and remove the mounting. 48 Support the weight of the transmission on a trolley jack then unscrew the remaining nut and bolts from the bellhousing and pull the transmission away from the engine.
A
Warning: Support the trans-mission to ensure that It remains steady o/i the jack head. Keep the transmission level until the Input shaft
1$
fully withdrawn from the clutch friction plate.
Refitting 48 Refitting is a reversal of the removal procedure, but note the following points. a) Appiy a smear* of high-meiting-point grease to the clutch friction piate splines; take care to avoid contaminating the friction surfaces. b) Tighten all bolts to the specified torque. c) Fit new clips to secure the driveshaft gaiters to the transmission output shafts. d) Adjust the clutch cable (where applicable) as described In Chapter 6.
4 Manual transmission overhaul -general Infomtatlon
Overhauling a manual transmission is a difficult and Involved Job for the DIY home mechanic. In addition to dismantling and reassembling many small parts, clearances must be precisely measured and, if necessary, changed by selecting shims and spacers. Internal transmission components are also often difficult to obtain, and in many Instances, extremely expensive. Because of this, If the transmission develops a fault or becomes noisy. Ihe best course of action is to have the unit overhauled by a specialist repairer, or to obtain an exchange reconditioned unit. Nevertheless, it is not impossible for the more experienced mechanic to overhaul the transmission, provided the special tools are available, and the Job is done in a deliberate step-by-step manner, so that nothing is overlooked.
The tools necessary for an overhaul include internal and external clrclip pliers, bearing pullers, a slide hammer, a sat of pin punches, a dial test Indicator, and possibly a hydraulic press. In addition, a large, sturdy workbench 8od a vice will be required. During dismantling o1 the transmission, make careful notes of how each component
1$
fitted, to make reassembly easier and more accurate. Before dismantling the transmission, it will help if you have some idea what area is malfunctioning. Certain problems can be closely related to specific areas In the transmission, which can make component examination and replacement easier. Refer to the Fault Finding Section at the end of this manual for more Information.
5 Reversing light switch -testing, removal and refitting ||
Testing 1 The reversing light circuit is controlled by a plunger-type switch screwed into the front of the transmission casing. If a fault develops, first ensure that Ihe circuit fuse has not blown. 2 To test the switch, disconnect the wiring connector, and use a multimeter (set to the resistance function) or a battery-and-bulb test circuit to check that there is continuity between the switch terminals only when reverse gear is selected. If this is not the case, and there are no obvious breaks or other damage to the wires, the switch is faulty, and must be renewed.
Removal 3 Access to the reversing light switch Is best achieved from under the vehicle. Apply the handbrake then jack up Ihe front of the vehicle and support on axle stands (see Jacking and vehicle support). 4 Disconnect the wiring connector, then unscrew It from the transmission casing.
Refitting 5 Refit the switch and tighten securely. 6 Reconnect the wiring then lower the vehicle to the ground.
Page 166 of 225
7B«1
Chapter 7 Part B:
Automatic transmission
Contents
Accelerator pedal micro-switch(es) - checking and adjustment II Automatic transmission filter and fluid change See Chapter 1A Automatic transmission fluid level check See Weekly checks Automatic transmission • overhaul 12 Automatic transmission • removal and refining 2 Bectro-magnetic clutch - removal, inspection and refitting 3 BectrO'fnagnetic clutch brushes- removal, inspection and refitting . 4
Electronic control unit - removal and refitting 5 Gear selector cable - adjustment 6 Gear selector cable - removal and refitting 9 General information 1 Kickdown cable - adjustment 7 Kickdown cable - removal and refitting 6 Transmission oil pump - removal and refitting 10
Degrees of difficulty
Easy,
suitable for novice
with
ittle experience ^
Party
easy,
suitable for beginner
with
^r someexperienoe ^
Faiily
difficult,
^ suitable
for
competent
DIY mechanic
^
Difficult, suitable
for fe, experienced DIY >8J mechanic
Verydfficult, ^
suitable
for
expert DIY
or professional ^
Specifications
General Type Ratios (at transmission): Lowest Highest Final drive
Torque wrench settings Esnh cable Control unit Sectro-magnetic clutch to flywheel Transmission-to-engine bolt/nut ..
ECVT (Electronic Continuously Variable Transmission)
2.503 0.497 4.647:1
Nm Ibftt 14 10 5 4 34 25 85 63
1 Genera) information
I The automatic transmission fitted is designated ECVT (Electronic Continuously Variable Transmission). The main components
01
the transmission are an electro-magnetic dutch, a variable-ratio coupling, a final drive/ differential unit, and the associated control mechanisms (see illustrations overleaf) 2 The variable-ratio coupling consists of two pulleys and a flexible metal drivebelt. The effective diameter of the two pulleys can be varied to provide different transmission ratios between them. 3 During normal driving, the transmission automatically selects the ratio giving the best
compromise between economy and speed. When the driver depresses the accelerator pedal to the floor, a kickdown effect is provided, and the transmission selects a lower ratio for improved acceleration. 4 The gear selector control resembles that fitted to conventional automatic transmissions. The control positions are as follows: P (Parking) The transmission is mech-anically locked by the engage-ment of a pawl with a toothed segment on the driven pulley. R (Reverse) Reverse gean's engaged, N (Neutral) The transmission is In neutral. D (Drive) Normal driving position. Trans-mission ratio is varied automat-ically to suit prevailing speed and load.
L (Low) Prevents the transmission
moving into high ratios. Provides maximum acceleration end maximum engine braking. 5 The engine can only be started In positions P and N. A warning buzzer sounds If the selector is in any position other than P when the ignition is switched off or when the driver's door is opened. 6 The electro-magnetic clutch consists of a driving element boiled to the engine flywheel, and a driven element spiined to the transmission Input shaft. The degree of coupling between the (wo elements Is determined by the intensity of a magnetic field generated by a current passing through windings in the driven element. The magnetic field acts on a layer of metallic powder between the driving and driven elements. When no magnetic field is present, the powder is loose and the two elements are effectively
Page 169 of 225
7B*4 Automatic transmission
2 Automatic transmission - ^ removal and refitting St
Removal 1 Select a solid, level surface to park the vehicle upon. Give yourself enough space to move around it easily. Apply the handbrake then jack up the front of the vehicle and support on axle stands (see Jacking and vehicle support). Remove both front wheels, 2 Remove the battery and mounting tray as described In Chapter 5A. 3 Remove the air cleaner and air inlet duct as described In Chapter 4A. 4 Disconnect the kickdown cable at the sector on the throttle housing and detach It from the mounting on the camshaft cover. Also release the cable from the support on the left-hand end of the cylinder head. 5 Disconnect the wiring connectors on the transmission. 6 Disconnect the fluid inlet and outlet Unas from the heat exchanger on top of the transmission. 7 Pull the fluid level dipstick from Its tube on the front of the transmission and tape over the top of the tube to prevent dirt entry. 8 Unscrew and remove the retaining pin and disconnect the speed selector cable from the top of the transmission. 9 Unscrew the upper bolt securing the starter motor to the transmission. 10 Unscrew the upper bolts securing the transmission to the engine. 11 Support the weight of the engine using a hoist attached to the engine lifting eyes, or alternatively UBO a trolley jack and block of wood beneath the engine, 12 Remove the screws and remove the front wheel arch liner from under the left-hand wheel arch. 13 Unscrew the nut securing the earth cablo to the transmission. 14 Using a punch drive out the roll pins securing both driveshafts to the final drive output shafts. 15 Unscrew and remove the bolts securing the left-hand swivel hub assembly to the front suspension strut, then separate the components and support the swivel hub on an axle stand. 16 Move the swivel hub assembly outwards and slide the inner end of the driveshaft from the splines on the transmission output shaft. Support the shaft away from the transmission to prevent damage to the gaiters. 17 Unscrew the lambdafoxygen sensor from the exhaust downpipe and position it In a safe place to prevent damage. 18 Unscrew ihe nuts securing the downpipe to Ihe exhaust manifold, then lower It and suppon on an axle stand. Recover the gasket. 19 Unscrew the knurled nut and disconnect the speedometer cable from the top of the final drive housing.
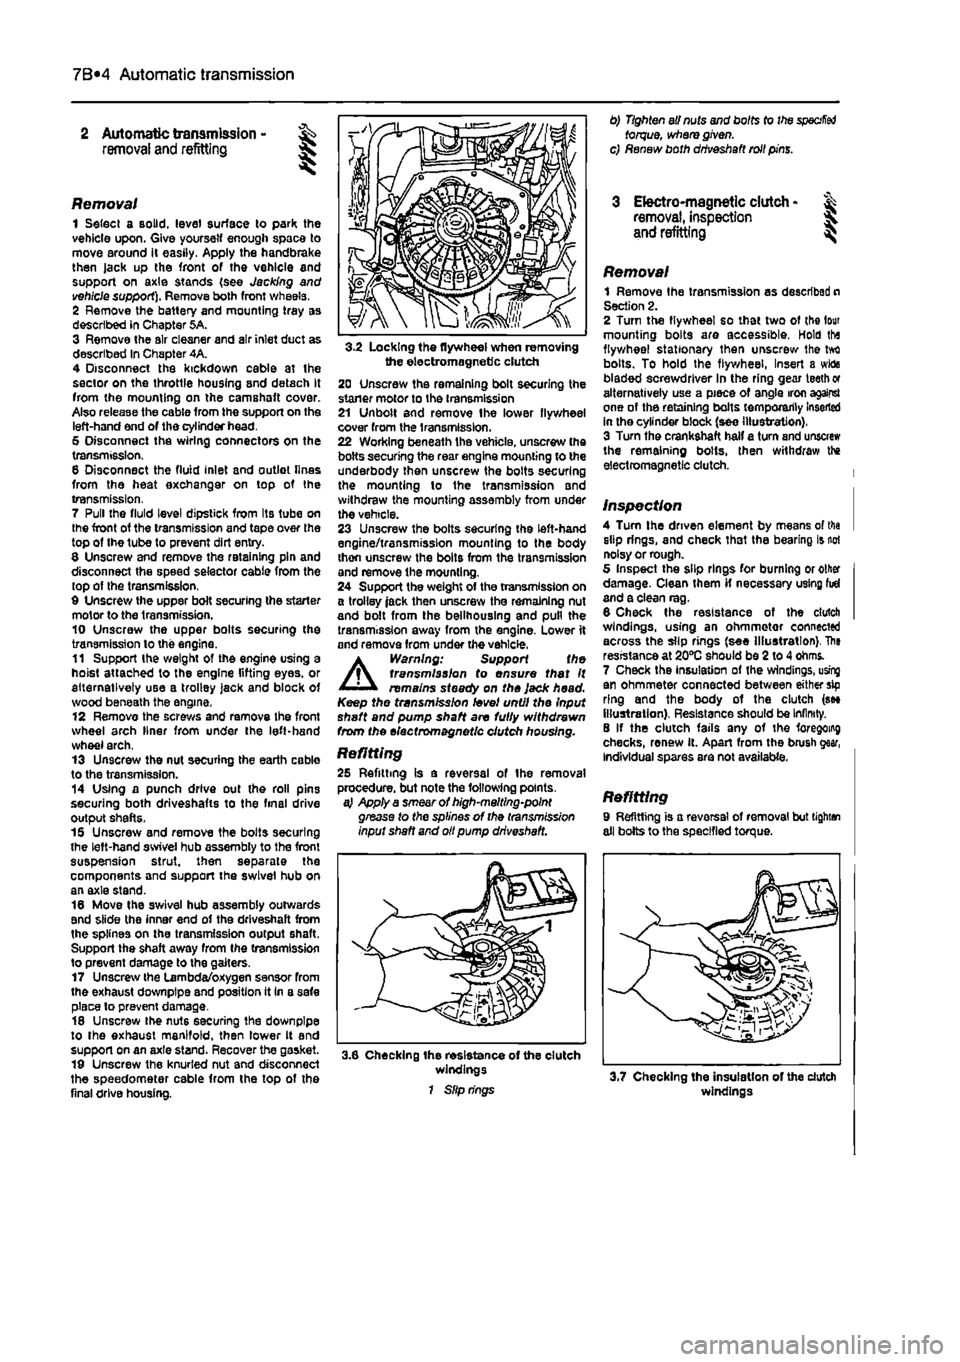
3-2 Locking the flywheel when removing the electromagnetic clutch 20 Unscrew the remaining bolt securing the staner motor to the transmission 21 Unbolt and remove Ihe lower flywheel cover from the transmission. 22 Working beneath the vehicle, unscrew the bolts securing the rear engine mounting to the underbody then unscrew the bolts securing the mounting lo the transmission and withdraw the mounting assembly from under the vehicle. 23 Unscrew the bolts securing the left-hand engine/transmission mounting to the body thon unscrew the bolts from the transmission and remove the mounting. 24 Support the weight of the transmission on a trolley jack then unscrew the remaining nut and bolt from the bellhouslng and pull the transmission away from the engine. Lower it and remove from under the vehicle.
A
Warning: Support the transmission to ensure that It remains steady on the Jack head. Keep the transmission level until the Input shaft and pump shaft are fully withdrawn from the electromagnetic clutch housing.
Refitting 25 Refitting is a reversal of the removal procedure, but note the following points. a} Apply a smear of high-melting-point grease to the splines of the transmission input shaft and oil pump driveshaft.
3.6 Checking the resistance of the clutch windings 1 Slip rings
0) Tighten all nuts and bolts to the
specified
torque, where given, c) Renew both driveshaft roll pins.
3 Electro-magnetic clutch • & removal, inspection 5. and refitting ^
Removal 1 Remove Ihe transmission as described n Section 2. 2 Turn the flywheel so that two of the lour mounting bolts are accessible, Hold tha flywheel stationary then unscrew Ihe tvrt bolts. To hold the flywheel, Insert a wida bladed screwdriver In the ring gear teeth or alternatively use a piece of angle iron against one of the retaining bolts temporarily Inserted in the cylinder block (see illustration). 3 Turn the crankshaft half a turn and unscrew the remaining bolts, then withdraw the electromagnetic clutch.
Inspection 4 Turn the driven element by means of tha slip rings, and check that the bearing is not noisy or rough. 5 Inspect the slip rings for burning or other damage. Clean them if necessary using fid and a clean rag. 6 Check the resistance of the clutch windings, using an ohmmetor connected across the slip rings (see Illustration). The resistance at 20*0 should be 2 to 4 ohms. 7 Check the Insulation of the windings, using an ohmmeter connected between either sip ring and the body of the clutch (see illustration). Resistance should be Infinity. 8 If the clutch fails any of the foregoing checks, renew it. Apart from the brush gear, Individual spares are not available.
Refitting 9 Refitting is a reversal of removal but tighten all bolts to the specified torque.
windings
Page 171 of 225
7B*6 Automatic transmission
Gear selector cable -adjustment
1 Remove the battery and tray as described In Chapter 5A for access to the transmission. 2 Disconnect the selector cable from the lever on Ihe transmission. 3 Move the selector fever inside the vehicle to the N (Neutral) position, then move the lever on the transmission to Its central (Neutral) position. Locate the cable end over the lever. If the cable end fitting does not line up exactly with the hole In Ihe lever, loosen the adjustment nut and reposition the end fitting. 4 With the adjustment correct reconnect tha cable to the lever, then move the selector lever to the P (Park) position. Check that the lever on the transmission has also moved to the P position. 6 Refit the battery and tray as described in Chapter 5A. 6 Road test the vehicle, and check for correct operation in all selector lever positions.
9 Gear selector cable -removal and refitting at
7 Inside the vehicle disconnect the selector cable from the bottom of the selector lever (hen remove it from the support bracket, a Withdraw the cable into the engine compartment, and remove it.
Refitting 9 Refitting is a reversal of removal, but adjust the cable as described in Section 8. 10 Check that It is only possible to start the engine in positions P and N. Reposition the selector lever switch If necessary. 11 Road test the vehicle, and check for correct operation In ell selector lever positions.
10 Transmission oil pump - & mnvtiifll rAtiMlitA removal a/id refitting
Removal 1 Using an Allen key. unscrew the screw and remove the selector lever knob from the lever. 2 Remove the oddment tray and the ashtray. 3 Remove the screws and withdraw the centre console and selector mechanism cover. 4 Unscrew the mounting screws, slightly lift the centre console, then disconnect the wiring and remove the console, 5 Remove the battery and tray as described in Chapter 5A for access to the transmission, 6 Disconnect the selector cable from the lever on the transmission.
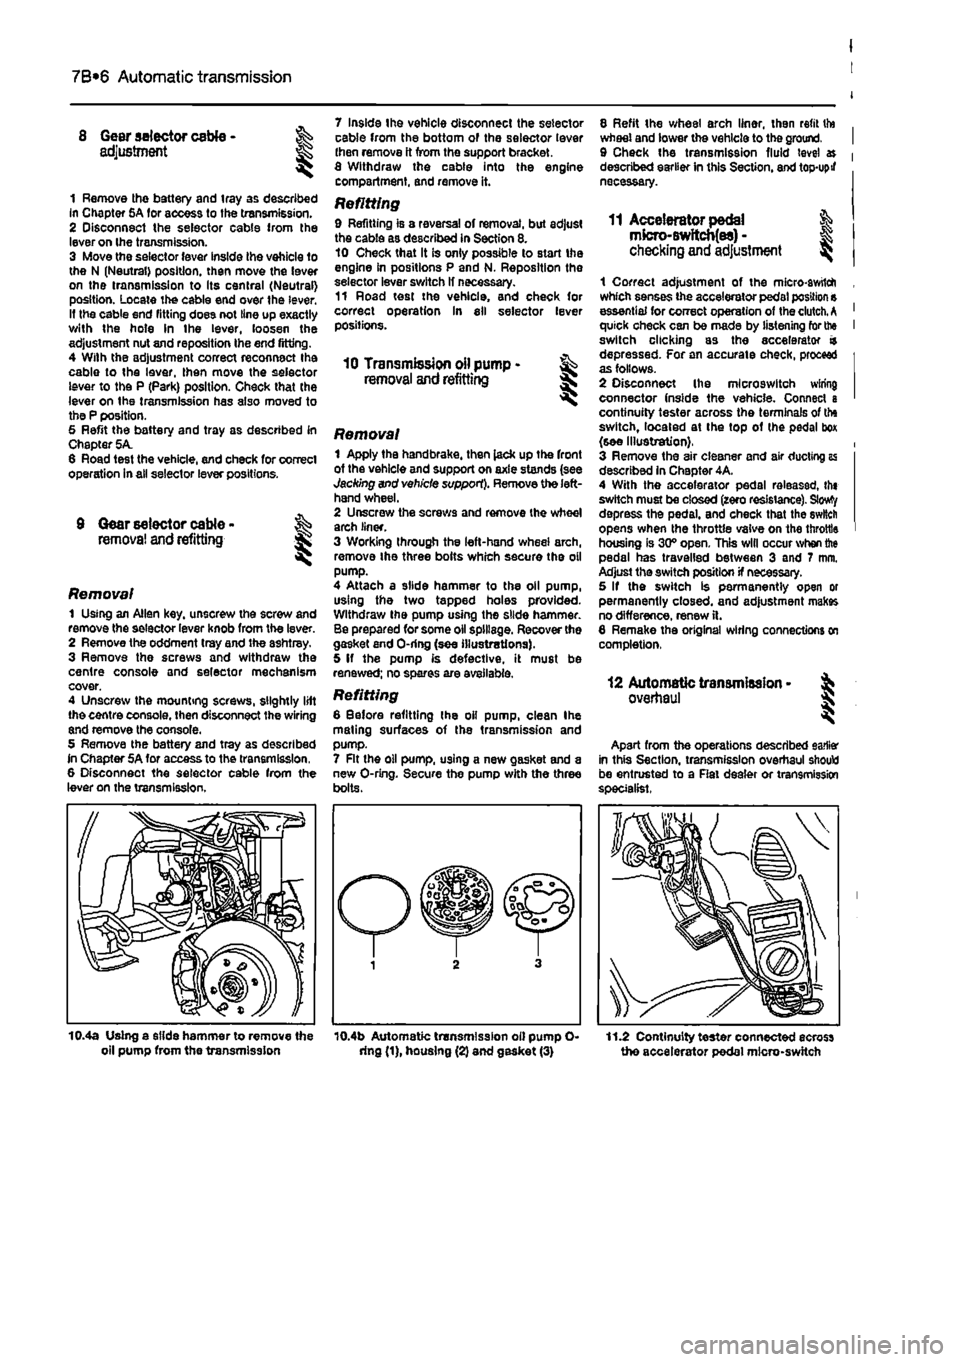
Removal 1 Apply the handbrake, then lack up the front of the vehicle and support on axle stands (see Jacking and vehicle support). Remove the left-hand wheel. 2 Unscrew the screws and remove the wheel arch liner. 3 Working through the left-hand wheel arch, remove Ihe three bolts which secure the oil pump. 4 Attach a slide hammer to the oil pump, using the two tapped holes provided. Withdraw the pump using the slide hammer. Be prepared for some oil spillage. Recover the gasket end O-ring (see illustrations). 5 If the pump is defective, it must be renewed; no spares are available.
Refitting 6 Before refitting Ihe oil pump, clean Ihe mating surfaces of the transmission and pump. 7 Rt the oil pump, U9ing a new gasket and a new O-ring. Secure the pump with the three bolts.
8 Refit the wheel arch liner, then refit tto wheel and lower the vehicle to the ground. 9 Check the transmission fluid level » described earlier in this Section, and top-upif necessary.
11 Accelerator pedal & mfcro-Bwftcb(es) -checking
and
adjustment ^
1 Correct adjustment of the micro-awtlch which senses the accelerator pedal position s essential for correct operation of the clutch.
A
quick check can be made by listening for the switch clicking as the accelerator a depressed. For an accurate check, proceed as follows. 2 Disconnect Ihe mlcroswitch wiring connector (nside the vehicle. Connect a continuity tester across the terminals of the switch, located at the top of (he pedal box (see Illustration}. 3 Remove the air cleaner and air ducting as described in Chapter 4A. 4 With the accelerator pedal releassd, th« switch must be closed (zero resistance). Slowty depress the pedal, and check that the switch opens when the throttle valve on the throttle housing is 30° open. This will occur when the pedal has travelled between 3 and 7 mm. Adjust the switch position if necessary. 5 If the switch is permanently open or permanently closed, and adjustment makes no difference, renew ft. 6 Remake the original wiring connections on completion,
12 Automatic transmission -overhaul
Apart from the operations described earlier in this Section, transmission overhaul should be entrusted to a Rat dealer or transmission specialist.
10.4a Using a slide hammer to remove the oil pump from the transmission 10.4b Automatic transmission oil pump O-dng (1), housing (2) and gasket (3) 11.2 Continuity tester connected ecross the accelerator pedal micro-switch
Page 175 of 225
I
8*4 Driveshafts
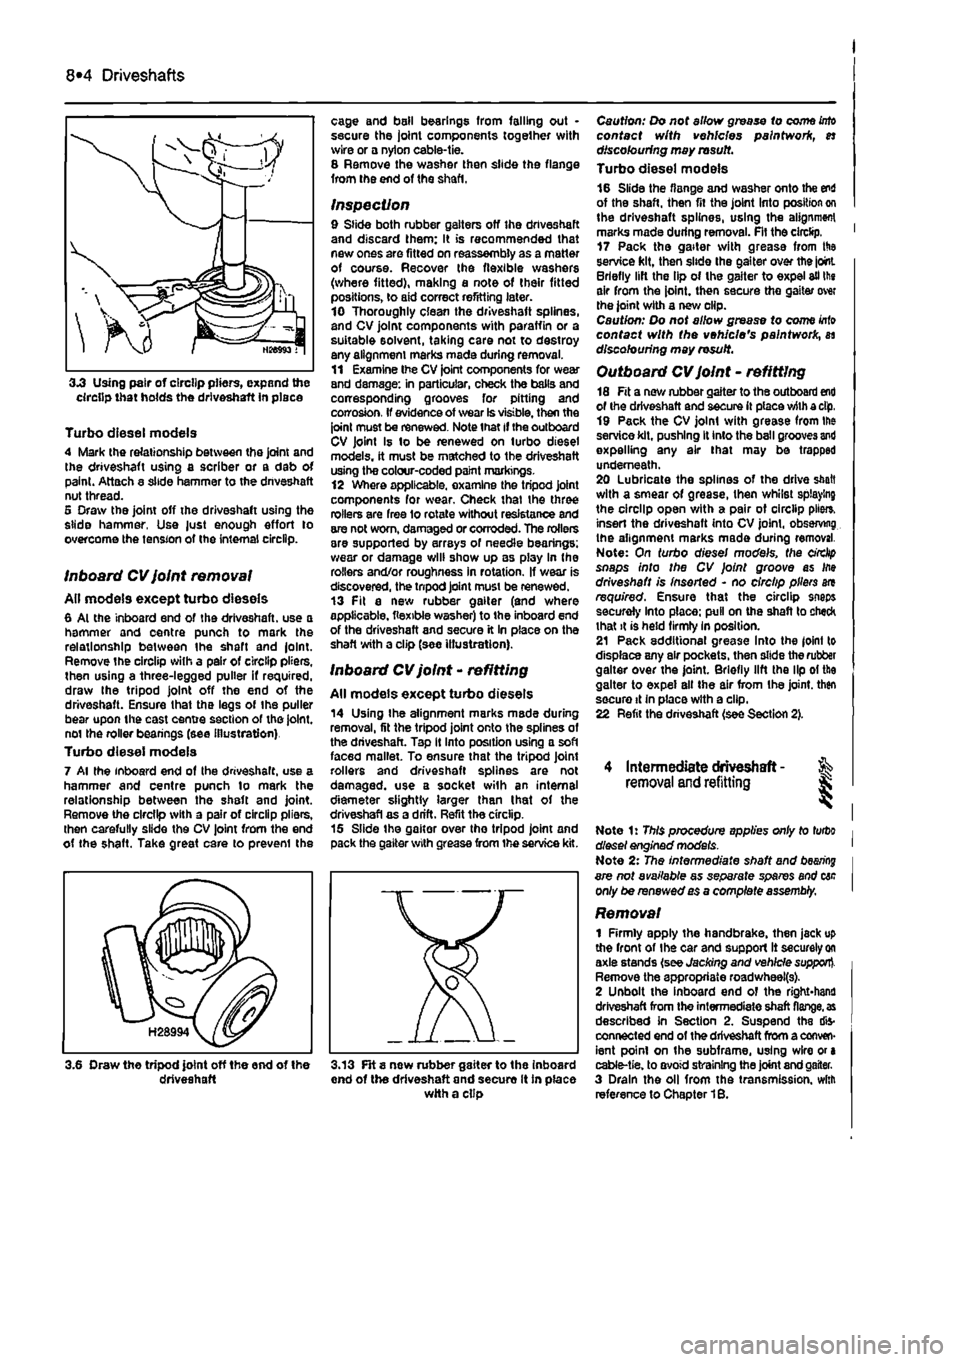
3.3 Using pair of circlip pliers, expand the circlip that holds the driveshaft in place
Turbo diesel models 4 Mark the relationship between the joint and the driveshaft using a scriber or a dab of paint. Attach a slide hammer to the dnveshaft nut thread. 5 Draw the joint off the driveshaft using the slide hammer, Use just enough effort to overcome the tension of the internal circlip.
Inboard CV joint removal All models except turbo dieseis 6 Al the inboard end of the driveshaft. use a hammer and centre punch to mark the relationship between Ihe shaft and |olnt. Remove the circlip with a pair of circlip pliers, then using a three-legged puller if required, draw Ihe tripod joint off the end of the driveshaft. Ensure that the legs of Ihe puller bear upon the cast centre section of the joint, not the roller beanngs (see illustration) Turbo diesel models 7 Al the inboard end of Ihe driveshaft. use a hammer and centre punch lo mark the relationship between the shaft and joint. Remove the circlip with a pair of circlip pliers, then carefully slide the CV joint from the end ot the shaft. Take great care to prevenl the
cage and bail bearings from falling out • secure the joint components together with wire or a nylon cable-tie. 8 Remove the washer then slide the flange from the end of the shaft.
Inspection 9 Slide both rubber gaiters off the driveshaft and discard them: It is recommended that new ones are fitted on reassembly as a matter of course. Recover the flexible washers (where fitted), making a note of their fitted positions, to aid correct refitting later. 10 Thoroughly clean the driveshaft splines, and CV joint components with paraffin or a suitable solvent, taking care not to destroy any alignment marks made during removal. 11 Examine Ihe CV joint components for wear and damage: in particular, check the balls and corresponding grooves for pitting and corrosion. If evidence of wear Is visible, then the joint must be renewed. Note that if the outboard CV joint Is to be renewed on turbo diesel models, it must be matched to the driveshaft using the colour-coded paint markings. 12 Where applicable, examine the tripod joint components for wear. Check thai the three rollers are free lo rotate without resistance and are not worn, damaged or corroded. The rollers are supported by arrays of needle bearings: wear or damage will show up as play In the rollers and/or roughness in rotation. If wear is discovered, the tnpod joint must be renewed. 13 Fit a new rubber gaiter (and where applicable, flexible washer) to the inboard end of the driveshaft and secure it In place on the shaft with a clip (see illustration).
Inboard CV joint - refitting
All models except turbo dieseis 14 Using Ihe alignment marks made during removal, fit the tripod joint onto the splines of the driveshaft. Tap It Into position using a soft faced mallet. To ensure that the tripod Joint rollers and driveshaft splines are not damaged, use a socket with an internal diameter slightly larger than I hat of the driveshafl as a drift. Refit the circlip. 15 Slide the gaiter over tho tripod joint and pack the gaiter with grease from the service kit.
3.6 Draw the tripod joint off the end of the driveshaft 3.13 FH s new rubber gaiter to the inboard end of the driveshaft and secure It in place with a clip
Caution: Do not allow grease to come
into
contact with vehicles paintwork, es discolouring may rasutt. Turbo diesel models 16 Slide the flange and washer onto the end of the shaft, then fit the joint Into position on the driveshaft splines, using the alignment marks made during removal. Fit the circlip. ' 17 Pack the gaiter with grease from His service kit, then slide the gaiter over the joint. Briefly lift the lip of the gaiter to expel ail the air from the joint, then secure the gaiter over the joint with a new clip. Caution: Do not allow grease to come
Into
contact with the vehicle's paintwork, as discolouring may result.
Outboard CV joint - refitting 18 Fit a new rubber gaiter to the outboard end of the driveshaft and secure it place with a dp, 19 Pack the CV joint with grease from Ihe service kit, pushing It into the ball grooves and expelling any air that may be trapped underneath. 20 Lubricate the splines of the drive shaft with a smear of grease, then whilst splaying the circlip open with a pair ot circlip pile*, insert the driveshaft into CV joint, observing the alignment marks made during removal. Note: On turbo diesel models, the circlip snaps into the CV Joint groove as Ifte driveshaft is inserted - no circlip pliers are required. Ensure that the circlip snaps securely Into place: pull on the shaft to check that it is held firmly In position. 21 Pack additional grease Into the joint to displace any air pockets, then slide the rubber gaiter over the joint. Briefly lift the lip ol the gaiter to expel all the air from Ihe joint, then secure it In place with a clip. 22 Refit the driveshaft (see Section 2).
4 Intermediate driveshaft - % removal and refitting J;
Note 1: This procedure applies only to turbo diesel engined models. Note 2: The intermediate shaft and
bearing
are not available as separate spares and cac only be renewed as a comptefe assembly.
Removal 1 Firmly apply the handbrake, then jack up the front of Ihe car and support It securely
on
axle stands (see Jacking and vehicle support). Remove the appropriate roadwheei(s). 2 Unbolt the inboard end of the right*hand driveshaft from the intermediate shaft
flange, as
described In Section 2. Suspend the dis-connected end of the driveshaft from a conven-ient point on the subframe, using wire or a cable-tie. to avoid straining the joint and gaiter. 3 Drain the oil from the transmission, with reference to Chapter 1B.
Page 186 of 225
9*10 Braking system
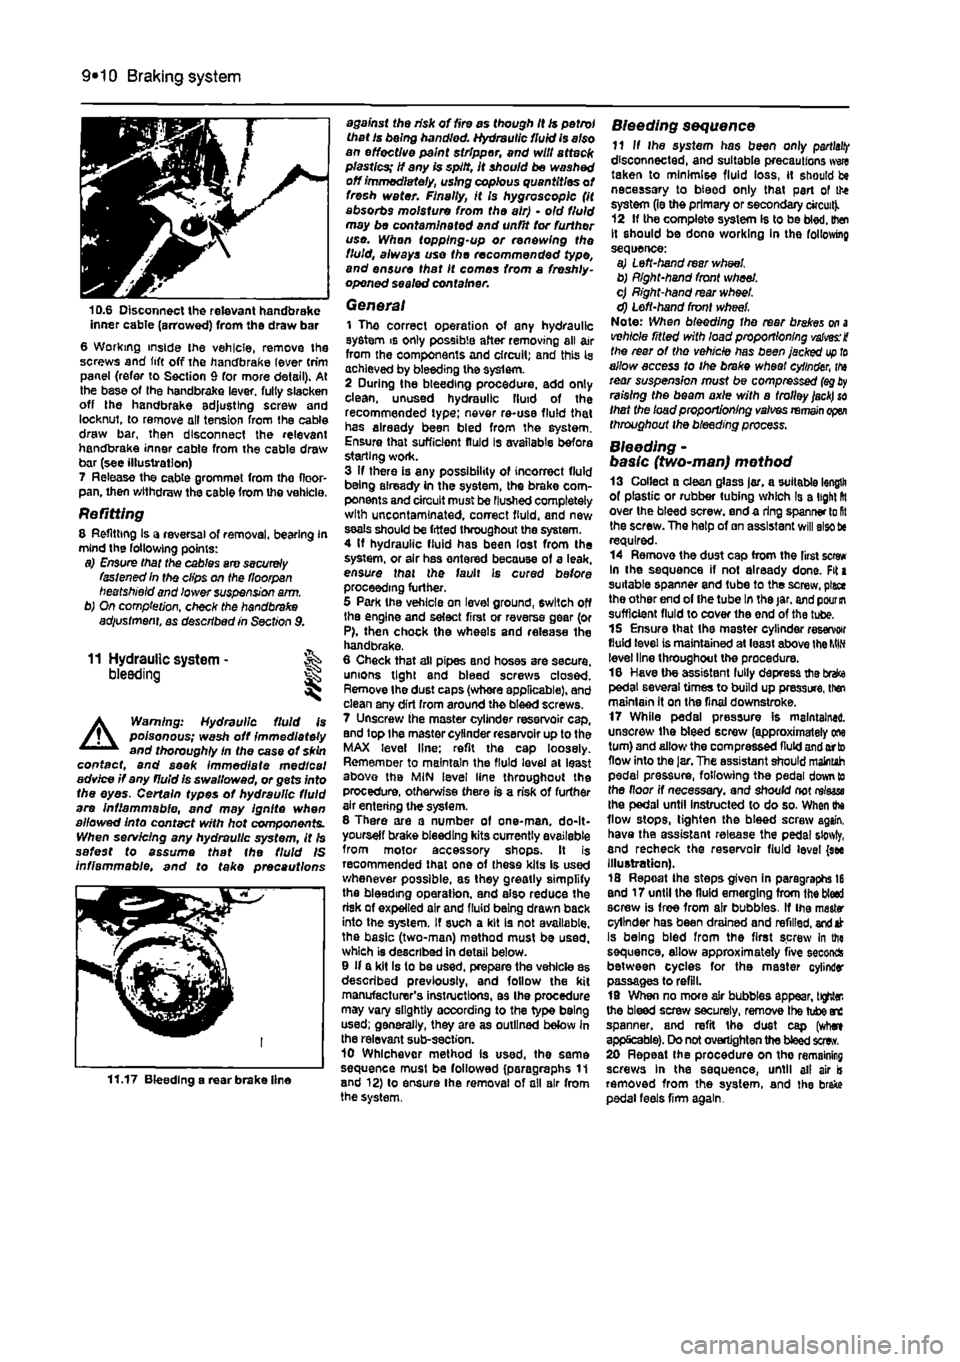
10.6 Disconnect the relevant handbrake inner cable (arrowed) from the draw bar 6 Working inside ihe vehicle, remove Ihe screws and lift off the handbrake lever trim panel (refer to Section 9 for more detail). At the base of the handbrake lever, full/ slacken off the handbrake adjusting screw and locknut, to remove oil tension from the cable draw bar, then disconnect the relevant handbrake inner cable from the cable draw bar (see illustration) 7 Release the cable grommet from tho floor-pan, then withdraw the cable from the vehicle.
Refitting 8 Refitting Is a reversal of removal, bearing in mind the following points: a) Ensure that the cables are securely fastened In the clips on the floorpan beetshield and lower suspension a/m. b) On completion, check the handbrake adiustment, as described in Section 9.
11 Hydraulic system -bleeding
A
Warning: Hydraulic fluid is poisonous; wash off immediately and thoroughly In the case ot skin contact, and seek immediate medical advice if any fluid is swallowed, or gets into the eyes. Certain types of hydraulic fluid are Inflammable, and may ignite when allowed into contact with hot components. When servicing any hydraulic system, it Is safest to assume that the fluid IS inflammable, and to take precautions
11.17 Bleeding a rear brake line
against the risk of fire as though it is petrol that Is being handled. Hydraulic fluid is also an effective paint stripper, and will attack plastics; If any is spilt, It should be washed off immediately, using copious quantities of fresh water. Finally, it Is hygroscopic (it absorbs moisture from the air) • old fluid may be contaminated and unfit tor further use. Whan topping-up or renewing the fluid, always use the recommended type, and ensure that It comes from a freshly-opened sealed container.
General 1 The correct operation of any hydraulic system is only possible after removing all air from the components and circuit; and this Is achieved by bleeding the syslem. 2 During the bleeding procedure, add only clean, unused hydraulic fluid of the recommended type; never re-use fluid that has already been bled from the system. Ensure that sufficient fluid is available before starting work. 3 If there is any possibility of incorrect fluid being already in the system, the brake com-ponents and circuit must be Flushed completely with uncontamlnated, correct fluid, and new seals should be fitted throughout the system. 4 If hydraulic fluid has been lost from the system, or air has ontered because of a leak, ensure that the fault is cured before proceeding further. 5 Park Ihe vehicle on level ground, switch off the engine and select first or reverse gear (or P), then chock the wheels and release the handbrake. 6 Cheek that all pipes and hoses are secure, unions tight and bleed screws closed. Remove Ihe dust caps (whore applicable), and clean any dirt from around the bleed screws. 7 Unscrew the master cylinder reservoir cap, and top Ihe master cylinder reservoir up to the MAX level line; refit the cap loosely. Rememoer to maintain the fluid level at least above the MIN level line throughout the procedure, otherwise there is a risk of further air entering the syslem. 8 There are a number of one-man. do-It-yourself brake bleeding kits currently available from motor accessory shops. It is recommended that one of these kits is used whenever possible, as they greatly simplify the bleeding operation, and also reduce the risk of expelled air and fluid being drawn back into the system. If such a kit is not available, the basic (two-man) method must be used, which is described in detail below. 9 If a kit Is to be used, prepare the vehicle as described previously, and follow the kit manufacturer's instructions, as Ihe procedure may vary slightly according to the type being used; generally, they are as outlined below in the relevant sub-section. 10 Whichever method is used, the same sequence must be followed (paragraphs 11 and 12) to ensure Ihe removal of all air from the system.
Bleeding sequence 11 If Ihe system has been only
partial!?
disconnected, and suitable precautions wwe taken to minimise fluid loss, it should be necessary to bteod only that part of the system (le the primary or secondary circuit). 12 If the complete system Is to be bled, then It should be done working in the following sequence: a) Left-hand rear wheel b) Right-hand front wheel. c) Right-hand rear wheel. d) Left-hand front wheel. Note: When bleeding the rear brakes
on a
vehicle ritled with load proportioning valves: i the rear of the vehicle has been jacked
up to
allow access to ihe brake wheel cylinder,
tha
rear suspension must be compressed
(eg
raising the beam axle with a trolley
jack) so
that the load proportioning valves
remain open
throughout the bleeding process.
Bleeding -basic (two~man) method 13 Collect a clean glass jar, a suitable length of plastic or rubber tubing which Is a light fit over the bleed screw, end a ring spanner lo
Rt
the screw. The help of an assistant will also tie required. 14 Remove the dust cap from the first screw In the sequence if not already done. Fit a suitable spanner and tube to the screw, place the other end of Ihe tube In the jar. and
pour in
sufficient fluid to cover the end of the tube. 15 Ensure that the master cylinder reservoir fluid level is maintained at least above the
MIN
level line throughout the procedure. 16 Have the assistant fully depress the brefce pedal several times to build up pressure, then maintain it on the final downstroke. 17 While pedal pressure is maintained, unscrew ihe bleed screw (approximately one turn) and allow the compressed fluid and orto flow into the
Jar,
The assistant should maintah pedal pressure, following the pedal down to the floor if necessary, and should not rrtaase Ihe pedal until instructed to do so. When ihe flow stops, tighten the bleed screw again, have the assistant retease the pedal sfowty, and recheck the reservoir fluid level (see Illustration). 18 Repeat Ihe steps given in paragraphs 16 end 17 until the fluid emerging from the bled screw is free from air bubbles. If Ihe master cylinder has been drained and refilled,
and
at Is being bled from the first screw In the sequence, allow approximately five seconds between cycles for the master cylinder passages to refill. 19 When no more air bubbles appear, tighter, the bleed screw securely, remove Ihe tube arc spanner, and refit the dust cap (where applicable). Do not overtighten the bleed sew. 20 Repeat the procedure on tho remaining screws In the sequence, until ail air is removed from the system, and the brake pedal feels firm again.
Page 187 of 225
Braking system 9®11
Bleeding • using a one-way valve kit 21 As their name implies, these kits consist ol a length of tubing with a one-way valve Fitted, to prevent expelled air and fluid being drawn back into the system; some kits include a translucent container, which can be positioned so that the air bubbles can be more easily seen flowing from the end of the tube. 22 The kit is connected to the bleed screw, which is then opened. The user returns to the driver's seat, depresses the brake pedal with a smooth, steady stroke, and stowty releases it; this is repeated until the expelled fluid is clear of air bubbles. 23 Note that these kits simplify work so much that It is easy lo forget the master cylinder reservoir fluid level; ensure that this Is maintained at least above the MIN level line at all times.
Bleeding -using a pressure-bleeding kit 24 These kits are usually operated by the reservoir of pressurised air contained in the spare tyre. However, note that it will probably be necessary to reduce the pressure lo a lower level than normal; refer to the instructions supplied with the kit. 2$ By connecting a pressurised, fluid-filled container to the master cylinder reservoir, bleeding can be carried out simply by opening each screw In turn (in the specified sequence), and allowing the fluid to flow out until no more air bubbles can be seen in the expelled fluid. 28 This method has the advantage that the large reservoir of fluid provides an additional safeguard against air being drawn into the system during bleeding. 27 Pressure-bleeding is particularly effective when bleeding 'difficult' systems, or when bleeding the complete system at the time of routine fluid renewal.
All methods 28 When bleeding is complete, and firm pedal feel is restored, wash off any split fluid, lighten the bleed screws securely, and refit their dust caps (where applicable). 29 Check the hydraulic fluid level in the master cylinder reservoir, and top-up if necessary. 30 Discard any hydraulic fluid thai has been Wed from the system; it will not be fit for re-use. 91 Check the feel of the brake pedal. If it feels at all spongy, air must still be present in Vie system, and further bleeding is required. Failure to bleed satisfactorily after a reasonable repetition of the bleeding procedure may be due to worn master cylinder seals.
12 Master cylinder- % removal
and
refitting SK
A
Warning: 8efore starting work, refer to the warning at the beginning of Section 11 concerning the dangers of hydraulic fluid.
Removal 1 Remove the master cylinder fluid reservoir cap, and syphon the hydraulic fluid from the reservoir. Note: Do not syphon the fluid by mouth, as It Is poisonous; use a syringe or an old poultry baster. Alternatively, open any convenient bleed screw In the system, and gently pump the brake pedal to expel (he fluid through a tube connected to the screw (see Section 11). Disconnect the wiring connector from the brake fiuld level sender unit. 2 Carefully prise the fiuld reservoir from the seals and release it from the top of the master cylinder. 3 Wipe clean Ihe area around the brake pipe unions on the side of the master cylinder, and place absorbent rags beneath the pipe unions to catch any surplus fluid. Make a note of the correct fitted positions of the unions, then unscrew the union nuts and carefully withdraw the pipes. Plug or tape over the pipe ends and master cylinder orifices, to minimise the loss of brake fluid, and to prevent the entry of dirt into the system. Wash off any spilt fluid immediately with cold wafer.
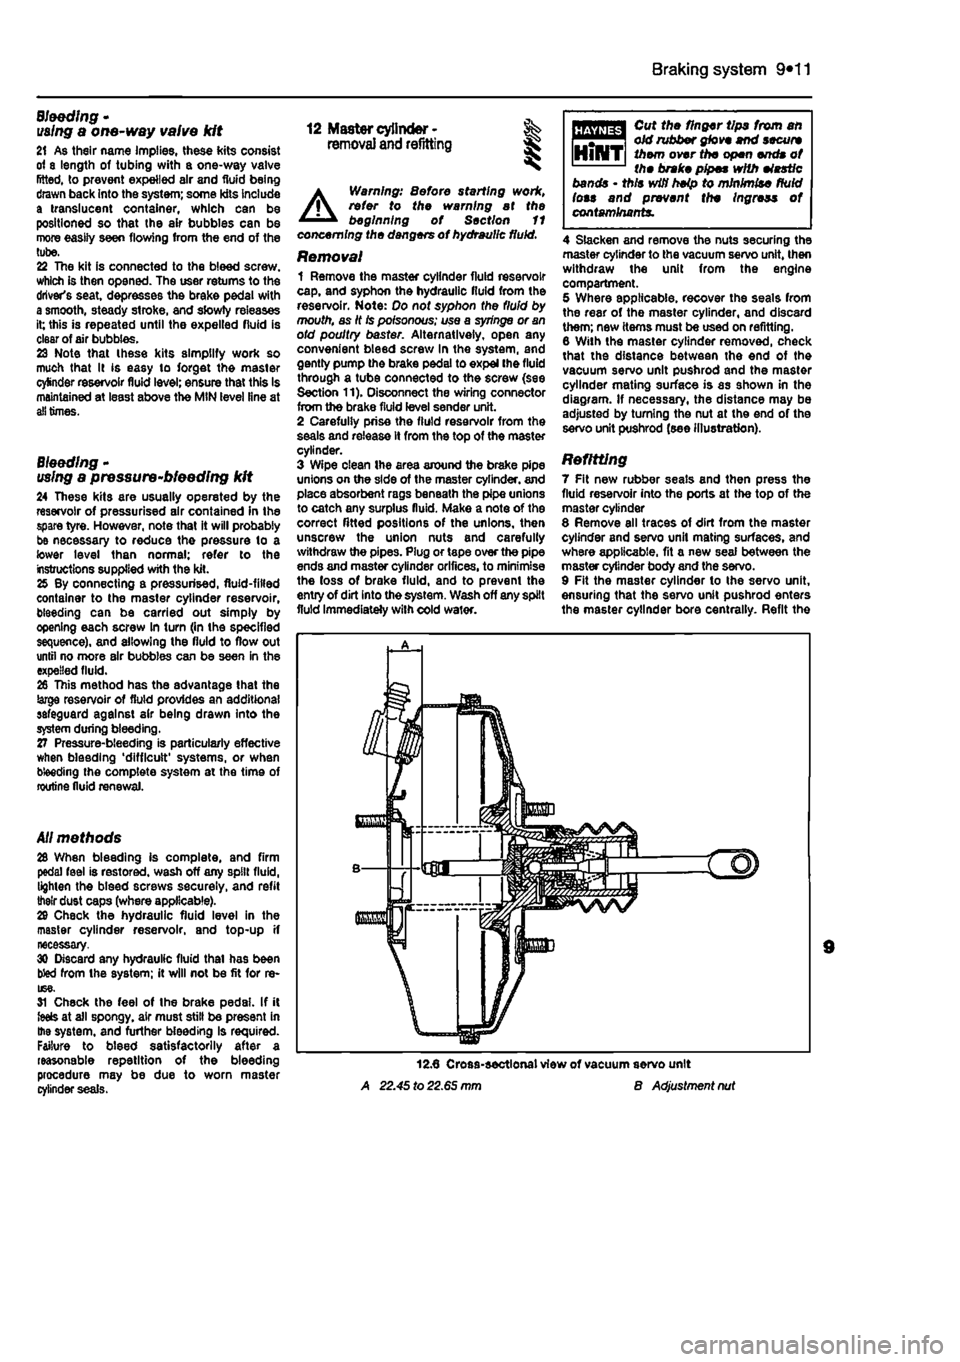
A 22.45 to 22.65 mm
Cut the finger tips from an old rubber glove end secure them over the open ends of the brake pipes with elastic bands • this wifi heip to minimise fluid lots and prevent the Ingress of contaminants.
4 Slacken and remove the nuts securing the master cylinder to the vacuum servo unit, then withdraw the unit from the engine compartment. 5 Where applicable, recover the seals from the rear of the master cylinder, and discard them; new items must be used on refitting. 8 With the master cylinder removed, check that the distance between the end of the vacuum servo unit pushrod and the master cylinder mating surface is as shown in the diagram. If necessary, the distance may be adjusted by turning the nut at the end of the servo unit pushrod (see illustration).
Refitting 7 Fit new rubber seals and then press the fluid reservoir into the ports at the top of the master cylinder 8 Remove all traces of dirt from the master cylinder and servo unit mating surfaces, and where applicable, fit a new seal between the master cylinder body and the servo. 9 Fit the master cylinder to the servo unit, ensuring that the servo unit pushrod enters the master cylinder bore centrally. Refit the
B Adjustment nut
Page 190 of 225
Suspension and steering 10*2
Torque wrench settings (continued) Nm ibt ft Rasr suspension Damper lower securing bolt 95 70 Damper upper securing bolt 60 44 Handbrake cable support bracket-to-trailing arm screws 15 11 Hub nut 280 207 Trailing arm securing bolt 150 111 Steering Ignition switch/steering column lock securing bolts 4 3 Steering column mounting bolts 55 41 Steering gear mounting bolts 70 52 Steering wheel nut' 50 37 Subframe-to-body bolts 110 81 Track-rod end to hub carrier 40 30 Unlversaijointclampbolts 20 15 Roadwheels Roadwheel bolts 85 63 * Use a new nut
1 General information
Front suspension The front suspension is independent, comprising transverse lower wishbones, coil spring-over-damper strut units and an anti-roll bar. The hub carriors are bolted to the base of the stmt units and are linked to the lower arms by means ot balliotnts. The entire front suspension assembly is mounted on a subframe, which is In turn botted to the vehicle body.
Rear suspension The rear suspension incorporates a torsion beam axle, trailing arms, coil springs and separate telescopic dampers. In addition, a rear anil-roll bar is fitted to certain models. The components form a discrete sub-assembly which can be unboiled from the underside of the vehicle separately or as a complete unit.
Steering The two-piece steering shaft runs in a tubular column assembly, which is bolted to a bracket mounted on the vehicles bulkhead. The shaft Is articulated at its lower end by means of a universal Joint, which is clamped to the steering shaft and the steering gear pinion by moans of clamp bolts. The steering gear is mounted on the engine compartment bulkhead, and is connected to the steering arms projecting rearwards from Ihe hub carriers. The track-rods are fitted with balljoints at their inner and outer ends, to allow for suspension movement, and are threaded to facilitate ad|ustment. Hydrauiically-assisted power steering ts fittod to some models. The hydraulic system is powered by a belt-driven servo pump, which is driven from the crankshaft pulley.
Certain models are fitted with an airbag system. Sensors built into the vehicle body are triggered in the event of a front end collision and prompt an Electronic Control Unll (ECU) to activate the airbag, mounted In the centre of the steering wheel and the facia. This reduces the risk of the front seat occupants striking the steering wheel, windscreen or facia during an accident.
A
Warning: For safety reasons, owners are strongty advised to entrust to an authorised Flat dealer any work which involves disturbing the airbag system components. The airbag inflation devices contain explosive material and legislation exists to control their handling and storage, in addition, specialised test equipment Is needed to check that the airbag system Is fully operational following reassembly.
2 Front hub bearings -renewal *
Note: A balljoint separator tool, and a press or suitable alternative tools (see text) will be required for this operation. The bearing will be destroyed during the removal procedure.
Removal 1 Chock the rear wheels, apply the handbrake, then jack up the front of the vehicle and support on axle stands (see Jacking and vehicle support). Remove the appropriate roadwheel. 2 Remove the brake disc and caliper, with reference to Chapter 9. Note that the caliper body can remain bolted to its bracket: there is no need lo disconnect the brake fluid hose from the caliper. 3 With reference to Chapter 8. slacken and remove the driveshaft hub nut. 4 On models with ABS, unbolt the ABS wheel sensor, and remove the screw securing the
ABS sensor wiring to the hub carrier. Suspend the sensor away from the working ares, to avoid the possibility of damage. 5 With reference to Section 17, separate
th»
track-rod end from the hub carrier, using
a
suitable balljoint splitter. 6 Remove the two nuts from tho botts securing Ihe hub carrier to the base of th» suspension strut (refer to Section
3).
Withdrew the bolts and separate the top of hub earrtt from the strut. 7 Disconnect the outboard end of Ito driveshaft from the hub, as described durirg the driveshaft removal and refitting procedm in Chapter 8. Note: There is no naod fo disconnect the Inboard end of the
drivestett
from the transmission. Caution: Do not allow the end of tin driveshaft to hang down under its
own
weight, as this places strain on the
CV
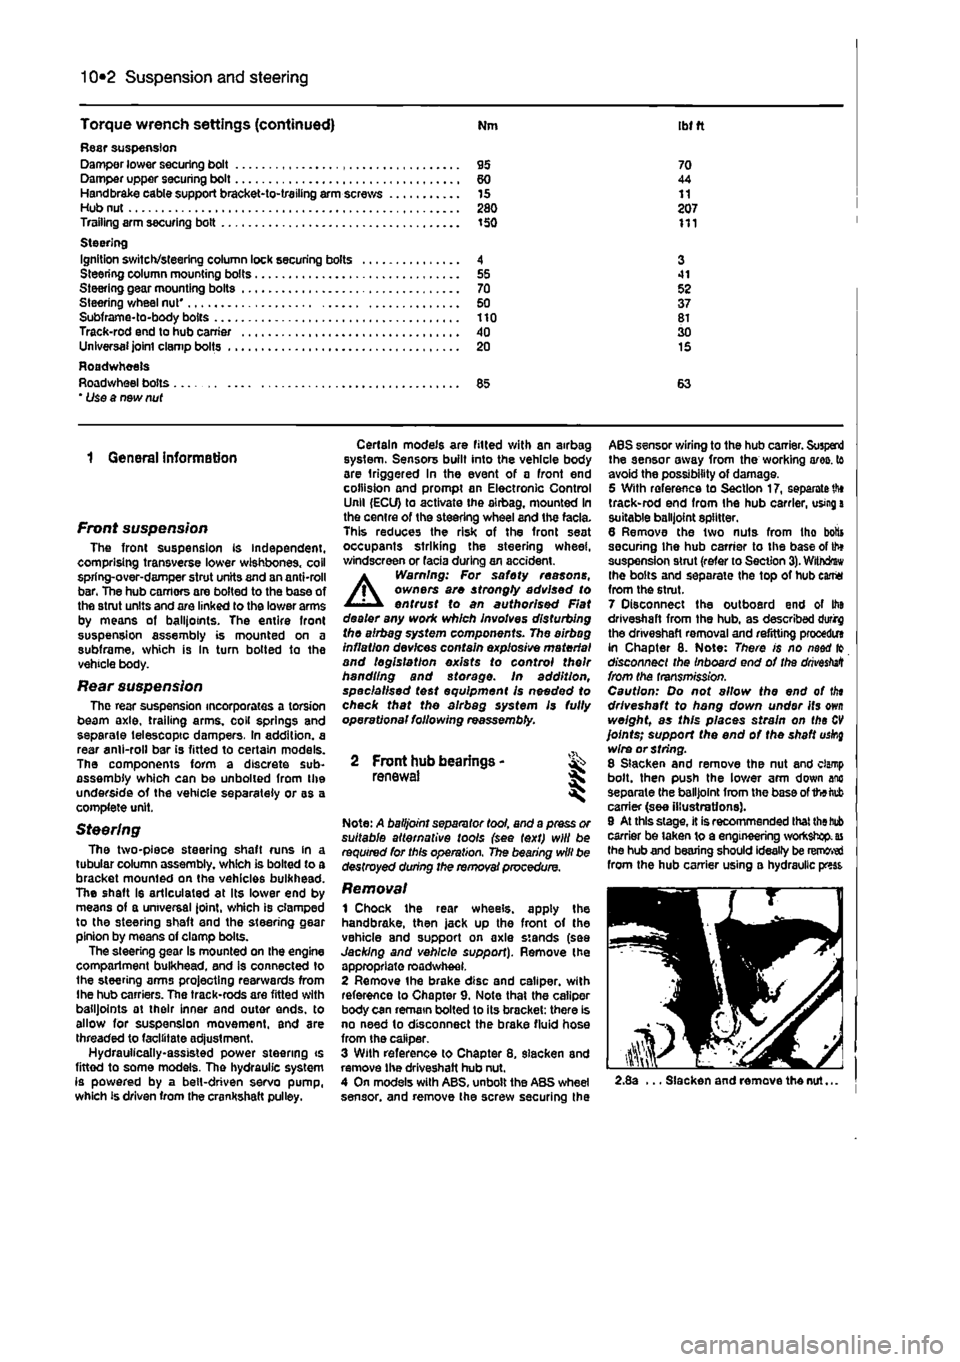
joints; support the end of the shaft uskg wire or string. 8 Slacken and remove the nut and clamp bolt, then push the lower arm down anc separate the balljoint from the base of the tab carrier (see illustrations). 9 At this stage, it is recommended that
the bub
carrier be taken to a engineering workshop,
as
the hub and bearing should ideally be removed from the hub carrier using a hydraulic press
2.8a ... Slacken and remove the nut...
Page 198 of 225
10*10 Suspension and steering
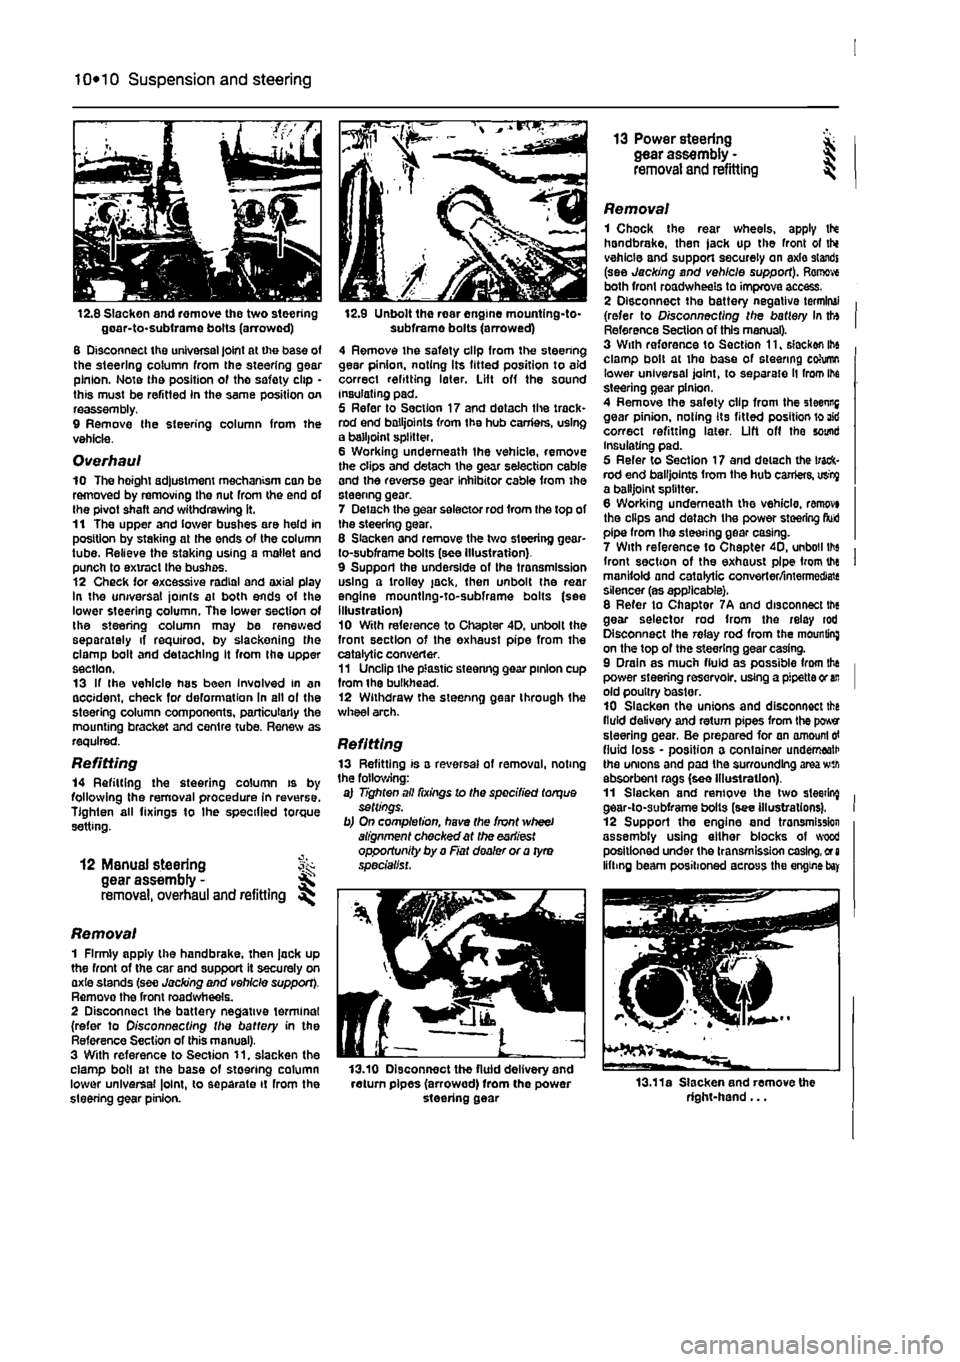
12.8 Slacken and remove the two steering goar-to-subirame bolts (arrowed) 8 Disconnect the universal joint at the base of the steering column from the steering gear pinion. Note the position of tho safety clip • this must be refitted In the same position on reassembly. 9 Remove Ihe steering column from the vehicle.
Overhaul 10 The hoight adjustment mechanism can be removed by removing the nut from the end of the pivot shaft and withdrawing it. 11 The upper and lower bushes are held in position by staking at the ends of the column tube. Relieve the staking using a mallet and punch to extract the bushes. 12 Check for excessive radial and axial play In the universal joints at both ends of the lower steering column. The lower section of the steering column may be renewed separately if required, by slackening the clamp bolt and detaching It from the upper section. 13 If the vehicle has been Involved in an accident, check for deformation In all ol the steering column components, particularly the mounting bracket and centre tube. Renew as required.
Refitting 14 Refitting the steering column is by following the removal procedure in reverse. Tighten all fixings to Ihe specified torque setting.
12 ManuaJ steering fk gear assembly -removal, overhaul and refitting
Removal 1 Firmly apply the handbrake, then jack up the front of the car and support it securely on axie stands (see Jacking and vehicle support). Remove the front road wheels. 2 Disconnect the battery negative terminal (refer to Disconnecting the battery in the Reference Section of this manual). 3 With reference to Section 11. slacken the clamp boil at the base of steering column lower universal |o!nt, to separate it rrom the steering gear pinion.
12.9 Unbolt the rear engine mountlng-to-subframe bolts (arrowed) 4 Remove the safety clip from the steering gear pinion, noting Its fitted position to aid correct refitting later. Lift off the sound insulating pad. 5 Refer to Section 17 and dotach the track* rod end bailjoints from the hub carriers, using a balljoint splitter. 6 Working underneath the vehicle, remove the clips and detach the gear selection cable and the reverse gear inhibitor cable from the steenng gear. 7 Delach the gear selector rod from the top of the steering gear, 8 Slacken and remove the two steering gear-to-subframe bolts (see Illustration) 9 Support the underside of the transmission using a trolley jack, then unbolt the rear engine mountlng-to-subframe bolts (see illustration) 10 With reference to Chapter 4D. unbolt the front section of the exhaust pipe from the catalytic converter. 11 Unclip the plastic steenng gear pinion cup from ihe bulkhead. 12 Withdraw the steenng gear through the wheel arch.
Refitting 13 Refitting is a reversal of removal, noting the following: a) Tighten all fixings lo the specified torque settings. b) On completion, have the front wheel alignment checked at the earliest opportunity by a Fiat dealer or a tyro specialist.
13.10 Disconnect the fluid delivery and return pipes (arrowed) from the power steering gear
13 Power steering * gear assembly - J removal and refitting ^
Removal 1 Chock the rear wheels, apply tN handbrake, then jack up the front ot thi vehicle and support securely on axle standi (see Jacking and vehicle support). Remove both front roadwheels to improve access. 2 Disconnect the battery negative terminal (refer to Disconnecting the battery In tto Reference Section of this manual). 3 With reforence to Section 11, slacken ihe clamp bolt at the base of steering cohimn lower universal joint, to separate ll from Ihe steering gear pinion. 4 Remove the safety clip from the steenng gear pinion, noting its fitted position lo aid correct refitting later. Lift off the sound Insulating pad. 5 Refer to Section 17 and detach the track-rod end bailjoints from the hub carriers, usty a balljoint splitter. 6 Working underneath the vehicle, ranwvi the clips and detach the power steering fluid pipe from the steering gear casing. 7 With reference to Chapter 40, unboil lbs front section of the exhaust pipe from the manifold and catalytic converter/intermediate silencer (as applicable). 8 Refer to Chaptor 7A and disconnect the gear selector rod from the relay rod Disconnect the relay rod from the mounting on the top of the steering gear casing. 9 Drain as much fluid as possible from the power steering reservoir, using a pipette or
an
old poultry baster. 10 Slacken the unions and disconnect the fluid delivery and return pipes from the power steering gear. Be prepared for an amount
erf
fluid loss - position a container underneath the unions and pad the surrounding area wth absorbent rags (see Illustration). 11 Slacken and remove the two sleeting gear-to-subframe bolts (see illustrations). 12 Support the engine and tronsmission assembly using either blocks of wood positioned under the transmission casing,
or a
lifting beam positioned across the engine
bay
13.11a Slacken and remove the right-hand...
Page 199 of 225
Suspension and steering 10*11
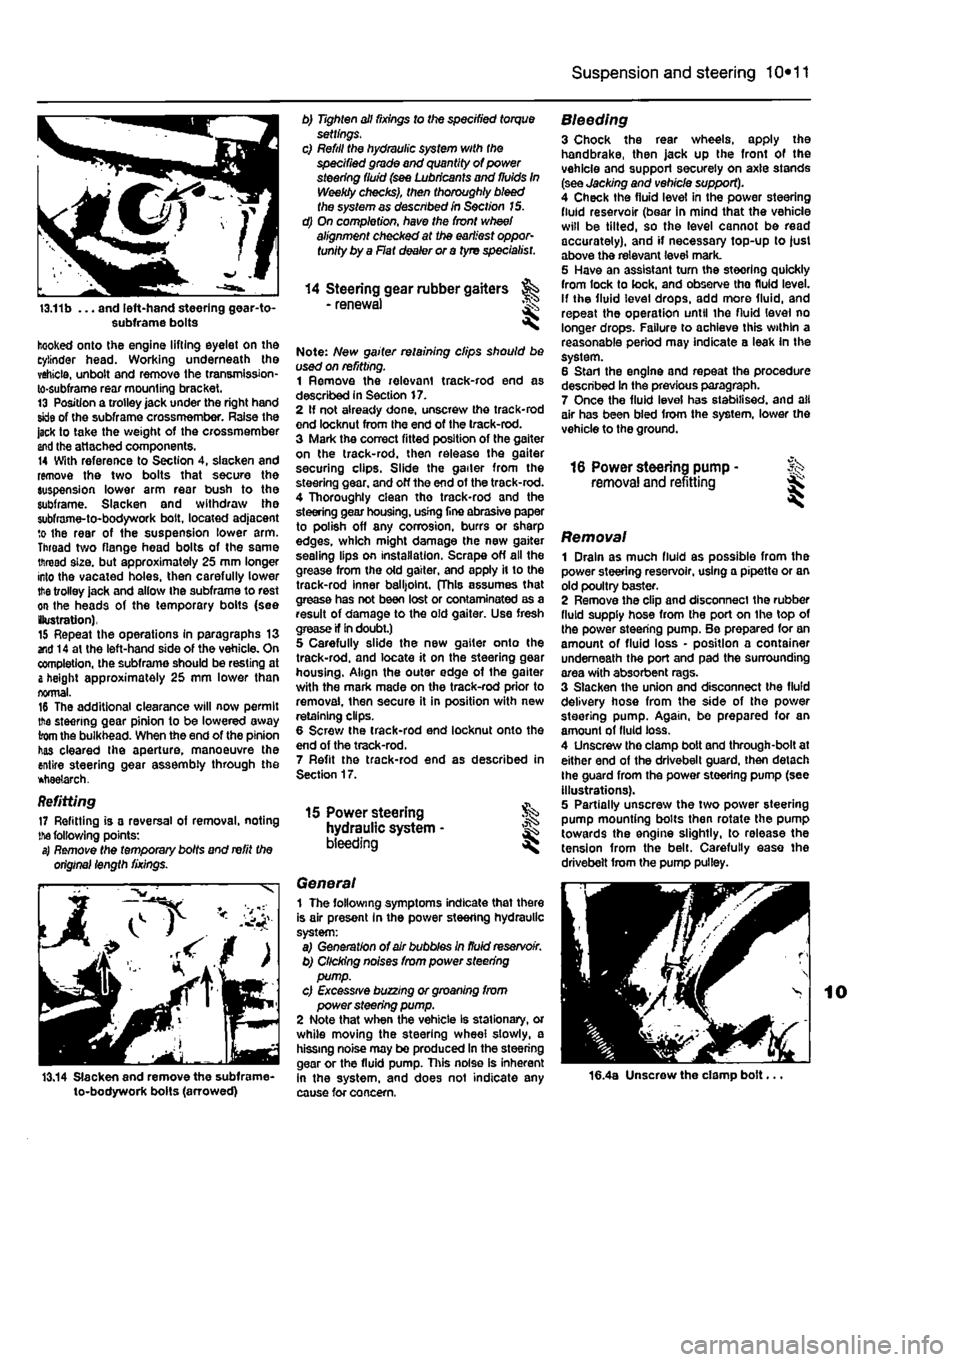
13.11b ... and left-hand steering gear-to-subframe bolts
hooked onto the engine lifting eyelet on the cylinder head. Working underneath the vehicle, unbolt and remove the transmission-lo-subframe rear mounting bracket. 13 Position a trolley jack under the right hand skle of the subframe crossmember. Raise the jack to take the weight of the crossmember
and
the attached components. 14 With reference to Section 4, slacken and remove the two bolts that secure the suspension lower arm rear bush to the subframe. Slacken and withdraw the subframe-to-bodywork bolt, located adjacent to the rear of the suspension lower arm. Throad two flange head bolts of the same thread size, but approximately 25 mm longer into the vacated holes, then carefully lower
the
trolley jack and allow ihe subframe to rest on the heads of the temporary bolts (see (lustration), 15 Repeat the operations in paragraphs 13 end 14 at the left-hand side of the vehicle. On completion, the subframe should be resting at
&
height approximately 25 mm lower than normal. 16 The additional clearance will now permit the steering gear pinion to be lowered away from the bulkhead. When the end of the pinion has cleared Ihe aperture, manoeuvre the entire steering gear assembly through the *tiae?arch.
Refitting 17 Refitting is a reversal of removal, noting
the
following points: s) Remote the temporary bolts and refit the original length fixings.
13.14 Slacken and remove the subframe-to-bodywork bolts (arrowed)
b) Tighten all fixings to the specified torque settings. c) Refill the hydraulic system with the specified grade and quantity of power steering fluid (see Lubricants and fluids In Weekly checks), then thoroughly bleed the system as described in Section 15. d) On completion, have the front wheel alignment checked at the earliest oppor-tunity by a Flat dealer or a tyre specialist.
14 Steering gear rubber gaiters - renewal <
Note: New gaiter retaining clips should be used on refitting. 1 Remove the relevant track-rod end as described in Section 17. 2 If not already done, unscresv the track-rod end locknut from Ihe end of the track-rod. 3 Mark the correct fitted position of the gaiter on the track-rod, then release the gaiter securing clips. Slide the gailer from the steering gear, and off the end of the track-rod. 4 Thoroughly clean tho track-rod and the steering gear housing, usrng fine abrasive paper to polish off any corrosion, burrs or sharp edges, which might damage the new gaiter sealing lips on installation. Scrape off all the grease from the old gaiter, and apply it to the track-rod inner balljoint. (This assumes that grease has not been lost or contaminated as a result of damage to the old gaiter. Use fresh crease if In doubt.) 5 Carefully slide the new gaiter onto the track-rod. and locate it on the steering gear housing. Align the outer edge of the gaiter with the mark made on the track-rod prior to removal, then secure it in position with new retaining clips. 6 Screw the track-rod end locknut onto the end of the track-rod. 7 Refit the track-rod end as described in Section 17.
15 Power steering hydraulic system • bleeding ^
General 1 The following symptoms indicate that there is air present In the power steering hydraulic system: a) Generation of air bubbles in fluid reservoir. b) Clicking noises from power steering pump. c) Excessive buzzing or groaning from power steering pump. 2 Note that when the vehicle Is stationary, or while moving the steering wheel slowly, a hissing noise may be produced In the steering gear or the fluid pump. This noise is inherent in the system, and does not indicate any cause for concern.
Bleeding 3 Chock the rear wheels, apply the handbrake, then jack up the front of the vehicle and support securely on axle stands (see Jacking and vehicle support). 4 Check the fluid level in the power steering fluid reservoir (bear in mind that the vehicle will be tilted, so the level cannot be read accurately), and if necessary top-up to just above the relevant level mark. 5 Have an assistant tum the steering quickly from lock to lock, and observe tho fluid level, if the fluid level drops, add more fluid, and repeat the operation until the fluid level no longer drops. Failure to achieve this within a reasonable period may indicate a leak in the system. 6 Stan the engine and repeat the procedure described In the previous paragraph. 7 Once the fluid level has stabilised, and all air has been bled from the system, lower the vehicle to the ground.
16 Power steering pump - Sk removal and refitting ^
Removal 1 Drain as much fluid as possible from the power steering reservoir, using a pipette or an old poultry baster. 2 Remove the clip and disconnect the rubber fluid supply hose from the port on the top of the power steering pump. Be prepared for an amount of fluid loss • position a container underneath the port and pad the surrounding area with absorbent rags. 3 Slacken the union and disconnect the fluid delivery hose from the side of the power steering pump. Again, be prepared for an amount of fluid loss. 4 Unscrew tho clamp bolt and through-bolt at either end of the drivebelt guard, then detach Ihe guard from the power steering pump (see illustrations). 5 Partially unscresv the two power steering pump mounting bolts then rotate the pump towards the engine slightly, to release the tension from the belt. Carefully ease the drivebelt from the pump pulley.
16.4a Unscrew the clamp bolt...