jump start FIAT PUNTO 1998 176 / 1.G Workshop Manual
[x] Cancel search | Manufacturer: FIAT, Model Year: 1998, Model line: PUNTO, Model: FIAT PUNTO 1998 176 / 1.GPages: 225, PDF Size: 18.54 MB
Page 3 of 225
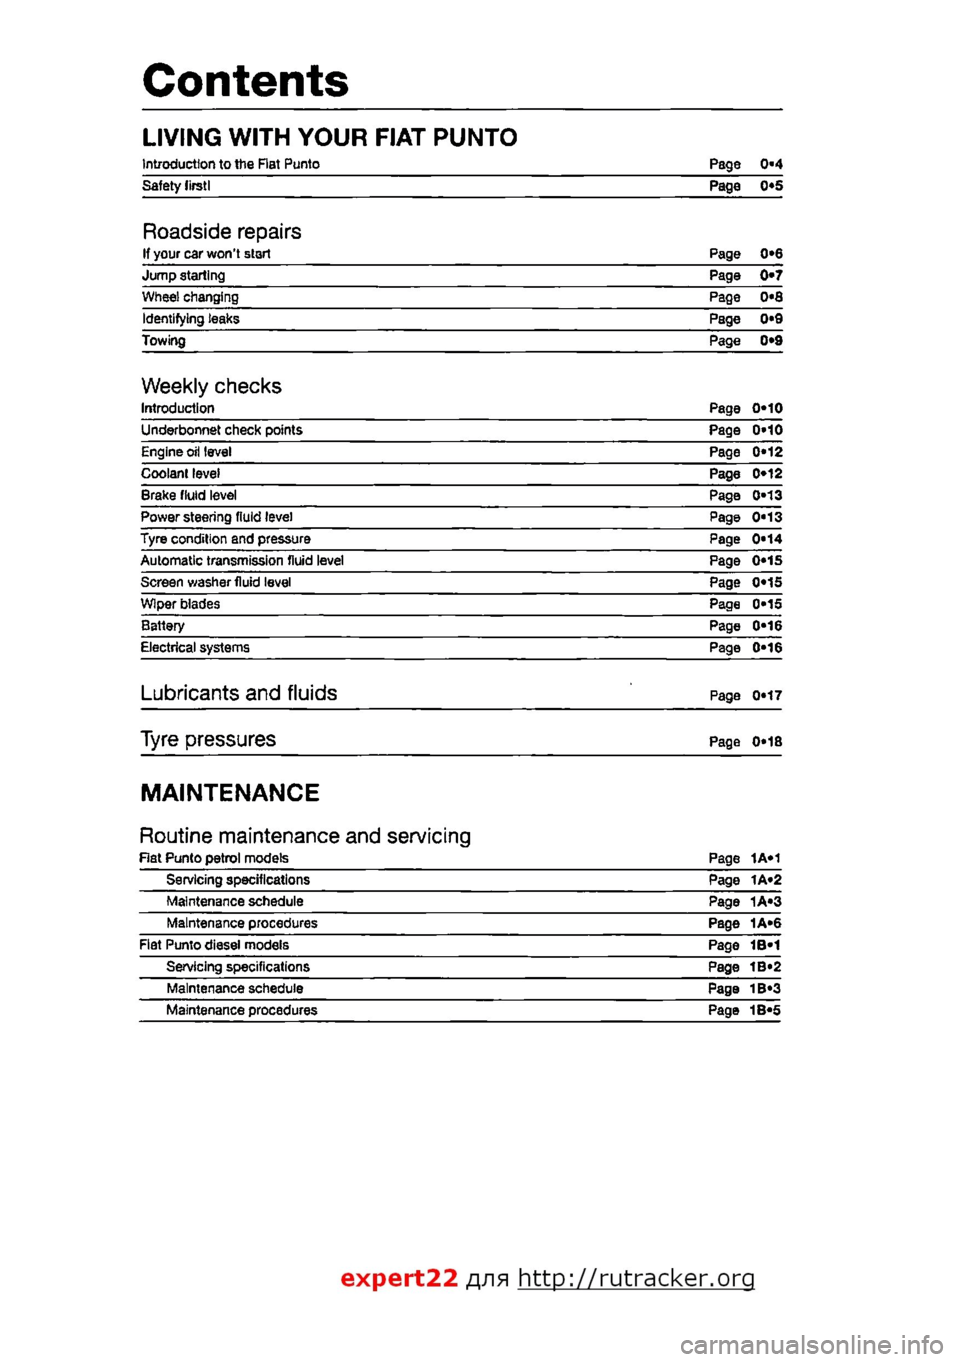
Contents
LIVING WITH YOUR FIAT PUNTO
Introduction to the Rat Punto Page 0-4 Safety lirstl Page 0*5
Roadside repairs If your car won't start Page 0*6 Jump starting Page 0*7 Wheel changing Page 0«8 Identifying teaks Page 0*9 Towing Page 0*9
Weekly checks Introduction Page 0*10 Underbonnet check points Page 0»10 Engine oil level Page 0*12 Coolant level Page 0*12 Brake fluid level Page 0*13 Power steering fluid level Page 0"13 Tyre condition and pressure Page 0*14 Automatic transmission fluid level Page 0«1S Screen washer fluid level Page 0«1S Wiper blades Page 0*15 Battery Page 0*16 Electrical systems Page 0-16
Lubricants and fluids Page 0*17
Tyre pressures Page 0*18
MAINTENANCE
Routine maintenance and servicing Rat Punto petrol models Page 1A«1 Servicing specifications Page 1A«2 Maintenance schedule Page 1A«3 Maintenance procedures Page 1A«6 Fiat Punto diesei models Page 1B-1 Servicing specifications Page 1B«2 Maintenance schedule Page 1B«3 Maintenance procedures Page 1B«5
expert22 fl/ia http://rutracker.org
Page 7 of 225
o.6 Roadside repairs
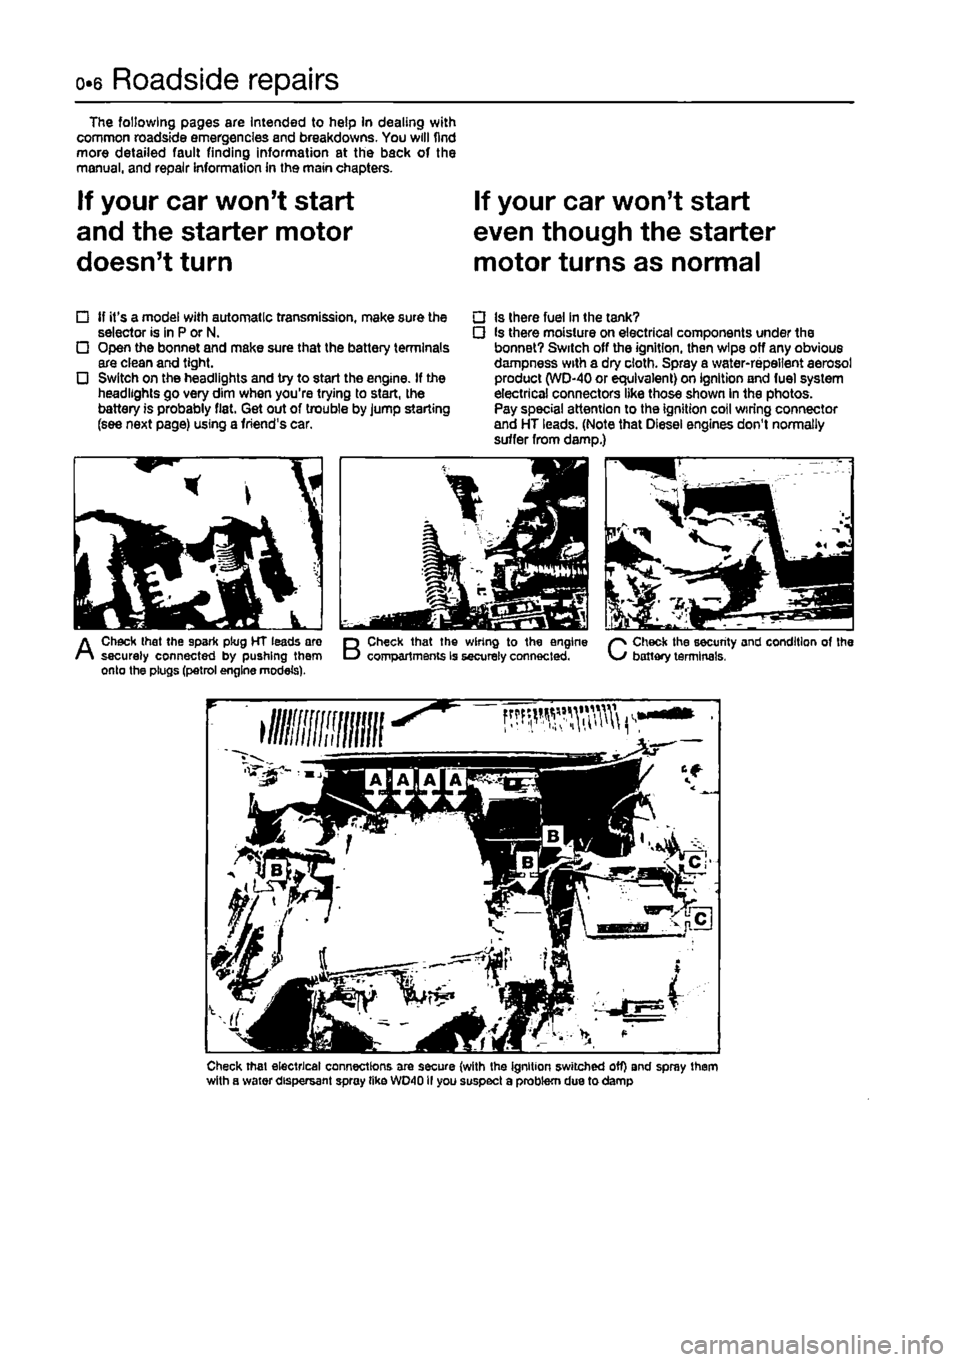
The following pages are Intended to help In dealing with common roadside emergencies and breakdowns. You will find more detailed fault finding information at the back of the manual, and repair Information In the main chapters.
If your car won't start
and the starter motor
doesn't turn
If your car won't start
even though the starter
motor turns as normal
tf it's a model with automatic transmission, make sure the selector is in P or N. Open the bonnet and make sure that the battery terminals are clean and tight. Switch on the headlights and try to start the engine. If the headlights go very dim when you're trying to start, the battery is probably flat. Get out of trouble by Jump starting (see next page) using a friend's car.
• Is there fuel In the tank? • Is there moisture on electrical components under the bonnet? Switch off the ignition, then wipe off any obvious dampness with a dry cloth. Spray a water-repellent aerosol product (WD-40 or equivalent) on ignition and fuel system electrical connectors like those shown in the photos. Pay special attention to the ignition coil wiring connector and HT leads. (Note that Diesel engines don't normally suffer from damp.)
A
Check that the spark plug HT leads are securely connected by pushing them onto the plugs (petrol engine models).
B
Check that the wiring to the engine compartments is securely connected.
C
Check the security and condition of the battery terminals,
Check that electrical connections are secure (with the ignition switched off) and spray them with a water dispersant spray tike WD40II you suspect a problem due to damp
Page 8 of 225
Roadside repairs 0.7
I Jump starting will get you out of trouble, but you must correct | whatever made the battery go fiat in the first place. There are three possibilities:
t
The battery has been drained by repeated attempts to start, or by leaving the lights on.
2
The charging system (s not working property (alternator drivebelt slack or broken, alternator wiring fault or alternator Itself faulty).
3
The battery Itself is at fault (ehctrotyte low, or battery worn out).
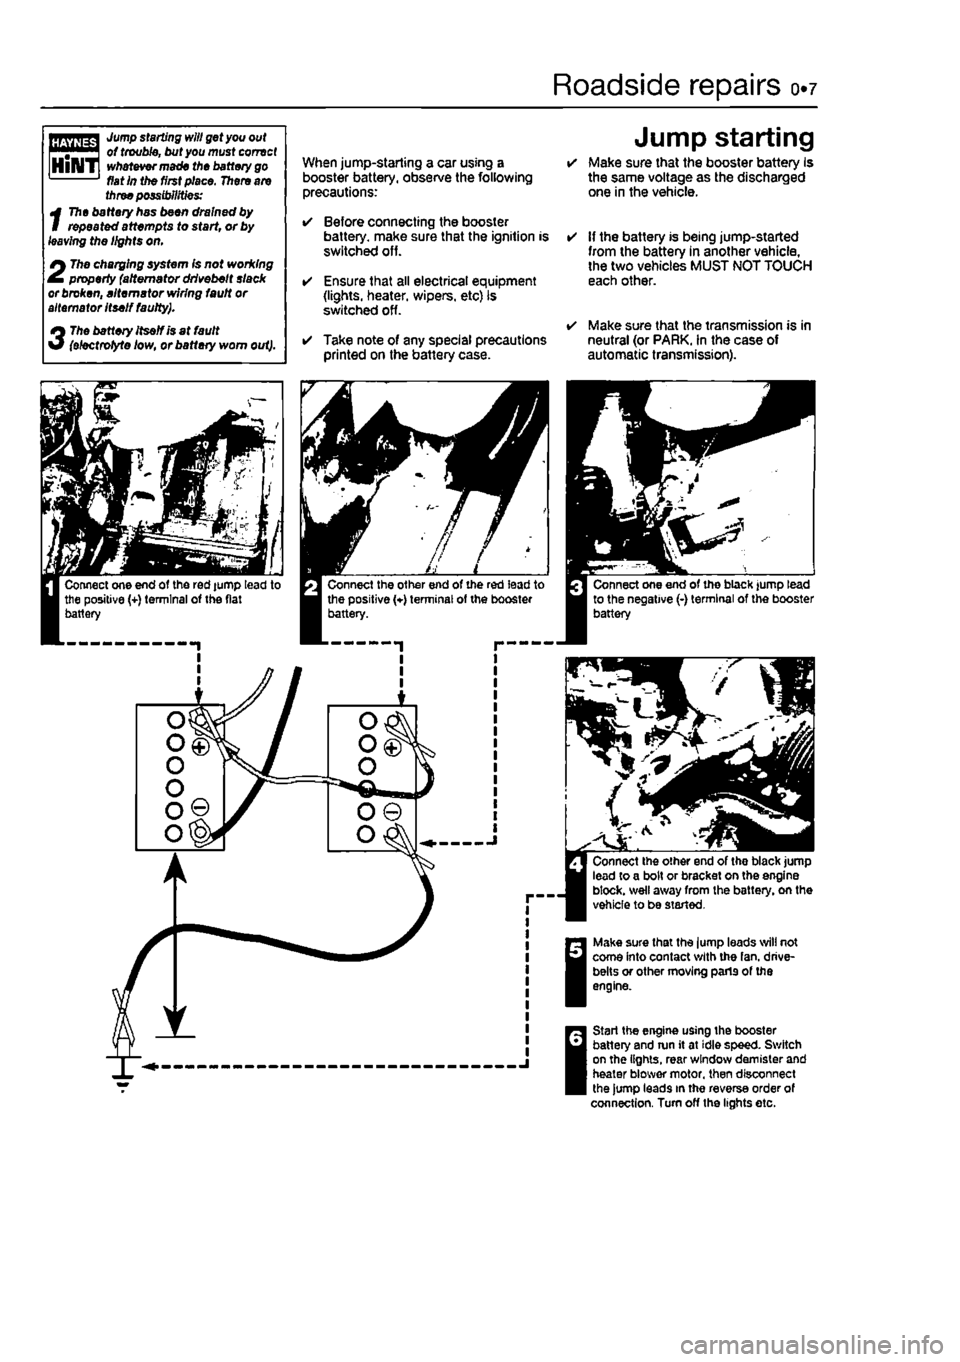
When jump-starling a car using a booster battery, observe the following precautions:
• Before connecting the booster battery, make sure that the ignition is switched off.
• Ensure that all electrical equipment (lights, heater, wipers, etc) is switched off.
• Take note of any special precautions printed on the battery case.
Jump starting • Make sure that the booster battery Is the same voltage as the discharged one in the vehicle.
• If the battery is being jump-started from the battery in another vehicle, the two vehicles MUST NOT TOUCH each other.
• Make sure that the transmission is in neutral (or PARK. In the case of automatic transmission).
Make sure that the lump leads will not come into contact with the fan. drive-belts or other moving parts of the engine.
Start the engine using the booster battery and run it at idle speed. Switch on the lights, rear window demister and heater blower motor, then disconnect the jump leads in the reverse order of connection. Turn off the lights etc.
Page 10 of 225
Roadside repairs 0.9
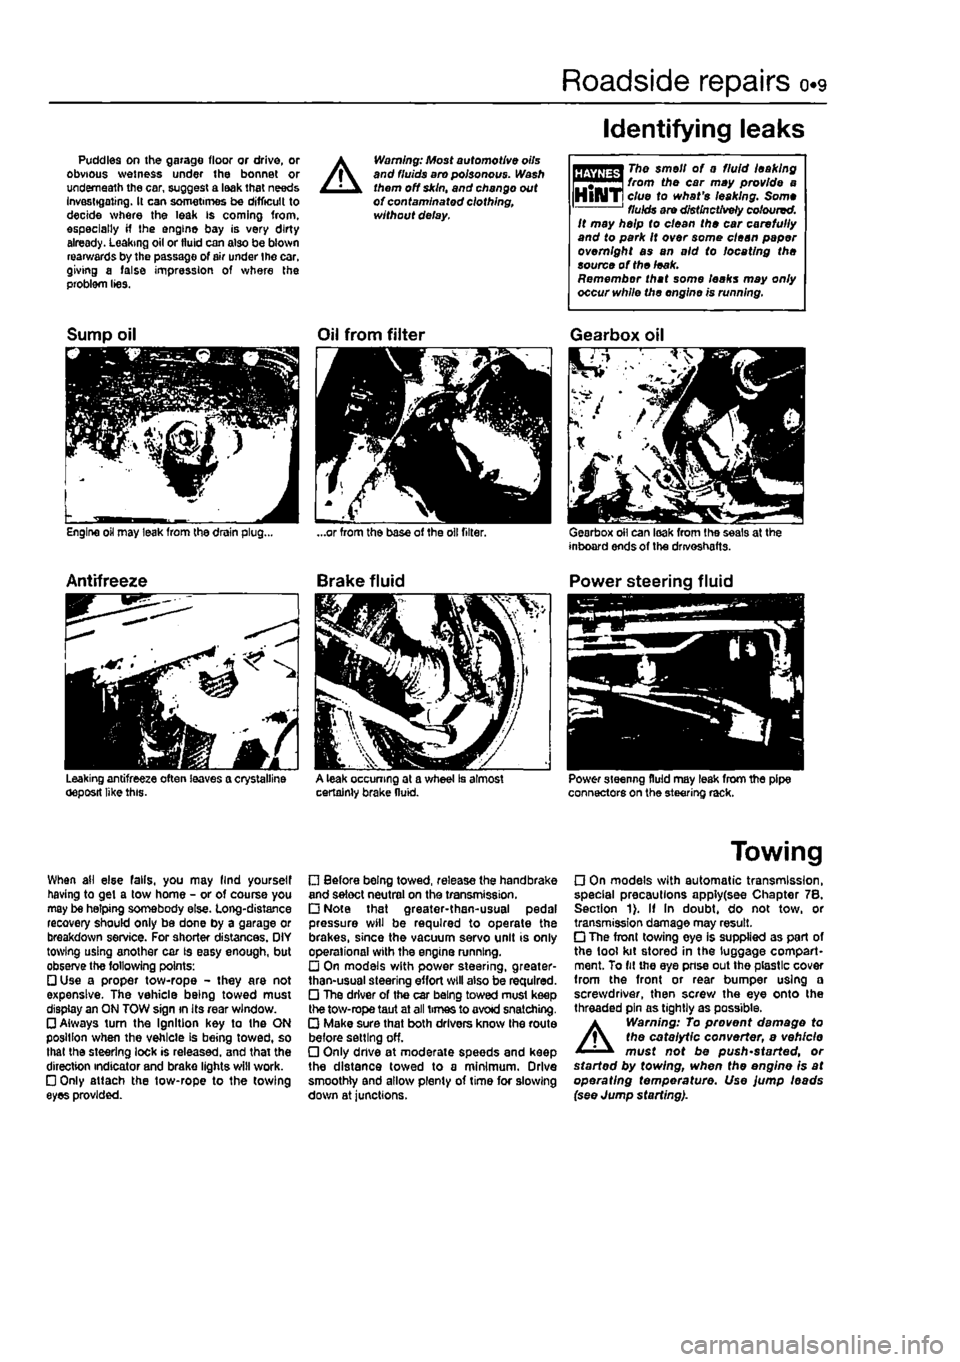
Puddles on the garage floor or drive, or obvious wetness under the bonnet or underneath the car, suggest a leak that needs Investigating. It can sometimes be difficult to decide where the leak is coming from, especially if the engine bay is very dirty already. Leaking oil or fluid can also be blown rearwards by the passage of air under the car, giving a false impression of where the problem lies.
A
Warning: Most automotive oils and fluids aro poisonous. Wash them off skin, and change out of contaminated clothing, without delay.
Identifying leaks
The smell of 0 fluid leaking from the car may provide a clue to what's leaking. Some fluids are distinctively coloured. It may help to clean the car carefully and to park It over some clean paper overnight as an aid to locating the source of the leak. Remember that some leaks may only occur while the engine is running.
Sump oil
Engine oil may leak from the drain plug...
Antifreeze
Leaking antifreeze often leaves a crystalline oeposit like this.
Oil from filter
A leak occurring at a wheel Is almost certainly brake fluid.
Gearbox oil
Gearbox oil can leak from the seals at the inboard ends of the drivoshafts.
Power steering fluid
Power steering fluid may leak from the pipe connectors on the steering rack.
When ail else falls, you may llnd yourself having to get a tow home - or of course you may be helping somebody else. Long-distance recovery should only be done by a garage or breakdown service. For shorter distances. OIY towing using another car is easy enough, but observe the following points: • Use a proper tow-rope - they are not expensive. The vehicle being towed must display an ON TOW sign in its rear window. • Always turn the Ignition key to the ON position when the vehicle is being towed, so that the steering lock is released, and that the direction indicator and brake lights will work. • Only attach the tow-rope to the towing eyes provided.
• Before being towed, release the handbrake and select neutral on the transmission. • Note that greater-then-usual pedal pressure will be required to operate the brakes, since the vacuum servo unit is only operational with the engine running. • On models with power steering, greater-than-usual steering effort will also be required. • The driver of the car being towed must keep the tow-rope taut at all times to avoid snatching. • Make sure that both drivers know the route before setting off. • Only dnve at moderate speeds and keep the distance towed to a minimum. Drive smoothly and allow plenty of time for slowing down at junctions.
Towing
• On models with automatic transmission, special precautions apply(see Chapter 7B. Section 1). If In doubt, do not tow, or transmission damage may result. • The front towing eye is supplied as part of the tool kit stored in the luggage compart-ment. To fit the eye pnse out the plastic cover from the front or rear bumper using a screwdriver, then screw the eye onto the threaded pin as tightly as possible.
A
Warning: To prevent damage to the catalytic converter, e vehicle must not be push'started, or started by towing, when the engine is at operating temperature. Use jump leads (see Jump starting).
Page 17 of 225
o«i6 Weekly checks
Battery
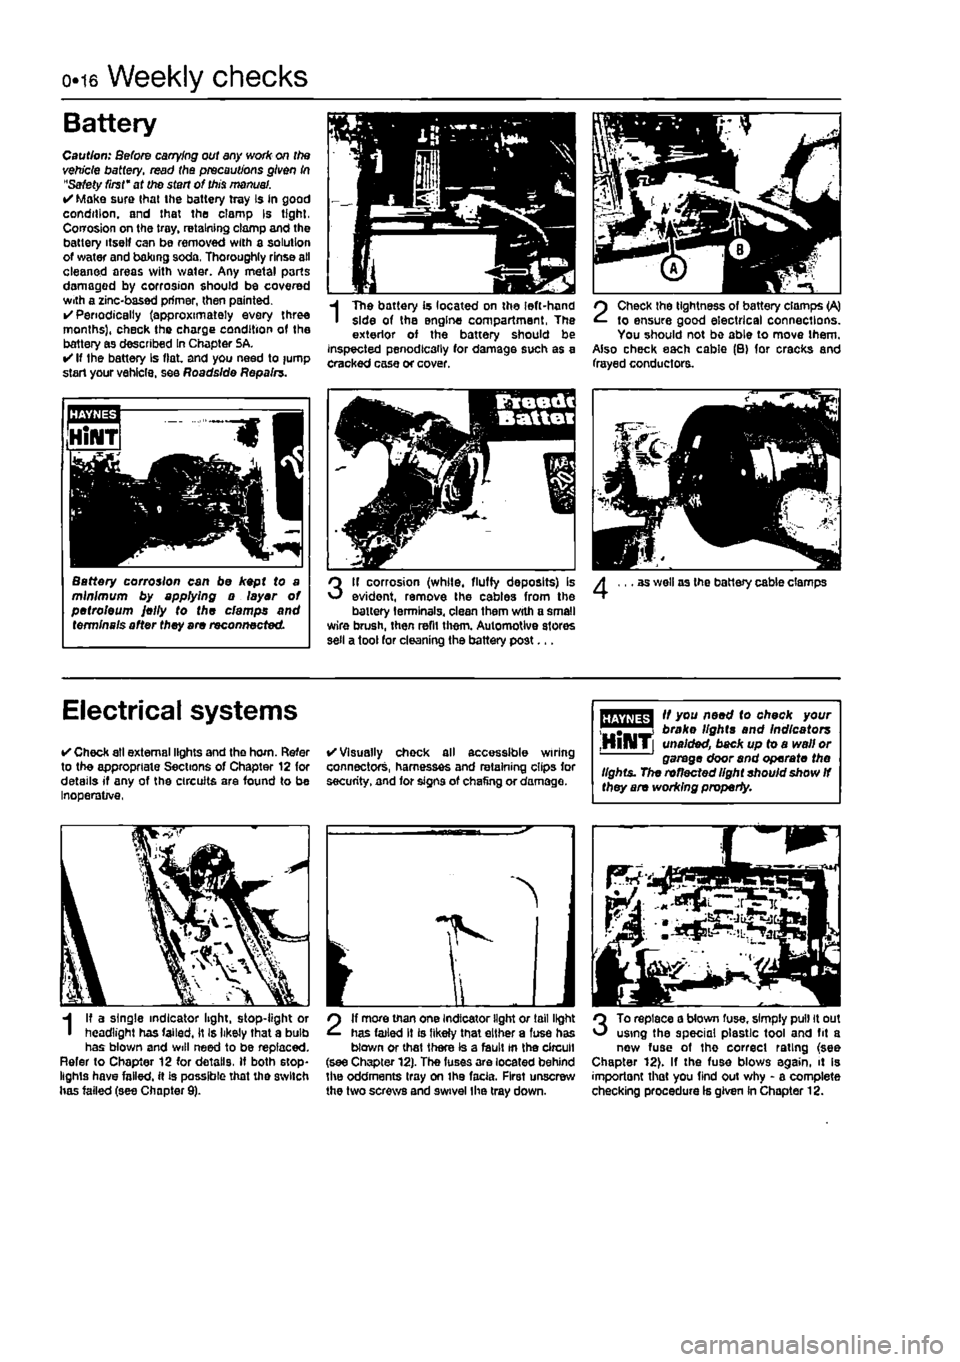
Caution: Before carrying out any work on the vehicle battery, read the precautions given In "Safety first" at the start of this manual. • Make sure thai the battery tray is in good condition, and that the clamp Is tight. Coirosion on the tray, retaining clomp and the battery itself can be removed with a solution of water and baking soda, Thoroughly rinse all cleaned areas with water. Any metal parts damaged by corrosion should be covered with a zinc-based primer, then painted. • Periodically (approximately every three months), check the charge condition of the battery as described In Chapter SA. • If the battery Is flat, and you need to jump start your vehicle, see Roadside Repalrz.
Battery corrosion can be kept to a minimum by applying o layer of petroleum Jelly to the clamps and terminals after they are reconnected
fin %
I
The battery is located on the left-hand side of the engine compartment, The exterior of the battery should be inspected penodlcaily for damage such as a cracked case or cover.
2
Check the tightness of battery clamps (A) to ensure good electrical connections. You should not be able to move them. Also check each cable (B) for cracks and frayed conductors.
3
If corrosion (while, fluffy deposits) is evident, remove the cables from the battery terminals, clean them with a small wire brush, then refit them. Automotive stores sell a tool for cleaning the battery post...
as well as the battery cable clamps
Electrical systems
• Check all external lights and the horn. Refer to the appropriate Sections of Chapter 12 for details if any of the circuits are found to be Inoperative,
• Visually chock all accessible wiring connectors, harnesses and retaining clips for security, and for signs of chafing or damage.
fffjffflg^ " y°u A**^ check your "T™*! broke lights and Indicators ,HllMT[ unaided, back up to a wall or garage door and operate the lights. The reflected light shouid show
If
they are working property.
I
I? a single indicator light, stop-light or headlight has failed, it Is likely that a bulb has blown and will need to be replaced. Refer to Chapter 12 for details. If both stop-lights have failed, it is passible that the switch has failed (see Chapter 9).
2
If more than one Indicator light or tail light has failed It is likely that either a fuse has blown or that there is a fault tn the circuit (see Chapter 12). The fuses are located behind the oddments tray on ihe facia. First unscrew the two screws and swivel Ihe tray down.
3
To replace a blown fuse, simply pull it out using the special plastic tool and fit a new fuse of tho correct rating (see Chapter 12). If the fuse blows again, it is importont that you find out why - a complete checking procedure Is given in Chapter 12.
Page 149 of 225
5A«2 Starting and charging systems
1 General information and precautions
General information The engine electrical system consists mainly of the charging and starting systems. Because of their engine-related functions, these components are covered separately from the body electrical devices such as the Ilght3, Instalments, etc (which are covered In Chapter 12). On petrol engine models refer to Part B for information on the ignition system, and on diesel models refer to Part C for information on the preheating system. The electncal system Is of 12-volt negative earth type. The battery fitted as original equipment is of maintenance* free (sealed for life} type and Is charged by the alternator, which is belt-driven from the crankshaft pulley. If a non-original battery is fitted It may be of standard or low maintenance type. The starter motor is of the pre-engaged type Incorporating an integral solenoid. On starting, the solenoid moves the drive pinion into engagement with the flywheel ring gear before the starter motor is energised. Once the engine has started, a one-way clutch prevents the motor armature being driven by the engine until the pinion disengages from the flywheel.
Precautions Further details of the various systems are given In the relevant Sections of this Chapter. While some repair procedures are given, the usual course of action is to renew the component concerned. The owner whose interest extends beyond mere component renewal should obtain a copy of the Automobile Electrical & Electronic Systems Manual, available from the publishers of this manual It Is necessary to take extra care when working on the electrical system to avoid damage to semiconductor devices (diodes and transistors), and to avoid the risk of personal injury. In addition to the precautions given in Safety first! at the beginning of this manual, observe the following when working on the system: Always remove rings, watches, etc before working on the electrical system. Even with the battery disconnected, capacitlve discharge could occur If a component's live terminal is earthed through a metal object. This could cause a shock or nasty bum. Do not reverse the battery connections. Components such as the alternator, electronic control units, or any other components having semi-conductor circuitry could be irreparably damaged. If the engine is being started using jump leads and a slave battery, connect the batteries positive-to-posibve and negative-to-
negative (see Jump starting). This also applies when connecting a battery charger but In this case both of the battery terminals should first be disconnected. Never disconnect the battery terminals, the alternator, any electrical wiring or any test Instalments when the engine Is running. Do not allow the engine to turn the alter-nator when the alternator Is not connected. Never test for alternator output by flashing the output lead to earth. Never use an ohmmeter ot the type Incorporating a hand-cranked generator for circuit or continuity testing. Always ensure that the battery negative lead is disconnected when working on the electrical system. Before using electric-arc welding equipment on the car, disconnect the battery, alternator and components such as the fuel Injection/ignition electronic control unit to protect them from the risk of damage. Several systems fitted to the vehicle require battery power to be available at all times, either to ensure their continued operation (such as the clock) or to maintain control unit memories or security codos which would be wiped if the battery were to be disconnected. To ensure that there are no unforeseen consequences of this action. Refer to Disconnecting the battery In the Reference Section of this manual for further Information.
2 Battery- % testing and charging
Standard and tow maintenance battery - testing 1 If the vehicle covers a small annual mileage, it is worthwhile checking the specific gravity of the electrolyte every three months to determine the state of charge of the battery. Use a hydrometer to make the check and compare the results with the following table, Note that the specific gravity readings assume an electrolyte temperature of 15*C (60'F); for every 10*C (18°f) below 158C (60aF) subtract 0.007, For every 108C (16'F) above 15"C (60'F) add 0.007. Ambient temperature Above 26"C Below 25DC Charged 1,210 to 1£30 1,270 to 1.290 70% charged 1.170to1.l90 1.230to1.250 Discharged 1.050toJ.070 1.110 to 1.130 2 If the battery condition is suspect, first check the specific gravity of electrolyte In each cell. A variation of 0.040 or more between any cells indicates loss of electrolyte or deterioration of the internal plates. 3 If the specific gravity variation is 0.040 or more, the battery should be renewed. If the cell variation Is satisfactory but the battery is discharged, it should be charged as described later in this Section.
Maintenance-free battery -testing 4 In cases where a sealed tor life maintenance-free battery is fitted, topplng-up and testing of the electrolyte in each cell Is not possible. The condition of the battery can therefore only be tested using a battery condition Indicator or a voltmeter. 5 Certain models may be fitted with a maintenance-free battery with a built-in charge condition Indicator. The indicator Is located in the top of the battery casing, and indicates the condition of the battery from its colour. If the Indicator shows green, then the battery is In a good state of charge. If the Indicator turns darker, eventually to black, then the battery requires charging, as described later in this Section. If Ihe indicator shows clear/yellow, then the electrolyte level in Ihe battery is too low to allow further use, and tho battery should be renewed. Do not attempt to charge, load or Jump start a battery when the indicator shows dear/yellow. 6 If testing the battery using a voltmeter, connect the voltmeter across the battery and compare the result with those given In the Specifications under 'charge condition'. The test is only accurate if the battery has not been subjected to any kind of charge for the previous six hours. If this is not the esse, switch on the headlights for 30 seconds, then wait four to five minutes baforo testing the battery after switching off the headlights. All other electrical circuits must be switched off, so check that the doors and tailgate are fully shut when making the test, 7 It the voltage reading Is less than 12.2 voHs, then the battery Is discharged, whilst a reading of 12.2 to 12.4 volts indicates 8 partially discharged condition. 6 If the battery Is to be charged, remove It from the vehicle (Section 3) and charge it as described later In this Section.
Standard and low maintenance battery - charging Note: The following is Intended as a guide only. Always refer to the manufacturer's recommendations (often printed on a label attached to the battery) before charging a battery. 9 Charge the battery at a rate of 3.5 to 4 amps and continue to charge the battery at this rate until no further rise In specific gravity Is noted over a four hour period. 10 Alternatively, a trickle charger charging at the rate of 1.5 amps can safely be used overnight. 11 Specially rapid boost charges which are claimed to restore the power of the battery in t to 2 hours are not recommended, as they can cause serious damage to the battery plates through overheating, 12 While charging the battery, note that the temperature of the electrolyte should never exceed 37.8*C(100°F),