tailgate FIAT PUNTO 1998 176 / 1.G User Guide
[x] Cancel search | Manufacturer: FIAT, Model Year: 1998, Model line: PUNTO, Model: FIAT PUNTO 1998 176 / 1.GPages: 225, PDF Size: 18.54 MB
Page 218 of 225
Body electrical systems 12*5
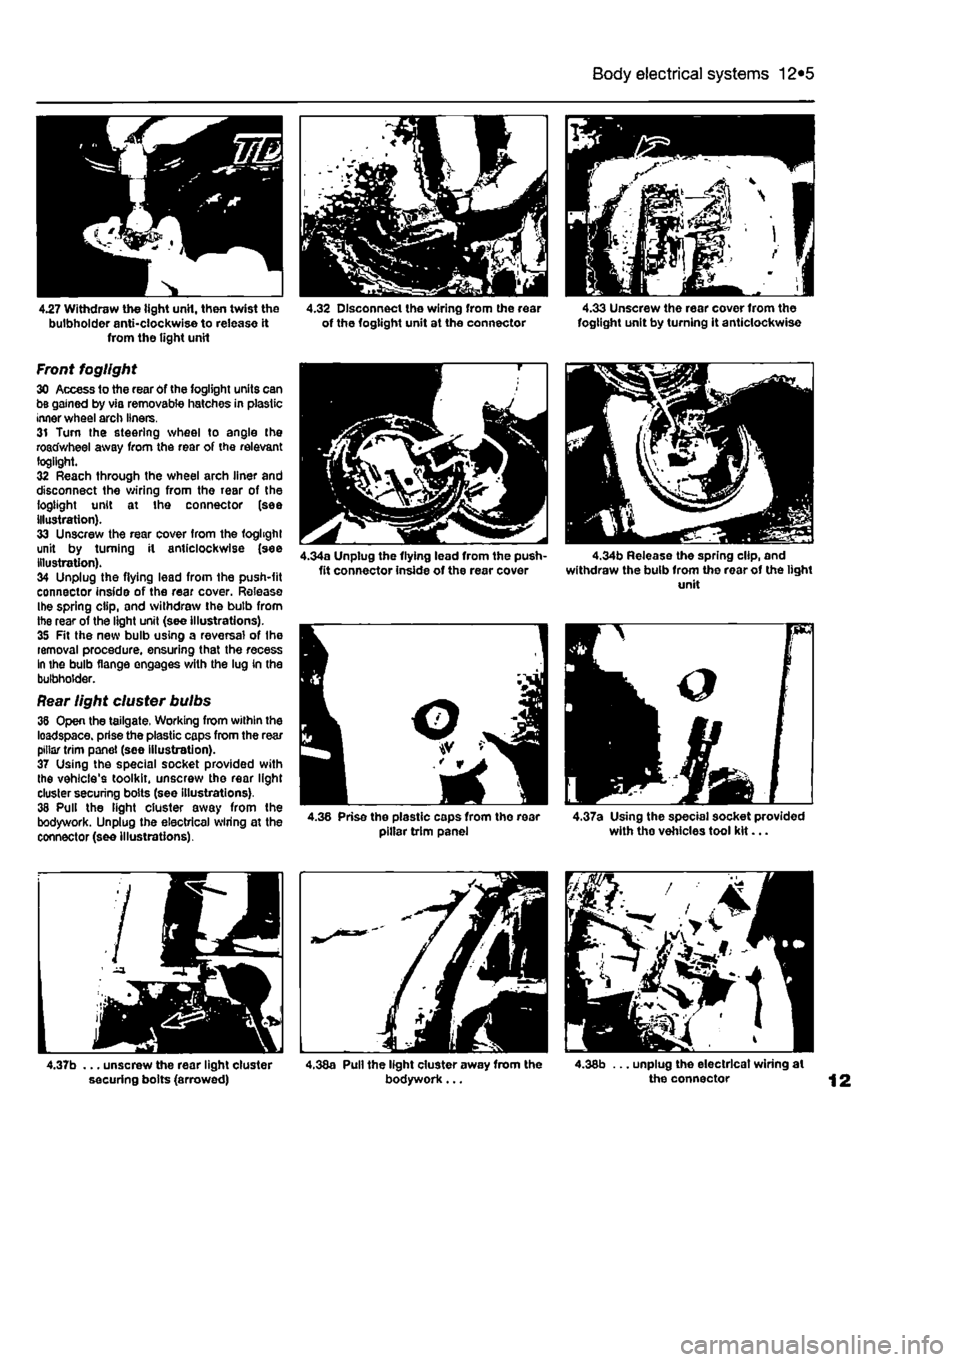
4.27 Withdraw the tight unH, then twist the bulbholder anti-clockwise to release it from the light unit
Front fogllght 30 Access to the rear of the fogllght units can be gained by via removable hatches in plastic inner wheel arch liners. 31 Turn the steering wheel to angle the roadwheel away from the rear of the relevant fogllght. 32 Reach through the wheel arch liner and disconnect the wiring from the rear of the fogllght unit at the connector (see illustration). 33 Unscrew the rear cover from the foghghl unit by turning it anticlockwise (see Illustration). 34 Unplug the flying lead from the push-fit connector inside of the rear cover. Release Ihe spring clip, and withdraw the bulb from the rear of the light unit (see illustrations). 35 Fit the new bulb using a reversal of Ihe removal procedure, ensuring that the recess In the bulb flange engages with the lug in the bulbholder.
Rear light cluster bulbs 38 Open the tailgate. Working from within the loadspace. prise the plastic caps from the rear pillar trim panel (see illustration). 37 Using the special socket provided with the vehicle's toolkit, unscrew the rear light cluster securing bolts (see illustrations). 38 Pull the light cluster away from the bodywork. Unplug the electrical wiring at the connector (see illustrations).
4.37b ... unscrew the rear light cluster securing bolts (arrowed)
4.32 Disconnect the wiring from the rear 4.33 Unscrew the rear cover from the of the fogtight unit at the connector fogllght unit by turning It anticlockwise
4.38a Pull the light cluster away from the 4.38b ... unplug the electrical wiring at bodywork... the connector
Page 219 of 225
12*6 Body electrical systems
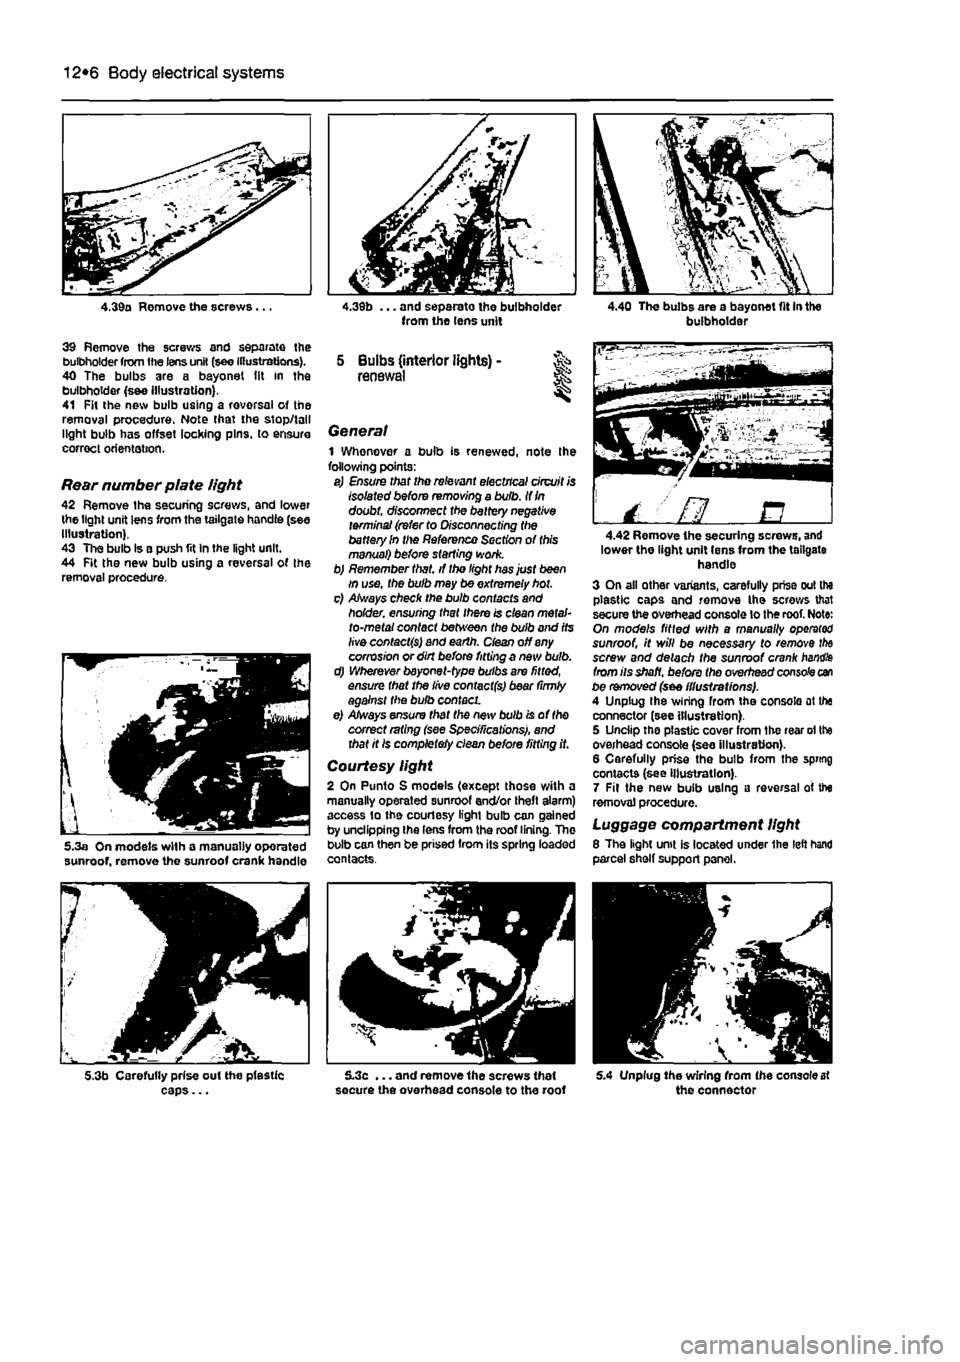
4.39a Remove the screws...
39 Remove the screws and separate the bulbholder from the lens unit (see Illustrations). 40 The bulbs are a bayonet (it in the bulbholder (s&e Illustration), 41 Fit the new bulb using a rovorsal of the removal procedure. Note that the stop/tall light bulb has offset locking pins, to ensure correct orientation.
Rear number plate light 42 Remove the securing screws, and lower the light unit lens from the tailgate handle (see Illustration), 43 The bulb Is a push fit In the light unit. 44 Fit the new bulb using a reversal of the removal procedure.
5.3a On models with a manually oporated sunroof, remove the sunroof crank handle
5.3b Carefully prise out the pfestic caps...
from the lens unit
5 Bulbs (interior lights) -renewal
General 1 Whenever a bulb is renewed, note Ihe following points: a) Ensure that the relevant electrical circuit is Isolated before removing a bulb. If
In
doubt, disconnect the battery negative terminal (refer to Disconnecting the battery In the Reference Section of this manual) before starting work. b) Remember that, if the light has just been in use, the bulb may be extremely hot. c) Always check the bulb contacts and holder, ensuring that there is clean metal-to-metal contact between the bulb and its live contacts) and earth, dean off any corrosion or dirt before fitting a new bulb. d) Wherever bayonet-type bulbs are fitted, ensure that the live contact(s) bear (irmly against the bulb contact. e) Always ensure that the new bulb is of the correct rating (see Specifications), and that it Is completely clean before fitting it.
Courtesy light 2 On Punto S models (except those with a manually operated sunroof end/or theft alarm) access to the courtesy light bulb can gained by unclipping the lens from the roof lining. The bulb can then be prised from its spring loaded contacts.
5.3c ... and remove the screws that secure the overhead console to the roof
buibhoidai
/ ' fl B 4.42 Remove the securing screws, and lower the light unit lens from the tailgate handle 3 On all other variants, carefully prise out the plastic caps and remove the screws that secure the overhead console lo the roof. Note: On models fitted with a manually operator sunroof, it will be necessary to remove
the
screw and detach the sunroof crank
handle
from its shaft, before the overhead console can be removed (see illustrations). A Unplug Ihe wiring from the console at the connector (see illustration). 5 Unciip the plastic cover from the rear ol the overhead console (see illustration). 6 Carefully prise the bulb from the spring contacts (see Illustration). 7 Fit the new bulb using a reversal of the removal procedure.
Luggage compartment light 8 The light unit is located under 1he left hand parcel shelf support panel.
5.4 Unplug Ihe wiring from (he console at the connector
Page 223 of 225
12*10 Body electrical systems
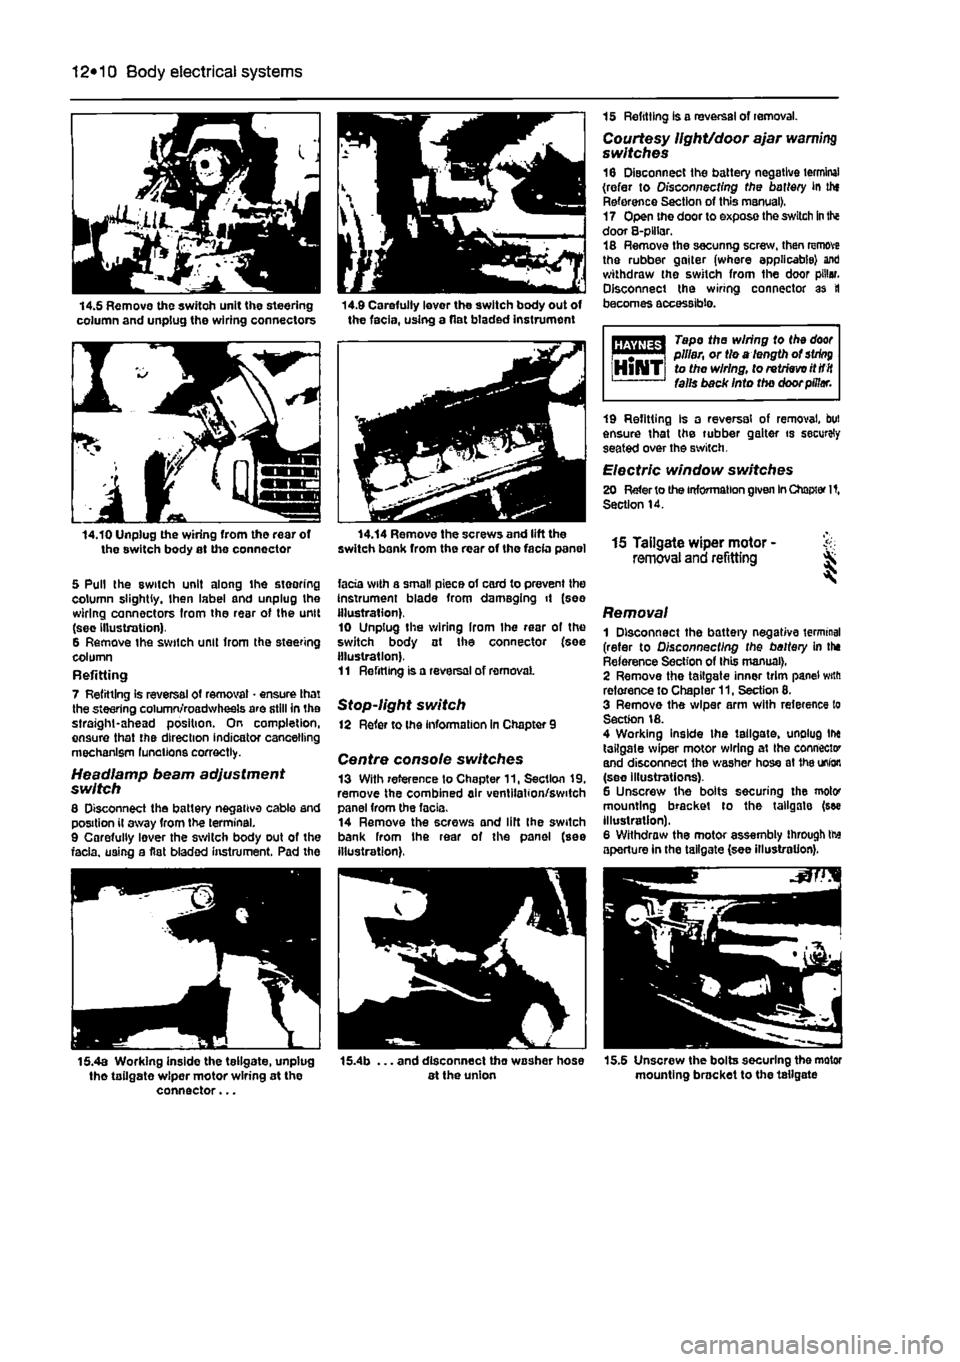
14.5 Remove the switch unit the steering column and unplug the wiring connectors 14.9 Carefully lever the switch body out of the facia, using a flat btaded instrument
14.10 Unplug the wiring from tho rear of the switch body at the connector
5 Pull the switch unit along ihe steering column slightly, then label and unplug the wiring connectors from the rear of the unit (sec Illustration). 6 Remove the switch unit from the steering column Refitting 7 Refitting is reversal of removal • ensure that the steering column/roadwheels are still in the straight-ahead position. On completion, ensure that the direction indicator cancelling mechanism lunations correctly.
Headlamp beam adjustment switch 8 Disconnect the battery negative cable and position il away from the terminal. 9 Carefully lever the switch body out of the facia, using a flat bladed instrument. Pad the
15 Refitting is a reversal of removal. Courtesy light/door ajar warning switches 16 Disconnect the battery negative terminal (refer to Disconnecting the battery in thf Reference Section of this manual). 17 Open the door to expose the switch
in
the door 8-plHar. 18 Remove the secunng screw, then remove the rubber gaiter (where applicable) ant) withdraw the switch from the door pillar. Disconnect the wiring connector as tl becomes accessible.
Tape the wiring to the
door
i m | pillar, or tie a length of
string
HlNTi to the wiring, to retrieve itttit falls back Into the door pillar.
14.14 Remove the screws and lift the switch bank from the rear of the facia panel
facia with a small piece of card to prevent the Instrument blade from damaging it (see illustration). 10 Unplug the wiring Irom Ihe rear of the switch body at Ihe connector (see illustration). 11 Refitting is a reversal of removal
Stop-light switch 12 Refer to the information in Chapter 9
Centre console switches 13 With reference to Chapter 11, Section 19, remove the combined air ventilation/switch panel from the facia. 14 Remove the screws and lift Ihe switch bank from Ihe rear of the panel (see illustration),
19 Refitting Is a reversal of removal, but ensure that the rubber gaiter is securely seated over the switch.
Electric window switches 20 Refer to the information given
In
Chapter It, Section 14.
15 Tailgate wiper motor - & removal and refitting ^
Removal 1 Disconnect the battery negative terminal (refer to Disconnecting the battery in the Reference Section of this manual), 2 Remove the tailgate inner trim panel with reference to Chapter 11, Section 8. 3 Remove the wiper arm with reference to Section 18. 4 Working inside the tailgate, unplug tlx tailgate wiper motor wiring at Ihe connector and disconnect the washer hose at
1he
union (see illustrations). 6 Unscrew the bolts securing the motor mounting bracket to the tailgate (see illustration). 6 Withdraw the motor assembly through tte aperture in the tailgate (see illustration).
15.4a Working inside the tellgate, unplug tho tailgate wiper motor wiring at the connector...
. and disconnect tho washer hose at the union 15.5 Unscrew the bolts securing the motor mounting bracket to the tailgate
Page 224 of 225
Body electrical systems 12*11
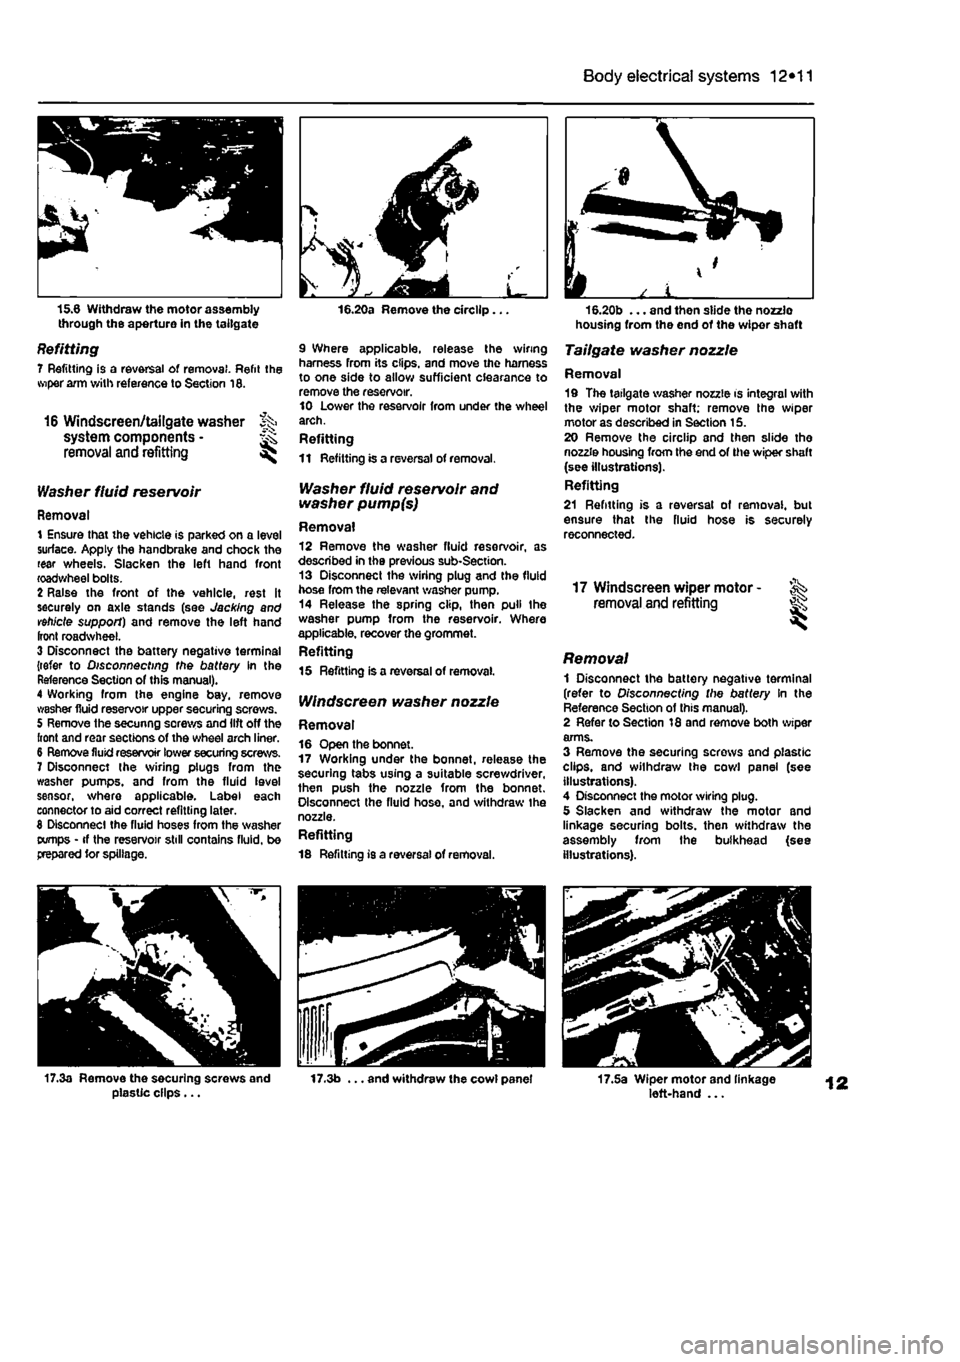
15.6 Withdraw the motor assembly through the aperture in the tailgate
Refitting 7 Refitting is a reversal of removal. Refit the wiper arm with reference to Section 16.
16 Windscreen/tailgate washer % system components • ^ removal and refitting ^
Washer fluid reservoir
Removal 1 Ensure that the vehicle is parked on a level surface. Apply the handbrake and chock the rear wheels. Slacken the left hand front roadwheel bolts. 2 Raise the front of the vehicle, rest it securely on axle stands (see Jacking and vehicle support) and remove the left hand front roadwheel. 3 Disconnect the battery negative terminal {refer to Disconnecting the battery In the Reference Section of this manual). 4 Working from the engine bay, remove washer fluid reservoir upper securing screws. 5 Remove the secunng screws and lift off the front and rear sections of the wheel arch liner. 6 Remove fluid reservoir lower securing screws. 7 Disconnect the sviring plugs from the washer pumps, and from the fluid level sensor, where applicable. Label each connector to aid correct refitting later. 8 Disconnect the fluid hoses from the washer tx/mps • if the reservoir still contains fluid, be prepared tor spillage.
16.20a Remove the circllp...
9 Where applicable, release the wiring harness from its clips, and move the harness to one side to allow sufficient clearance to remove the reservoir. 10 Lower the reservoir from under the wheel arch. Refitting 11 Refitting is a reversal of removal.
Washer fluid reservoir and washer pump(s)
Removal 12 Remove the washer fluid reservoir, as described in the previous sub-Section. 13 Disconnect the wiring plug and the fluid hose from the relevant washer pump. 14 Release the spring clip, then pull the washer pump from the reservoir. Where applicable, recover the grommet. Refitting 15 Refitting is a reversal of removal.
IV/nctecreen washer nozzle
Removal 16 Open the bonnet. 17 Working under the bonnet, release the securing tabs using a suitable screwdriver, then push the nozzle from the bonnet. Disconnect the fluid hose, and withdraw the nozzle. Refitting 18 Refitting is a reversal of removal.
housing from the end of the wiper shaft
Tailgate washer nozzle
Removal 19 The tailgate washer nozzle is integral with the wiper motor shaft; remove the wiper motor as described in Section 15. 20 Remove the circllp and then slide the nozzle housing from the end of the wiper shaft (see illustrations). Refitting 21 Refitting is a reversal of removal, but ensure that the fluid hose is securely reconnected.
17 Windscreen wiper motor -removal and refitting ^
Removal 1 Disconnect the battery negative terminal (refer to Disconnecting the battery In the Reference Section of this manual). 2 Refer to Section 18 and remove both wiper arms. 3 Remove the securing screws and plastic clips, and withdraw the cowl panel (see illustrations). 4 Disconnect the motor wiring plug. 5 Slacken and withdraw the motor and linkage securing bolts, then withdraw the assembly from the bulkhead (see illustrations).
17.3a Remove the securing screws and plasUc clips... 17.3b ... and withdraw the cowl panel 17.5a Wiper motor and linkage left-hand ...
Page 225 of 225
12*12 Body electrical systems
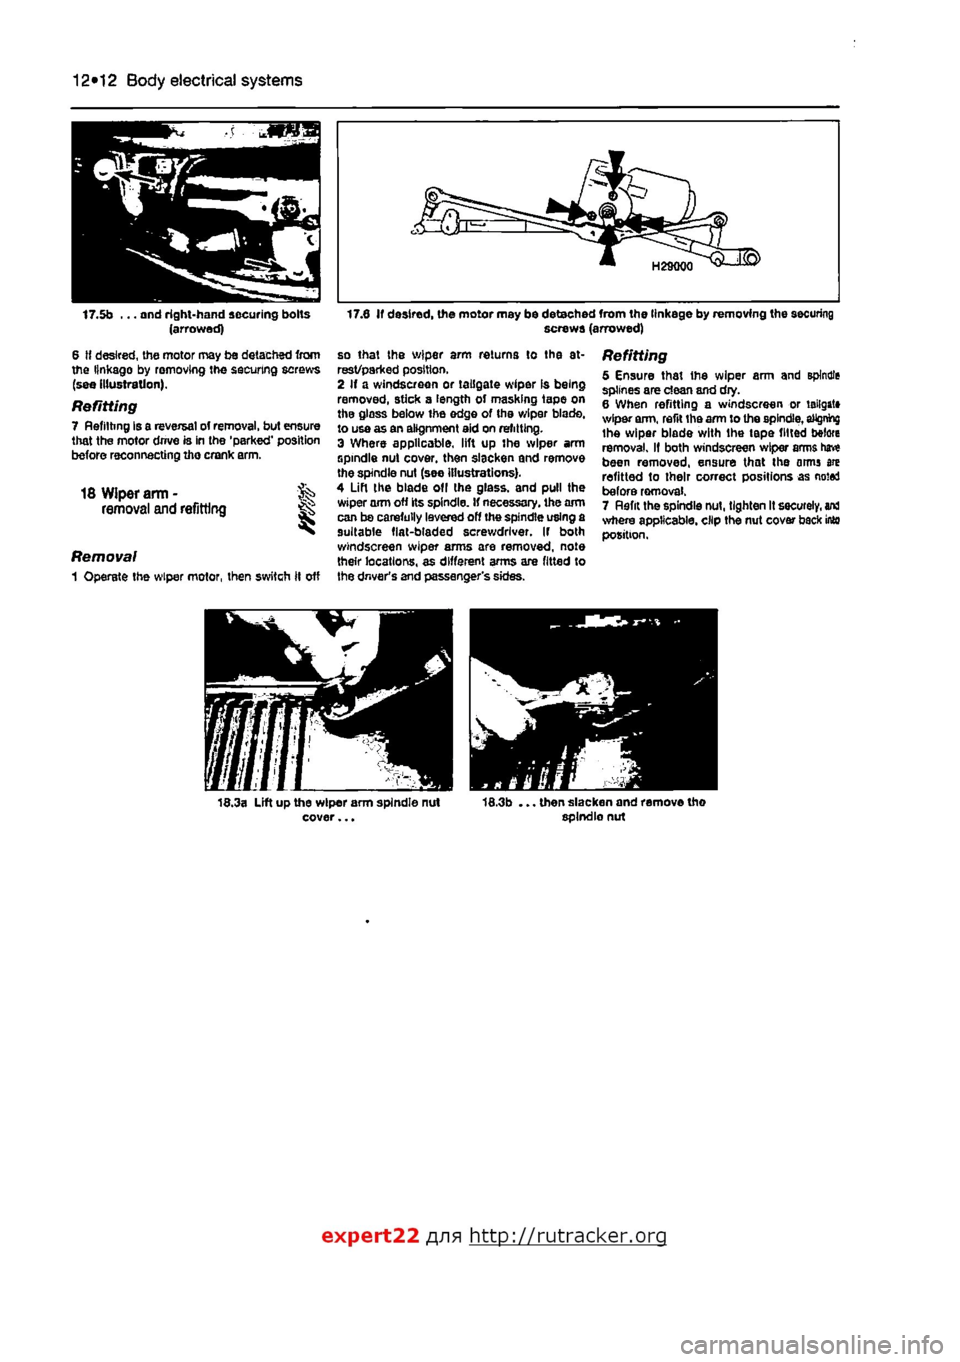
17.0 If desired, the motor may be detached from the linkage by removing the securing screws (arrowed) 17.5b ... and right-hand securing bolts (arrowed)
6 If desired, the motor may be detached from the linkage by removing the securing screws (see illustration).
Refitting 7 Refitting Is a reversal of removal, but ensure that the motor drrve is in the 'parked' position before reconnecting ihe crank arm.
18 Wiper arm - fe removal and refitting
Removal 1 Operate the wiper motor, then switch ft off
so that the wiper arm returns to tha at-rest/parked position, 2 If a windscreen or tailgate wiper Is being removed, stick a length of masking tape on tha glass below ihe edge of tha wiper blade, to use as an alignment aid on refitting. 3 Where applicable, lift up the wiper arm spindle nut cover, then slacken and remove the spindle nut (see illustrations). 4 Lift the blade of
I
the glass, and pull the wiper arm off its spindle. If necessary, the aim can be carefully lavered off the spindle using a suitable fiat-bladed screwdriver. If both windscreen wiper arms are removed, note their locations, as different arms are fitted to the driver's and passenger's sides.
Refitting 5 Ensure that the wiper arm and spindle splines are dean and dry. 6 When refitting a windscreen or tailgate wiper arm, refit tha arm to the spindle,
aMgnhg
the wiper blade with the tape fitted before removal. If both windscreen wiper arms have been removed, ensure that the arms are refitted to their correct positions as noted before removal. 7 Rflfit the spindle nut, tighten It securely,
ana
where applicable, clip the nut cover back into position.
expert22 fl/in http://rutracker.org