flywheel FIAT PUNTO 1998 176 / 1.G Owner's Manual
[x] Cancel search | Manufacturer: FIAT, Model Year: 1998, Model line: PUNTO, Model: FIAT PUNTO 1998 176 / 1.GPages: 225, PDF Size: 18.54 MB
Page 107 of 225
2D*10 Engine removal and overhaul procedures
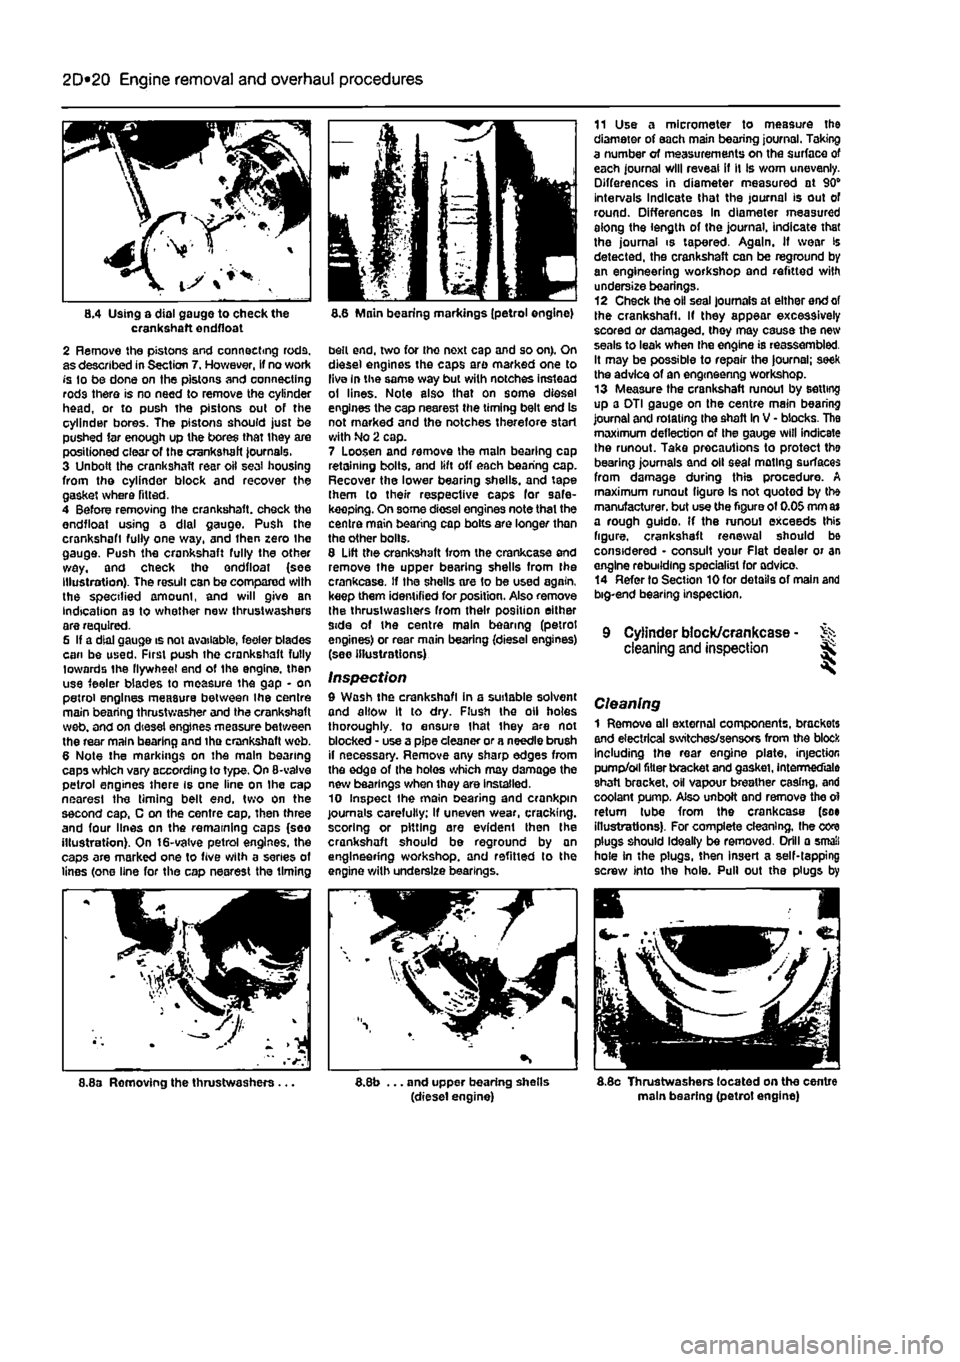
8.4 Using a dial gauge to check the crankshaft endfloat 2 Remove the pistons and connecting rods, as described in Section 7. However, If no work fs to be done on the pistons and connecting rods there is no need to remove the cylinder head, or to push the pistons out of the cylinder bores. The pistons should just be pushed far enough up the bores that they are positioned clear of the crankshaft Journals. 3 Unbolt the crankshaft rear oil seal housing from the cylinder block and recover the gasket where fitted. 4 Before removing the crankshaft, check the endfloat using a dial gauge. Push the crankshaft fully one way, and then zero Ihe gauge. Push the crankshaft fully the other way, and check tho endfloat (see Illustration). The result can be compared with the specified amount, and will give an indication as to whether new thrustwashers are required. 6 If a dial gauge is not available, feeler blades can be used. First push the crankshaft fully towards the flywheel end of the engine, then use feeler blades to measure the gap - on petrol engines measure between the centre main bearing thrust washer and the crankshaft web. and on diesel engines measure between the rear main bearing and tha crankshaft web. 6 Note the markings on the main bearing caps which vary according to type. On 8-valve petrol engines there is one line on Ihe cap nearest the timing belt end, two on the second cap, C on the centre cap, then three and four lines on the remaining caps (soo illustration). On 16-valve petrol engines, the caps are marked one to five with a series of lines (one line for the cap nearest the timing
8.6 Main bearing markings (petrol engine)
belt end, two for tho next cap and so on). On diesel engines the caps are marked one to live In the same way but with notches instead ol lines. Note also that on some diesel engines the cap nearest the timing belt end Is not marked and the notches therefore start with No 2 cap. 7 Loosen and remove the main bearing cop retaining bolts, and lift off each bearing cap. Recover the lower bearing shells, and tape them to their respective caps for safe-keeping. On some diesel engines note that the centre main bearing cap botts are longer than the other bolls. 8 Lift the crankshaft Irom the crankcase and remove the upper bearing shells from the crankcase. If the shells are 1o be used again, keep them identified for position. Also remove the thrustwashers from their position either side of the centre main bearing (petrol engines) or rear main bearing (diesel engines) (see illustrations)
Inspection 9 Wash the crankshaft in a suitable solvent and allow It to dry. Flush the oil holes thoroughly, to ensure that ihey are not blocked - use a pipe cleaner or a needle brush il necessary. Remove any sharp edges from the edge of the holes which may damage the new bearings when they are installed. 10 Inspect the main searing and crankpin journals carefully; if uneven wear, cracking, scoring or pitting are evident then the crankshaft should be reground by an engineering workshop, and refitted to the engine with underslze bearings.
11 Use a micrometer to measure the diameter of each main bearing journal. Taking a number of measurements on the surface of each journal will reveal if it Is worn unevenly. Differences in diameter measured at 90" intervals Indicate that the journal is out of round. Differences In diameter measured aiong the length of the journal, indicate that the journal is tapered. Again. If wear is detected, the crankshaft can be reground by an engineering workshop and refitted with undersize bearings. 12 Check the oil seal journals at either end of the crankshaft. If they appear excessively scored or damaged, they may cause the new seals to leak when the engine is reassembled. It may be possible to repair the |ournal; seek the advice of an engmeenng workshop. 13 Measure the crankshaft runoul by setting up a DTI gauge on the centre main bearing journal and rotating the shaft In V - blocks. The maximum deflection of the gauge will indicate Ihe runout. Take precautions to protect the bearing journals and oil seal mating surfaces from damage during this procedure. A maximum runout figure Is not quoted by the manufacturer, but use the figure of 0.05 mm
a»
a rough guido. If the runoul exceeds this figure, crankshaft renewal should be considered • consult your Flat dealer or an engine rebuilding specialist for advico. 14 Refer to Section 10 for details of main and big-end bearing inspection.
9 Cylinder block/crankcase - % cleaning and inspection Sk
Cleaning 1 Remove all external components, brackets and electrical switches/sensors from the block Including the rear engine plate, injection pump/oil filter bracket and gasket, Intermediate shaft bracket, oH vapour breather casing, and coolant pump. Also unboit and remove the ol return tube from the crankcase (see illustrations). For complete cleaning, the core plugs should Ideally be removed. Drill a small hole in the plugs, then insert a self-tapping screw into the hole. Pull out the plugs by
8.8a Removing the thrustwashers.. ... and upper bearing shells (diesel engine) 8.8o Thrustwashers located on the centre main bearing (petrol engine)
Page 109 of 225
2D*10 Engine removal and overhaul procedures
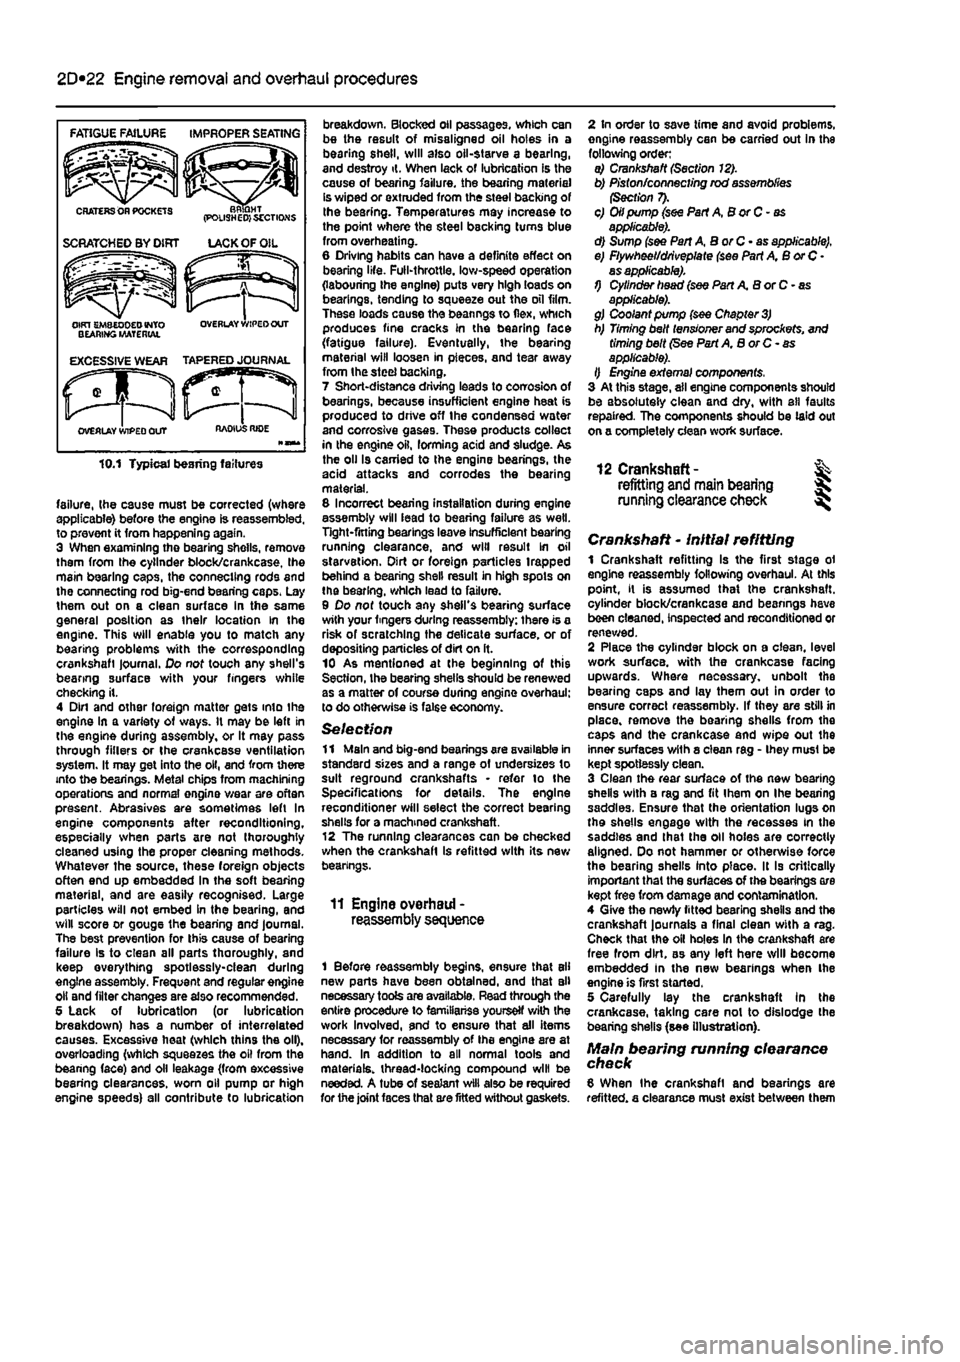
failure, (he cause must be corrected (where applicable) before the engine is reassembled, to prevent it from happening again. 3 When examining the bearing shells, remove them from the cylinder block/crankcase, Ihe main bearing caps, the connecting rods and the connecting rod big-end bearing caps. Lay them out on a clean surface in the same general position as their location in the engine. This will enable you to match any bearing problems with the corresponding crankshaft journal. Do not touch any shell's bearing surface with your fingers while checking it. 4 Din and other foreign matter gets into the engine in a variety of ways. It may be left in the engine during assembly, or It may pass through fillers or the crankcase ventilation system. It may get into the oil, and from there into the bearings. Metal chips from machining operations and normal engine wear are often present. Abrasives are sometimes left In engine components after reconditioning, especially when parts are not thoroughly cleaned using the proper cleaning methods. Whatever the source, these foreign objects often end up embedded In the soft bearing material, and are easily recognised. Large particles will not embed in the bearing, and will score or gouge the bearing and journal. The best prevention for this cause of bearing failure Is to clean all parts thoroughly, and keep everything spotlessly-clean during engine assembly. Frequent and regular engine oil and filter changes are also recommended. 5 Lack of lubrication (or lubrication breakdown) has a number of interrelated causes. Excessive heat (which thins the oil), overloading (which squeezes the oil from the bearing face) and oil leakage (from excessive bearing clearances, worn oil pump or high engine speeds) all contribute to lubrication
breakdown. Blocked oil passages, which can be the result of misaligned oil holes in a bearing shell, will also oil-starve a bearing, and destroy it. When lack of lubrication is the cause of bearing failure, the bearing materiel is wiped or extruded from the steel backing of Ihe bearing. Temperatures may increase to the point where the steel backing turns blue from overheating. 6 Driving habits can have a definite effect on bearing life. Full-throttle, low-speed operation (labouring ihe engine) puts very high loads on bearings, tending to squeeze out the oil film. These loads cause the beanngs to flex, which produces fine cracks in the bearing face (fatigue failure). Eventually, the bearing material will loosen in pieces, and tear away from Ihe steel backing. 7 Short-distance driving leads to corrosion of bearings, because insufficient engine heat is produced to drive off the condensed water and corrosive gases. These products collect in the engine oil, forming acid and sludge. As the oil Is carried to the engine bearings, the acid attacks and corrodes the bearing material. 8 Incorrect bearing installation during engine assembly will lead to bearing failure as well. Tight-fitting bearings leave insufficient bearing running clearance, and will result in oil starvation. Dirt or foreign particles trapped behind a bearing shell result in high spots on the bearing, which lead to failure. 9 Do not touch any shell's bearing surface with your fingers during reassembly: there is a risk of scratching the delicate surface, or of depositing particles of dirt on ft. 10 As mentioned at the beginning of this Section, the bearing shells should be renewed as a matter of course during engine overhaul; to do otherwise is false economy.
Selection 11 Main and big-end bearings are available in standard sizes and a range of undersizes to suit reground crankshafts • refer to the Specifications for details. The engine reconditioner will select the correct bearing shells for a machined crankshaft. 12 The running clearances can be checked when the crankshaft is refitted with its new bearings.
11 Engine overhaul -reassembly sequence
1 Before reassembly begins, ensure that all new parts have been obtained, and that all necessary tools are available. Read through the entire procedure to familiariss yourself with the work Involved, and to ensure that ail items necessary for reassembly of the engine are at hand. In addition to all normal tools and materials, thread-locking compound will be needed. A tube of sealant will also be required for the joint faces that are fitted without gaskets.
2 In order to save time and avoid problems, engine reassembly can be carried out in the following order: a) Crankshaft (Section 12). b) Piston/connecting rod assemblies (Section 7). c) Oil pump (see Part A, B or C - as applicable). d) Sump (see Pan A, BorC-as applicable). e) Flywheel/driveplate (see Part A, B or C • as applicable). 1) Cylinder head (see Part A B or C - as applicable). g) Coolant pump (see Chapter
3)
h) Timing belt tensioner and sprockets, and timing belt (See Part A, B or C- as applicable). I) Engine external components, 3 At this stage, ail engine components should be absolutely clean and dry, with all faults repaired. The components should be laid out on a completely clean work surface.
12 Crankshaft- % refitting and main bearing S running clearance check ^
Crankshaft - initial refitting 1 Crankshaft refitting Is the first stage ol engine reassembly following overhaul. At this point, it is assumed that the crankshaft, cylinder block/crankcase and beanngs have been cleaned, inspected and reconditioned or renewed. 2 Place the cylinder block on a clean, level work surface, with the crankcase facing upwards. Where necessary, unbolt the bearing caps and lay them out in order to ensure correct reassembly. If they are still in place, remove the bearing shells from the caps and the crankcase and wipe out the inner surfaces wilh a clean rag - they musl be kept spotlessly clean. 3 Clean the rear surface of the new bearing shells with a rag and fit ihem on Ihe bearing saddles. Ensure that the orientation lugs on the shells engage with the recesses in the saddles and lhat the oil holes are correctly aligned. Do not hammer or otherwise force the bearing shells into place. It Is critically important that the surfaces of the bearings ore kept free from damage and contamination. 4 Give the newly fitted bearing shells and the crankshaft journals a final clean with a rag. Check that the oil holes In the crankshaft are free from dirt, as any left here will become embedded In the new bearings when Ihe engine is first started. 5 Carefully lay the crankshaft In the crankcase, taking care not to dislodge the bearing shells (see illustration}.
Main bearing running clearance check 8 When Ihe crankshaft and bearings are refitted, a clearance must exist between them
Page 136 of 225
4C»1
Chapter 4 PartC:
Fuel system - diesel models
Contents
Accelerator cable • removal, refitting and adjustment 3 Air cleaner and inlet system • removal and refitting 2
AJr
cleaner filter element - renewal See Chapter IB Fuet filter renewal See Chapter 1B Fuel gauge sender unit • removal and refitting 10 Fuel injection pump • removal and refitting 5 Fuel injectors - testing, removal and refitting 9
Fuel
system • priming and bleeding 4
Fuel
tank - removal and refitting 11 General Information and precautions 1
Idle speed - checking and adjustment See Chapter 1B Injection timing • checking methods 6 injection timing {Bosch fuel Injection pump) • checking and adjustment 7 Injection timing (Lucas fuel Injection pump) - checking and adjustment 8 Inlet manifold - removal and refitting 12 Turbocharger - description and precautions 13 Turbocharger - examination and renovation 15 Turbocharger - removal and refitting 14
Degrees of difficulty
Easy,
suitable for novice
with Ittle
p experience sS^
Fairly easy, suitable (or beginner with some experience
Fairly tfifficuit, suitable
for
competent ^
DIY
mechanic
Difficult, suitable
for ^ experienced DIY jR mechanic ^
Very difficult, ^ sutable for expert
DIY
S or professional ^
Specifications
General System type
Firing order
Injection pump (Bosch VE) Direction of rotation Static timing: Engine position Pump timing measurement Maximum engine speed
Injection pump (Lucas/CAV FT08) Direction of rotation Static timing: Engine position Pump timing measurement Maximum engine speed
injectors Type Opening pressure: Bosch Lucas: New After running in
RPM sensor Sensor-to-flywheel ring gear teeth gap — Winding resistance
Rear-mounted fuel tank, distributor fuel injection pump with integral transfer pump. Indirect Injection, Turbocharger on TDS, TD and TDSX models 1-3-4-2 (No
1
at timing belt end of engine)
Clockwise, viewed from sprocket end
No
1
piston at TDC 0.93 ± 0.05 mm 5200 to 5300 rpm
Clockwise, viewed from sprocket end
No 1 piston at TDC 0° ± 1° TDC (Note: Value shown on pump - see text} 5150150 rpm
Pintle
150 to 158 bar
124 to
131
bar 116lo123 bar
0.25 to 1.3 mm 680* 100 ohms
Page 139 of 225
Fuel system - diesel models 4C*3
bolt (Bosch)
4 Fuel system -priming and bleeding
The Injection pump Is self-priming and no special procedures are necessary to prime the fuel system. However where the luei system has been completely drained it (s helpful to loosen the injector union nuts while turning the engine on the starter motor In order to purge trooped air.
S Fuel injection pump • removal and refitting 5
Removal 1 Disconnect the battery negative terminal (refer to Disconnecting the battery In the Reference Section of this manual) 2 Remove the timing belt and Injection pump sprocket aa described in Chapter 2C. 3 Disconnect the accelerator cable from the fuel injection pump, with reference to Section 3. 4 Loosen the clip, or undo the banjo union, and disconnect the fuel supply hose. Recover the sealing washers from the banjo union, where applicable. Cover the open end of the hose, and raflt and cover the banjo bolt to keep dirt out. 5 Disconnect the main fuel return pipe and the injector leak-off return pipe banjo union. Recover the sealing washers from the banjo union Again, cover the open end of the hose and the banjo bolt to keep dirt out.
6.2a Remove the rubber bung ...
k
5.10a Injection pump lower mounting bolt removal (Bosch) 6 Disconnect all relevant wiring from the pump. 7 Unscrew the union nuts securing the Injector pipes to the fuel Injection pump and injectors. Counterhold the unions on Ihe pump, while unscrewing the pipe-to-pump union nuts. Remove the pipes as a set. Cover open unions lo keep dirt out. using small plastic begs, or fingers cut from discarded (but clean!) rubber gloves. 8 Mark the fuel Injection pump in relation to the mounting bracket, using a scriber or felt tip pen. This will ensure Ihe correct pump timing is retained when refitting. 9 Unscrew the bolt(s) from Ihe rear support bracket (see illustration) 10 Unscrew the mounting nuts/bolt, remove the special bracket, then remove the injection pump from the mounting bracket/housing (see illustrations).
Refitting 11 Locate the injection pump In the mounting bracket and align the marks mode on the pump and bracket before removal. If a new pump is being fitted, transfer the mark from the old pump to give an approximate setting. Locate the special bracket and fit the nuts/bolt loosely. 12 Refil Ihe rear support bracket and fit the bolts loosely. 13 Set up the injection timing, as described In Sections 7 and 8 (as applicable). 14 Refil and reconnect the injector fuel pipes. 15 Reconnect all relevant wiring to the pump. 16 Reconnect the fuel supply and return hoses, and tighten the unions, as applicable.
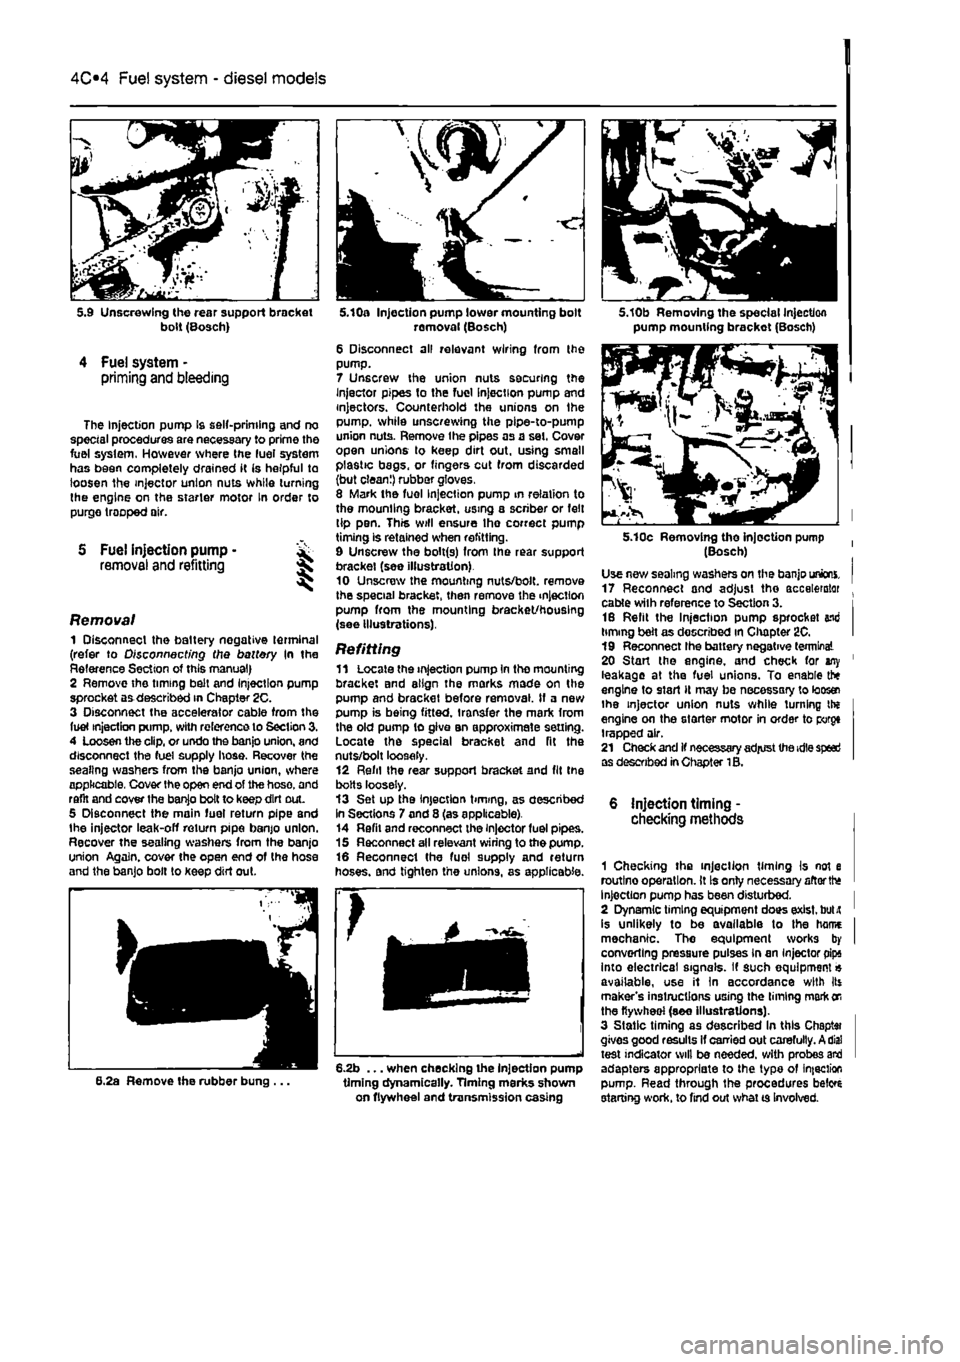
6.2b ... when checking the injection pump timing dynamically. Timing marks shown on flywheel and transmission casing
5.10b Removing the special Injection pump mounting brackot (Bosch)
5.10c Removing tho injection pump (Bosch) Use new sealing washers on the banjo unions. 17 Reconnect and adjust the accelerator . cable with reference to Section 3. i 16 Refit the Injection pump sprocket end timing belt as described in Chapter 2C. I 19 Reconnect Ihe battery negative terminal 20 Start the engine, and check for any ' leakage at the fuel unions. To enable the engine to start It may be necessary to loos® the injector union nuts while turning the engine on the starter motor in order to porgt trapped air. 21 Check and if necessary adjust the idle speed as described in Chapter 1B.
6 injection timing -checking methods
1 Checking the injection timing Is not e routlno operation. It Is only necessary aftorth* Injection pump has been disturbed. I 2 Dynamic timing equipment does exist, bulit ' is unlikely to be available to the hame I mechanic. Tho equipment works by I converting pressure pulses in an Injector pips into electrical signals. If such equipment« available, use it In accordance with Its maker's instructions using the liming mark
on
the flywheel (see illustrations). 3 Static timing as described In this Chaptai gives good results If carried out carefully. A dial test indicator will be needed, with probes and adapters appropriate to the typo of infection pump. Read through the procedures beto starting work, to find out what ts Involved.
Page 149 of 225
5A«2 Starting and charging systems
1 General information and precautions
General information The engine electrical system consists mainly of the charging and starting systems. Because of their engine-related functions, these components are covered separately from the body electrical devices such as the Ilght3, Instalments, etc (which are covered In Chapter 12). On petrol engine models refer to Part B for information on the ignition system, and on diesel models refer to Part C for information on the preheating system. The electncal system Is of 12-volt negative earth type. The battery fitted as original equipment is of maintenance* free (sealed for life} type and Is charged by the alternator, which is belt-driven from the crankshaft pulley. If a non-original battery is fitted It may be of standard or low maintenance type. The starter motor is of the pre-engaged type Incorporating an integral solenoid. On starting, the solenoid moves the drive pinion into engagement with the flywheel ring gear before the starter motor is energised. Once the engine has started, a one-way clutch prevents the motor armature being driven by the engine until the pinion disengages from the flywheel.
Precautions Further details of the various systems are given In the relevant Sections of this Chapter. While some repair procedures are given, the usual course of action is to renew the component concerned. The owner whose interest extends beyond mere component renewal should obtain a copy of the Automobile Electrical & Electronic Systems Manual, available from the publishers of this manual It Is necessary to take extra care when working on the electrical system to avoid damage to semiconductor devices (diodes and transistors), and to avoid the risk of personal injury. In addition to the precautions given in Safety first! at the beginning of this manual, observe the following when working on the system: Always remove rings, watches, etc before working on the electrical system. Even with the battery disconnected, capacitlve discharge could occur If a component's live terminal is earthed through a metal object. This could cause a shock or nasty bum. Do not reverse the battery connections. Components such as the alternator, electronic control units, or any other components having semi-conductor circuitry could be irreparably damaged. If the engine is being started using jump leads and a slave battery, connect the batteries positive-to-posibve and negative-to-
negative (see Jump starting). This also applies when connecting a battery charger but In this case both of the battery terminals should first be disconnected. Never disconnect the battery terminals, the alternator, any electrical wiring or any test Instalments when the engine Is running. Do not allow the engine to turn the alter-nator when the alternator Is not connected. Never test for alternator output by flashing the output lead to earth. Never use an ohmmeter ot the type Incorporating a hand-cranked generator for circuit or continuity testing. Always ensure that the battery negative lead is disconnected when working on the electrical system. Before using electric-arc welding equipment on the car, disconnect the battery, alternator and components such as the fuel Injection/ignition electronic control unit to protect them from the risk of damage. Several systems fitted to the vehicle require battery power to be available at all times, either to ensure their continued operation (such as the clock) or to maintain control unit memories or security codos which would be wiped if the battery were to be disconnected. To ensure that there are no unforeseen consequences of this action. Refer to Disconnecting the battery In the Reference Section of this manual for further Information.
2 Battery- % testing and charging
Standard and tow maintenance battery - testing 1 If the vehicle covers a small annual mileage, it is worthwhile checking the specific gravity of the electrolyte every three months to determine the state of charge of the battery. Use a hydrometer to make the check and compare the results with the following table, Note that the specific gravity readings assume an electrolyte temperature of 15*C (60'F); for every 10*C (18°f) below 158C (60aF) subtract 0.007, For every 108C (16'F) above 15"C (60'F) add 0.007. Ambient temperature Above 26"C Below 25DC Charged 1,210 to 1£30 1,270 to 1.290 70% charged 1.170to1.l90 1.230to1.250 Discharged 1.050toJ.070 1.110 to 1.130 2 If the battery condition is suspect, first check the specific gravity of electrolyte In each cell. A variation of 0.040 or more between any cells indicates loss of electrolyte or deterioration of the internal plates. 3 If the specific gravity variation is 0.040 or more, the battery should be renewed. If the cell variation Is satisfactory but the battery is discharged, it should be charged as described later in this Section.
Maintenance-free battery -testing 4 In cases where a sealed tor life maintenance-free battery is fitted, topplng-up and testing of the electrolyte in each cell Is not possible. The condition of the battery can therefore only be tested using a battery condition Indicator or a voltmeter. 5 Certain models may be fitted with a maintenance-free battery with a built-in charge condition Indicator. The indicator Is located in the top of the battery casing, and indicates the condition of the battery from its colour. If the Indicator shows green, then the battery is In a good state of charge. If the Indicator turns darker, eventually to black, then the battery requires charging, as described later in this Section. If Ihe indicator shows clear/yellow, then the electrolyte level in Ihe battery is too low to allow further use, and tho battery should be renewed. Do not attempt to charge, load or Jump start a battery when the indicator shows dear/yellow. 6 If testing the battery using a voltmeter, connect the voltmeter across the battery and compare the result with those given In the Specifications under 'charge condition'. The test is only accurate if the battery has not been subjected to any kind of charge for the previous six hours. If this is not the esse, switch on the headlights for 30 seconds, then wait four to five minutes baforo testing the battery after switching off the headlights. All other electrical circuits must be switched off, so check that the doors and tailgate are fully shut when making the test, 7 It the voltage reading Is less than 12.2 voHs, then the battery Is discharged, whilst a reading of 12.2 to 12.4 volts indicates 8 partially discharged condition. 6 If the battery Is to be charged, remove It from the vehicle (Section 3) and charge it as described later In this Section.
Standard and low maintenance battery - charging Note: The following is Intended as a guide only. Always refer to the manufacturer's recommendations (often printed on a label attached to the battery) before charging a battery. 9 Charge the battery at a rate of 3.5 to 4 amps and continue to charge the battery at this rate until no further rise In specific gravity Is noted over a four hour period. 10 Alternatively, a trickle charger charging at the rate of 1.5 amps can safely be used overnight. 11 Specially rapid boost charges which are claimed to restore the power of the battery in t to 2 hours are not recommended, as they can cause serious damage to the battery plates through overheating, 12 While charging the battery, note that the temperature of the electrolyte should never exceed 37.8*C(100°F),
Page 155 of 225
Ignition system - petrol models 5B®3
Chapter 1A tor further information. Also check tnat tha accelerator cable is correctly adjusted
as
described in the relevant part of Chapter 4. If the engine is running very roughly, check the compression pressures and the valve clearances as descnbed In the relevant parts of Chapters 1 and 2. 2
H
these checks fall to reveal the cause of the problem, the vehicle should be taken to a suitably equipped Fiat dealer for testing. A wiring block connector Is Incorporated in the engine management circuit Into which a special electronic diagnostic tester can be plugged. The tester will locate the fault quickly and simply alleviating the need to test all the system components Individually which is a time consuming operation that carries a high risk of damaging the ECU. 3 The only Ignition system checks which can
oe
earned out by the home mechanic are those cescribed in Chapter 1A, relating to the spark plugs, and the ignition coll test descnbed In this Chapter. If necessary, the system wiring and wiring connectors can oe checked as descnbed in Chapter 12, Section 2, ensuring that the ECU wiring connector(s) have first
been
disconnected.
3 Ignition HT coil - ^ removal, testing and refitting
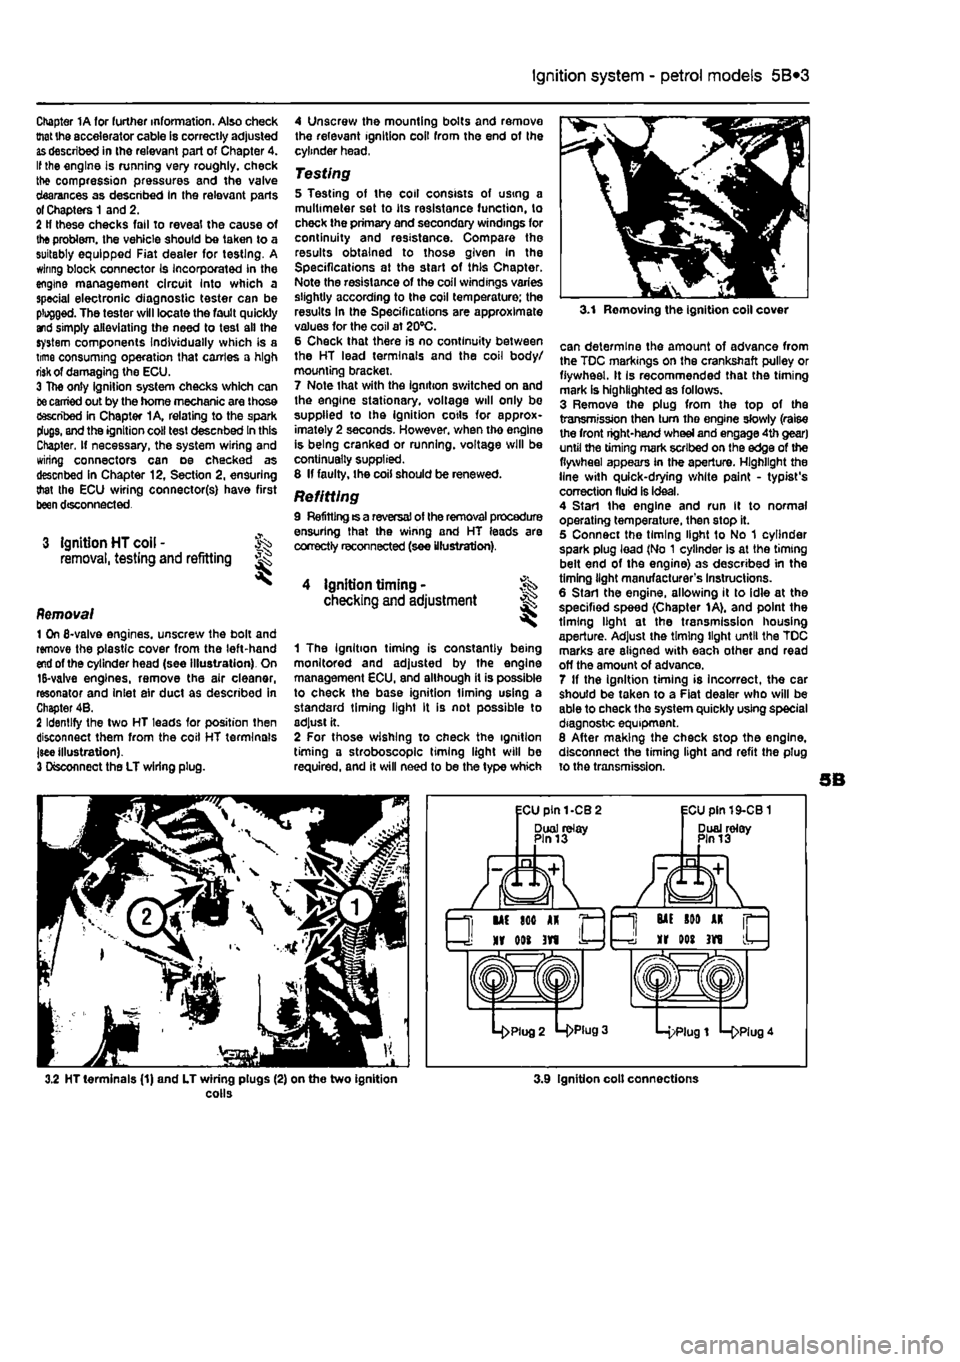
Removal 1 On 6-valve engines, unscrew the boll and remove the plastic cover from the left-hand
end
of the cylinder head (see Illustration). On 15-valve engines, remove the air cleaner, resonator and Inlet air duct as described in Chapter 4B. 2 Identify the two HT leads for position then disconnect them from the coil HT terminals jsee illustration). 3 Disconnect the LT wiring plug.
4 Unscrew the mounting bolts and remove the relevant ignition coil from the end of the cylinder head,
Testing 5 Testing of the coil consists of using a multimeter set to its resistance function, to check the primary and secondary windings for continuity and resistance. Compare the results obtained to those given In the Specifications at the start of this Chapter. Note the resistance of the coil windings varies slightly according to the coil temperature; the results In the Specifications are approximate values for the coil at 20°C. 6 Check that there is no continuity between the HT lead terminals and the coil body/ mourning bracket. 7 Note that with the ignition switched on and the engine stationary, voltage will only be supplied to the ignition cotls for approx-imately 2 seconds. However, when tho engine is being cranked or running, voltage will be continually supplied. 8 If faulty, the coil should be renewed.
Refitting 9 Refitting ts a reversal of the removal procedure ensuring that the winng and HT leads are correctly reconnected (see illustration).
4 ignition timing • checking and adjustment
1 The Ignition timing is constantly being monitored and adjusted by the engine management ECU, and although it is possible to check the base ignition liming using a standard timing light It is not possible to adjust it. 2 For those wishing to check the ignition timing a stroboscope timing light will be required, and it will need to be the type which
3.1 Removing the ignition coll cover
can determine the amount of advance from the TDC markings on the crankshaft pulley or flywheel. It Is recommended that the timing mark is highlighted as follows. 3 Remove the plug from the top of the transmission then turn tho engine slowly (raise the front right-hand wheel and engage 4th gear) until the timing mark scribed on the edge of the flywheel appears in the aperture. Highlight the line with quick-drying white paint - typist's correction fluid is ideal. 4 Start the engine and run It to normal operating temperature, then stop it. 5 Connect the timing light to No 1 cylinder spark plug lead (No 1 cylinder Is at the timing belt end of the engine) as described in the timing light manufacturer's Instructions. 6 Start the engine, allowing it to idle at the specified speed (Chapter 1A), and point the timing light at the transmission housing aperture. Adjust the timing light until the TDC marks are aligned with each other and read off the amount of advance. 7 If the ignition timing is incorrect, the car should be taken to a Fiat dealer who will be able to check the system quickly using special diagnostic equipment. 8 After making the check stop the engine, disconnect the timing light and refit the plug to the transmission.
3.2 HT terminals (1) and LT wiring plugs (2) on the two ignition colls 3.9 Ignition colt connections
Page 158 of 225
6*1
Chapter 6
Clutch
Contents
Clutch - adjustment Clutch assembly - removal, inspection and refitting Clutch cable • removal and refitting Clutch hydraulic system - bleeding
Degrees of difficulty
2 Clutch master cylinder • removal and refitting 5 7 Clutch release mechanism - removal, Inspection and refitting 8 3 Clutch slave cylinder - removal and refitting 6 4 General information 1
Easy, suitable for
novice with little experience oi^
Faidy easy,
suitable for beginner
with
^
some
experience
Fairly difficult, suitable
for
competent ^
DIY
mechanic ^
Difficiit, suitable for ^ experienced DIY JR mechanic ^
V<*y difficult,
jk
suitable
for expert
DIY
« or professional ^
Specifications
General Type
Clutch pedal travel (cable-operated mechanism)
Friction plate diameter 8-valve petrol engines 16-valve petrol engines Diesel engines
Torque wrench setting Pressure plate retaining bolts
Single dry plate with diaphragm spring, cable- or hydraullcally-operated according to model 140.0 ± 5.0 mm
181.5 mm 190.0 mm 200.0 mm
Nm Ibf ft 16 12
1 General information
Vehicles with manual transmission are fitted with a pedal operated single dry plate clutch system. When the clutch pedal is depressed, effort is transmitted to the clutch release mechanism either mechanically by means of a cable, or hydraullcally by means of a master
2.5 Clutch cable adjustment
cylinder and slave cylinder. The release mechanism transfers effort to Ihe pressure plate diaphragm spring, which withdraws the pressure plate from the flywheel and releases the driven plate-Where applicable, the hydraulic fluid employed in the clutch system is the same as that used in the braking system, hence fluid is supplied to the master cylinder from a tapping on the brake fluid reservoir. The clutch hydraulic system must be sealed before work Is carried out on any of its components and then on completion, topped up and bled to remove any air bubbles.
2 Clutch - % adjustment §§ ^
Note: This procedure applies to models fitted with a cable-operated dutch
release
mechanism. No adjustment is possible on models with the hydrauHcaSy-operated system. 1 The clutch adjustment Is checked by measuring the clutch pedal travel. If a new cable has been fitted, settle it in position by depressing the clutch pedal at least thirty times. 2 Ensure that there are no obstructions
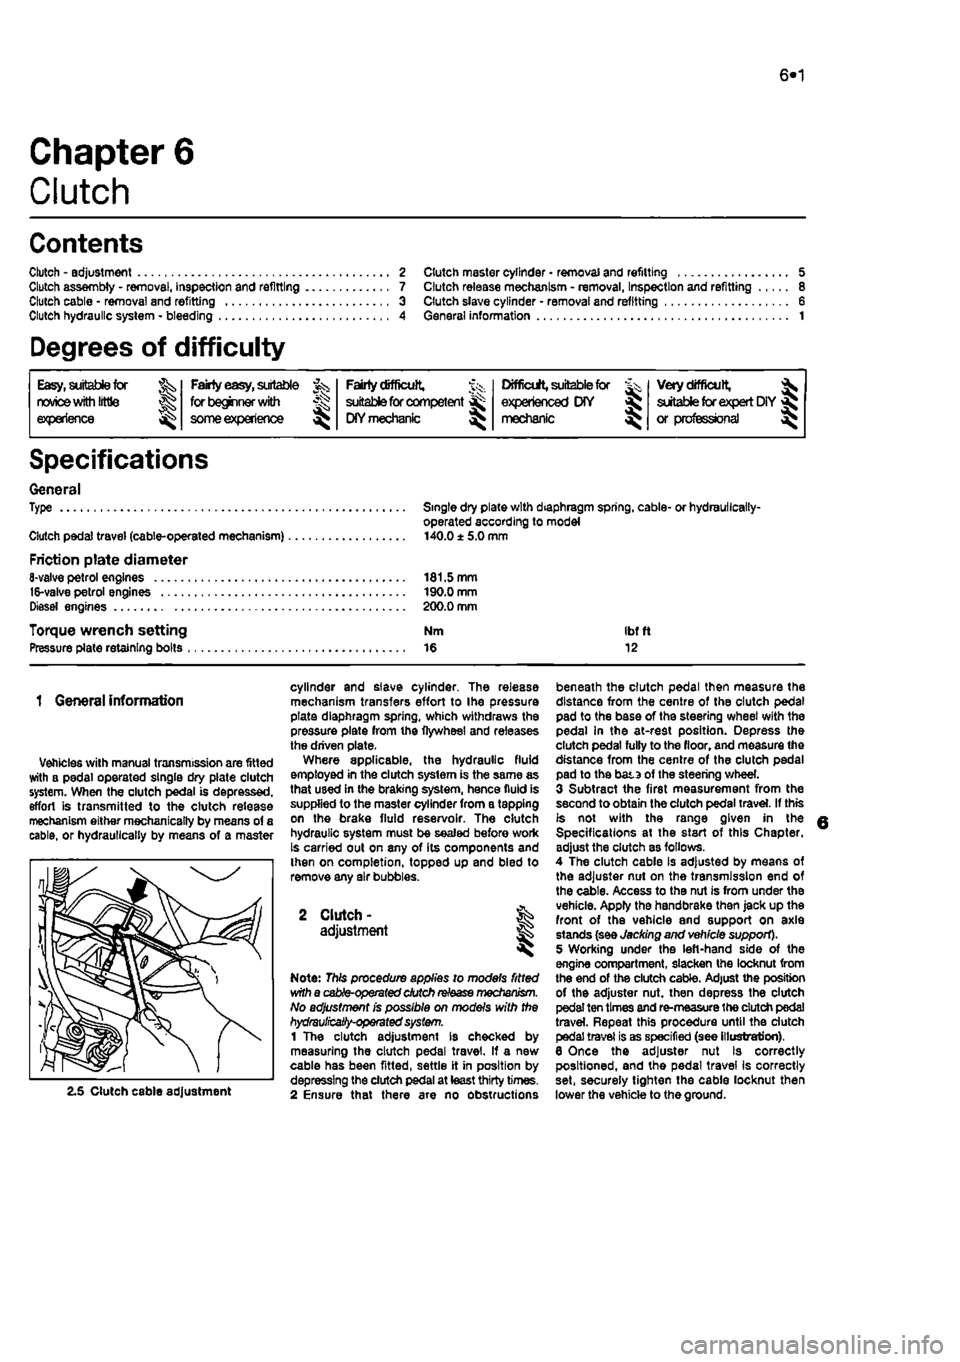
beneath the clutch pedal then measure the distance from the centre of the clutch pedal pad to the base of the steering wheel with the pedal In the at-rest position. Depress the clutch pedal fully to the floor, and measure the distance from the centre of the clutch pedal pad to the bata of the steering wheel. 3 Subtract the first measurement from the second to obtain the clutch pedal travel. If this is not with the range given in the Specifications at the start of this Chapter, adjust the clutch as follows. 4 The clutch cable Is adjusted by means of the adjuster nut on the transmission end of the cable. Access to the nut is from under the vehicle. Apply the handbrake then jack up the front of the vehicle and support on axle stands (see Jacking and vehicle support). 5 Working under the left-hand side of the engine compartment, slacken the locknut from the end of the clutch cable. Adjust the position of the adjuster nut. then depress the clutch pedal ten times and re-measure the dutch pedal travel. Repeat this procedure until the clutch pedal travel is as specified (see illustration). 6 Once the adjuster nut Is correctly positioned, and the pedal travel Is correctly set, securely tighten the cable locknut then lower the vehicle to the ground.
Page 160 of 225
Clutch 6*3
6 WorWng inside the vehicle, extract the split pin and remove the washer securing the master cylinder pushrod to the clutch pedal. Dsoonnect the pushrod from the pivot. 7 Have an assistant support the master cylinder In the engine compartment, then unscrew the mounting bolts. Withdraw the master cylinder from the engine compartment, 8 II is not possible to obtain an overhaul kit from Flat however some motor factors may be abls to supply one. Follow the Instructions with the repair kit if obtained.
Refitting 9 Refit the clutch master cylinder by following ihe removal procedure In reverse, noting the following. a) Apply a
Utile
high-melting point grease to the clutch pedal pivot. b) Tighten the mounting bolts and union nut securely. cj Fit a new split pin to the pushrod. d) Where removed, refit the alternator
as
described In Chapter 5A e) On completion bleed the clutch hydraulic system as descnbed in Section
A.
7 Clutch assembly -
removal,
inspection
and
refitting
S Clutch slave cylinder-removal and refitting
Note: This procedure applies to models fitted
ivrth
the hydraulically-operated clutch release mechanism. Note: Refer to the warning at the beginning
of
Section A regarding the hazards of working
with
hydraulic fluid.
Removal 1 Remove the battery and battery tray as described in Chapter 5A. 2 Fit a brake hose clamp to tha hose leading to the clutch slave cylinder. 3 Unscrew the union nut and disconnect the hydraulic pipe from the slave cylinder. Be prepared for some fluid loss by placing rags beneath the cylinder. 4 Unscrew the mounting bolts and release the slave cylinder pushrod from the release am on the transmission, then remove the unit from the engine compartment (see Illustration). 5 It is not possible to obtain an overhaul kit from Flat however some motor factors may be able to supply one. Follow tha instructions with the repair kit if obtained.
Refitting 6 Refit the clutch slave cylinder by following the removal procedure In reverse, noting the following. a) Apply a little high-melting point grease to the tip of the slave cylinder pushrod. b) Tighten the mounting bolts and union nut securely. c) On completion bleed the dutch hydraulic system as described in Section A.
A
Warning: Dust created by clutch wear and deposited on the clutch components may contain asbestos, which Is a health hazard. DO NOT blow it out with compressed air, or inhale any of it. DO NOT use petrol or petroleum-based solvents to clean off the dust. Brake system cleaner or methylated spirit should be used to flush the dust Into a suitable receptacle. After the clutch components are wiped clean with rags, dispose of the confam/nafed rags and cleaner In a sealed, marked container. Note: Although some friction materials may no longer contain asbestos, it is safest to assume that they DO. and to take precautions accordingly.
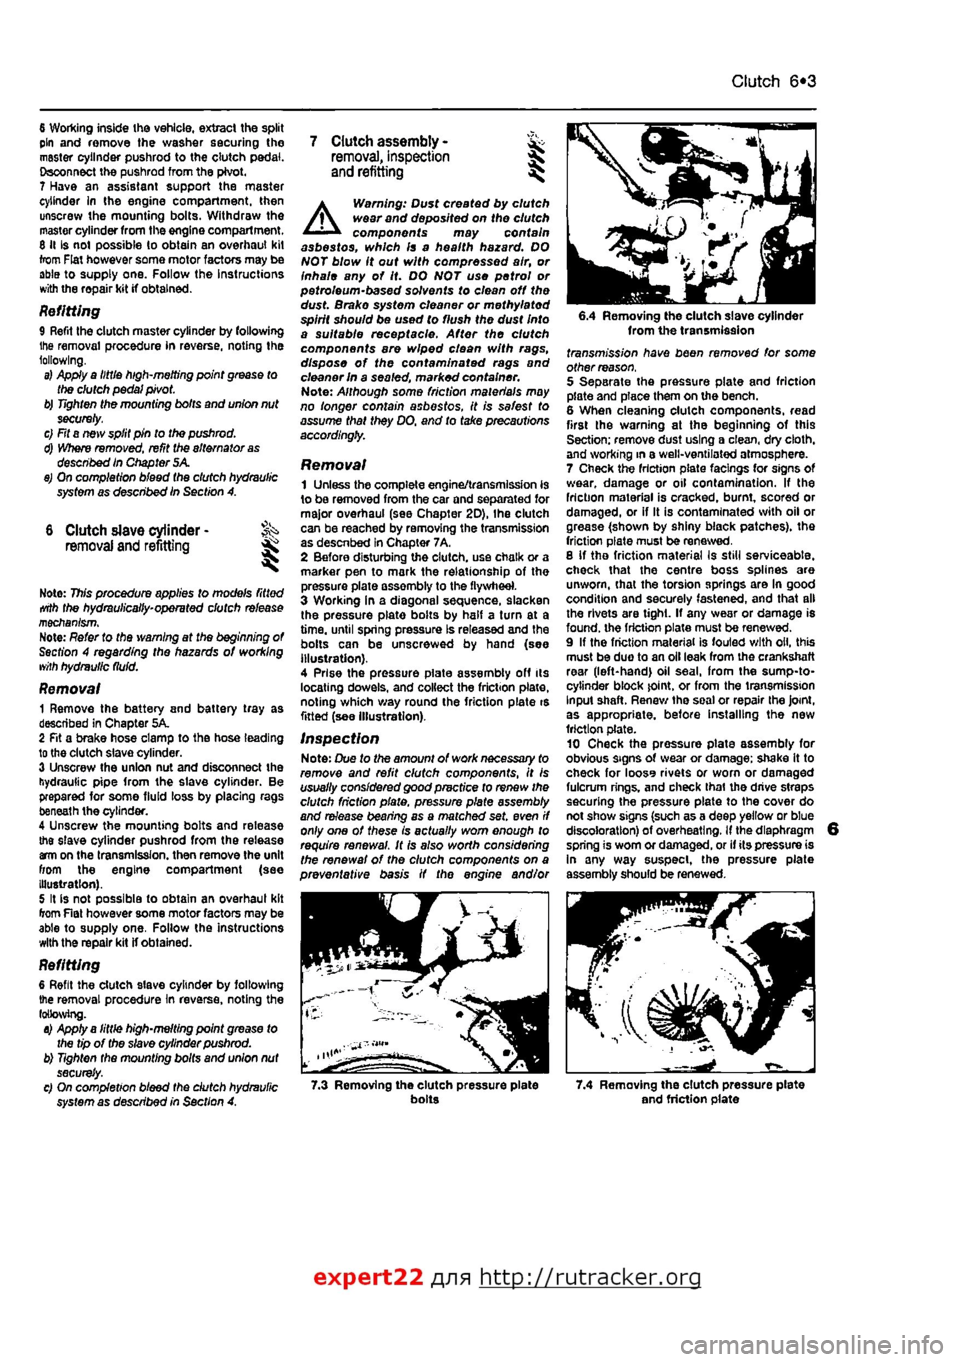
Removal 1 Unless the complete engine/transmission is to be removed from the car and separated for major overhaul (see Chapter 2D), Ihe clutch can be reached by removing the transmission as descnbed in Chapter 7A, 2 Before disturbing the clutch, use chalk or a marker pen to mark the relationship of the pressure plate assembly to the flywheel. 3 Working In a diagonal sequence, slacken the pressure plate bolts by half a turn at a time, until spring pressure Is released and the bolls can be unscrewed by hand (see Illustration). 4 Prise the pressure piate assembly off its locating dowels, and collect the friction plate, noting which way round the friction plate is fitted (see Illustration).
Inspection Note: Due to the amount of work necessary to remove and refit clutch components, It is usually considered good practice to renew the clutch friction plate, pressure plate assembly and release bearing as a matched set. even if only one of these is actually worn enough to require renewal. It Is also worth considering the renewal of the clutch components on a preventative basis if the engine and/or
6.4 Removing the clutch slave cylinder from the transmission fransmj'ss/on have been removed for some other reason. 5 Separate the pressure plate and friction plate and place them on the bench. 6 When cleaning clutch components, read first the warning at the beginning of this Section; remove dust using a clean, dry cloth, and working in a well-ventilated atmosphere. 7 Check the friction plats facings for signs Of wear, damage or oil contamination. If the friction material is cracked, burnt, scored or damaged, or if It is contaminated with oil or grease (shown by shiny black patches), the friction plate must be renewed. 8 If tho friction material Is still serviceable, check that the centre boss splines are unworn, that the torsion springs are In good condition and securely fastened, and that all the rivets are tight. If any wear or damage is found, the friction plate must be renewed. 9 If the friction material is fouled with oil, this must be duo to an oil leak from the crankshaft rear (left-hand) oil seal, from the sump-to-cytinder block joint, or from the transmission Input shaft. Renew tha soal or repair the Joint, as appropriate, before Installing the new friction plate. 10 Check tha pressure plate assembly for obvious signs of wear or damage; shake it to check for looss rivets or worn or damaged fulcrum rings, and check thai the drive straps securing the pressure plate to the cover do not show signs (such as a deep yellow or blue discoloration) of overheating. If the diaphragm spring is worn or damaged, or if its pressure is In any way suspect, the pressure plate assembly should be renewed.
7.3 Removing the clutch pressure plate bolts 7.4 Removing the clutch pressure plate and friction plate
expert22 {
a http://rutracker.org
Page 161 of 225
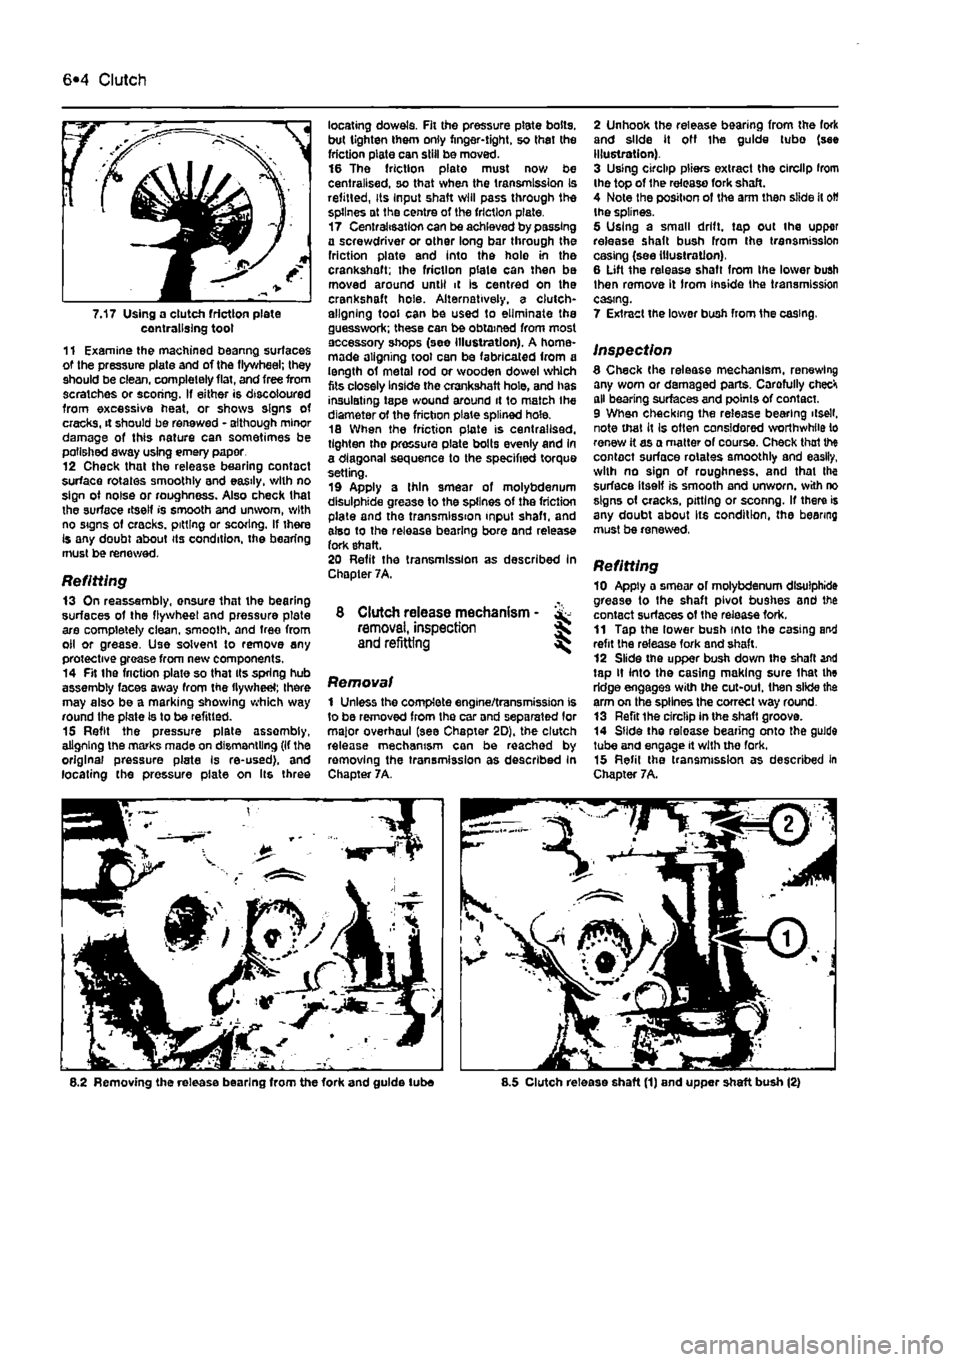
6*4 Clutch
7.17 Using a clutch friction plate centralising toot 11 Examine the machined beanng surfaces of the pressure plate and of the flywheel; they should be clean, completely flat, and free from scratches or scoring. If either is discoloured from excessive heat, or shows signs of cracks, it should be renewed - although minor damage of this nature can sometimes be polished away using emery paper 12 Check that the release bearing contact surface rotates smoothly and easily, with no sign of noise or roughness. Also check that the surface itself is smooth and unworn, with no signs of cracks, pitting or scoring. If there Is any doubt about its condition, the bearing must be renewed.
Refitting 13 On reassembly, onsure that the bearing surfaces of the flywheel and pressure plate are completely clean, smoolh. and tree from oil or grease. Use solvent to remove any protective grease from new components. 14 Fit the friction plate so that its spring hub assembly faces away from the flywheel; there may also be a marking showing which way round the plate Is to be refitted. 15 Refit the pressure plate assembly, aligning the marks made on dismantling (If the original pressure plate Is re-used), and locating the pressure plate on Its three
locating dowels. Fit the pressure plate bolts, but tighten them only finger-tight, so thai the friction plate can skill be moved. 16 The friction plate must now be centralised, so that when the transmission Is refitted, Its Input shaft will pass through the splines at the centre of the friction plate. 17 Centralisation can be achieved by passing a screwdriver or other long bar through the friction plate and into the holo in the crankshaft; the friction plate can then be moved around until it is centred on the crankshaft hole. Alternatively, a clutch-aligning tool can be used to eliminate the guesswork; these can be obtained from most accessory shops (see illustration). A home-made aligning tool can be fabricated from a length of metal rod or wooden dowel which fits closely Inside the crankshaft hole, and has insulating tape wound around it to match Ihe diameter of the friction plate splined hole. 18 When the friction plate is centralised, tighten tho pressure plate bolts evenly and In a diagonal sequence to the specified torque setting. 19 Apply a Ihin smear of molybdenum dlsulphide grease to the splines of the friction plate and the transmission input shaft, and also to the release bearing bore and release fork shaft. 20 Refit the transmission as described In Chapter 7A.
8 Clutch release mechanism - & removal, inspection J and refitting ^
Removal 1 Unless the complete engine/transmission is to be removed from the car and separated lor major overhaul (see Chapter 2D), the clutch release mechanism can be reached by removing the transmission as described In Chapter 7A.
2 Unhook the release bearing from the fork and slide it off Ihe guide tubo (see illustration). 3 Using circlip pliers extract the circllp Irom the top of the release fork shaft. 4 Note the position of the arm then slide it
oW
the splines. 5 Using a small drift, tap out the upper release shaft bush from the transmission casing (see illustration). 6 Lift the release shaft from Ihe lower bush then remove it Irom inside Ihe transmission casing.
7 Extract the lower bush from 1he casing.
inspection 8 Check (he release mechanism, renewing any worn or damaged parts. Carofully checH all bearing surfaces and points of contact. 9 When checking the release bearing ilsell. note that it Is often considered worthwhile to renew it as a matter of course. Check thai the contact surface rotates smoothly and easily, with no sign of roughness, and that Ihe surface itself is smooth and unworn, with no signs of cracks, pitting or sconng. If there is any doubt about Its condition, the bearing must be renewed, Refitting 10 Apply a smear of molybdenum dlsulphide grease to the shaft pivot bushes and the contact surfaces of the release fork. 11 Tap the lower bush into the casing and refit the release fork and shaft. 12 Slide the upper bush down the shaft and tap it into the casing making sure lhat the ridge engages with the cut-out. then slide the arm on the splines the correct way round. 13 Refit the circlip in the shaft groove. 14 Slide the release bearing onto the guide tube and engage it with the fork. 15 Refil the transmission as described in Chapter 7A.
8.2 Removing the release bearing from the fork and guide lube 8.5 Clutch release shaft (1) and upper shaft bush (2)
Page 166 of 225
7B«1
Chapter 7 Part B:
Automatic transmission
Contents
Accelerator pedal micro-switch(es) - checking and adjustment II Automatic transmission filter and fluid change See Chapter 1A Automatic transmission fluid level check See Weekly checks Automatic transmission • overhaul 12 Automatic transmission • removal and refining 2 Bectro-magnetic clutch - removal, inspection and refitting 3 BectrO'fnagnetic clutch brushes- removal, inspection and refitting . 4
Electronic control unit - removal and refitting 5 Gear selector cable - adjustment 6 Gear selector cable - removal and refitting 9 General information 1 Kickdown cable - adjustment 7 Kickdown cable - removal and refitting 6 Transmission oil pump - removal and refitting 10
Degrees of difficulty
Easy,
suitable for novice
with
ittle experience ^
Party
easy,
suitable for beginner
with
^r someexperienoe ^
Faiily
difficult,
^ suitable
for
competent
DIY mechanic
^
Difficult, suitable
for fe, experienced DIY >8J mechanic
Verydfficult, ^
suitable
for
expert DIY
or professional ^
Specifications
General Type Ratios (at transmission): Lowest Highest Final drive
Torque wrench settings Esnh cable Control unit Sectro-magnetic clutch to flywheel Transmission-to-engine bolt/nut ..
ECVT (Electronic Continuously Variable Transmission)
2.503 0.497 4.647:1
Nm Ibftt 14 10 5 4 34 25 85 63
1 Genera) information
I The automatic transmission fitted is designated ECVT (Electronic Continuously Variable Transmission). The main components
01
the transmission are an electro-magnetic dutch, a variable-ratio coupling, a final drive/ differential unit, and the associated control mechanisms (see illustrations overleaf) 2 The variable-ratio coupling consists of two pulleys and a flexible metal drivebelt. The effective diameter of the two pulleys can be varied to provide different transmission ratios between them. 3 During normal driving, the transmission automatically selects the ratio giving the best
compromise between economy and speed. When the driver depresses the accelerator pedal to the floor, a kickdown effect is provided, and the transmission selects a lower ratio for improved acceleration. 4 The gear selector control resembles that fitted to conventional automatic transmissions. The control positions are as follows: P (Parking) The transmission is mech-anically locked by the engage-ment of a pawl with a toothed segment on the driven pulley. R (Reverse) Reverse gean's engaged, N (Neutral) The transmission is In neutral. D (Drive) Normal driving position. Trans-mission ratio is varied automat-ically to suit prevailing speed and load.
L (Low) Prevents the transmission
moving into high ratios. Provides maximum acceleration end maximum engine braking. 5 The engine can only be started In positions P and N. A warning buzzer sounds If the selector is in any position other than P when the ignition is switched off or when the driver's door is opened. 6 The electro-magnetic clutch consists of a driving element boiled to the engine flywheel, and a driven element spiined to the transmission Input shaft. The degree of coupling between the (wo elements Is determined by the intensity of a magnetic field generated by a current passing through windings in the driven element. The magnetic field acts on a layer of metallic powder between the driving and driven elements. When no magnetic field is present, the powder is loose and the two elements are effectively