Instrument FIAT PUNTO 1998 176 / 1.G Workshop Manual
[x] Cancel search | Manufacturer: FIAT, Model Year: 1998, Model line: PUNTO, Model: FIAT PUNTO 1998 176 / 1.GPages: 225, PDF Size: 18.54 MB
Page 26 of 225
Maintenance procedures - petrol models ia./
Every 5000 miles (7500 km) or 6 months
3 Engine oil and filter renewal Ja*
1 Frequent oil and filter changes are the most important preventative maintenance which can be undertaken by the DIY owner. As engine oil ages, it becomes diluted and contaminated, which leads to premature engine wear. 2 Before starting this procedure, gather all Ihe necessary tools and materials. Also make sure that you have plenty of clean rags and newspapers handy, to mop up any spills. Ideally, the engine oil should be warm, as It
will
drain better, and more built-up sludge will
be
removed with it. Tske care, however, not to touch the exhaust or any other hot parts of the engine when working under the vehicle. To avoid any possibility of scalding, and to protect yourself from possible skin irritants end other harmful contaminants in used engine oils, it Is advisable to wear gloves when carrying out this work. Access to the underside of the vehicle will be greatly Improved if it can be raised on a lift, driven onto ramps, or jacked up and supported on axle stands (see Jacking and vehicle support). Whichever method is chosen, make sure that
the
vehicle remains level, or if it is at an angle, that the drain plug Is at the lowest point. 3 Slacken the drain plug about half a turn using an Allen key. Position the draining container under the drain plug, then remove
the plug
completely (see Haynes Hint). 4 Allow some time for the old oil to dram, noting that it may be necessary to reposition
the
container as the oil flow slows to a trickle. 5 After all the oil has drained, wipe off the drain plug with a clean rag, then clean the area around the drain plug opening and refit
(MB
HiNT '
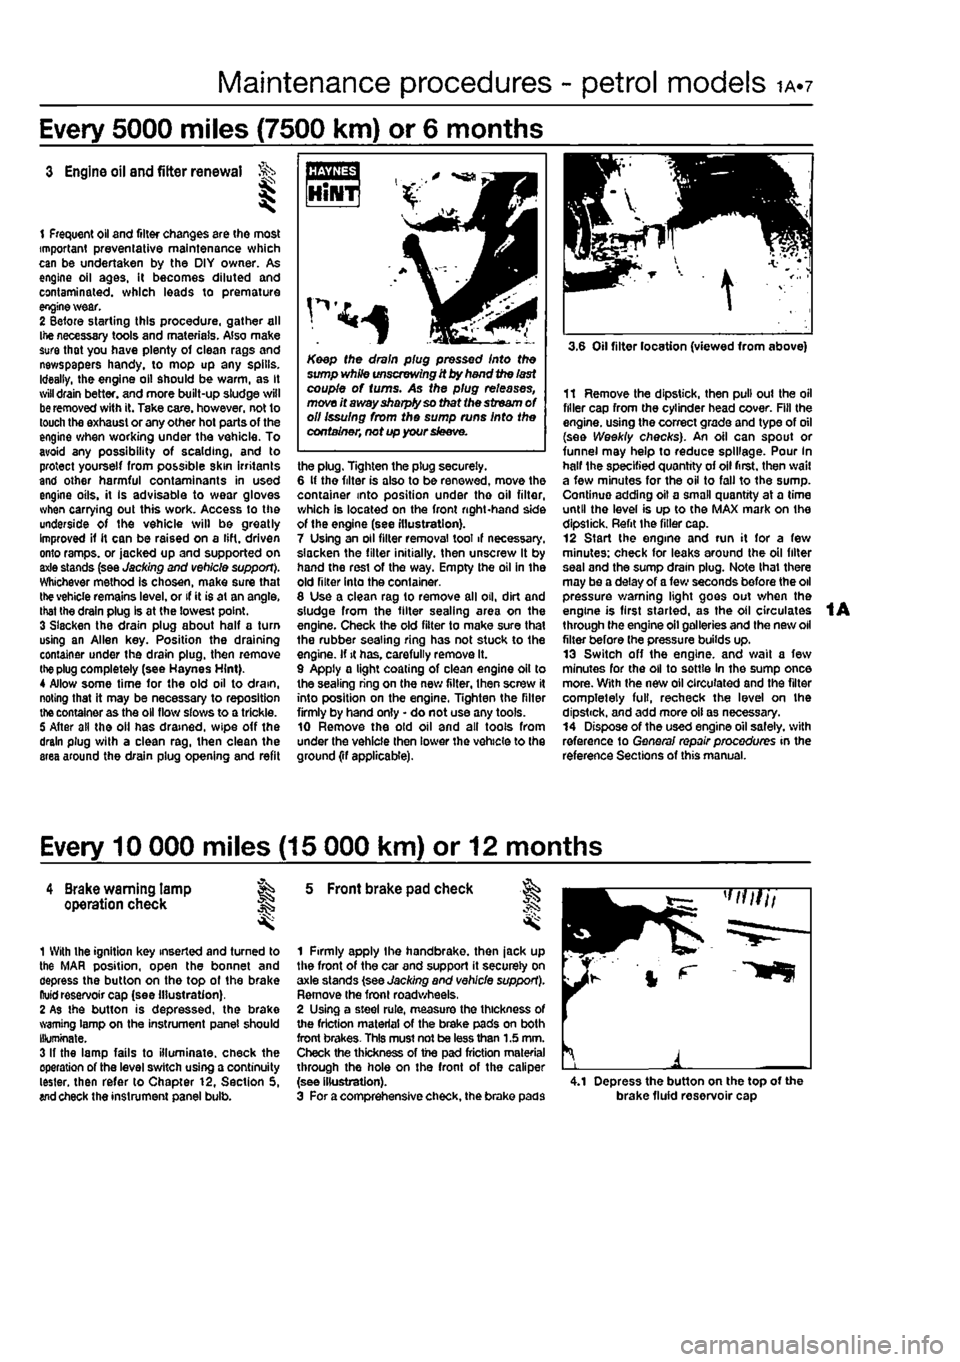
Keep the drain plug pressed Into the sump white unscrewing it by hand the last couple of turns. As the plug releases, move it away sharply so that the stream
of
oil Issuing from the sump runs into the container, net up your sleeve.
the plug. Tighten the plug securely. 6 It the filter is also to be renewed, move the container into position under tho oil filter, which is located on the front right-hand side of the engine (see illustration). 7 Using an oil filter removal tool if necessary, slacken the filter initially, then unscrew It by hand the rest of the way. Empty the oil in the old filter into the container. 8 Use a clean rag to remove all oil, dirt and sludge from the filter sealing area on the engine. Check the old filter to make sure that the rubber sealing ring has not stuck to the engine. If it has. carefully remove It. 9 Apply a light coating of clean engine oil to the sealing ring on the new filter, then screw it into position on the engine. Tighten the filter firmly by hand only • do not use any tools. 10 Remove the old oil and all tools from under the vehicle then lower the vehicle to the ground (if applicable).
3.6 Oil filter location (viewed from above)
11 Remove the dipstick, then pull out the oil filler cap from the cylinder head cover. Fill the engine, using the correct grade and type of oil (see Weekly checks). An oil can spout or funnel may help to reduce spillage. Pour In half the specified quantity of oil first, then wail a few minutes for the oil to fall to the sump. Continue adding oil a small quantity at a time until the level is up to the MAX mark on the dipstick. Refit the filler cap. 12 Start the engine and run it for a few minutes: check for leaks around the oil filter seal and the sump drain plug. Note that there may be a delay of a few seconds before the oil pressure warning light goes out when the engine is first started, as the oil circulates through the engine oil galleries and the new oil filter before (he pressure builds up. 13 Switch off the engine, and wait a few minutes for the oil to settle In the sump once more. With the new oil circulated and the filter completely full, recheck the level on the dipstick, and add more oil as necessary. 14 Dispose of the used engine oil safely, with reference to General repair procedures in the reference Sections of this manual.
Every 10 000 miles (15 000 km) or 12 months
4 Brake warning lamp ag operation check J§
1 With the ignition key inserted and turned to the MAR position, open the bonnet and depress the button on the top of the brake ftuid reservoir cap (see illustration). 2 As the button is depressed, the brake warning lamp on the instrument panel should Illuminate. 3 If the lamp fails to illuminate, check the operation of the level switch using a continuity tester, then refer to Chapter 12, Section 5, wd check the instrument panel bulb.
5 Front brake pad check
1 Firmly apply the handbrake, then jack up the front of the car and support it securely on axle stands (see Jacking and vehicle support). Remove the front roadwheels, 2 Using a steel rule, measure the thickness of the friction material of the brake pads on both front brakes- This must not be less than 1.5 mm. Check the thickness of the pad friction material through the hole on the front of the caliper (see illustration). 3 For a comprehensive check, the brake pads 4.1 Depress the button on the top of the brake fluid reservoir cap
Page 32 of 225
Every 20 000 miles - petrol models 1A.13
20 Ignition system check
81
21 Engine management system check
A
Warning: Voltages produced by an electronic ignition system are considerably higher than those produced by conventional ignition systems. Extreme care must be taken when working on the system with the Ignition switched on. Persons with surgically-Implanted cardiac pacemaker devices should keep well clear of the ignition circuits, components and test oquipment. 1 The ignition system components should be checked for damage or deterioration as follows.
General component check 2 The spark plug (HT) leads should be checked whenever new spark plugs are fitted. 3 Pull the leads from the plugs by gripping
the end
fitting, not the lead, otherwise the lead connection may be fractured.
Ensure that the leads are i numbered before removing i them, to avoid confusion when refitting
4 Check Inside the end fitting for signs of corrosion, which will look like a white crusty powder. Push the end fitting back onto the spark plug, ensuring that it is a tight fit on the plug. if not, remove the lead again and use pliers to carefully crimp the metal connector inside the end fitting until it fits securely on the
end
of the spark plug. 5 Using a clean rag, wipe Ihe emlre length of the lead to remove any built-up dirt and grease. Once the lead is clean, check for bums, cracks and other damage. Do not bend the lead excessively, nor pull the lead lengthways - the conductor inside might break. 6 Disconnect the other end of the lead from the ignition coll. Again, pull only on the end fitting. Check for corrosion and a tight fit in the
same
manner as the spark plug end. Refit the bad securely on completion. 7 Check the remaining leads one at a time, in
ihe same
way. 8 if new spark plug (HT) leads are required, purchase a set for your specific car and engine. 9 Even with the ignition system In first-class condition, some engines may still occasionally experience poor starting attributable to damp ignition components. To disperse moisture, a water-dispersant aerosol should be liberally
Ignition timing -
check
and adjustment 10 Check the ignition timing as described In Chapter 58.
1 This check is part of the manufacturer's maintenance schedule, and Involves testing Ihe engine management system using special dedicated test equipment. Such testing will allow the test equipment to read any fault codes stored in the electronic control unit memory. 2 Unless a fault is suspected, this test te not essential, although it should be noted that it is recommended by the manufacturers. 3 If access to suitable test equipment is not possible, make a thorough check of all ignition, fuel and emission control system components, hoses, and wiring, for security and obvious signs of damage. Further details of the fuet system, emission control system and ignition system can be .found In the relevant parts of Chapters 4 and 5.
22 Hinge and lock lubrication %
1
1 Lubricate the hinges of the bonnet, doors and tailgate with a light general-purpose oil. Similarly, lubricate ail latches, locks and lock strikers. At the same time, check the security and operation of all the locks, adjusting them If necessary (see Chapter 11). 2 Lightly lubricate the bonnet release mechanism and cable with a suitable grease.
23 Headlight beam adjustment % & ^
1 Accurate adjustment of the headlight beam is only possible using optical beem-setting equipment, and this work should therefore be carried out by a Fiat dealer or service station with the necessary facilities. In an emergency, however, the following procedure will provide an acceptable light pattern. 2 Position the car on a level surface with tyres correctly inflated, approximately 10 metres in front of. and at right-angles to, a wall or garage door, 3 Draw a horizontal line on the wall or door at headlamp centre height. Draw a vertical line corresponding to the centre line of the car, then measure off a point either side of this, on the horizontal line, corresponding with the headlamp centres. 4 Switch on the main beam and check that the areas of maximum illumination coincide with the headlamp centre marfcs on Ihe wall, if not. turn the adjustment screw located on the upper inside edge of the headlight unit to adjust the beam laterally, and the adjustment screw located on the upper outside edge of the headlight unit to adjust the beam
vertically. On models with electric headlight adjustment, make sure that it is set at its basic setting before making the adjustment.
24 Road test
Instruments and electrical equipment 1 Check the operation of all Instruments and electrical equipment. 2 Make sure that all instruments read correctly, and switch on all electrical equipment in turn, to check that it functions properly.
Steering and suspension 3 Check for any abnormalities in the steering, suspension, handling or road feel. 4 Drive the vehicle, and check that there are no unusual vibrations or noises. 5 Check that the steering feels positive, with no excessive sloppiness, or roughness, and check for any suspension noises when cornering and driving over bumps.
Drivetrain 6 Check the performance of the engine, clutch (where applicable), transmission and driveshafts. 7 Listen for any unusual noises from the engine, clutch and gearbox/transmission. 8 Make sure that the engine runs smoothly when Idling, and that there Is no hesitation when accelerating. 9 Check that, where applicable, the clutch action Is smooth and progressive, that the drive is taken up smoothly, and that the pedal travel is not excessive. Also listen for any noises when the clutch pedal is depressed. 10 On manual gearbox models, check that all gears can be engaged smoothly without noise, and that the gear lever action is not abnormally vsgue or notchy. 11 On automatic transmission models, check that all Ihe gear positions can be selected with the vehicle at rest, if any problems are found, they should be referred to a Flat dealer. 12 Listen for a metallic clicking sound from the front of the vehicle, as the vehicle is driven slowly in a circle with the steering on full-lock. Carry out this check in both directions. If a clicking noise is heard, this Indicates wear in a drtveshaft joint, In which case renew the joint if necessary.
Check the braking system 13 Make sure that the vehicle does not pull to one side when braking, and that the wheels do not lock prematurely when braking hard. 14 Check that there is no vibration through the steering when braking. 15 Check that the handbrake operates correctly without excessive movement of the lever, and that It holds the vehicle stationary on a slope.
Page 43 of 225
Maintenance procedures - diesel models ib.?
Every 10 000 miles (15 000 km) or 12 months
5 Brake warning lamp operation check 1
1 With Ihe ignition Key inserted and turned to the MAR position, open the bonnet and depress the button on the top of the brake
fluid
reservoir cap (see illustration). I
As
the button is pressed, the brake warning
lamp
on the instrument panel should light. 3 If Ihe lamp fails to illuminate, check the operation of the level switch using a continuity taster, then refer to Chapter t2, Section 5,
and
check the Instrument panel bulb.
6 Front brake pad check ^
I
1 firmly apply Ihe handbrake, then jack up the front of the car and support it securely on arie stands (see Jacking and vehicle support). Remove the front roadwheels. 2 Using a steel rule, measure the thickness of
the
friction material of the brake pads on both brakes. This must not be less than 1.5 mm. Ctefc the thickness of the pad friction material through the hole on the front of the caliper
|see
lustration), 3
For a
comprehensive check, the brake pads should be removed and cleaned. The operation of the caliper can then also bo checked, and the condition of the brake disc iteeil can be fully examined on both sides. Refer to Chapter 9 for further Information. 4 If any pad's friction material Is worn to the specified thickness or less, all lour pads must to renewed as a set. Refer to Chapter 9. 5 On completion refit the roadwheels and lower the car to the ground.
7 Underbody sealant check f^
1 Jack up the front and rear of the car and support on axle stands (see Jacking and
vehicle
support). Alternatively position the car over
an
Inspection pit. 2 Check the complete underbody, wheel housings and side sills for corrosion and/or damage to the underbody sealant. If evident,
rapairi
8
Hose
and fluid leak check
1 Visually inspect the engine Joint faces. g3skets and seals for any signs of water or oil leaks. Pay particular attention to the areas
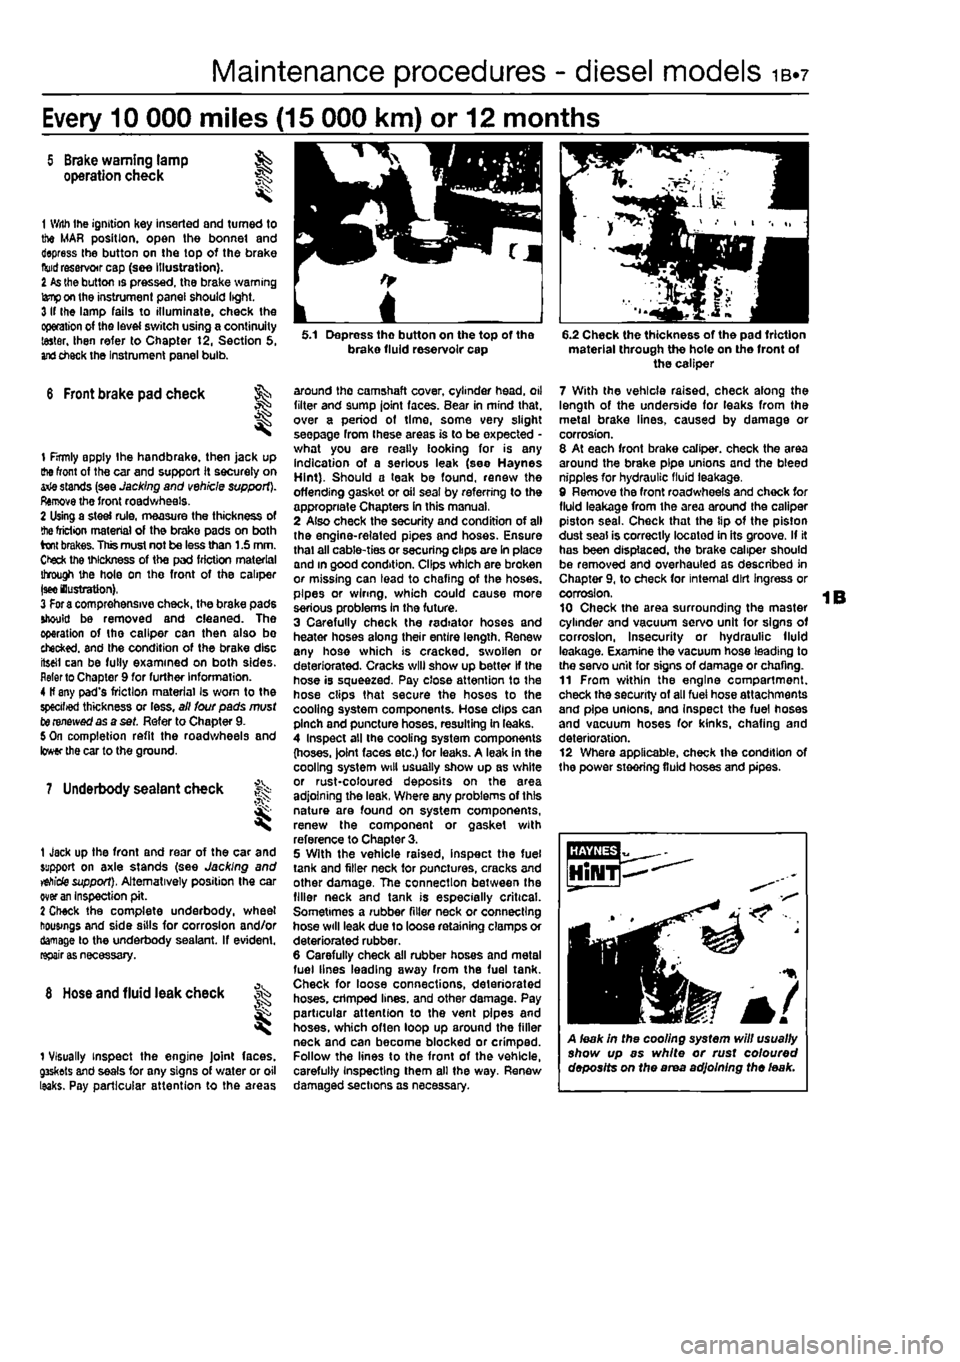
5.1 Depress tho button on the top of the brake fluid reservoir cap
around the camshaft cover, cylinder head, oil filter and sump joint faces. Bear in mind that, over a period of time, some very slight seepage from these areas is to be expected -what you are really looking for is any indication of a serious leak (see Haynes Hint). Should a teak be found, renew the offending gasket or oil seal by referring to the appropriate Chapters In this manual, 2 Also check the security and condition of all the engine-related pipes and hoses. Ensure thai all cable-ties or securing clips are In place and in good condition. Clips which are broken or missing can lead to chafing of the hoses, pipes or wiring, which could cause more serious problems In the future. 3 Carefully check the radiator hoses and heater hoses along their entire length. Renew any hose which is cracked, swollen or deteriorated. Cracks will show up better If the hose is squeezed. Pay close attention to the hose clips that secure the hoses to the cooling system components. Hose clips can pinch and puncture hoses, resulting in leaks. 4 Inspect all the cooling system components (hoses. )olnt faces etc.) for leaks. A leak in the cooling system will usually show up as white or rust-coloured deposits on the area adjoining the leak, Where any problems of this nature are found on system components, renew the component or gasket with reference to Chapter 3. 5 With the vehicle raised, inspect the fuel tank and filler neck for punctures, cracks and other damage, The connection between the filler neck and tank is especially critical. Sometimes a rubber filler neck or connecting hose will leak due to loose retaining clamps or deteriorated rubber. 6 Carefully check all rubber hoses and metal fuel lines leading away from the fuel tank. Check for loose connections, deteriorated hoses, crimped lines, and other damage. Pay particular attention to the vent pipes and hoses, which often loop up around the filler neck and can become blocked or crimped. Follow the lines to the front of the vehicle, carefully Inspecting them all the way. Renew damaged sections as necessary.
6.2 Check the thickness of the pad friction material through the hote on the front of the caliper
7 With the vehicle raised, check along the length of the underside for leaks from the metal brake lines, caused by damage or corrosion. 8 At each front brake caliper, check the area around the brake pipe unions and the bleed nipples for hydraulic fluid leakage, 9 Remove the front roadwheels and chock for fluid leakage from the area around the caliper piston seal. Check that the tip of the piston dust seal is correctly located in its groove. If it has been displaced, the brake caliper should be removed and overhauled as described in Chapter 9, to check for internal dirt Ingress or corrosion. 10 Check the area surrounding the master cylinder and vacuum servo unit for signs of corrosion, Insecurity or hydraulic fluid leakage. Examine the vacuum hose leading to the servo unit for signs of damage or chafing. 11 From within the engine compartment, check the security of all fuel hose attachments and pipe unions, and Inspect the fuel hoses and vacuum hoses for kinks, chafing and deterioration. 12 Where applicable, check the condition of the power steering fluid hoses and pipes.
A leak in the cooling system will usually show up as white or rust coloured deposits on the area adjoining the leak.
Page 48 of 225
1B«12 Every 20 000 miles - diesel models
21 Road test
Instruments and electrical equipment 1 Check the operation of atl instruments and electrical equipment. 2 Make sure that all instruments read correctly, and switch on all electrical equipment rn turn, to check that It functions properly. Steering and suspension 3 Check for any abnormalities in the steering, suspension, handling or road feel. 4 Drive the vehicle, and check that there are no unusual vibrations or noises. 5 Check that the steering feete positive, with no excessive sloppiness, or roughness, and check for any suspension noises when cornering and driving over bumps. Drivetrain 6 Check (he performance of the engine, clutch, transmission and driveshafts.
7 Listen for any unusual noises from the engine, clutch and transmission. 8 Make sure that the engine runs smoothly when Idling, and that there is no hesitation when accelerating. 9 Check that the clutch action is smooth and progressive, that tho drive is taken up smoothly, and that the pedal travel Is not excessive. Also listen for any noises when the clutch pedal is depressed. 10 Check that all gears can be engaged smoothly without noise, and that the gear lever action Is not abnormally vague or notchy. 11 Listen for a metallic clicking sound from ihe front of the vehicle, as the vehicle « driven slowly In a circle with the steering on full-lock. Carry out this check In both directions, if a clicking noise is heard, this Indicates wear in a driveshaft |oinl, in which case renew the joint if necessary.
Check the braking system 12 Make sure that the vehicle does not pull to one side when braking, and that the wheels do not lock prematurely when braking hard.
13 Check that there Is no vibration through the steering when braking. 14 Check that the handbrake operates correctiy without excessive movement of th« lever, end that it holds the vehicle stationery on a slope. 15 Test the operation of the brake servo unit as follows. With the engine off, depress the footbrake four or five times to exhaust the vacuum. Hold the brake pedal depressed, then start the engine. As the engine starts, there should be a noticeable give In the brake pedal as vacuum builds up. Allow the engine to run for at least two minutes, and then switch it off. If the brake pedal is depressed now, it should be possible to detect a hiss from the servo es the pedal is depressed. After about four or five applications, no fimher hissing should be heard, and the pedal should feel considerably harder. Note: The vacuum for the servo unit is provided by the vacuum pump mounted on the left-hand end of t/ie cylinder head.
Every 30 000 miles (45 000 km) or 3 years
22 Manual transmission oil level check ;5§
1 Park the vehicle on a level surface. If possible over an inspection pit or on a ramp as the filler/level plug is best reached from under Ihe engine compartment. The oil level must be checked before the car Is driven, or at least 5 minutes after the engine has been switched off. If the oil is checked Immediately after driving the car. some of the oil will remain distnbuted around the transmission compo-nents, resulting In an inaccurate level reading. 2 Wipe clean the area around the filler/level plug, which is situated on tho front of the
transmission (see illustration). Using an Allen key. unscrew the plug and clean it. 3 The oil level should reach the lower edge of the filler/level hole. A certain amount of oil will have gathered behind the filler/level plug, and will trickle out when it is removed; this does not necessarily Indicate that the level Is correct. To ensure that a true level Is established, wait until the Initial trickle has stopped, then add oil as necessary until a trickle of new oil can be seen emerging. The level will be correct when the flow ceases; use only good-quality oil of the specified type-Make sure that the vehicle Is completely level when checking the level and do not overfill. 4 When the level is correct refit and tighten the plug and wipe away any spilt oil.
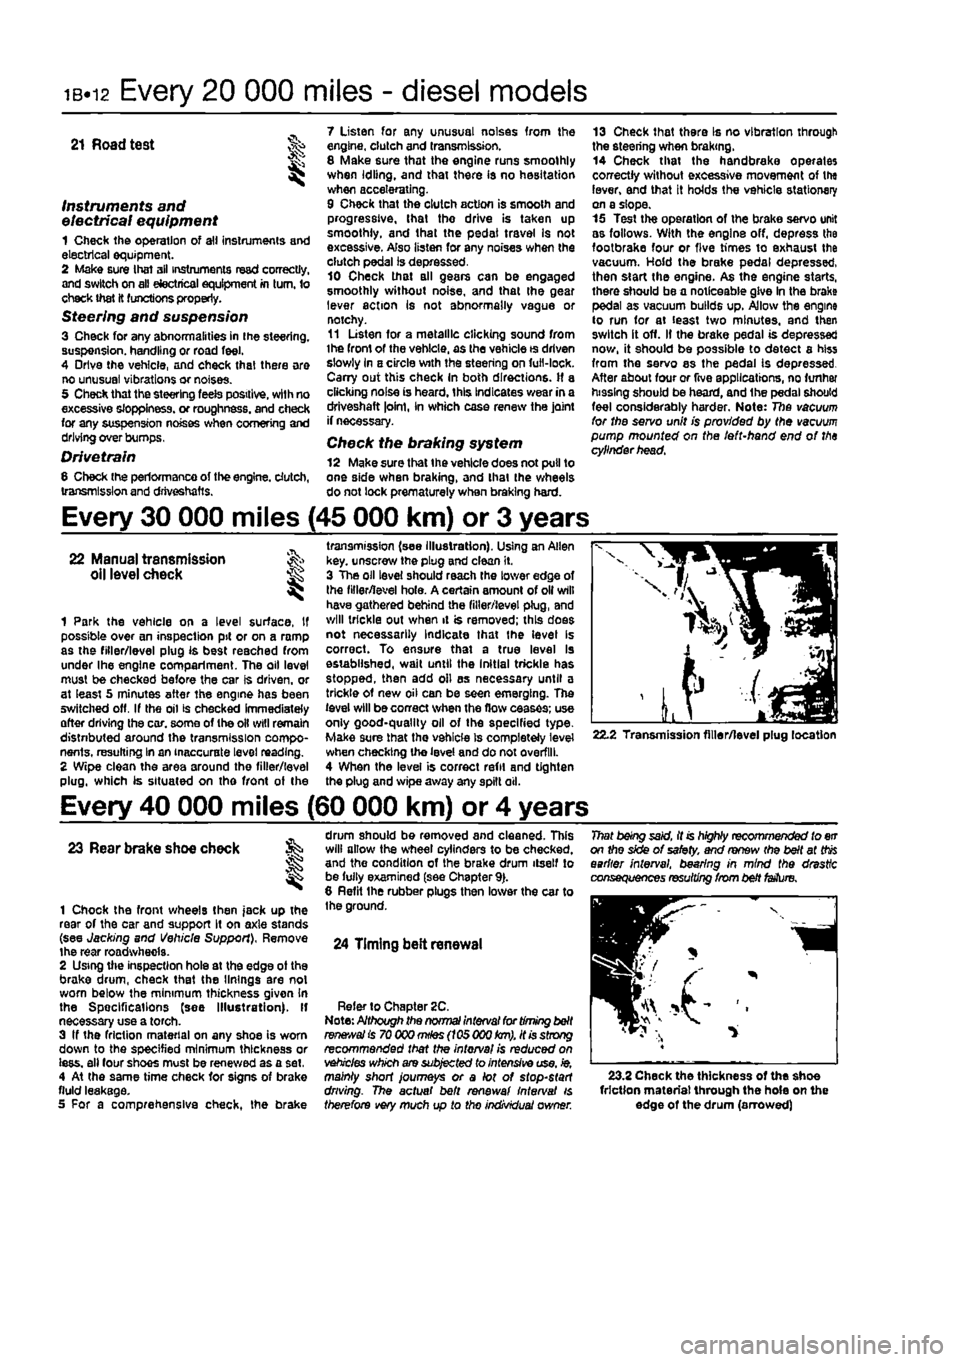
22.2 Transmission filler/level plug location
Every 40 000 miles (60 000 km) or 4 years
23 Rear brake shoe check
1 Chock the front wheels then jack up the rear of the car and support It on axle stands (see Jacking and Vehicle Support), Remove the rear roadwhecla. 2 Using the inspection hole at the edge ot the brake drum, check that the linings are not worn below the minimum thickness given In the Spec ifi cat Ions (see Illustration). If necessary use a torch. 3 If the friction material on any shoe is worn down to the specified minimum thickness or iess. all four shoes must be renewed as a set, 4 At the same time check for signs of brake fluid leakage. 5 For a comprehensive check, the brake
drum should be removed and cleaned. This will allow the wheel cylinders to be checked, and the condition of the brake drum itself to be fully examined (see Chapter 9). 8 Refit the rubber plugs then lower the car to the ground.
24 Timing belt renewal
Refer to Chapter 2C. Note: Although the normal interval for timing belt
ranees/a!
is 70 000
mHes
(105 000
km),
it is strong recommended that the interval is reduced on vehicles which are subjected to intensive use, ie, mainly short journeys or a lot of stop-start driving. The actual belt renewal interval is therefore very much up to tho individual owner.
That being said, it is highly recommended to err on the side of safety, and renew (he belt at
this
earlier interval, bearing in mind the drastic consequences resulting from belt fetfure.
23.2 Check the thickness of the shoe friction material through the hole on the edge of the drum (arrowed)
Page 56 of 225
2A*10 SOHC (8-valve) petrol engine in-car repair procedures
6.3 Camshaft cover gasket
not attempt to lover it ofl • instead free >t by working around the cover and lapping it lightly with a soft-faced mallet, 3 Recover the camshaft covor gasket {see Illustration). Inspect the gasket carefully. And renew It If damage or deterioration is evident. 4 Clean the mating surfaces of the cylinder head and camshaft cover thoroughly, removing all traces of oil and old gasket - take care to avoid damaging the surfaces as you do this.
Refitting 5 Locate a new gasket on the cylinder head and make sure it Is correctly seated. 6 Lower the cover onto the gasket making sure the gasket is not displaced. 7 Insert Ihe mounting bolts and tighten them progressively to the specified torque. 8 Refit the air cleaner assembly and inlet duct with reference to Chapter 4A or 48.
7 Camshaft oil seal • renewal I
1 Remove the timing beft and camshaft sprocket as described in Sections 4 and 5, 2 Using a suitable hooked Instrument, remove the oil seal from the cylinder head taking care not to damage the surface of (he camshaft. 3 Clean the seating in the cylinder head and the end of the camshaft. To prevent damage to the new olf seal as it is being fitted, wrap some adhesive tape around the end of the camshaft and lightly oil it.
4 Dip the new oil seal In oil then locate it over the camshaft making sure that the sealing lips are facing inwards, 5 Using a suitable tubular drift, drive the oil seal squarely Into the cylinder head. Remove the adhesive tape. 8 Refit the camshaft sprocket and liming belt wtth reference to Sections 5 and 4.
8 Crankshaft oil seals - ^ renewal S
Front (right-hand side) oil seal 1 The fronl oil seal is located in tho oil pump on the front of the crankshaft. Remove the timing belt as described in Section 4 and the crankshaft sprocket as described in Section 5. 2 Using a hooked instrument, remove the oil seal from the oil pump casing taking care not to damage the surface of the crankshaft. 3 Clean Ihe seating in the housing and the surface of the crankshaft. To prevent damage to the new oil seal as it is being fitted, wrap some adhesive tape around the end of the crankshaft and lightly oil it. 4 Dtp the new oil seal In oil then offer It up 1o the oil pump casing making sure that tho sealing lips are facing Inwards. G Using a suitable tubular drift, drive the oil seal squarely into the casing. Remove the adhesive tape. 6 Refit the crankshaft sprocket and timing belt with reference to Sections S and 4.
Rear {left-hand side) oil seal Note: The following paragraphs describe renewal of the rear oil seal leaving the housing in position. Refer to Chapter 2D for details of removing the housing. 7 Remove the fiywheel/drlveplate as described in Section 10. 8 Using a suitable hooked instrument, remove the oil seal from the rear oil seat housing taking care not to damage the surface of Ihe crankshaft. 9 Clean the seating In the nousing and the surface of the crankshaft. Check the crankshaft for burrs which may damage the sealing lip of the new seal, and If necessary use a fine file to remove them,
10 Dip the new seal In clean engine oil and carefully locate it over the crankshaft rear flange making sure that It is the correct way round. 11 Progressively tap the oil seal Into the housing keeping It square to prevent distortion. A block of wood is useful for this purpose. 12 Refit the fiywheet/drlvepiate with refer-ence to Section 10.
9 Cylinder head -removal and refitting I
i Removing the timing belt inner covers 9.12 Removing the cylinder head
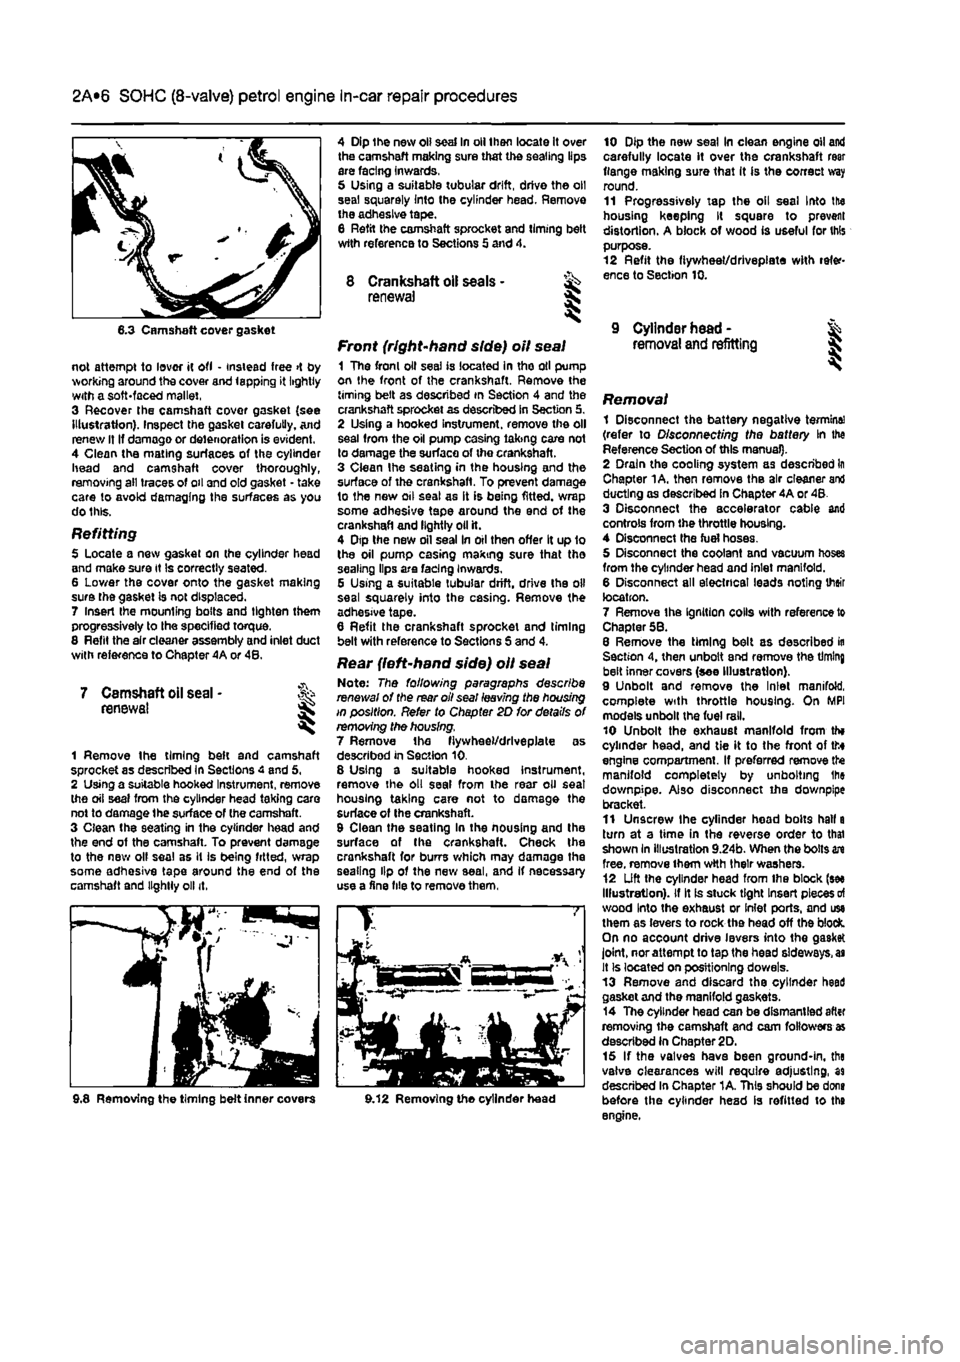
Removal 1 Disconnect the battery negative termine! (refer to Disconnecting the battery In the Reference Section of this manual). 2 Drain the cooling system as described In Chapter 1A. then remove the air cleaner and ducting as described in Chapter 4A or 48. 3 Disconnect the accelerator cable and controls from the throttle housing. 4 Disconnect the fuel hoses. 5 Disconnect the coolant and vacuum hoses from the cylinder head and inlet manifold. 6 Disconnect all electrical leads noting their location. 7 Remove the Ignition colls with reference to Chapter 58. 8 Remove the timing belt as described in Section 4, then unbolt end remove the timing belt inner covers (see Illustration). 9 Unbolt and remove the Inlet manifold, complete with throttle housing. On MPI models unbolt the fuel rail. 10 Unbolt the exhaust manifold from th» cylinder head, and tie it to the front of tto engine compartment. If preferred remove the manifold completely by unbolting Ihe downpipe. Also disconnect iha downpipe bracket. 11 Unscrew the cylinder head bolts hall a turn at a time in the reverse order to thai shown In illustration 9.24b. When the bolts in free, remove them wtth their washers. 12 Lift the cylinder head from Ihe block (see Illustration), if It is stuck tight Insert pieces
of
wood Into the exhaust or Inlet ports, and use them as levers to rock the head off the block. On no account drive levers into the gasket joint, nor attempt to tap the head sideways,
as
It Is located on positioning dowels. 13 Remove and discard the cylinder heed gasket and the manifold gaskets. 14 The cylinder head can be dismantled after removing the camshaft and cam followers as described in Chapter 2D. 15 If the valves have been ground-in, the valve clearances will require adjusting, as described In Chapter 1A. This should be dons before the cylinder head is refitted to the engine.
Page 67 of 225
2B*7 DOHC (16-valve) petrol engine in-car repair procedures
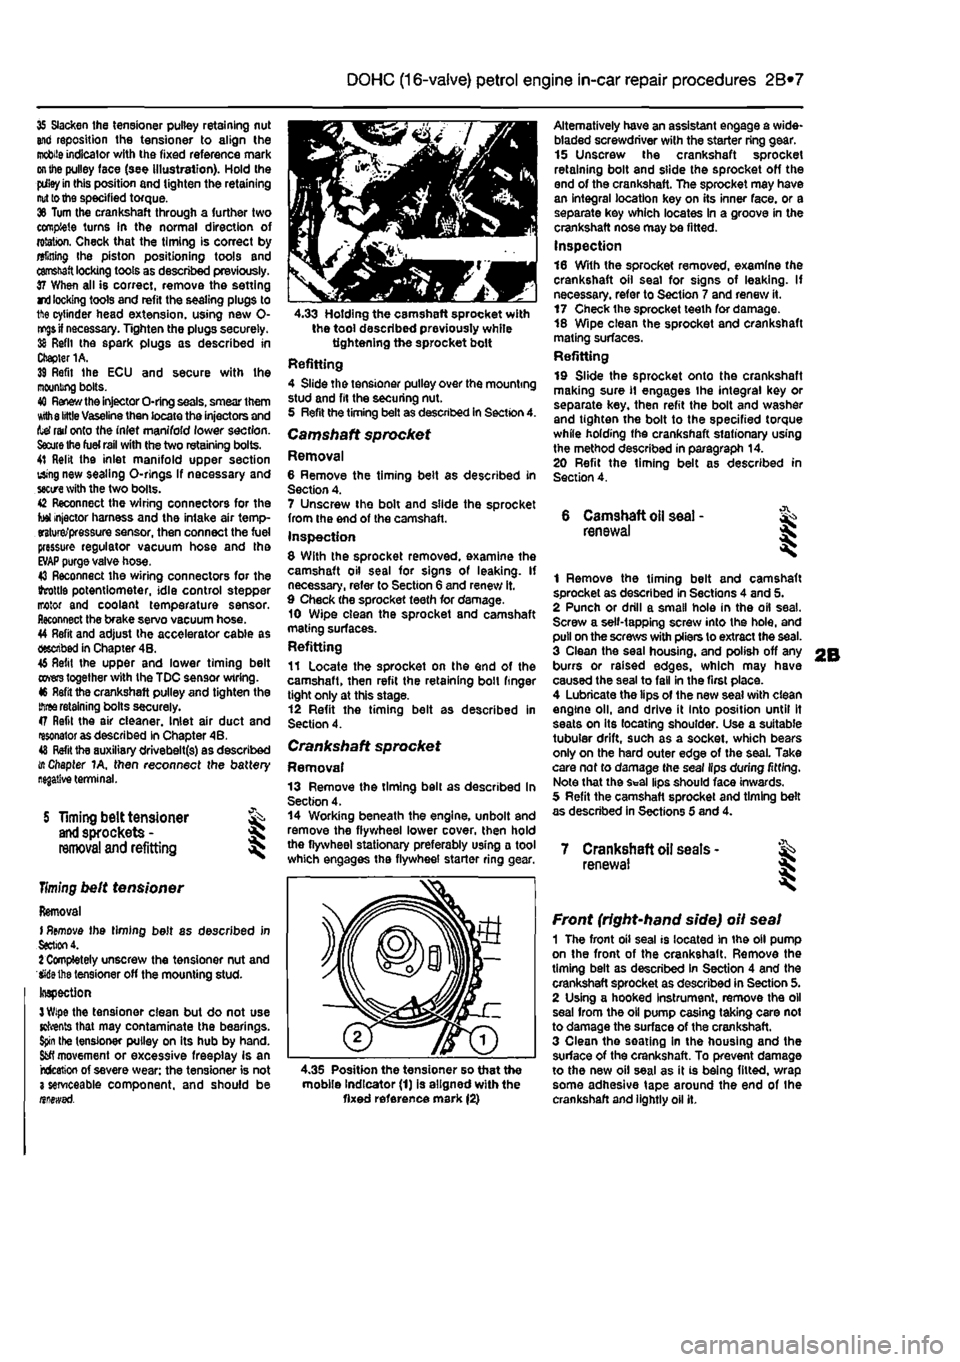
35 Slacken the tensioner pulley retaining nut and reposition the tensioner to align the
mobile
indicator with the fixed reference mark
on the
pulley face (see illustration). Hold the
pdley in
this position and tighten the retaining
nut to the
specified torque. 36 Turn the crankshaft through a further two complete turns In the normal direction of rotation. Check that the timing is correct by alining Ihe piston positioning tools and
camshaft
locking tools as described previously. 37 When all is correct, remove the setting rri
locking
tools and refit the sealing plugs to 1ft© cylinder head extension, using new 0-
nr^s if
necessary. Tighten the plugs securely. 38 Refit the spark plugs as described in Chapter 1A. 39 Refit Ihe ECU and secure with Ihe mooning bolts. 40
Renew the
injector O-ring seals, smear them Kith
8 little
Vaseline then locate the injectors and tef rail onto the inlet manifold lower section.
Saute Ihe fuel rail
with the two retaining bolts. 41 Relit the inlet manifold upper section using new sealing O-rlngs If necessary and
sectre
with the two bolts. 42 Reconnect the wiring connectors for the tot injector harness and the intake air temp-erature/pressure sensor, then connect the fuel pressure regulator vacuum hose and tha
EVAP
purge valve hose. 43 Reconnect the wiring connectors for the ihrottls potentiometer, idle control stepper motor and coolant temperature sensor. Reconnect the brake servo vacuum hose. 44 Refit and adjust the accelerator cable as described in Chapter 4B. 46 Refit the upper and lower timing belt
covers
together with the TDC sensor wiring. 46 Refit the crankshaft pulley and tighten the
three
retaining bolts securely. 47 Refit the air cleaner. Inlet air duct and resonator as described in Chapter 4B. 48
Refit
tha auxiliary drivebelt(s) as described i/t Chapter 1A, then reconnect the battery
S Timing belt tensioner
and
sprockets -
removal
and refitting
Timing
belt tensioner
Removal I
Remove
the timing belt as described in
Section
4. 1 Completely unscrew the tensioner nut and Wiethe tensioner off the mounting stud-Inspection
3 Wipe
the tensioner clean but do not use Kfrents that may contaminate the bearings.
Spin
the tensioner pulley on its hub by hand.
Sfcfl
movement or excessive freeplay is an rcfceticn of severe wear: the tensioner is not 3 serviceable component, and should be nnewsd.
4.33 Holding the camshaft sprocket with the tool described previously while tightening the sprocket bolt Refitting 4 Slide the tensioner pulley over the mounting stud and fit the securing nut. 5 Refit the timing belt as described in Section 4. Camshaft sprocket Removal 6 Remove the timing belt as described in Section 4. 7 Unscrew the bolt and slide the sprocket from the end of the camshaft. Inspection 8 With the sprocket removed, examine the camshaft oil seal for signs of leaking. If necessary, refer to Section 6 and renew it. 9 Check the sprocket teeth for damage. 10 Wipe clean the sprocket and camshaft mating surfaces. Refitting 11 Locate the sprocket on the end of the camshaft, then refit the retaining boll finger tight only at this stage. 12 Refit the timing belt as described in Section 4.
Crankshaft sprocket Removal 13 Remove the timing bell as described In Section 4. 14 Working beneath the engine, unbolt and remove the flywheel lower cover, then hold the flywheel stationary preferably using a tool which engages the flywheel starter ring
<
Alternatively have an assistant engage a wide-bladed screwdriver with the starter ring gear. 15 Unscrew the crankshaft sprocket retaining bolt and slide the sprocket off the end of the crankshaft. The sprocket may have an integral location key on its inner face, or a separate key which locates In a groove in the crankshaft nose may be fitted. Inspection 16 With the sprocket removed, examine the crankshaft oil seal for signs of leaking. If necessary, refer to Section 7 and renew it. 17 Check the sprocket teeth for damage. 18 Wipe clean the sprocket and crankshaft mating surfaces. Refitting 19 Slide the sprocket onto the crankshaft making sure
11
engages the integral key or separate key, then refit the bolt and washer and tighten the bolt to the specified torque while holding the crankshaft stationary using the method described in paragraph 14. 20 Refit the timing belt as described in Section 4.
6 Camshaft
oil
seal -renewal
1 Remove the timing belt and camshaft sprocket as described in Sections 4 and 5. 2 Punch or drill a small hole in the oil seal. Screw a self-tapping screw into the hole, and pull on the screws with pliers to extract the seal. 3 Clean the seal housing, and polish off any burrs or raised edges, which may have caused the seal to fall in the first place. 4 Lubricate the lips of the new seal with clean engine oil, and drive it into position until It seats on its locating shoulder. Use a suitable tubular drift, such as a socket, which bears only on the hard outer edge of the seal. Take care nof to damage the seal lips during fitting. Note that the Seal lips should face inwards. 5 Refit the camshaft sprocket and timing belt as described in Sections 5 and 4.
7 Crankshaft oil seats -renewal I
4.35 Position the tensioner so that the mobile Indicator (1) is aligned with the fixed reference mark (2)
Front (right-hand side) oil seal 1 The front oil seal is located in the oil pump on the front of the crankshaft. Remove the timing belt as described in Section 4 and the crankshaft sprocket as described in Section 5. 2 Using a hooked Instrument, remove the oil seal from the oil pump casing taking care not to damage the surface of the crankshaft. 3 Clean the seating in the housing and the surface of the crankshaft. To prevent damage to the new oil seal as it is being fitted, wrap some adhesive tape around the end of the crankshaft and lightly oil it.
Page 68 of 225
2B*8 DOHC (16-valve) petrol engine in-car repair procedures
8.3a Disconnect the LT wiring plugs from the two Ignition coils ... 4 Dip the new oil seal in oil then offer it up to the oil pump casing making sure that the sealing Hps are facing inwards. 5 Using a suitable tubular drift, drive the oil seal squarely into the casing. Remove the adhesive tape, 8 Reftl the crankshaft sprocket and timing belt wrth reference to Sections 5 and
Rear (left-hand side) oil seal Note: The following paragraphs describe renewal of the rear oil seal leaving the housing in position. Refer to Chapter 20 for details of removing ihe housing. 7 Remove the flywheel as described In Section 11. 8 Using a suitable hooked Instrument, remove the oil seal from the rear oil seal
L •
~ 1 8.8a Lift the cylinder head extension slightly and insert the tools {shown with cylinder head removed for clarity)...
8.3b ... then unscrew the mounting bolts end romove the ignition colls housing taking care not to damage the surface of the crankshaft. 9 Clean the seating In the housing and the surface of Ihe crankshaft. Check the crankshaft for burrs which may damage the sealing lip ol Ihe new seal, and If necessary use a Tine file to remove them. 10 Dip the new seal In clean engine oil and carefully locate it over Ihe crankshaft rear flange making sure that it is the correct way round. 11 Progressively tap the oil seal into the housing keeping it square to prevent distortion. A block of wood Is useful for this purpose. 12 Refit the flywheel with reference to Section 11,
8 Cylinder head extension -removal and refitting ^
Removal 1 Remove the timing bolt as described in Soction A. 2 Identify the two HT leads for position then disconnect them from the coil HT terminals. 3 Disconnect the LT wiring plugs from the two ignition coils, then unscrew the mounting bolts and remove the ignition coils from the and of the cylinder head extension {see illustrations). A Undo the bolt and remove the resonator support bracket from Ihe top of the cylinder head extension,
8.8b ... thon remove the cylinder head extension
8.G Unscrew tho protective caps covering the cylinder head extension retaining bolts
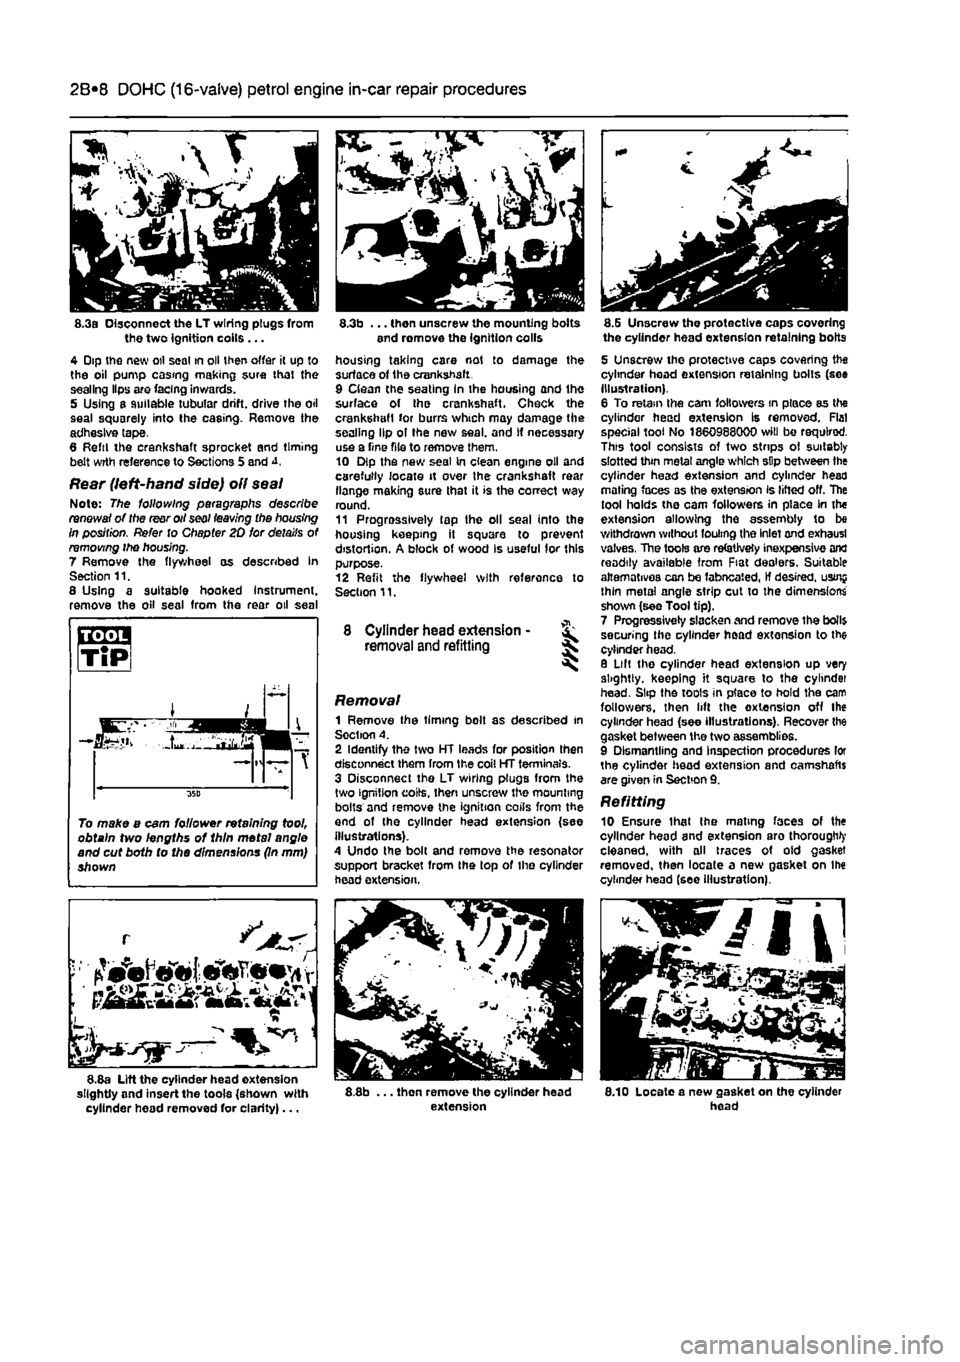
5 Unscrew the protective caps covering the cylinder head extension retaining bolts (see Illustration). 6 To retain the cam followers in place as the cylinder head extension Is removed. Flat special tool No 1860988000 will bo required. This tool consists of two strips ol suitably slotted thin metal angle which sDp between the cylinder head extension and cylinder head mating faces as the extension Is lifted off. The tool holds the cam followers in place in the extension allowing the assembly to be withdrawn without fouling the Inlet and exhausl valves, The tools are refetJvety inexpensive and readily available from Fiat dealers. Suitable alternatives can be fabneated, If desired, usrnj thin metal angle strip cut to the dimensions shown (see Tool tip). 7 Progressively slacken and remove the boll$ securing the cylinder head extension to the cylinder head. 8 Lilt tho cylinder head extension up very slightly, keeping it square to the cylindei head. Slip the toots in place to hold the cam followers, then lift the extension off the cylinder head (see illustrations). Recover the gasket between the two assemblies. 9 Dismantling and Inspection procedures lor the cylinder head extension and camshafts are given in Section 9. Refitting 10 Ensure thai Ihe mating faces of the cylinder head and extension aro thorough^ cleaned, with all traces of old gasket removed, then locate a new gasket on Ihe cylinder head (see Illustration).
8.10 Locate a new gasket on the cylinder head
To make a cam follower retaining tool, obtain two lengths of 1hln metal angle and cut both to the dimensions (In mm) shown
Page 80 of 225
2C*2 Diesel engine in-car repair procedures
Refitting 6 Locate a new gasket on the cylinder head and make sure tt Is correctly seated. 7 Lower the cover onto the gasket making sure the gasket Is not displaced, 8 Insert the mounting bolts and tighten them securely In a progressive sequence. Position Ihe support brackets as noted during removal. 9 Clip ihe coolant hoses in position then refil the air ducting.
7 Camshaft oil seal -renewal
8 Crankshaft oil seals -renswal I
9 Cylinder head -
removal
and refitting
1 Remove the timing belt and camshaft sprocket as descnbed in Sections 4 and 5. 2 Using a suitable hooked instrument, remove tho oil seal from the cylinder head taking care nol to damage the surface of the camshafl. Alternatively drill a small hole In tho oil seal and Insert a self-topping screw - the seal can then be removed by pulling on the screw with a pair of pliers. 3 Clean the seating In the cylinder head and tho end of the camshaft To prevent damage to the new oil seal as It is being fitted, wrap some adhesive tape around the end ol the camshaft and lightJy oil it. 4 Dip tho new ail s«al In oil then locate it over Ihe camshaft making sure that the sealing lips are facing inwards. 5 Using a suitable tubular drift, drive the oil seal squarely into the cylinder h*ad. Remove the adhesive tap© 6 Refit the camshaft sprocket and timing belt with reference to Sections 6 and 4.
Front (right-hand side) oil seal t The front oil seal is located in the oil pump casing on the front of the crankshaft. Remove the timing belt as described in Section 4 and the crankshaft sprocket as described in Section 5, 2 Using a suitable hooked instrument, remove the oil seal from the oil pump casing taking care not to damage the surface of the crankshaft. Alternatively drill a small hole In the oil soal and insert a self-tapping screw - the seal can then be removed by pulling on the screw with a pair of pliers. 3 Clean the seating in the oH pump and the surface of the crankshaft. To prevent damage to the new off seal as It Is being fitted, wrap some adhesive tape around the end of tha crankshaft and lightly oil it. 4 Oip the new oii seal In oil then otter it up to the oil pump casing making sure that the sealing Hps are facing inwards,
8.Ba Rear oil soal and housing
5 Using a suitable tubular drift, driva the oil sea! squarely into the casing. Remove the adhesive tape. 6 Refit the crankshaft sprocket and timing belt with reference to Sections 5 and 4.
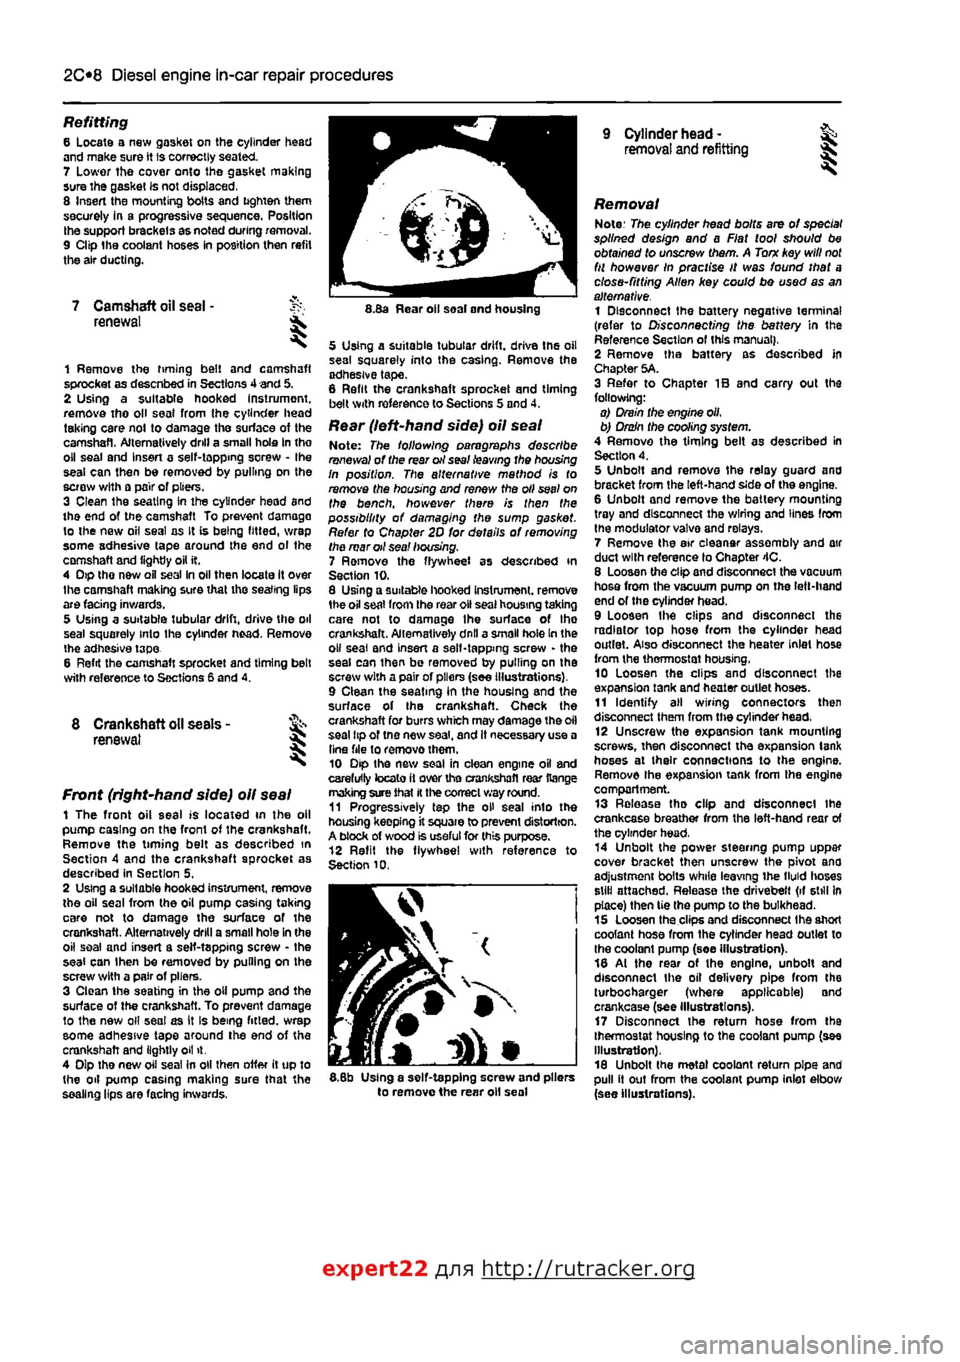
Rear (left-hand side) oil seal Note: The following paragraphs describe renewal of the rear oil seal leaving the housing In position. The alternative mathod is to remove the housing and renew the oil seel on the bench, however there is then the possibility of damaging the sump gasket. Refer to Chapter 2D for details of removing the mar oil sea! housing. 7 Ramove the flywheel as described in Section 10. 8 Using a suitable hooked Instrument. remove 1he oil seat from the roar oil seal housing taking care not to damage Ihe surface of Ihe crankshaft. Alternatively dnll a small hole In the o» seal and insert a self-tapping screw - the seal can ihan be removed by pulling on the screw with a pair of pliers (see Illustrations), 9 Clean the seating in the housing and the surface of the crankshaft. Check the crankshaft for burrs which may damage the oil seal tip of tno new saal, and It necessary use a Una file to removothem. 10 Dip the new soal in clean engine oil and carefully tocato it over tho crankshafl rear Range making sure that
H
the correct way round. 11 Progressively tap the oH seal into the housing keepfng it square to prevent distortion. A block of wood is useful for this purpose. 12 Refit the flywheel with reference to Section 10.
I
5.8b Using a self-tapping screw and pliers to remove the rear oil seal
Removal Note: The cylinder head bolts are of special splined design and a Fiat tool should be obtained to unscrew them. A Torn key will
not
fit however In practise It was found that a close-fitting Allen key could bo used as an alternative. 1 Disconnect the battery negative terminal (refer to Disconnecting the battery in the Reference Section of this manual), 2 Remove tha battery as described In Chapter 5A. 3 Refer to Chapter IB and carry out the following: o) Drain the engine oil, b) Drain the cooling system. 4 Remove the timing belt as described in Section 4. 5 Unbolt and remova the relay guard and bracket from the left-hand side of the engine. 6 Unbolt and remove the battery mounting tray and disconnect the wiring and lines from the modulator valva and relays. 7 Remove the air eleanar assembly and air duct with reference lo Chapter 4C. 8 Loosen the clip and disconnect the vacuum hosa from the vacuum pump on the left-hand end of the cylinder head. 9 Loosen Ihe clips and disconnect the radiator top hose from the cylinder head outlet. Also disconnect the heater inlet hose from the thermostat housing, 10 Loosen the clips and disconnect the expansion tank and heater outlet hoses. 11 Identify all wiring connectors then disconnect them from the cylinder head, 12 Unscrew the expansion tank mounting screws, then disconnect tha expansion tank hoses at their connections to the engine. Remove the expansion tank from tha engine compartment. 13 Release tha clip and disconnect ihe crankcase breather from the left-hand rear of the cylinder head. 14 Unbolt the power steering pump uppar cover bracket then unscrew the pivot ana adjustment bolts while leaving ihe tMd lioses still attached. Release the drivebelt (if still In place) then tie the pump to the bulkhead. 15 Loosen tha clips and disconnect Ihe short coolant hose from the cylinder head outlet to the coolant pump (soe illustration). 18 At the rear of the engine, unbolt and disconnect the oil delivery pipe from the turbocharger (where applicable) and crankcase (see Illustrations). 17 Disconnect the return hose from tha thermostat housing to the coolant pump (see Illustration), 18 Unbolt the metal coolant return pipe and pull it out from the coolant pump inlet elbow (see Illustrations).
expert22 flna http://rutracker.org
Page 123 of 225
4A*2 Fuel system - single-point petrol Injection models
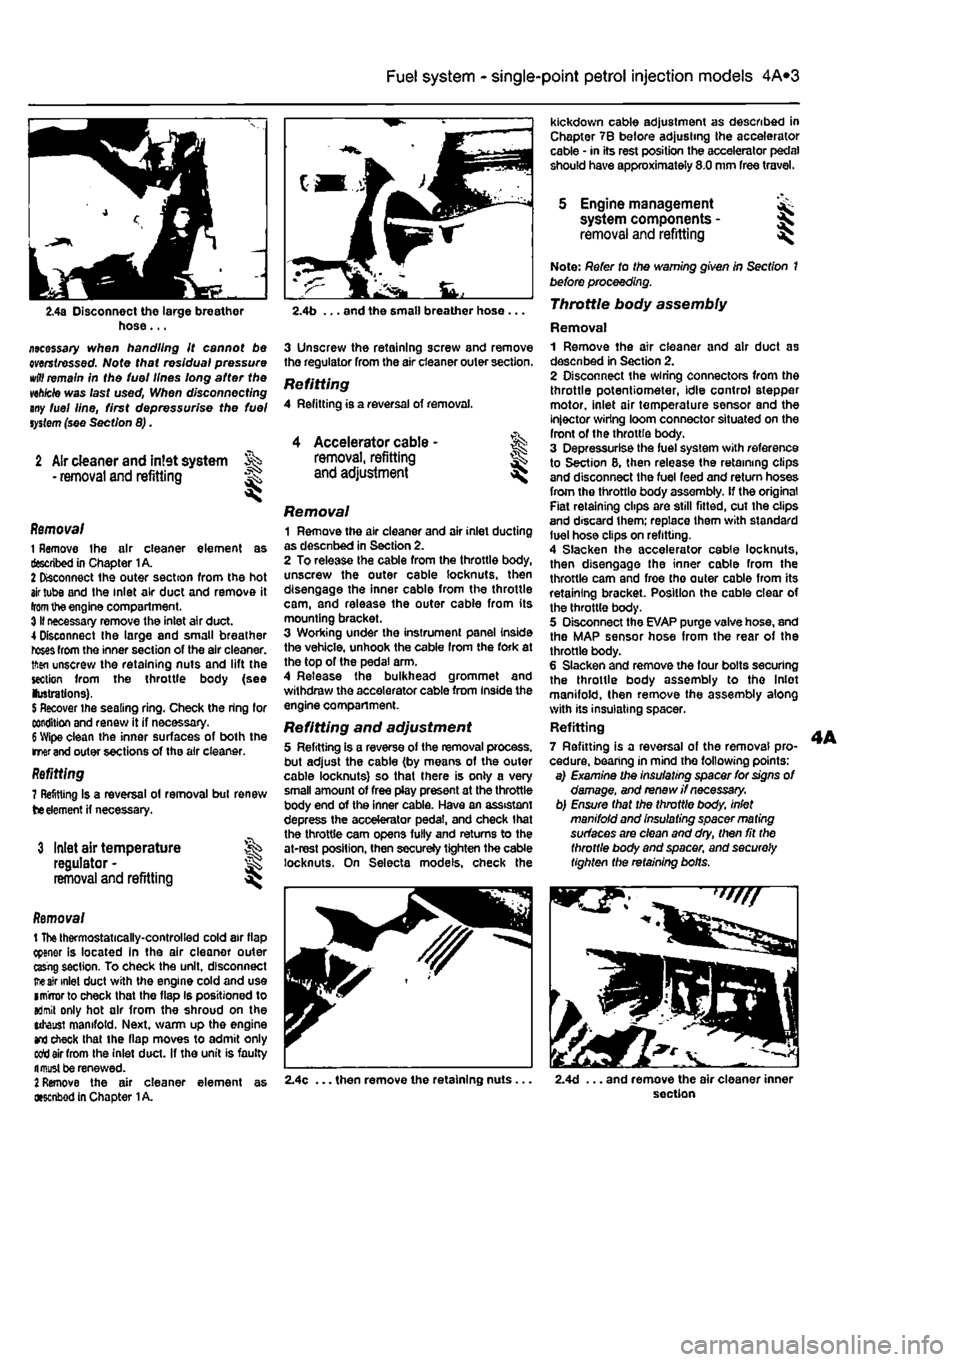
2.4a Disconnect the large breather hose... ziecessary when handling it cannot be mrstressed. Note that residual pressure
wttf
remain in the tuei lines long after the wh/cte was last used, When disconnecting any fuel line, first depressurise the fuel
system
(see Section 8).
2 Air cleaner and intet system • removal and refitting
1
Accelerator cable -removal, refitting and adjustment l
Removal 1 Remove the air cleaner element as described in Chapter 1A. 2 Disconnect the outer section from the hot
air
tube and the inlet air duct and remove it
from
the engine compartment. 3II necessary remove the inlet air duct. 4 Disconnect Ihe large and small breather
roses
from the inner section of the air cleaner, tftsn unscrew the retaining nuts and lift the section from the throttle body (see lustrations).
5
Recover the sealing ring. Check the ring for condition and renew it if necessary.
6
Wipe clean the inner surfaces of both the merand outer sections of the air cleaner. Refitting 7 Refitting Is a reversal ol removal but renew
tie
element
H
necessary.
3 Inlet air temperature regulator -removal and refitting
Removal t
The
thermostatically-controlled cold air flap cpener is located in the air cleaner outer ttsrig section. To check the unit, disconnect
ire air
inlet duct with the engine cold and use imrrorto check that the flap Is positioned to aJmit only hot air from the shroud on the utaust manifold. Next, warm up the engine
and
check that the flap moves to admit only sett air from the inlet duct. If the unit is faulty fl must be renewed.
2
Remove the air cleaner element as •senbod in Chapter
1
A.
kickdown cable adjustment as described in Chapter 7B before adjusting the accelerator cable • in its rest position the accelerator pedal should have approximately 8.0 mm free travel.
5 Engine management system components -removal and refitting I
2.4b ... and the small breather hose ...
3 Unscrew the retaining screw and remove the regulator from the air cleaner outer section.
Refitting 4 Refitting is a reversal of removal.
Removal 1 Remove the air cleaner and air inlet ducting as desenbed in Section 2. 2 To release the cable from the throttle body, unscrew the outer cable locknuts, then disengage the inner cable from the throttle cam, and release the outer cable from its mounting bracket. 3 Working under the instrument panel inside the vehicle, unhook the cable from the fork at the top of the pedal arm. 4 Release the bulkhead grommet and withdraw the accelerator cable from Inside the engine compartment.
Refitting and adjustment 5 Refitting is a reverse of the removal process, but adjust the cable (by means of the outer cable locknuts) so that there is only a very small amount of free play present at the throttle body end of the inner cable. Have an assistant depress the accelerator pedal, and check that the throttle cam opens fully and returns to the at-rest position, then secureJy tighten the cable locknuts. On Selecta models, check the
Note: Refer to the warning given in Section 1 before proceeding. Throttle body assembly
Removal 1 Remove the air cleaner and air duct as desenbed in Section 2. 2 Disconnect the wiring connectors from the throttle potentiometer, idle control stepper motor, inlet air temperature sensor and the injector wiring loom connector situated on the front of the throttle body. 3 Depressurise the fuel system with reference to Section 8, then release the retaining clips and disconnect the fuel feed and return hoses from the throttle body assembly, if the original Fiat retaining clips are still fitted, cut the clips and discard them; replace them with standard luel hose clips on refitting. 4 Slacken the accelerator cable locknuts, then disengage the inner cable from the throttle cam and froe tho outer cable from its retaining bracket. Position the cable clear of the throttle body. 5 Disconnect the EVAP purge valve hose, and the MAP sensor hose from the rear of the throttle body. 6 Slacken and remove the four bolts securing the throttle body assembly to tho Inlet manifold, then remove the assembly along with its insulating spacer. Refitting 7 Refitting is a reversal of the removal pro-cedure, bearing in mind the following points: a) Examine the insulating spacer for signs of damage, and renew //necessary, b) Ensure that the throttle body, inlet manifold and insulating spacer ma ting surfaces are clean and dry, then fit the throttle body and spacer, and securely tighten the retaining bolts.
2.4c ... then remove the retaining nuts. 2.4d ... and remove the air cleaner inner section
Page 124 of 225
4A*2 Fuel system - single-point petrol Injection models
motor c) Ensure that all hoses are correctly reconnected and, where necessary, that their retaining clips are securely tightened. d) Adjust the accelerator cable as described In Section 4.
Fuel injector Note: If a faulty Injector Is suspected, before condemning the Injector, it is worth vying the effect of one of the proprietary Injector cleaning treatments. Removal 8 Remove the air cleaner and air duct as described In Section 2. 9 Disconnect the wiring then unscrew the mounting screws and remove Ihe Injector from the throttle body. Refitting 10 Refitting is a reversal of removal.
Fuel pressure regulator
Removal 11 Remove Ihe air cleaner and air duel as described In Section 2. 12 Using a marker pen. make alignment marks between the regulator cover end the throttle body, then undo the four retaining
screws. As the screws are loosened, place a rag over the cover to catch any fuel spray which may be released. 13 Lift off the cover, then remove the spring and withdraw the diaphragm, noting Its correct fitted orientation. Remove all traces of dirt, and examine the diaphragm for signs of splitting. If damage Is found, it will be necessary to renew the complete upper throttle body assembly. Refitting 14 Refitting is a reversal of removal ensuring that the diaphragm and cover are fitted the correct way round, and that the retaining screws are securely tightened,
Idle control stepper motor
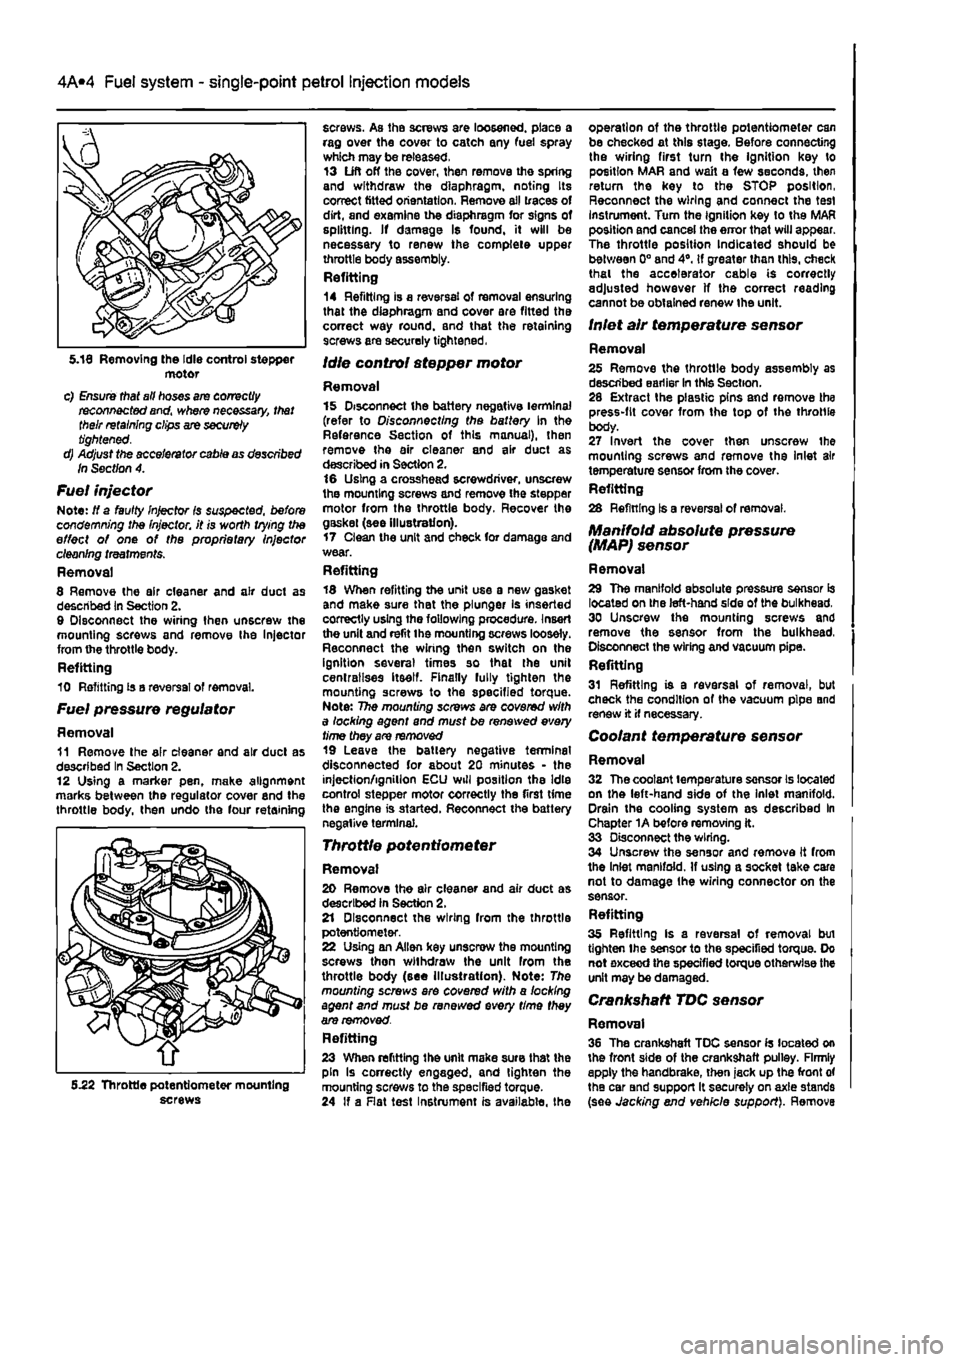
Removal 15 Disconnect the battery negative terminal (refer to Disconnecting the battery In the Reference Section of this manual), then remove the air cleaner and air duct as described in Section 2. 16 Using a crosshead screwdriver, unscrew the mounting screws and remove the stepper motor from the throttle body. Recover the gaskei (see illustration). 17 Clean the unit and check for damage and wear. Refitting 18 When refitting the unit use a new gasket and make sure that the plunger is inserted correctly using the following procedure. Insert the unit and refit the mounting screws loosely. Reconnect the wiring then switch on the ignition several times so that the unit centralises itself. Finally fully tighten the mounting screws to the specified torque. Note: The mounting screws are covered with a locking agent and must be renewed every time they are removed 19 Leave the battery negative terminal disconnected for about 20 minutes - the injection/ignition ECU will position the Idle control stepper motor correctly the first time the engine is started. Reconnect the battery negative terminal.
Throttle potentiometer
Removal 20 Remove the air cleaner and air duct as described in Section 2. 21 Disconnect the wiring from the throttle potentiometer. 22 Using an Allen key unscrew the mounting screws then withdraw the unit from the throttle body (see Illustration). Note: The mounting screws ere covered with a locking agent and must be renewed every time they are removed. Refitting 23 When refitting the unit make sure that the pin Is correctly engaged, and tighten the mounting screws to the specified torque. 24 If a Rat test Instrument is available, the
operation of the throttle potentiometer can be checked at this stage. Before connecting the wiring first turn Ihe ignition key to position MAR and wait a few seconds, then return the key to the STOP position, Reconnect the wiring and connect the test instrument. Turn the Ignition key to the MAR position and cancel the error that will appear. The throttle position Indicated should be between 0° and 4°. If greater than this, check thai the accelerator cable is correctly adjusted however If the correct reading cannot be obtained renew the unit.
Inlet air temperature sensor
Removal 25 Remove the throtlle body assembly as described earlier In this Section. 28 Extract the plastic pins and remove the press-fit cover from the top of the throttle body. 27 Invert the cover then unscrew the mounting screws and remove the Inlet air temperature sensor from the cover. Refitting 28 Refining Is a reversal of removal.
Manifold absolute pressure (MAP) sensor
Removal 29 The manifold absolute pressure sensor is located on the left-hand side of the bulkhead. 30 Unscrew the mounting screws and remove the sensor from the bulkhead, Disconnect the wiring and vacuum pipe. Refitting 31 Refitting is a reversal of removal, but check the condition of the vacuum pipe and renew it if necessary.
Coolant temperature sensor
Removal 32 The coolant temperature sensor Is located on the left-hand side of the inlet manifold. Drain the cooling system as described In Chapter 1A before removing it. 33 Disconnect the wiring. 34 Unscrew the sensor and remove It from the Inlet manifold. If using a socket take care not to damage Ihe wiring connector on the sensor. Refitting 35 Refitting Is a reversal of removal bui tighten Ihe sensor to the specified torque. Do not exceed the specified torque otherwise the unit may be damaged.
Crankshaft TDC sensor
Removal 36 The crankshaft TDC sensor Is located on the front side of the crankshaft pulley. Firmly apply the handbrake, then jack up the front of the car Bnd support It securely on axle stands (see Jacking end vehicle support). Remove 5.22 Throttle potentiometer mounting screws