cam cover FIAT PUNTO 1999 176 / 1.G User Guide
[x] Cancel search | Manufacturer: FIAT, Model Year: 1999, Model line: PUNTO, Model: FIAT PUNTO 1999 176 / 1.GPages: 225, PDF Size: 18.54 MB
Page 55 of 225
2A*10 SOHC (8-valve) petrol engine in-car repair procedures
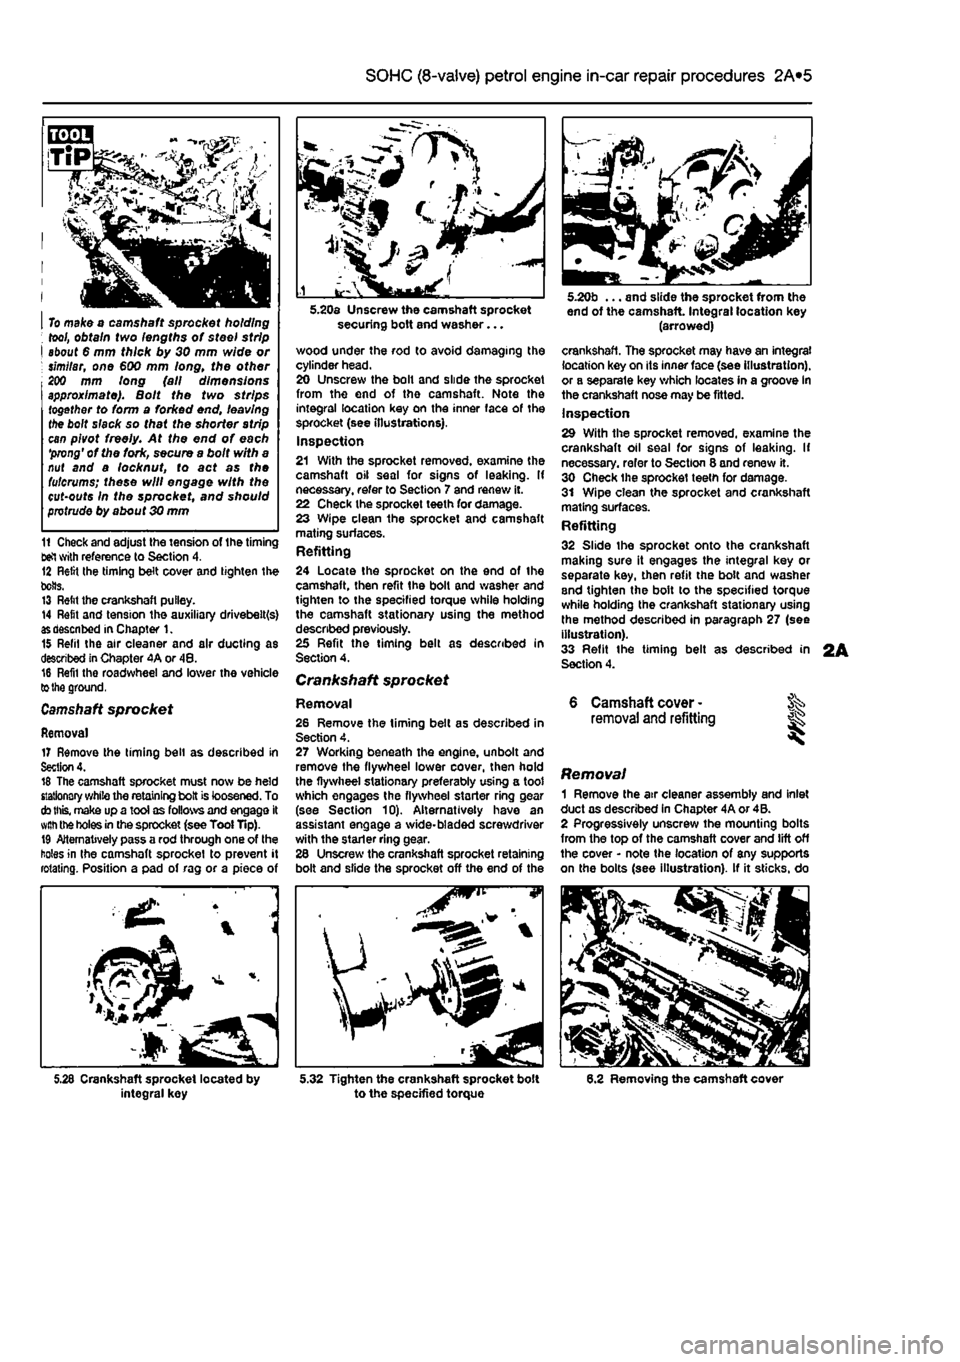
I To make o camshaft sprocket holding ; tool, obtain two lengths of steel strip I about 6 mm thick by 30 mm wide or ; similar, one €00 mm long, the other 200 mm long (all dimensions approximate). Bolt the two strips together to form a forked end, leaving the bolt slack so that the shorter strip can pivot freely. At the end of each 'prong' of the fork, secure a bolt with a nut and a locknut, to act as the fulcrums; these will engage with the cut-outs In the sprocket, and should protrude by about 30 mm
11 Check and adjust the tension of the timing tel with reference to Section 4. 12 Relit Ihe timing belt cover and tighten the bolts. 13 Relit the crankshaft pulley. 14 Refit and tension the auxiliary drivebelt(s)
as
described in Chapter 1. 15 Refil the air cleaner and air ducting as described in Chapter 4A or 48. 16 Refil the roadwheel and lower the vehicle
to the
ground.
Camshaft
sprocket
Removal 17 Remove the timing bell as described in Section 4. 16 The camshaft sprocket must now be held stationary while the retaining bolt is loosened. To
cto this,
make up a tool as follows and engage it
with the
holes
in
the sprocket (see Tool Tip). 19 Alternatively pass a rod through one of the holes in the camshaft sprocket to prevent it rotating. Position a pad of rag or a piece of
integral key
securing bolt and washer...
wood under the rod to avoid damaging the cylinder head. 20 Unscrew the bolt and slide the sprocket from the end of tho camshaft. Note the integral location key on the inner face of the sprocket (see illustrations). Inspection 21 With the sprocket removed, examine the camshaft oil seal for signs of leaking. If necessary, refer to Section 7 and renew it. 22 Check the sprocket teeth for damage. 23 Wipe clean the sprocket and camshaft mating surfaces. Refitting 24 Locate the sprocket on the end of the camshaft, then refit the bolt and washer and tighten to the specified torque while holding the camshaft stationary using the method described previously. 25 Refit the timing belt as described in Section 4.
Crankshaft sprocket
Removal 26 Remove the timing belt as described in Section 4. 27 Working beneath the engine, unbolt and remove the flywheel lower cover, then hold the flywheel stationary preferably using a toot which engages the flywheel starter ring gear (see Section 10). Alternatively have an assistant engage a wide-bladed screwdriver with the stader ring gear. 26 Unscrew the crankshaft sprocket retaining bolt and slide the sprocket off the end of the
^P
5.32 Tighten the crankshaft sprocket bolt to the specified torque
end of the camshaft Integral location key (arrowed)
crankshaft. The sprocket may have an integral location key on its inner face (see illustration), or a separate key which locates in a groove in the crankshaft nose may be fitted. Inspection 29 With the sprocket removed, examine the crankshaft oil seal for signs of leaking. If necessary, refer to Section 8 and renew it. 30 Check the sprocket teeth for damage. 31 Wipe clean the sprocket and crankshaft mating surfaces. Refitting 32 Slide the sprocket onto the crankshaft making sure it engages the integral key or separate key, then refit the bolt and washer and tighten the bolt to the specified torque while holding the crankshaft stationary using the method described in paragraph 27 (see illustration). 33 Refit the timing belt as described in Section 4.
6 Camshaft cover -removal and refitting
Removal 1 Remove the air cleaner assembly and inlet duct as described in Chapter 4A or 4B. 2 Progressively unscrew the mounting bolts from the top of the camshaft cover and lift off the cover • note the location of any supports on the bolts (see illustration). If it sticks, do
6.2 Removing the camshaft cover
Page 56 of 225
2A*10 SOHC (8-valve) petrol engine in-car repair procedures
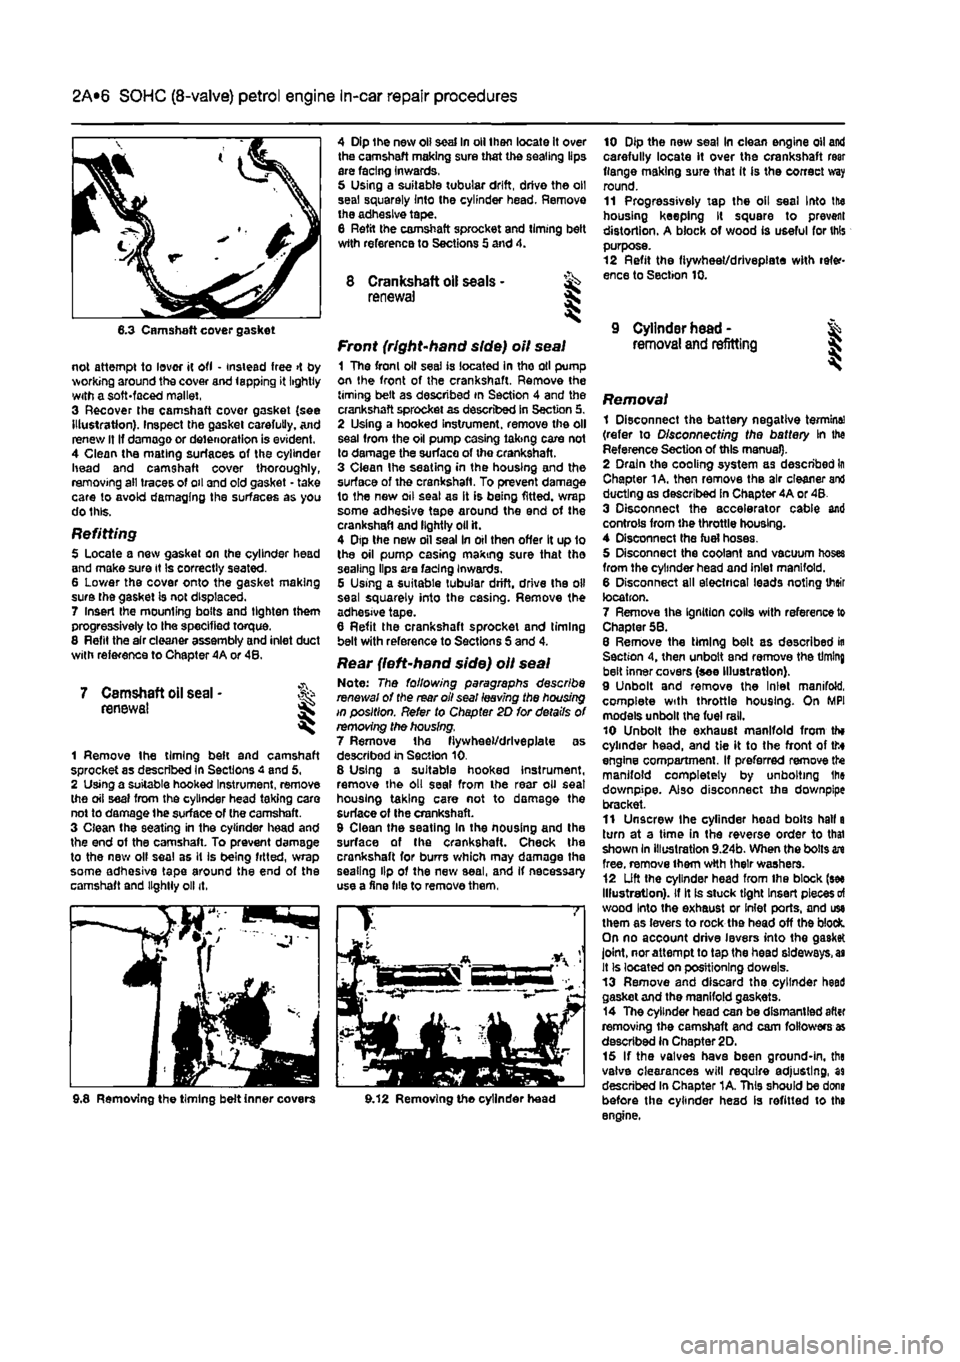
6.3 Camshaft cover gasket
not attempt to lover it ofl • instead free >t by working around the cover and lapping it lightly with a soft-faced mallet, 3 Recover the camshaft covor gasket {see Illustration). Inspect the gasket carefully. And renew It If damage or deterioration is evident. 4 Clean the mating surfaces of the cylinder head and camshaft cover thoroughly, removing all traces of oil and old gasket - take care to avoid damaging the surfaces as you do this.
Refitting 5 Locate a new gasket on the cylinder head and make sure it Is correctly seated. 6 Lower the cover onto the gasket making sure the gasket is not displaced. 7 Insert Ihe mounting bolts and tighten them progressively to the specified torque. 8 Refit the air cleaner assembly and inlet duct with reference to Chapter 4A or 48.
7 Camshaft oil seal • renewal I
1 Remove the timing beft and camshaft sprocket as described in Sections 4 and 5, 2 Using a suitable hooked Instrument, remove the oil seal from the cylinder head taking care not to damage the surface of (he camshaft. 3 Clean the seating in the cylinder head and the end of the camshaft. To prevent damage to the new olf seal as it is being fitted, wrap some adhesive tape around the end of the camshaft and lightly oil it.
4 Dip the new oil seal In oil then locate it over the camshaft making sure that the sealing lips are facing inwards, 5 Using a suitable tubular drift, drive the oil seal squarely Into the cylinder head. Remove the adhesive tape. 8 Refit the camshaft sprocket and liming belt wtth reference to Sections 5 and 4.
8 Crankshaft oil seals - ^ renewal S
Front (right-hand side) oil seal 1 The fronl oil seal is located in tho oil pump on the front of the crankshaft. Remove the timing belt as described in Section 4 and the crankshaft sprocket as described in Section 5. 2 Using a hooked instrument, remove the oil seal from the oil pump casing taking care not to damage the surface of the crankshaft. 3 Clean Ihe seating in the housing and the surface of the crankshaft. To prevent damage to the new oil seal as it is being fitted, wrap some adhesive tape around the end of the crankshaft and lightly oil it. 4 Dtp the new oil seal In oil then offer It up 1o the oil pump casing making sure that tho sealing lips are facing Inwards. G Using a suitable tubular drift, drive the oil seal squarely into the casing. Remove the adhesive tape. 6 Refit the crankshaft sprocket and timing belt with reference to Sections S and 4.
Rear {left-hand side) oil seal Note: The following paragraphs describe renewal of the rear oil seal leaving the housing in position. Refer to Chapter 2D for details of removing the housing. 7 Remove the fiywheel/drlveplate as described in Section 10. 8 Using a suitable hooked instrument, remove the oil seal from the rear oil seat housing taking care not to damage the surface of Ihe crankshaft. 9 Clean the seating In the nousing and the surface of the crankshaft. Check the crankshaft for burrs which may damage the sealing lip of the new seal, and If necessary use a fine file to remove them,
10 Dip the new seal In clean engine oil and carefully locate it over the crankshaft rear flange making sure that It is the correct way round. 11 Progressively tap the oil seal Into the housing keeping It square to prevent distortion. A block of wood is useful for this purpose. 12 Refit the fiywheet/drlvepiate with refer-ence to Section 10.
9 Cylinder head -removal and refitting I
i Removing the timing belt inner covers 9.12 Removing the cylinder head
Removal 1 Disconnect the battery negative termine! (refer to Disconnecting the battery In the Reference Section of this manual). 2 Drain the cooling system as described In Chapter 1A. then remove the air cleaner and ducting as described in Chapter 4A or 48. 3 Disconnect the accelerator cable and controls from the throttle housing. 4 Disconnect the fuel hoses. 5 Disconnect the coolant and vacuum hoses from the cylinder head and inlet manifold. 6 Disconnect all electrical leads noting their location. 7 Remove the Ignition colls with reference to Chapter 58. 8 Remove the timing belt as described in Section 4, then unbolt end remove the timing belt inner covers (see Illustration). 9 Unbolt and remove the Inlet manifold, complete with throttle housing. On MPI models unbolt the fuel rail. 10 Unbolt the exhaust manifold from th» cylinder head, and tie it to the front of tto engine compartment. If preferred remove the manifold completely by unbolting Ihe downpipe. Also disconnect iha downpipe bracket. 11 Unscrew the cylinder head bolts hall a turn at a time in the reverse order to thai shown In illustration 9.24b. When the bolts in free, remove them wtth their washers. 12 Lift the cylinder head from Ihe block (see Illustration), if It is stuck tight Insert pieces
of
wood Into the exhaust or Inlet ports, and use them as levers to rock the head off the block. On no account drive levers into the gasket joint, nor attempt to tap the head sideways,
as
It Is located on positioning dowels. 13 Remove and discard the cylinder heed gasket and the manifold gaskets. 14 The cylinder head can be dismantled after removing the camshaft and cam followers as described in Chapter 2D. 15 If the valves have been ground-in, the valve clearances will require adjusting, as described In Chapter 1A. This should be dons before the cylinder head is refitted to the engine.
Page 57 of 225
2A*10 SOHC (8-valve) petrol engine in-car repair procedures
Preparation for refitting 16 The mating faces of the cylinder head and cylinder block must be perfectly clean before
refitting
the head. Use a hard plastic or wooden scraper to remove all traces of gasket and carbon; also clean the piston crowns. Take padicular care when cleaning the piston crowns as the soft aluminium alloy is easily damaged. Make sure that the carbon is not afowed to enter the oil and water passages -Ihs is particularly important for the lubrication
system, as
carbon could block the oil supply to
Ihe
engine's components. Using adhesive tape
and
paper, seal the water, oil and bolt holes in tf« cylinder block. To prevent carbon entering twgap between the pistons and bores, smear
a
iittte grease in the gap. After cleaning each piston, use a small brush to remove all traces of grease and carbon from the gap, then wipe away the remainder with a clean rag. Clean all
ttie pistons
in the same way. 17 Check the mating surfaces of the cylinder block and the cylinder head for nicks, deep scratches and other damage. If slight, they may be removed carefully with a file, but if (xcassive, machining may be the only alternative to renewal. If warpage of the Cytodar head gasket surface is suspected, use a straight-edge to check it for distortion.
Refer
to Part 0 of this Chapter if necessary. 18 Check the condition of the cylinder head
MRS.
and particularly their threads, whenever
they are
removed. Wash the bolts In a suitable solvent, and wipe them dry. Check each bolt for any sign of visible wear or damage, renewing them if necessary.
Refitting 18 Before refitting Ihe assembled cylinder head, make sure that the head and block mating surfaces are perfectly clean, and that
the
bolt holes in the cylinder block have been
mopped
out to clear any oil. 20 Check that the camshaft and crankshaft sprocket timing marks are still aligned with tteir respective cylinder head and oil pump covtr marks as described in Section 2. 21 The new gasket should not be removed from its nylon cover until required for use. Fit
the
gasket dry, and make sure that the mating surfaces on the head and block are perfectly dean.
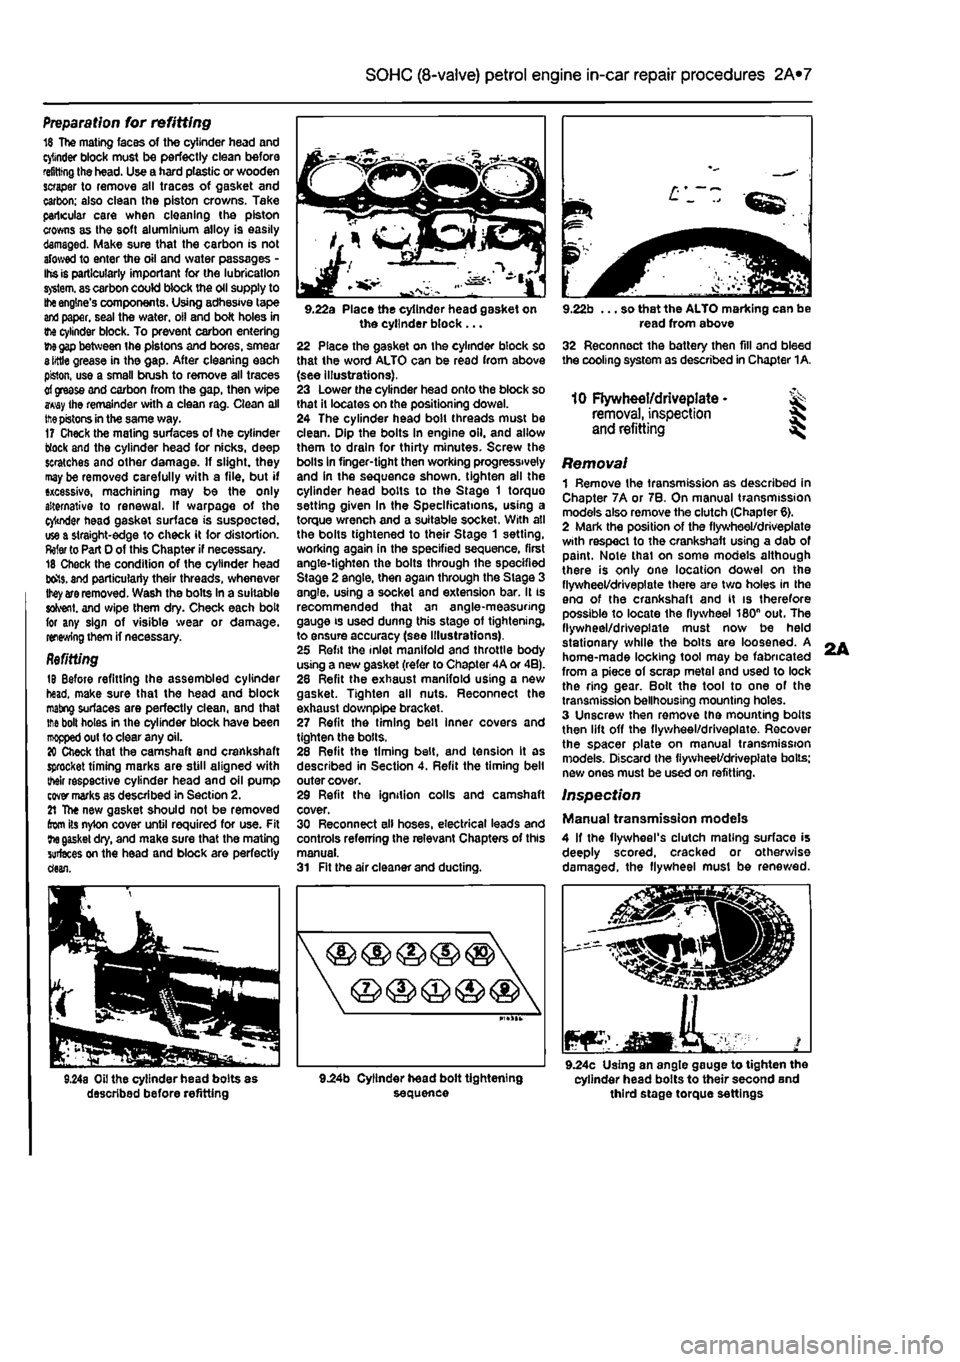
9.22a Place the cylinder head gasket on the cylinder block ... 22 Place the gasket on the cylinder block so that the word ALTO can be read from above (see illustrations). 23 Lower the cylinder head onto the block so that It locates on the positioning dowel. 24 The cylinder head bolt threads must be clean. Dip the bolts In engine oil. and allow them to drain for thirty minutes. Screw the bolls in finger-tight then working progressively and in the sequence shown, tighten all the cylinder head bolts to the Stage 1 torque setting given In the Specifications, using a torque wrench and a suitable socket. With all the bolts tightened to their Stage 1 setting, working again in the specified sequence, first angle-tighten the bolts through ihe specified Stage 2 angle, then again through the Stage 3 angle, using a socket and extension bar. It is recommended that an angle-measuring gauge is used dunng this stage of tightening, to ensure accuracy (see Illustrations). 25 Refit the inlet manifold and throttle body using a new gasket (refer to Chapter 4A or 4B). 28 Refit the exhaust manifold using a new gasket. Tighten all nuts. Reconnect the exhaust downplpe bracket. 27 Refit the timing belt inner covers and tighten the bolls. 28 Refit the timing belt, and tension It as described in Section 4. Refit the timing belt outer cover. 29 Refit the ignition colls and camshaft cover. 30 Reconnect all hoses, electrical leads and controls referring the relevant Chapters of this manual. 31 Fit the air cleaner and ducting.
9.22b ... so that the ALTO marking can be read from above 32 Reconnect the battery then fill and bleed the cooling system as described in Chapter 1A.
10 Flywheel/driveplate • ^ removal, inspection
and
refitting ^
Removal 1 Remove the transmission as described in Chapter 7A or 7B. On manual transmission models also remove the clutch (Chapter 6). 2 Mark the position of the flywheel/driveplate with respect to the crankshaft using a dab of paint. Note thai on some models although there is only one location dowel on the flywheel/driveplate there are two holes in the eno of the crankshaft and it is therefore possible to locate Ihe flywheel 180n out. The flywheel/driveplate must now be held stationary while the bolts are loosened. A home-made locking tool may be fabricated from a piece of scrap metal and used to lock the ring gear. Bolt the tool to one of the transmission bellhousing mounting holes. 3 Unscrew then remove the mounting bolts then lift off the flywheel/driveplate. Recover the spacer plate on manual transmission models. Discard the fiywheet/drivepiate boils; new ones must be used on refitting.
Inspection
Manual transmission models 4 If the flywheel's clutch mating surface is deeply scored, cracked or otherwise damaged, the flywheel must be renewed.
JEaMKA. mar 9.24c Using an angle gauge to tighten the cylinder head bolts to their second and third stage torque settings
L
Page 61 of 225
2B»1
Chapter 2 Part B:
DOHC (16-valve) petrol
engine in-car repair procedures
Contents
Auxiliary drlvebelts - removal and refitting See Chapter 1A Camshaft oil seal - renewal 6 Camshafts and cam followers - removal, inspection and refitting .. 9 Crankshaft oil seals • renewal 7 Cylinder compression test 3 Cylinder head - dismantling and overhaul See Chapter 2D Cylinder head • removal and refitting 10 Cylinder head extension • removal and refitting 8 Engine assembly/Valve timing holes - general information and usage 2
Engine mountings - inspection and renewal 12 Engine oil and filter - renewal See Chapter 1A Engine oil level - check See Weekly checks Flywheel - removal, Inspection and refitting 11 General Information 1 Oil pump and pick-up tube - removal, inspection and refitting 14 Sump - removal and refitting 13 Timing belt and covers - removal and refitting 4 Timing belt tensioner and sprockets • removal and refitting 5
Degrees of difficulty
Easy,
sitable
for
J; Fairly
easy,
suitable Fairtydifflcutt, ^
Difficult,
aitabtefcr Very
difficult,
^ nwice
wim
(ttls for beginner with £
suitable
for competent KYmechanic ^ experienced DIY > suitable
for
expert DIY« experience
some
experience £
suitable
for competent KYmechanic ^ mechanic > or professional ^
Specifications
General Engine code* 176.09.000 •Note: See Vehicle Identification for the location of code marking on the engine. Bore 70.8 mm Stroke 78.86 mm Capacity 1242 cc Compression ratio 10.2:1 Firing order 1-3-4-2 No
1
cylinder location Timing belt end of engine Timing belt tension See text
Camshaft Orlve Toothed belt
No
of bearings 3 Camshaft bearing journal diameters: Ho
1
bearing 35.000 to 35.015 mm
Mo
2 bearing 48.000 to 48.015 mm No 3 bearing 49.000 to 49.015 mm Camshaft bearing Journal running clearance 0.030 to 0.070 mm Camshaft endfloat 0.15 to 0.34 mm
Cylinder head extension Camshaft bearing diamelers: No
1
bearing 35.045 to 35.070 mm No 2 bearing 48,045 to 48.070 mm No 3 bearing 49.045 to 49.070 mm
Cam
follower (tappet) type Hydraulic
Cam
follower (tappet) diameter 28.353 to 28.370 mm
Cam
follower (tappet) bore diameter in cylinder head extension 28.400 to 28.421 mm
Cam
follower (tappet) running clearance 0.046 to
0.051
mm
Page 62 of 225
2A*10 SOHC (8-valve) petrol engine in-car repair procedures
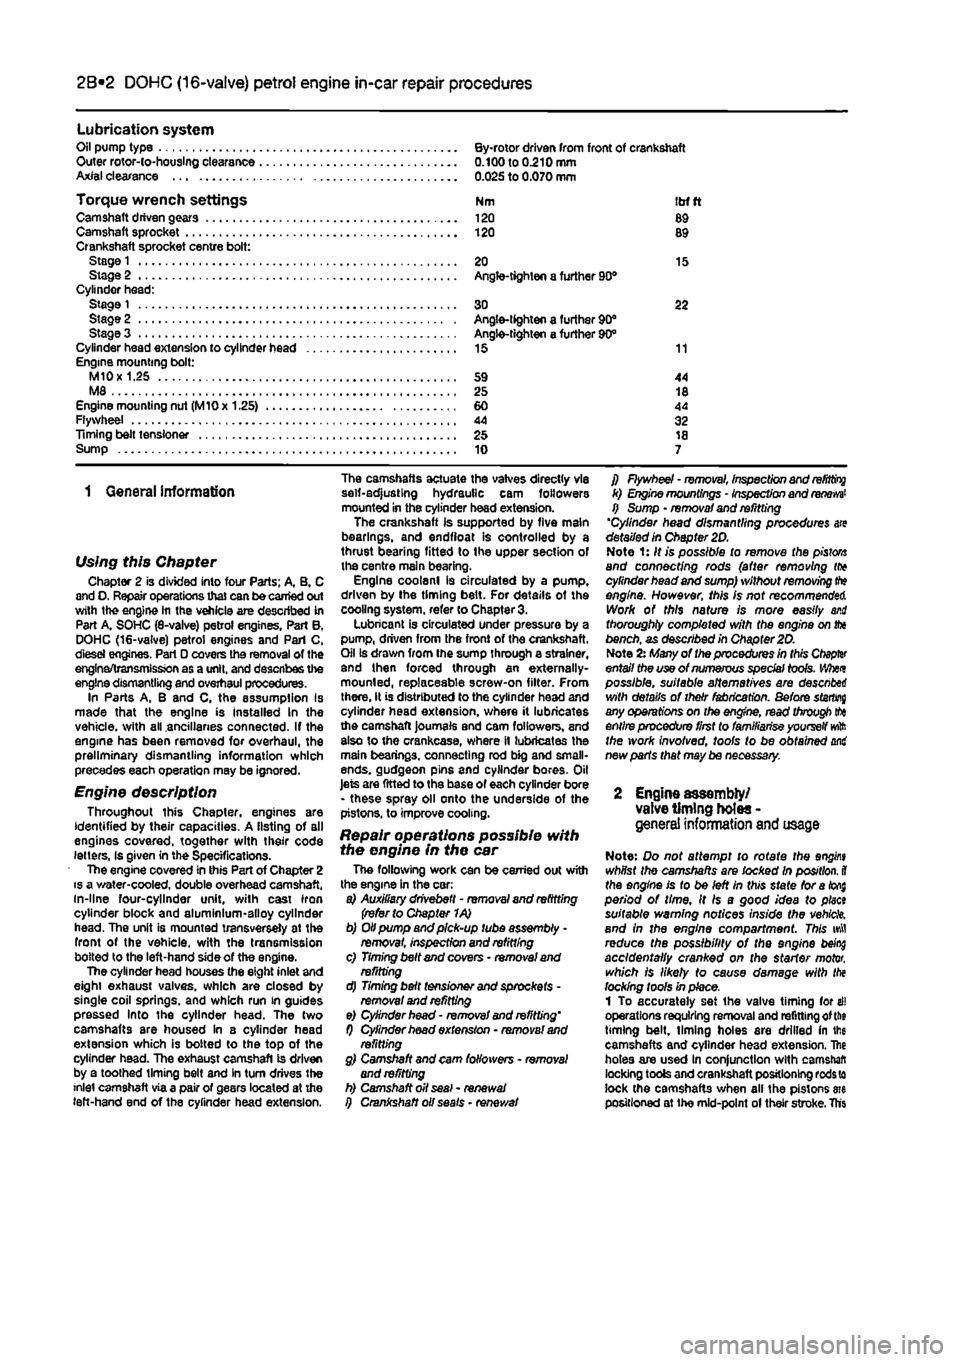
Lubrication system Oil pump type By-rotor driven from front of crankshaft Outer rotor-io-houslng clearance 0.100 to 0.210 mm Axial clearance 0.025 to 0.070 mm
Torque wrench settings Nm itrf ft Camshaft driven gears 120 89 Camshaft sprocket 120 89 Crankshaft sprocket centre bolt: Stage
1
20 15 Stage 2 Angle-tighten a further 90® Cylinder head: Stage
1
30 22 Stage 2 Angle-tighten a further 90" Stage 3 Angle-tighten a further 90° Cylinder head extension to cylinder head 15 11 Engine mounting bolt: M10
x
1.25 59 44 M8 25 18 Engine mounting nut (MlOx 1.25) 60 44 Flywheel 44 32 Timing belt tensioner 25 18 Sump 10 7
1 General information
Using this Chapter Chapter 2 is divided into four Parts; A, B. C and O. Repair operations that can be carried out with the engine hi the vehicle are described in Part A. SOHC (8-valve) petrol engines. Part B, DOHC (16-valve) petrol engines and Pari C, dlesei engines. Part D covers the removal of the engine/transmission as a unit, and describes the engine dismantling and overhaul procedures. In Parts A, B and C, the assumption Is made that the engine is Installed In the vehicle, with all ancillaries connected. If the engine has been removed for overhaul, the preliminary dismantling information which precedes each operation may be ignored.
Engine description Throughout this Chapter, engines are identified by their capacities. A listing of all engines covered, together with their code letters, Is given in the Specifications. The engine covered in this Part of Chapter 2 is a water-cooled, double overhead camshaft, in-line four-cylinder unit, with cast iron cylinder block and aluminium-alloy cylinder head. The unit is mounted transversely at the front of the vehicle, with the transmission bolted to the left-hand side of the engine. The cylinder head houses the eight inlet and eight exhaust valves, which are closed by single coil springs, and which run in guides pressed Into the cylinder head. The two camshafts are housed in 8 cylinder head extension which is bolted to the top of the cylinder head. The exhaust camshaft is driven by a toothed timing belt and In turn drives the inlet camshaft via a pair of gears located at the left-hand end of the cylinder head extension.
The camshafts actuate the valves directly via self-adjusting hydraulic cam followers mounted in the cylinder head extension. The crankshaft is supported by five main bearings, and endfioat is controlled by a thrust bearing fitted to (he upper section of the centre main bearing. Engine coolanl is circulated by a pump, driven by the timing belt. For details of the cooling system, refer to Chapter 3. Lubricant is circulated under pressure by a pump, driven from the front of the crankshaft. Oil is drawn from Ihe sump through a strainer, and then forced through an externally-mounted, replaceable screw-on filter. From there, It is distributed to the cylinder head and cylinder head extension, where it lubricates the camshaft journals and cam followers, and also to the crankcase, where it lubricates the main bearings, connecting rod big and small-ends. gudgeon pins and cylinder bores. Oil Jets are fitted to the base of each cylinder bore - these spray oil onto the underside of the pistons, to improve cooling.
Repair operations possible with the engine in the car The following work can be carried out with the engine in the car: a) Auxiliary drivebett - removal and refitting (refer to Chapter 1A) b) Oil pump and pick-up tube assembly -removal, Inspection and refitting c) Timing belt and covers • removal and refitting d) Timing belt tensioner and sprockets -removal and refitting e) Cylinder head - removal and refitting' f) Cylinder hoad extension - removal and refitting g) Camshaft and cam followers - removal and refitting h) Camshaft oil seal - renewal i) Crankshaft oil seals • renewal
f) Flywheel - removal, inspection and
refitting
k) Engine mountings - Inspection and
renews'
f) Sump • removal and refitting 'Cylinder head dismantling procedures are detailed In Chapter 2D. Note 1: It is possible to remove the
pistons
and connecting rods (after removing (to cylinder head and sump) without removing
tt*»
engine. However, this Is not recommended. Work of this nature is more easily and thoroughly completed with the engine on fix bench, as described in Chapter 20. Note
2x
Many of the procedures in this Ctopfer entail the use of numerous special tools. Whet possible, suitable alternatives are descnbei with details of their fabrication. Before starring any operations on the engine, read through
tto
entire procedure first to familiarise yourself
wft
the work involved, tools to be obtained mi new parts that may be necessary.
2 Engine assembly/ valve timing holes -genera! information
and
usage
Note: Do not attempt to rotate the angint whilst the camshafts are locked In position,
il
the engine is to be left in this state foratofi$ period of time. It Is a good idea to plect suitable warning notices inside the vehicle, and in the engine compartment. This wfl reduce the possibility of the engine being accidentally cranked on the starter motor, which is likely to cause damage with the locking tools In place. 1 To accurately set the valve timing for ell operations requiring removal and refitting of
the
timing belt, liming holes are drilled in ihe camshafts and cylinder head extension. Ihe holes are used In conjunction with camshaft locking tools and crankshaft positioning
rods w
lock the camshafts when all the pistons me positioned at the mid-point of their stroke. Ths
Page 64 of 225
2B*4 DOHC (16-valve) petrol engine in-car repair procedures
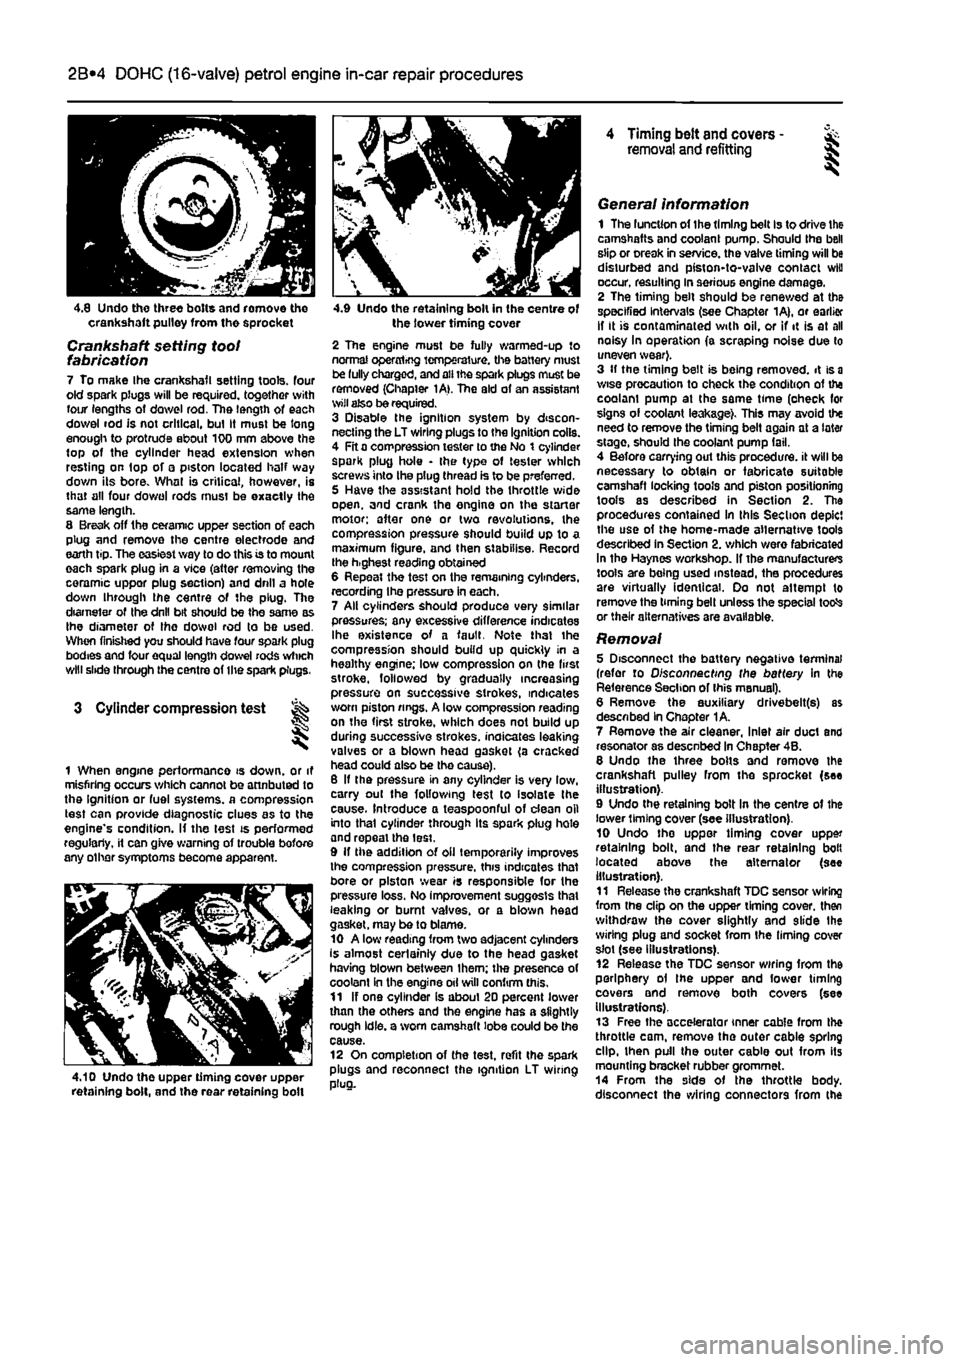
4.8 Undo three bolts and romove tho crankshaft pulley from the sprocket
Crankshaft setting toot fabrication 7 To make Ihe crankshafl setting tools, four old spark plugs will be required, together with four lengths of dowel rod. The length of each dowel rod is not critical, bul It must be long enough to protrude about 100 mm above the top of the cylinder head extension when resting on top of a piston located half way down its bore. What is critical, however, is that all four do wo I rods must be exactly the same length. 8 Break off the ceramic upper section of each plug and remove the centre electrode and earth tip. The easiest way to do this is to mount each spark plug in a vice (attar removing the ceramic uppor plug section) and drill a hole down through ihe centre of the plug. The diameter of Ihe drill bit should be the same as Ihe diameter of Ihe dowol rod to be used. When finished you should have four spark plug bodies and four equal length dowel rods which will slide through the centre of the spark plugs.
3 Cylinder compression test
1 When engine performance is down, or it misfiring occurs which cannot be attnbuted to the Ignition or fuel systems, a compression test can provide diagnostic clues as to the engine's condition. If the lest is performed regularly, it can give warning of trouble bofore any other symptoms become apparent.
4.10 Undo the upper timing cover upper retaining bolt, and the rear retaining boll
4.9 Undo the retaining bolt in the centre of the lower timing cover
2 The engine must be fully warmed-up to normal operxrtrfjg temperature, the battery must be fully charged, and all the spark plugs muse be removed (Chapter 1A>. The aid of an assistant wilt also be required. 3 Disable the ignition system by discon-necting the LT wiring plugs to the Ignition coils. 4 Fit a compression tester to the No t cylinder spark plug hole • the type of tester which screws into the plug thread is to be preferred. 5 Have the assistant hold the throttle wide open, and crank the engine on the starter motor; after one or two revolutions, the compression pressure should build up to a maximum figure, and then stabilise. Record the h.ghest reading obtained 6 Repeat the test on the remaining cylinders, recording Ihe pressure in each. 7 All cylinders should produce very similar pressures; any excessive difference indicates Ihe existence of a fault. Note that the compression should build up quickly in a healthy engine; low compression on (he first stroke, followed by gradually increasing pressure on successive strokes, indicates worn piston rings. A low compression reading on the first stroke, which does not build up during successive strokes, indicates leaking valves or a blown head gasket (a cracked head could also be tho cause). 6 If the pressure in any cylinder is very low, carry out the following test to isolate the cause. Introduce a teaspoonful of dean oil into that cylinder through its spark plug hole and repeal the lest. 9 If the addition of oil temporarily improves the compression pressure, this indicates that bore or piston wear is responsible for the pressure loss. No improvement suggests that leaking or burnt valves, or a blown head gasket, may be to blame. 10 A low reading from two adjacent cylinders is almost certainly due to the head gasket having blown between Ihem; the presence of coolant in the engine oil will confirm this. 11 If one cylinder is about 20 percent lower than the others and the engine has a slightly rough idle, a worn camshaft lobe could be the cause. 12 On completion of the test, refit the spark plugs and reconnect the ignition LT wiring plug.
4 Timing belt and covers -removal and refitting §
General information 1 The luncUon of the timing belt Is to drive the camshafts and coolant pump. Should the bell slip or creak in service, the valve timing will be disturbed and piston-to-valve contact wiu occur, resulting in serious engine damage. 2 The timing belt should be renewed at the specified Intervals (see Chapter 1A), or earlier If It is contaminated with oil, or if it is at all noisy In operation (a scraping noise due to uneven wear}. 3 If the timing belt is being removed, it is
a
wise precaution to check the condition of the coolam pump at the same time (oheck for signs of coolant leakage). This may avoid the need to remove the timing belt again at a later stage, should the coolant pump fail. 4 Before carrying out this procedure, it will be necessary to obtain or fabricate suitable camshaft locking tools and piston positioning tools as described in Section 2. The procedures contained In this Section depict the use of the home-made alternative tools described in Section 2. which were fabricated In the Haynes workshop. If the manufacturers tools are being used instead, the procedures are virtually identical. Oo not attempt to remove the timing bell unless the special totfs or their alternatives are available.
Removal 5 Disconnect the battery negative terminal (refer to Disconnecting the battery in the Reference Section of Ihis manual). 6 Remove the auxiliary drivebelt(s) as described In Chapter 1A. 7 Remove the air cleaner, Inlet air duct and resonator as desenbed In Chapter 4B. 8 Undo the three bolts and remove the crankshaft pulley from the sprocket (see illustration). 9 Undo the retaining bolt In the centre of the lower liming cover (see illustration). 10 Undo tho uppor timing cover upper retaining bolt, and the rear retaining bolt located above the alternator (see illustration). 11 Release the crankshaft TDC sensor wiring from the clip on the upper timing cover, then withdraw the cover slightly and slide Ihe wiring plug and socket from the liming cover slot (see illustrations). 12 Release the TDC sensor wiring from the periphery ol the upper and fower timing covers and remove both covers (see Illustrations). 13 Free the accelerator inner cable from the throttle cam, remove the outer cable spring dip, then pull the outer cable out from its mounting bracket rubber grommet. 14 From the side of the throttle body, disconnect the wiring connectors from the
Page 65 of 225
2B*5 DOHC (16-valve) petrol engine in-car repair procedures
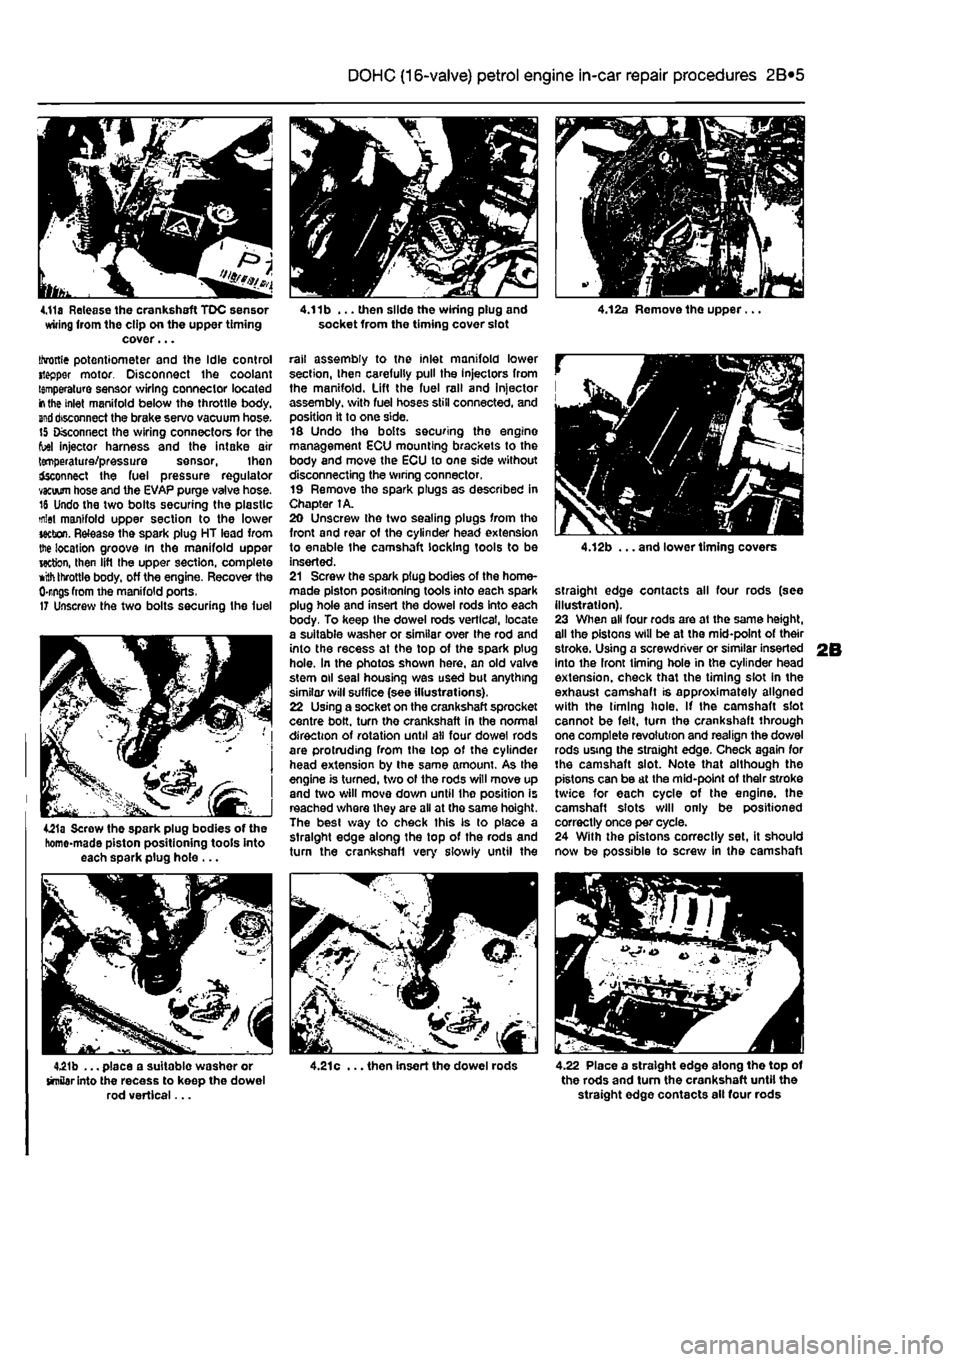
4.11a Release the crankshaft TDC sensor wiring from the clip on the upper timing cover... throttle potentiometer and the Idle control stepper motor. Disconnect the coolant temperature sensor wiring connector located
in
the inlet manifold below the throttle body,
end
disconnect the brake servo vacuum hose. 15 Disconnect the wiring connectors for the fuel injector harness and the intake air temperature/pressure sensor, then fcconnect the fuel pressure regulator vacuum hose and the EVAP purge valve hose. 18 Undo the two bolts securing the plastic mlet manifold upper section to the lower section. Release the spark plug HT lead from the location groove in the manifold upper wctton, then lift the upper section, complete
»ith
throttle body, off the engine. Recover the 0-rngs from the manifold ports. 17 Unscrew the two bolts securing the fuel
4£1a Screw the spark plug bodies of the homo-made piston positioning tools into each spark plug hole ...
4.21b ... place a suitable washer or similar into the recess to keep the dowel rod vertical...
4.11b ... then slide the wiring plug and socket from the timing cover slot
rail assembly to the inlet manifold lower section, then carefully pull the Injectors from the manifold. Lift the fuel rail and Injector assembly, with fuel hoses still connected, and position it to one side. 16 Undo the bolts securing the engine management ECU mounting brackets to the body and move the ECU to one side without disconnecting the wiring connector. 19 Remove the spark plugs as described in Chapter 1A. 20 Unscrew the two sealing plugs from the front and rear of the cylinder head extension to enable the camshaft locking tools to be inserted. 21 Screw the spark plug bodies of the home-made piston positioning tools into each spark plug hole and insert the dowel rods into each body. To keep the dowel rods vertical, locate a suitable washer or similar over Ihe rod and into the recess at the top of the spark plug hole. In the photos shown here, an old valve stem oil seal housing was used but anything similar will suffice (see illustrations). 22 Using a socket on the crankshaft sprocket centre bolt, turn the crankshaft in the normal direction of rotation until all four dowel rods are protruding from the top of the cylinder head extension by the same amount. As the engine is turned, two of the rods will move up and two will move down until the position is reached where they are all at the same hoight. The best way to check this is to place a straight edge along the top of the rods and turn the crankshafl very slowly until the
4.21c ... then insert the dowel rods
4.12b ... and lower timing covers
straight edge contacts all four rods (see illustration). 23 When all four rods are at the same height, all the pistons will be at the mid-point of their stroke. Using a screwdriver or similar inserted into the front timing hole in the cylinder head extension, check that the timing slot in the exhaust camshaft is approximately aligned with the liming hole. If the camshaft slot cannot be felt, turn the crankshaft through one complete revolution and realign the dowel rods using the straight edge. Check again for the camshaft slot. Note that although the pistons can be at the mid-point of their stroke twice for each cycle of the engine, the camshaft slots will only be positioned correctly once per cycle. 24 With the pistons correctly set, it should now be possible to screw in the camshaft
4.22 Place a straight edge along the top of the rods and turn the crankshaft until the straight edge contacts ail four rods
Page 67 of 225
2B*7 DOHC (16-valve) petrol engine in-car repair procedures
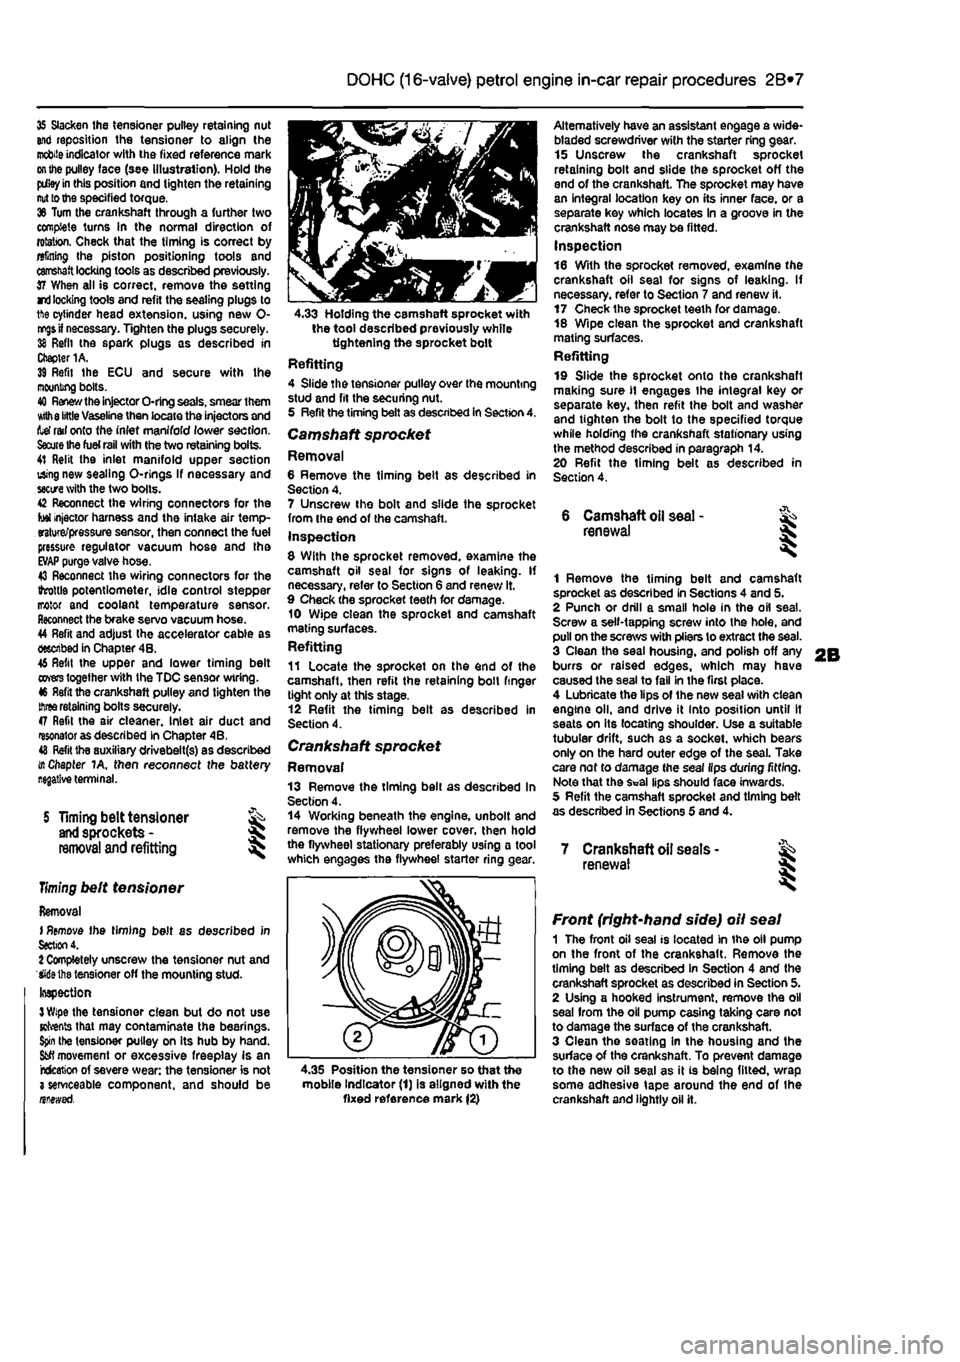
35 Slacken the tensioner pulley retaining nut and reposition the tensioner to align the
mobile
indicator with the fixed reference mark
on the
pulley face (see illustration). Hold the
pdley in
this position and tighten the retaining
nut to the
specified torque. 36 Turn the crankshaft through a further two complete turns In the normal direction of rotation. Check that the timing is correct by alining Ihe piston positioning tools and
camshaft
locking tools as described previously. 37 When all is correct, remove the setting rri
locking
tools and refit the sealing plugs to 1ft© cylinder head extension, using new 0-
nr^s if
necessary. Tighten the plugs securely. 38 Refit the spark plugs as described in Chapter 1A. 39 Refit Ihe ECU and secure with Ihe mooning bolts. 40
Renew the
injector O-ring seals, smear them Kith
8 little
Vaseline then locate the injectors and tef rail onto the inlet manifold lower section.
Saute Ihe fuel rail
with the two retaining bolts. 41 Relit the inlet manifold upper section using new sealing O-rlngs If necessary and
sectre
with the two bolts. 42 Reconnect the wiring connectors for the tot injector harness and the intake air temp-erature/pressure sensor, then connect the fuel pressure regulator vacuum hose and tha
EVAP
purge valve hose. 43 Reconnect the wiring connectors for the ihrottls potentiometer, idle control stepper motor and coolant temperature sensor. Reconnect the brake servo vacuum hose. 44 Refit and adjust the accelerator cable as described in Chapter 4B. 46 Refit the upper and lower timing belt
covers
together with the TDC sensor wiring. 46 Refit the crankshaft pulley and tighten the
three
retaining bolts securely. 47 Refit the air cleaner. Inlet air duct and resonator as described in Chapter 4B. 48
Refit
tha auxiliary drivebelt(s) as described i/t Chapter 1A, then reconnect the battery
S Timing belt tensioner
and
sprockets -
removal
and refitting
Timing
belt tensioner
Removal I
Remove
the timing belt as described in
Section
4. 1 Completely unscrew the tensioner nut and Wiethe tensioner off the mounting stud-Inspection
3 Wipe
the tensioner clean but do not use Kfrents that may contaminate the bearings.
Spin
the tensioner pulley on its hub by hand.
Sfcfl
movement or excessive freeplay is an rcfceticn of severe wear: the tensioner is not 3 serviceable component, and should be nnewsd.
4.33 Holding the camshaft sprocket with the tool described previously while tightening the sprocket bolt Refitting 4 Slide the tensioner pulley over the mounting stud and fit the securing nut. 5 Refit the timing belt as described in Section 4. Camshaft sprocket Removal 6 Remove the timing belt as described in Section 4. 7 Unscrew the bolt and slide the sprocket from the end of the camshaft. Inspection 8 With the sprocket removed, examine the camshaft oil seal for signs of leaking. If necessary, refer to Section 6 and renew it. 9 Check the sprocket teeth for damage. 10 Wipe clean the sprocket and camshaft mating surfaces. Refitting 11 Locate the sprocket on the end of the camshaft, then refit the retaining boll finger tight only at this stage. 12 Refit the timing belt as described in Section 4.
Crankshaft sprocket Removal 13 Remove the timing bell as described In Section 4. 14 Working beneath the engine, unbolt and remove the flywheel lower cover, then hold the flywheel stationary preferably using a tool which engages the flywheel starter ring
<
Alternatively have an assistant engage a wide-bladed screwdriver with the starter ring gear. 15 Unscrew the crankshaft sprocket retaining bolt and slide the sprocket off the end of the crankshaft. The sprocket may have an integral location key on its inner face, or a separate key which locates In a groove in the crankshaft nose may be fitted. Inspection 16 With the sprocket removed, examine the crankshaft oil seal for signs of leaking. If necessary, refer to Section 7 and renew it. 17 Check the sprocket teeth for damage. 18 Wipe clean the sprocket and crankshaft mating surfaces. Refitting 19 Slide the sprocket onto the crankshaft making sure
11
engages the integral key or separate key, then refit the bolt and washer and tighten the bolt to the specified torque while holding the crankshaft stationary using the method described in paragraph 14. 20 Refit the timing belt as described in Section 4.
6 Camshaft
oil
seal -renewal
1 Remove the timing belt and camshaft sprocket as described in Sections 4 and 5. 2 Punch or drill a small hole in the oil seal. Screw a self-tapping screw into the hole, and pull on the screws with pliers to extract the seal. 3 Clean the seal housing, and polish off any burrs or raised edges, which may have caused the seal to fall in the first place. 4 Lubricate the lips of the new seal with clean engine oil, and drive it into position until It seats on its locating shoulder. Use a suitable tubular drift, such as a socket, which bears only on the hard outer edge of the seal. Take care nof to damage the seal lips during fitting. Note that the Seal lips should face inwards. 5 Refit the camshaft sprocket and timing belt as described in Sections 5 and 4.
7 Crankshaft oil seats -renewal I
4.35 Position the tensioner so that the mobile Indicator (1) is aligned with the fixed reference mark (2)
Front (right-hand side) oil seal 1 The front oil seal is located in the oil pump on the front of the crankshaft. Remove the timing belt as described in Section 4 and the crankshaft sprocket as described in Section 5. 2 Using a hooked Instrument, remove the oil seal from the oil pump casing taking care not to damage the surface of the crankshaft. 3 Clean the seating in the housing and the surface of the crankshaft. To prevent damage to the new oil seal as it is being fitted, wrap some adhesive tape around the end of the crankshaft and lightly oil it.
Page 68 of 225
2B*8 DOHC (16-valve) petrol engine in-car repair procedures
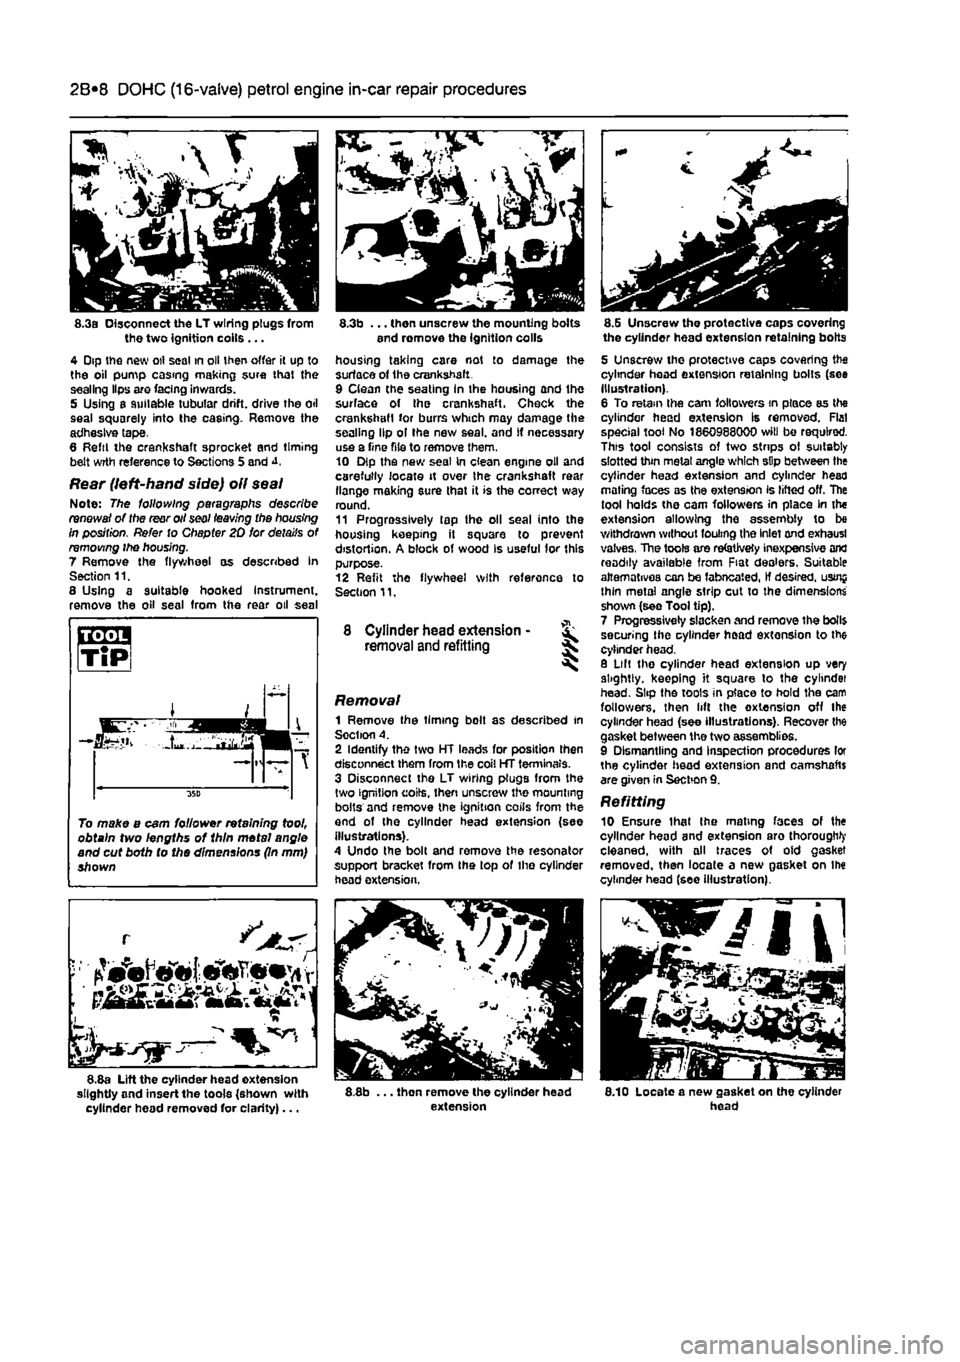
8.3a Disconnect the LT wiring plugs from the two Ignition coils ... 4 Dip the new oil seal in oil then offer it up to the oil pump casing making sure that the sealing Hps are facing inwards. 5 Using a suitable tubular drift, drive the oil seal squarely into the casing. Remove the adhesive tape, 8 Reftl the crankshaft sprocket and timing belt wrth reference to Sections 5 and
Rear (left-hand side) oil seal Note: The following paragraphs describe renewal of the rear oil seal leaving the housing in position. Refer to Chapter 20 for details of removing ihe housing. 7 Remove the flywheel as described In Section 11. 8 Using a suitable hooked Instrument, remove the oil seal from the rear oil seal
L •
~ 1 8.8a Lift the cylinder head extension slightly and insert the tools {shown with cylinder head removed for clarity)...
8.3b ... then unscrew the mounting bolts end romove the ignition colls housing taking care not to damage the surface of the crankshaft. 9 Clean the seating In the housing and the surface of Ihe crankshaft. Check the crankshaft for burrs which may damage the sealing lip ol Ihe new seal, and If necessary use a Tine file to remove them. 10 Dip the new seal In clean engine oil and carefully locate it over Ihe crankshaft rear flange making sure that it is the correct way round. 11 Progressively tap the oil seal into the housing keeping it square to prevent distortion. A block of wood Is useful for this purpose. 12 Refit the flywheel with reference to Section 11,
8 Cylinder head extension -removal and refitting ^
Removal 1 Remove the timing bolt as described in Soction A. 2 Identify the two HT leads for position then disconnect them from the coil HT terminals. 3 Disconnect the LT wiring plugs from the two ignition coils, then unscrew the mounting bolts and remove the ignition coils from the and of the cylinder head extension {see illustrations). A Undo the bolt and remove the resonator support bracket from Ihe top of the cylinder head extension,
8.8b ... thon remove the cylinder head extension
8.G Unscrew tho protective caps covering the cylinder head extension retaining bolts
5 Unscrew the protective caps covering the cylinder head extension retaining bolts (see Illustration). 6 To retain the cam followers in place as the cylinder head extension Is removed. Flat special tool No 1860988000 will bo required. This tool consists of two strips ol suitably slotted thin metal angle which sDp between the cylinder head extension and cylinder head mating faces as the extension Is lifted off. The tool holds the cam followers in place in the extension allowing the assembly to be withdrawn without fouling the Inlet and exhausl valves, The tools are refetJvety inexpensive and readily available from Fiat dealers. Suitable alternatives can be fabneated, If desired, usrnj thin metal angle strip cut to the dimensions shown (see Tool tip). 7 Progressively slacken and remove the boll$ securing the cylinder head extension to the cylinder head. 8 Lilt tho cylinder head extension up very slightly, keeping it square to the cylindei head. Slip the toots in place to hold the cam followers, then lift the extension off the cylinder head (see illustrations). Recover the gasket between the two assemblies. 9 Dismantling and Inspection procedures lor the cylinder head extension and camshafts are given in Section 9. Refitting 10 Ensure thai Ihe mating faces of the cylinder head and extension aro thorough^ cleaned, with all traces of old gasket removed, then locate a new gasket on Ihe cylinder head (see Illustration).
8.10 Locate a new gasket on the cylinder head
To make a cam follower retaining tool, obtain two lengths of 1hln metal angle and cut both to the dimensions (In mm) shown
Page 69 of 225
2B*9 DOHC (16-valve) petrol engine in-car repair procedures
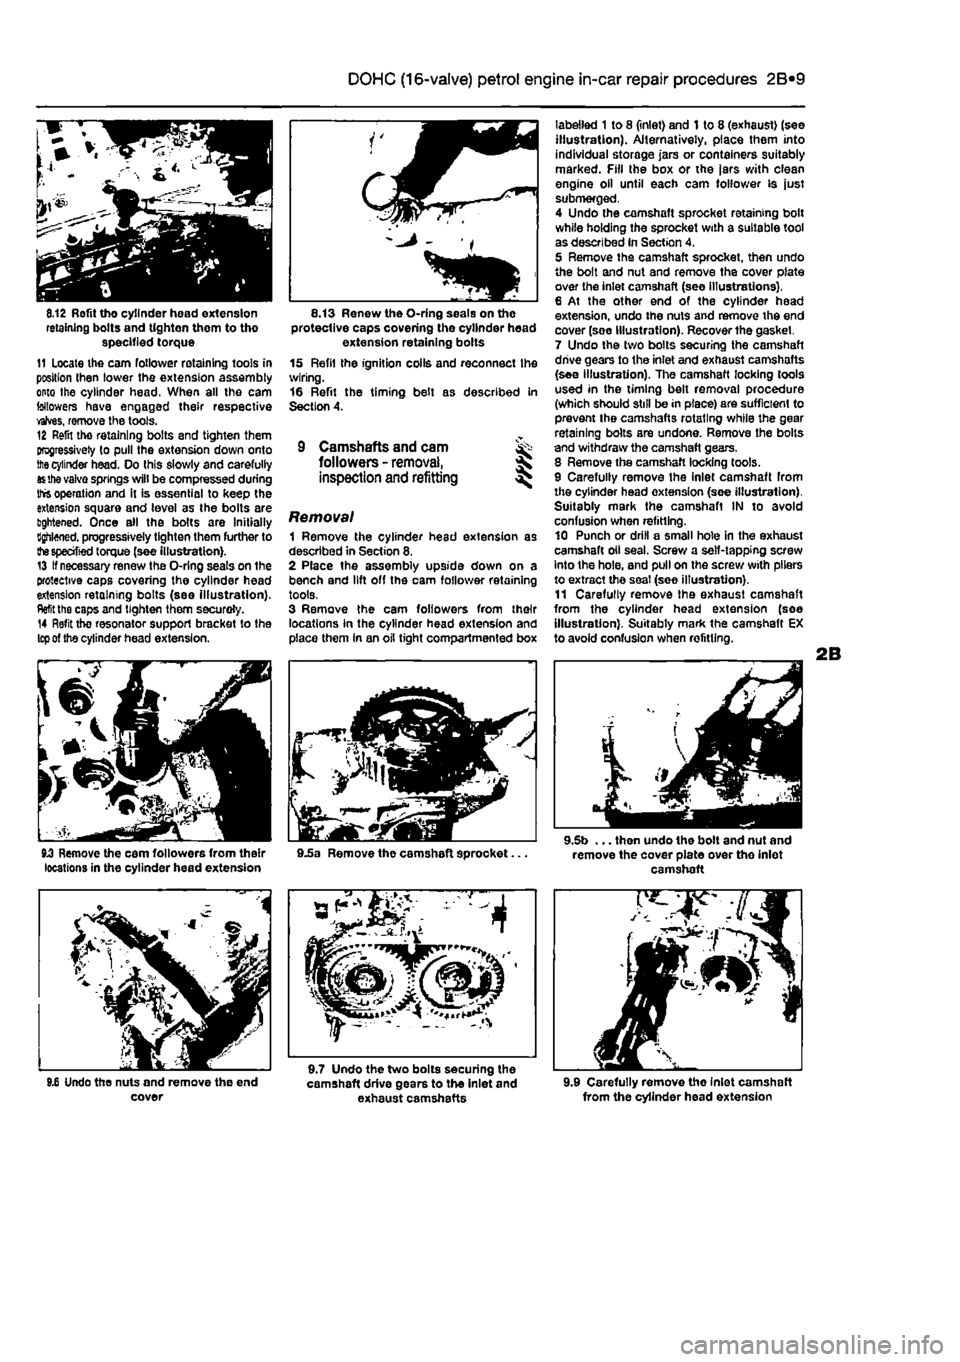
8.12 Rofit tho cylinder head extension retaining bolts and tighten them to tho specified torque 11 Locate the cam follower retaining tools in position Ihen lower the extension assembly onto the cylinder head. When all the cam followers have engaged their respective valves, remove the tools. 12 Refit tho retaining bolts and tighten them progressively to pull the extension down onto
the
cylinder head. Do this slowly and carefully
as the
vaivo springs will be compressed during Ihfs operation and it is essential to keep the extension square and level as the bolts are lightened. Once all the bolts are Initially Bghloned. progressively tighten them further to
the specified
torque (see illustration). 13 If necessary renew the O-rlng seals on the protective caps covering the cylinder head extension retaining bolts (see illustration).
Refit
the caps and tighten them securoly. 14 Refit the resonator support bracket to the
Icp of
the cylinder head extension.
8.13 Renew the O-ring seals on the protective caps covering the cylinder head extension retaining bolts 15 Refil the ignition coils and reconnect Ihe wiring. 16 Refit the timing belt as described in Section 4.
9 Camshafts and cam ^ followers -
removal,
S inspection and refitting ^
Removal 1 Remove the cylinder head extension as described in Section 8. 2 Place the assembly upside down on a bench and lift off the cam follower retaining tools, 3 Remove the cam followers from their locations In the cylinder head extension and place them In an oil tight compartmented box
labelled 1 to 8 (inlet) and 1 to 8 (exhaust) (see illustration). Alternatively, place them into individual storage jars or containers suitably marked. Fill the box or the jars with clean engine oil until each cam follower is just submerged, 4 Undo the camshaft sprocket retaining bolt while holding the sprocket with a suitable tool as described In Section 4. 5 Remove the camshaft sprocket, then undo the bolt and nut and remove the cover plate over the inlet camshaft (see Illustrations), 6 At the other end of the cylinder head extension, undo the nuts and remove the end cover (soe Illustration). Recover the gasket. 7 Undo the two bolts securing the camshaft drive gears to the inlet and exhaust camshafts (see illustration). The camshaft locking tools used in the timing belt removal procedure (which should still be in place) are sufficient to prevent the camshafts rotating while the gear retaining bolts are undone. Remove the bolts and withdraw the camshaft gears. 8 Remove the camshaft locking tools. 9 Carefully remove the Inlet camshaft from the cylinder head extension (see illustration). Suitably mark the camshaft IN to avoid confusion when refitting. 10 Punch or drill a small hole in the exhaust camshaft oil seal. Screw a self-tapping screw into the hole, and pull on the screw with pliers to extract the seat (soe illustration). 11 Carefully remove Ihe exhaust camshaft from the cylinder head extension (soe illustration). Suitably mark the camshaft EX to avoid confusion when refitting.
JJ Remove the cam followers from their 9.5a Remove the camshaft sprocket... locations in the cylinder head extension
9.5b ... then undo the bolt and nut and remove the cover plate over tho inlet camshaft
9.6 Undo the nuts and remove the end cover
9.7 Undo the two bolts securing the camshaft drive gears to the inlet and exhaust camshafts 9.9 Carefully remove tho Inlet camshaft from the cylinder head extension