wheel bolts FIAT SPIDER ABARTH 2017 Owners Manual
[x] Cancel search | Manufacturer: FIAT, Model Year: 2017, Model line: SPIDER ABARTH, Model: FIAT SPIDER ABARTH 2017Pages: 292, PDF Size: 9.24 MB
Page 133 of 292

Warning!Never place a rear-facing child restraint
in front of an air bag. A deploying
passenger Advanced Front Air Bag can
cause death or serious injury to a child
12 years or younger, including a child in a
rear-facing child restraint.
Only use a rear-facing child restraint in a
vehicle with a rear seat.
An incorrectly anchored tether strap
could lead to increased head motion and
possibly injury to the child. Use only the
anchorage position directly behind the child
seat to secure a child restraint top tether
strap. SUPPLEMENTARY
RESTRAINT SYSTEM
SRS — AIR BAG Description
The front and side Supplementary
Restraint Systems (SRS) include
different types of Air Bags.
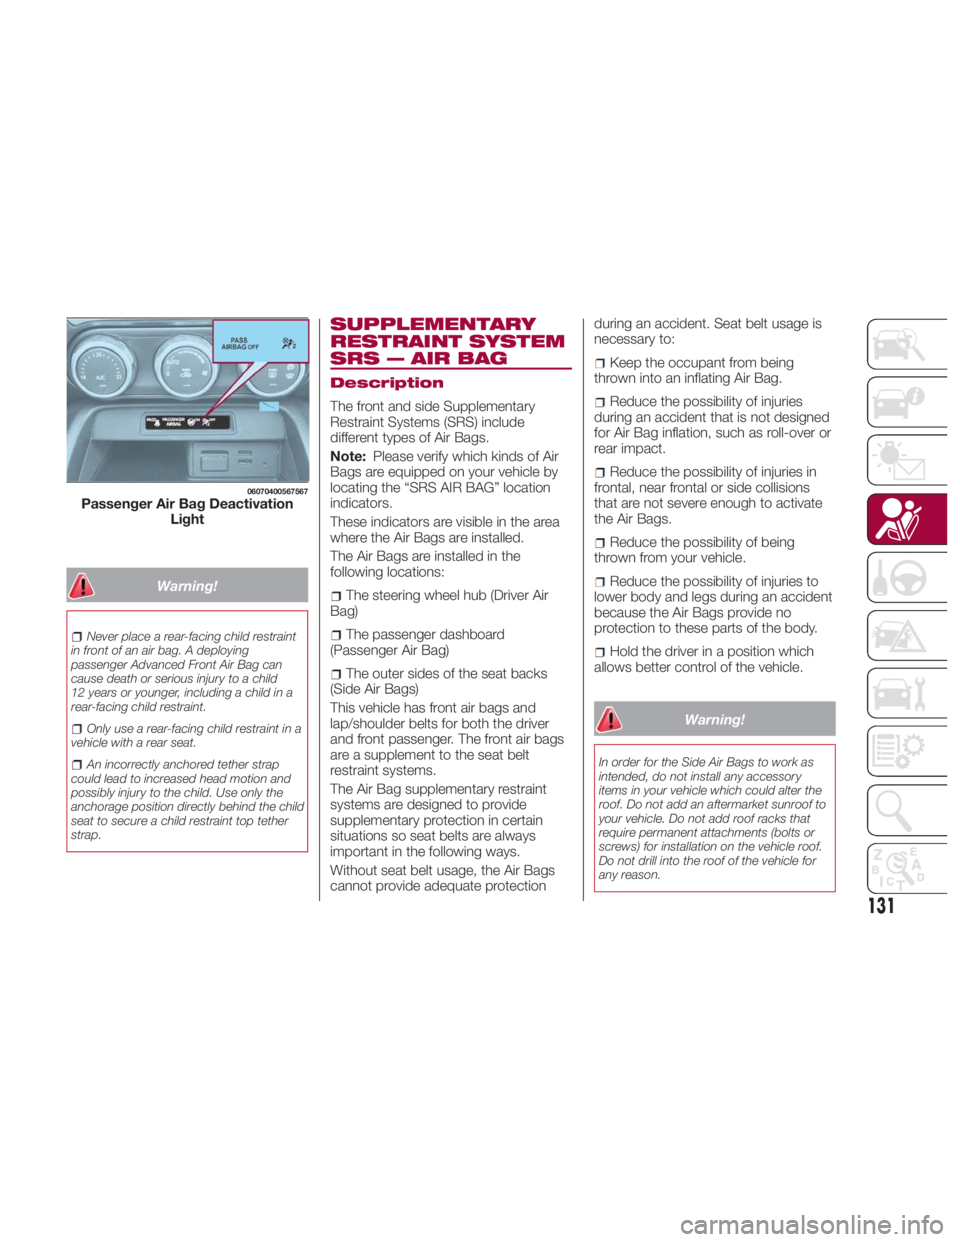
Note: Please verify which kinds of Air
Bags are equipped on your vehicle by
locating the “SRS AIR BAG” location
indicators.
These indicators are visible in the area
where the Air Bags are installed.
The Air Bags are installed in the
following locations:
The steering wheel hub (Driver Air
Bag)
The passenger dashboard
(Passenger Air Bag)
The outer sides of the seat backs
(Side Air Bags)
This vehicle has front air bags and
lap/shoulder belts for both the driver
and front passenger. The front air bags
are a supplement to the seat belt
restraint systems.
The Air Bag supplementary restraint
systems are designed to provide
supplementary protection in certain
situations so seat belts are always
important in the following ways.
Without seat belt usage, the Air Bags
cannot provide adequate protection during an accident. Seat belt usage is
necessary to:
Keep the occupant from being
thrown into an inflating Air Bag.
Reduce the possibility of injuries
during an accident that is not designed
for Air Bag inflation, such as roll-over or
rear impact.
Reduce the possibility of injuries in
frontal, near frontal or side collisions
that are not severe enough to activate
the Air Bags.
Reduce the possibility of being
thrown from your vehicle.
Reduce the possibility of injuries to
lower body and legs during an accident
because the Air Bags provide no
protection to these parts of the body.
Hold the driver in a position which
allows better control of the vehicle.
Warning!In order for the Side Air Bags to work as
intended, do not install any accessory
items in your vehicle which could alter the
roof. Do not add an aftermarket sunroof to
your vehicle. Do not add roof racks that
require permanent attachments (bolts or
screws) for installation on the vehicle roof.
Do not drill into the roof of the vehicle for
any reason.06070400567567
Passenger Air Bag Deactivation
Light
131
Page 147 of 292

Warning!Never place a rear-facing child restraint
in front of an air bag. A deploying
passenger front air bag can cause death or
serious injury to a child 12 years or
younger, including a child in a rear-facing
child restraint.
Only use a rear-facing child restraint in a
vehicle with a rear seat.
Children 12 years or younger should
always ride buckled up in a vehicle with a
rear seat.
Warning!No objects should be placed over or
near the air bag on the instrument panel or
steering wheel because any such objects
could cause harm if the vehicle is in a
collision severe enough to cause the air
bag to inflate.
Do not put anything on or around the air
bag covers or attempt to open them
manually. You may damage the air bags
and you could be injured because the air
bags may no longer be functional. The
protective covers for the air bag cushions
are designed to open only when the air
bags are inflating.
Relying on the air bags alone could lead
to more severe injuries in a collision. The air
bags work with your seat belt to restrain
you properly. In some collisions, air bags won’t deploy at all. Always wear your seat
belts even though you have air bags.
Maintaining Your Air Bag
System
Warning!Modifications to any part of the air bag
system could cause it to fail when you
need it. You could be injured if the air bag
system is not there to protect you. Do not
modify the components or wiring, including
adding any kind of badges or stickers to
the steering wheel hub trim cover or the
upper right side of the instrument panel. Do
not modify the front bumper, vehicle body
structure, or add aftermarket side steps or
running boards.
It is dangerous to try to repair any part
of the air bag system yourself. Be sure to
tell anyone who works on your vehicle that
it has an air bag system.
Do not attempt to modify any part of your
air bag system. The air bag may inflate
accidentally or may not function properly if
modifications are made. Take your vehicle to
an authorized dealer for any air bag system
service. If your seat, including your trim cover
and cushion, needs to be serviced in any way
(including removal or loosening/tightening of
seat attachment bolts), take the vehicle to
your authorized dealer. Only manufacturer
approved seat accessories may be used. If it
is necessary to modify the air bag system for
persons with disabilities, contact your
authorized dealer. EVENT DATA
RECORDER (EDR) This vehicle is equipped with an event
data recorder (EDR).
The main purpose of an EDR is to
record, in certain crash or near
crash-like situations, such as an air bag
deployment or hitting a road obstacle,
data that will assist in understanding
how a vehicle’s systems performed.
The EDR is designed to record data
related to vehicle dynamics and safety
systems for a short period of time,
typically 30 seconds or less.
The EDR in this vehicle is designed to
record such data as:
How various systems in your vehicle
were operating.
Whether or not the driver and
passenger safety belts were
buckled/fastened.
How far (if at all) the driver was
pushing the accelerator and/or brake
pedal.
How fast the vehicle was traveling.
This data can help provide a better
understanding of the circumstances in
which crashes and injuries occur.
145
Page 208 of 292

Warning!Being under a jacked-up vehicle is
dangerous. The vehicle could slip off the
jack and fall on you. You could be crushed.
Never get any part of your body under a
vehicle that is on a jack. If you need to get
under a raised vehicle, take it to a service
center where it can be raised on a lift.
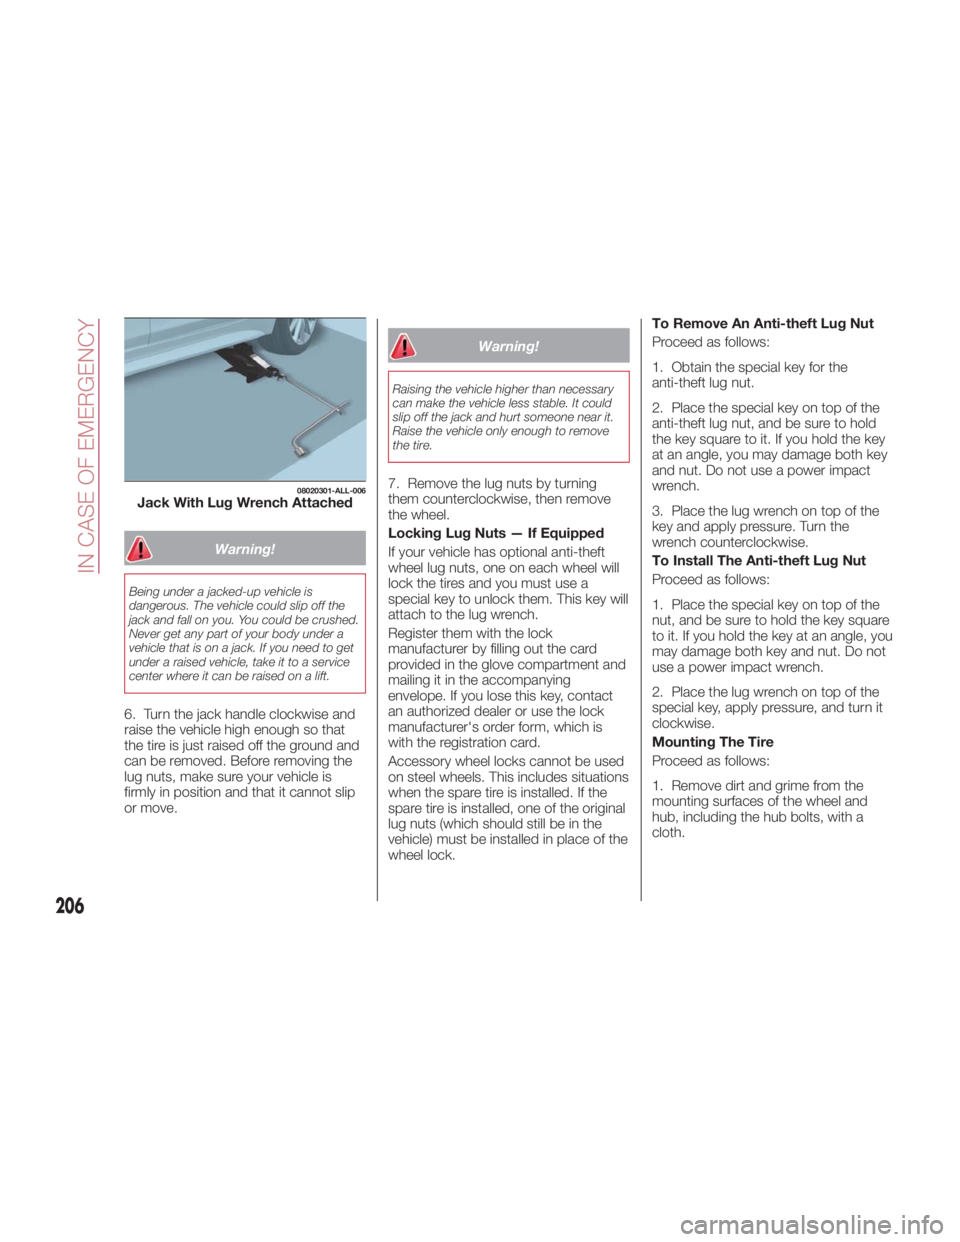
6. Turn the jack handle clockwise and
raise the vehicle high enough so that
the tire is just raised off the ground and
can be removed. Before removing the
lug nuts, make sure your vehicle is
firmly in position and that it cannot slip
or move. Warning!Raising the vehicle higher than necessary
can make the vehicle less stable. It could
slip off the jack and hurt someone near it.
Raise the vehicle only enough to remove
the tire.
7. Remove the lug nuts by turning
them counterclockwise, then remove
the wheel.
Locking Lug Nuts — If Equipped
If your vehicle has optional anti-theft
wheel lug nuts, one on each wheel will
lock the tires and you must use a
special key to unlock them. This key will
attach to the lug wrench.
Register them with the lock
manufacturer by filling out the card
provided in the glove compartment and
mailing it in the accompanying
envelope. If you lose this key, contact
an authorized dealer or use the lock
manufacturer's order form, which is
with the registration card.
Accessory wheel locks cannot be used
on steel wheels. This includes situations
when the spare tire is installed. If the
spare tire is installed, one of the original
lug nuts (which should still be in the
vehicle) must be installed in place of the
wheel lock. To Remove An Anti-theft Lug Nut
Proceed as follows:
1. Obtain the special key for the
anti-theft lug nut.
2. Place the special key on top of the
anti-theft lug nut, and be sure to hold
the key square to it. If you hold the key
at an angle, you may damage both key
and nut. Do not use a power impact
wrench.
3. Place the lug wrench on top of the
key and apply pressure. Turn the
wrench counterclockwise.
To Install The Anti-theft Lug Nut
Proceed as follows:
1. Place the special key on top of the
nut, and be sure to hold the key square
to it. If you hold the key at an angle, you
may damage both key and nut. Do not
use a power impact wrench.
2. Place the lug wrench on top of the
special key, apply pressure, and turn it
clockwise.
Mounting The Tire
Proceed as follows:
1. Remove dirt and grime from the
mounting surfaces of the wheel and
hub, including the hub bolts, with a
cloth.08020301-ALL-006
Jack With Lug Wrench Attached
206
IN CASE OF EMERGENCY