change time FIAT STILO 2004 1.G Connect NavPlus Manual
[x] Cancel search | Manufacturer: FIAT, Model Year: 2004, Model line: STILO, Model: FIAT STILO 2004 1.GPages: 166, PDF Size: 3.8 MB
Page 128 of 166

CONNECT Nav+
127
VOICE COMMANDS
Voice commands, identified as “key-
words”, that the system is able to rec-
ognize are organised according to four
increasing levels: 1
stlevel, 2ndlevel, 3rd
level, 4thlevel. 1stlevel keywords acti-
vate the following main system func-
tions: Memo; Radio; CD player; CD
Changer; Navigator, Telephone.
When a 1st level keyword is pro-
nounced, the system will activate 2nd
level keywords; when a 2nd level key-
word is pronounced, the system will
activate 3rd level keywords; when a3rd level keyword is pronounced, the
system will activate 4th level key-
words.
If the user pronounces a 1st level
keyword, then the submenu relevant
to that command will remain active
until another 1st level keyword is giv-
en; the same rule applies for the oth-
er lower levels (2, 3 and 4).
If too much time passes between a
command and another of lower level
the system will invite the user to con-
tinue by voice message “Can I help
you?”.1st level keywords are the following:
– Memo
– Radio
– CD player
– CD changer
– Navigator
– Call
– Dial
– Redial
– PIN code
– Address book
– Abort.
KEYWORDS - Summary
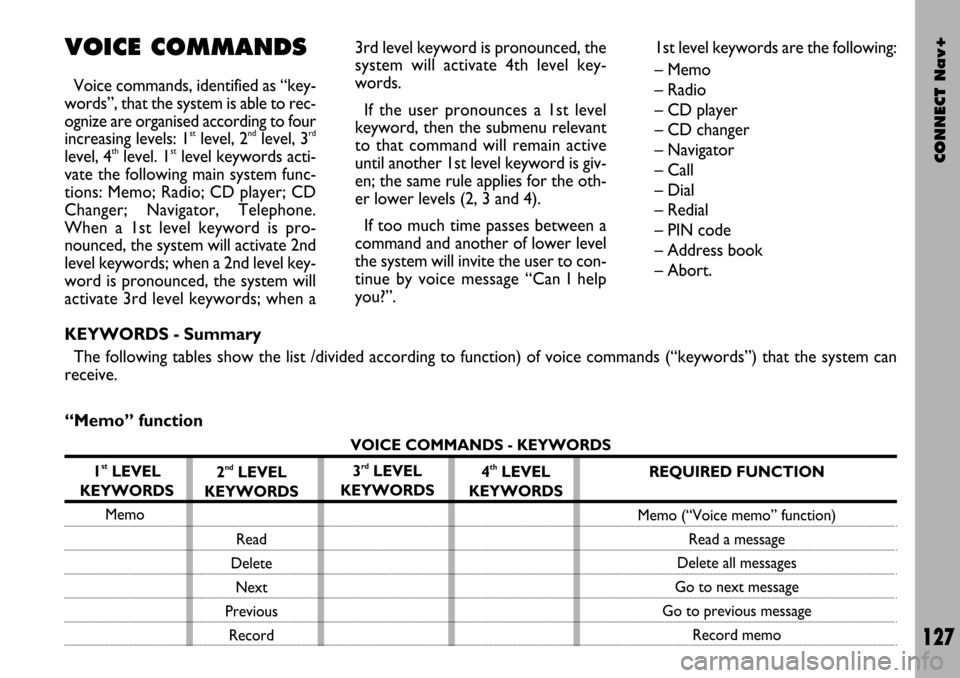
The following tables show the list /divided according to function) of voice commands (“keywords”) that the system can
receive.
“Memo” function
VOICE COMMANDS - KEYWORDS
1
stLEVEL
KEYWORDS
Memo
2ndLEVEL
KEYWORDS
Read
Delete
Next
Previous
Record3rdLEVEL
KEYWORDS4thLEVEL
KEYWORDSREQUIRED FUNCTION
Memo (“Voice memo” function)
Read a message
Delete all messages
Go to next message
Go to previous message
Record memo
Page 153 of 166

CONNECT Nav+
152
The display will show the following
string:
“Insert Setup CD to change language
of messages and voice commands.
Press ESC to cancel”.
If the Setup CD is inserted the fol-
lowing message will be permanently
displayed:
“System will be unavailable for a few
seconds and calls in progress will be
terminated. Press ENTER to continue
or ESC to cancel”.
If “ENTER” has been pressed 15-
fig. 1the following message will be
permanently displayed:
“Message and voice command lan-
guage change in progress. Do not turn
off system. Please wait”.
The end of the procedure is indicat-
ed by the following message:
“Message and voice command lan-
guage change concluded correctly”.If some errors occur during language
updating, the following message will be
displayed:
“Language change failed. Please re-
peat procedure”.
This message asks the user to repeat
the above procedure.
Whenever the system is switched on
turning the ignition key to MAR, the
language module is checked and if the
system finds a fault the following mes-
sage is displayed:
“Voice commands and messages not
available. Please change the language”.
This message asks the user to repeat
language change procedure.
The user shall set again the desired
language in the SETUP menu and then
follow the above procedure.DATE&TEMP (date
& temperature)
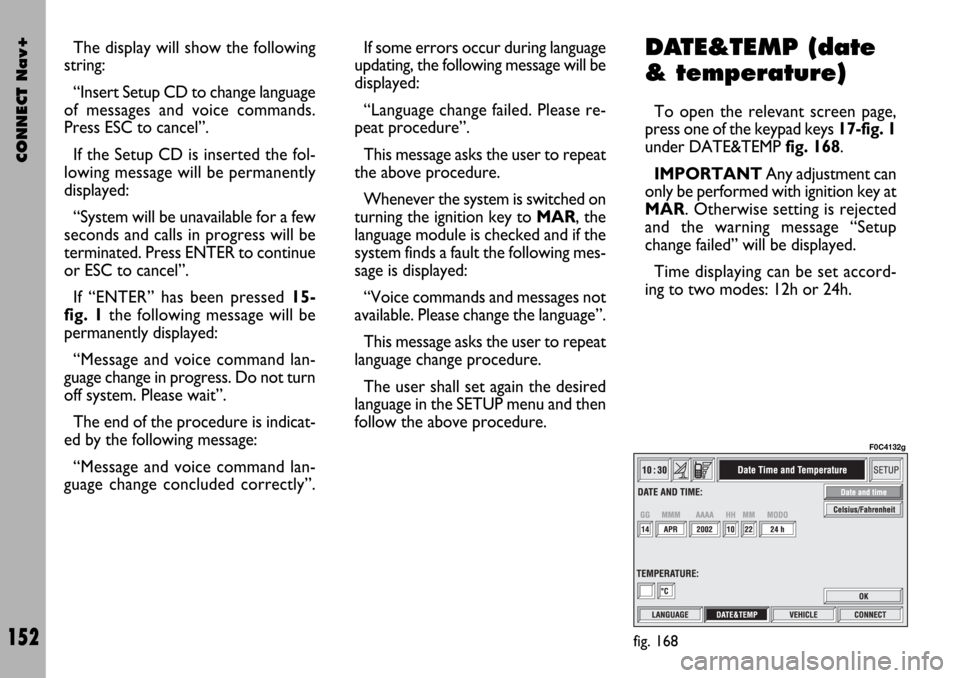
To open the relevant screen page,
press one of the keypad keys 17-fig. 1
under DATE&TEMP fig. 168.
IMPORTANTAny adjustment can
only be performed with ignition key at
MAR. Otherwise setting is rejected
and the warning message “Setup
change failed” will be displayed.
Time displaying can be set accord-
ing to two modes: 12h or 24h.
fig. 168
F0C4132g
Page 159 of 166

CONNECT Nav+
158
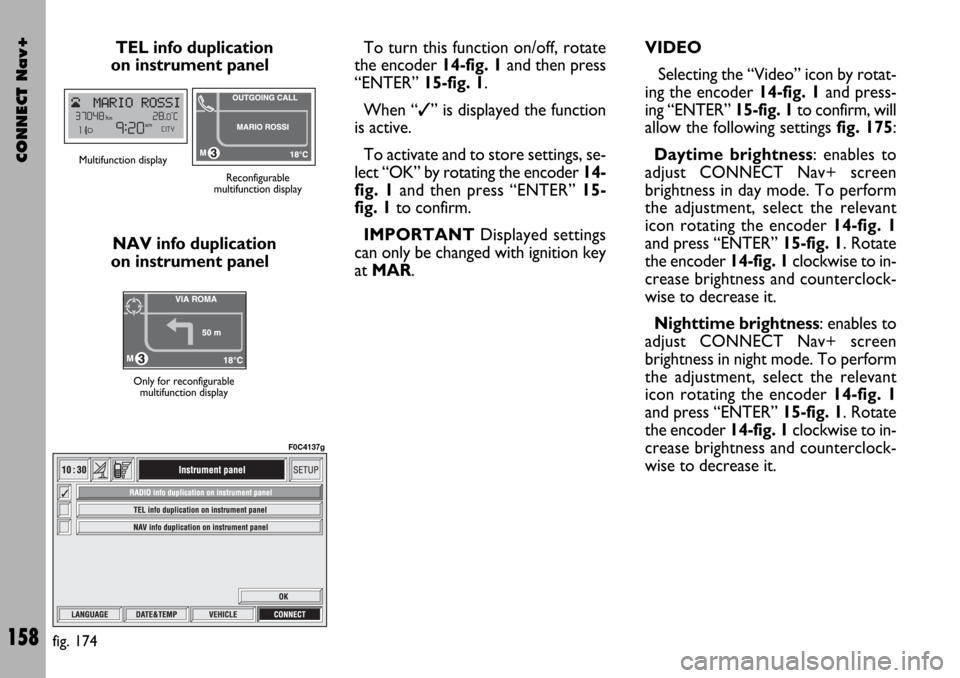
TEL info duplication
on instrument panel
NAV info duplication
on instrument panelTo turn this function on/off, rotate
the encoder 14-fig. 1and then press
“ENTER” 15-fig. 1.
When “✓” is displayed the function
is active.
To activate and to store settings, se-
lect “OK” by rotating the encoder 14-
fig. 1and then press “ENTER” 15-
fig. 1to confirm.
IMPORTANTDisplayed settings
can only be changed with ignition key
at MAR.
Multifunction display
Reconfigurable
multifunction display
Only for reconfigurable
multifunction display
fig. 174
F0C4137g
VIDEO
Selecting the “Video” icon by rotat-
ing the encoder 14-fig. 1and press-
ing “ENTER” 15-fig. 1to confirm, will
allow the following settings fig. 175:
Daytime brightness: enables to
adjust CONNECT Nav+ screen
brightness in day mode. To perform
the adjustment, select the relevant
icon rotating the encoder 14-fig. 1
and press “ENTER” 15-fig. 1. Rotate
the encoder 14-fig. 1clockwise to in-
crease brightness and counterclock-
wise to decrease it.
Nighttime brightness: enables to
adjust CONNECT Nav+ screen
brightness in night mode. To perform
the adjustment, select the relevant
icon rotating the encoder 14-fig. 1
and press “ENTER” 15-fig. 1. Rotate
the encoder 14-fig. 1clockwise to in-
crease brightness and counterclock-
wise to decrease it.