length FIAT STILO 2004 1.G Connect NavPlus Manual
[x] Cancel search | Manufacturer: FIAT, Model Year: 2004, Model line: STILO, Model: FIAT STILO 2004 1.GPages: 166, PDF Size: 3.8 MB
Page 8 of 166

CONNECT Nav+
7
No
– Never use chemical products for
cleaning (e.g. spray cans, antistatics or
thinners) as they might damage the
surface of Compact Discs.
– After listening to them put Com-
pact Discs back in their boxes to avoid
marking or scoring which could cause
skipping when playing.
– Do not expose Compact Discs to
direct sunlight, high temperatures or
damp for prolonged lengths of time to
prevent them from bending.
– Do not stick labels or write on the
recorded surface of Compact Discs.
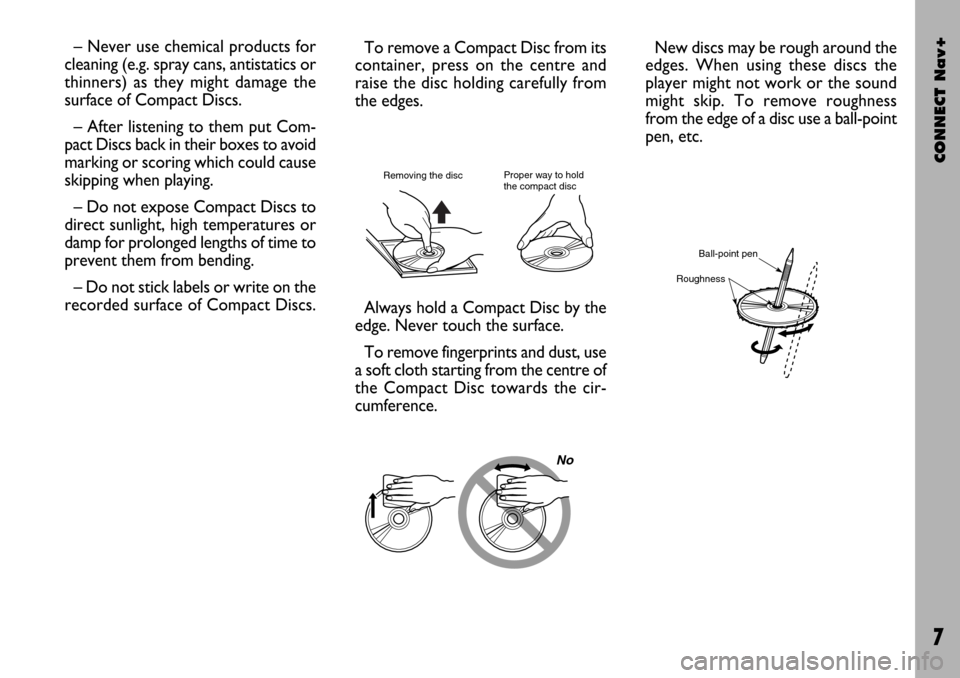
Always hold a Compact Disc by the
edge. Never touch the surface.
To remove fingerprints and dust, use
a soft cloth starting from the centre of
the Compact Disc towards the cir-
cumference.
Proper way to hold
the compact discRemoving the disc
New discs may be rough around the
edges. When using these discs the
player might not work or the sound
might skip. To remove roughness
from the edge of a disc use a ball-point
pen, etc.
Ball-point pen
Roughness
To remove a Compact Disc from its
container, press on the centre and
raise the disc holding carefully from
the edges.
Page 50 of 166

CONNECT Nav+
49
OK
To confirm the chosen option, select
“OK” with the encoder 14-fig. 1and
press “ENTER” 15-fig. 1.
During the operations available in the
“CDC Prog” function, buttons 18, 21
and 22-fig. 1are disabled.
When removing the Compact Disc
from the multiple player or changing
the CD sequence, a new playback se-
quence shall be programmed.
CD name
This function can be selected only if
a Compact Disc is inserted in the mul-
tiple player.
If the CD already has a name, this will
be shown on the display.
“CD name” function allows to name
max. 30 CDs with 20 characters max.
For the description of the different
functions, refer to “CD Mode”.“AUDIO SETUP” FUNCTION
(AUDIO ADJUSTMENTS)
To access the audio setup menu
while listening to a CD, select the “Au-
dio setup” icon rotating the encoder
14-fig. 1and then press “ENTER” to
confirm 15-fig. 1.
For the description of the different
functions available in the menu, see the
corresponding paragraph of the “RA-
DIO MODE” chapter.MP3 MODE
CONNECT Nav+ can recognize the
type of Compact Disc inserted. Dur-
ing the reading procedure to recognize
the disk the display shows “Reading
CD...”. If the inserted CD is a MP3 one,
a specific management is activated.
IMPORTANTNever use 8 cm au-
dio or MP3 CDs, even with the spe-
cific adapter, since this format damages
the system.
IMPORTANTCONNECT Nav+
builds MP3 CD folder-organized struc-
ture of files; folders are organized in
sequence with their own MP3 tracks
(up to max. four levels of folders/sub-
directories). Folder and file name
length shall not exceed 20 characters.
Characters: blank, ’(apostrophe), (
and )(open and closed brackets) are
not admitted in MP3 track names.
When creating MP3 CD you must not
use these characters to name files oth-
erwise CONNECT Nav+ will not be
able to play it.
Page 82 of 166

CONNECT Nav+
81
“In directory” icon key
This key fig. 65 - 66, selected by ro-
tating the encoder 14-fig. 1and then
confirmed by “ENTER” 15-fig. 1,
stores current displayed site address
in the “Site directory” (with a maxi-
mum of 10 stored addresses), proceed
as follows:
– rotate the encoder14-fig. 1to se-
lect the address and then press “EN-
TER” to confirm 15-fig. 1.Storing the tenth address, the display
shows a dialog box warning the user
that the directory is full and the icon
key (“In directory”) is greyed. Further
storing requests a preventive deletion.
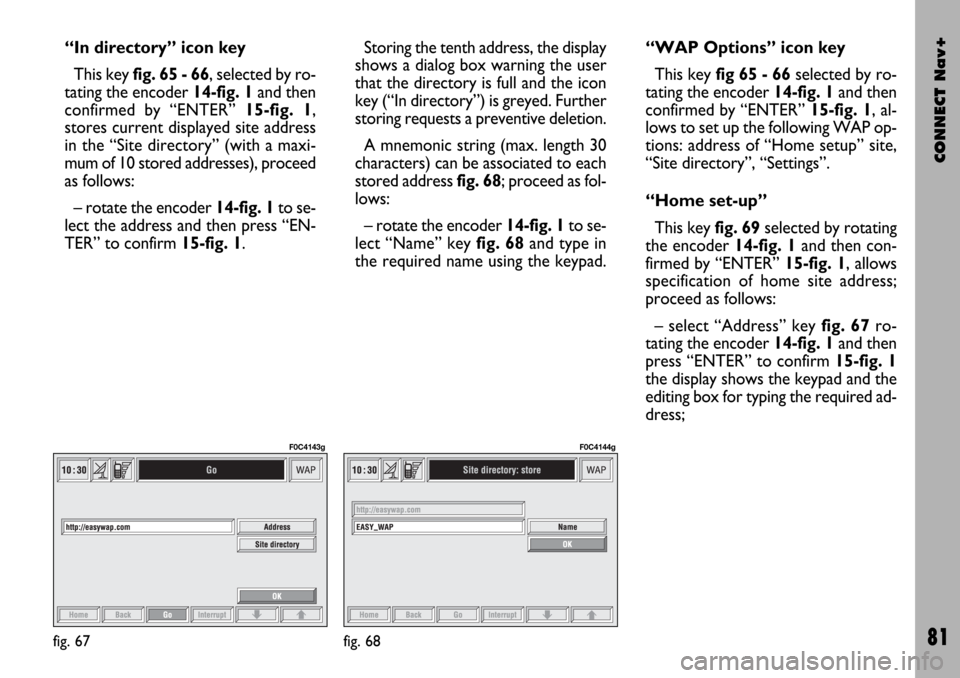
A mnemonic string (max. length 30
characters) can be associated to each
stored address fig. 68; proceed as fol-
lows:
– rotate the encoder 14-fig. 1to se-
lect “Name” key fig. 68and type in
the required name using the keypad.“WAP Options” icon key
This key fig 65 - 66selected by ro-
tating the encoder 14-fig. 1and then
confirmed by “ENTER” 15-fig. 1, al-
lows to set up the following WAP op-
tions: address of “Home setup” site,
“Site directory”, “Settings”.
“Home set-up”
This keyfig. 69selected by rotating
the encoder 14-fig. 1and then con-
firmed by “ENTER” 15-fig. 1, allows
specification of home site address;
proceed as follows:
– select “Address” key fig. 67ro-
tating the encoder 14-fig. 1and then
press “ENTER” to confirm 15-fig. 1
the display shows the keypad and the
editing box for typing the required ad-
dress;
fig. 67
F0C4143g
fig. 68
F0C4144g
Page 87 of 166

CONNECT Nav+
86
“Other menus”
FUNCTION
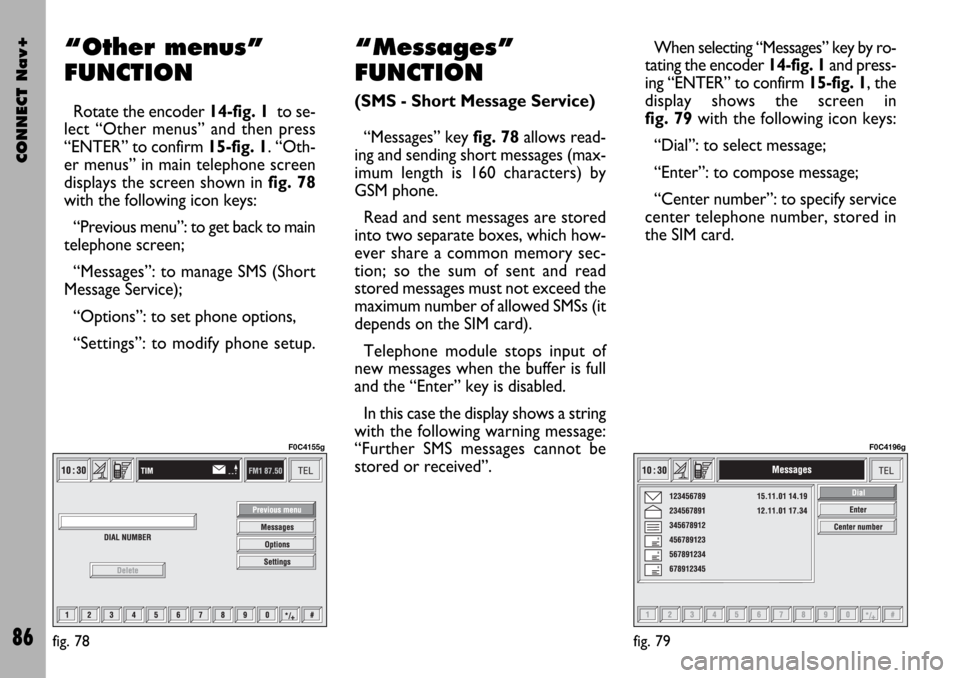
Rotate the encoder 14-fig. 1to se-
lect “Other menus” and then press
“ENTER” to confirm 15-fig. 1. “Oth-
er menus” in main telephone screen
displays the screen shown in fig. 78
with the following icon keys:
“Previous menu”: to get back to main
telephone screen;
“Messages”: to manage SMS (Short
Message Service);
“Options”: to set phone options,
“Settings”: to modify phone setup.
“Messages”
FUNCTION
(SMS - Short Message Service)
“Messages” key fig. 78allows read-
ing and sending short messages (max-
imum length is 160 characters) by
GSM phone.
Read and sent messages are stored
into two separate boxes, which how-
ever share a common memory sec-
tion; so the sum of sent and read
stored messages must not exceed the
maximum number of allowed SMSs (it
depends on the SIM card).
Telephone module stops input of
new messages when the buffer is full
and the “Enter” key is disabled.
In this case the display shows a string
with the following warning message:
“Further SMS messages cannot be
stored or received”.When selecting “Messages” key by ro-
tating the encoder 14-fig. 1and press-
ing “ENTER” to confirm 15-fig. 1, the
display shows the screen in
fig. 79with the following icon keys:
“Dial”: to select message;
“Enter”: to compose message;
“Center number”: to specify service
center telephone number, stored in
the SIM card.
fig. 78
F0C4155g
fig. 79
F0C4196g