tow FIAT STILO 2004 1.G Connect NavPlus Manual
[x] Cancel search | Manufacturer: FIAT, Model Year: 2004, Model line: STILO, Model: FIAT STILO 2004 1.GPages: 166, PDF Size: 3.8 MB
Page 8 of 166
CONNECT Nav+
7
No
– Never use chemical products for
cleaning (e.g. spray cans, antistatics or
thinners) as they might damage the
surface of Compact Discs.
– After listening to them put Com-
pact Discs back in their boxes to avoid
marking or scoring which could cause
skipping when playing.
– Do not expose Compact Discs to
direct sunlight, high temperatures or
damp for prolonged lengths of time to
prevent them from bending.
– Do not stick labels or write on the
recorded surface of Compact Discs.
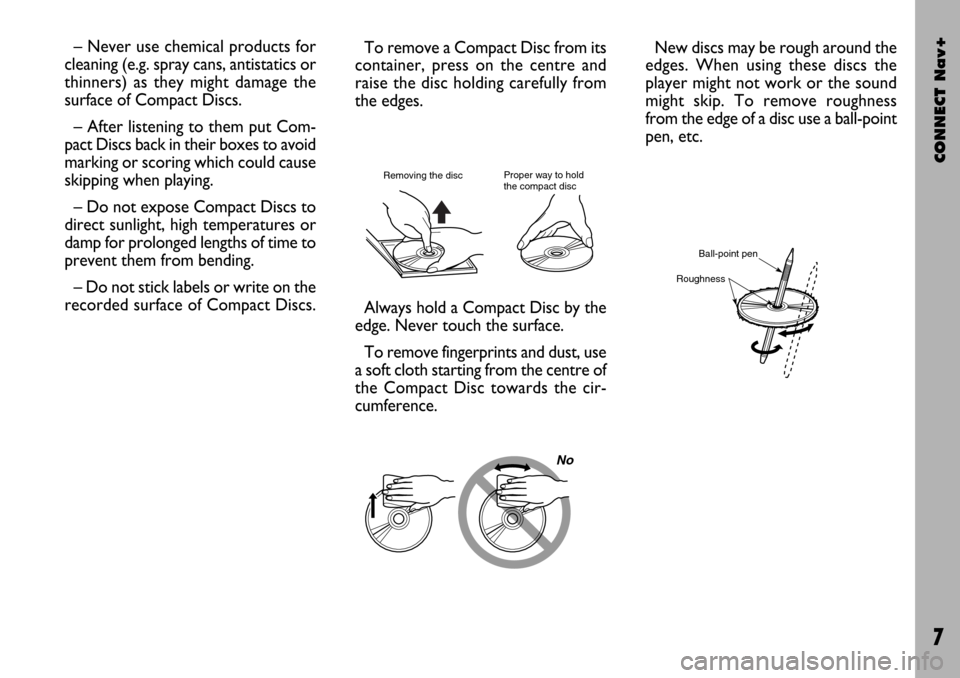
Always hold a Compact Disc by the
edge. Never touch the surface.
To remove fingerprints and dust, use
a soft cloth starting from the centre of
the Compact Disc towards the cir-
cumference.
Proper way to hold
the compact discRemoving the disc
New discs may be rough around the
edges. When using these discs the
player might not work or the sound
might skip. To remove roughness
from the edge of a disc use a ball-point
pen, etc.
Ball-point pen
Roughness
To remove a Compact Disc from its
container, press on the centre and
raise the disc holding carefully from
the edges.
Page 99 of 166
CONNECT Nav+
98
Moreover, navigation in these con-
ditions involves limitations and there-
fore some functions and commands
will not be available. Also information
shown on the map will be limited.
When the navigation system is no
longer able to continue destination
guidance or the car is now out of the
loaded map section, the system
prompts for inserting the navigation
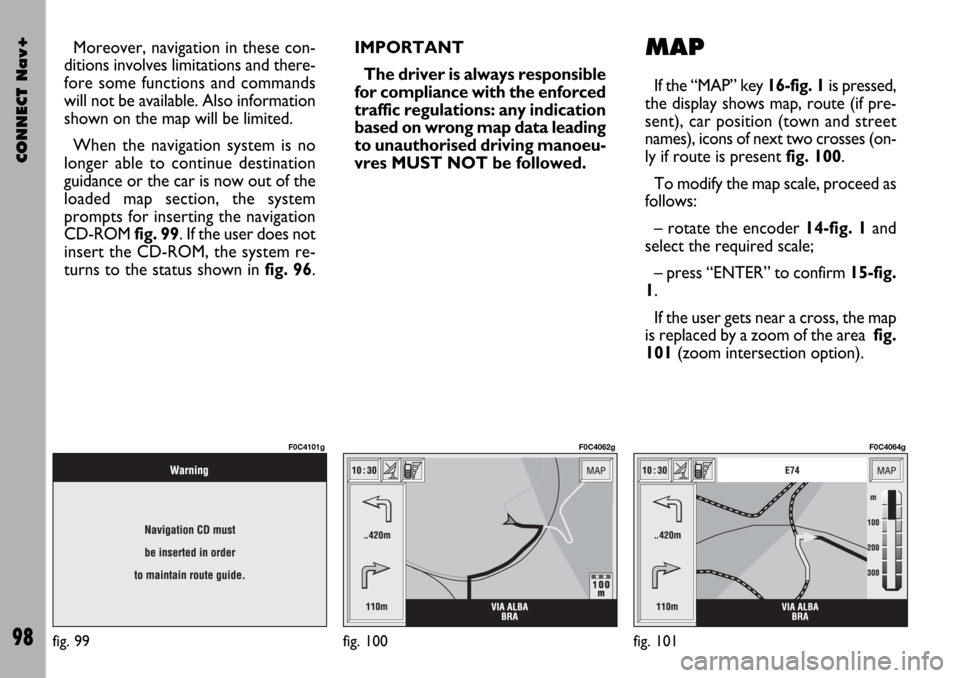
CD-ROM fig. 99. If the user does not
insert the CD-ROM, the system re-
turns to the status shown in fig. 96.IMPORTANT
The driver is always responsible
for compliance with the enforced
traffic regulations: any indication
based on wrong map data leading
to unauthorised driving manoeu-
vres MUST NOT be followed.MAP
If the “MAP” key 16-fig. 1is pressed,
the display shows map, route (if pre-
sent), car position (town and street
names), icons of next two crosses (on-
ly if route is present fig. 100.
To modify the map scale, proceed as
follows:
– rotate the encoder 14-fig. 1and
select the required scale;
– press “ENTER” to confirm 15-fig.
1.
If the user gets near a cross, the map
is replaced by a zoom of the area fig.
101(zoom intersection option).
fig. 99
F0C4101g
fig. 100
F0C4062g
fig. 101
F0C4064g
Page 100 of 166
CONNECT Nav+
99
MAIN SCREEN
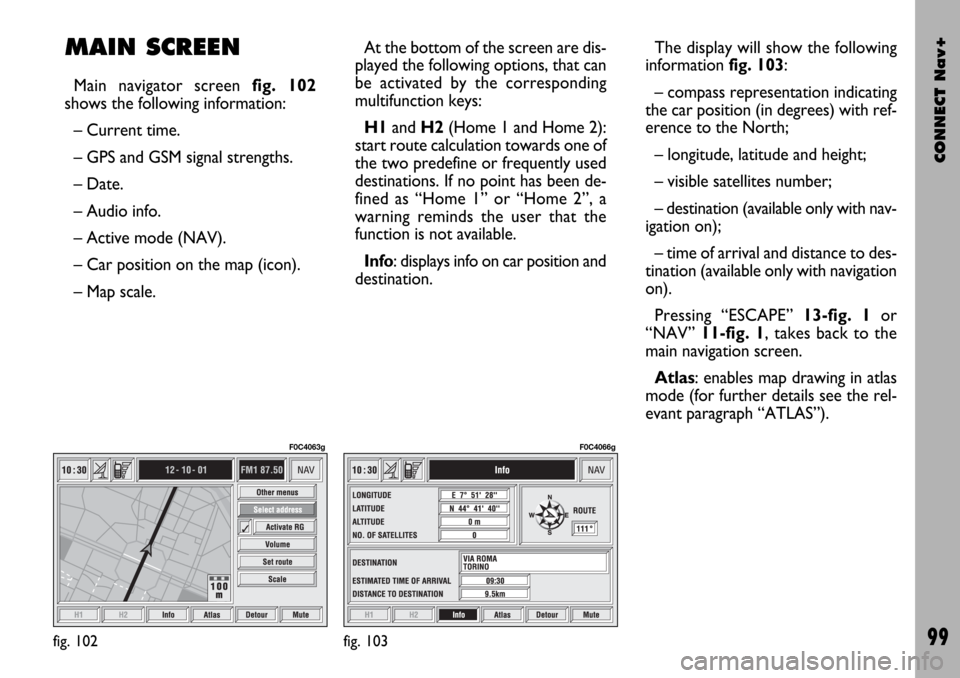
Main navigator screen fig. 102
shows the following information:
– Current time.
– GPS and GSM signal strengths.
– Date.
– Audio info.
– Active mode (NAV).
– Car position on the map (icon).
– Map scale.At the bottom of the screen are dis-
played the following options, that can
be activated by the corresponding
multifunction keys:
H1and H2(Home 1 and Home 2):
start route calculation towards one of
the two predefine or frequently used
destinations. If no point has been de-
fined as “Home 1” or “Home 2”, a
warning reminds the user that the
function is not available.
Info: displays info on car position and
destination.The display will show the following
information fig. 103:
– compass representation indicating
the car position (in degrees) with ref-
erence to the North;
– longitude, latitude and height;
– visible satellites number;
– destination (available only with nav-
igation on);
– time of arrival and distance to des-
tination (available only with navigation
on).
Pressing “ESCAPE” 13-fig. 1or
“NAV” 11-fig. 1, takes back to the
main navigation screen.
Atlas: enables map drawing in atlas
mode (for further details see the rel-
evant paragraph “ATLAS”).
fig. 102
F0C4063g
fig. 103
F0C4066g
Page 103 of 166
CONNECT Nav+
102
RDS-TMC: to select a point from
the RDS-TMC generated “list of
events”.
Home 1: to select as destination, to
delete or to display the point stored
as “Home 1”;
Home 2: to select as destination, to
delete or to display the point stored
as “Home 2”;
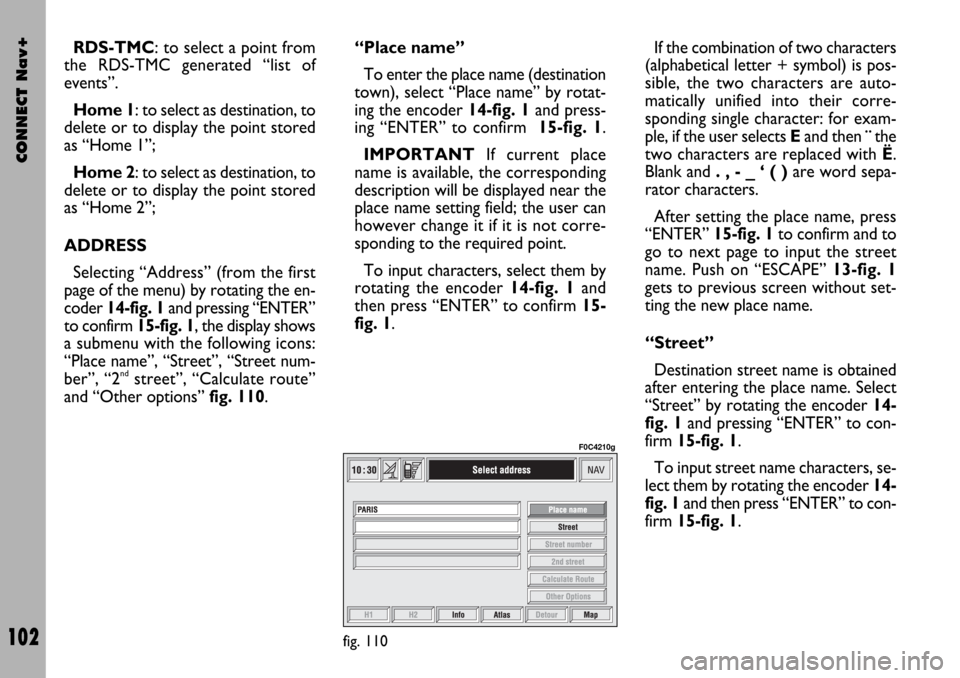
ADDRESS
Selecting “Address” (from the first
page of the menu) by rotating the en-
coder 14-fig. 1and pressing “ENTER”
to confirm 15-fig. 1, the display shows
a submenu with the following icons:
“Place name”, “Street”, “Street num-
ber”, “2
ndstreet”, “Calculate route”
and “Other options” fig. 110.“Place name”
To enter the place name (destination
town), select “Place name” by rotat-
ing the encoder 14-fig. 1and press-
ing “ENTER” to confirm 15-fig. 1.
IMPORTANTIf current place
name is available, the corresponding
description will be displayed near the
place name setting field; the user can
however change it if it is not corre-
sponding to the required point.
To input characters, select them by
rotating the encoder 14-fig. 1and
then press “ENTER” to confirm 15-
fig. 1. If the combination of two characters
(alphabetical letter + symbol) is pos-
sible, the two characters are auto-
matically unified into their corre-
sponding single character: for exam-
ple, if the user selects Eand then¨the
two characters are replaced with Ë.
Blank and . , - _ ‘ ( )are word sepa-
rator characters.
After setting the place name, press
“ENTER” 15-fig. 1to confirm and to
go to next page to input the street
name. Push on “ESCAPE” 13-fig. 1
gets to previous screen without set-
ting the new place name.
“Street”
Destination street name is obtained
after entering the place name. Select
“Street” by rotating the encoder 14-
fig. 1and pressing “ENTER” to con-
firm 15-fig. 1.
To input street name characters, se-
lect them by rotating the encoder 14-
fig. 1and then press “ENTER” to con-
firm 15-fig. 1.
fig. 110
F0C4210g
Page 104 of 166
CONNECT Nav+
103
If in place of “Street” the user spec-
ifies “C”, it means “downtown” and
so neither “Street number” and “2nd
street” must be input.
The navigation system always guide
you downtown in case of small towns.
After setting the street name, press
“ENTER” 15-fig. 1to confirm and to
go to next screen to input the street
number. Push on “ESCAPE” 13-fig. 1
gets to previous screen without set-
ting the street name.
“Street number”
Destination street number is ob-
tained after entering the street name.
Select “Street number” by rotating the
encoder 14-fig. 1and pressing “EN-
TER” to confirm 15-fig. 1.
To input digits, select them by rotating
the encoder 14-fig. 1and then press
“ENTER” to confirm 15-fig. 1.“2nd street”
This option is used to enter the name
of a second street that intersects the
first entered street, so that the se-
lected destination is the intersection
between the two streets.
The second street name can be en-
tered, after entering the place name
and the first street name. Select “2nd
street” by rotating the encoder 14-fig.
1and press “ENTER” to confirm 15-
fig. 1.
To input the 2nd street name char-
acters, select them by rotating the en-
coder 14-fig. 1and then press “EN-
TER” to confirm 15-fig. 1.
“Calculate route”
This option will activate route calcu-
lation to the required destination.
If a destination is already set, the sys-
tem will ask for confirmation before
changing destination.“Other options”
– Directory
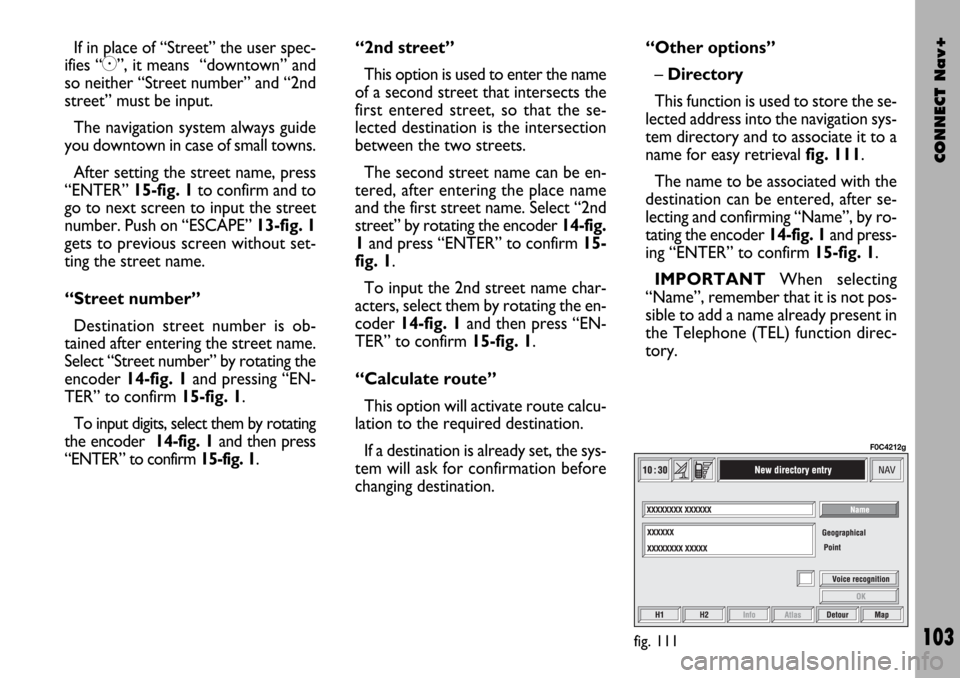
This function is used to store the se-
lected address into the navigation sys-
tem directory and to associate it to a
name for easy retrieval fig. 111.
The name to be associated with the
destination can be entered, after se-
lecting and confirming “Name”, by ro-
tating the encoder 14-fig. 1and press-
ing “ENTER” to confirm 15-fig. 1.
IMPORTANTWhen selecting
“Name”, remember that it is not pos-
sible to add a name already present in
the Telephone (TEL) function direc-
tory.
fig. 111
F0C4212g
Page 117 of 166
CONNECT Nav+
116
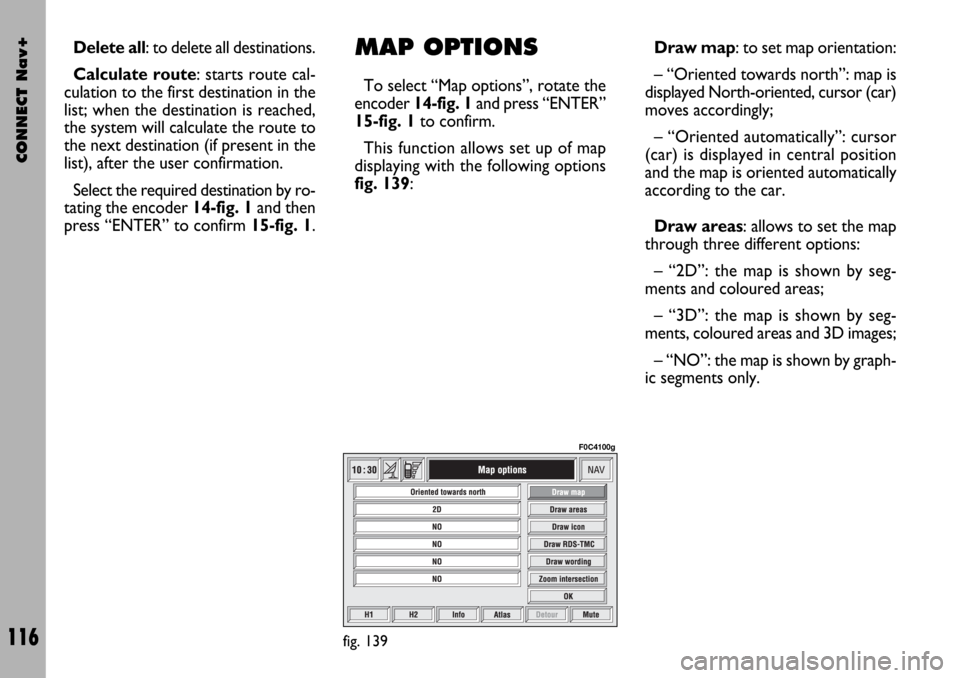
Draw map: to set map orientation:
– “Oriented towards north”: map is
displayed North-oriented, cursor (car)
moves accordingly;
– “Oriented automatically”: cursor
(car) is displayed in central position
and the map is oriented automatically
according to the car.
Draw areas: allows to set the map
through three different options:
– “2D”: the map is shown by seg-
ments and coloured areas;
– “3D”: the map is shown by seg-
ments, coloured areas and 3D images;
– “NO”: the map is shown by graph-
ic segments only. Delete all: to delete all destinations.
Calculate route: starts route cal-
culation to the first destination in the
list; when the destination is reached,
the system will calculate the route to
the next destination (if present in the
list), after the user confirmation.
Select the required destination by ro-
tating the encoder 14-fig. 1and then
press “ENTER” to confirm 15-fig. 1.MAP OPTIONS
To select “Map options”, rotate the
encoder 14-fig. 1and press “ENTER”
15-fig. 1to confirm.
This function allows set up of map
displaying with the following options
fig. 139:
fig. 139
F0C4100g
Page 118 of 166
CONNECT Nav+
117
Draw icon: enables (“YES”) or dis-
ables (“NO”) the display of icon cat-
egory (e.g.: hotels, restaurants, service
stations, etc.) on the map;
Draw RDS-TMC: enables (“YES”)
or disables (“NO”) the display of the
icons related to RDS-TMC category
(if available): Traffic, Weather, Info
etc..., on the map ;
Draw wording: enables (“YES”) or
disables (“NO”) the indications of the
places names (town, streets, etc..) on
the map;
Zoom intersection: enables
(“YES”) or disables (“NO”) the zoom
intersection option, i.e. whether to
zoom the map when car approaches
an intersection;
OK: activates settings.VOICE DIRECTORY
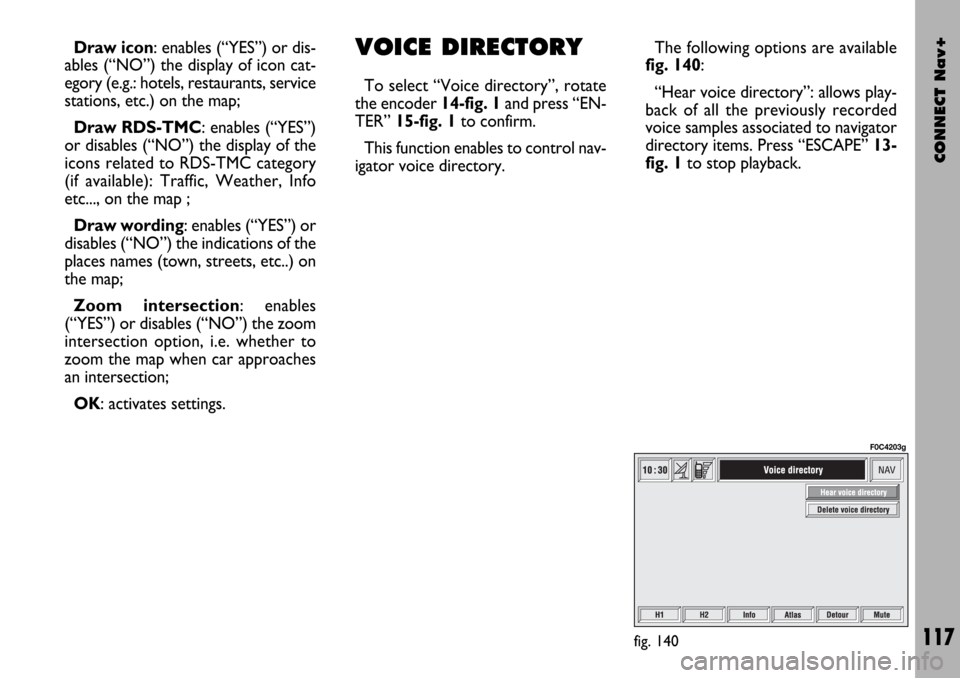
To select “Voice directory”, rotate
the encoder 14-fig. 1and press “EN-
TER” 15-fig. 1to confirm.
This function enables to control nav-
igator voice directory.The following options are available
fig. 140:
“Hear voice directory”: allows play-
back of all the previously recorded
voice samples associated to navigator
directory items. Press “ESCAPE”13-
fig. 1to stop playback.
fig. 140
F0C4203g