fuse FIAT STRADA 2014 Owner handbook (in English)
[x] Cancel search | Manufacturer: FIAT, Model Year: 2014, Model line: STRADA, Model: FIAT STRADA 2014Pages: 187, PDF Size: 8.06 MB
Page 14 of 187
12
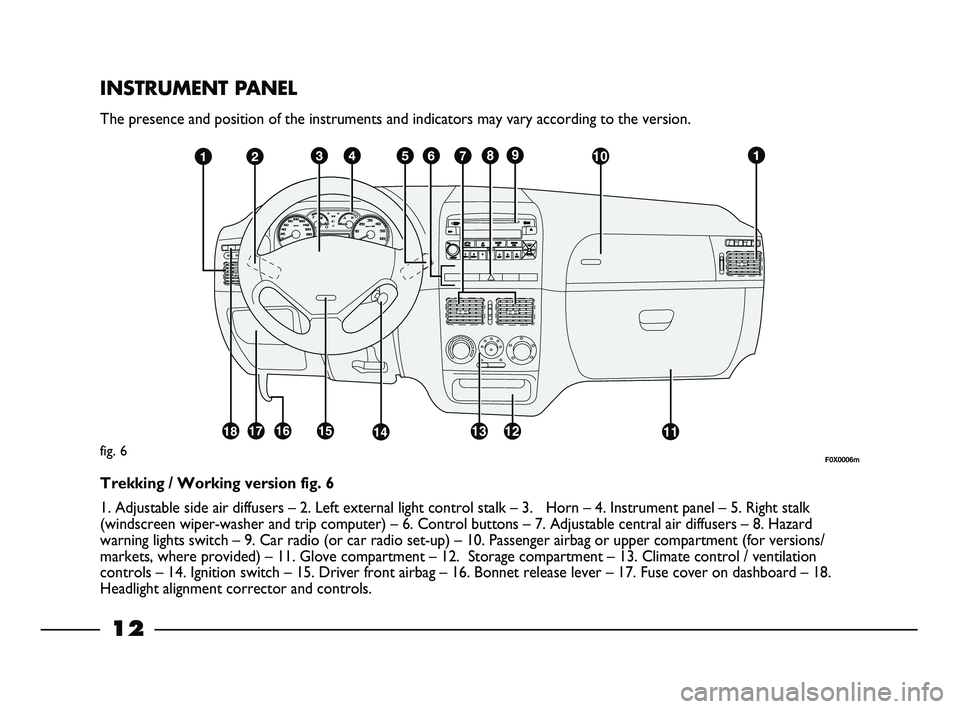
INSTRUMENT PANEL
The presence and position of the instruments and indicators may vary according to the version.
fig. 6
Trekking / Working version fig. 6
1. Adjustable side air diffusers – 2. Left external light control stalk – 3. Horn – 4. Instrument panel – 5. Right stalk
(windscreen wiper-washer and trip computer) – 6. Control buttons – 7. Adjustable central air diffusers – 8. Hazard
warning lights switch – 9. Car radio (or car radio set-up) – 10. Passenger airbag or upper compartment (for versions/
markets, where provided) – 11. Glove compartment – 12. Storage compartment – 13. Climate control / ventilation
controls – 14. Ignition switch – 15. Driver front airbag – 16. Bonnet release lever – 17. Fuse cover on dashboard – 18.
Headlight alignment corrector and controls.
F0X0006m
007-044 STRADA LUM GB 1ed 9-01-2012 14:49 Pagina 12
Page 15 of 187
13
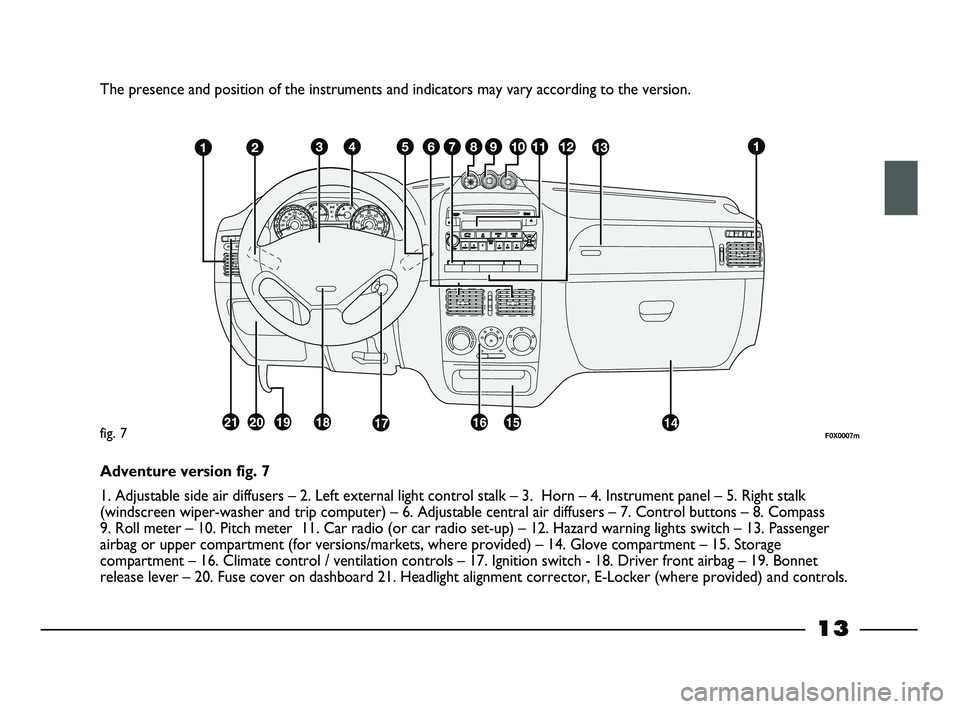
The presence and position of the instruments and indicators may vary according to the version.
F0X0007mfig. 7
Adventure version fig. 7
1. Adjustable side air diffusers – 2. Left external light control stalk – 3. Horn – 4. Instrument panel – 5. Right stalk
(windscreen wiper-washer and trip computer) – 6. Adjustable central air diffusers – 7. Control buttons – 8. Compass
9. Roll meter – 10. Pitch meter 11. Car radio (or car radio set-up) – 12. Hazard warning lights switch – 13. Passenger
airbag or upper compartment (for versions/markets, where provided) – 14. Glove compartment – 15. Storage
compartment – 16. Climate control / ventilation controls – 17. Ignition switch - 18. Driver front airbag – 19. Bonnet
release lever – 20. Fuse cover on dashboard 21. Headlight alignment corrector, E-Locker (where provided) and controls.
007-044 STRADA LUM GB 1ed 9-01-2012 14:49 Pagina 13
Page 54 of 187
EXTERIOR LIGHTS
FAULT (amber)
(for versions/markets,
where provided)
The warning light will switch on, on
some versions, when a fault with
one of the following lights is
detected:
– side lights
– brake lights
– rear fog lights
– direction indicators
– number plate lights.
The fault relating to these lights
could be: one or more blown bulbs,
a blown protection fuse or a break
in the electrical connection.
On some versions, the display shows
a dedicated message.The presence of water in
the fuel supply circuit
may cause severe
damage to the injection system
and irregular engine operation.
If the
cwarning light switches
on (on some versions together
with the message on the
display), contact a Fiat
Dealership as soon as possible
to have the system bled. If this
problem is indicated
immediately after refueling,
water may have entered the fuel
tank. In this case, stop the
engine immediately and contact
a Fiat Dealership.
W
WATER IN DIESEL
FILTER (amber)
When the key is turned to MAR, the
warning light switches on but should
switch off after a few seconds.
The cwarning light switches on
when there is water in the diesel
filter.
On some versions, the display shows
a dedicated message.
c
52
045-094 STRADA LUM GB 1ed 23-01-2012 9:10 Pagina 52
Page 57 of 187

CLIMATE CONTROL/HEATING SYSTEM
1 - Diffusers for windscreen
demisting.
2 - Diffusers for front side window
demisting.
3 - Adjustable side and central
diffusers.
4 - Side vents to direct air to the
front passenger footwell.
fig. 55F0X0027m
55
045-094 STRADA LUM GB 1ed 23-01-2012 9:10 Pagina 55
Page 58 of 187
ADJUSTABLE DIFFUSERS
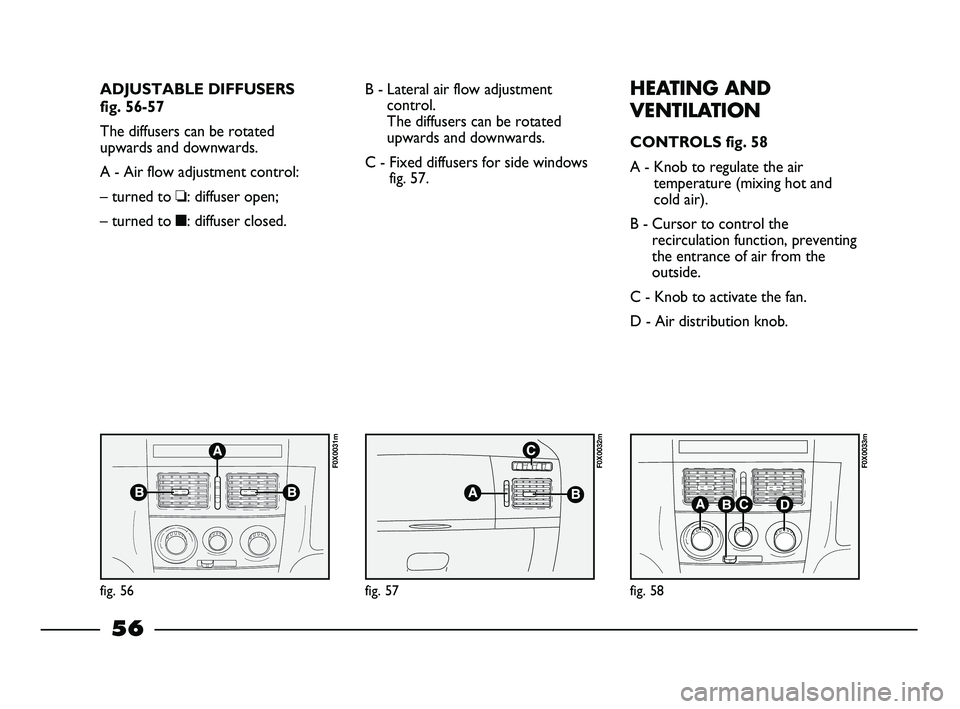
fig. 56-57
The diffusers can be rotated
upwards and downwards.
A - Air flow adjustment control:
– turned to ❏: diffuser open;
– turned to ■: diffuser closed.B - Lateral air flow adjustment
control.
The diffusers can be rotated
upwards and downwards.
C - Fixed diffusers for side windows
fig. 57.HEATING AND
VENTILATION
CONTROLS fig. 58
A - Knob to regulate the air
temperature (mixing hot and
cold air).
B - Cursor to control the
recirculation function, preventing
the entrance of air from the
outside.
C - Knob to activate the fan.
D - Air distribution knob.
fig. 56fig. 57
F0X0032m F0X0031m
fig. 58
F0X0033m
56
045-094 STRADA LUM GB 1ed 23-01-2012 9:10 Pagina 56
Page 59 of 187
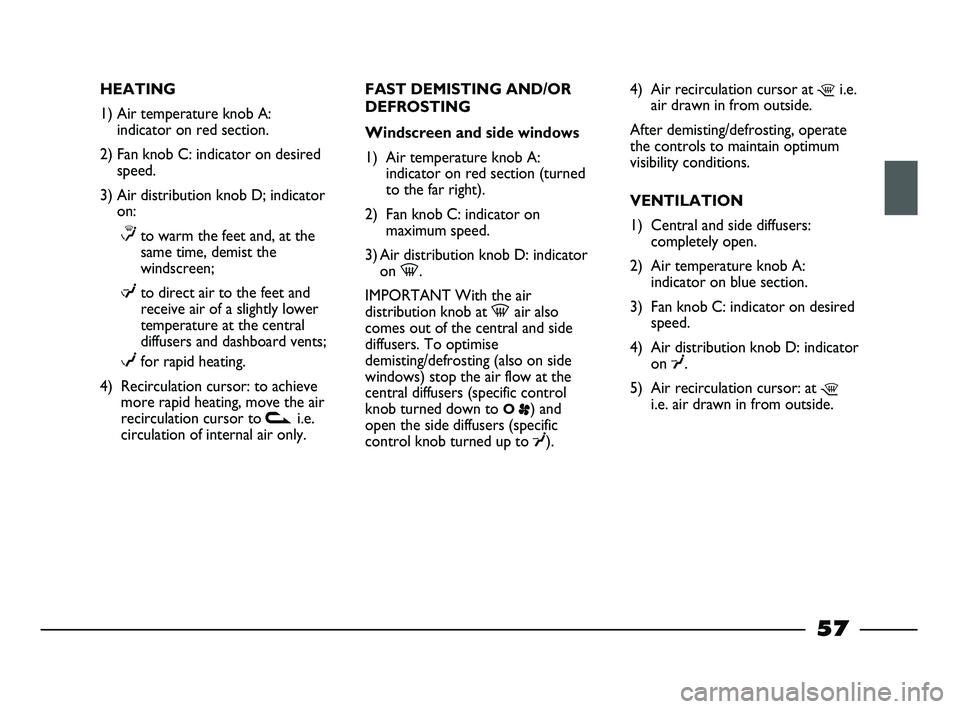
HEATING
1) Air temperature knob A:
indicator on red section.
2) Fan knob C: indicator on desired
speed.
3) Air distribution knob D; indicator
on:
≤to warm the feet and, at the
same time, demist the
windscreen;
μto direct air to the feet and
receive air of a slightly lower
temperature at the central
diffusers and dashboard vents;
wfor rapid heating.
4) Recirculation cursor: to achieve
more rapid heating, move the air
recirculation cursor to vi.e.
circulation of internal air only.FAST DEMISTING AND/OR
DEFROSTING
Windscreen and side windows
1) Air temperature knob A:
indicator on red section (turned
to the far right).
2) Fan knob C: indicator on
maximum speed.
3) Air distribution knob D: indicator
on -.
IMPORTANT With the air
distribution knob at -air also
comes out of the central and side
diffusers. To optimise
demisting/defrosting (also on side
windows) stop the air flow at the
central diffusers (specific control
knob turned down to
O
p) and
open the side diffusers (specific
control knob turned up to
¥).4) Air recirculation cursor at
¶i.e.
air drawn in from outside.
After demisting/defrosting, operate
the controls to maintain optimum
visibility conditions.
VENTILATION
1) Central and side diffusers:
completely open.
2) Air temperature knob A:
indicator on blue section.
3) Fan knob C: indicator on desired
speed.
4) Air distribution knob D: indicator
on
¥.
5) Air recirculation cursor: at
¶i.e. air drawn in from outside.
57
045-094 STRADA LUM GB 1ed 23-01-2012 9:10 Pagina 57
Page 61 of 187
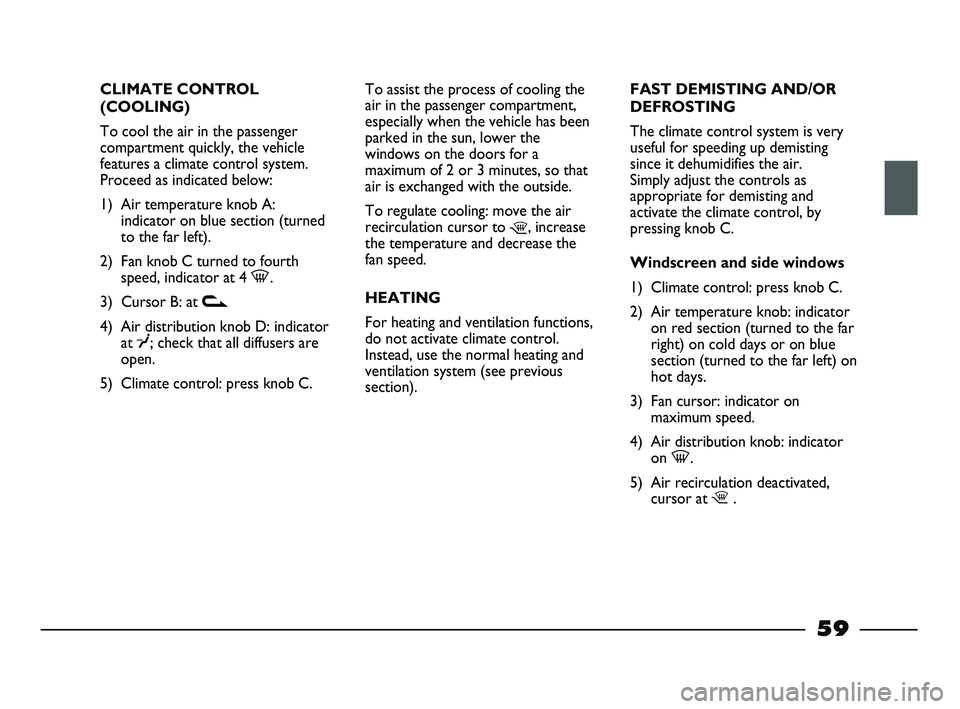
CLIMATE CONTROL
(COOLING)
To cool the air in the passenger
compartment quickly, the vehicle
features a climate control system.
Proceed as indicated below:
1) Air temperature knob A:
indicator on blue section (turned
to the far left).
2) Fan knob C turned to fourth
speed, indicator at 4 -.
3) Cursor B: at v
4) Air distribution knob D: indicator
at
¥; check that all diffusers are
open.
5) Climate control: press knob C.To assist the process of cooling the
air in the passenger compartment,
especially when the vehicle has been
parked in the sun, lower the
windows on the doors for a
maximum of 2 or 3 minutes, so that
air is exchanged with the outside.
To regulate cooling: move the air
recirculation cursor to
¶, increase
the temperature and decrease the
fan speed.
HEATING
For heating and ventilation functions,
do not activate climate control.
Instead, use the normal heating and
ventilation system (see previous
section).FAST DEMISTING AND/OR
DEFROSTING
The climate control system is very
useful for speeding up demisting
since it dehumidifies the air.
Simply adjust the controls as
appropriate for demisting and
activate the climate control, by
pressing knob C.
Windscreen and side windows
1) Climate control: press knob C.
2) Air temperature knob: indicator
on red section (turned to the far
right) on cold days or on blue
section (turned to the far left) on
hot days.
3) Fan cursor: indicator on
maximum speed.
4) Air distribution knob: indicator
on -.
5) Air recirculation deactivated,
cursor at ¶.
59
045-094 STRADA LUM GB 1ed 23-01-2012 9:10 Pagina 59
Page 62 of 187
IMPORTANT With the air
distribution knob at -air also
comes out of the central and side
diffusers. To optimise demisting
/defrosting (also on side windows)
stop the air flow at the central
diffusers (specific control knob
turned down to
Op) and open the
side diffusers (specific control knob
turned up to
¥).
After demisting, operate the
controls to maintain optimum
visibility conditions.
EXTERIOR LIGHTS
The left stalk operates most of the
external lights.
The ignition key has to be at MAR
for the exterior lights to switch on.
The instrument panel and the
various dashboard controls will
switch on with the external lights.
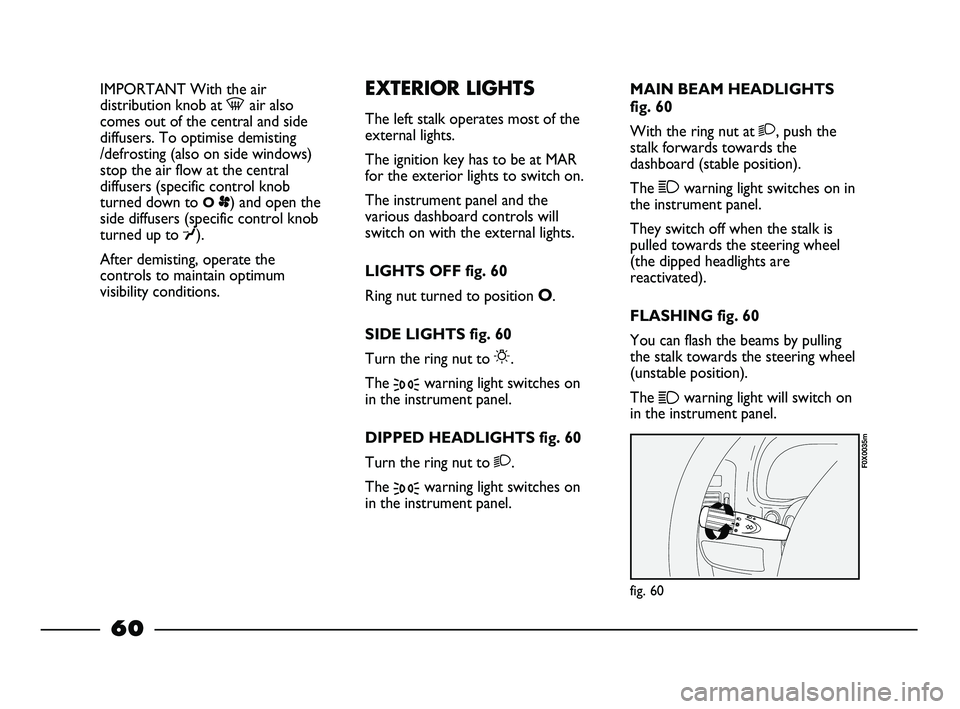
LIGHTS OFF fig. 60
Ring nut turned to position
O.
SIDE LIGHTS fig. 60
Turn the ring nut to
6.
The
3warning light switches on
in the instrument panel.
DIPPED HEADLIGHTS fig. 60
Turn the ring nut to
2.
The
3warning light switches on
in the instrument panel.MAIN BEAM HEADLIGHTS
fig. 60
With the ring nut at
2, push the
stalk forwards towards the
dashboard (stable position).
The
1warning light switches on in
the instrument panel.
They switch off when the stalk is
pulled towards the steering wheel
(the dipped headlights are
reactivated).
FLASHING fig. 60
You can flash the beams by pulling
the stalk towards the steering wheel
(unstable position).
The
1warning light will switch on
in the instrument panel.
fig. 60
F0X0035m
60
045-094 STRADA LUM GB 1ed 23-01-2012 9:10 Pagina 60
Page 66 of 187
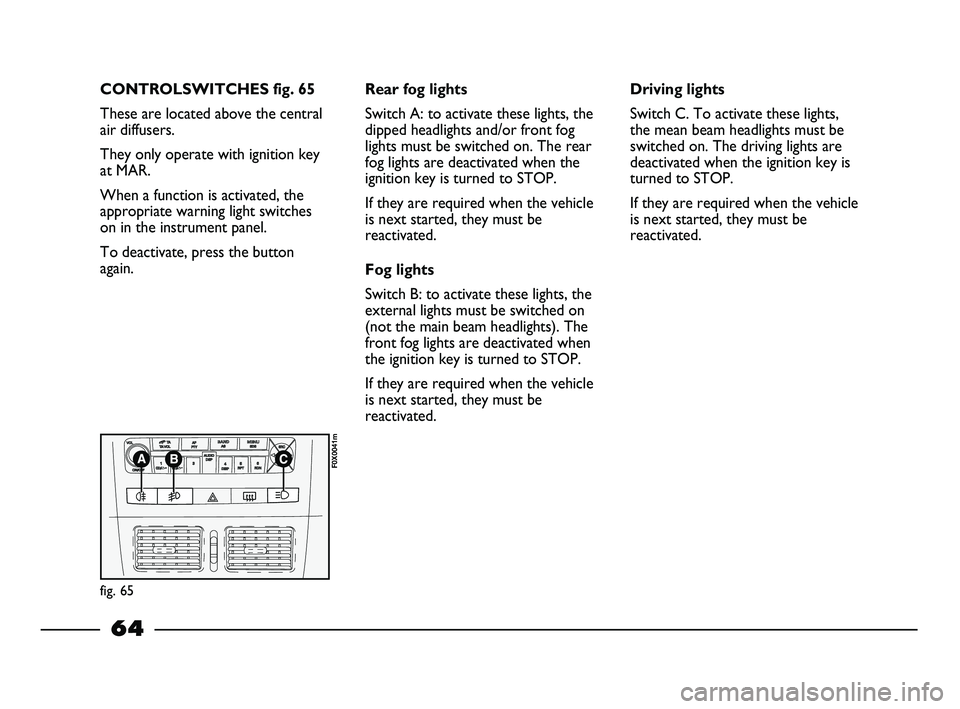
CONTROLSWITCHES fig. 65
These are located above the central
air diffusers.
They only operate with ignition key
at MAR.
When a function is activated, the
appropriate warning light switches
on in the instrument panel.
To deactivate, press the button
again.
(
r
fig. 65
F0X0041m
Rear fog lights
Switch A: to activate these lights, the
dipped headlights and/or front fog
lights must be switched on. The rear
fog lights are deactivated when the
ignition key is turned to STOP.
If they are required when the vehicle
is next started, they must be
reactivated.
Fog lights
Switch B: to activate these lights, the
external lights must be switched on
(not the main beam headlights). The
front fog lights are deactivated when
the ignition key is turned to STOP.
If they are required when the vehicle
is next started, they must be
reactivated.Driving lights
Switch C. To activate these lights,
the mean beam headlights must be
switched on. The driving lights are
deactivated when the ignition key is
turned to STOP.
If they are required when the vehicle
is next started, they must be
reactivated.
64
045-094 STRADA LUM GB 1ed 23-01-2012 9:10 Pagina 64
Page 115 of 187
113
Modifications or repairs
to the electrical system
that are not carried out
correctly or do not take the
system’s technical
specifications into account can
cause malfunctions leading to
the risk of fire.
WARNING
Halogen bulbs contain
pressurised gas. Glass
shards may be projected if a
bulb breaks.
WARNING
Halogen bulbs must be
handled by holding the
metal part only. If the
transparent bulb is touched with
the fingers, its lighting intensity
is reduced and life of the bulb
may be compromised. In the
event of accidental contact,
wipe the bulb with a cloth
moistened with alcohol and let
the bulb dry.
Where possible, it is
advisable to have bulbs
changed at a Fiat
Dealership. The correct
operation and direction of the
exterior lights are absolutely
essential for the driving in safety
and compliance with law.
– Burnt bulbs must be replaced by
others of the same type and
power.
– Always check the direction of the
beam after changing a headlight
bulb, for reasons of safety.
TYPES OF BULBS
Various types of bulbs are fitted on
your vehicle fig. 119:
A. All-glass bulbs
These are press-fitted.
Pull to remove them.
B. Bayonet bulbs
To remove this type of bulb from
the holder, press the bulb and turn it
anticlockwise.
C. Cylindrical bulbs
Release from the contacts to
remove.
D-E. Halogen bulbs
Detach the locking spring from its
housing to remove the bulb.IF YOU NEED TO
REPLACE A BULB
GENERAL INSTRUCTIONS
– When a light is not working,
check that the corresponding fuse
is intact before replacing the bulb.
– For the location of fuses, refer to
the paragraph “If you blow a fuse”
in this section.
– Before changing a burnt bulb,
check the contacts for oxidation.
107-132 STRADA LUM GB 1ed 9-01-2012 14:52 Pagina 113