glove box FIAT TEMPRA 1988 Service And Repair Manual
[x] Cancel search | Manufacturer: FIAT, Model Year: 1988, Model line: TEMPRA, Model: FIAT TEMPRA 1988Pages: 171, PDF Size: 18.05 MB
Page 2 of 171
Running The Vehicle
NEVER start the engine unless the gearbox is in neutral (or
'Park' in the case of automatic transmission) and the hand
brake is fully applied.
NEVER run catalytic converter equipped vehicles without the
exhaust system heat shields in place.
TAKE CARE when parking vehicles fitted with catalytic
converters. The 'cat' reaches extremely high temperatures and
any combustible materials under the car, such as long dry
grass, could be ignited.
Personal Safety
NEVER siphon fuel, antifreeze, brake fluid or other such toxic
liquids by mouth, or allow contact with your skin. Use a
suitable hand pump and wear gloves.
BEFORE undertaking dirty jobs, use a barrier cream on your
hands as a protection against infection. Preferably, wear
suitable gloves, available from DIY outlets.
WEAR IMPERVIOUS GLOVES for sure when there is a risk of
used engine oil coming into contact with your skin. It can
cause cancer.
WIPE UP any spilt oil, grease or water off the floor
immediately.
MAKE SURE that spanners and all other tools are the right size
for the job and are not likely to slip. Never try to 'double-up'
spanners to gain more leverage.
SEEK HELP if you need to lift something heavy which may be
beyond your capability. Don't forget that when lifting a heavy
weight, you should keep your back straight and bend your
knees to avoid injuring your back.
NEVER take risky short-cuts or rush to finish a job. Plan ahead
and allow plenty of time.
BE METICULOUS and keep the work area tidy
-
you'll avoid
frustration, work better and lose less.
KEEP children and animals right-away from the work area and
from unattended vehicles.
ALWAYS tell someone what you're doing and have them
regularly check that all is well, especially when working alone
on, or under, the vehicle.
Fire!
Petrol (gasoline) is a dangerous and highly flammable liquid
requiring special precautions. When working on the fuel
system, disconnect the vehicle battery earth (ground) terminal
whenever possible and always work outside, or in a very well
ventilated area. Any form of spark, such as that caused by an
electrical fault, by two metal surfaces striking against each
other, by a central heating boiler in the garage 'firing up', or
even by static electricity built up in your clothing can, in a
confined space, ignite petrol vapour causing an explosion.
Take great care not to spill petrol on to the engine or exhaust
system, never allow any naked flame anywhere near the work
area and, above all, don't smoke.
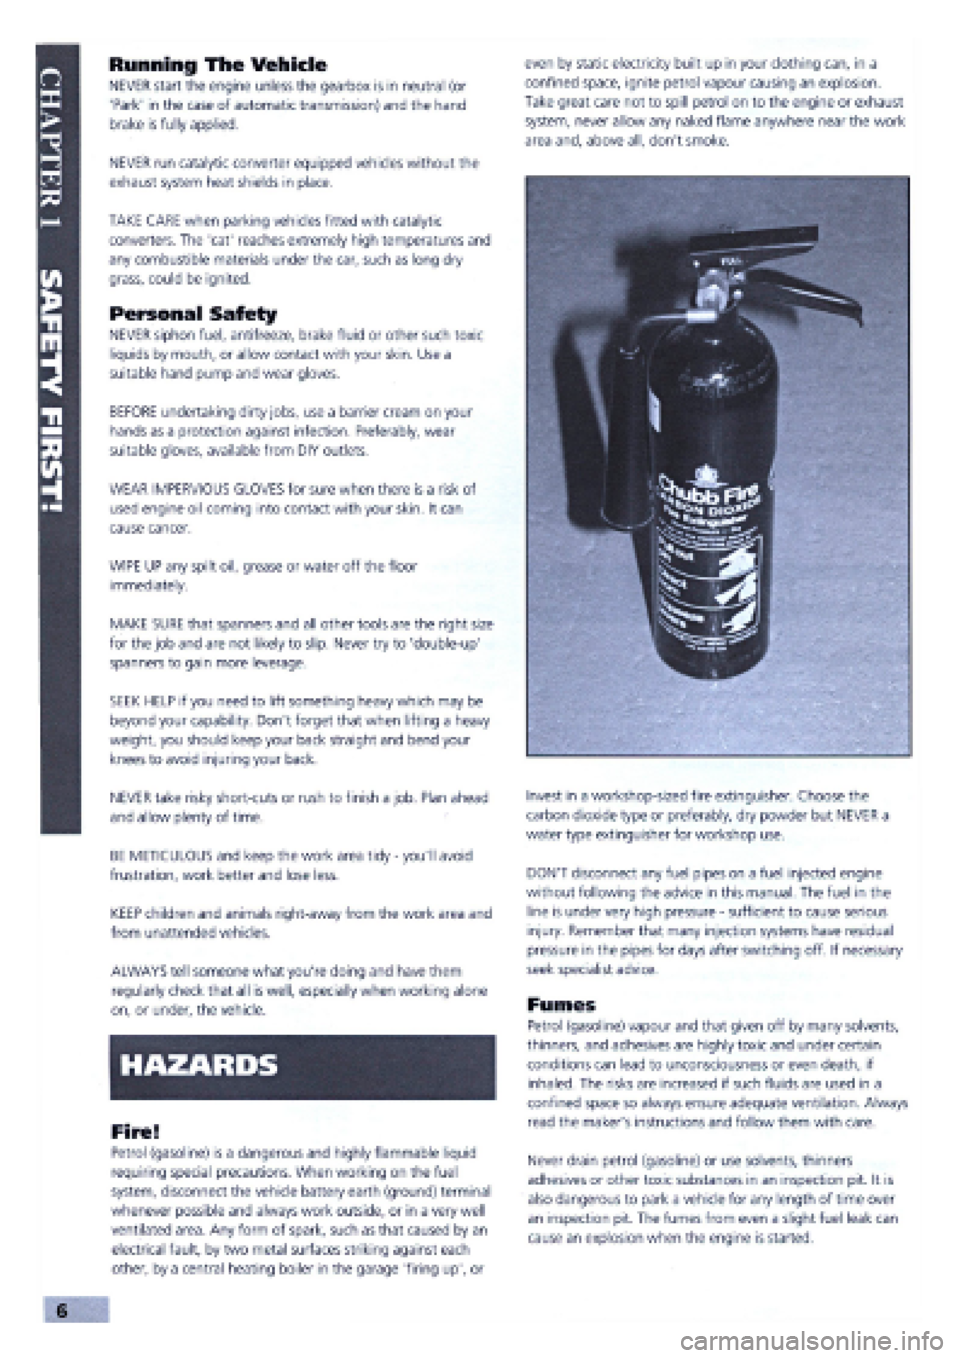
Invest in a workshop-sized fire extinguisher. Choose the
carbon dioxide type or preferably, dry powder but NEVER a
water type extinguisher for workshop use.
DON'T disconnect any fuel pipes on a fuel injected engine
without following the advice in this manual. The fuel in the
line is under very high pressure
-
sufficient to cause serious
injury. Remember that many injection systems have residual
pressure in the pipes for days after switching off. If necessary
seek specialist advice.
Fumes
Petrol (gasoline) vapour and that given off by many solvents,
thinners, and adhesives are highly toxic and under certain
conditions can lead to unconsciousness or even death, if
inhaled. The risks are increased if such fluids are used in a
confined space so always ensure adequate ventilation. Always
read the maker's instructions and follow them with care.
Never drain petrol (gasoline) or use solvents, thinners
adhesives or other toxic substances in an inspection pit. It is
also dangerous to park a vehicle for any length of time over
an inspection pit. The fumes from even a slight fuel leak can
cause an explosion when the engine is started.
v ,,, Oil;::;s
Page 4 of 171
and explosions. Do not allow resin or 2-pack adhesive hardener,
or that supplied with filler or 2-pack stopper, to come into
contact with skin or eyes. Read carefully the safety notes
supplied on the can, tube or packaging and always wear
impervious gloves and goggles when working with them.
Fluoroelastomers
Fluoroelastomers are commonly used for oil seals, wiring and
cabling, bearing surfaces, gaskets, diaphragms, hoses and '0'
rings. If they are subjected to temperatures greater than 315
degrees C, they will decompose and can be potentially
hazardous. Some decomposition may occur at temperatures
above 200 degrees C, and it is obvious that when a car has
been in a fire or has been dismantled with the assistance of a
cutting torch or blow torch, the fluoroelastomers can
decompose in the manner indicated above.
According to the Health and Safety Executive, "Skin contact
with this liquid or decomposition residues can cause painful and
penetrating burns. Permanent irreversible skin and tissue
damage can occur". Damage can also be caused to eyes or by
the inhalation of fumes created as fluoroelastomers are burned
or heated.
After a vehicle has been exposed to fire or high temperatures:
1. Do not touch blackened or charred seals or equipment.
2. Preferably, don't handle parts containing decomposed
fluoroelastomers, but if you must, wear goggles and PVC
(polyvinyl chloride) or neoprene protective gloves whilst doing
so. Never handle such parts unless they are completely cool.
3. Contaminated parts, residues, materials and clothing,
including protective clothing and gloves, should be disposed of
by an approved contractor to landfill or by incineration
according to national or local regulations. Oil seals, gaskets and
'0' rings, along with contaminated material, must not
be burned.
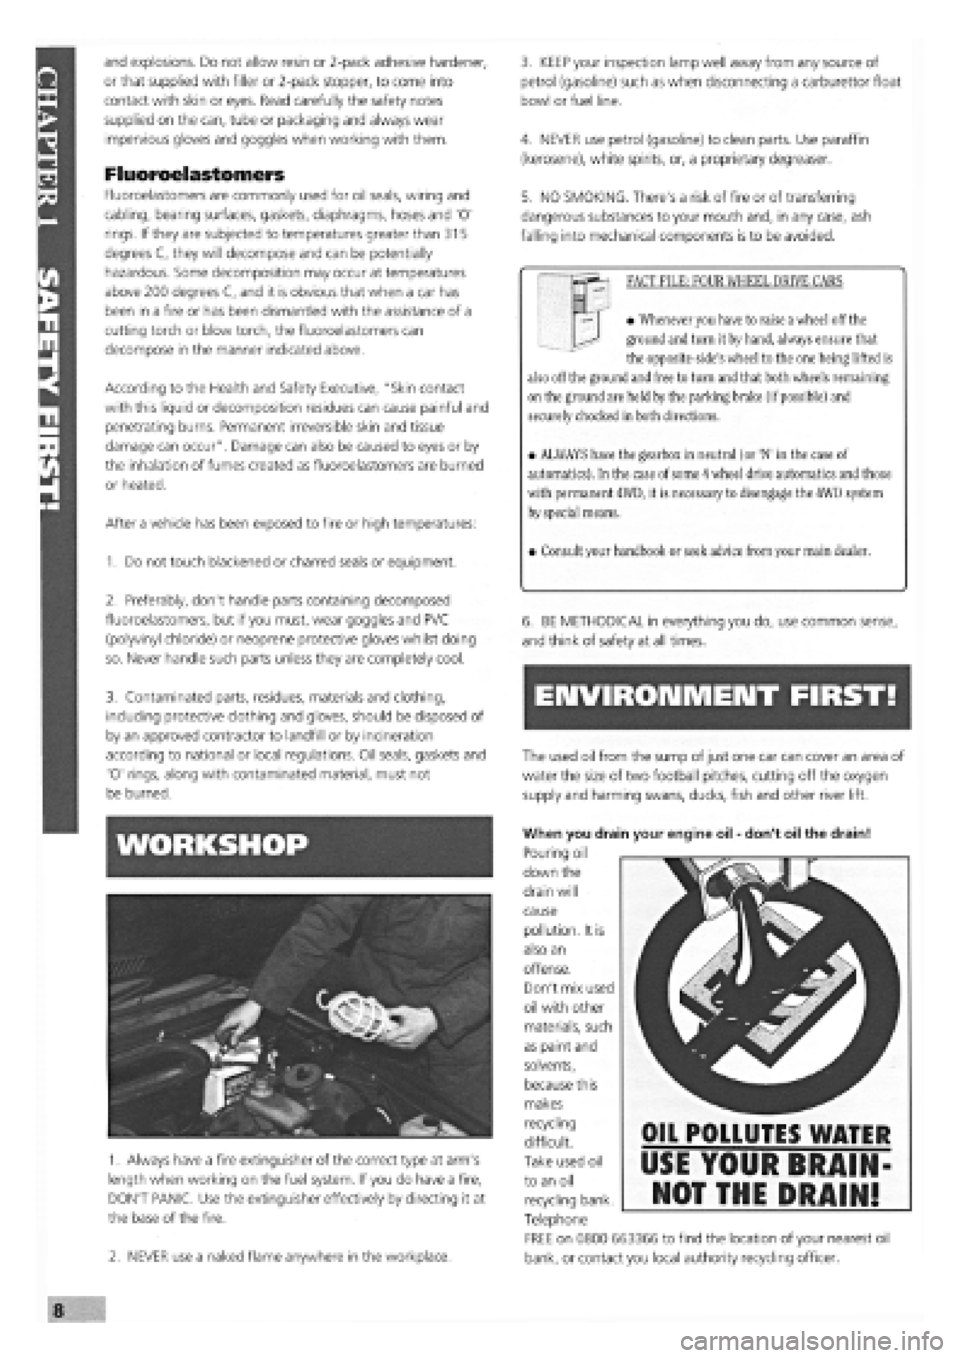
1. Always have a fire extinguisher of the correct type at arm's
length when working on the fuel system. If you do have a fire,
DON'T PANIC. Use the extinguisher effectively by directing it at
the base of the fire.
2. NEVER use a naked flame anywhere in the workplace.
3. KEEP your inspection lamp well away from any source of
petrol (gasoline) such as when disconnecting a carburettor float
bowl or fuel line.
4. NEVER use petrol (gasoline) to clean parts. Use paraffin
(kerosene), white spirits, or, a proprietary degreaser.
5. NO SMOKING. There's a risk of fire or of transferring
dangerous substances to your mouth and, in any case, ash
falling into mechanical components is to be avoided.
FACT FILE: FOUR WHEEL DRIVE CARS
• Whenever you have to raise a wheel off the
ground and turn it by hand, always ensure that
the opposite-side's wheel to the one being lifted is
also off the ground and free to turn and that both wheels remaining
on the ground are held by the parking brake (if possible) and
securely chocked in both directions.
• ALWAYS have the gearbox in neutral (or 'N' in the case of
automatics). In the case of
some
4 wheel drive automatics and those
with permanent 4WD, it is necessary to disengage the 4WD system
by special means.
• Consult your handbook or seek advice from your main dealer.
6. BE METHODICAL in everything you do, use common sense,
and think of safety at all times.
ENVIRONMENT FIRST!
The used oil from the sump of
just
one car
can
cover
an
area of
water the size of two football pitches, cutting off the oxygen
supply
and
harming swans, ducks, fish and other river lift.
When you drain your engine oil
-
don't oil the drain!
Pouring oil
down the
drain will
cause
pollution. It is
also an
offense.
Don't mix used
oil with other
materials, such
as paint and
solvents,
because this
makes
recycling
difficult.
Take used oil
to an oil
recycling bank.
Telephone
FREE on 0800 663366 to find the location of your nearest oil
bank, or contact you local authority recycling officer.
OIL POLLUTES WATER
USE YOUR BRAIN-
NOT THE DRAIN!
Page 37 of 171
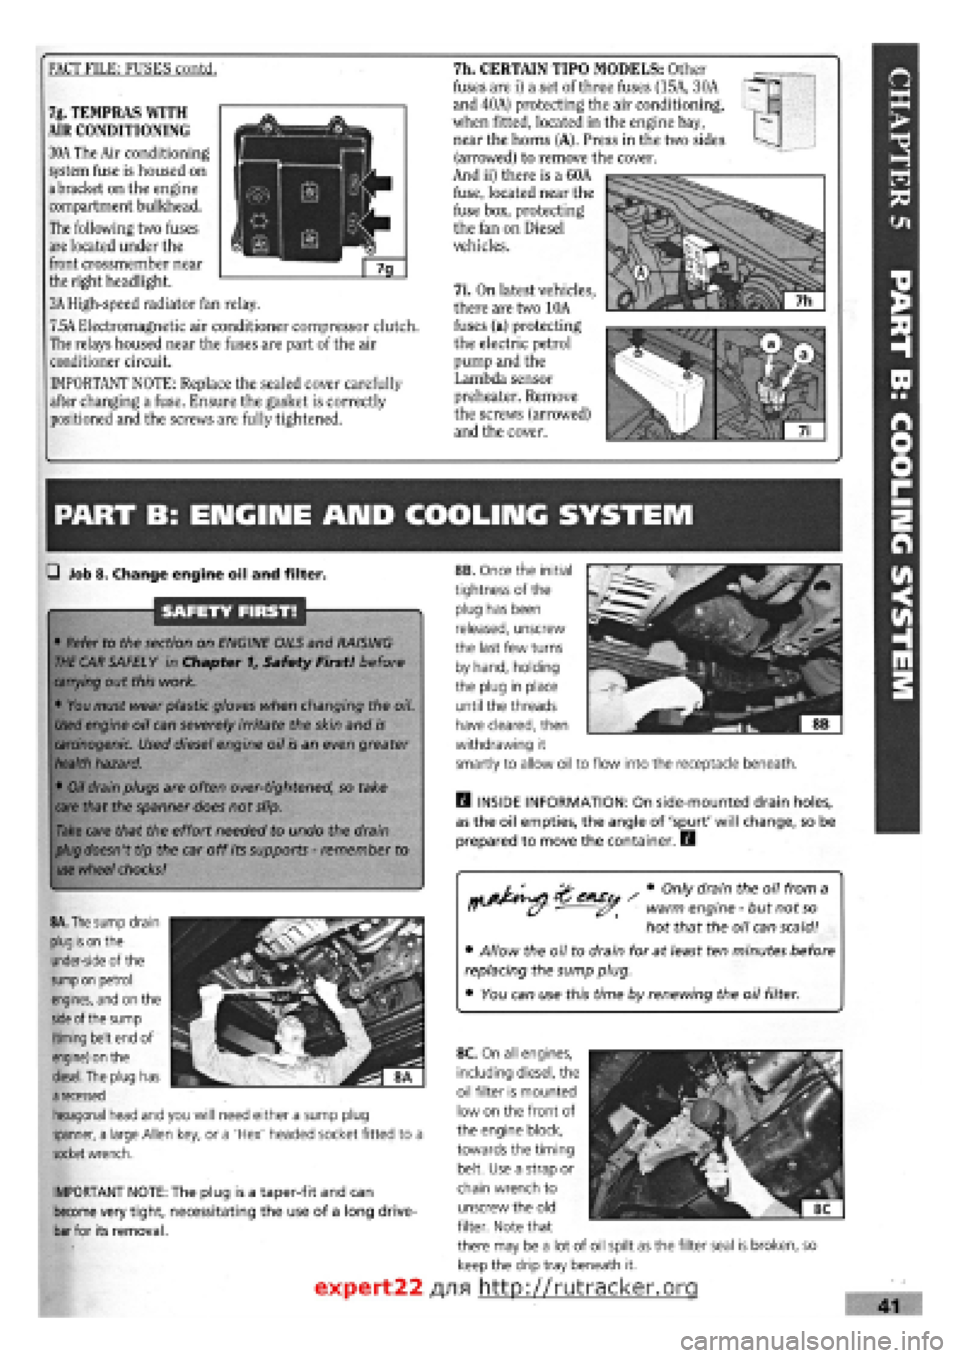
FACT FILE: FUSES contd. 7h. CERTAIN TIPO MODELS: Other
fuses are i) a set of three fuses (15A, 30A
and 40A) protecting the air conditioning,
when fitted, located in the engine bay,
near the horns (A). Press in the two sides
(arrowed) to remove the cover.
And ii) there is a 60A
fuse, located near the
fuse box, protecting
the fan on Diesel
vehicles.
7i. On latest vehicles,
there are two 10A
fuses (a) protecting
the electric petrol
pump and the
Lambda sensor
preheater. Remove
the screws (arrowed)
and the cover.
7g. TEMPRAS WITH
AIR CONDITIONING
30A The Air conditioning
system fuse is housed on
a bracket on the engine
compartment bulkhead.
The following two fuses
are located under the
front crossmember near
the right headlight.
3A High-speed radiator fan relay.
7.5A Electromagnetic air conditioner compressor clutch.
The relays housed near the fuses are part of the air
conditioner circuit.
IMPORTANT NOTE: Replace the sealed cover carefully
after changing a fuse. Ensure the gasket is correctly
positioned and the screws are fully tightened.
PART B: ENGIIME AND COOLING SYSTEM
Q Job 8. Change engine oil and filter.
SAFETY FIRST!
• Refer to the section on ENGINE OILS and RAISING
THE
CAR SAFELY in Chapter f, Safety First! before
carrying
out this work.
• You must wear plastic gloves when changing the oil.
Used
engine oil can severely irritate the skin and
is
carcinogenic.
Used diesel engine oil is an even greater
health
hazard.
•
Oil
drain plugs are often over-tightened, so take
care
that the spanner does not slip.
Take
care that the effort needed to undo the drain
plug
doesn't tip the car off its supports
-
remember to
use
wheel
chocks!
rtj&^si ' # °nly dram theu 0,7 fr°m a ff (y warm engine
-
but not
so
hot that the oil can scald!
• Allow the oil to drain for at least ten minutes before
replacing the sump plug.
• You can use this time by renewing the oil filter.
IMPORTANT NOTE: The plug is a taper-fit and can
become very tight, necessitating the use of a long drive-
bar for its removal.
H INSIDE INFORMATION: On side-mounted drain holes,
as the oil empties, the angle of 'spurt' will change, so be
prepared to move the container. E3
8A. The
sump drain
plug is on
the
under-side of the
sump on
petrol
engines, and on the
side
of the sump
(timing belt end of
engine) on the
diesel.
The plug has
a
recessed
hexagonal head and you will need either a sump plug
spanner, a large Allen key, or a 'Hex' headed socket fitted to a
socket
wrench.
8B. Once the initial
tightness of the
plug has been
released, unscrew
the last few turns
by hand, holding
the plug in place
until the threads
have cleared, then
withdrawing it
smartly to allow oil to flow into the receptacle beneath.
expert22
8C. On all engines,
including diesel, the
oil filter is mounted
low on the front of
the engine block,
towards the timing
belt. Use a strap or
chain wrench to
unscrew the old
filter. Note that
there may be a lot of oil spilt as the filter seal is broken, so
keep the drip tray beneath it.
/yifl http://rutracker.org
Page 42 of 171
• Job 20. Check/adjust clutch. CABLE OPERATED CLUTCH
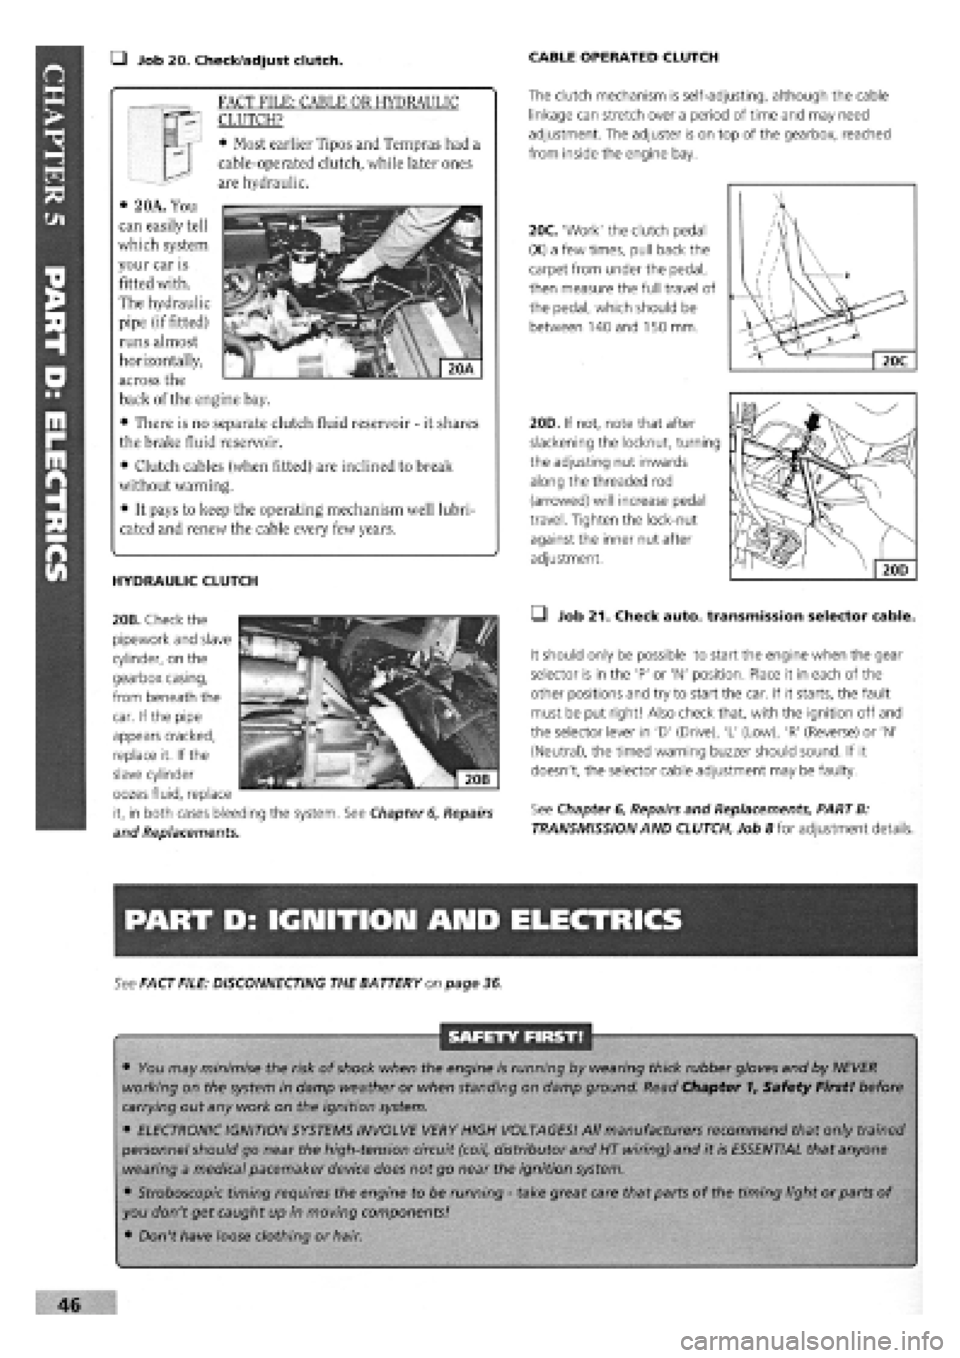
The clutch mechanism is self-adjusting, although the cable
linkage can stretch over a period of time and may need
adjustment. The adjuster is on top of the gearbox, reached
from inside the engine bay.
20C. 'Work' the clutch pedal
(X) a few times, pull back the
carpet from under the pedal,
then measure the full travel of
the pedal, which should be
between 140 and 150 mm.
/
\
/ \
/ u / Xl
1 ' ' / . V y 2
Jdi V 1 \
X. 1 —
20C
HYDRAULIC CLUTCH
20B. Check the
pipework and slave
cylinder, on the
gearbox casing,
from beneath the
20D. If not, note that after
slackening the locknut, turning
the adjusting nut inwards
along the threaded rod
(arrowed) will increase pedal
travel. Tighten the lock-nut
against the inner nut after
adjustment.
• Job 21. Check auto, transmission selector cable.
It should only be possible to start the engine when the gear
selector is in the 'P' or 'N' position. Place it in each of the
other positions and try to start the car. If it starts, the fault
must be put right! Also check that, with the ignition off and
the selector lever in 'D' (Drive), 'L' (Low), 'R' (Reverse) or 'N'
(Neutral), the timed warning buzzer should sound. If it
doesn't, the selector cable adjustment may be faulty.
See Chapter
6,
Repairs and Replacements, PART B:
TRANSMISSION AND CLUTCH, Job 8 for adjustment details.
PART D: IGNITION AND ELECTRICS
See FACT FILE: DISCONNECTING THE BATTERY on page 36
SAFETY FIRST!
• You may minimise the risk of shock when the engine is running by wearing thick rubber gloves and by NEVER
working on the system in damp weather or when standing on damp ground. Read Chapter 1, Safety First! before
carrying out any work on the ignition system.
• ELECTRONIC IGNITION SYSTEMS INVOLVE VERY HIGH VOLTAGES! All manufacturers recommend that only trained
personnel should go near the high-tension circuit (coil, distributor and HT wiring) and it is ESSENTIAL that anyone
wearing a medical pacemaker device does not go near the ignition system.
• Stroboscopic timing requires the engine to be running
-
take great care that parts of the timing light or parts of
you don't get caught up in moving components!
• Don't have loose clothing or hair.
46
FACT FILE: CABLE OR HYDRAULIC
CLUTCH?
• Most earlier Tipos and Tempras had a
cable-operated clutch, while later ones
are hydraulic.
• 2 OA. You
can easily tell
which system
your car is
fitted with.
The hydraulic
pipe (if fitted)
runs almost
horizontally,
across the
back of the engine bay.
• There is no separate clutch fluid reservoir
-
it shares
the brake fluid reservoir.
• Clutch cables (when fitted) are inclined to break
without warning.
• It pays to keep the operating mechanism well lubri-
cated and renew the cable every few years.
car. If the pipe
appears cracked,
replace it. If the
slave cylinder
oozes fluid, replace
it, in both cases bleeding the system. See Chapter
6,
Repairs
and Replacements.
Page 46 of 171
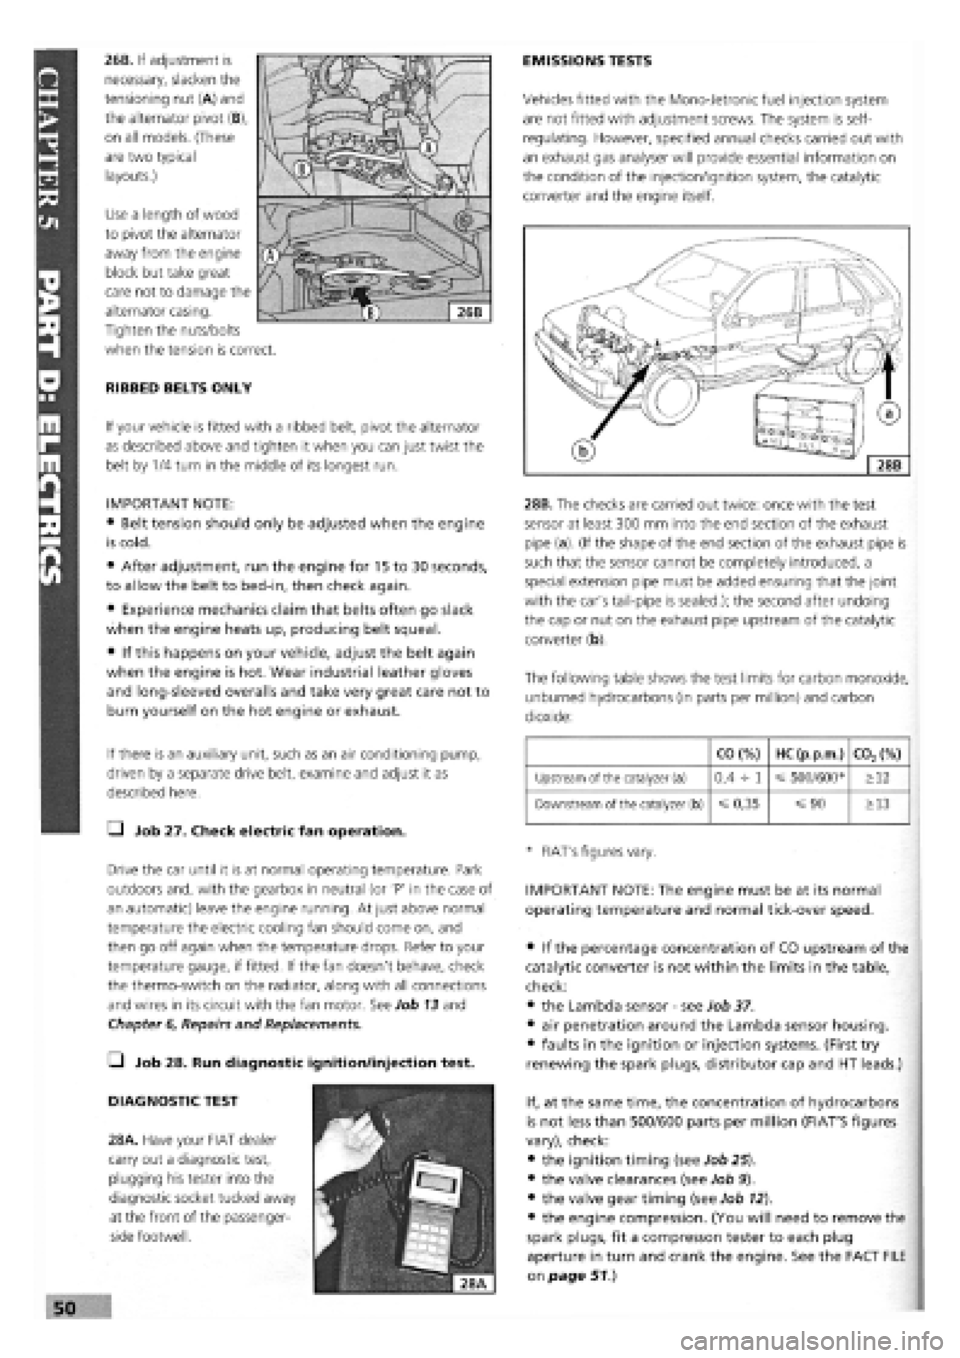
26B. If adjustment is
necessary, slacken the
tensioning nut (A) and
the alternator pivot (B),
on all models. (These
are two typical
layouts.)
Use a length of wood
to pivot the alternator
away from the engine
block but take great
care not to damage the
alternator casing.
Tighten the nuts/bolts
when the tension is correct.
RIBBED BELTS ONLY
If your vehicle is fitted with a ribbed belt, pivot the alternator
as described above and tighten it when you can just twist the
belt by 1/4 turn in the middle of its longest run.
IMPORTANT NOTE:
• Belt tension should only be adjusted when the engine
is cold.
• After adjustment, run the engine for 15 to 30 seconds,
to allow the belt to bed-in, then check again.
• Experience mechanics claim that belts often go slack
when the engine heats up, producing belt squeal.
• If this happens on your vehicle, adjust the belt again
when the engine is hot. Wear industrial leather gloves
and long-sleeved overalls and take very great care not to
burn yourself on the hot engine or exhaust.
If there is an auxiliary unit, such as an air conditioning pump,
driven by a separate drive belt, examine and adjust it as
described here.
Q Job 27. Check electric fan operation.
Drive the car until it is at normal operating temperature. Park
outdoors and, with the gearbox in neutral (or 'P' in the case of
an automatic) leave the engine running. At just above normal
temperature the electric cooling fan should come on, and
then go off again when the temperature drops. Refer to your
temperature gauge, if fitted. If the fan doesn't behave, check
the thermo-switch on the radiator, along with all connections
and wires in its circuit with the fan motor. See Job 13 and
Chapter
6,
Repairs and Replacements.
• Job 28. Run diagnostic ignition/injection test.
DIAGNOSTIC TEST
28A. Have your FIAT dealer
carry out a diagnostic test,
plugging his tester into the
diagnostic socket tucked away
at the front of the passenger-
side footwell.
EMISSIONS TESTS
Vehicles fitted with the Mono-Jetronic fuel injection system
are not fitted with adjustment screws. The system is self-
regulating. However, specified annual checks carried out with
an exhaust gas analyser will provide essential information on
the condition of the injection/ignition system, the catalytic
converter and the engine itself.
28B. The checks are carried out twice: once with the test
sensor at least 300 mm into the end section of the exhaust
pipe (a). (If the shape of the end section of the exhaust pipe is
such that the sensor cannot be completely introduced, a
special extension pipe must be added ensuring that the joint
with the car's tail-pipe is sealed.); the second after undoing
the cap or nut on the exhaust pipe upstream of the catalytic
converter (b).
The following table shows the test limits for carbon monoxide,
unburned hydrocarbons (in parts per million) and carbon
dioxide:
CO (%) HC (p.p.m.) C02(%)
Upstream of the catalyzer (a) 0,4 -h 1 500/600* >12
Downstream of the catalyzer (b)
=£
0,35 =s 90 >13
* FIAT's figures vary.
IMPORTANT NOTE: The engine must be at its normal
operating temperature and normal tick-over speed.
• if the percentage concentration of CO upstream of the
catalytic converter is not within the limits in the table,
check:
• the Lambda sensor
-
see Job 37.
• air penetration around the Lambda sensor housing.
• faults in the ignition or injection systems. (First try
renewing the spark plugs, distributor cap and HT leads.)
If, at the same time, the concentration of hydrocarbons
is not less than 500/600 parts per million (FIAT'S figures
vary), check:
• the ignition timing (see Job 25).
• the valve clearances (see Job 9).
• the valve gear timing (see Job 12).
• the engine compression. (You will need to remove the
spark plugs, fit a compresson tester to each plug
aperture in turn and crank the engine. See the FACT FILE
on page 51.)
Page 47 of 171
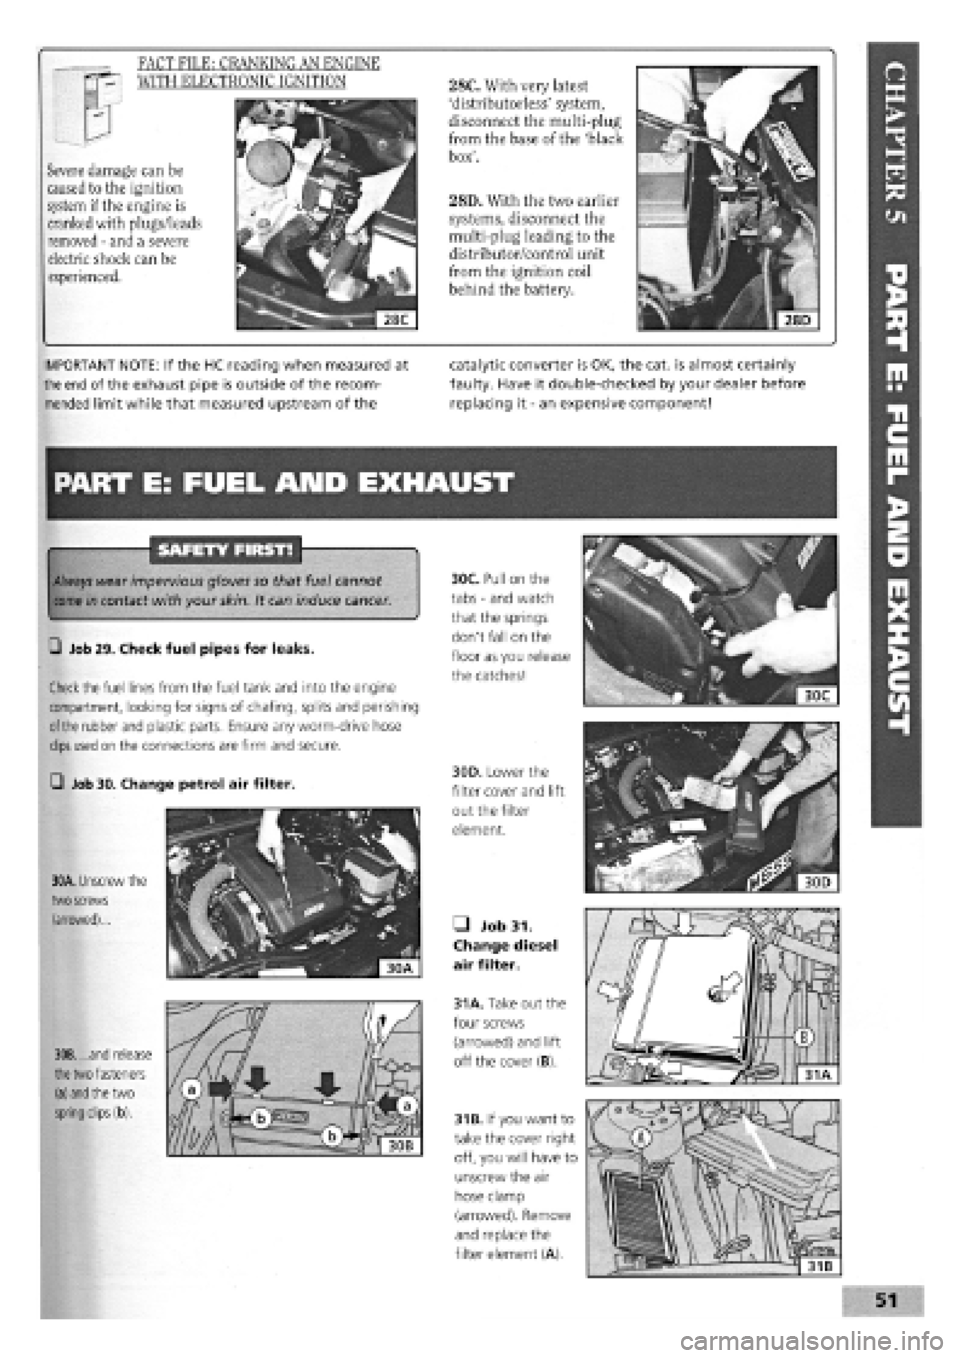
28C. With very latest
'distributorless' system,
disconnect the multi-plug
from the base of the 'black
box'.
28D. With the two earlier
systems, disconnect the
multi-plug leading to the
distributor/control unit
from the ignition coil
behind the battery.
FACT FILE: CRANKING AN ENGINE
WITH ELECTRONIC IGNITION
Severe damage can be
caused to the ignition
system if the engine is
cranked with plugs/leads
removed
-
and a severe
electric shock can be
experienced.
PART E: FUEL AND EXHAUST
SAFETY FIRST!
Always
wear impervious gloves so that fuel cannot
come
in contact with your
skin.
It can induce cancer.
Q Job 29. Check fuel pipes for leaks.
Check the fuel lines from the fuel tank and into the engine
compartment, looking for signs of chafing, splits and perishing
of the
rubber and plastic parts. Ensure any worm-drive hose
clips used
on the connections are firm and secure.
Q Job 30. Change petrol air filter.
IMPORTANT NOTE: If the HC reading when measured at
the end of the exhaust pipe is outside of the recom-
mended limit while that measured upstream of the
catalytic converter is OK, the cat. is almost certainly
faulty. Have it double-checked by your dealer before
replacing it
-
an expensive component!
30C. Pull on the
tabs
-
and watch
that the springs
don't fall on the
floor as you release
the catches!
30D. Lower the
filter cover and lift
out the filter
element.
31B. If you want to
take the cover right
off, you will have to
unscrew the air
hose clamp
(arrowed). Remove
and replace the
filter element (A).
• Job 31.
Change diesel
air filter.
31A. Take out the
four screws
(arrowed) and lift
off the cover (B). 30B. ...and release
the two
fasteners
(a) and the
two
spring clips
(b).
30A. Unscrew the
two
screws
(arrowed)...
51
Page 91 of 171
Q Step 2: Before starting the engine, make sure all your
electrical connections are sound and your fuel, oil and coolant
connections are correct and secure.
Q Step 3: Run the engine to working temperature and then
allow to cool. Re-check all fluid levels.
Job 20. Diesel engine.
Mountings - replacement.
See
Job
12
and Job
18,
Step 20
Job 21. Diesel engine/
transmission (removed from car)
- separation.
Q Step 1: Remove the starter motor.
• Step 2: On the turbo version, undo the flange bolts see
Job
18,
Step 16A and withdraw the drive-shaft extension, if
still
fitted.
Q Step 3: Unbolt and remove the rear engine plate and the
gearbox, being careful to support the gearbox weight as it is
withdrawn.
Job 22. Diesel engine/
transmission (removed from car)
- reconnection.
Q Step 1: Before proceeding, check the condition of the
clutch and
its release mechanism. Make sure the driven plate
is
properly centred on the flywheel
-
see PART B: TRANS-
MISSION.
Q Step 2: Now reverse the order of separation, but be
careful when
engaging the gearbox input shaft with the
clutch
driven plate that you don't 'hang' its weight on the
splines.
Also,
see
Job 11.
Job 23. Diesel engine -
dismantling.
This Job should
be read in conjunction with Job 5 The
engines are
broadly similar although the information given in
this Job takes
priority for diesel engines. It is MOST
IMPORTANT that you read the FACT FILE on page 84.
SAFETY FIRST!
•
The inside
of diesel engines are particularly filthy
places!
•
Old diesel
oil
is
carcinogenic!
•
Wear suitable
impervious gloves!
I
• Step 1: Remove the timing belt and cylinder head. See
Jobs
13
and 14.
Q Step 2: Remove the alternator, water pump and
thermostat housing distribution pipe.
• Step 3: Remove the crankshaft timing belt sprocket.
Q INSIDE INFORMATION! Note that the bolt securing
the crankshaft sprocket has a left-hand thread and must
be undone clockwise. D
• Step 4: Unbolt the timing belt tensioner and idler pulleys.
• Step 5: Remove the injection pump sprocket.
Q INSIDE INFORMATION! You will need two FIAT tools
for this operation. One (No. 1860473000) is to prevent
the sprocket from turning when undoing the nut, and
the other (extractor No. 1842128000) to pull the sprocket
from the injection pump shaft. Alternatively it may be
possible to improvise a means of preventing sprocket
rotation, and a suitable three-leg puller may be carefully
used to withdraw the sprocket. Take care not to lose the
pump shaft Woodruff key. B
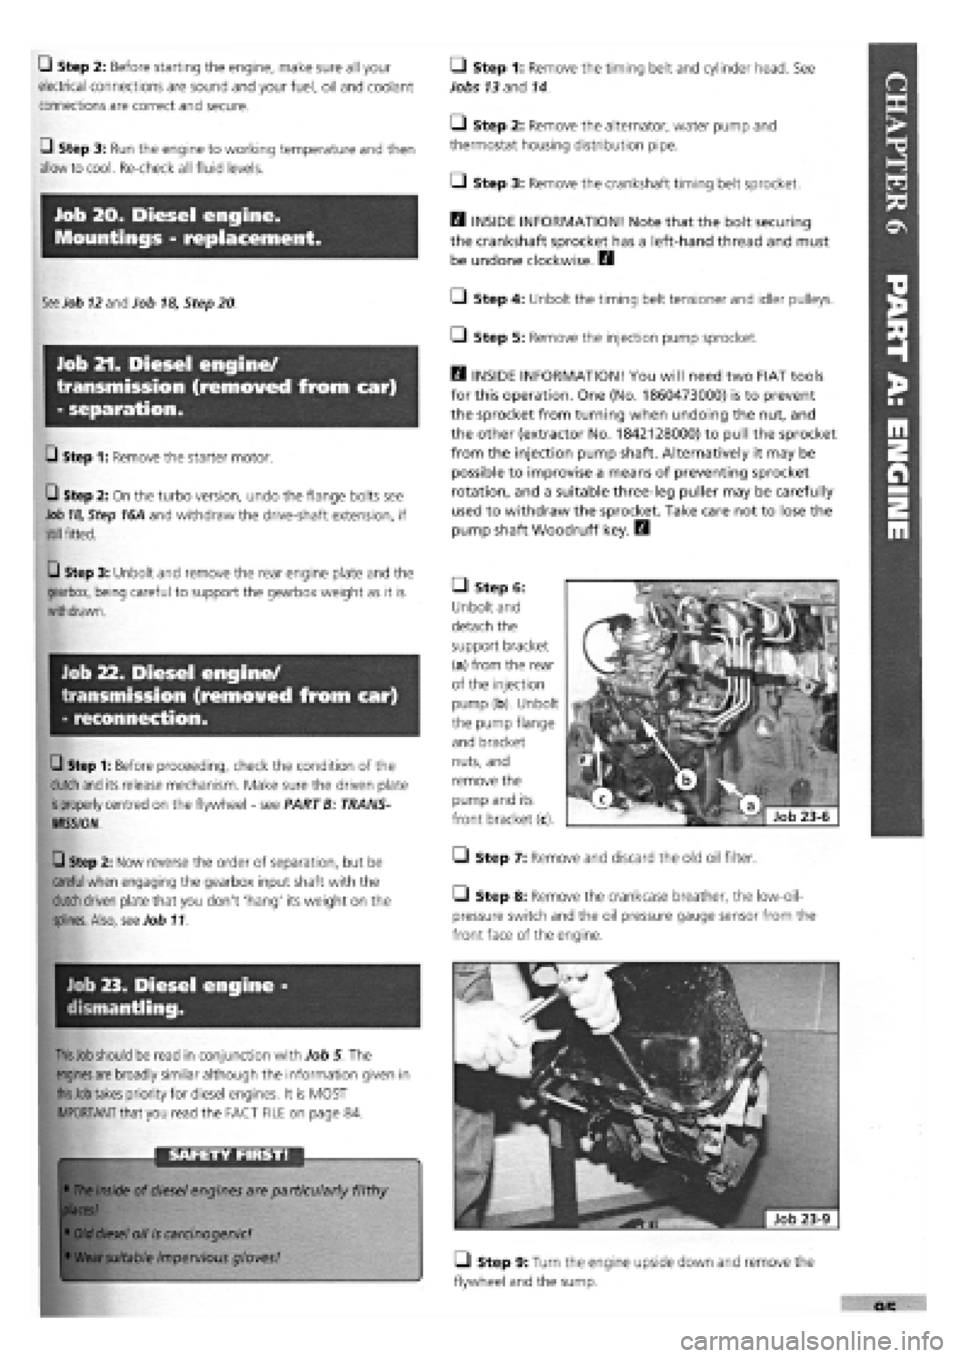
• Step 6:
Unbolt and
detach the
support bracket
(a) from the rear
of the injection
pump (b). Unbolt
the pump flange
and bracket
nuts, and
remove the
pump and its
front bracket (c).
• Step 7: Remove and discard the old oil filter.
Step 8: Remove the crankcase breather, the low-oil-
pressure switch and the oil pressure gauge sensor from the
front face of the engine.
• Step 9: Turn the engine upside down and remove the
flywheel and the sump.