light FIAT TIPO 5DOORS STATION WAGON 2018 Owner handbook (in English)
[x] Cancel search | Manufacturer: FIAT, Model Year: 2018, Model line: TIPO 5DOORS STATION WAGON, Model: FIAT TIPO 5DOORS STATION WAGON 2018Pages: 292, PDF Size: 7.74 MB
Page 24 of 292
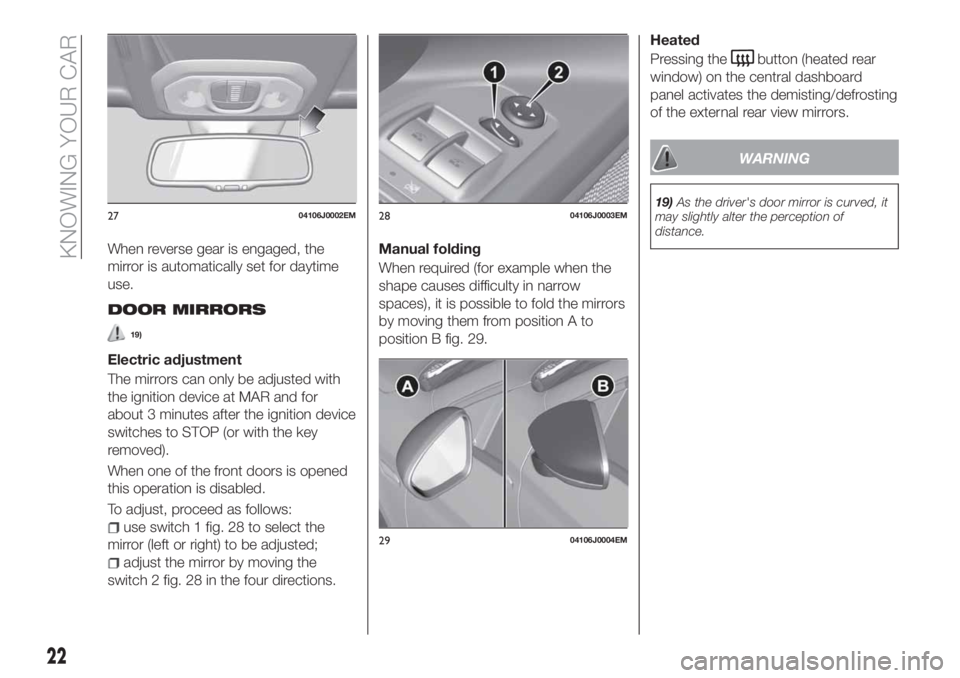
When reverse gear is engaged, the
mirror is automatically set for daytime
use.
DOOR MIRRORS
19)
Electric adjustment
The mirrors can only be adjusted with
the ignition device at MAR and for
about 3 minutes after the ignition device
switches to STOP (or with the key
removed).
When one of the front doors is opened
this operation is disabled.
To adjust, proceed as follows:
use switch 1 fig. 28 to select the
mirror (left or right) to be adjusted;
adjust the mirror by moving the
switch 2 fig. 28 in the four directions.Manual folding
When required (for example when the
shape causes difficulty in narrow
spaces), it is possible to fold the mirrors
by moving them from position A to
position B fig. 29.Heated
Pressing the
button (heated rear
window) on the central dashboard
panel activates the demisting/defrosting
of the external rear view mirrors.
WARNING
19)As the driver's door mirror is curved, it
may slightly alter the perception of
distance.2704106J0002EM2804106J0003EM
2904106J0004EM
22
KNOWING YOUR CAR
Page 25 of 292
EXTERNAL LIGHTS
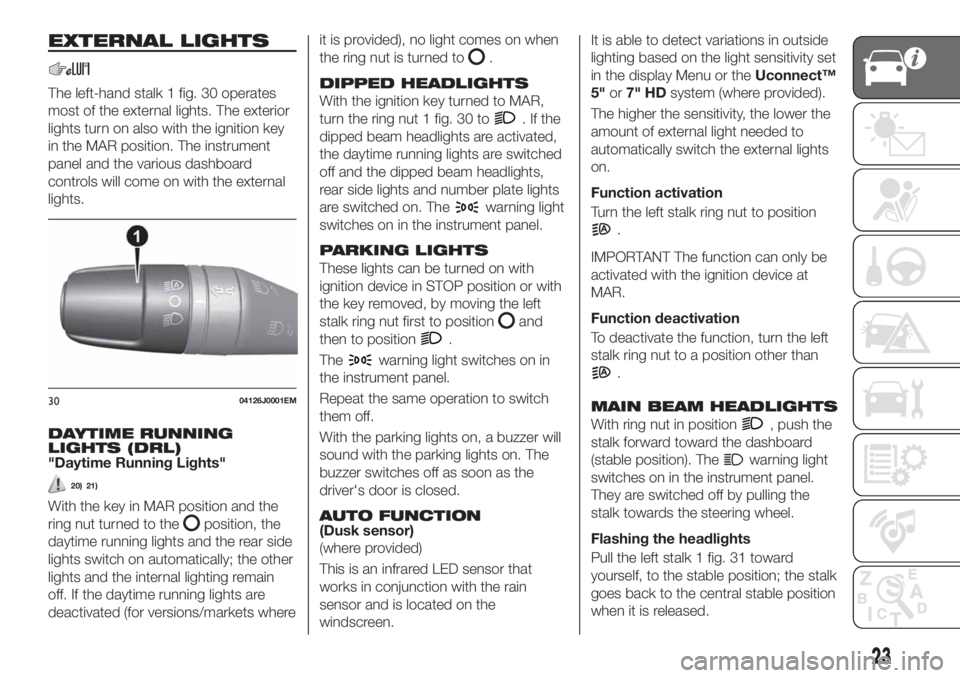
The left-hand stalk 1 fig. 30 operates
most of the external lights. The exterior
lights turn on also with the ignition key
in the MAR position. The instrument
panel and the various dashboard
controls will come on with the external
lights.
DAYTIME RUNNING
LIGHTS (DRL)
"Daytime Running Lights"
20) 21)
With the key in MAR position and the
ring nut turned to the
position, the
daytime running lights and the rear side
lights switch on automatically; the other
lights and the internal lighting remain
off. If the daytime running lights are
deactivated (for versions/markets whereit is provided), no light comes on when
the ring nut is turned to
.
DIPPED HEADLIGHTS
With the ignition key turned to MAR,
turn the ring nut 1 fig. 30 to
.Ifthe
dipped beam headlights are activated,
the daytime running lights are switched
off and the dipped beam headlights,
rear side lights and number plate lights
are switched on. The
warning light
switches on in the instrument panel.
PARKING LIGHTS
These lights can be turned on with
ignition device in STOP position or with
the key removed, by moving the left
stalk ring nut first to position
and
then to position
.
The
warning light switches on in
the instrument panel.
Repeat the same operation to switch
them off.
With the parking lights on, a buzzer will
sound with the parking lights on. The
buzzer switches off as soon as the
driver's door is closed.
AUTO FUNCTION(Dusk sensor)
(where provided)
This is an infrared LED sensor that
works in conjunction with the rain
sensor and is located on the
windscreen.It is able to detect variations in outside
lighting based on the light sensitivity set
in the display Menu or theUconnect™
5"or7" HDsystem (where provided).
The higher the sensitivity, the lower the
amount of external light needed to
automatically switch the external lights
on.
Function activation
Turn the left stalk ring nut to position
.
IMPORTANT The function can only be
activated with the ignition device at
MAR.
Function deactivation
To deactivate the function, turn the left
stalk ring nut to a position other than
.
MAIN BEAM HEADLIGHTS
With ring nut in position, push the
stalk forward toward the dashboard
(stable position). The
warning light
switches on in the instrument panel.
They are switched off by pulling the
stalk towards the steering wheel.
Flashing the headlights
Pull the left stalk 1 fig. 31 toward
yourself, to the stable position; the stalk
goes back to the central stable position
when it is released.
3004126J0001EM
23
Page 26 of 292
With main beam headlights on, the
warning light on the instrument
panel will come on at the same time.
HEADLIGHT ALIGNMENT
CORRECTOR
The headlight alignment corrector
operates with ignition device at MAR
and dipped headlights on.
Press
andon the control panel.The display located on the instrument
panel provides a visual indication of the
adjusted position.
Position 0: one or two people on
the front seats;
Position 1: 4 or 5 passengers;
Position 2: 4 or 5 passengers + load
in the luggage compartment;
Position 3: driver + maximum
admissible load stowed only in the
luggage compartment.
IMPORTANT Check the headlight
alignment each time the weight of the
load transported changes.
FOG LIGHTS
(where provided)
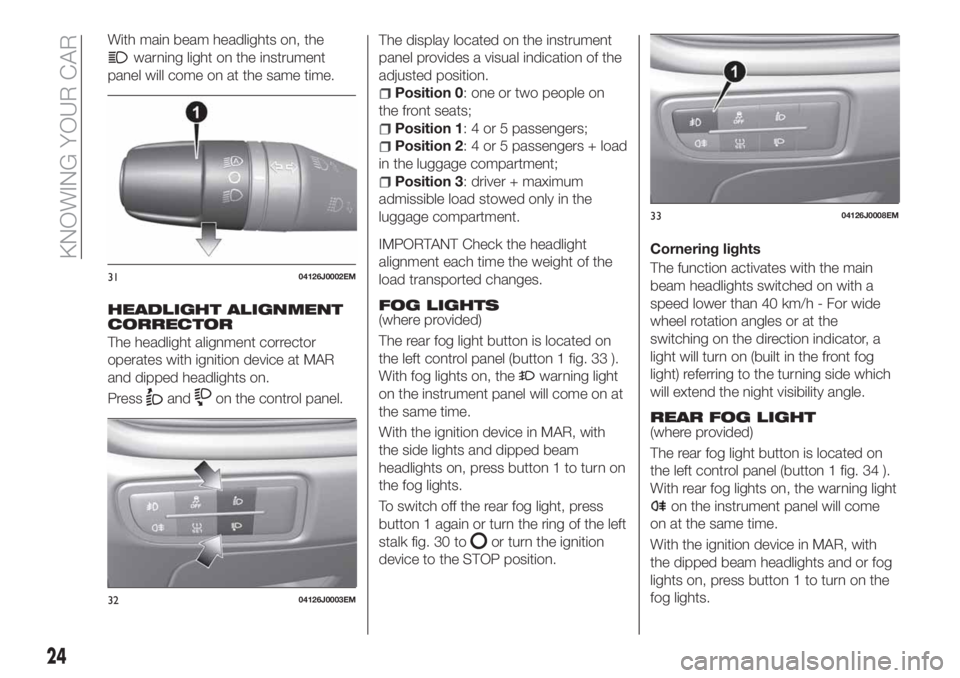
The rear fog light button is located on
the left control panel (button 1 fig. 33 ).
With fog lights on, the
warning light
on the instrument panel will come on at
the same time.
With the ignition device in MAR, with
the side lights and dipped beam
headlights on, press button 1 to turn on
the fog lights.
To switch off the rear fog light, press
button 1 again or turn the ring of the left
stalk fig. 30 to
or turn the ignition
device to the STOP position.Cornering lights
The function activates with the main
beam headlights switched on with a
speed lower than 40 km/h - For wide
wheel rotation angles or at the
switching on the direction indicator, a
light will turn on (built in the front fog
light) referring to the turning side which
will extend the night visibility angle.
REAR FOG LIGHT(where provided)
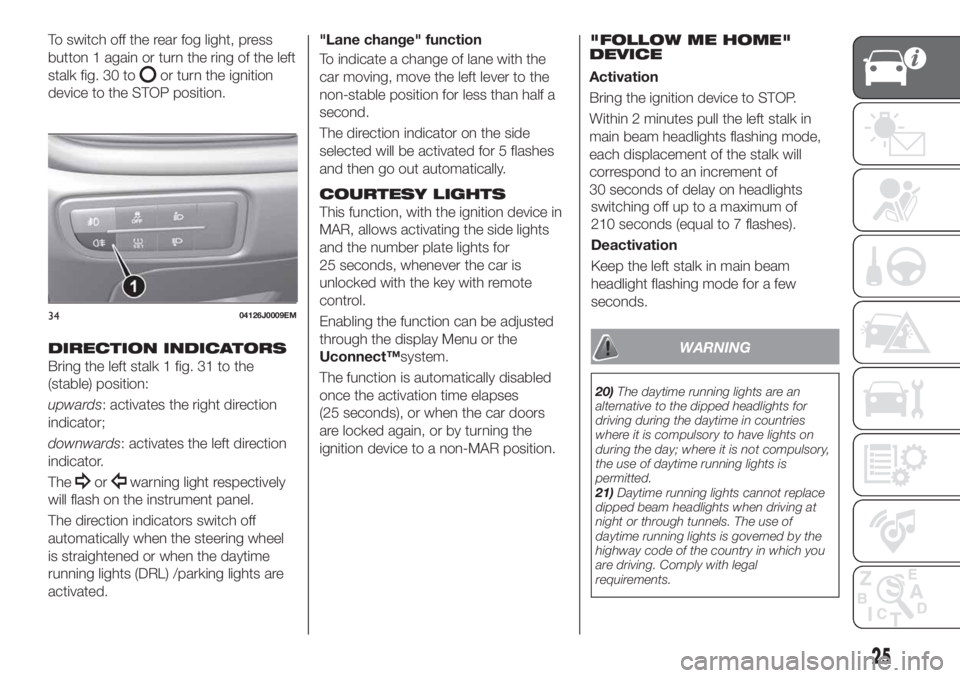
The rear fog light button is located on
the left control panel (button 1 fig. 34 ).
With rear fog lights on, the warning light
on the instrument panel will come
on at the same time.
With the ignition device in MAR, with
the dipped beam headlights and or fog
lights on, press button 1 to turn on the
fog lights.
3104126J0002EM
3204126J0003EM
3304126J0008EM
24
KNOWING YOUR CAR
Page 27 of 292
To switch off the rear fog light, press
button 1 again or turn the ring of the left
stalk fig. 30 to
or turn the ignition
device to the STOP position.
DIRECTION INDICATORS
Bring the left stalk 1 fig. 31 to the
(stable) position:
upwards: activates the right direction
indicator;
downwards: activates the left direction
indicator.
The
orwarning light respectively
will flash on the instrument panel.
The direction indicators switch off
automatically when the steering wheel
is straightened or when the daytime
running lights (DRL) /parking lights are
activated."Lane change" function
To indicate a change of lane with the
car moving, move the left lever to the
non-stable position for less than half a
second.
The direction indicator on the side
selected will be activated for 5 flashes
and then go out automatically.
COURTESY LIGHTS
This function, with the ignition device in
MAR, allows activating the side lights
and the number plate lights for
25 seconds, whenever the car is
unlocked with the key with remote
control.
Enabling the function can be adjusted
through the display Menu or the
Uconnect™system.
The function is automatically disabled
once the activation time elapses
(25 seconds), or when the car doors
are locked again, or by turning the
ignition device to a non-MAR position.
3404126J0009EM
25
"FOLLOW ME HOME"
DEVICE
Activation
Bring the ignition device to STOP.
Within 2 minutes pull the left stalk in
main beam headlights flashing mode,
each displacement of the stalk will
correspond to an increment of
30 seconds of delay on headlights
switching off up to a maximum of
210 seconds (equal to 7 flashes).
Deactivation
Keep the left stalk in main beam
headlight flashing mode for a few
seconds.
WARNING
20)The daytime running lights are an
alternative to the dipped headlights for
driving during the daytime in countries
where it is compulsory to have lights on
during the day; where it is not compulsory,
the use of daytime running lights is
permitted.
21)Daytime running lights cannot replace
dipped beam headlights when driving at
night or through tunnels. The use of
daytime running lights is governed by the
highway code of the country in which you
are driving. Comply with legal
requirements.
Page 28 of 292
INTERIOR LIGHTS
FRONT CEILING LIGHT
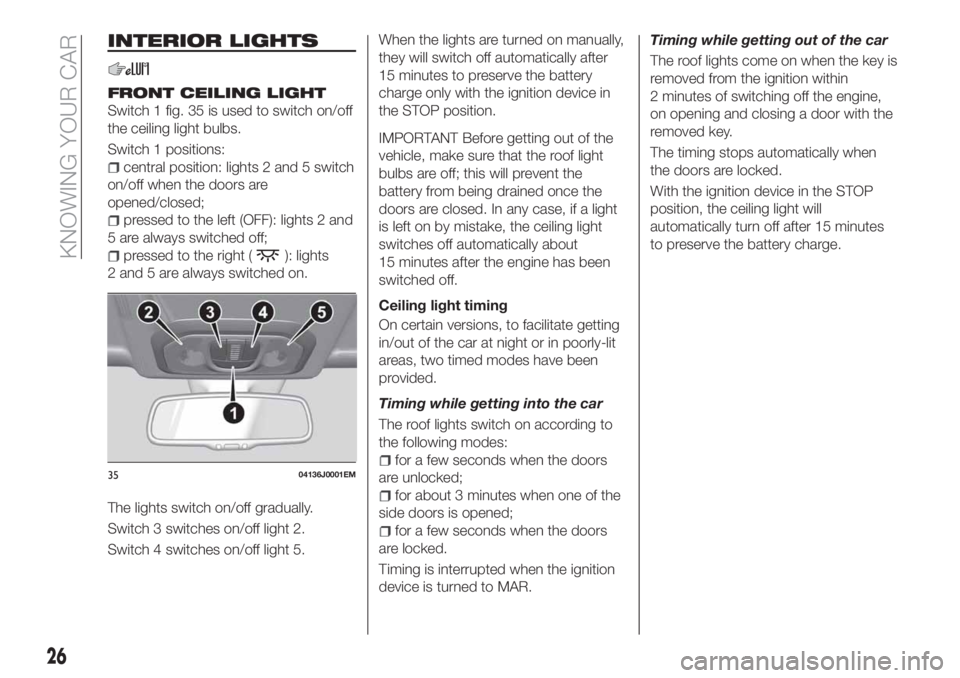
Switch 1 fig. 35 is used to switch on/off
the ceiling light bulbs.
Switch 1 positions:
central position: lights 2 and 5 switch
on/off when the doors are
opened/closed;
pressed to the left (OFF): lights 2 and
5 are always switched off;
pressed to the right (): lights
2 and 5 are always switched on.
The lights switch on/off gradually.
Switch 3 switches on/off light 2.
Switch 4 switches on/off light 5.When the lights are turned on manually,
they will switch off automatically after
15 minutes to preserve the battery
charge only with the ignition device in
the STOP position.
IMPORTANT Before getting out of the
vehicle, make sure that the roof light
bulbs are off; this will prevent the
battery from being drained once the
doors are closed. In any case, if a light
is left on by mistake, the ceiling light
switches off automatically about
15 minutes after the engine has been
switched off.
Ceiling light timing
On certain versions, to facilitate getting
in/out of the car at night or in poorly-lit
areas, two timed modes have been
provided.
Timing while getting into the car
The roof lights switch on according to
the following modes:
for a few seconds when the doors
are unlocked;
for about 3 minutes when one of the
side doors is opened;
for a few seconds when the doors
are locked.
Timing is interrupted when the ignition
device is turned to MAR.Timing while getting out of the car
The roof lights come on when the key is
removed from the ignition within
2 minutes of switching off the engine,
on opening and closing a door with the
removed key.
The timing stops automatically when
the doors are locked.
With the ignition device in the STOP
position, the ceiling light will
automatically turn off after 15 minutes
to preserve the battery charge.
3504136J0001EM
26
KNOWING YOUR CAR
Page 32 of 292
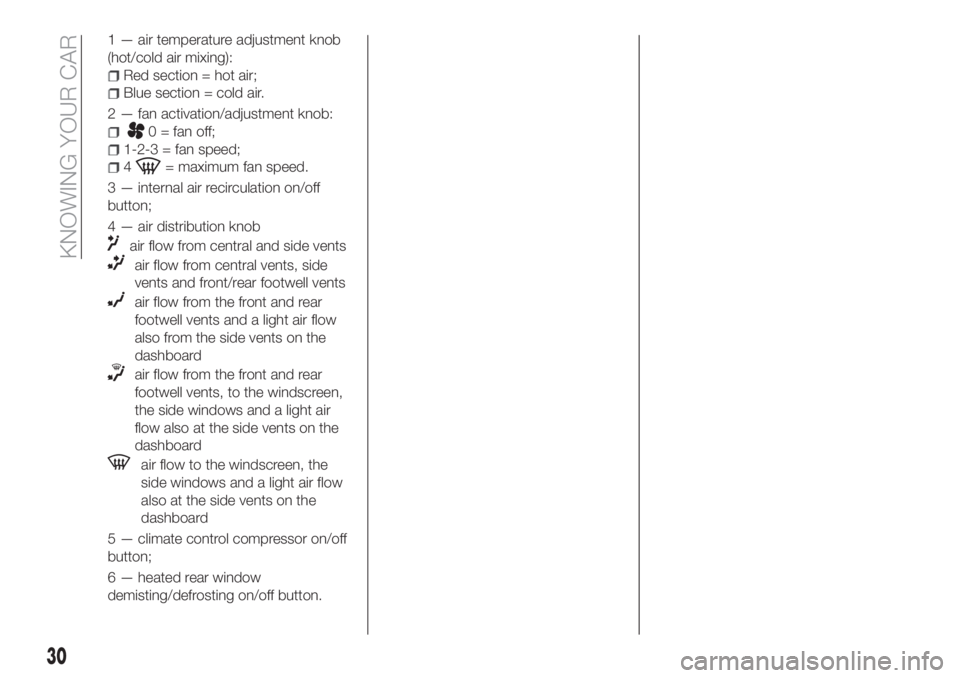
1 — air temperature adjustment knob
(hot/cold air mixing):
Red section = hot air;
Blue section = cold air.
2 — fan activation/adjustment knob:
0 = fan off;
1-2-3 = fan speed;
4= maximum fan speed.
3 — internal air recirculation on/off
button;
4 — air distribution knob
air flow from central and side vents
air flow from central vents, side
vents and front/rear footwell vents
air flow from the front and rear
footwell vents and a light air flow
also from the side vents on the
dashboard
air flow from the front and rear
footwell vents, to the windscreen,
the side windows and a light air
flow also at the side vents on the
dashboard
air flow to the windscreen, the
side windows and a light air flow
also at the side vents on the
dashboard
5 — climate control compressor on/off
button;
6 — heated rear window
demisting/defrosting on/off button.
30
KNOWING YOUR CAR
Page 37 of 292
When the CITY function is on, the
steering wheel effort is lighter, making
parking easier: therefore, this function is
particularly useful for driving in city
centres.
To ensure steering uniformity, when the
key is pressed while the steering wheel
is being turned, the change of force will
only be felt when it is turned in the
opposite direction, or the steering
wheel is released.
WARNING
28)It is absolutely forbidden to carry out
any after-market operation involving
steering system or steering column
modifications (e.g. installation of anti-theft
device) that could adversely affect
performance, invalidate the warranty, cause
serious safety problems and also result in
the car not meeting type-approval
requirements.
29)Before performing any maintenance
operations, always stop the engine and
remove the key from the ignition to lock the
steering column (especially when the car
wheels are not touching the ground). If this
is not possible (for example if the key
needs to be turned to MAR or the engine
must be running), remove the main fuse
that protects the electric power steering.
LUGGAGE
COMPARTMENT
IMPORTANT When travelling, do not
put any object on the rear parcel shelf
because they can injure passengers in
the event of an accident or sudden
braking.
OPENING
30)
Tailgate opening
When the central locking system is
unlocked, the tailgate can be opened
from outside the car using the electric
opening handle (where provided)
fig. 46 located under the handle until
the unlocking click is heard.The roof light inside the luggage
compartment will turn on when the
tailgate is opened; the roof light will
automatically switch off when the
tailgate is closed (see also "Interior
lights").
If the tailgate is left open, the roof light
will automatically switch off to preserve
the battery charge.
Emergency opening from inside
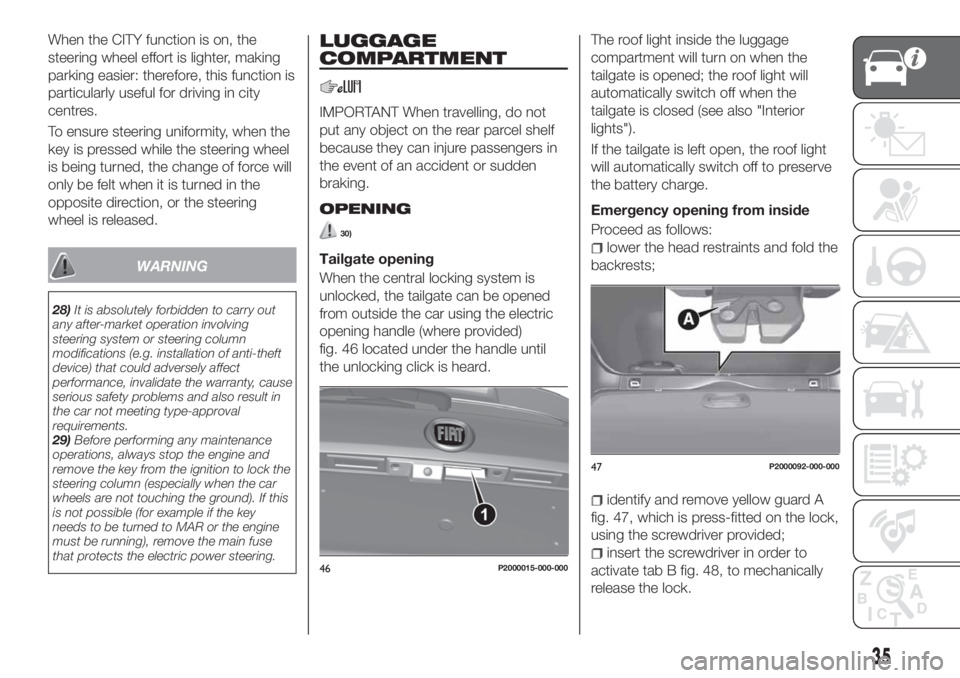
Proceed as follows:lower the head restraints and fold the
backrests;
identify and remove yellow guard A
fig. 47, which is press-fitted on the lock,
using the screwdriver provided;
insert the screwdriver in order to
activate tab B fig. 48, to mechanically
release the lock.46P2000015-000-000
47P2000092-000-000
35
Page 39 of 292
LUGGAGE COVERING
CURTAIN
TIPO STATION WAGON version
31)
Complete closure
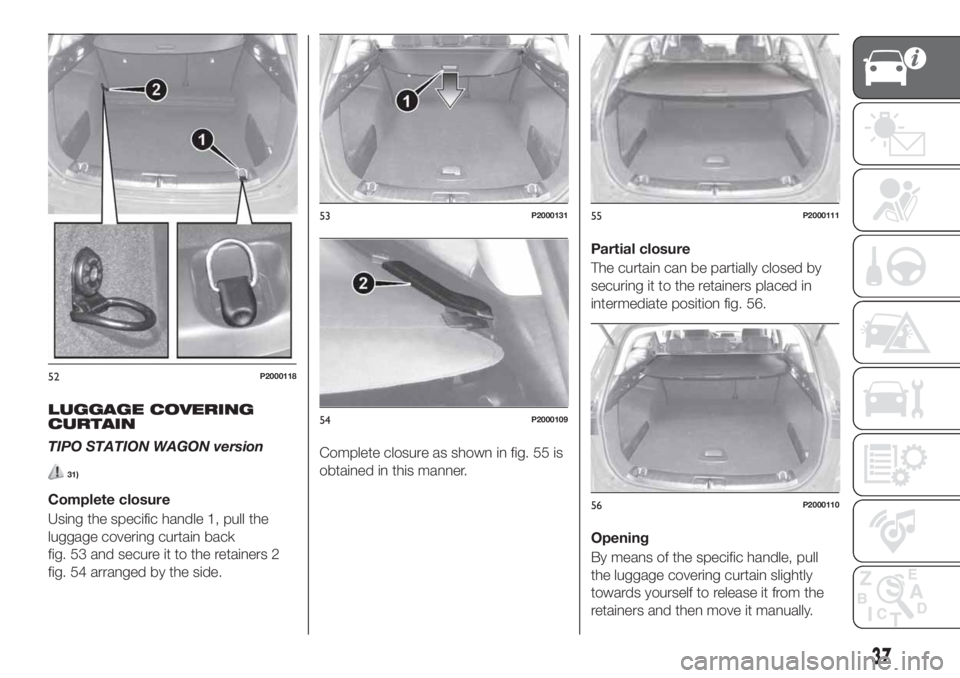
Using the specific handle 1, pull the
luggage covering curtain back
fig. 53 and secure it to the retainers 2
fig. 54 arranged by the side.Complete closure as shown in fig. 55 is
obtained in this manner.Partial closure
The curtain can be partially closed by
securing it to the retainers placed in
intermediate position fig. 56.
Opening
By means of the specific handle, pull
the luggage covering curtain slightly
towards yourself to release it from the
retainers and then move it manually.
52P2000118
53P2000131
54P2000109
55P2000111
56P2000110
37
Page 44 of 292
LPG TANK
The car has a pressurised tank for
storing LPG in a liquid state. It is
toroidal and is located in the spare
wheel compartment with suitable
protection.
LPG tank certification
The LPG tank is certified in accordance
with the regulations in force.
In Italy, the tank has a life of 10 years
starting from the car registration date. If
the vehicle has been registered in a
country other than Italy, the duration
and the testing/inspection procedures
of the LPG tank can vary depending on
the national provisions in force in that
country. In all case, when the time limit
for your country has expired, go to a
Fiat Dealer to have the tank replaced.
LPG/PETROL SWITCH
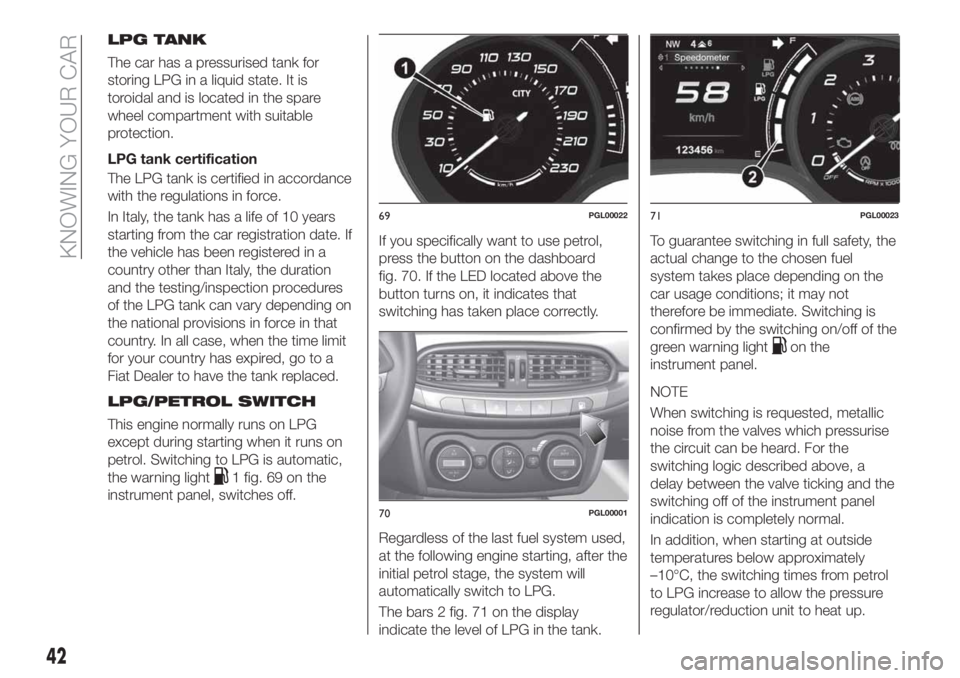
This engine normally runs on LPG
except during starting when it runs on
petrol. Switching to LPG is automatic,
the warning light
1 fig. 69 on the
instrument panel, switches off.If you specifically want to use petrol,
press the button on the dashboard
fig. 70. If the LED located above the
button turns on, it indicates that
switching has taken place correctly.
Regardless of the last fuel system used,
at the following engine starting, after the
initial petrol stage, the system will
automatically switch to LPG.
The bars 2 fig. 71 on the display
indicate the level of LPG in the tank.To guarantee switching in full safety, the
actual change to the chosen fuel
system takes place depending on the
car usage conditions; it may not
therefore be immediate. Switching is
confirmed by the switching on/off of the
green warning light
on the
instrument panel.
NOTE
When switching is requested, metallic
noise from the valves which pressurise
the circuit can be heard. For the
switching logic described above, a
delay between the valve ticking and the
switching off of the instrument panel
indication is completely normal.
In addition, when starting at outside
temperatures below approximately
–10°C, the switching times from petrol
to LPG increase to allow the pressure
regulator/reduction unit to heat up.
69PGL00022
70PGL00001
71PGL00023
42
KNOWING YOUR CAR
Page 45 of 292
To change fuel type, press the
fig. 70 button on the dashboard with
the car stationary and engine running,
or while driving.
16) 17)
LPG FUEL RESERVE
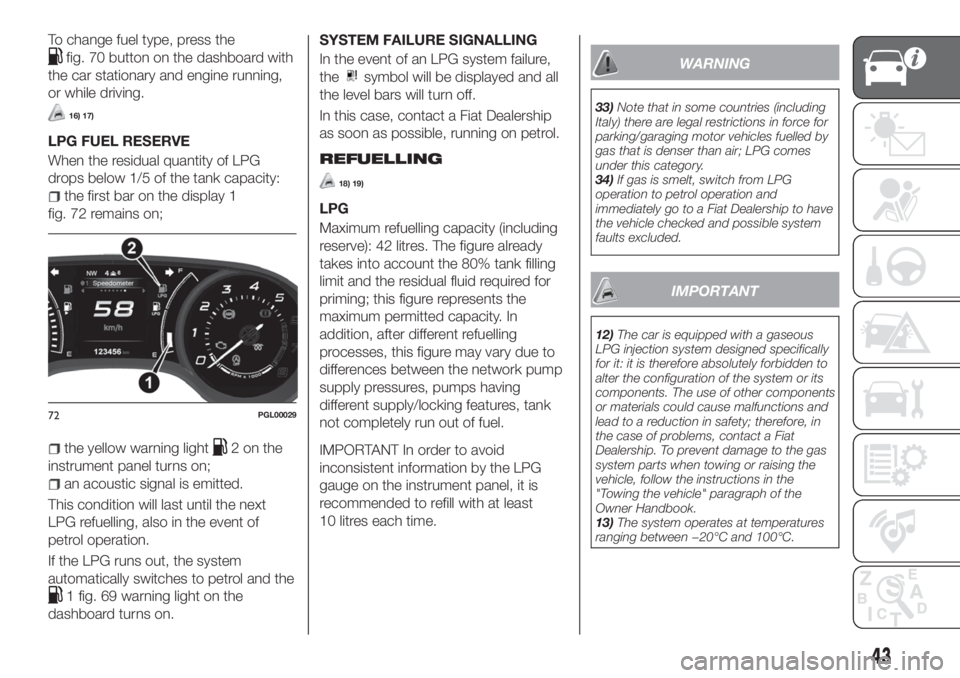
When the residual quantity of LPG
drops below 1/5 of the tank capacity:
the first bar on the display 1
fig. 72 remains on;
the yellow warning light2onthe
instrument panel turns on;
an acoustic signal is emitted.
This condition will last until the next
LPG refuelling, also in the event of
petrol operation.
If the LPG runs out, the system
automatically switches to petrol and the
1 fig. 69 warning light on the
dashboard turns on.SYSTEM FAILURE SIGNALLING
In the event of an LPG system failure,
the
symbol will be displayed and all
the level bars will turn off.
In this case, contact a Fiat Dealership
as soon as possible, running on petrol.
REFUELLING
18) 19)
LPG
Maximum refuelling capacity (including
reserve): 42 litres. The figure already
takes into account the 80% tank filling
limit and the residual fluid required for
priming; this figure represents the
maximum permitted capacity. In
addition, after different refuelling
processes, this figure may vary due to
differences between the network pump
supply pressures, pumps having
different supply/locking features, tank
not completely run out of fuel.
IMPORTANT In order to avoid
inconsistent information by the LPG
gauge on the instrument panel, it is
recommended to refill with at least
10 litres each time.
WARNING
33)Note that in some countries (including
Italy) there are legal restrictions in force for
parking/garaging motor vehicles fuelled by
gas that is denser than air; LPG comes
under this category.
34)If gas is smelt, switch from LPG
operation to petrol operation and
immediately go to a Fiat Dealership to have
the vehicle checked and possible system
faults excluded.
IMPORTANT
12)The car is equipped with a gaseous
LPG injection system designed specifically
for it: it is therefore absolutely forbidden to
alter the configuration of the system or its
components. The use of other components
or materials could cause malfunctions and
lead to a reduction in safety; therefore, in
the case of problems, contact a Fiat
Dealership. To prevent damage to the gas
system parts when towing or raising the
vehicle, follow the instructions in the
"Towing the vehicle" paragraph of the
Owner Handbook.
13)The system operates at temperatures
ranging between −20°C and 100°C.
72PGL00029
43