ECO mode FORD B MAX 2012 1.G Owners Manual
[x] Cancel search | Manufacturer: FORD, Model Year: 2012, Model line: B MAX, Model: FORD B MAX 2012 1.GPages: 256, PDF Size: 19.67 MB
Page 7 of 256
Downloaded from www.Manualslib.com manuals search engine ABOUT THIS MANUAL
Thank you for choosing Ford. Werecommend that you take some time toget to know your vehicle by reading thismanual. The more that you know about it,the greater the safety and pleasure youwill get from driving it.
WARNING
Always drive with due care andattention when using and operatingthe controls and features on yourvehicle.
Note:This manual describes productfeatures and options available throughoutthe range, sometimes even before they aregenerally available. It may describe optionsnot fitted to your vehicle.
Note:Some of the illustrations in thismanual may be used for different models,so may appear different to your vehicle.However, the essential information in theillustrations is always correct.
Note:Always use and operate your vehiclein line with all applicable laws andregulations.
Note:Pass on this manual when sellingyour vehicle. It is an integral part of thevehicle.
Protecting the Environment
You must play your part in protecting theenvironment. Correct vehicle usage andthe authorised disposal of waste, cleaningand lubrication materials are significantsteps toward this aim.
SYMBOLS GLOSSARY
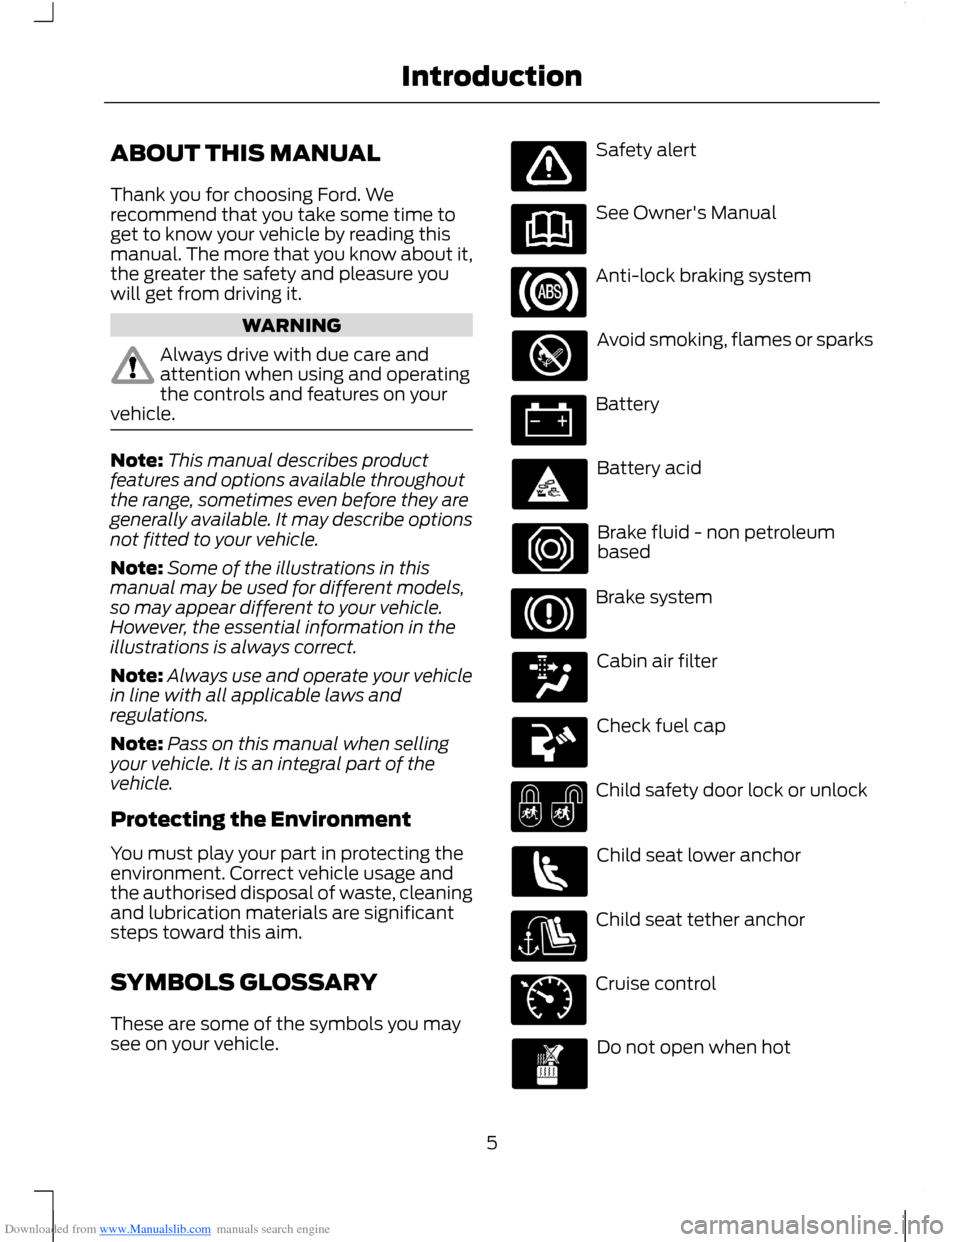
These are some of the symbols you maysee on your vehicle.
Safety alert
See Owner's Manual
Anti-lock braking system
Avoid smoking, flames or sparks
Battery
Battery acid
Brake fluid - non petroleumbased
Brake system
Cabin air filter
Check fuel cap
Child safety door lock or unlock
Child seat lower anchor
Child seat tether anchor
Cruise control
Do not open when hot
5Introduction
Page 35 of 256
Downloaded from www.Manualslib.com manuals search engine Note:If a second valid passive key islocated within the liftgate detection range,the liftgate can be closed.
Unlocking Your Vehicle
Note:When your vehicle remains lockedfor longer than three days, the system willenter an energy-saving mode. This is toprevent your vehicle battery running out ofcharge. When your vehicle is unlocked whilein this mode, the reaction time of the systemmay be a little longer than normal. To exitthe energy-saving mode, unlock yourvehicle.
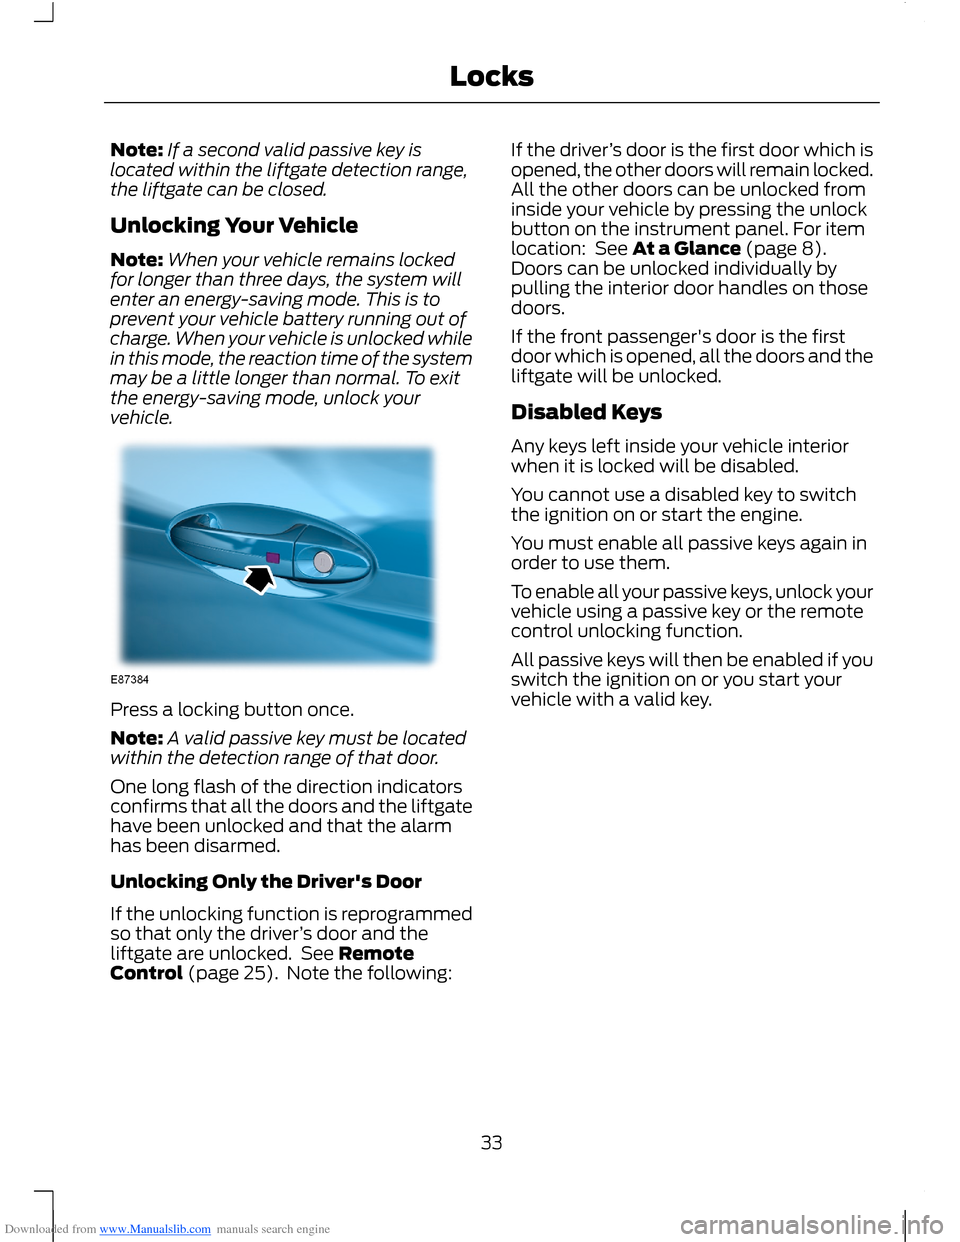
Press a locking button once.
Note:A valid passive key must be locatedwithin the detection range of that door.
One long flash of the direction indicatorsconfirms that all the doors and the liftgatehave been unlocked and that the alarmhas been disarmed.
Unlocking Only the Driver's Door
If the unlocking function is reprogrammedso that only the driver’s door and theliftgate are unlocked. See RemoteControl (page 25). Note the following:
If the driver’s door is the first door which isopened, the other doors will remain locked.All the other doors can be unlocked frominside your vehicle by pressing the unlockbutton on the instrument panel. For itemlocation: See At a Glance (page 8).Doors can be unlocked individually bypulling the interior door handles on thosedoors.
If the front passenger's door is the firstdoor which is opened, all the doors and theliftgate will be unlocked.
Disabled Keys
Any keys left inside your vehicle interiorwhen it is locked will be disabled.
You cannot use a disabled key to switchthe ignition on or start the engine.
You must enable all passive keys again inorder to use them.
To enable all your passive keys, unlock yourvehicle using a passive key or the remotecontrol unlocking function.
All passive keys will then be enabled if youswitch the ignition on or you start yourvehicle with a valid key.
33Locks
Page 62 of 256
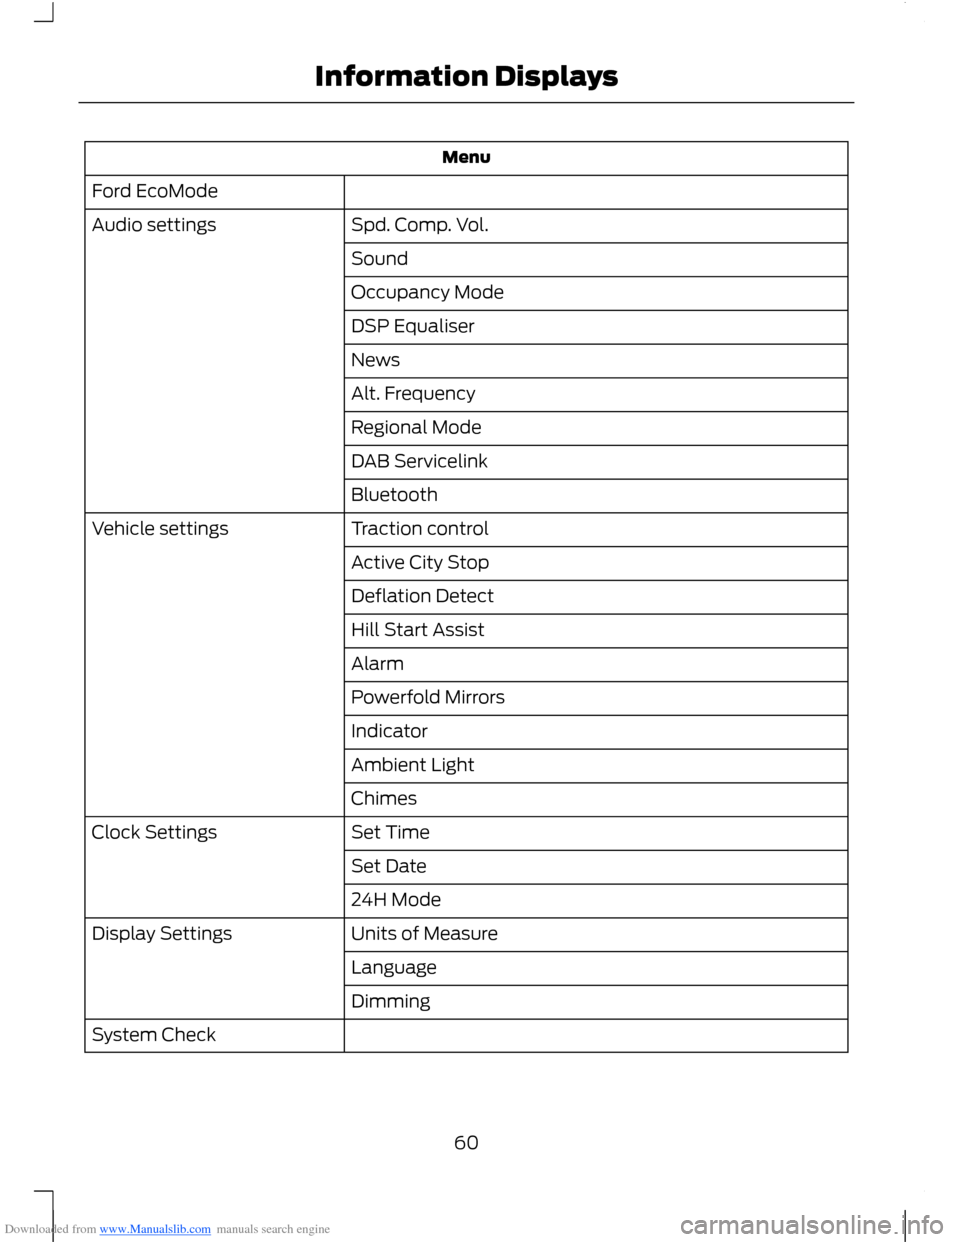
Downloaded from www.Manualslib.com manuals search engine Menu
Ford EcoMode
Spd. Comp. Vol.Audio settings
Sound
Occupancy Mode
DSP Equaliser
News
Alt. Frequency
Regional Mode
DAB Servicelink
Bluetooth
Traction controlVehicle settings
Active City Stop
Deflation Detect
Hill Start Assist
Alarm
Powerfold Mirrors
Indicator
Ambient Light
Chimes
Set TimeClock Settings
Set Date
24H Mode
Units of MeasureDisplay Settings
Language
Dimming
System Check
60Information Displays
Page 71 of 256
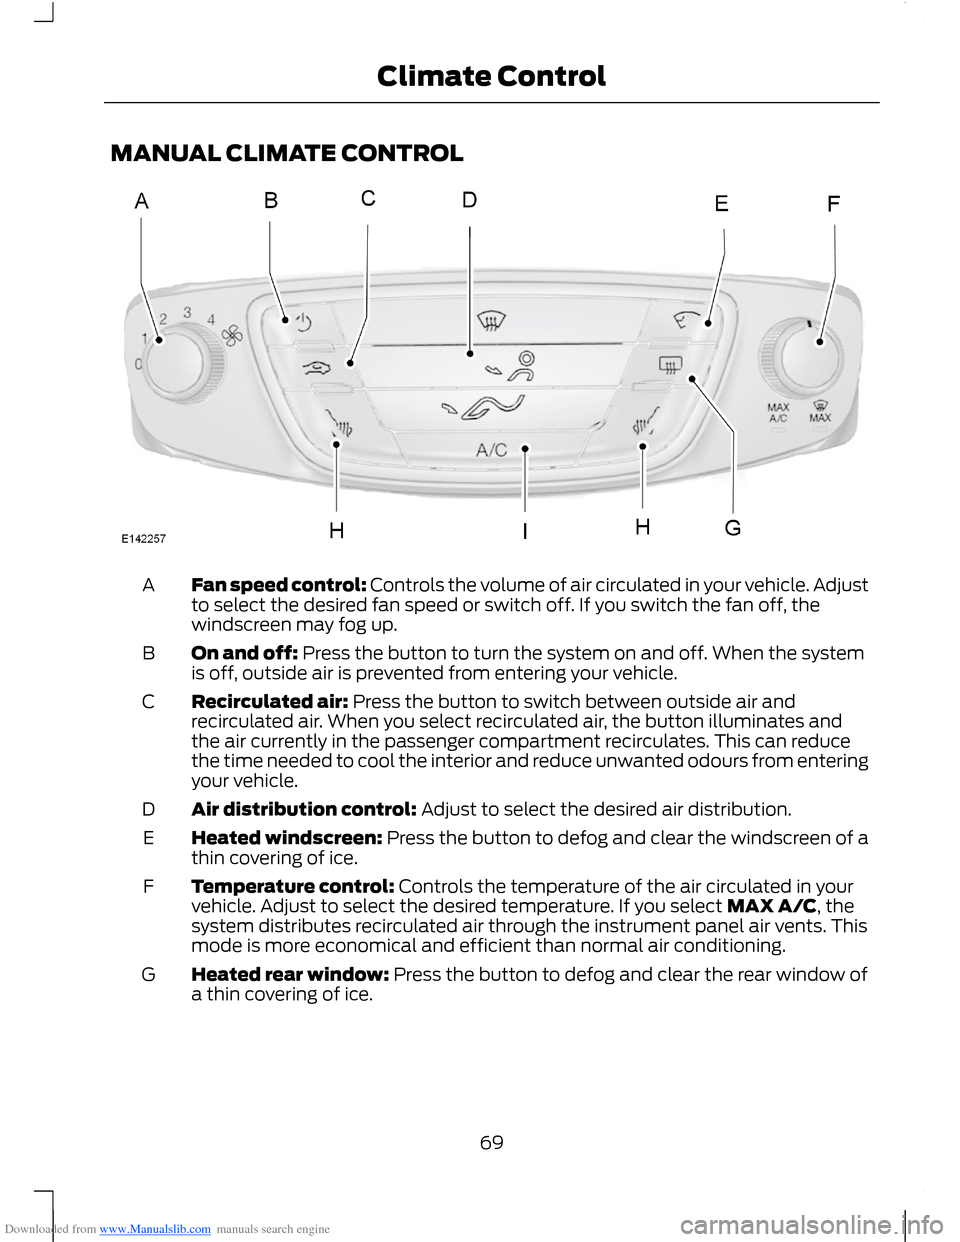
Downloaded from www.Manualslib.com manuals search engine MANUAL CLIMATE CONTROL
Fan speed control: Controls the volume of air circulated in your vehicle. Adjustto select the desired fan speed or switch off. If you switch the fan off, thewindscreen may fog up.
A
On and off: Press the button to turn the system on and off. When the systemis off, outside air is prevented from entering your vehicle.B
Recirculated air: Press the button to switch between outside air andrecirculated air. When you select recirculated air, the button illuminates andthe air currently in the passenger compartment recirculates. This can reducethe time needed to cool the interior and reduce unwanted odours from enteringyour vehicle.
C
Air distribution control: Adjust to select the desired air distribution.D
Heated windscreen: Press the button to defog and clear the windscreen of athin covering of ice.E
Temperature control: Controls the temperature of the air circulated in yourvehicle. Adjust to select the desired temperature. If you select MAX A/C, thesystem distributes recirculated air through the instrument panel air vents. Thismode is more economical and efficient than normal air conditioning.
F
Heated rear window: Press the button to defog and clear the rear window ofa thin covering of ice.G
69Climate Control
Page 73 of 256
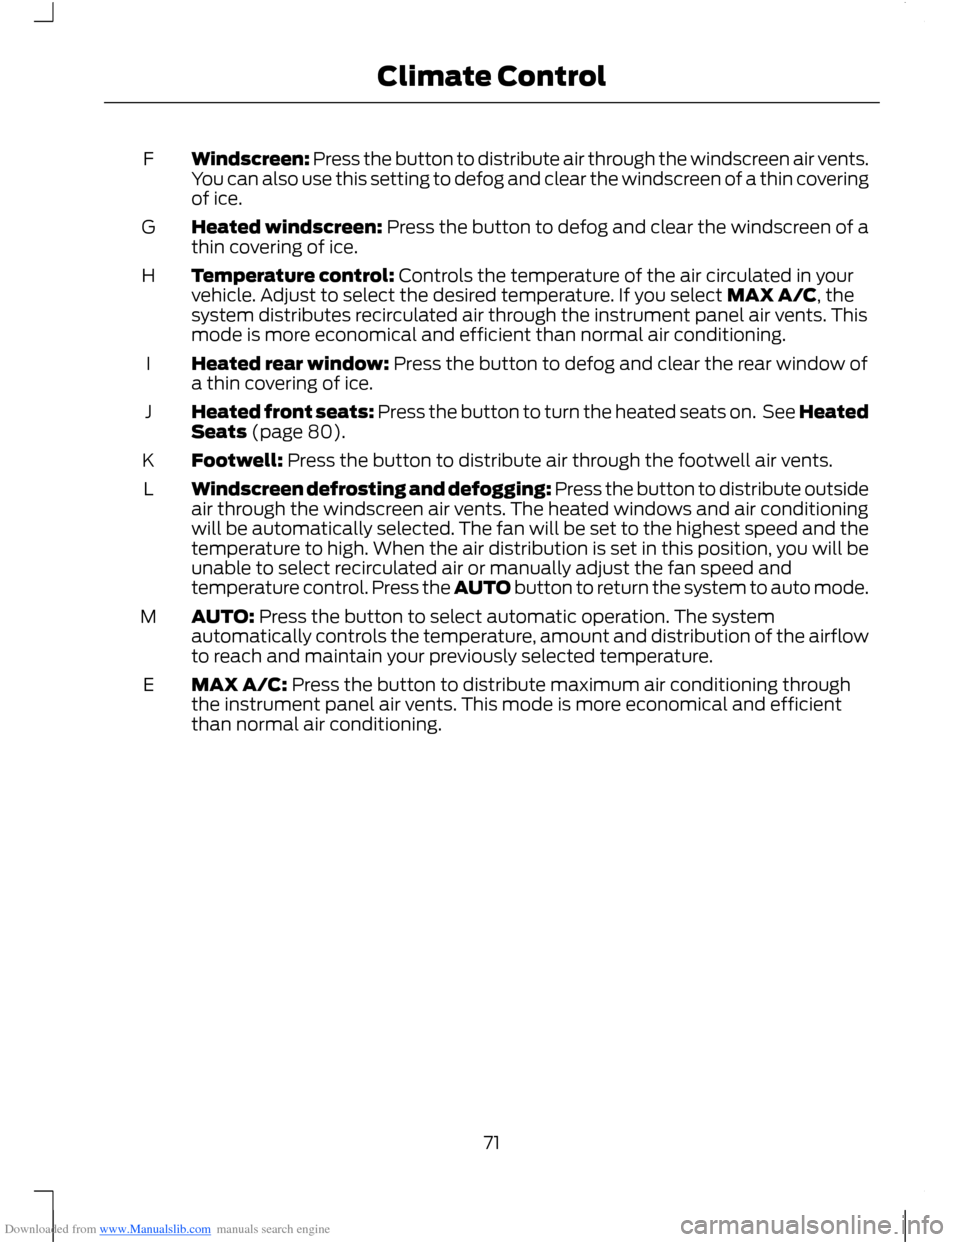
Downloaded from www.Manualslib.com manuals search engine Windscreen: Press the button to distribute air through the windscreen air vents.You can also use this setting to defog and clear the windscreen of a thin coveringof ice.
F
Heated windscreen: Press the button to defog and clear the windscreen of athin covering of ice.G
Temperature control: Controls the temperature of the air circulated in yourvehicle. Adjust to select the desired temperature. If you select MAX A/C, thesystem distributes recirculated air through the instrument panel air vents. Thismode is more economical and efficient than normal air conditioning.
H
Heated rear window: Press the button to defog and clear the rear window ofa thin covering of ice.I
Heated front seats: Press the button to turn the heated seats on. See HeatedSeats (page 80).J
Footwell: Press the button to distribute air through the footwell air vents.K
Windscreen defrosting and defogging: Press the button to distribute outsideair through the windscreen air vents. The heated windows and air conditioningwill be automatically selected. The fan will be set to the highest speed and thetemperature to high. When the air distribution is set in this position, you will beunable to select recirculated air or manually adjust the fan speed andtemperature control. Press the AUTO button to return the system to auto mode.
L
AUTO: Press the button to select automatic operation. The systemautomatically controls the temperature, amount and distribution of the airflowto reach and maintain your previously selected temperature.
M
MAX A/C: Press the button to distribute maximum air conditioning throughthe instrument panel air vents. This mode is more economical and efficientthan normal air conditioning.
E
71Climate Control
Page 97 of 256
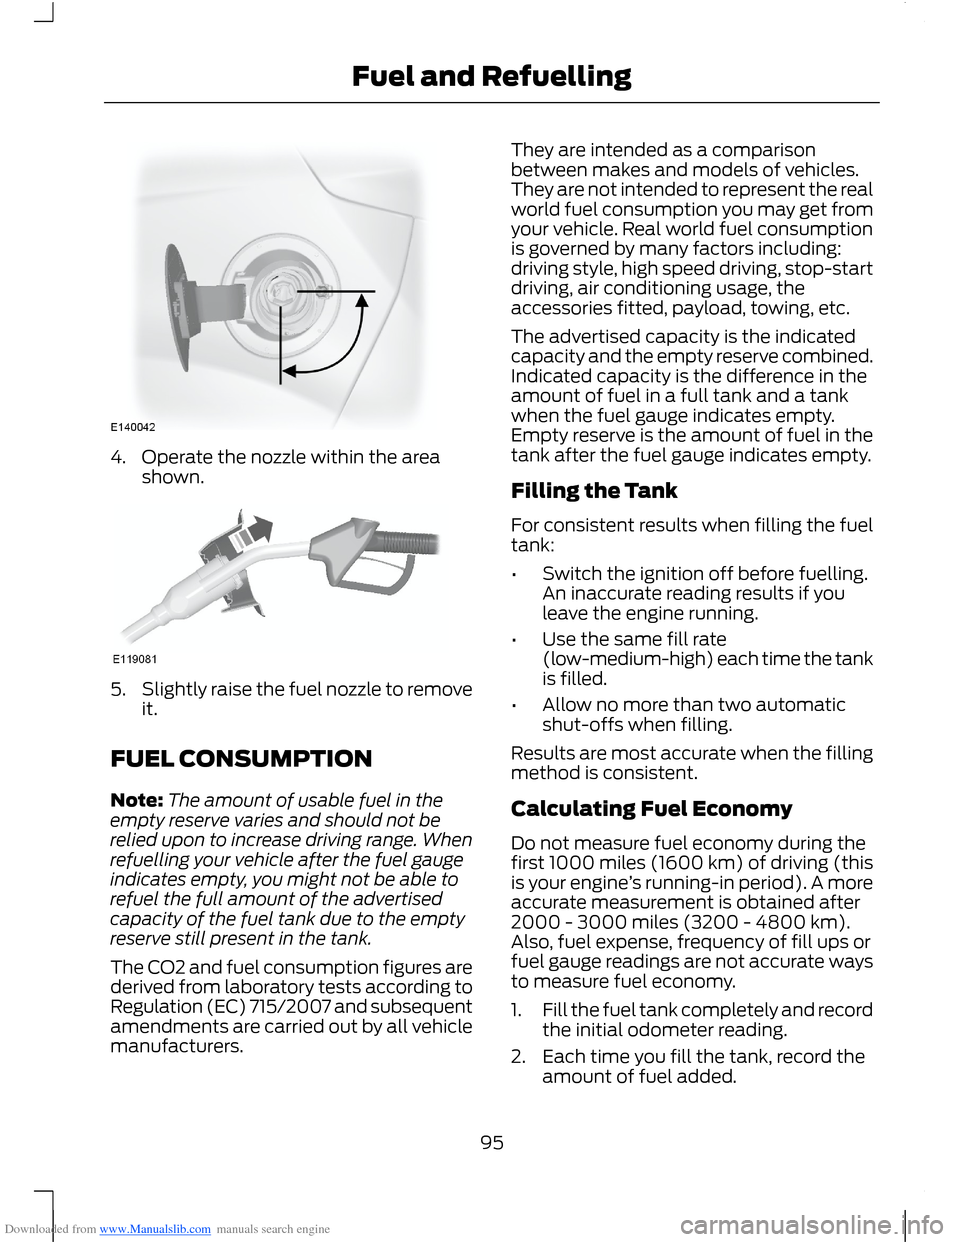
Downloaded from www.Manualslib.com manuals search engine 4.Operate the nozzle within the areashown.
5.Slightly raise the fuel nozzle to removeit.
FUEL CONSUMPTION
Note:The amount of usable fuel in theempty reserve varies and should not berelied upon to increase driving range. Whenrefuelling your vehicle after the fuel gaugeindicates empty, you might not be able torefuel the full amount of the advertisedcapacity of the fuel tank due to the emptyreserve still present in the tank.
The CO2 and fuel consumption figures arederived from laboratory tests according toRegulation (EC) 715/2007 and subsequentamendments are carried out by all vehiclemanufacturers.
They are intended as a comparisonbetween makes and models of vehicles.They are not intended to represent the realworld fuel consumption you may get fromyour vehicle. Real world fuel consumptionis governed by many factors including:driving style, high speed driving, stop-startdriving, air conditioning usage, theaccessories fitted, payload, towing, etc.
The advertised capacity is the indicatedcapacity and the empty reserve combined.Indicated capacity is the difference in theamount of fuel in a full tank and a tankwhen the fuel gauge indicates empty.Empty reserve is the amount of fuel in thetank after the fuel gauge indicates empty.
Filling the Tank
For consistent results when filling the fueltank:
•Switch the ignition off before fuelling.An inaccurate reading results if youleave the engine running.
•Use the same fill rate(low-medium-high) each time the tankis filled.
•Allow no more than two automaticshut-offs when filling.
Results are most accurate when the fillingmethod is consistent.
Calculating Fuel Economy
Do not measure fuel economy during thefirst 1000 miles (1600 km) of driving (thisis your engine’s running-in period). A moreaccurate measurement is obtained after2000 - 3000 miles (3200 - 4800 km).Also, fuel expense, frequency of fill ups orfuel gauge readings are not accurate waysto measure fuel economy.
1.Fill the fuel tank completely and recordthe initial odometer reading.
2.Each time you fill the tank, record theamount of fuel added.
95Fuel and Refuelling
Page 173 of 256
Downloaded from www.Manualslib.com manuals search engine GENERAL INFORMATION
Radio Frequencies and ReceptionFactors
WARNING
Radio sound levels can go above85dCB. Listening to sounds about 85decibels can harm the humanauditory system.
Radio Reception Factors
The further you travel from an FM station, the weaker thesignal and the weaker the reception.Distance/Strength
Hills, mountains, tall buildings, bridges, tunnels, motorwayoverpasses, parking garages, dense tree foliage andthunderstorms can interfere with your reception.
Terrain
When you pass near a radio transmission tower, a strongersignal can override a weaker signal and can cause interfer-ence in the audio system.
Station overload
CD and CD Player Information
Note:CD units are designed to playcommercially-pressed 4.75 inch (12centimetre) audio compact discs only. Dueto technical incompatibility, certainrecordable and re-recordable compact discsmay not function correctly when used inFord CD players.
Note:CDs with homemade paper(adhesive) labels should not be insertedinto the CD player as the label may peel andcause the CD to become jammed. It isrecommended that homemade CDs beidentified with permanent felt tip markerrather than adhesive labels. Ballpoint pensmay damage CDs. Contact an authoriseddealer for further information.
Note:Do not use any irregularly shapeddiscs or discs with a scratch protection filmattached.
Always handle discs by their edges only.Clean the disc with an approved CDcleaner only, wiping from the centre of thedisc toward the edge. Do not clean in acircular motion.
Do not expose discs to direct sunlight orheat sources for extended periods of time.
MP3 and WMA Track and FolderStructure
Audio systems capable of recognising andplaying MP3 and WMA individual tracksand folder structures work as follows:
•There are two different modes for MP3and WMA disc playback: MP3 andWMA track mode (system default) andMP3 and WMA folder mode.
•MP3 and WMA track mode ignores anyfolder structure on the MP3 and WMAdisc. The player numbers each MP3and WMA track on the disc (noted bythe .mp3 file extension) from T001 toa maximum of T255. The maximumnumber of playable MP3 and WMA filesmay be less depending on the structureof the CD and exact model of radiopresent.
171Audio System
Page 174 of 256
Downloaded from www.Manualslib.com manuals search engine •MP3 and WMA folder mode representsa folder structure consisting of onelevel of folders. The CD player numbersall MP3 and WMA tracks on the disc(noted by the .mp3 or . WMA fileextension) and all folders containingMP3 and WMA files, from F001 (folder)T001 (track) to F253 T255.
•Creating discs with only one level offolders helps with navigation throughthe disc files.
If you are burning your own MP3 and WMAdiscs, it is important to understand howthe system reads the structures you create.While various files may be present, (fileswith extensions other than mp3 andWMA), only files with the .mp3 and WMAextension are played; other files areignored by the system. This enables you touse the same MP3 and WMA disc for avariety of tasks on your work computer,home computer and your in-vehiclesystem.
In track mode, the system displays andplays the structure as if it were only onelevel deep (all .mp3 and WMA files areplayed, regardless of being in a specificfolder). In folder mode, the system onlyplays the .mp3 or WMA files in the currentfolder.
AUDIO UNIT - VEHICLES WITH:
AM/FM/CD
WARNING
Driving while distracted can result inloss of vehicle control, accident andinjury. We strongly recommend thatyou use extreme caution when using anydevice or feature that may take your focusoff the road. Your primary responsibility isthe safe operation of your vehicle. Werecommend against the use of anyhandheld device while driving andencourage the use of voice-operatedsystems when possible. Make sure you areaware of all applicable local laws that mayaffect the use of electronic devices whiledriving.
172Audio System
Page 176 of 256
Downloaded from www.Manualslib.com manuals search engine MENU: Press the button to access different audio system features.K
SOUND: Press the button to adjust the sound settings for bass, treble, middle,balance and fade.L
AUX: Press the button to access the AUX and SYNC features, it will also cancelthe menu or list browsing.M
RADIO: Press the button to select different radio bands, it will also cancel themenu or list browsing.N
CD: Press the button to change source to CD, it will also cancel the menu orlist browsing.O
Sound Button
This will allow you to adjust the soundsettings (for example bass, middle andtreble).
1.Press the SOUND button.
2.Use the up and down arrow buttons toselect the required setting.
3.Use the left and right arrow buttons tomake the necessary adjustment. Thedisplay indicates the level selected.
4.Press the OK button to confirm thenew settings.
Waveband Button
Press the RADIO button to select from thewavebands available.
You can use the selector to return to radioreception when you have been listening toanother source.
Alternatively, press the left arrow buttonto display the available wavebands. Scrollto the required waveband and press OK.
Station Tuning Control
Seek Tuning
Select a waveband and briefly press oneof the seek buttons. The unit will stop atthe first station it finds in the direction youhave chosen.
Manual Tuning
1.Press the MENU button.
2.Select RADIO mode and thenMANUAL TUNE.
3.Use the left and right arrow buttons totune down or up the waveband in smallincrements or press and hold toincrement quickly, until you find astation you want to listen to.
4.Press OK to continue listening to astation.
Scan Tuning
Scan allows you to listen to a few secondsof each station detected.
1.Press the MENU button.
2.Select RADIO mode and then SCAN.
3.Use the seek buttons to scan up ordown the selected waveband.
4.Press OK to continue listening to astation.
Station Preset Buttons
This feature allows you to store yourfavourite stations, they can be recalled byselecting the appropriate waveband andpressing one of the preset buttons.
1.Select a waveband.
2.Tune to the station required.
174Audio System
Page 177 of 256
Downloaded from www.Manualslib.com manuals search engine 3.Press and hold one of the presetbuttons. A progress bar and messagewill appear. When the progress barcompletes the station has been stored.The audio unit will also mutemomentarily as confirmation.
You can repeat this on each waveband andfor each preset button.
Note:When you drive to another part of thecountry, stations that broadcast onalternative frequencies and are stored onpreset buttons, may be updated with thecorrect frequency and station name for thatarea.
Autostore Control
Note:This will store up to a maximum ofthe six strongest signals available, eitherfrom the AM or the FM waveband andoverwrite the previously stored stations. Youcan also store stations manually in the sameway as other wavebands.
•Press the MENU button, select RADIOmode, press AUTOSTORE.
•When the search is complete, sound isrestored and the strongest signals arestored on the autostore presets.
Traffic Information Control
Many stations that broadcast on the FMwaveband have a TP code to signify thatthey carry traffic program information.
Turning Traffic Announcements On andOff
Before you can receive trafficannouncements, you must press either theTA or TRAFFIC button. A TA display willappear to show the feature is switched on.
If you are already tuned to a station thatbroadcasts traffic information,TP will alsobe displayed. Otherwise the unit will searchfor a traffic program.
When traffic information is broadcast, itwill automatically interrupt normal radioor CD playback and Trafficannouncement will appear in the display.
If a non-traffic station is selected orrecalled using a preset button, the audiounit will remain on that station unless TAor TRAFFIC is turned off, then on again.
Note:If traffic announcement is on and youselect a preset or manual tune to a nontraffic announcement station no trafficannouncement will be heard.
Note:When you are listening to a nontraffic announcement station and turntraffic announcement off and on again a TPseek will occur.
Traffic Announcement Volume
Traffic announcements interrupt normalbroadcasts at a preset minimum level thatis usually louder than normal listeningvolumes.
To adjust the preset volume:
•Use the volume control to make thenecessary adjustment during anincoming traffic announcementbroadcast. The display will show thelevel selected.
Ending Traffic Announcements
The audio unit will return to normaloperation at the end of each trafficannouncement. To end the announcementprematurely, press TA or TRAFFIC duringthe announcement.
Note:If you press TA or TRAFFIC at anyother time it will switch all announcementsoff.
Automatic Volume Control
When available, automatic volume controladjusts the volume level to compensatefor engine noise and road speed noise.
175Audio System