emergency FORD B MAX 2013 1.G Owners Manual
[x] Cancel search | Manufacturer: FORD, Model Year: 2013, Model line: B MAX, Model: FORD B MAX 2013 1.GPages: 298, PDF Size: 20.63 MB
Page 10 of 298
Downloaded from www.Manualslib.com manuals search engine Warranty on Replacement Parts
Genuine Ford and Motorcraft replacementparts are the only replacement parts thatbenefit from a Ford Warranty. Damagecaused to your vehicle as a result of thefailure of non-Ford parts may not becovered by the Ford Warranty. Foradditional information, refer to the termsand conditions of the Ford Warranty.
MOBILE COMMUNICATIONS
EQUIPMENT
Using mobile communications equipmentis becoming increasingly important in theconduct of business and personal affairs.However, you must not compromise yourown or others’ safety when using suchequipment. Mobile communications canenhance personal safety and security whenappropriately used, particularly inemergency situations. Safety must beparamount when using mobilecommunications equipment to avoidnegating these benefits. Mobilecommunication equipment includes, butis not limited to, cellular phones, pagers,portable email devices, text messagingdevices and portable two-way radios.
WARNING
Driving while distracted can result inloss of vehicle control, crash andinjury. We strongly recommend thatyou use extreme caution when using anydevice that may take your focus off theroad. Your primary responsibility is the safeoperation of your vehicle. We recommendagainst the use of any hand-held devicewhile driving and encourage the use ofvoice-operated systems when possible.Make sure you are aware of all applicablelocal laws that may affect the use ofelectronic devices while driving.
8B-MAX (CB2) Vehicles Built From: 25-06-2012, Vehicles Built Up To: 31-12-2013Introduction
Page 32 of 298
Downloaded from www.Manualslib.com manuals search engine PRINCIPLE OF OPERATION
The system allows you to program keyswith restricted driving modes to promotegood driving habits. You can use all but oneof the keys programmed to your vehiclewith these restricted modes.
Any keys that have not been programmedare referred to as an administrator key oradmin key. These can be used to:
•create a MyKey
•program optional MyKey settings
•clear all MyKey features.
When you have programmed a MyKey, youcan access the following information usingthe information display:
•How many admin keys and MyKeys areprogrammed to your vehicle.
•The total distance your vehicle hastraveled using a MyKey.
Note:Switch the ignition on to use thesystem.
Note:All MyKeys are programmed to thesame settings. You cannot program themindividually.
Standard Settings
The following settings cannot be changed:
•Safety belt minder. You cannot disablethis feature. The audio system willmute when this feature is activated.
•Low fuel level warning. When the fuellevel is low, warnings will be shown inthe display followed by an audibletone.
•Driver assist features, for examplenavigation and parking aids. Thesesystems turn on automaticallywhenever you switch the ignition on.
Optional Settings
You can configure MyKey settings whenyou first create a MyKey. You can alsochange the settings afterward with anadmin key.
The following settings can be configuredusing an admin key:
•Various vehicle speed limits can be set.Warnings will be shown in the displayfollowed by an audible tone when yourvehicle reaches the set speed. Youcannot override the set speed by fullydepressing the accelerator pedal.
•Various vehicle speed reminders canbe set. Warnings will be shown in thedisplay followed by an audible tonewhen the set vehicle speed isexceeded.
•Audio system maximum volume of45%. A message will be shown in thedisplay when you attempt to exceedthe limited volume. Automatic volumecontrol will be disabled.
•Always on setting. When this isselected you will not be able to disableemergency assistance or the do notdisturb feature.
Vehicles with Keyless Entry
If a MyKey and an admin key are present,your vehicle will recognize the admin keyonly.
CREATING A MYKEY
Vehicles without Keyless Starting
1.Insert the key you want to program intothe ignition.
2.Switch the ignition on.
3.Access the main menu using theinformation display. Select MyKey andpress OK or the right arrow button.
30B-MAX (CB2) Vehicles Built From: 25-06-2012, Vehicles Built Up To: 31-12-2013MyKey™
Page 37 of 298
Downloaded from www.Manualslib.com manuals search engine Locking With the Key
Turn the top of the key toward the front ofyour vehicle.
Double Locking With the Key
Turn the key to the lock position twicewithin three seconds.
Unlocking With the Key
Note:If the child safety locks are on andyou pull the interior handle, you will onlyturn off the emergency locking, not the childsafety lock. You can only open the doorsusing the external door handle.
Note:If the doors have been unlocked usingthis method, the doors must be lockedindividually until the central locking functionhas been repaired.
Unlock the driver's door using the key. Youcan unlock all other doors individually bypulling the interior door handles.
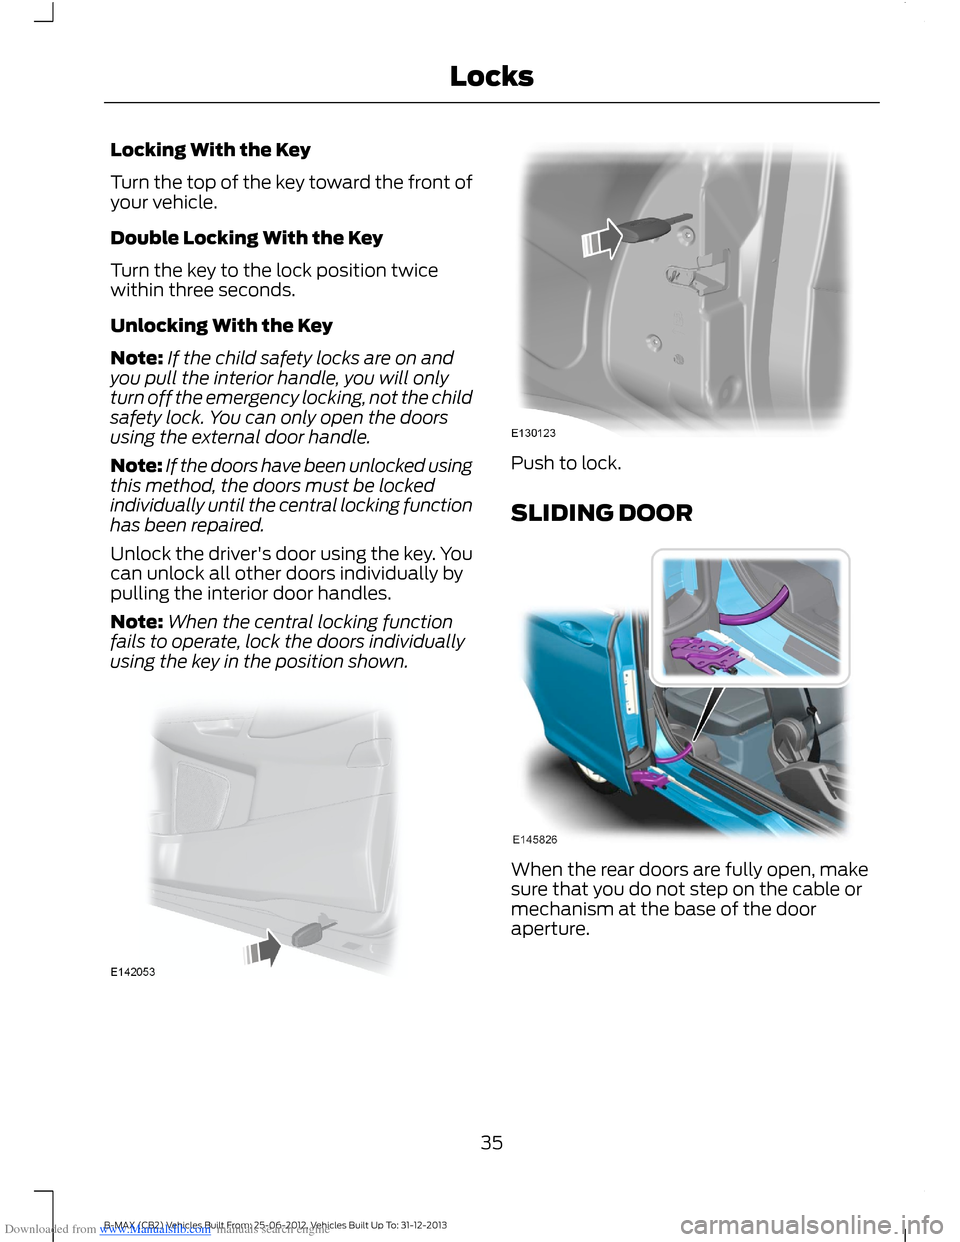
Note:When the central locking functionfails to operate, lock the doors individuallyusing the key in the position shown.
Push to lock.
SLIDING DOOR
When the rear doors are fully open, makesure that you do not step on the cable ormechanism at the base of the dooraperture.
35B-MAX (CB2) Vehicles Built From: 25-06-2012, Vehicles Built Up To: 31-12-2013Locks
Page 58 of 298
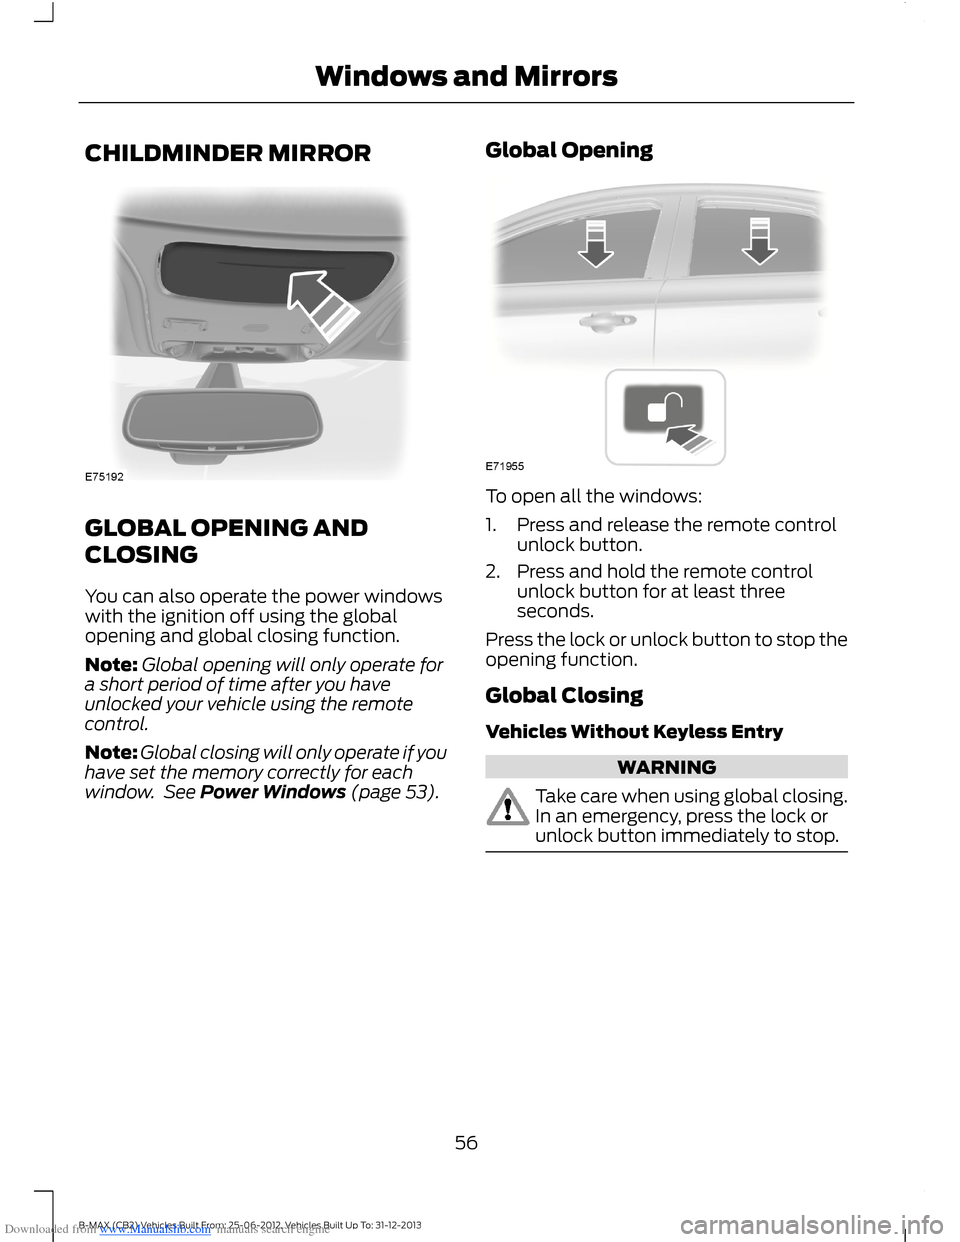
Downloaded from www.Manualslib.com manuals search engine CHILDMINDER MIRROR
GLOBAL OPENING AND
CLOSING
You can also operate the power windowswith the ignition off using the globalopening and global closing function.
Note:Global opening will only operate fora short period of time after you haveunlocked your vehicle using the remotecontrol.
Note:Global closing will only operate if youhave set the memory correctly for eachwindow. See Power Windows (page 53).
Global Opening
To open all the windows:
1.Press and release the remote controlunlock button.
2.Press and hold the remote controlunlock button for at least threeseconds.
Press the lock or unlock button to stop theopening function.
Global Closing
Vehicles Without Keyless Entry
WARNING
Take care when using global closing.In an emergency, press the lock orunlock button immediately to stop.
56B-MAX (CB2) Vehicles Built From: 25-06-2012, Vehicles Built Up To: 31-12-2013Windows and Mirrors
Page 59 of 298
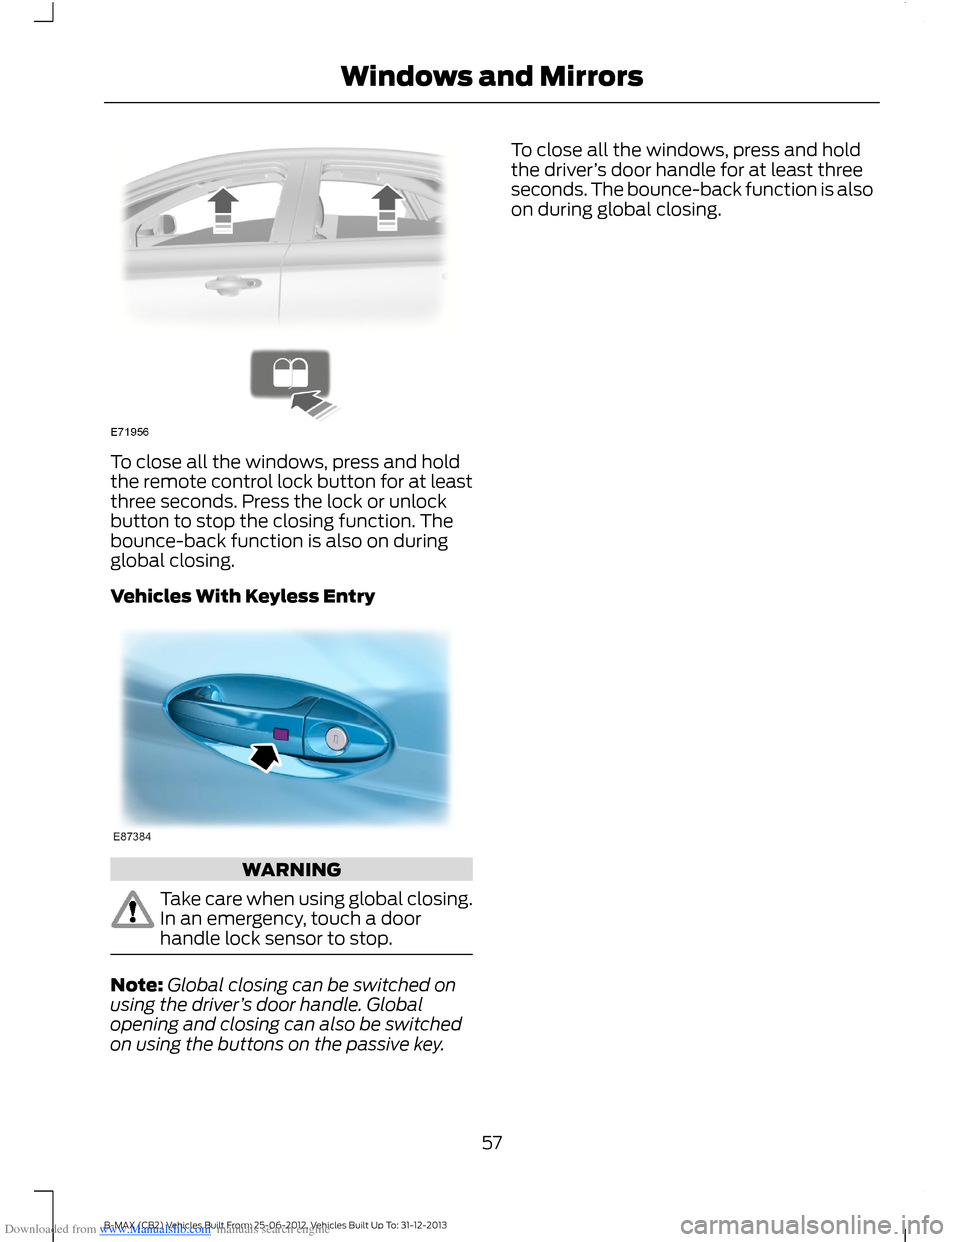
Downloaded from www.Manualslib.com manuals search engine To close all the windows, press and holdthe remote control lock button for at leastthree seconds. Press the lock or unlockbutton to stop the closing function. Thebounce-back function is also on duringglobal closing.
Vehicles With Keyless Entry
WARNING
Take care when using global closing.In an emergency, touch a doorhandle lock sensor to stop.
Note:Global closing can be switched onusing the driver’s door handle. Globalopening and closing can also be switchedon using the buttons on the passive key.
To close all the windows, press and holdthe driver’s door handle for at least threeseconds. The bounce-back function is alsoon during global closing.
57B-MAX (CB2) Vehicles Built From: 25-06-2012, Vehicles Built Up To: 31-12-2013Windows and Mirrors
Page 108 of 298
Downloaded from www.Manualslib.com manuals search engine Hints on Driving With anAutomatic Transmission
WARNING
Do not idle the engine for longperiods of time in drive with thebrakes applied.
Moving Off
1.Release the parking brake.
2.Release the brake pedal and press theaccelerator pedal.
Stopping
1.Release the accelerator pedal andpress the brake pedal.
2.Apply the parking brake.
3.Move the transmission selector leverto N or P.
Kickdown
Press the accelerator pedal fully with thetransmission selector lever in the driveposition to select the next lowest gear foroptimum performance. Release theaccelerator pedal when you no longerrequire kickdown.
If Your Vehicle Gets Stuck In Mud orSnow
Note:Do not rock your vehicle if the engineis not at normal operating temperature ordamage to the transmission may occur.
Note:Do not rock your vehicle for morethan a minute or damage to thetransmission and tires may occur, or theengine may overheat.
If your vehicle gets stuck in mud or snow,it may be rocked out by shifting betweenforward and reverse gears, stoppingbetween shifts in a steady pattern. Presslightly on the accelerator in each gear.
Emergency Park Position ReleaseLever
WARNINGS
Do not drive your vehicle until youverify that the brake lamps areworking.
If the parking brake is fully released,but the brake warning lamp remainsilluminated, the brakes may not beworking correctly. See an authorizeddealer.
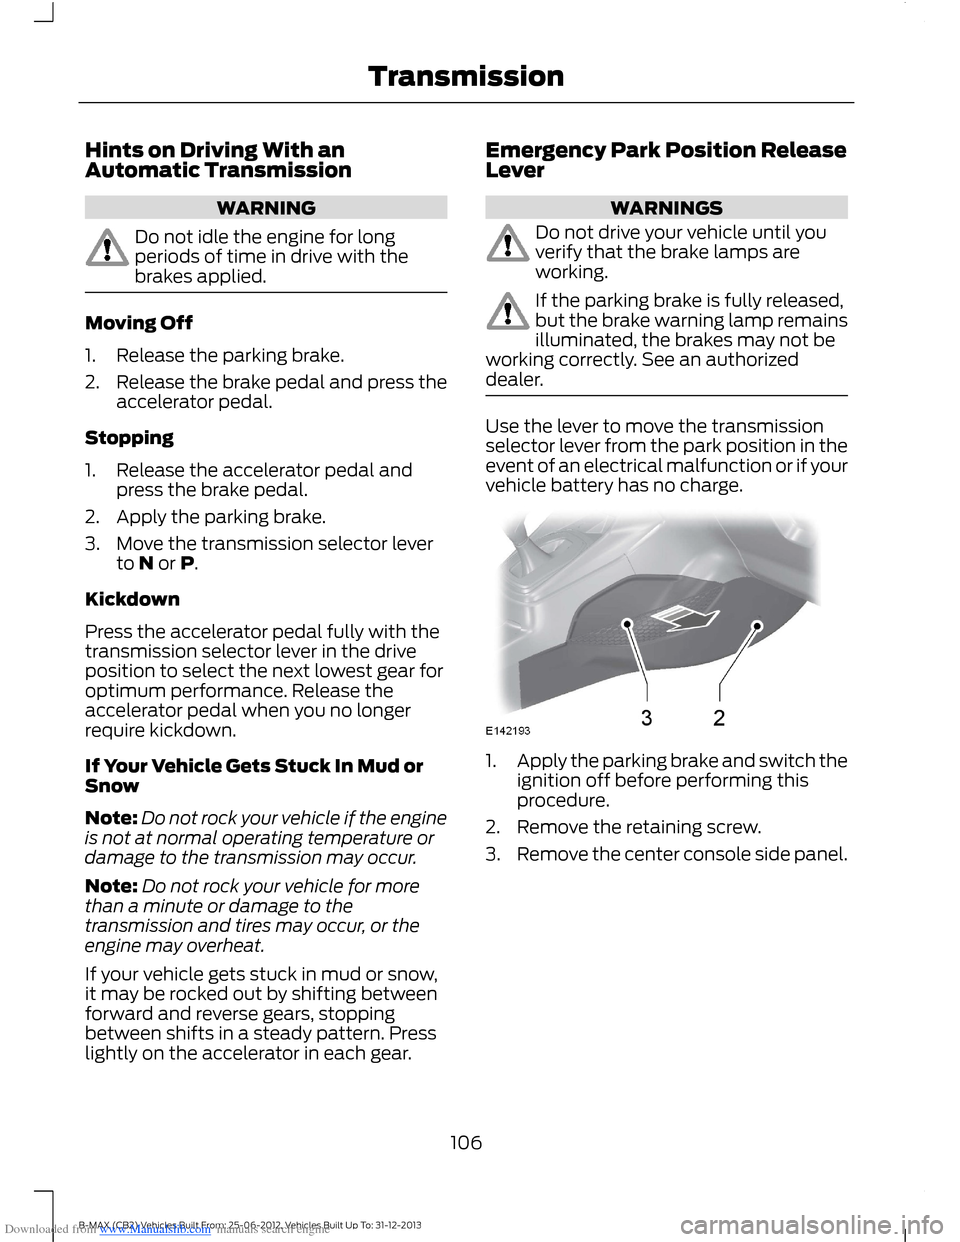
Use the lever to move the transmissionselector lever from the park position in theevent of an electrical malfunction or if yourvehicle battery has no charge.
1.Apply the parking brake and switch theignition off before performing thisprocedure.
2.Remove the retaining screw.
3.Remove the center console side panel.
106B-MAX (CB2) Vehicles Built From: 25-06-2012, Vehicles Built Up To: 31-12-2013Transmission
Page 111 of 298
Downloaded from www.Manualslib.com manuals search engine GENERAL INFORMATION
WARNING
The system does not relieve you ofyour responsibility to drive with duecare and attention.
Note:Occasional brake noise is normal. Ifa metal-to-metal, continuous grinding orcontinuous squeal sound is present, thebrake linings may be worn-out. If the vehiclehas continuous vibration or shudder in thesteering wheel while braking, have yourvehicle checked by an authorized dealer.
Note:Brake dust may accumulate on thewheels, even under normal drivingconditions. Some dust is inevitable as thebrakes wear. See Cleaning the AlloyWheels (page 173).
Wet brakes result in reduced brakingefficiency. Gently press the brake pedal afew times when driving from a car wash orstanding water to dry the brakes.
Emergency Brake Assist
Emergency brake assist detects when youbrake heavily by measuring the rate atwhich you press the brake pedal. Itprovides maximum braking efficiency aslong as you press the pedal. Emergencybrake assist can reduce stopping distancesin critical situations.
Anti-lock Brake System
This system helps you maintain steeringcontrol and vehicle stability duringemergency stops by keeping the brakesfrom locking.
HINTS ON DRIVING WITH
ANTI-LOCK BRAKES
Note:When the system is operating, thebrake pedal will pulse and may travelfurther. Maintain pressure on the brakepedal. You may also hear a noise from thesystem. This is normal.
The anti-lock braking system will noteliminate the risks when:
•you drive too closely to the vehicle infront of you
•your vehicle is hydroplaning
•you take corners too fast
•the road surface is poor.
PARKING BRAKE
Vehicles With AutomaticTransmission
WARNING
Always set the parking brake fullyand leave your vehicle with thetransmission selector lever inposition P.
Note:If you park your vehicle on a hill andfacing uphill move the transmission selectorlever to position P and turn the steeringwheel away from the curb.
Note:If you park your vehicle on a hill andfacing downhill move the transmissionselector lever to position P and turn thesteering wheel toward the curb.
Vehicles With ManualTransmission
Note:If you park your vehicle on a hill andfacing uphill select first gear and turn thesteering wheel away from the curb.
109B-MAX (CB2) Vehicles Built From: 25-06-2012, Vehicles Built Up To: 31-12-2013Brakes
Page 131 of 298
Downloaded from www.Manualslib.com manuals search engine WARNINGS
The brake and steering assistancewill not operate unless the engine isrunning. Press the brake pedal harderand allow for increased stopping distancesand heavier steering. Failure to take caremay lead to a crash or personal injury.
Too much tension on a tow ropecould cause damage to your vehicleor the vehicle that is towing.
Emergency Towing
If your vehicle is disabled without accessto wheel dollies, a car-hauling trailer, or aflatbed transport vehicle it can beflat-towed with all wheels on the ground.
You may do this under the followingconditions:
•Your vehicle is facing forward so thatit is towed in a forward direction.
•The transmission selector lever isplaced in position N. If the transmissiongear shift lever cannot be moved toposition N, it may need to beoverridden. See AutomaticTransmission (page 104).
•Maximum speed is 35 mph (56 km/h).
•Maximum distance is 50 miles (80kilometers).
Drive off slowly and smoothly withoutjerking the vehicle that is being towed.
You must only use the towing eye that wasdelivered with your vehicle. See TowingPoints (page 127).
Tow ropes or rigid towing bars must beplaced on the same side. For example; righthand rear towing point to right hand fronttowing point.
You must use a tow rope or rigid towingbar that is of the correct strength for theweight of the towing vehicle and thevehicle that is being towed.
Note:Using a rigid towing bar is the safestway to tow a vehicle.
The weight of the vehicle that is beingtowed must not exceed the weight of thetowing vehicle.
129B-MAX (CB2) Vehicles Built From: 25-06-2012, Vehicles Built Up To: 31-12-2013Towing
Page 132 of 298
Downloaded from www.Manualslib.com manuals search engine BREAKING-IN
Tires
WARNING
New tires need to be run-in forapproximately 300 miles (500kilometers). During this time, youmay experience different drivingcharacteristics.
Brakes and Clutch
WARNING
Avoid heavy use of the brakes andclutch if possible for the first 100miles (150 kilometers) in town andfor the first 1000 miles (1500 kilometers)on freeways.
Engine
WARNING
Avoid driving too fast during the first1000 miles (1500 kilometers). Varyyour speed frequently and changeup through the gears early. Do not laborthe engine.
COLD WEATHER
PRECAUTIONS
The functional operation of somecomponents and systems can be affectedat temperatures below -13°F (-25°C).
DRIVING THROUGH WATER
WARNINGS
Drive through water in an emergencyonly and not as part of normaldriving.
WARNINGS
Engine damage can occur if waterenters the air filter.
In an emergency, you can drive your vehiclethrough water to a maximum depth of 8inches (200 millimeters) and at amaximum speed of 6 mph (10 km/h). Youmust take extra care when driving throughflowing water.
When driving in water, maintain a lowspeed and do not stop your vehicle. Afterdriving through water and as soon as it issafe to do so:
•Depress the brake pedal lightly tocheck that the brakes are functioningcorrectly.
•Check that the horn works.
•Check that your vehicle's lamps arefully operational.
•Check the power assistanceof the steering system.
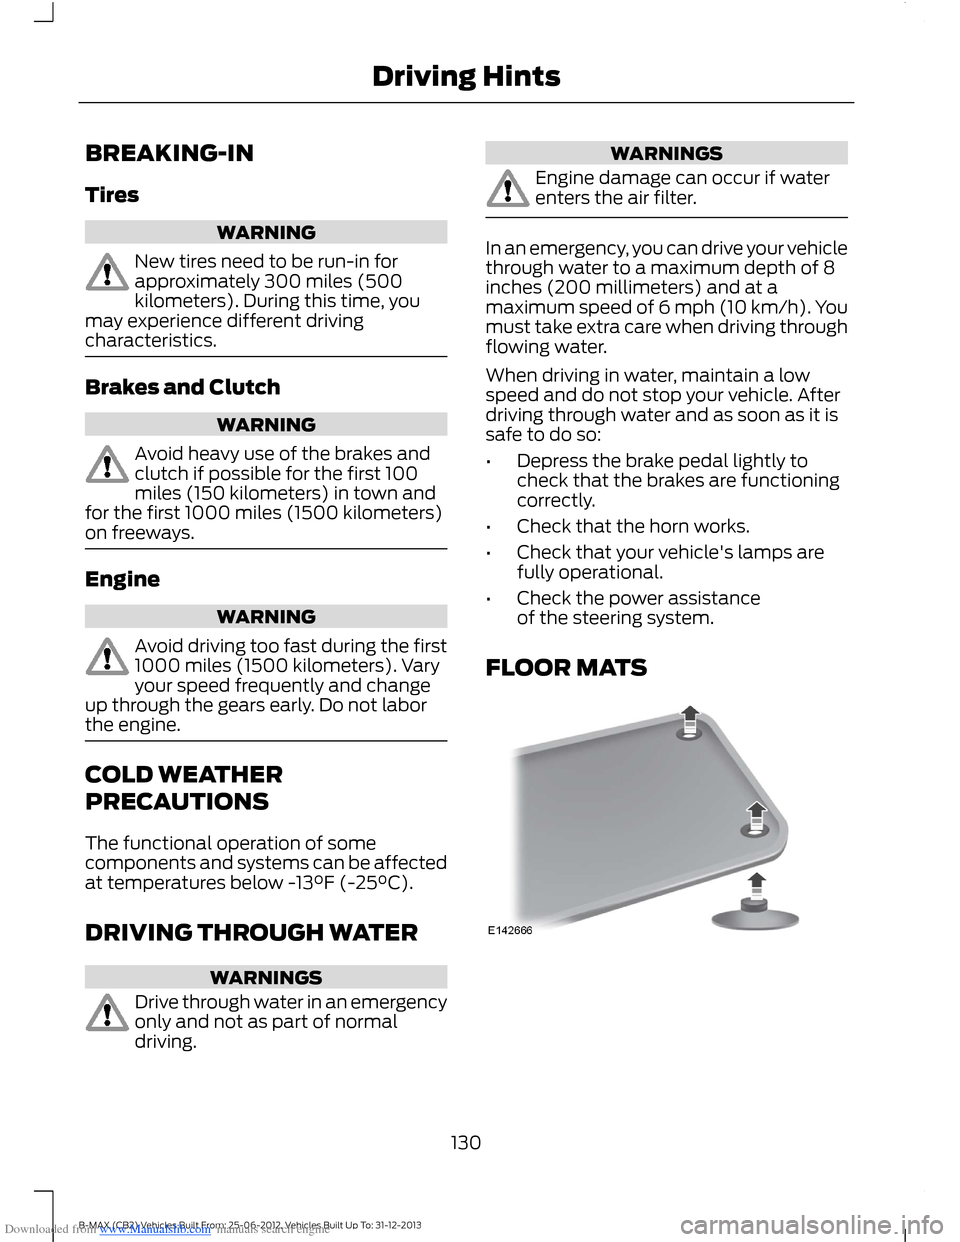
FLOOR MATS
130B-MAX (CB2) Vehicles Built From: 25-06-2012, Vehicles Built Up To: 31-12-2013Driving Hints
Page 160 of 298
Downloaded from www.Manualslib.com manuals search engine Adding Oil
WARNINGS
Only add oil when the engine is cold.If the engine is hot, wait 10 minutesfor the engine to cool down. Failureto take care may result in personal injury.
Do not remove the filler cap whenthe engine is running. Failure to takecare may result in personal injury.
1.Remove the filler cap.
2.Add oil that meets Ford specifications.See Technical Specifications (page169).
3.Replace the filler cap. Turn it until youfeel a strong resistance.
Note:Do not add oil further than themaximum mark. Oil levels above themaximum mark may cause engine damage.
Note:Soak up any spillage with anabsorbent cloth immediately.
ENGINE COOLANT CHECK
WARNING
Do not allow the fluid to touch yourskin or eyes. If this happens, rinse theaffected areas immediately withplenty of water and contact your physician.
Note:Make sure that the level is betweenthe MIN and the MAX marks.
Note:Coolant expands when it is hot. Thelevel may therefore extend beyond the MAXmark.
If the level is at the MIN mark, add coolantimmediately.
Adding Engine Coolant
WARNINGS
Only add coolant when the engine iscold. If the engine is hot, wait 10minutes for the engine to cool down.
Do not remove the filler cap whenthe engine is running.
Do not remove the filler cap whenthe engine is hot. Wait for the engineto cool down.
Undiluted coolant is flammable andmay ignite if spilt on a hot exhaust.
Note:In an emergency, you can add justwater to the cooling system to reach avehicle service station. Have the systemchecked by an authorized dealer as soon aspossible.
Note:Prolonged use of incorrect dilutionof the coolant can cause engine damagefrom corrosion, overheating or freezing.
Note:Do not add coolant further than theMAX mark.
1.Remove the filler cap. Any pressure willescape slowly as you unscrew the cap.
2.Add a 50/50 mixture of coolant andwater using fluid that meets the Fordspecifications. See TechnicalSpecifications (page 169).
3.Replace the filler cap. Turn it until youfeel a strong resistance.
158B-MAX (CB2) Vehicles Built From: 25-06-2012, Vehicles Built Up To: 31-12-2013Maintenance