buttons FORD B MAX 2013 1.G Owners Manual
[x] Cancel search | Manufacturer: FORD, Model Year: 2013, Model line: B MAX, Model: FORD B MAX 2013 1.GPages: 298, PDF Size: 20.63 MB
Page 4 of 298
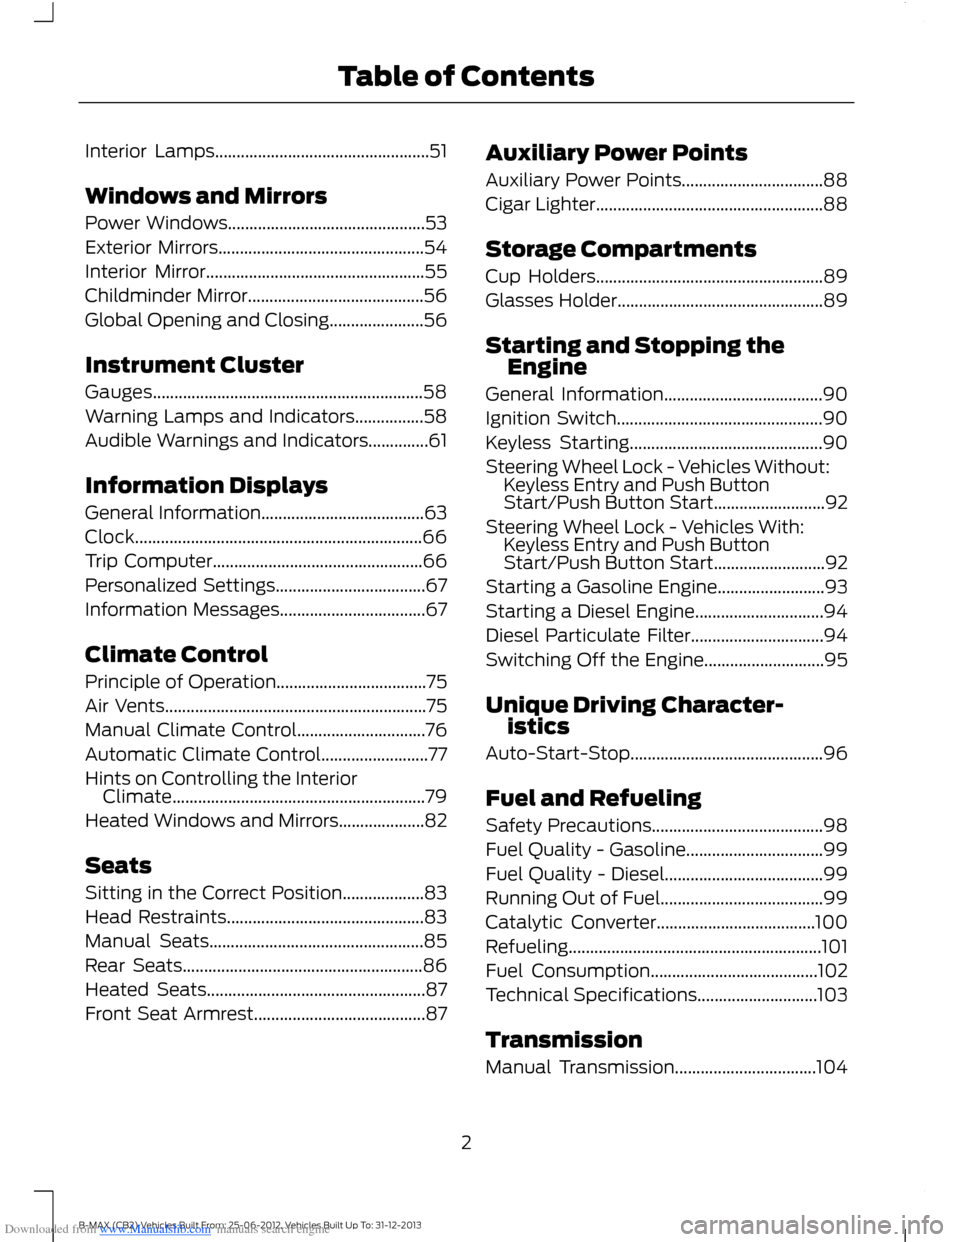
Downloaded from www.Manualslib.com manuals search engine Interior Lamps..................................................51
Windows and Mirrors
Power Windows..............................................53
Exterior Mirrors................................................54
Interior Mirror...................................................55
Childminder Mirror.........................................56
Global Opening and Closing......................56
Instrument Cluster
Gauges...............................................................58
Warning Lamps and Indicators................58
Audible Warnings and Indicators..............61
Information Displays
General Information......................................63
Clock...................................................................66
Trip Computer.................................................66
Personalized Settings...................................67
Information Messages..................................67
Climate Control
Principle of Operation...................................75
Air Vents.............................................................75
Manual Climate Control..............................76
Automatic Climate Control.........................77
Hints on Controlling the InteriorClimate...........................................................79
Heated Windows and Mirrors....................82
Seats
Sitting in the Correct Position...................83
Head Restraints..............................................83
Manual Seats..................................................85
Rear Seats........................................................86
Heated Seats...................................................87
Front Seat Armrest........................................87
Auxiliary Power Points
Auxiliary Power Points.................................88
Cigar Lighter.....................................................88
Storage Compartments
Cup Holders.....................................................89
Glasses Holder................................................89
Starting and Stopping theEngine
General Information.....................................90
Ignition Switch................................................90
Keyless Starting.............................................90
Steering Wheel Lock - Vehicles Without:Keyless Entry and Push ButtonStart/Push Button Start..........................92
Steering Wheel Lock - Vehicles With:Keyless Entry and Push ButtonStart/Push Button Start..........................92
Starting a Gasoline Engine.........................93
Starting a Diesel Engine..............................94
Diesel Particulate Filter...............................94
Switching Off the Engine............................95
Unique Driving Character-istics
Auto-Start-Stop.............................................96
Fuel and Refueling
Safety Precautions........................................98
Fuel Quality - Gasoline................................99
Fuel Quality - Diesel.....................................99
Running Out of Fuel......................................99
Catalytic Converter.....................................100
Refueling...........................................................101
Fuel Consumption.......................................102
Technical Specifications............................103
Transmission
Manual Transmission.................................104
2B-MAX (CB2) Vehicles Built From: 25-06-2012, Vehicles Built Up To: 31-12-2013Table of Contents
Page 28 of 298
Downloaded from www.Manualslib.com manuals search engine GENERAL INFORMATION ON
RADIO FREQUENCIES
Note:Changes or modifications notexpressly approved by the party responsiblefor compliance could void the user’sauthority to operate the equipment.
The typical operating range for yourtransmitter is approximately 33 ft (10 m).
A decrease in operating range could becaused by:
•weather conditions
•nearby radio towers
•structures around your vehicle
•other vehicles parked next to yourvehicle.
The radio frequency used by your remotecontrol can also be used by other shortdistance radio transmissions (e.g. amateurradios, medical equipment, wirelessheadphones, remote controls and alarmsystems). If the frequencies are jammed,you will not be able to use your remotecontrol. You can lock and unlock the doorswith the key.
Note:Make sure your vehicle is lockedbefore leaving it unattended.
Note:If you are in range, the remote controlwill operate if you press any buttonunintentionally.
REMOTE CONTROL
You can program a maximum of eightremote controls to your vehicle. Thisincludes any that were supplied with yourvehicle. The remote controls must remaininside your vehicle during the programmingprocedure. Fasten the front safety beltsand close all doors to make sure thatconflicting chimes do not sound duringprogramming.
Programming a New RemoteControl
1.Turn the ignition key from position 0 toposition II four times within sixseconds.
2.Turn the ignition to position 0. A tonesounds to indicate that it is nowpossible to program a remote control.
3.Press any button on a new remotecontrol within 10 seconds. A tone willsound as confirmation.
4.Repeat step three within 10 secondsfor each new remote control. Do notremove the key from the ignition whenpressing the button on the remotecontrol.
5.Switch the ignition back on (positionII) or wait for 10 seconds withoutprogramming another remote controlto end the key programming. Only theremote controls which you have justprogrammed are now able to lock andunlock your vehicle.
Reprogramming the UnlockingFunction
Note:When you press the unlock buttoneither all the doors are unlocked or only thedriver’s door and the liftgate are unlocked.Pressing the unlock button again unlocksall the doors.
Press and hold the unlock and lock buttonson the remote control simultaneously forat least four seconds with the ignition off.The direction indicators will flash twice toconfirm the change.
To return to the original unlocking function,repeat the process.
26B-MAX (CB2) Vehicles Built From: 25-06-2012, Vehicles Built Up To: 31-12-2013Keys and Remote Controls
Page 30 of 298
Downloaded from www.Manualslib.com manuals search engine Remote Control Without a FoldingKey Blade
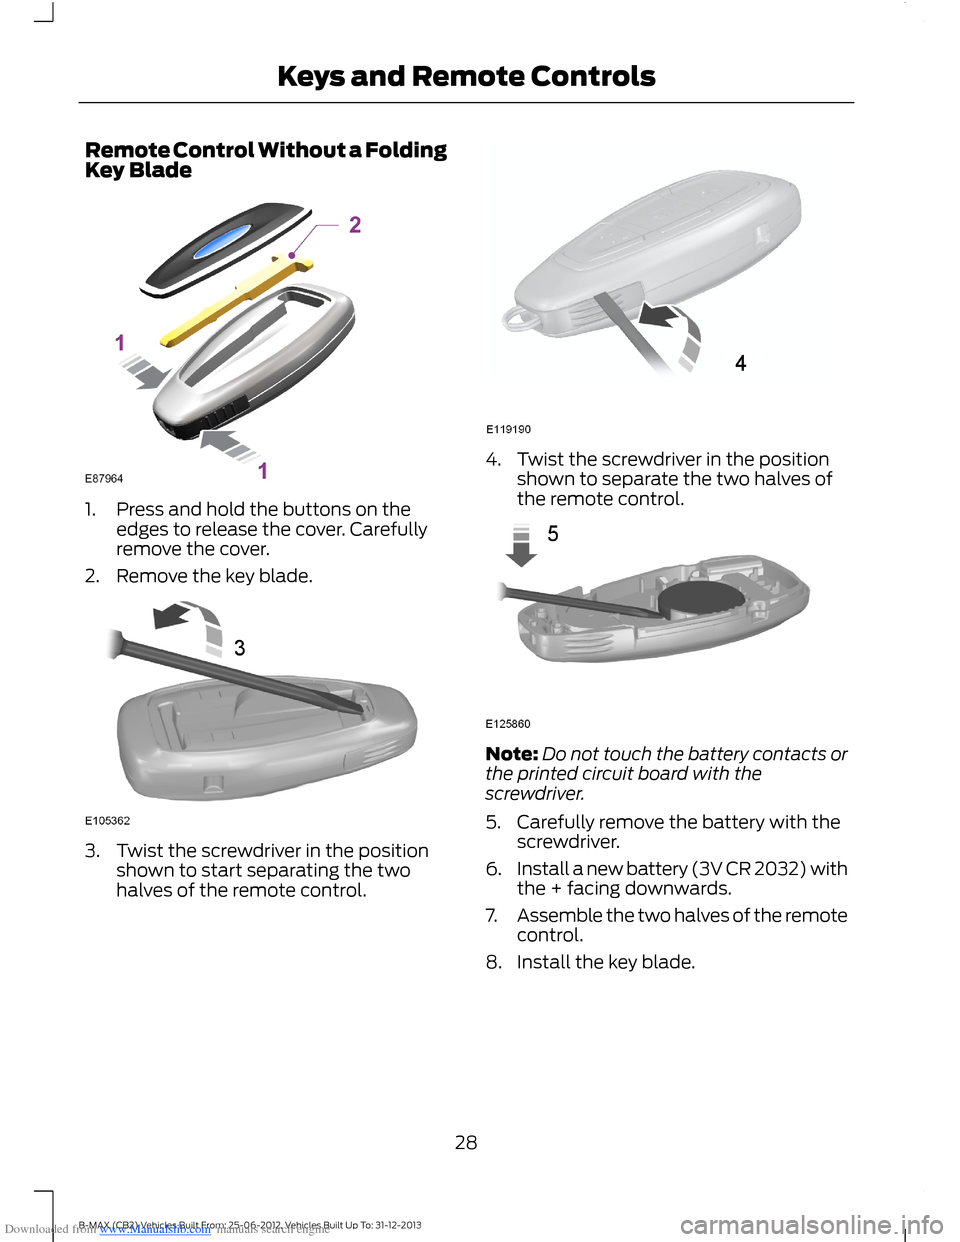
1.Press and hold the buttons on theedges to release the cover. Carefullyremove the cover.
2.Remove the key blade.
3.Twist the screwdriver in the positionshown to start separating the twohalves of the remote control.
4.Twist the screwdriver in the positionshown to separate the two halves ofthe remote control.
Note:Do not touch the battery contacts orthe printed circuit board with thescrewdriver.
5.Carefully remove the battery with thescrewdriver.
6.Install a new battery (3V CR 2032) withthe + facing downwards.
7.Assemble the two halves of the remotecontrol.
8.Install the key blade.
28B-MAX (CB2) Vehicles Built From: 25-06-2012, Vehicles Built Up To: 31-12-2013Keys and Remote Controls
Page 33 of 298
Downloaded from www.Manualslib.com manuals search engine 4.Select Create MyKey and press OK.
5.When prompted, press and hold OKuntil you see a message informing youto label this key as a MyKey. The keywill be restricted the next time you useit.
Note:Make sure you label the MyKey soyou can distinguish it from the admin keys.
Vehicles with Keyless Starting
1.Switch the ignition on using an adminkey.
2.Access the main menu using theinformation display. Select MyKey andpress OK or the right arrow button.
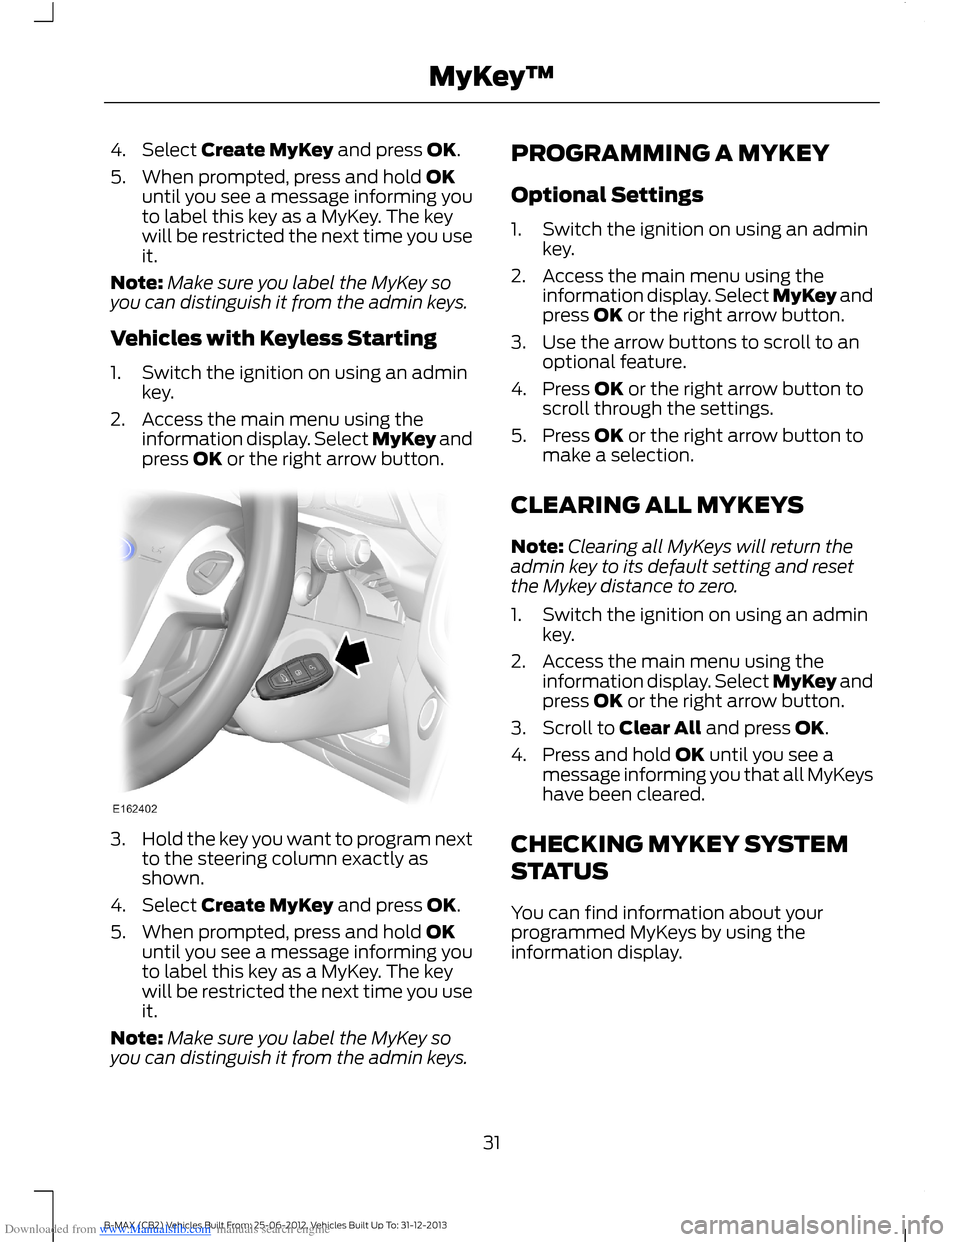
3.Hold the key you want to program nextto the steering column exactly asshown.
4.Select Create MyKey and press OK.
5.When prompted, press and hold OKuntil you see a message informing youto label this key as a MyKey. The keywill be restricted the next time you useit.
Note:Make sure you label the MyKey soyou can distinguish it from the admin keys.
PROGRAMMING A MYKEY
Optional Settings
1.Switch the ignition on using an adminkey.
2.Access the main menu using theinformation display. Select MyKey andpress OK or the right arrow button.
3.Use the arrow buttons to scroll to anoptional feature.
4.Press OK or the right arrow button toscroll through the settings.
5.Press OK or the right arrow button tomake a selection.
CLEARING ALL MYKEYS
Note:Clearing all MyKeys will return theadmin key to its default setting and resetthe Mykey distance to zero.
1.Switch the ignition on using an adminkey.
2.Access the main menu using theinformation display. Select MyKey andpress OK or the right arrow button.
3.Scroll to Clear All and press OK.
4.Press and hold OK until you see amessage informing you that all MyKeyshave been cleared.
CHECKING MYKEY SYSTEM
STATUS
You can find information about yourprogrammed MyKeys by using theinformation display.
31B-MAX (CB2) Vehicles Built From: 25-06-2012, Vehicles Built Up To: 31-12-2013MyKey™
Page 39 of 298
Downloaded from www.Manualslib.com manuals search engine Note:If the system does not function, youwill need to use the key blade to lock andunlock your vehicle.
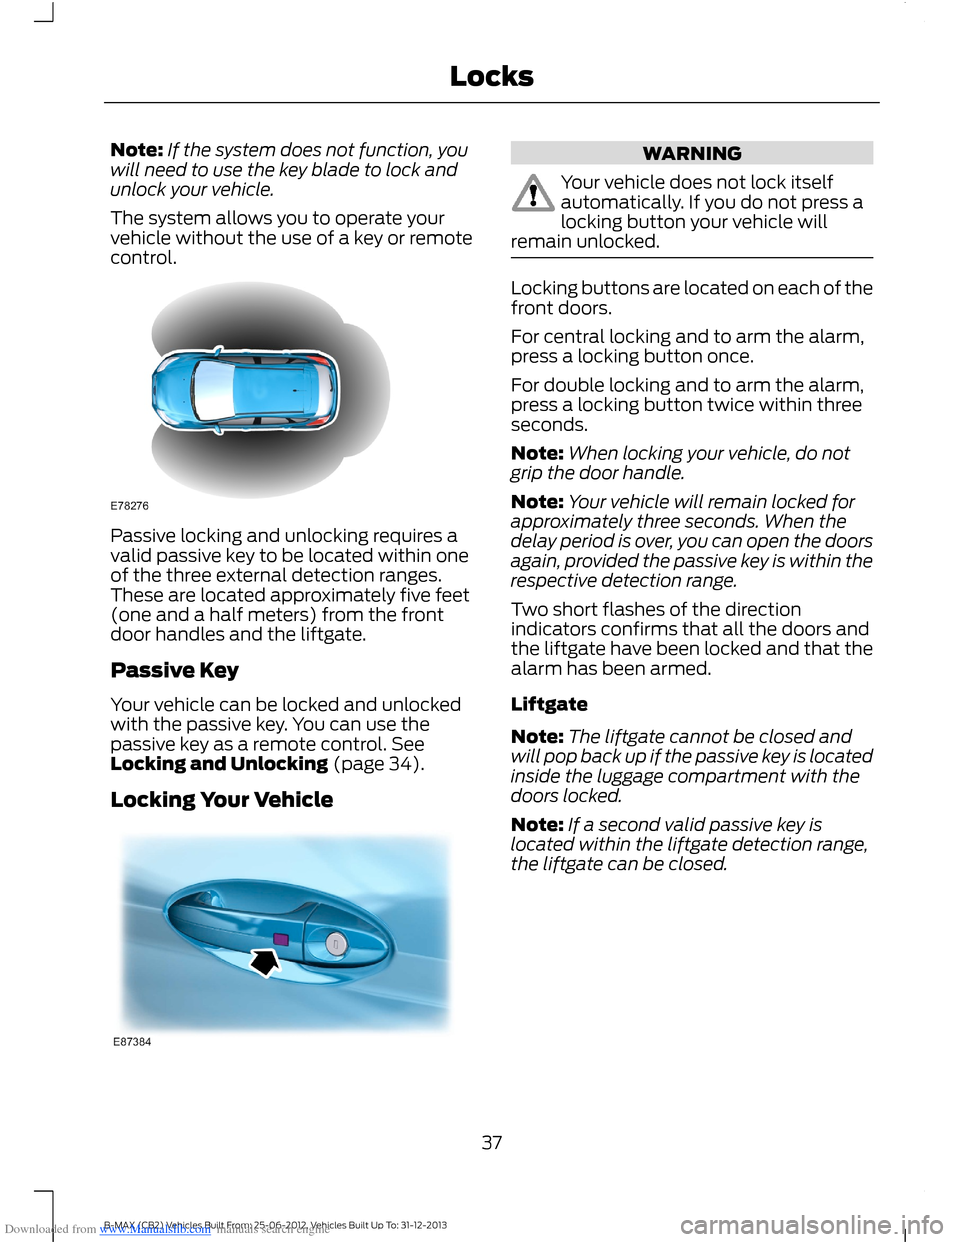
The system allows you to operate yourvehicle without the use of a key or remotecontrol.
Passive locking and unlocking requires avalid passive key to be located within oneof the three external detection ranges.These are located approximately five feet(one and a half meters) from the frontdoor handles and the liftgate.
Passive Key
Your vehicle can be locked and unlockedwith the passive key. You can use thepassive key as a remote control. SeeLocking and Unlocking (page 34).
Locking Your Vehicle
WARNING
Your vehicle does not lock itselfautomatically. If you do not press alocking button your vehicle willremain unlocked.
Locking buttons are located on each of thefront doors.
For central locking and to arm the alarm,press a locking button once.
For double locking and to arm the alarm,press a locking button twice within threeseconds.
Note:When locking your vehicle, do notgrip the door handle.
Note:Your vehicle will remain locked forapproximately three seconds. When thedelay period is over, you can open the doorsagain, provided the passive key is within therespective detection range.
Two short flashes of the directionindicators confirms that all the doors andthe liftgate have been locked and that thealarm has been armed.
Liftgate
Note:The liftgate cannot be closed andwill pop back up if the passive key is locatedinside the luggage compartment with thedoors locked.
Note:If a second valid passive key islocated within the liftgate detection range,the liftgate can be closed.
37B-MAX (CB2) Vehicles Built From: 25-06-2012, Vehicles Built Up To: 31-12-2013Locks
Page 59 of 298
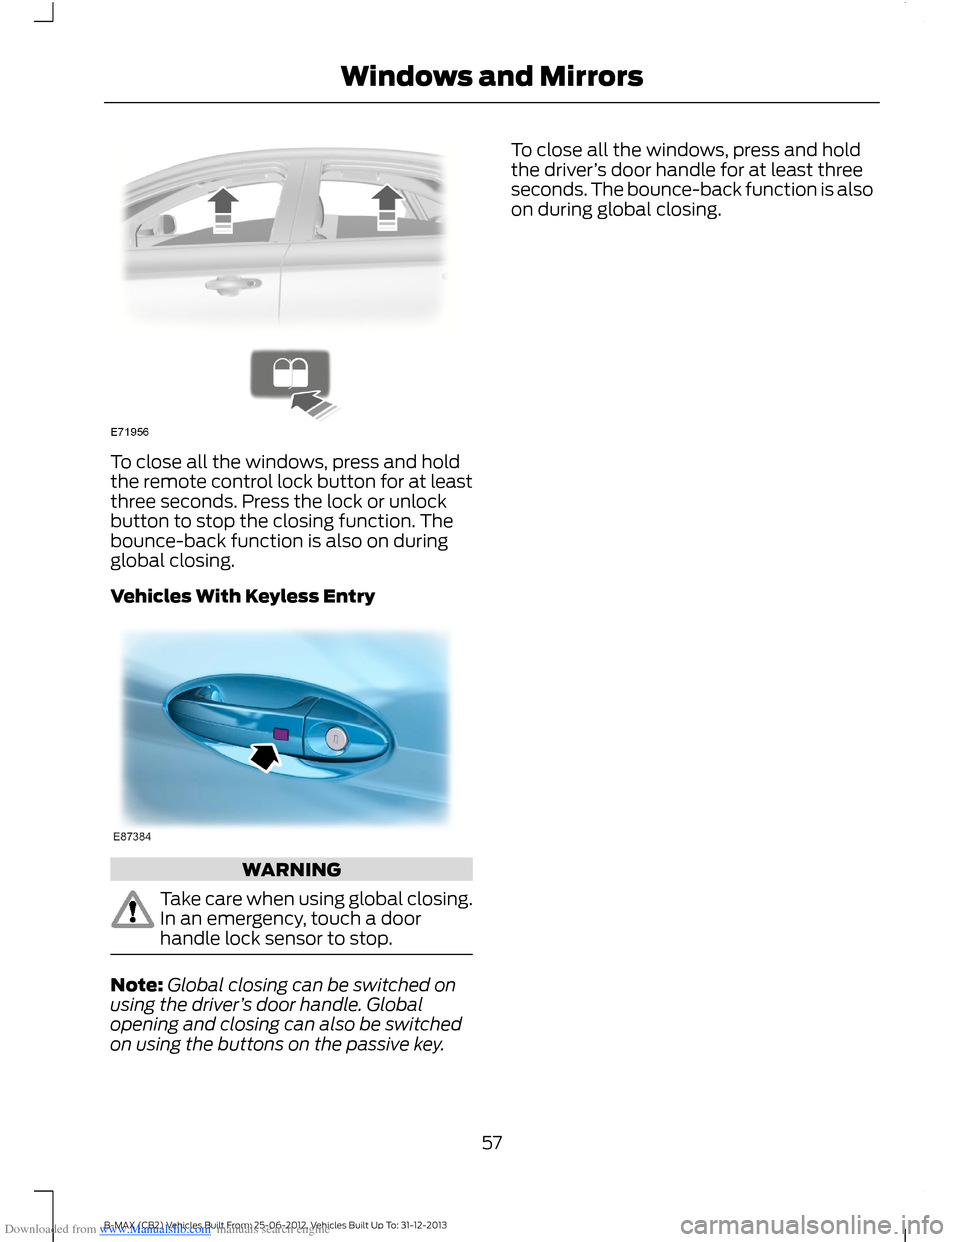
Downloaded from www.Manualslib.com manuals search engine To close all the windows, press and holdthe remote control lock button for at leastthree seconds. Press the lock or unlockbutton to stop the closing function. Thebounce-back function is also on duringglobal closing.
Vehicles With Keyless Entry
WARNING
Take care when using global closing.In an emergency, touch a doorhandle lock sensor to stop.
Note:Global closing can be switched onusing the driver’s door handle. Globalopening and closing can also be switchedon using the buttons on the passive key.
To close all the windows, press and holdthe driver’s door handle for at least threeseconds. The bounce-back function is alsoon during global closing.
57B-MAX (CB2) Vehicles Built From: 25-06-2012, Vehicles Built Up To: 31-12-2013Windows and Mirrors
Page 68 of 298
Downloaded from www.Manualslib.com manuals search engine Menu
Active City Stop
Speed limit
Speed warning
Volume limit
Information
Clear all MyKeys
InformationMyKey active
System Check
All active warnings will display first ifapplicable. The system check menu mayappear different based upon equipmentoptions and current vehicle status. Pressthe up or down arrow button to scrollthrough the list.
CLOCK
Type 1
To adjust the clock, switch the ignition onand press buttons H or M on theinformation and entertainment display asnecessary.
Type 2
Note:Use the information display to adjustthe clock. See General Information (page63).
TRIP COMPUTER
Press the button to scroll through thedisplays.
You can reset the trip, averagefuel consumption and averagespeed. Scroll to the requireddisplay, then press and hold the button.
The trip computer includes the followinginformation displays:
Trip Odometer
Registers the distance traveledof individual journeys.
66B-MAX (CB2) Vehicles Built From: 25-06-2012, Vehicles Built Up To: 31-12-2013Information Displays
Page 84 of 298
Downloaded from www.Manualslib.com manuals search engine Vehicles With Automatic Climate ControlVehicles With Manual Climate Control
Adjust the fan speed to the highestsetting.4
Direct the instrument panel side air ventstoward the side windows.5
Close the instrument panel vents.6
Maximum Cooling Performance inInstrument Panel or InstrumentPanel and Footwell Positions
1.Adjust the temperature control to thelowest setting.
2.Press the A/C and recirculated airbuttons.
3.Adjust the fan speed to the highestsetting initially and then adjust it to suitthe desired comfort level.
HEATED WINDOWS AND
MIRRORS
Heated Windows
Use the heated windows to defrost ordemist the windshield or rear window.
Note:The heated windows operate onlywhen the engine is running.
Heated Windshield
Heated Rear Window
Heated Exterior Mirrors
Electric exterior mirrors have a heatingelement that will defrost or demist themirror glass. They will switch onautomatically when you switch the heatedrear window on.
82B-MAX (CB2) Vehicles Built From: 25-06-2012, Vehicles Built Up To: 31-12-2013Climate Control
Page 86 of 298
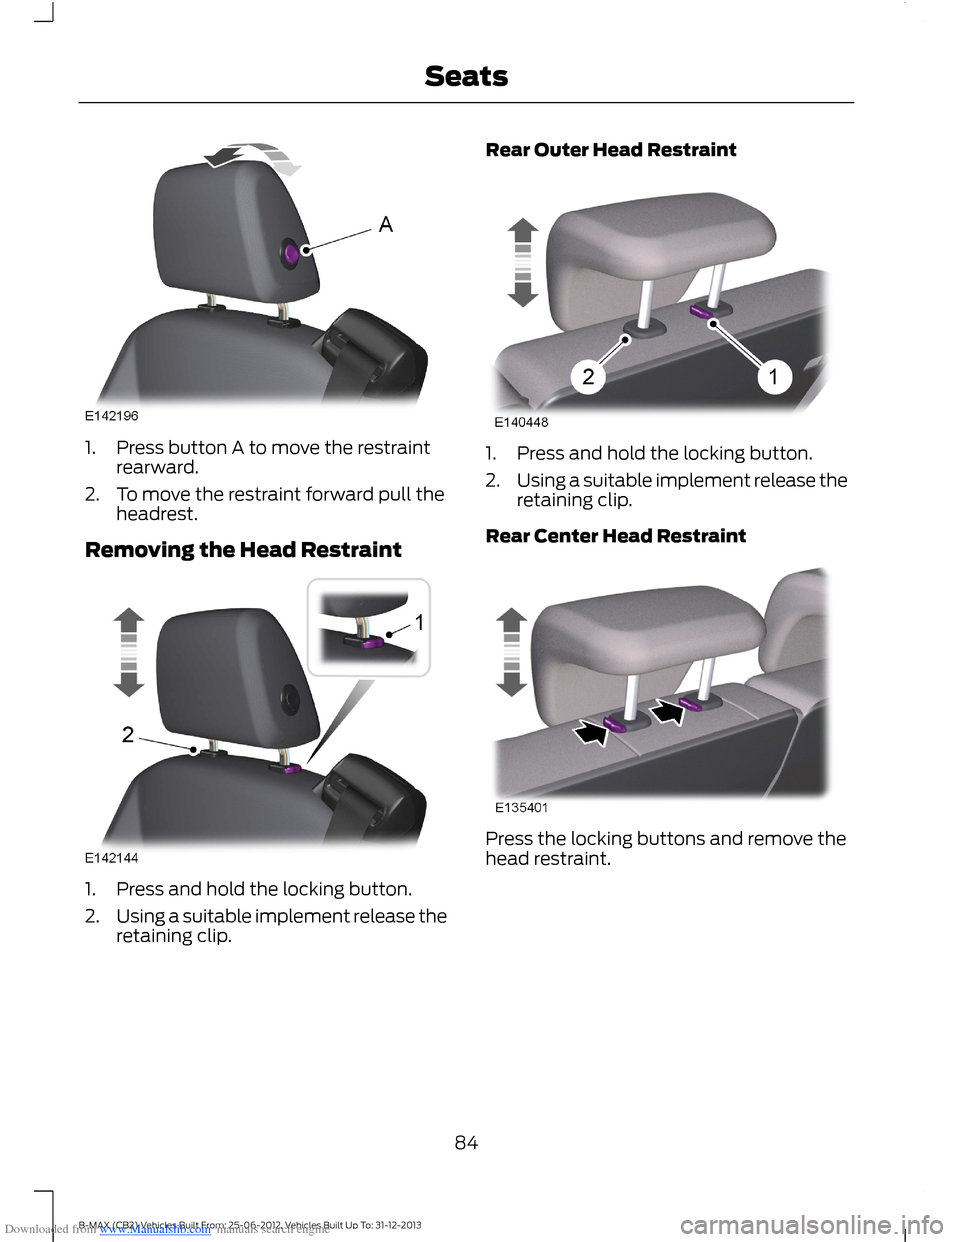
Downloaded from www.Manualslib.com manuals search engine 1.Press button A to move the restraintrearward.
2.To move the restraint forward pull theheadrest.
Removing the Head Restraint
1.Press and hold the locking button.
2.Using a suitable implement release theretaining clip.
Rear Outer Head Restraint
1.Press and hold the locking button.
2.Using a suitable implement release theretaining clip.
Rear Center Head Restraint
Press the locking buttons and remove thehead restraint.
84B-MAX (CB2) Vehicles Built From: 25-06-2012, Vehicles Built Up To: 31-12-2013Seats
Page 88 of 298
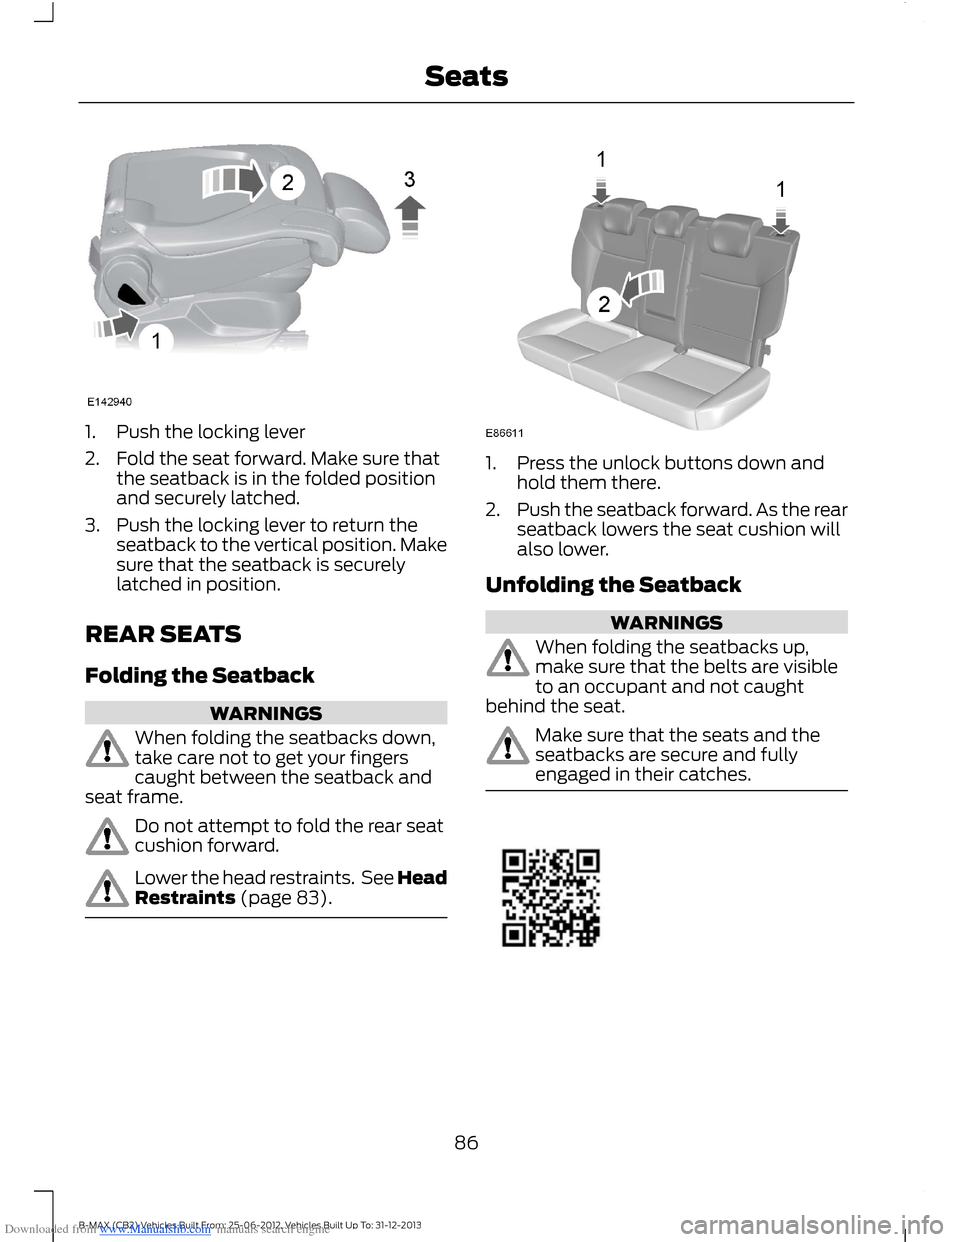
Downloaded from www.Manualslib.com manuals search engine 1.Push the locking lever
2.Fold the seat forward. Make sure thatthe seatback is in the folded positionand securely latched.
3.Push the locking lever to return theseatback to the vertical position. Makesure that the seatback is securelylatched in position.
REAR SEATS
Folding the Seatback
WARNINGS
When folding the seatbacks down,take care not to get your fingerscaught between the seatback andseat frame.
Do not attempt to fold the rear seatcushion forward.
Lower the head restraints. See HeadRestraints (page 83).
1.Press the unlock buttons down andhold them there.
2.Push the seatback forward. As the rearseatback lowers the seat cushion willalso lower.
Unfolding the Seatback
WARNINGS
When folding the seatbacks up,make sure that the belts are visibleto an occupant and not caughtbehind the seat.
Make sure that the seats and theseatbacks are secure and fullyengaged in their catches.
86B-MAX (CB2) Vehicles Built From: 25-06-2012, Vehicles Built Up To: 31-12-2013Seats