radio FORD BRONCO 2022 User Guide
[x] Cancel search | Manufacturer: FORD, Model Year: 2022, Model line: BRONCO, Model: FORD BRONCO 2022Pages: 562, PDF Size: 73 MB
Page 152 of 562
WHAT IS THE WIRELESS
ACCESSORY CHARGER
The wireless accessory charger allows youto charge one compatible Qi wirelesscharging device on the charging area.
WIRELESS ACCESSORY
CHARGER PRECAUTIONS
WARNING: Wireless chargingdevices can affect the operation ofimplanted medical devices, includingcardiac pacemakers. If you have anyimplanted medical devices, werecommend that you consult with yourphysician.
Keep the charging area clean and removeforeign objects prior to charging a device.
Do not place items with a magnetic stripor radio-frequency identification chip, forexample passports, parking tickets,transportation passes or credit cards, nearthe charging area when charging a device.Damage could occur to the magnetic stripor radio-frequency identification chip.
Do not place metal objects, for exampleremote controls, coins and candywrappers, on or near the charging areawhen charging a device. Metal objects mayheat up and degrade the chargingperformance, in addition to causinginterruptions in charging.
Charging could be interrupted, degraded,or could stop if any of the following occur:
•The system detects a foreign object.
•The device is misaligned on thecharging area.
•The device moves on the activecharging area when the vehicle is inmotion.
•The vehicle ambient temperature is toohigh.
•You attempt to charge a non-Qicompatible device on the wirelesscharger.
Note:During charging, the device and thecharger could heat up, this is normal. If thebattery gets hotter than usual, the devicemay stop charging.
LOCATING THE WIRELESS
ACCESSORY CHARGER
The charging area is on thecenter console or in the mediabin below the instrument panel.
CHARGING A WIRELESS
DEVICE
Place the device on the center of thecharging surface with the charging sidedown. The charging stops after your devicereaches a full charge.
You can use the charger when the vehicleis in accessory mode, when the vehicle isrunning, or when SYNC is on.
Displays on the status bar whenwireless charging is in progress.
Note:The charging performance may beaffected if your device is in a case. It may benecessary to remove the case to wirelesslycharge your device.
Note:Software and firmware updates mayaffect device compatibility, including theuse of unofficial software or firmware.Customers should verify chargingfunctionality with their specific devicesin-vehicle.
148
2022 Bronco (TG1) Canada/United States of America, enUSA, Edition date: 202109, First-PrintingWireless Accessory Charger (If Equipped)E297549
Page 155 of 562
STARTING AND STOPPING
THE ENGINE – PRECAUTIONS
WARNING: Extended idling at highengine speeds can produce very hightemperatures in the engine and exhaustsystem, creating the risk of fire or otherdamage.
WARNING: Do not park, idle ordrive your vehicle on dry grass or otherdry ground cover. The emission systemheats up the engine compartment andexhaust system, creating the risk of fire.
WARNING: Do not start the enginein a closed garage or in other enclosedareas. Exhaust fumes are toxic. Alwaysopen the garage door before you startthe engine. Failure to follow thisinstruction could result in personal injuryor death.
WARNING: Exhaust leaks mayresult in entry of harmful and potentiallylethal fumes into the passengercompartment. If you smell exhaustfumes inside your vehicle, have yourvehicle inspected immediately. Do notdrive if you smell exhaust fumes.
The powertrain control system meets allCanadian interference-causing equipmentstandard requirements regulating theimpulse electrical field or radio noise.
If you stop your vehicle and leave theengine idling for long periods, werecommend that you do one of thefollowing:
•Open the windows at least 1 in(2.5 cm).
•Set your climate control to outside air.
PUSH BUTTON IGNITION
SWITCH
Switching the Ignition Off
When the ignition is on or in accessorymode, press the push button ignitionswitch once without your foot on the brakepedal.
Switching the Ignition toAccessory Mode
When the ignition is off, press the pushbutton ignition switch once without yourfoot on the brake pedal.
All electrical circuits and accessories areoperational and the warning lamps andindicators illuminate.
Note:Your vehicle has a battery saverfeature that shuts your vehicle off when itdetects a certain amount of battery drain,or after about 30 minutes of inactivity inaccessory mode.
Starting the Engine
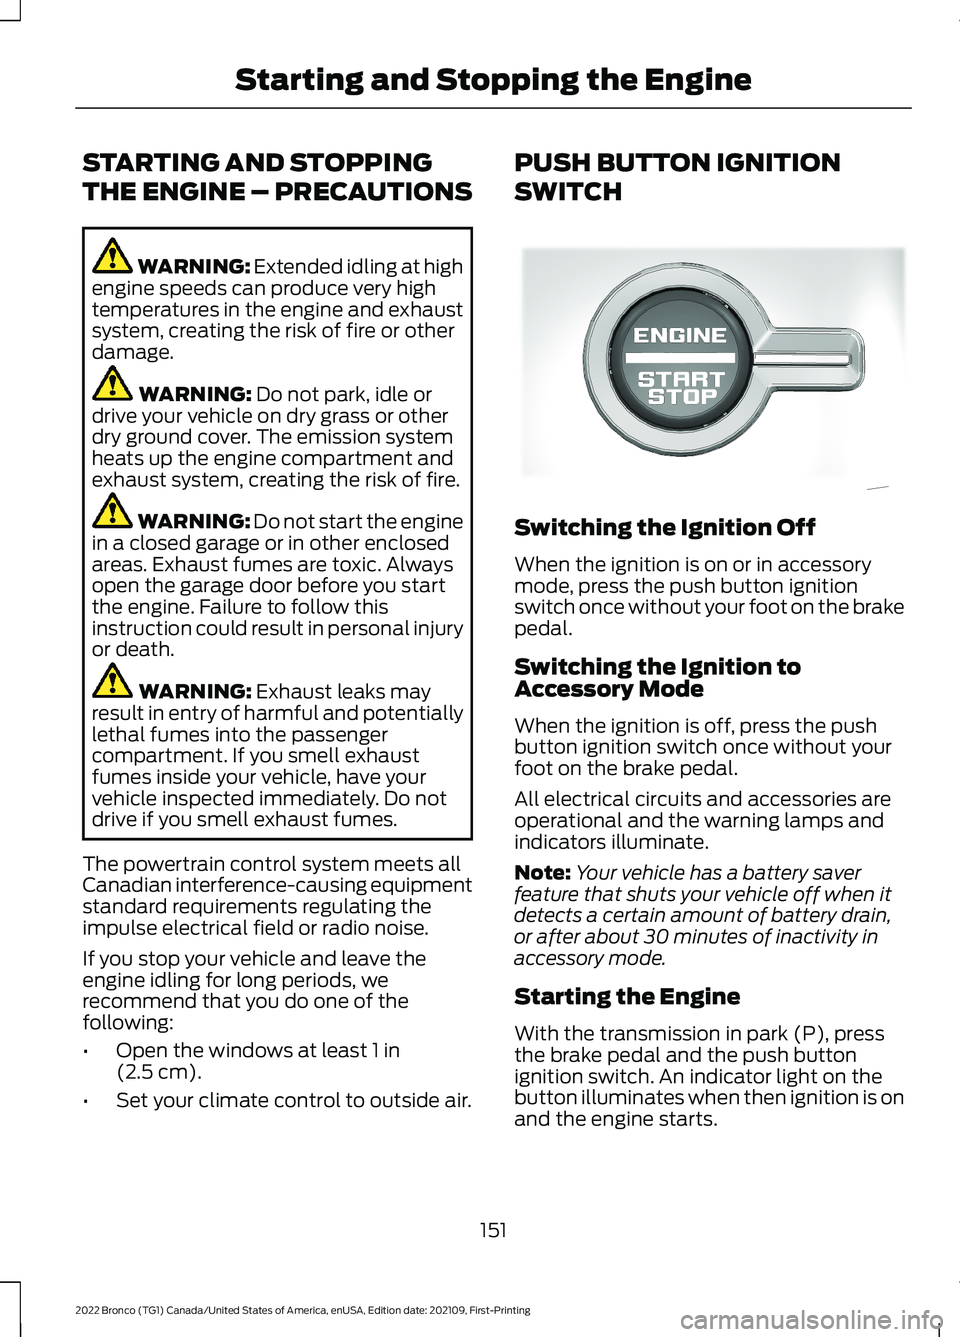
With the transmission in park (P), pressthe brake pedal and the push buttonignition switch. An indicator light on thebutton illuminates when then ignition is onand the engine starts.
151
2022 Bronco (TG1) Canada/United States of America, enUSA, Edition date: 202109, First-PrintingStarting and Stopping the EngineE340581
Page 322 of 562
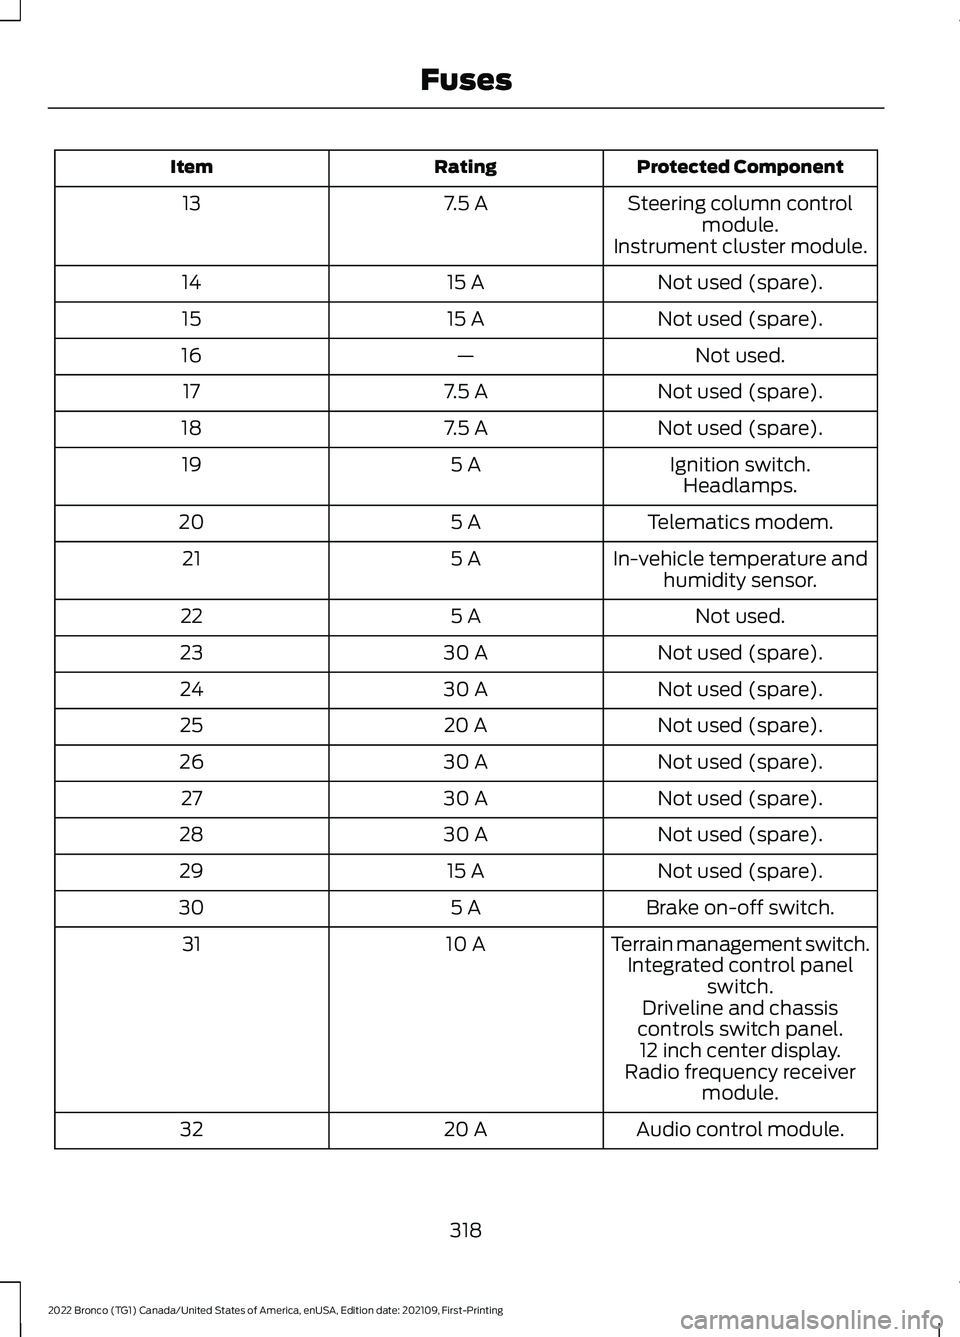
Protected ComponentRatingItem
Steering column controlmodule.7.5 A13
Instrument cluster module.
Not used (spare).15 A14
Not used (spare).15 A15
Not used.—16
Not used (spare).7.5 A17
Not used (spare).7.5 A18
Ignition switch.5 A19Headlamps.
Telematics modem.5 A20
In-vehicle temperature andhumidity sensor.5 A21
Not used.5 A22
Not used (spare).30 A23
Not used (spare).30 A24
Not used (spare).20 A25
Not used (spare).30 A26
Not used (spare).30 A27
Not used (spare).30 A28
Not used (spare).15 A29
Brake on-off switch.5 A30
Terrain management switch.10 A31Integrated control panelswitch.Driveline and chassiscontrols switch panel.12 inch center display.Radio frequency receivermodule.
Audio control module.20 A32
318
2022 Bronco (TG1) Canada/United States of America, enUSA, Edition date: 202109, First-PrintingFuses
Page 336 of 562
We recommend that you disconnect thenegative battery cable terminal from thebattery if you plan to store your vehicle foran extended period.
Note:If you only disconnect the negativebattery cable terminal, make sure it isisolated or placed away from the batteryterminal to avoid unintended connection orarcing.
To maintain correct operation of thebattery management system, if you addany electrical devices to your vehicle, donot connect the ground connection directlyto the negative battery terminal. Aconnection at the negative battery terminalcan cause inaccurate measurements ofthe battery condition and potentialincorrect system operation.
Note:If you add electrical accessories orcomponents to your vehicle this mayadversely affect battery performance,durability and the performance of otherelectrical systems on your vehicle.
If you replace the battery make sure itmatches the electrical requirements ofyour vehicle.
If you disconnect or replace the batteryand your vehicle has an automatictransmission, it must relearn its adaptivestrategy. Because of this, the transmissionmay shift firmly when first driven. This isnormal operation while the transmissionfully updates its operation to optimumshift feel.
Remove and Reinstall the Battery
To disconnect or remove the battery, dothe following:
1.Apply the parking brake and switch theignition off.
2.Switch all electrical equipment off, forexample lights and radio.
3.Wait a minimum of two minutes beforedisconnecting the battery.
Note:The engine management system hasa power hold function and remains poweredfor a period of time after you switch theignition off. This is to allow diagnostic andadaptive tables to be stored. Disconnectingthe battery without waiting can causedamage not covered by the vehicleWarranty.
4.Disconnect the negative battery cableterminal.
5.Disconnect the positive battery cableterminal.
6.Remove the battery securing clamp.
7.Remove the battery.
8.To install, reverse the removalprocedure.
Note:Before reconnecting the battery,make sure the ignition remains switched off.
Note:Make sure the battery cable terminalsare fully tightened.
Note:After cleaning or replacing thebattery, make sure you reinstall the batterycover or shield.
If you disconnect or replace the vehiclebattery, you must reset the followingfeatures:
•Window bounce-back. See Windows(page 103).
•Clock settings.
•Pre-set radio stations.
•Steering angle sensor.
Note:To calibrate the steering anglesensor, drive the vehicle above 30 mph(50 km/h) for a minimum of 1.2 mi (2 km).Make sure to drive straight ahead for aminimum of 30 seconds. Several vehiclefunctions are disabled and a warning lightcould appear until the sensor is calibrated.
332
2022 Bronco (TG1) Canada/United States of America, enUSA, Edition date: 202109, First-PrintingMaintenance
Page 359 of 562
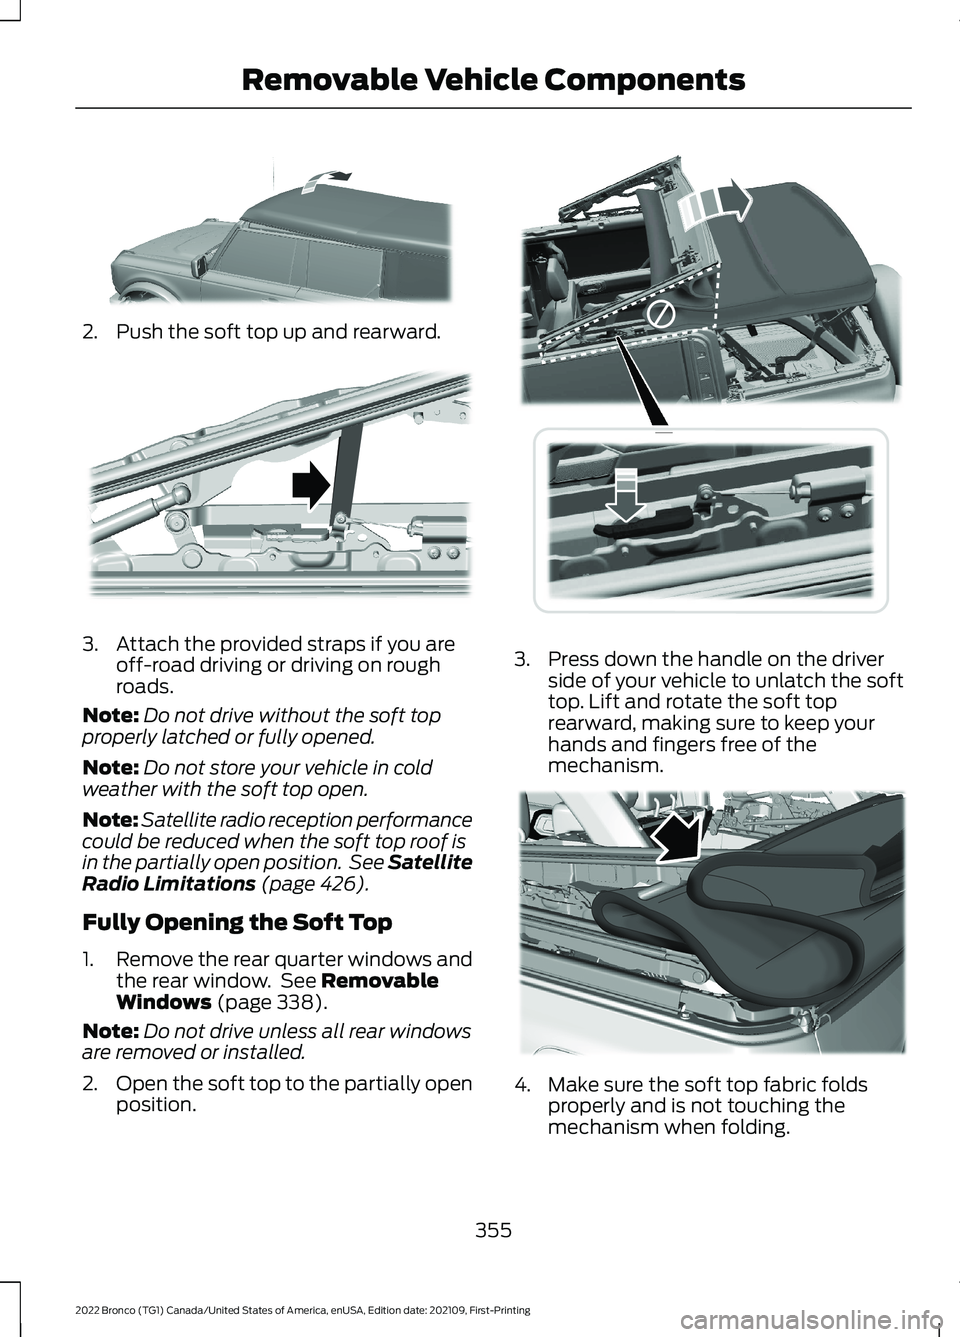
2.Push the soft top up and rearward.
3.Attach the provided straps if you areoff-road driving or driving on roughroads.
Note:Do not drive without the soft topproperly latched or fully opened.
Note:Do not store your vehicle in coldweather with the soft top open.
Note:Satellite radio reception performancecould be reduced when the soft top roof isin the partially open position. See SatelliteRadio Limitations (page 426).
Fully Opening the Soft Top
1.Remove the rear quarter windows andthe rear window. See RemovableWindows (page 338).
Note:Do not drive unless all rear windowsare removed or installed.
2.Open the soft top to the partially openposition.
3.Press down the handle on the driverside of your vehicle to unlatch the softtop. Lift and rotate the soft toprearward, making sure to keep yourhands and fingers free of themechanism.
4.Make sure the soft top fabric foldsproperly and is not touching themechanism when folding.
355
2022 Bronco (TG1) Canada/United States of America, enUSA, Edition date: 202109, First-PrintingRemovable Vehicle ComponentsE337153 E342767 E348154 E365632
Page 396 of 562
When the malfunction indicator isilluminated, the system may not be ableto detect or signal low tire pressure asintended. TPMS malfunctions may occurfor a variety of reasons, including theinstallation of replacement or alternatetires or wheels on the vehicle that preventthe TPMS from functioning properly.Always check the TPMS malfunctiontelltale after replacing one or more tires orwheels on your vehicle to ensure that thereplacement or alternate tires and wheelsallow the TPMS to continue to functionproperly.
WARNING: Changes ormodifications not expressively approvedby the party responsible for compliancecould void the user's authority to operatethe equipment. The term "IC:" before theradio certification number only signifiesthat Industry Canada technicalspecifications were met.
This device complies with Part 15 of theFCC Rules and with License exempt RSSStandards of Industry Canada. Operationis subject to the following two conditions:
1.This device may not cause harmfulinterference, and
2.This device must accept anyinterference received, includinginterference that may cause undesiredoperation.
TIRE PRESSURE MONITORING
SYSTEM PRECAUTIONS
WARNING: The tire pressuremonitoring system is not a substitute formanually checking tire pressures. Youshould periodically check tire pressuresusing a pressure gauge. Failure tocorrectly maintain tire pressures couldincrease the risk of tire failure, loss ofcontrol, vehicle rollover and personalinjury.
WARNING: Do not use the tirepressure displayed in the informationdisplay as a tire pressure gauge. Failureto follow this instruction could result inpersonal injury or death.
Note:The use of tire sealants can damagethe tire pressure monitoring system.
TIRE PRESSURE MONITORING
SYSTEM LIMITATIONS
When the outside temperature dropssignificantly, the tire pressure coulddecrease and activate the low tire pressurewarning lamp.
The warning lamp could also illuminatewhen you use a spare wheel, or tire sealantfrom the inflator kit.
Note:Regularly checking the vehicle tirepressures can reduce the possibility for thewarning lamp to illuminate due to outsideair temperature changes.
Note:After you inflate the tires to therecommended pressure it could take up totwo minutes of driving over 20 mph(32 km/h) for the warning indicator to turnoff.
392
2022 Bronco (TG1) Canada/United States of America, enUSA, Edition date: 202109, First-PrintingTire Pressure Monitoring System
Page 428 of 562
4.Press a setting.
Occupancy Mode (If Equipped)
1.Press Settings on the touchscreen.
2.Press Sound Settings.
3.Press Occupancy Mode.
4.Press a setting.
Sound Mode (If Equipped)
1.Press Settings on the touchscreen.
2.Press Sound Settings.
3.Press Sound Mode.
4.Press a setting.
SETTING THE CLOCK AND
DATE
1.Press Settings on the touchscreen.
2.Press Clock Settings.
3.Set the time.
Note:The AM and PM options are notavailable if 24-hour mode is on.
Switching Automatic TimeUpdates On and Off
1.Press Settings on the touchscreen.
2.Press Clock Settings.
3.Switch Automatic time zone updateon or off.
AM/FM RADIO
AM/FM RADIO LIMITATIONS
The further you travel from an AM or FMstation, the weaker the signal and theweaker the reception.
Hills, mountains, tall buildings, bridges,tunnels, freeway overpasses, parkinggarages, dense tree foliage andthunderstorms can interfere with thereception.
When you pass a ground-based broadcastrepeating tower, a stronger signal mayovertake a weaker one and result in theaudio system muting.
SELECTING A RADIO STATION
Manually Selecting a RadioStation
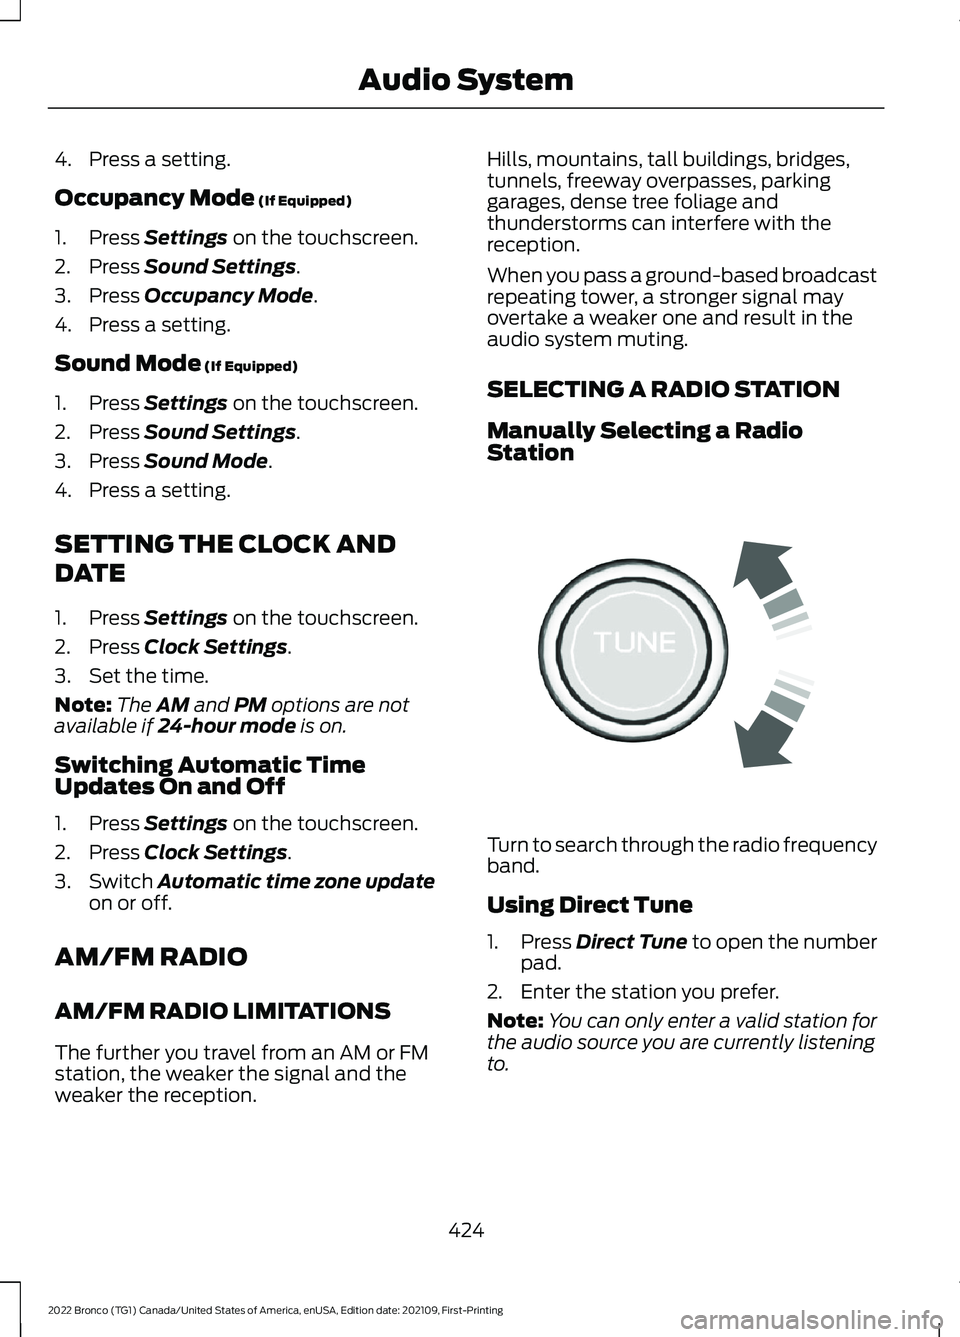
Turn to search through the radio frequencyband.
Using Direct Tune
1.Press Direct Tune to open the numberpad.
2.Enter the station you prefer.
Note:You can only enter a valid station forthe audio source you are currently listeningto.
424
2022 Bronco (TG1) Canada/United States of America, enUSA, Edition date: 202109, First-PrintingAudio SystemE270235
Page 429 of 562
Using Seek
Press either button. The systemstops at the first station it findsin that direction.
SWITCHING THE DISPLAY ON
AND OFF
Audio Unit
Press the button.
Touchscreen
To switch the display off:
1.Press Settings on the touchscreen.
2.Press Display Settings.
3.Press Display Off.
Note:The display defaults to on each timeyou switch your vehicle on.
To switch the display on, press anywhereon the touchscreen.
DIGITAL RADIO (IF EQUIPPED)
WHAT IS DIGITAL RADIO
HD Radio™ technology is the digitalevolution of analog AM/FM radio.
For additional information, visitwww.HDRadio.com.
HD Radio Technology is manufacturedunder license from iBiquity DigitalCorporation and foreign patents. HD Radioand the HD and HD Radio logos areproprietary trademarks of DTS. The vehiclemanufacturer and DTS are not responsiblefor the content sent using HD Radiotechnology. Content may be changed,added or deleted at any time at the stationowner's discretion.
HOW DOES DIGITAL RADIO WORK
Your system has a special receiver thatallows it to receive digital broadcasts inaddition to analog broadcasts.
HD1 signifies the main programming statusand is available in both analog and digitalbroadcasts. Other multicast stations areonly available digitally and could containnew or different content.
Note:When the system first receives anHD1 station, it plays the station in the analogversion until it verifies the station is an HDRadio station. Then it shifts to the digitalversion.
Note:There is an audio mute delay whenswitching to an HD2 or HD3 station becausethe system has to reacquire and decode thedigital signal.
DIGITAL RADIO LIMITATIONS
If you are outside the reception area, thesystem could not work.
If you are on the fringe of the receptionarea, the station could mute due to weaksignal strength.
Note:If you are listening to HD1, the systemchanges back to the analog broadcast untilthe digital broadcast is available again. Ifyou are listening to any other multicastchannels, the station mutes and staysmuted unless it is able to connect to thedigital signal again.
425
2022 Bronco (TG1) Canada/United States of America, enUSA, Edition date: 202109, First-PrintingAudio System E272035
Page 430 of 562
Depending on the station quality, you couldhear a slight sound change when thestation changes between analog anddigital audio.
You cannot access a saved HD station ifyour vehicle is outside the station’sreception area.
SWITCHING DIGITAL RADIORECEPTION ON AND OFF
1.Press Settings on the touchscreen.
2.Press Radio Settings.
3.Switch AM HD Radio or FM HD Radioon or off.
DIGITAL RADIO INDICATORS
HD Radio Indicator
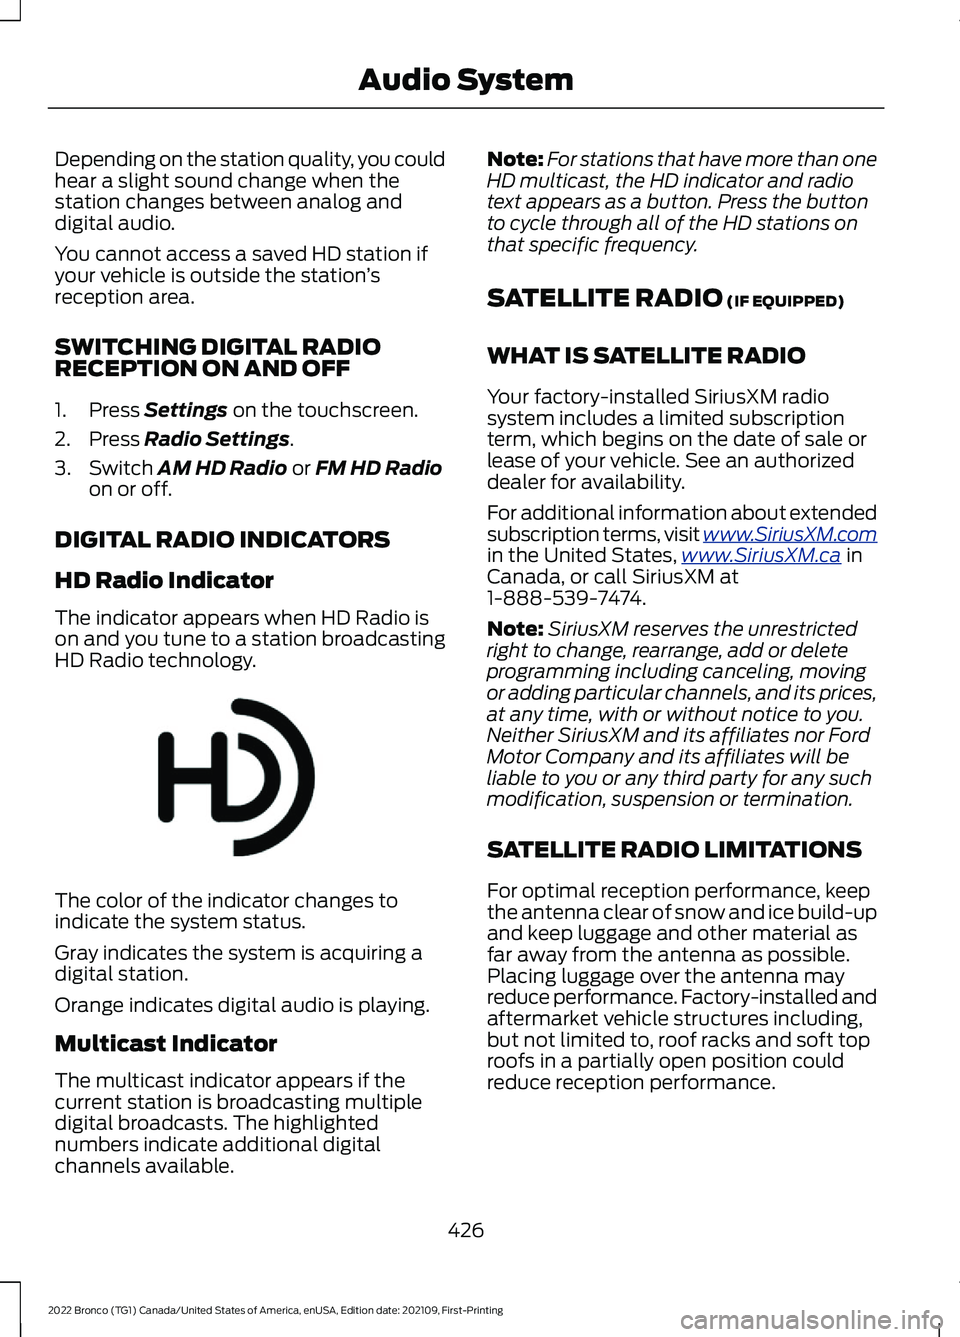
The indicator appears when HD Radio ison and you tune to a station broadcastingHD Radio technology.
The color of the indicator changes toindicate the system status.
Gray indicates the system is acquiring adigital station.
Orange indicates digital audio is playing.
Multicast Indicator
The multicast indicator appears if thecurrent station is broadcasting multipledigital broadcasts. The highlightednumbers indicate additional digitalchannels available.
Note:For stations that have more than oneHD multicast, the HD indicator and radiotext appears as a button. Press the buttonto cycle through all of the HD stations onthat specific frequency.
SATELLITE RADIO (IF EQUIPPED)
WHAT IS SATELLITE RADIO
Your factory-installed SiriusXM radiosystem includes a limited subscriptionterm, which begins on the date of sale orlease of your vehicle. See an authorizeddealer for availability.
For additional information about extendedsubscription terms, visit www.SiriusXM.comin the United States,www.SiriusXM.ca inCanada, or call SiriusXM at1-888-539-7474.
Note:SiriusXM reserves the unrestrictedright to change, rearrange, add or deleteprogramming including canceling, movingor adding particular channels, and its prices,at any time, with or without notice to you.Neither SiriusXM and its affiliates nor FordMotor Company and its affiliates will beliable to you or any third party for any suchmodification, suspension or termination.
SATELLITE RADIO LIMITATIONS
For optimal reception performance, keepthe antenna clear of snow and ice build-upand keep luggage and other material asfar away from the antenna as possible.Placing luggage over the antenna mayreduce performance. Factory-installed andaftermarket vehicle structures including,but not limited to, roof racks and soft toproofs in a partially open position couldreduce reception performance.
426
2022 Bronco (TG1) Canada/United States of America, enUSA, Edition date: 202109, First-PrintingAudio SystemE142616
Page 431 of 562
Hills, mountains, tall buildings, bridges,tunnels, freeway overpasses, parkinggarages, dense tree foliage andthunderstorms can interfere with yourreception.
When you pass a ground-basedbroadcast-repeating tower, a strongersignal may overtake a weaker one andcould result in the audio system muting.Your display could show an error messageto indicate the interference.
LOCATING THE SATELLITE RADIOIDENTIFICATION NUMBER
1.Select SiriusXM as the audio source.
2.Tune to channel 0.
SELECTING A CHANNEL
Manually Selecting a Channel
Press the button to find theprevious or next available radiochannel.
Linear Tuner
The linear tuner is displayed whenmanually selecting a channel. You canswipe left or right on the linear tunercarousel to navigate through the channellist. Tap on a channel title to listen to it.
Using Direct Tune
1.Press the channel up or down buttonto open the linear tuner screen.
2.Press Direct Tune to open the numberpad.
3.Enter the channel you prefer.
Using Browse
1.Press Browse.
2.Select a channel.
SATELLITE RADIO SETTINGS
Subscription
Your subscription status is displayed. Youcan subscribe or manage your subscriptiondirectly from the touchscreen.
Listener Add/Switch
You can create up to five listener profilesper SiriusXM account. Each listener profilecan be personalized with a name andprofile image.
Note:Requires a trial or active subscriptionto use.
Note:A default profile is available when nolistener profiles are created.
SiriusXM Favorites
SiriusXM Favorites are shown for the activelistener profile. While you are listening toSiriusXM, you can save favorites by:
•Tapping the currently tuned channelor show logo on the SiriusXM audioscreen. A favorite icon appears next tothe logo when it is saved as a favorite.
•Tuning to a channel or show you wantto save as a favorite. Navigate to theSiriusXM Favorites screen and pressthe Add Current button. The currentlytuned channel or show is saved as afavorite.
•Saving a radio preset. This saves thecurrently tuned SiriusXM channel orshow as a favorite.
Note:Requires a trial or active subscriptionto use.
427
2022 Bronco (TG1) Canada/United States of America, enUSA, Edition date: 202109, First-PrintingAudio SystemE328569 E328570