engine FORD C MAX 2011 2.G Owners Manual
[x] Cancel search | Manufacturer: FORD, Model Year: 2011, Model line: C MAX, Model: FORD C MAX 2011 2.GPages: 296, PDF Size: 7.87 MB
Page 171 of 296
Downloaded from www.Manualslib.com manuals search engine Swivelling the tow ball in
WARNINGS
Keep your hands away from the
handwheel as it rotates during the
locking process.
You will hear a warning tone when
the tow ball arm is not in one of the
locked positions. If you do not hear
the tone when moving the tow ball arm,
do not use the tow bar and have it checked
by a properly trained technician. CAUTION
Before retracting the ball neck into its
stowage position always unhitch the
trailer or dismantle load carriers and
their attachments. Dismantle attachments
for tracking stabilisation. Remove the plug
for the trailer power supply and the
adapter from the socket. Failure to do so
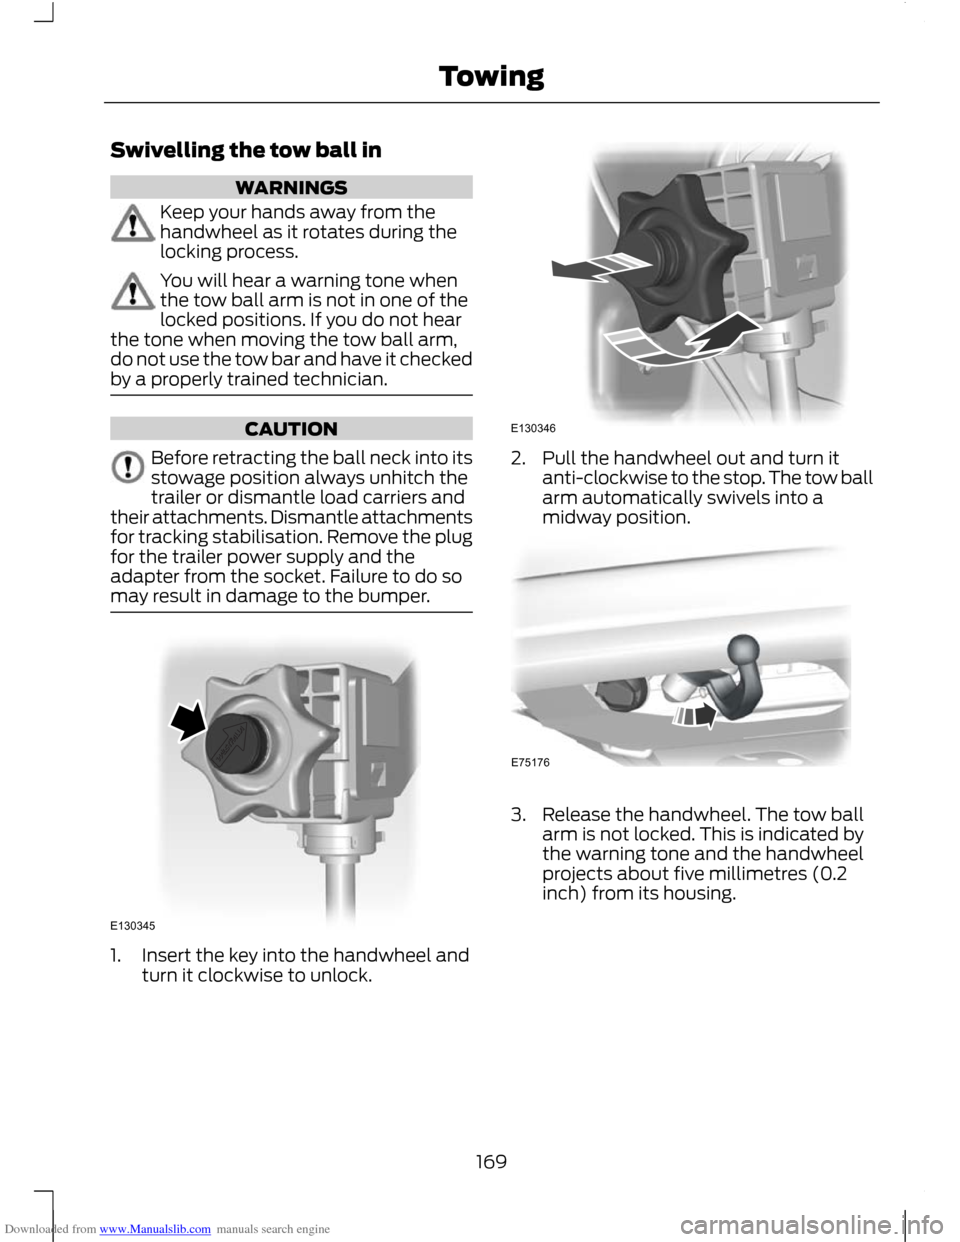
may result in damage to the bumper. 1. Insert the key into the handwheel and
turn it clockwise to unlock. 2. Pull the handwheel out and turn it
anti-clockwise to the stop. The tow ball
arm automatically swivels into a
midway position. 3. Release the handwheel. The tow ball
arm is not locked. This is indicated by
the warning tone and the handwheel
projects about five millimetres (0.2
inch) from its housing.
169
TowingE130345 E130346 E75176
Page 172 of 296
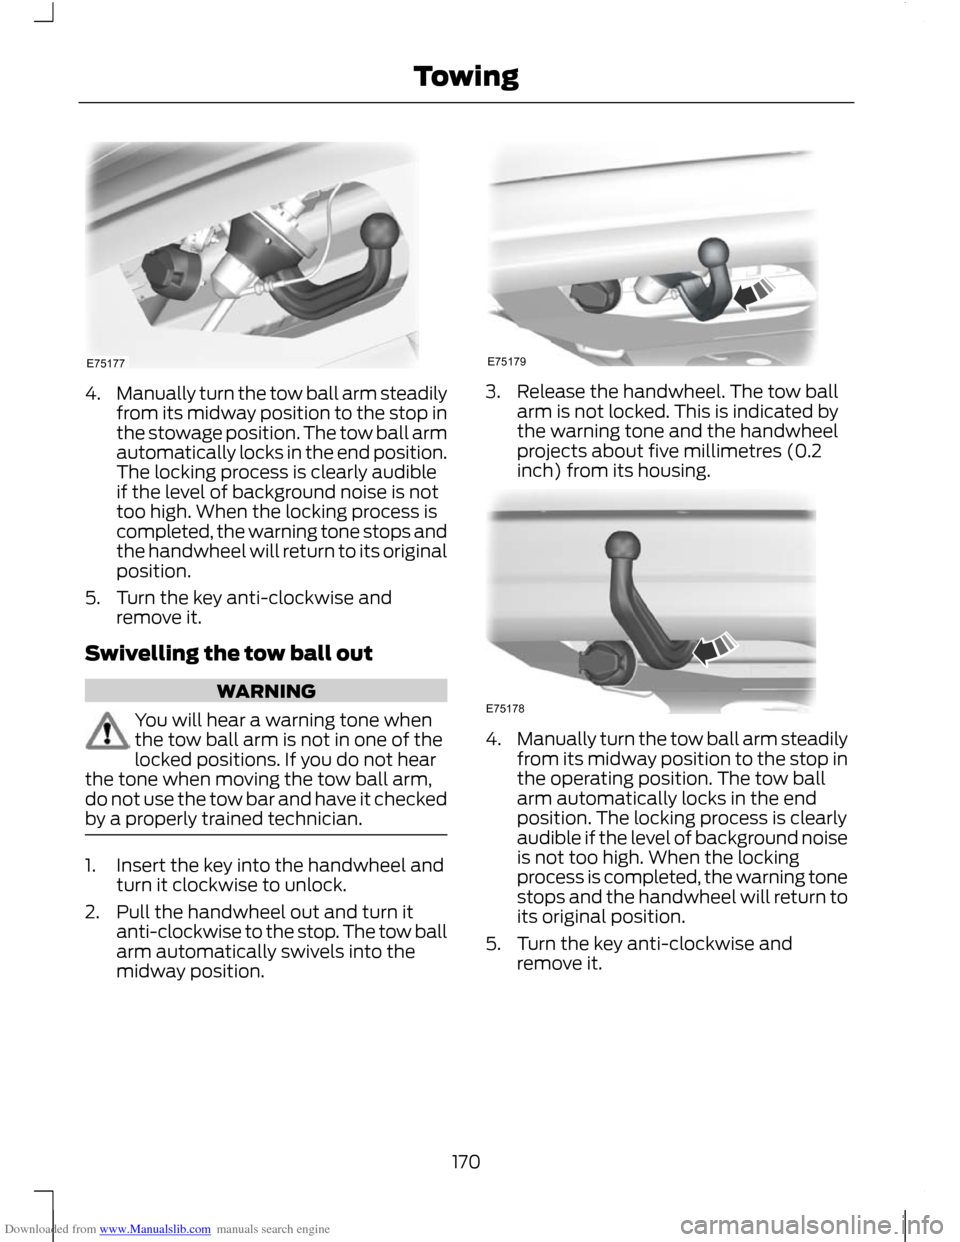
Downloaded from www.Manualslib.com manuals search engine 4.
Manually turn the tow ball arm steadily
from its midway position to the stop in
the stowage position. The tow ball arm
automatically locks in the end position.
The locking process is clearly audible
if the level of background noise is not
too high. When the locking process is
completed, the warning tone stops and
the handwheel will return to its original
position.
5. Turn the key anti-clockwise and remove it.
Swivelling the tow ball out WARNING
You will hear a warning tone when
the tow ball arm is not in one of the
locked positions. If you do not hear
the tone when moving the tow ball arm,
do not use the tow bar and have it checked
by a properly trained technician. 1. Insert the key into the handwheel and
turn it clockwise to unlock.
2. Pull the handwheel out and turn it anti-clockwise to the stop. The tow ball
arm automatically swivels into the
midway position. 3. Release the handwheel. The tow ball
arm is not locked. This is indicated by
the warning tone and the handwheel
projects about five millimetres (0.2
inch) from its housing. 4.
Manually turn the tow ball arm steadily
from its midway position to the stop in
the operating position. The tow ball
arm automatically locks in the end
position. The locking process is clearly
audible if the level of background noise
is not too high. When the locking
process is completed, the warning tone
stops and the handwheel will return to
its original position.
5. Turn the key anti-clockwise and remove it.
170
TowingE75177 E75179 E75178
Page 173 of 296
Downloaded from www.Manualslib.com manuals search engine Driving with a trailer
WARNING
If any of the conditions below cannot
be met, do not use the tow bar and
have it checked by a properly trained
technician. Before starting your journey, make sure
that the tow ball arm is properly locked.
Check that:
•
there is no warning tone when the
locking procedure has been completed
• the handwheel is in its housing and that
there is no gap
• you have locked the handwheel
(anti-clockwise) and removed the key
• the tow ball arm is locked. It must not
move when jerked.
Maintenance CAUTIONS
The towing hitch and control unit are
maintenance-free. Do not grease or
oil them.
Only the manufacturer should carry
out repairs or dismantle the towing
hitch.
If you use a high pressure spray to
wash your vehicle, do not direct the
spray onto the swivel joint of the tow
ball arm. 171
Towing
Page 174 of 296
Downloaded from www.Manualslib.com manuals search engine RUNNING-IN
Tyres
WARNING
New tyres need to be run-in for
approximately 500 kilometres (300
miles). During this time, you may
experience different driving characteristics. Brakes and clutch
WARNING
Avoid heavy use of the brakes and
clutch if possible for the first 150
kilometres (100 miles) in town and
for the first 1500 kilometres (1000 miles)
on motorways. Engine
CAUTION
Avoid driving too fast during the first
1500 kilometres (1000 miles). Vary
your speed frequently and change up
through the gears early. Do not labour the
engine. COLD WEATHER
PRECAUTIONS
The functional operation of some
components and systems can be affected
at temperatures below -30°C (-22°F).
DRIVING THROUGH WATER
Driving through water
CAUTIONS
Drive through water in an emergency
only, and not as part of normal driving.
Engine damage can occur if water
enters the air filter. In an emergency, the vehicle can be driven
through water to a maximum depth of 200
millimetres (8 inches) and at a maximum
speed of 10 km/h (6 mph). Extra caution
should be exercised when driving through
flowing water.
When driving in water, maintain a low
speed and do not stop the vehicle. After
driving through water, and as soon as it is
safe to do so:
•
Depress the brake pedal lightly and
check that full brake function is
achieved.
• Check that the horn works.
• Check that the vehicle's lights are fully
operational.
• Check the power assistance
of the steering system.
172
Driving Hints
Page 175 of 296
Downloaded from www.Manualslib.com manuals search engine FIRST AID KIT
Space is provided in the under floor storage
compartment to store a first aid kit. See
Rear Under Floor Storage (page 163).
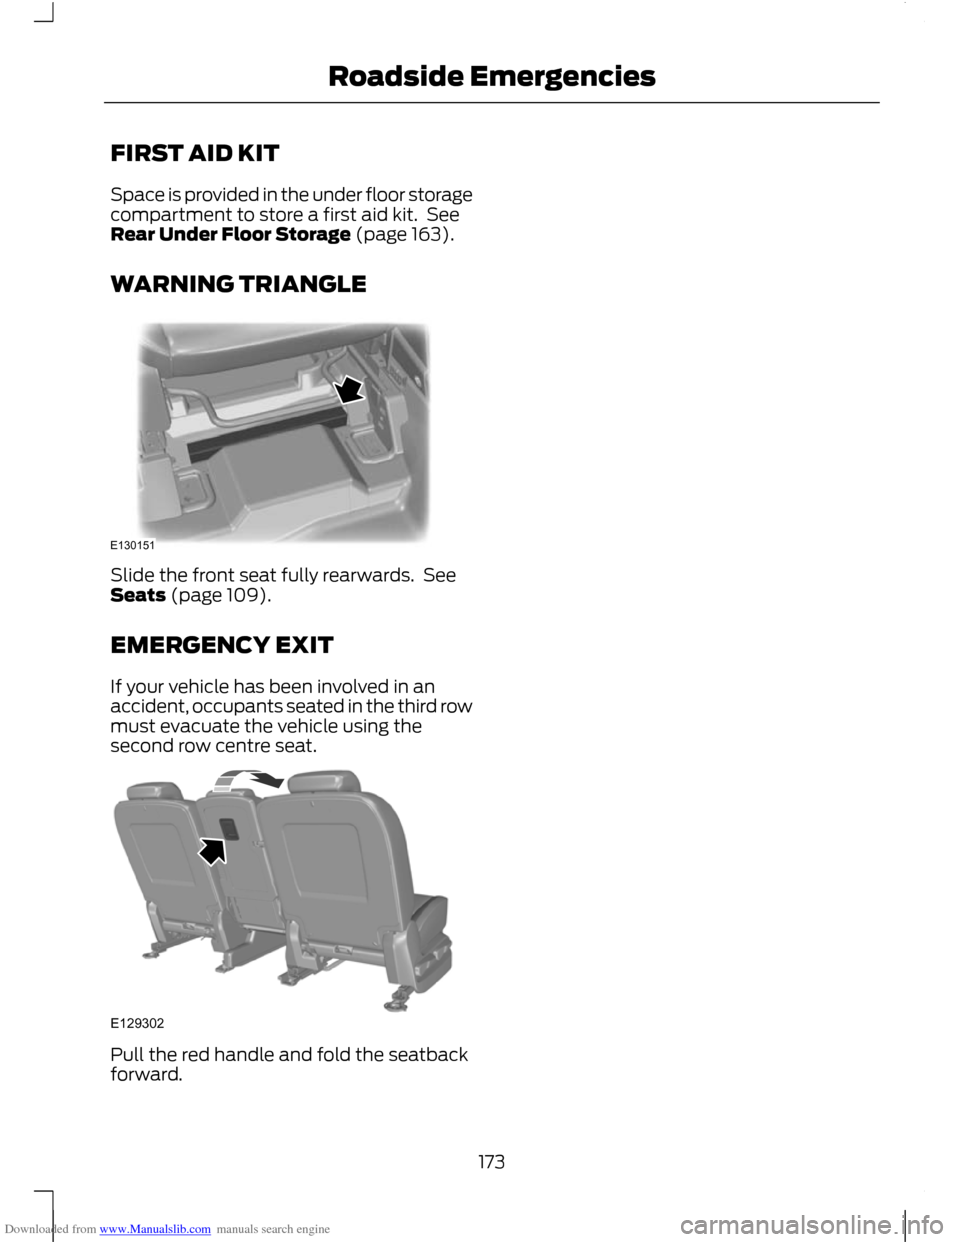
WARNING TRIANGLE
Slide the front seat fully rearwards. See
Seats (page 109).
EMERGENCY EXIT
If your vehicle has been involved in an
accident, occupants seated in the third row
must evacuate the vehicle using the
second row centre seat.
Pull the red handle and fold the seatback
forward.
173
Roadside EmergenciesE130151 E129302
Page 176 of 296
Downloaded from www.Manualslib.com manuals search engine FUSE BOX LOCATIONS
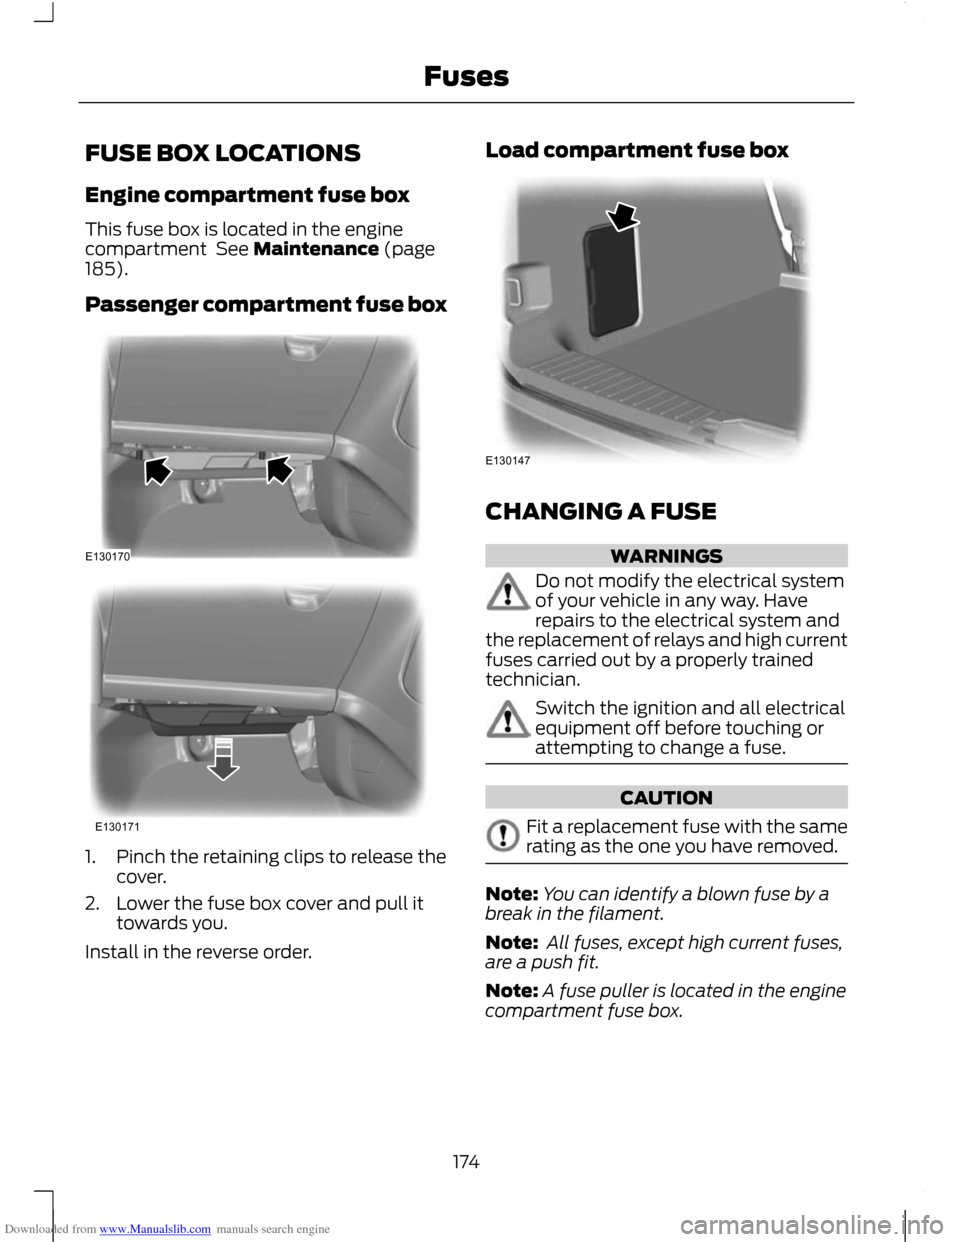
Engine compartment fuse box
This fuse box is located in the engine
compartment See Maintenance (page
185).
Passenger compartment fuse box
1. Pinch the retaining clips to release the
cover.
2. Lower the fuse box cover and pull it towards you.
Install in the reverse order. Load compartment fuse box
CHANGING A FUSE
WARNINGS
Do not modify the electrical system
of your vehicle in any way. Have
repairs to the electrical system and
the replacement of relays and high current
fuses carried out by a properly trained
technician. Switch the ignition and all electrical
equipment off before touching or
attempting to change a fuse.
CAUTION
Fit a replacement fuse with the same
rating as the one you have removed.
Note:
You can identify a blown fuse by a
break in the filament.
Note: All fuses, except high current fuses,
are a push fit.
Note: A fuse puller is located in the engine
compartment fuse box.
174
FusesE130170 E130171 E130147
Page 177 of 296
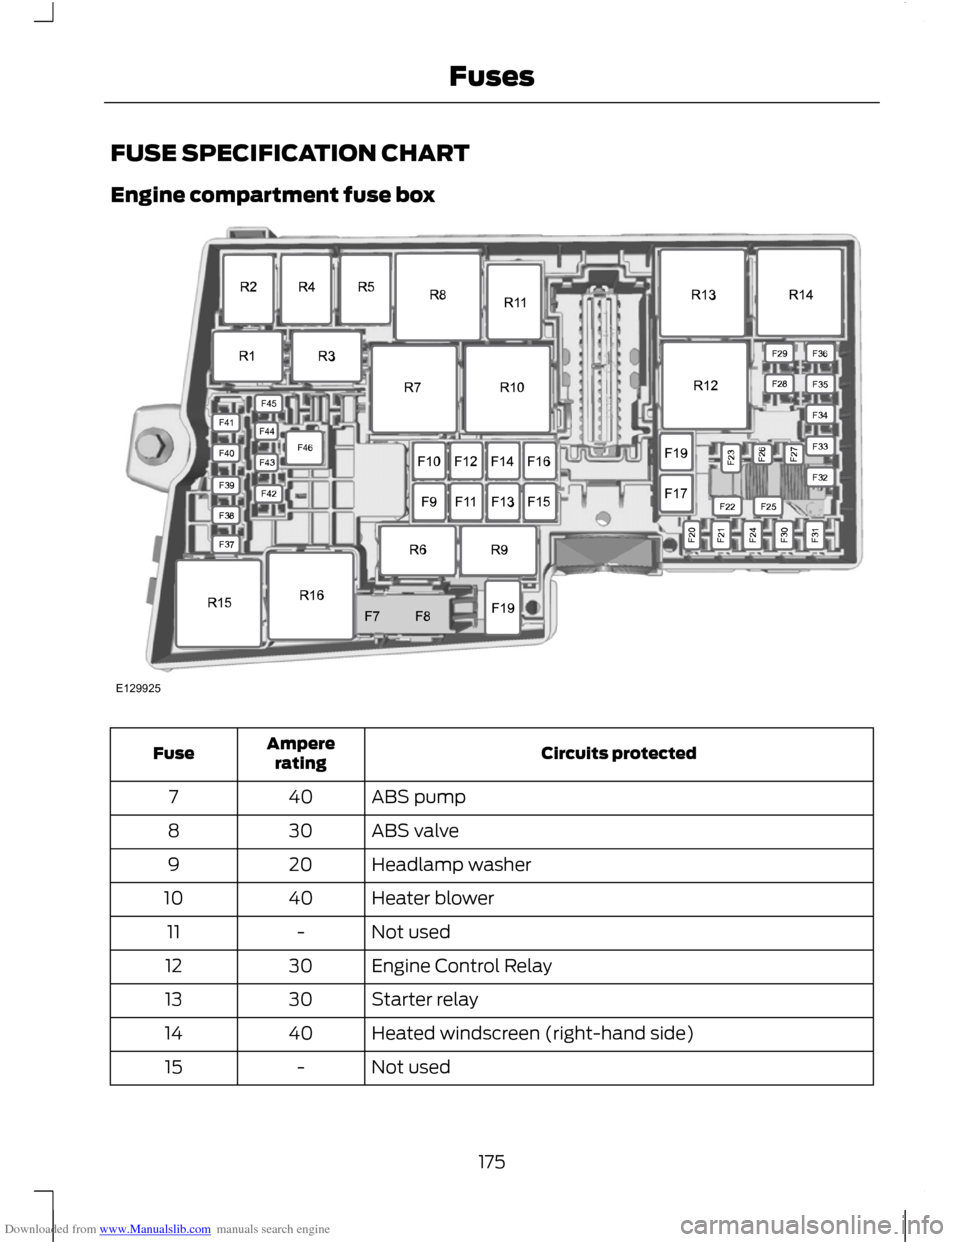
Downloaded from www.Manualslib.com manuals search engine FUSE SPECIFICATION CHART
Engine compartment fuse box
Circuits protected
Ampere
rating
Fuse
ABS pump
40
7
ABS valve
30
8
Headlamp washer
20
9
Heater blower
40
10
Not used
-
11
Engine Control Relay
30
12
Starter relay
30
13
Heated windscreen (right-hand side)
40
14
Not used
-
15
175
FusesE129925
Page 178 of 296
Downloaded from www.Manualslib.com manuals search engine Circuits protected
Ampere
rating
Fuse
Heated windscreen (left-hand side)
40
16
Fuel fired heater
20
17
Windscreen wipers
20
18
ABS ESP module
5
19
Horn
15
20
Stop lamp switch
5
21
Battery monitoring system
15
22
Relay coils, light switch module
5
23
Rear power outlet
20
24
Electric exterior mirrors
10
25
Powertrain control module (PCM)
15
26
Air conditioning clutch
15
27
Not used
-
28
Heated rear window
25
29
Engine control module
5
30
Not used
-
31
EGR Valve, swirl control valves, HEGO sensor (engine
management)
10
32
Ignition Coils
10
33
Injectors
10
34
Diesel filter heater, active grille shutters
15
35
Engine control module
10
36
ABS
5
37
Engine control module, transmission control module
15
38
Headlamp control module
5
39
Electric power assisted steering
5
40
Body Control Module
20
41
176
Fuses
Page 179 of 296
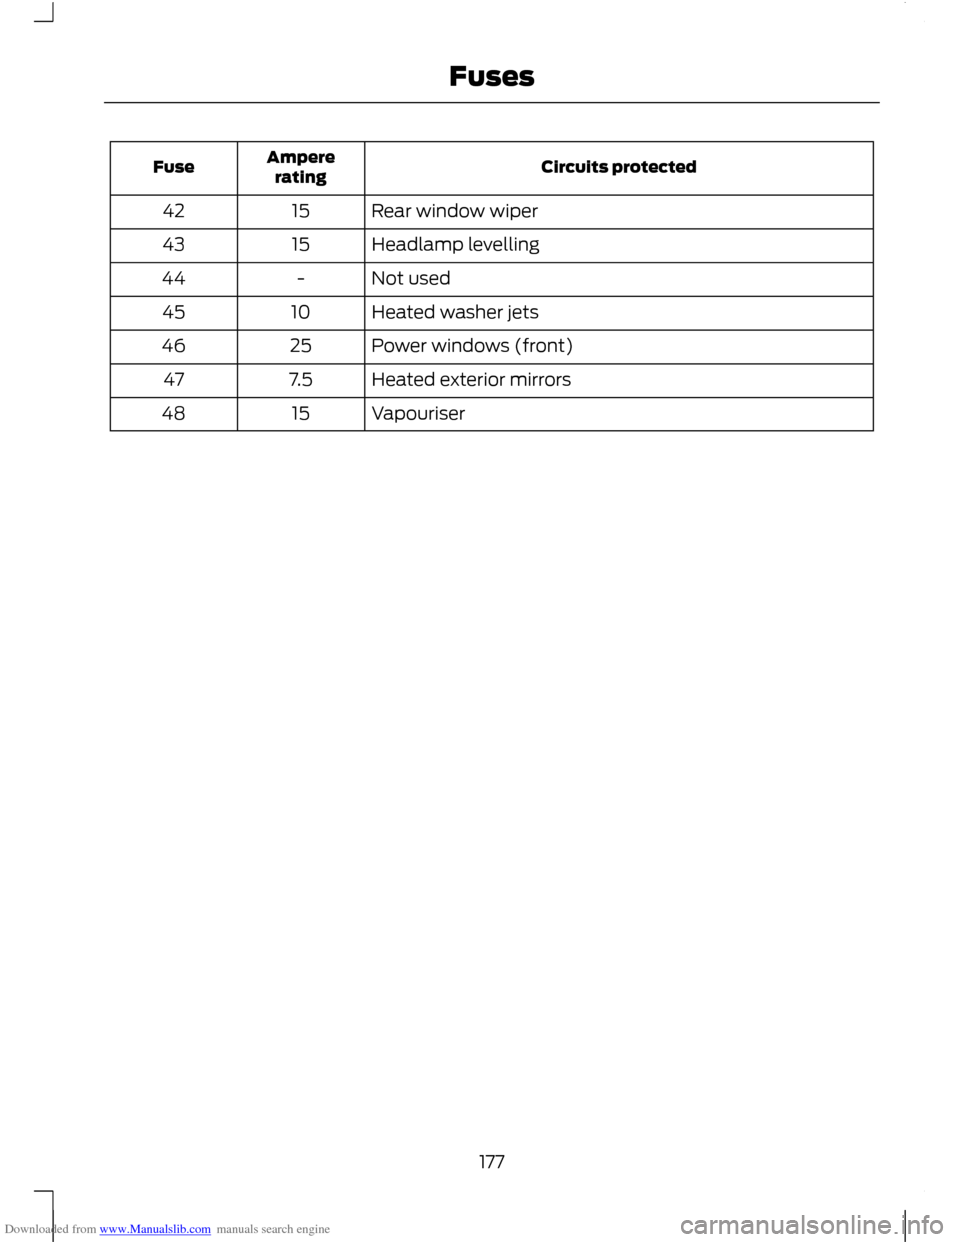
Downloaded from www.Manualslib.com manuals search engine Circuits protected
Ampere
rating
Fuse
Rear window wiper
15
42
Headlamp levelling
15
43
Not used
-
44
Heated washer jets
10
45
Power windows (front)
25
46
Heated exterior mirrors
7.5
47
Vapouriser
15
48
177
Fuses
Page 180 of 296
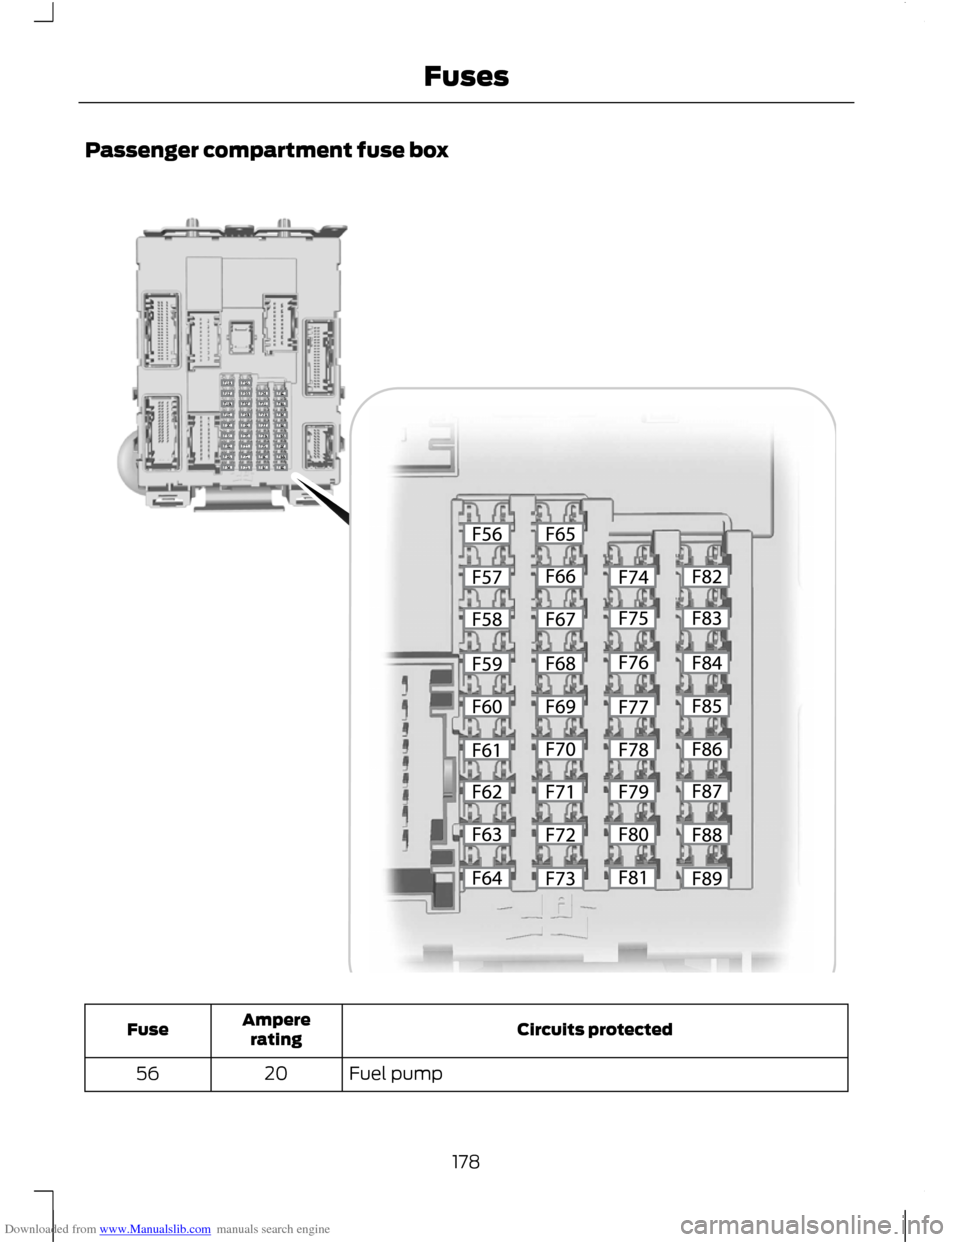
Downloaded from www.Manualslib.com manuals search engine Passenger compartment fuse box
Circuits protected
Ampere
rating
Fuse
Fuel pump
20
56
178
FusesE129926