display FORD C MAX 2011 2.G User Guide
[x] Cancel search | Manufacturer: FORD, Model Year: 2011, Model line: C MAX, Model: FORD C MAX 2011 2.GPages: 296, PDF Size: 7.87 MB
Page 60 of 296
Downloaded from www.Manualslib.com manuals search engine Home safe lighting
Switch the ignition off and pull the
direction indicator lever towards the
steering wheel to switch the headlamps
on. You will hear a short tone. The
headlamps will go off automatically after
three minutes with any door open, or 30
seconds after the last door has been
closed.
The home safe lights can be cancelled by
either pulling the direction indicator lever
towards the steering wheel again or by
turning the ignition switch ON.
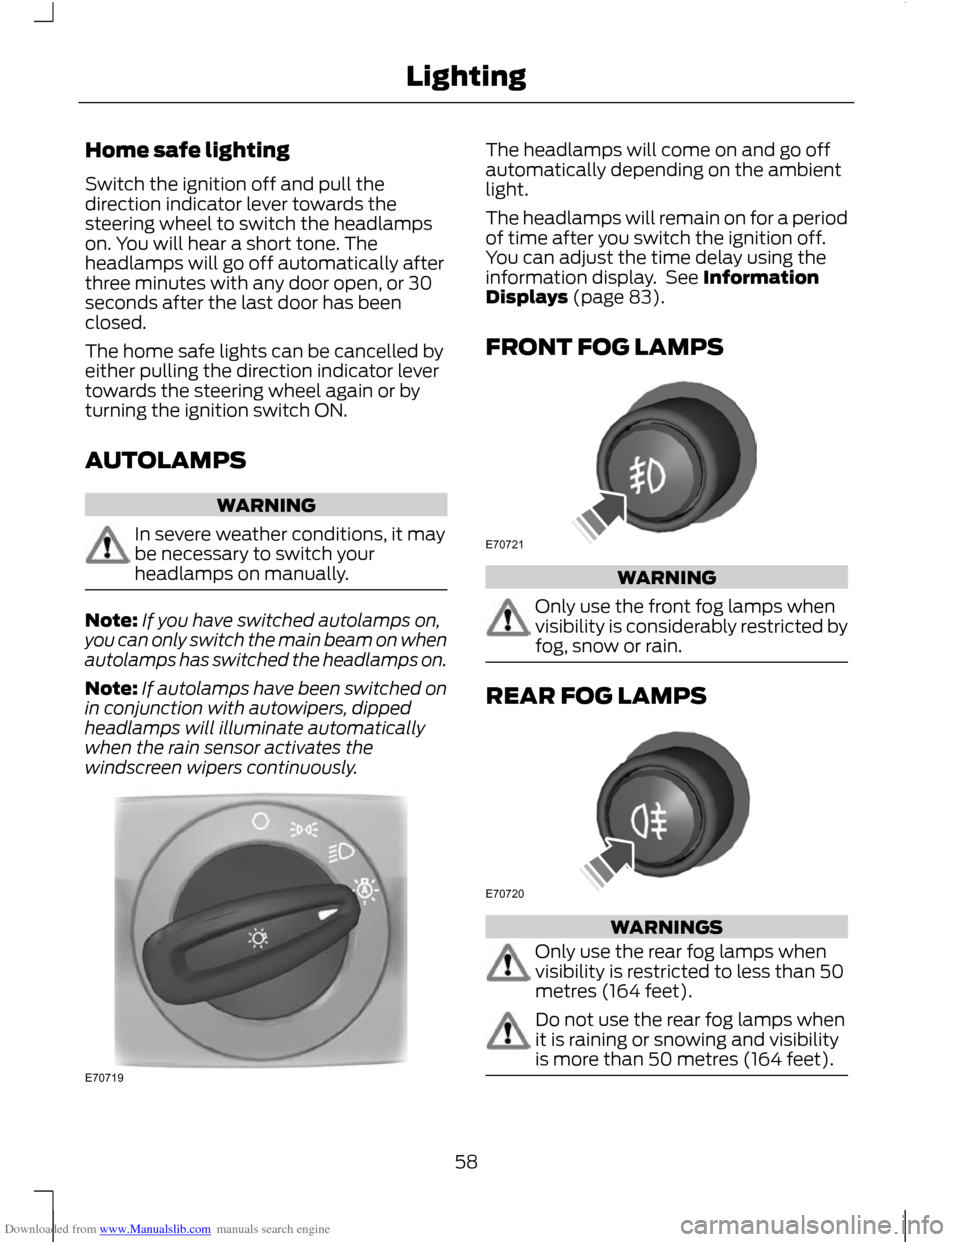
AUTOLAMPS
WARNING
In severe weather conditions, it may
be necessary to switch your
headlamps on manually.
Note:
If you have switched autolamps on,
you can only switch the main beam on when
autolamps has switched the headlamps on.
Note: If autolamps have been switched on
in conjunction with autowipers, dipped
headlamps will illuminate automatically
when the rain sensor activates the
windscreen wipers continuously. The headlamps will come on and go off
automatically depending on the ambient
light.
The headlamps will remain on for a period
of time after you switch the ignition off.
You can adjust the time delay using the
information display. See Information
Displays (page 83).
FRONT FOG LAMPS
WARNING
Only use the front fog lamps when
visibility is considerably restricted by
fog, snow or rain.
REAR FOG LAMPS
WARNINGS
Only use the rear fog lamps when
visibility is restricted to less than 50
metres (164 feet).
Do not use the rear fog lamps when
it is raining or snowing and visibility
is more than 50 metres (164 feet).
58
LightingE70719 E70721 E70720
Page 64 of 296
Downloaded from www.Manualslib.com manuals search engine Ambient lighting illuminates several areas,
for example footwells, cup holders and
doors with a single colour and can be
switched on and off using the information
display menu. See General Information
(page 83).
Use the instrument lighting dimmer
switches to adjust to the desired
brightness. See Instrument Lighting
Dimmer (page 122).
REMOVING A HEADLAMP
WARNING
Have Xenon bulbs changed by a
trained technician. There is a risk of
electric shock.
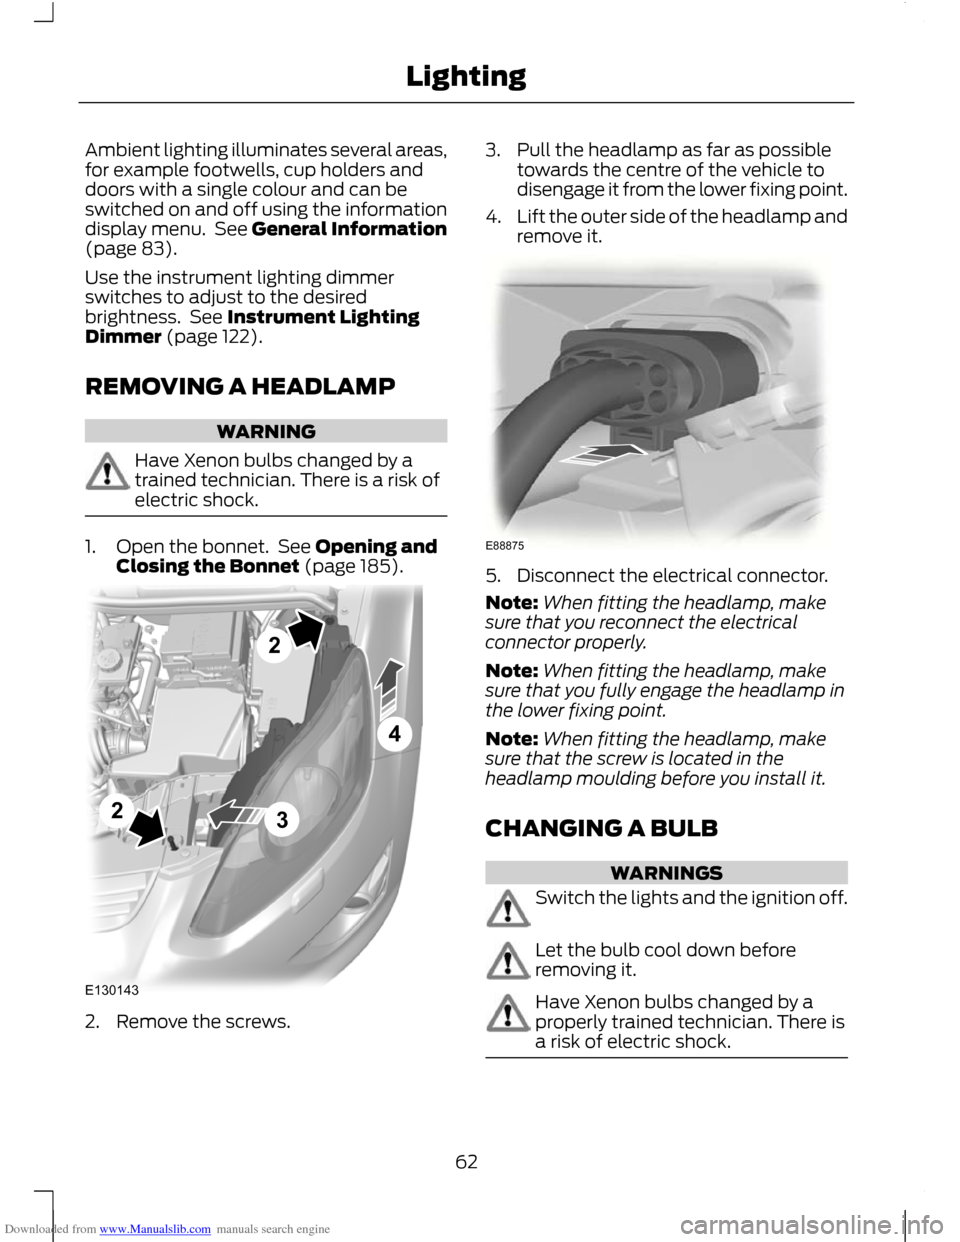
1. Open the bonnet. See Opening and
Closing the Bonnet (page 185). 2. Remove the screws. 3. Pull the headlamp as far as possible
towards the centre of the vehicle to
disengage it from the lower fixing point.
4. Lift the outer side of the headlamp and
remove it. 5. Disconnect the electrical connector.
Note:
When fitting the headlamp, make
sure that you reconnect the electrical
connector properly.
Note: When fitting the headlamp, make
sure that you fully engage the headlamp in
the lower fixing point.
Note: When fitting the headlamp, make
sure that the screw is located in the
headlamp moulding before you install it.
CHANGING A BULB WARNINGS
Switch the lights and the ignition off.
Let the bulb cool down before
removing it.
Have Xenon bulbs changed by a
properly trained technician. There is
a risk of electric shock.
62
LightingE1301432243 E88875
Page 76 of 296
Downloaded from www.Manualslib.com manuals search engine If you press the switch again while the
mirrors are moving, they will stop and
reverse the direction of movement.
Note:
When the mirrors are operated often
during a short period of time, the system
may become inoperable for a period of time
to prevent damage due to overheating.
AUTO-DIMMING MIRROR The auto-dimming mirror will adjust
automatically when hit by glaring light
from behind. It will not work when you have
selected reverse gear.
BLIND SPOT MONITOR
Blind spot information system
(BLIS)
WARNINGS
The system is not designed to
prevent contact with other vehicles
or objects. The system only provides
a warning to assist you in detecting
vehicles in the blind spot zones. The
system will not detect obstacles,
pedestrians, motorcyclists or cyclists. Do not use the system as a
replacement for using the side and
rear view mirrors, and looking over
your shoulder before changing lanes. The
system is not a replacement for careful
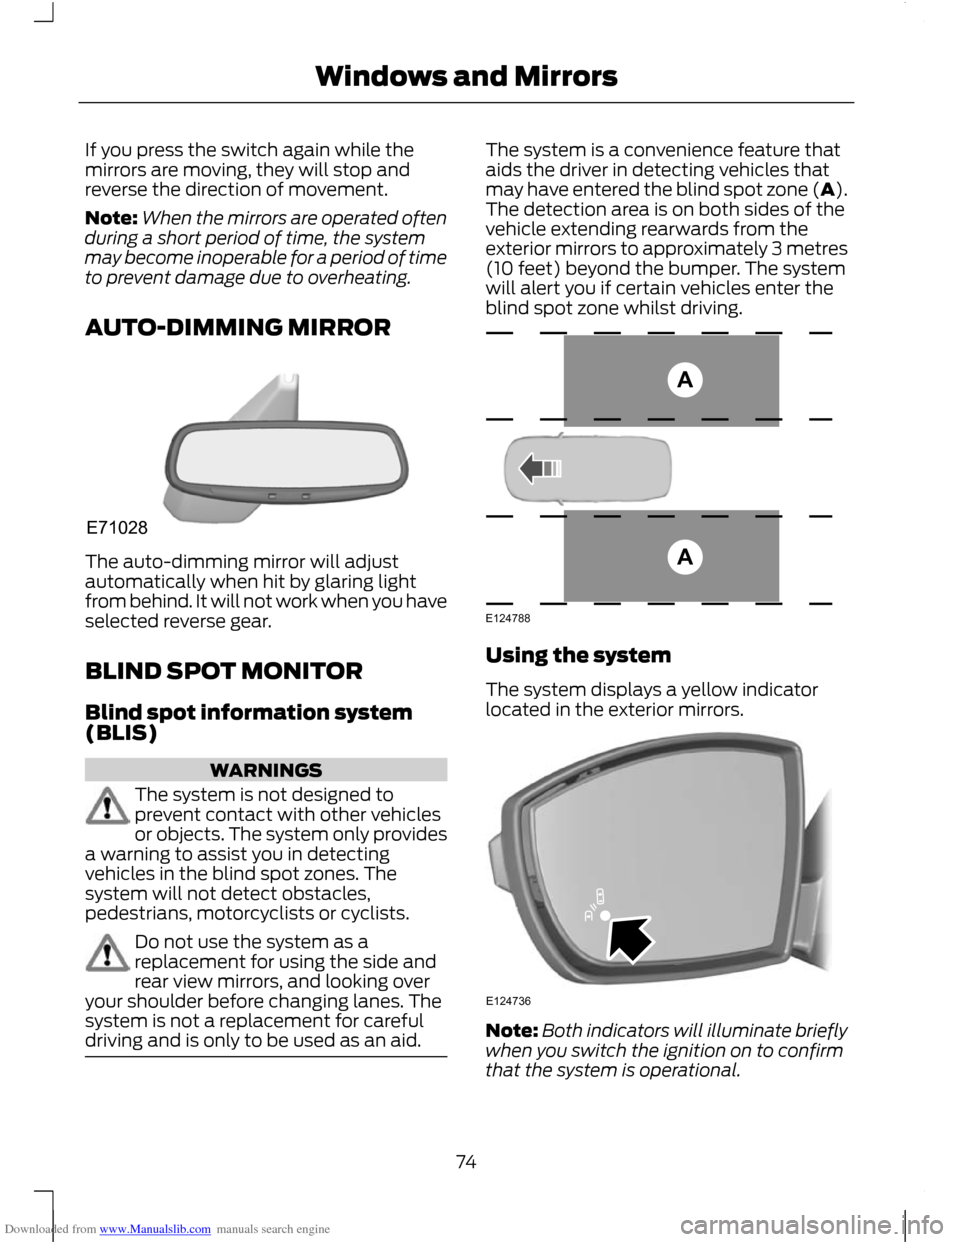
driving and is only to be used as an aid. The system is a convenience feature that
aids the driver in detecting vehicles that
may have entered the blind spot zone (A).
The detection area is on both sides of the
vehicle extending rearwards from the
exterior mirrors to approximately 3 metres
(10 feet) beyond the bumper. The system
will alert you if certain vehicles enter the
blind spot zone whilst driving.
Using the system
The system displays a yellow indicator
located in the exterior mirrors.
Note:
Both indicators will illuminate briefly
when you switch the ignition on to confirm
that the system is operational.
74
Windows and MirrorsE71028 AAE124788 E124736
Page 77 of 296
Downloaded from www.Manualslib.com manuals search engine Note:
On vehicles with automatic
transmission, the system is active only in S,
D and N.
The system is only active when you exceed
10 km/h (6 mph). The system is
temporarily deactivated when you select
reverse gear.
System detection and alerts
The system will trigger the alert for vehicles
that enter the blind spot zone from the rear
or merge from the side. Vehicles that you
pass, or vehicles that enter the blind spot
zone from the front, will only trigger the
alert after the vehicle has remained in the
blind spot zone for a short period of time.
Note: Vehicles that pass through the blind
zone quickly (typically less than 2 seconds)
will not trigger the alert.
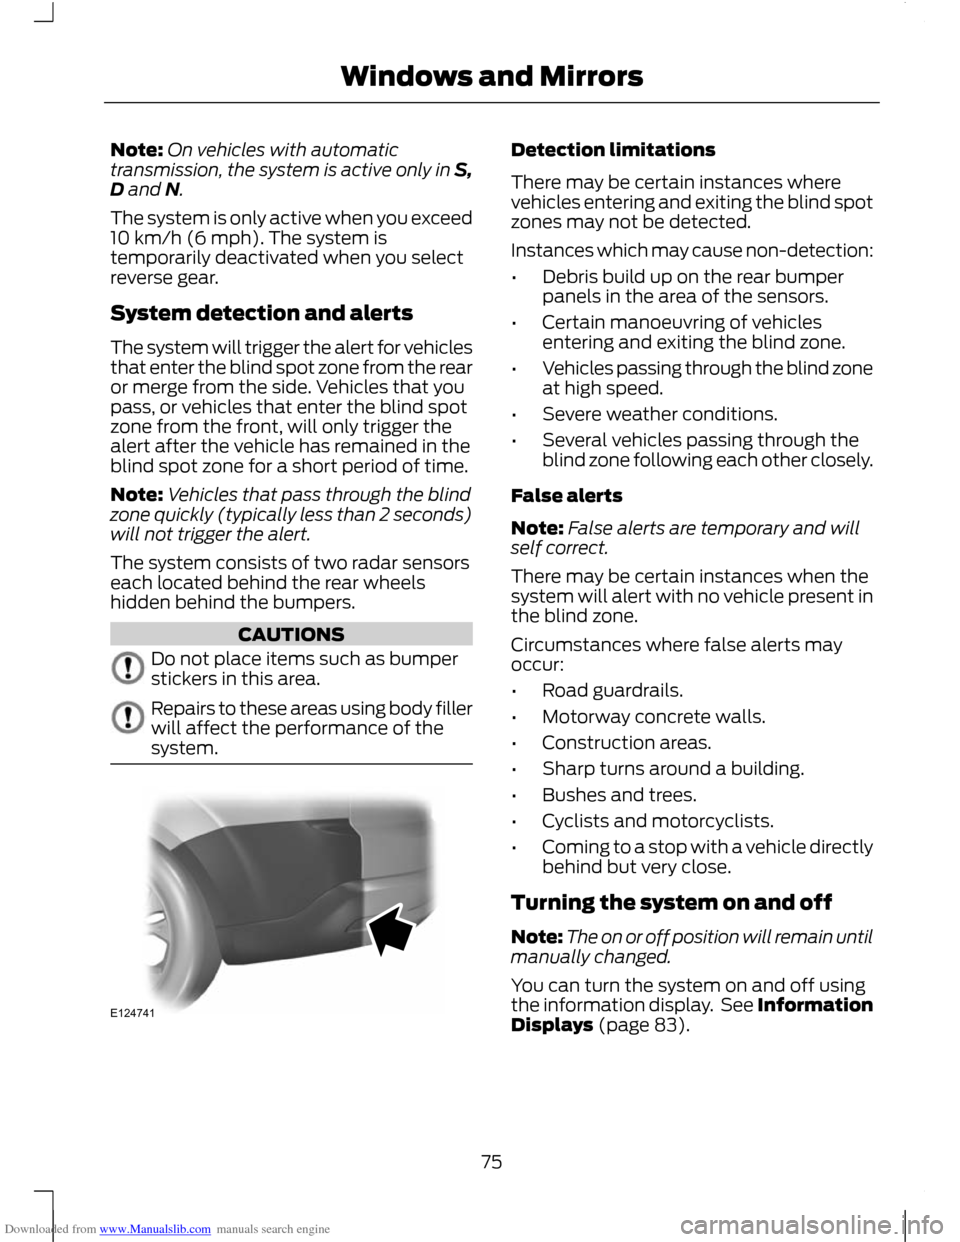
The system consists of two radar sensors
each located behind the rear wheels
hidden behind the bumpers. CAUTIONS
Do not place items such as bumper
stickers in this area.
Repairs to these areas using body filler
will affect the performance of the
system. Detection limitations
There may be certain instances where
vehicles entering and exiting the blind spot
zones may not be detected.
Instances which may cause non-detection:
•
Debris build up on the rear bumper
panels in the area of the sensors.
• Certain manoeuvring of vehicles
entering and exiting the blind zone.
• Vehicles passing through the blind zone
at high speed.
• Severe weather conditions.
• Several vehicles passing through the
blind zone following each other closely.
False alerts
Note: False alerts are temporary and will
self correct.
There may be certain instances when the
system will alert with no vehicle present in
the blind zone.
Circumstances where false alerts may
occur:
• Road guardrails.
• Motorway concrete walls.
• Construction areas.
• Sharp turns around a building.
• Bushes and trees.
• Cyclists and motorcyclists.
• Coming to a stop with a vehicle directly
behind but very close.
Turning the system on and off
Note: The on or off position will remain until
manually changed.
You can turn the system on and off using
the information display. See Information
Displays (page 83).
75
Windows and MirrorsE124741
Page 78 of 296
Downloaded from www.Manualslib.com manuals search engine When you turn the system off no further
alerts will be received. The BLIS warning
indicator will illuminate. See Warning
Lamps and Indicators (page 79).
Detection errors
Note:
The alert indicator in the mirror will
not illuminate.
If the system senses a fault on either
sensor, the system warning symbol will
illuminate and remain on. The information
display will confirm the fault and indicate
whether the left or right side is affected.
Blocked sensor WARNING
Prior to the system recognizing a
blocked condition and issuing a
warning, the number of missed
objects will increase. CAUTION
The sensors may not detect vehicles
in heavy rain or other conditions that
cause disruptive reflections.
Note:
Keep the rear bumper area
surrounding the sensors free from dirt, ice
and snow.
If a sensor becomes blocked the system
performance may degrade. A blocked
sensor message may be displayed.
The system will automatically return to
normal operation once two other vehicles
have been detected on both sides. Trailer towing false alerts CAUTION
Vehicles fitted with a trailer tow
module not approved by us may not
correctly be detected. Switch the
system off to avoid false alerts. See
Information Displays (page 83). If the vehicle is fitted with a trailer tow
module approved by us, the system will
detect a connected trailer and deactivate.
A confirmation message will be shown in
the information display. See Information
Messages (page 90). The BLIS warning
indicator will illuminate. See Warning
Lamps and Indicators (page 79).
76
Windows and Mirrors
Page 79 of 296
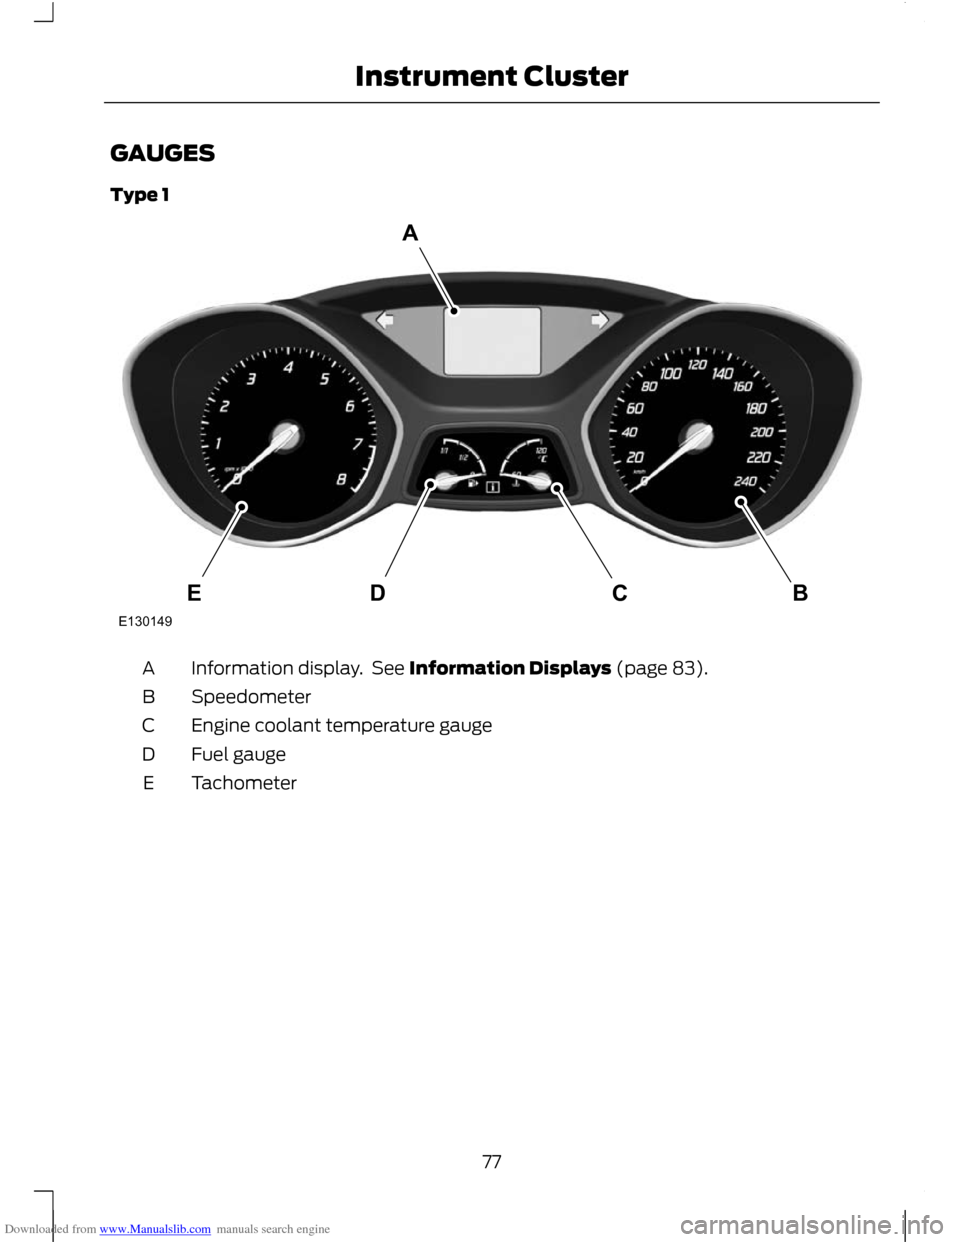
Downloaded from www.Manualslib.com manuals search engine GAUGES
Type 1
Information display. See Information Displays (page 83).
A
Speedometer
B
Engine coolant temperature gauge
C
Fuel gauge
D
Tachometer
E
77
Instrument ClusterBCDEAE130149
Page 80 of 296
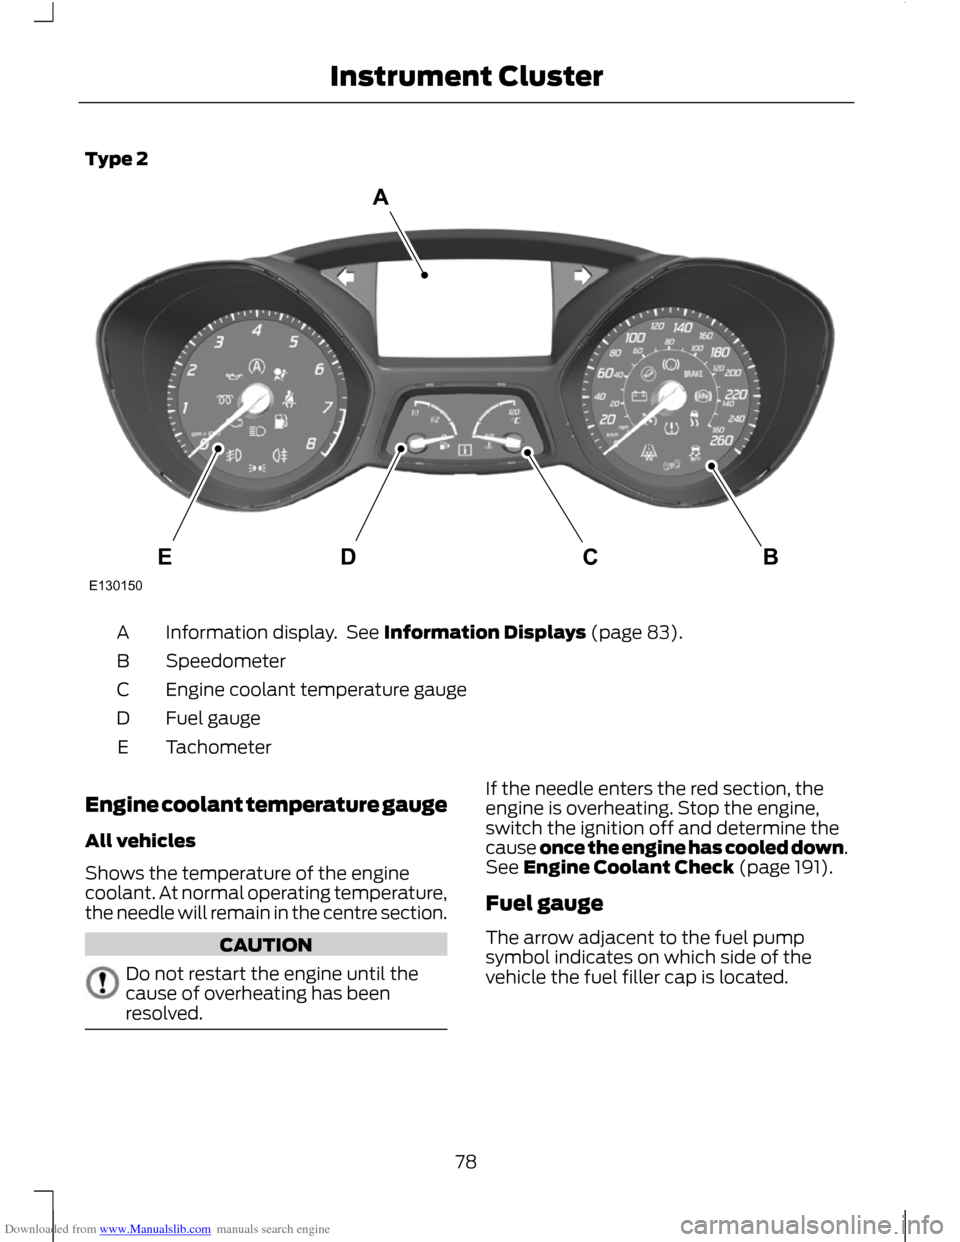
Downloaded from www.Manualslib.com manuals search engine Type 2
Information display. See Information Displays (page 83).
A
Speedometer
B
Engine coolant temperature gauge
C
Fuel gauge
D
Tachometer
E
Engine coolant temperature gauge
All vehicles
Shows the temperature of the engine
coolant. At normal operating temperature,
the needle will remain in the centre section. CAUTION
Do not restart the engine until the
cause of overheating has been
resolved. If the needle enters the red section, the
engine is overheating. Stop the engine,
switch the ignition off and determine the
cause once the engine has cooled down.
See Engine Coolant Check (page 191).
Fuel gauge
The arrow adjacent to the fuel pump
symbol indicates on which side of the
vehicle the fuel filler cap is located.
78
Instrument ClusterBCDEAE130150
Page 82 of 296
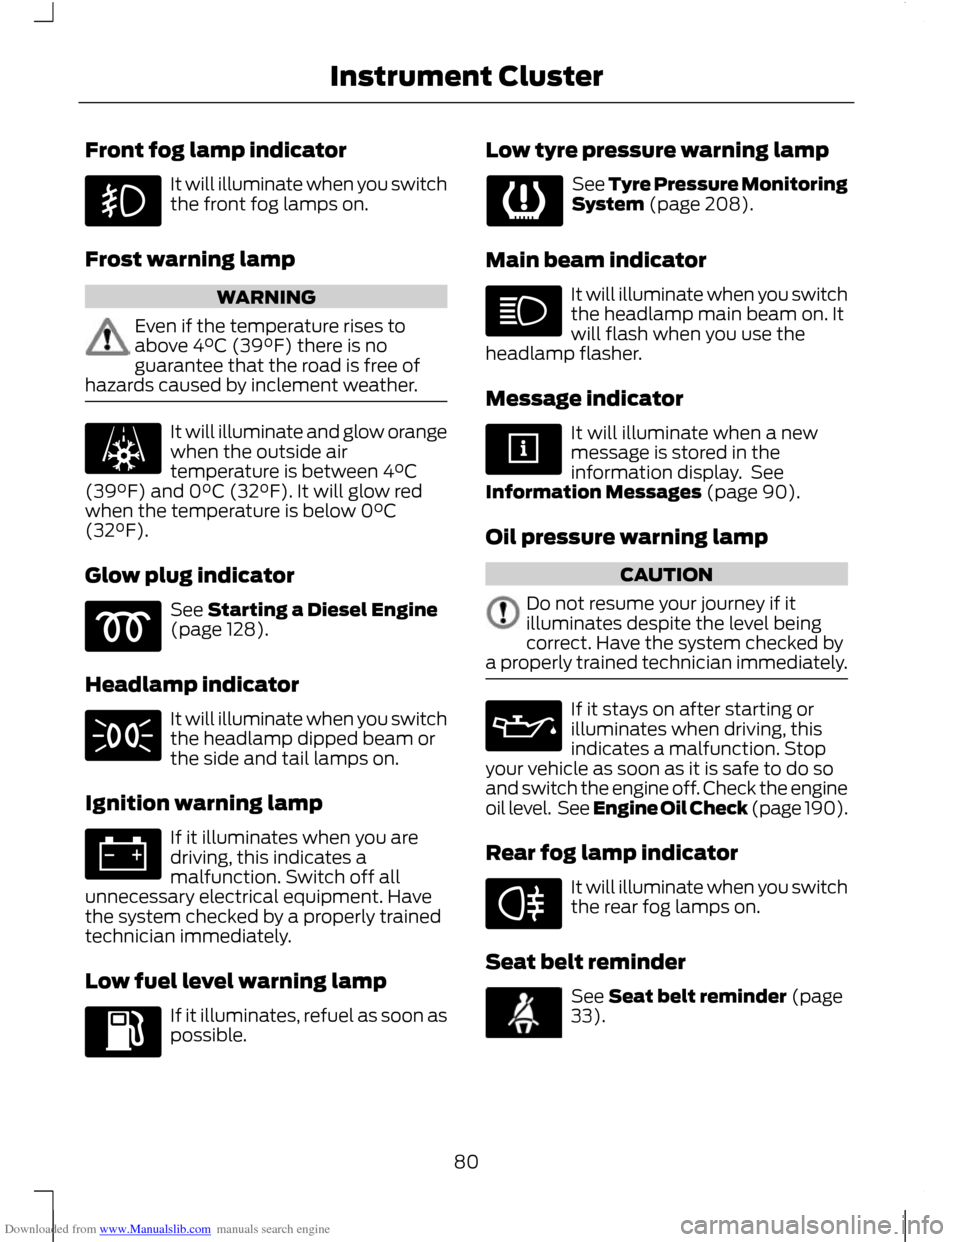
Downloaded from www.Manualslib.com manuals search engine Front fog lamp indicator
It will illuminate when you switch
the front fog lamps on.
Frost warning lamp WARNING
Even if the temperature rises to
above 4°C (39°F) there is no
guarantee that the road is free of
hazards caused by inclement weather. It will illuminate and glow orange
when the outside air
temperature is between 4°C
(39°F) and 0°C (32°F). It will glow red
when the temperature is below 0°C
(32°F).
Glow plug indicator See Starting a Diesel Engine
(page 128).
Headlamp indicator It will illuminate when you switch
the headlamp dipped beam or
the side and tail lamps on.
Ignition warning lamp If it illuminates when you are
driving, this indicates a
malfunction. Switch off all
unnecessary electrical equipment. Have
the system checked by a properly trained
technician immediately.
Low fuel level warning lamp If it illuminates, refuel as soon as
possible. Low tyre pressure warning lamp See Tyre Pressure Monitoring
System (page 208).
Main beam indicator It will illuminate when you switch
the headlamp main beam on. It
will flash when you use the
headlamp flasher.
Message indicator It will illuminate when a new
message is stored in the
information display. See
Information Messages (page 90).
Oil pressure warning lamp CAUTION
Do not resume your journey if it
illuminates despite the level being
correct. Have the system checked by
a properly trained technician immediately. If it stays on after starting or
illuminates when driving, this
indicates a malfunction. Stop
your vehicle as soon as it is safe to do so
and switch the engine off. Check the engine
oil level. See Engine Oil Check (page 190).
Rear fog lamp indicator It will illuminate when you switch
the rear fog lamps on.
Seat belt reminder See Seat belt reminder (page
33).
80
Instrument Cluster
Page 83 of 296
Downloaded from www.Manualslib.com manuals search engine Stability control (ESP) indicator
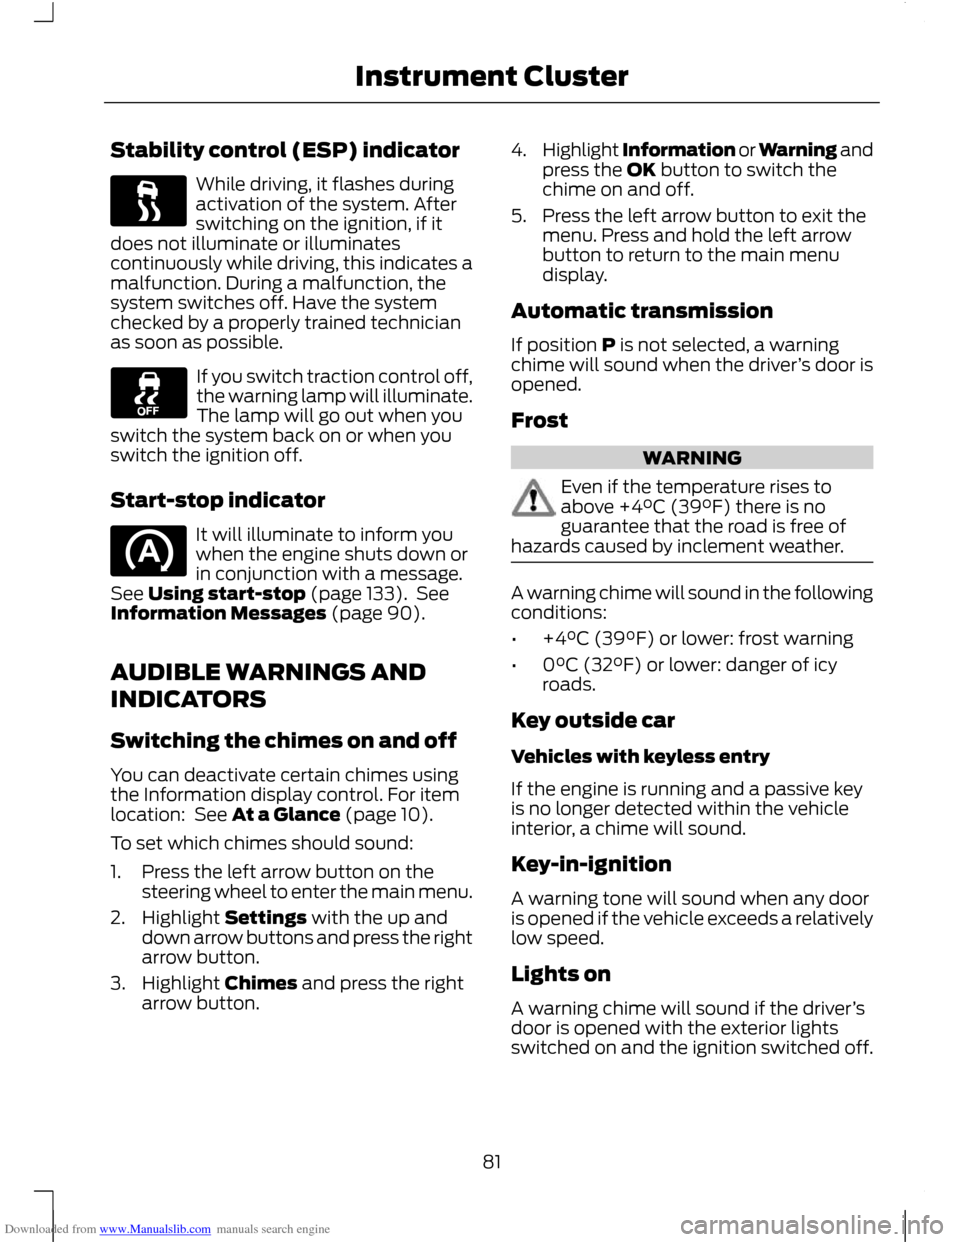
While driving, it flashes during
activation of the system. After
switching on the ignition, if it
does not illuminate or illuminates
continuously while driving, this indicates a
malfunction. During a malfunction, the
system switches off. Have the system
checked by a properly trained technician
as soon as possible. If you switch traction control off,
the warning lamp will illuminate.
The lamp will go out when you
switch the system back on or when you
switch the ignition off.
Start-stop indicator It will illuminate to inform you
when the engine shuts down or
in conjunction with a message.
See Using start-stop (page 133). See
Information Messages (page 90).
AUDIBLE WARNINGS AND
INDICATORS
Switching the chimes on and off
You can deactivate certain chimes using
the Information display control. For item
location: See At a Glance (page 10).
To set which chimes should sound:
1. Press the left arrow button on the steering wheel to enter the main menu.
2. Highlight Settings with the up and down arrow buttons and press the right
arrow button.
3. Highlight Chimes and press the right arrow button. 4.
Highlight Information or Warning and
press the OK button to switch the
chime on and off.
5. Press the left arrow button to exit the menu. Press and hold the left arrow
button to return to the main menu
display.
Automatic transmission
If position P is not selected, a warning
chime will sound when the driver ’s door is
opened.
Frost WARNING
Even if the temperature rises to
above +4°C (39°F) there is no
guarantee that the road is free of
hazards caused by inclement weather. A warning chime will sound in the following
conditions:
•
+4°C (39°F) or lower: frost warning
• 0°C (32°F) or lower: danger of icy
roads.
Key outside car
Vehicles with keyless entry
If the engine is running and a passive key
is no longer detected within the vehicle
interior, a chime will sound.
Key-in-ignition
A warning tone will sound when any door
is opened if the vehicle exceeds a relatively
low speed.
Lights on
A warning chime will sound if the driver ’s
door is opened with the exterior lights
switched on and the ignition switched off.
81
Instrument Cluster
Page 85 of 296
Downloaded from www.Manualslib.com manuals search engine GENERAL INFORMATION
Note:
The information display will remain
on for several minutes after you switch off
the ignition.
Various systems on your vehicle can be
controlled using the information display
controls on the steering column.
Corresponding information is displayed in
the information display.
For detailed instructions on navigation,
refer to the appropriate manual.
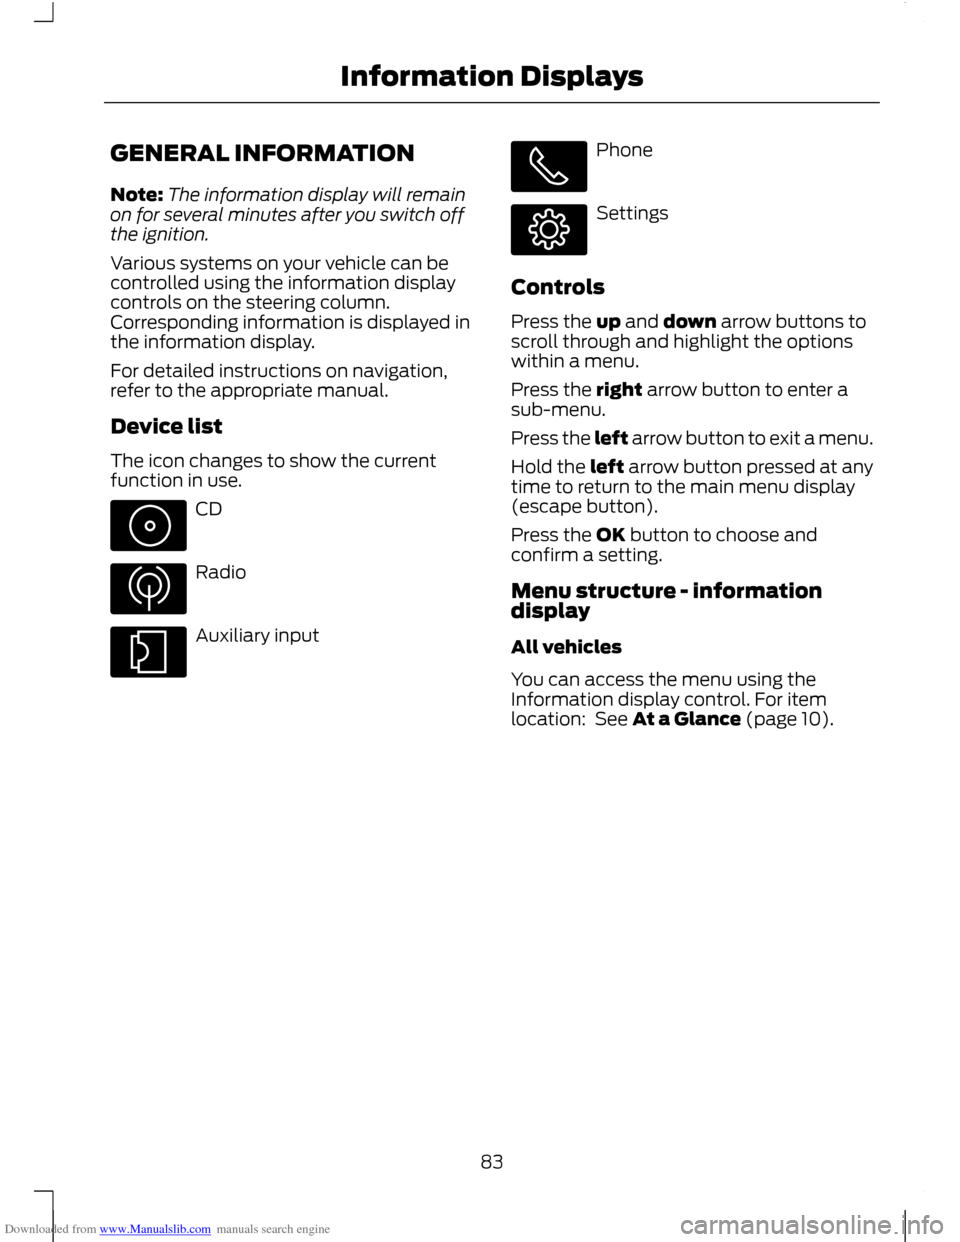
Device list
The icon changes to show the current
function in use. CD
Radio
Auxiliary input Phone
Settings
Controls
Press the up and down arrow buttons to
scroll through and highlight the options
within a menu.
Press the right arrow button to enter a
sub-menu.
Press the left arrow button to exit a menu.
Hold the left arrow button pressed at any
time to return to the main menu display
(escape button).
Press the OK button to choose and
confirm a setting.
Menu structure - information
display
All vehicles
You can access the menu using the
Information display control. For item
location: See At a Glance (page 10).
83
Information Displays