buttons FORD C MAX 2011 2.G Owner's Manual
[x] Cancel search | Manufacturer: FORD, Model Year: 2011, Model line: C MAX, Model: FORD C MAX 2011 2.GPages: 296, PDF Size: 7.87 MB
Page 229 of 296
Downloaded from www.Manualslib.com manuals search engine ON/OFF CONTROL
Press the on/off control. This will also
operate the unit for up to one hour with the
ignition turned off.
The radio will switch off automatically
after one hour.
SOUND BUTTON
This will allow you to adjust the sound
settings (for example bass and treble).
1. Press the sound button.
2.
Use the up and down arrow buttons to
select the required setting.
3. Use the left and right arrow buttons to
make the necessary adjustment. The
display indicates the level selected.
4. Press the OK button to confirm the new settings.
WAVEBAND BUTTON
Press the RADIO button to select from the
wavebands available.
The selector can also be used to return to
radio reception when you have been
listening to another source.
Alternatively, press the left arrow button
to display the available wavebands. Scroll
to the required waveband and press OK.
STATION TUNING CONTROL
DAB service linking
Note: The DAB service linking is as per
default off.
Note: Service linking allows
cross-referencing to other corresponding
frequencies of the same station, for example
FM and other DAB ensembles. Note:
The system will automatically
change to another corresponding station if
the current one becomes unavailable, for
example when leaving the coverage area.
Switching DAB service linking on and off.
See General Information (page 83).
Seek tuning
Select a waveband and briefly press one
of the seek buttons. The unit will stop at
the first station it finds in the direction you
have chosen.
Manual tuning
Type 1
1. Press the MENU button.
2. Select RADIO mode and then MANUAL
TUNE.
3. Use the left and right arrow buttons to
tune down or up the waveband in small
increments or press and hold to
increment quickly, until you find a
station you want to listen to.
4. Press OK to continue listening to a station.
Type 2 and 3
1. Press function button 2.
2. Use the left and right arrow buttons to
tune down or up the waveband in small
increments or press and hold to
increment quickly, until you find a
station you want to listen to.
3. Press OK to continue listening to a station.
Scan tuning
Scan allows you to listen to a few seconds
of each station detected.
Type 1
1. Press the MENU button.
227
Audio unit operation
Page 230 of 296
Downloaded from www.Manualslib.com manuals search engine 2. Select RADIO mode and then SCAN.
3. Use the seek buttons to scan up or
down the selected waveband.
4. Press OK to continue listening to a station.
Type 2 and 3
1. Press function button 3.
2. Use the seek buttons to scan up or down the selected waveband.
3. Press function button 3 again or OK to
continue listening to a station.
STATION PRESET BUTTONS
This feature allows you to store your
favourite stations so that they can be
recalled by selecting the appropriate
waveband and pressing one of the preset
buttons.
1. Select a waveband.
2. Tune to the station required.
3. Press and hold one of the preset buttons. A progress bar and message
will appear. When the progress bar
completes the station has been stored.
The audio unit will also mute
momentarily as confirmation.
This can be repeated on each waveband
and for each preset button.
Note: When you drive to another part of the
country, FM and DAB stations that
broadcast on alternative frequencies, and
are stored on preset buttons, may be
updated with the correct frequency and
station name for that area. AUTOSTORE CONTROL
Note:
This will store up to a maximum of
the 10 strongest signals available, either
from the AM or the FM waveband, and
overwrite the previously stored stations. It
can also be used to store stations manually
in the same way as other wavebands.
Note: On type 3 you must select either FM
AST or AM AST to use this function.
• Press and hold function button 1 or the
RADIO button.
• When the search is complete, sound is
restored and the strongest signals are
stored on the Autostore presets.
TRAFFIC INFORMATION
CONTROL
Many stations that broadcast on the FM
waveband have a TP code to signify that
they carry traffic programme information.
Activating traffic announcements
Before you can receive traffic
announcements, you must press either the
TA or TRAFFIC button. A ‘TA’ display will
appear to show the feature is switched on.
If you are already tuned to a station that
broadcasts traffic information, ‘TP’ will
also be displayed. Otherwise the unit will
search for a traffic programme.
When traffic information is broadcast, it
will automatically interrupt normal radio
or CD playback and ‘Traffic announcement
(TA)’ will appear in the display.
If a non-traffic station is selected or
recalled using a preset button, the audio
unit will remain on that station unless TA
or TRAFFIC is turned off, then on again.
Note: If TA is on and you select a preset or
manual tune to a non TA station no traffic
announcement will be heard.
228
Audio unit operation
Page 232 of 296
Downloaded from www.Manualslib.com manuals search engine AUTOMATIC VOLUME
CONTROL
When available, automatic volume control
(AVC) adjusts the volume level to
compensate for engine noise and road
speed noise.
1. Press the MENU button and select
AUDIO.
2. Select AVC LEVEL or ADAPTIVE VOL.
3. Use the left or right arrow button to adjust the setting.
4. Press the OK button to confirm your selection.
5. Press the MENU button to return.
DIGITAL SIGNAL PROCESSING
(DSP)
DSP occupancy
This feature takes into account the
differences in distance from the various
speakers in the vehicle to each seat. Select
the sitting position for which the audio is
to be correctly enhanced.
DSP equaliser
Select the music category that most suits
your listening preference. The audio output
will change to enhance the particular style
of music chosen.
Changing the DSP settings
1. Press the MENU button.
2. Select AUDIO or AUDIO SETTINGS.
3. Scroll to the required DSP function.
4. Use the up and down arrow buttons to
select the required setting.
5. Press the OK button to confirm your selection.
6. Press the MENU button to return. NEWS BROADCASTS
Some audio units interrupt normal
reception to broadcast news bulletins from
stations on the FM waveband or radio data
system (RDS) and enhanced other
network (EON) linked stations, in the same
way as traffic information is provided.
During news broadcasts, the display will
indicate there is an incoming
announcement. News interrupts are
broadcast at the same preset volume level
as traffic announcements.
1. Press the MENU button.
2. Select AUDIO or AUDIO SETTINGS.
3.
Scroll to NEWS and turn on or off with
the OK button.
4. Press the MENU button to return.
ALTERNATIVE FREQUENCIES
Many programmes that broadcast on the
FM waveband have a programme
identification (PI) code, which can be
recognised by audio units.
If your radio has alternative frequencies
(AF) tuning switched on and you move
from one transmission area to another, this
facility will search for and switch to a
stronger station signal, if one can be found.
Under certain conditions, however, AF
tuning may temporarily disrupt normal
reception.
When selected, the unit continually
evaluates signal strength and, if a better
signal becomes available, the unit will
switch to that alternative. It mutes while
it checks a list of alternative frequencies
and, if necessary, it will search once across
the selected waveband for a genuine
alternative frequency.
230
Audio unit menus
Page 234 of 296
Downloaded from www.Manualslib.com manuals search engine COMPACT DISC PLAYBACK
Note:
During playback, the display indicates
the disc, track and time that has elapsed
since the start of the track.
During radio reception, press the CD button
once to start CD playback.
Playback will start immediately after a disc
is loaded.
TRACK SELECTION
• Press the seek up button once to move
to the next track or press it repeatedly
to access later tracks.
• Press the seek down button once to
replay the current track. If pressed
within two seconds of the start of a
track, the previous track will be
selected.
• Press the seek down button repeatedly
to select previous tracks.
• Press the up or down arrow buttons,
and using the OK button, select the
required track.
Type 2 and 3
The desired track number may be entered
using the numeric keypad. Dial the required
track number until complete (for example
1 then 2 for track 12), or dial the number
and directly press OK.
FAST FORWARD/REVERSE
Press and hold the seek down or up
buttons to search backwards or forwards
within the tracks on the disc. SHUFFLE/RANDOM
Random track playback, also known as
shuffle, plays all tracks on the CD in
random order.
Type 1
1. Press the MENU button and select CD
MODE.
2. Select SHUFFLE, which then enables the function to be selected on or off.
When an MP3 CD is playing, options
include SHUFFLE for the whole CD, or to
play all the tracks in the folder in a random
order.
Type 2 and 3
Press function button 2.
Note: When an MP3 CD is playing, options
include SHUFFLE for the whole CD, or to
play all the tracks in the folder in a random
order. Repeat presses of function button 2
will toggle these options.
Use the seek up or down button to select
the next track to shuffle if required.
REPEAT COMPACT DISC
TRACKS
Type 1
1. Press the MENU button and select CD MODE.
2. Select REPEAT, which then enables the function to be selected on or off.
The track will replay once ended.
When an MP3 CD is playing, options
include REPEAT for the track, or to repeat
all the tracks in the folder.
Type 2 and 3
Press function button 1.
232
Compact disc player
Page 237 of 296
Downloaded from www.Manualslib.com manuals search engine Note:
For optimum performance when
using any auxiliary device set the volume on
the device high. This will reduce audio
interference when charging the device via
the vehicle power supply socket.
When fitted the Auxiliary input (AUX IN)
socket permits an auxiliary device, such as
an MP3 player, to be linked into the vehicle
audio system. Output can be played
through the vehicle speakers.
To connect an auxiliary device, plug it into
the AUX IN socket using a 3.5 mm
conventional audio jack connector.
Select the auxiliary input via the AUX
button and playback will be heard through
the vehicle speakers. LINE IN or LINE IN
ACTIVE will appear in the vehicle audio
unit display. Volume, treble and bass can
be adjusted on the vehicle audio unit as
normal.
The vehicle audio unit buttons can also be
used to restore playback from the vehicle
audio unit, while the auxiliary device
remains connected.
235
Auxiliary input (AUX IN) socket
Page 241 of 296
Downloaded from www.Manualslib.com manuals search engine Note:
You can exit the phone menu by
pressing any source button CD, RADIO or
AUX.
Note: When referred to, the use of the
up/down arrow buttons, seek up and seek
down buttons, and the OK button can be
used on either the steering wheel or the
audio unit.
This chapter describes the phone functions
of the audio unit.
An active phone must be present.
Even if connected to the audio unit, your
phone can still be used in the usual way.
Making a call
Dialling a number using voice control
Phone numbers can be dialled using voice
control. See Telephone commands
(page 249).
Dialling a number using the address
book
1. Press the PHONE button.
2. Press the up/down arrow buttons until
PHONEBOOK is shown.
3. Press the OK button.
Note: You can also use the telephone
keypad to select the first letter of the entry
you are looking for. Press the relevant
number that corresponds to the letter
repeatedly until the required letter is
displayed.
4. Press the up/down arrow buttons to select the desired phone number.
Note: Press and hold the up/down arrow
buttons to search forwards or backwards
within the phonebook.
5. Press the OK button to dial the selected phone number. Dialling a number using the telephone
keypad
1. Press the PHONE button.
2. Dial the number using the telephone
keypad on the audio unit.
3. Press the OK button.
Note: If you enter an incorrect digit whilst
entering a phone number, press function
button 3 to erase the last digit. A long press
will erase the complete string of digits.
Ending a call
Calls can be ended by:
• pressing the seek up button
• pressing the OK button
• pressing function button 4.
Redialling a number
1. Press the PHONE button.
2. Press the up/down arrow buttons until
CALL LISTS is displayed.
3. Press the OK button.
Note: If the active phone does not provide
a call out list, the last outgoing call
number/entry can be redialled.
4. Press the up/down buttons to select the desired call list.
5. Press the OK button.
6. Press the up/down buttons to select the desired phone number.
7. Press the OK button.
Redialling the last dialled number
1. Press the PHONE button.
2. Press the up/down arrow buttons until
REDIAL is displayed.
3. Press the OK button.
239
Telephone
Page 242 of 296
Downloaded from www.Manualslib.com manuals search engine Receiving an incoming call
Accepting an incoming call
Incoming calls can be accepted by pressing
the seek down button, or by pressing the
OK button.
Rejecting an incoming call
Incoming calls can be rejected by:
•
pressing the seek up button, or
• pressing the arrow down button to
highlight REJECT and then pressing
the OK button.
Receiving a second incoming call
Note: The second incoming call function
must be activated in your phone.
If there is an incoming call whilst there is
an ongoing call, a beep will be heard and
you will have the option to end the active
call and to accept the incoming call.
Accepting a second incoming call
Note: The first incoming call will be
disconnected and replaced by the second
incoming call.
Second incoming calls can be accepted
by pressing the seek down button on the
steering wheel or on the audio unit, or by
pressing the OK button on the audio unit.
Rejecting a second incoming call
Second incoming calls can be rejected by:
• pressing the seek up button, or
• pressing the arrow down button to
highlight REJECT and then pressing
the OK button.
Second incoming calls can be rejected by
pressing function button 4. Muting the microphone
Note:
During a call, it is possible to mute
the microphone. Whilst muted, confirmation
will appear in the display.
Press function button 1. Press the button
once again to turn this function off.
Changing the active phone
Note: Phones must be bonded to the
system before they can be made active.
Note: After bonding a phone to the system,
this becomes the active phone.
1. Press the PHONE button.
2. Press the up/down buttons until SELECT PHONE is shown.
3. Press the OK button.
4. Scroll through the different stored phones by using the up/down buttons
to display the bonded phones.
5. Press the OK button to select the phone which is to be the active phone.
Debonding a bonded phone
A bonded phone can be deleted from the
system at any time, unless a phone call is
in progress.
1. Press the PHONE button.
2. Press the up/down buttons until SELECT PHONE is shown.
3. Press the OK button.
4. Press the up/down buttons to highlight
the required phone.
5. Press function button 1.
240
Telephone
Page 261 of 296
Downloaded from www.Manualslib.com manuals search engine Bonding the device
To connect the device to the system follow
the same procedure as for Bluetooth hands
free phones. See Bluetooth setup (page
237).
Operating the device
Note:
The seek buttons and file information
will only work on certain phones and
devices.
Select Bluetooth audio as the active
source.
1. Select AUX.
2. Press the up and down arrow buttons to select the desired function.
3. Press the OK button.
Tracks can be accessed by skipping
forwards and backwards using the steering
wheel controls, or directly from the audio
unit controls.
Audio control
Press the seek up and down keys to skip
backwards and forwards through tracks.
Press and hold the seek keys to enable fast
rewind/fast forward through track content.
Press the INFO button or function button
4 to display the following:
• Title.
• Artist.
• Album.
• File name.
USING A USB DEVICE
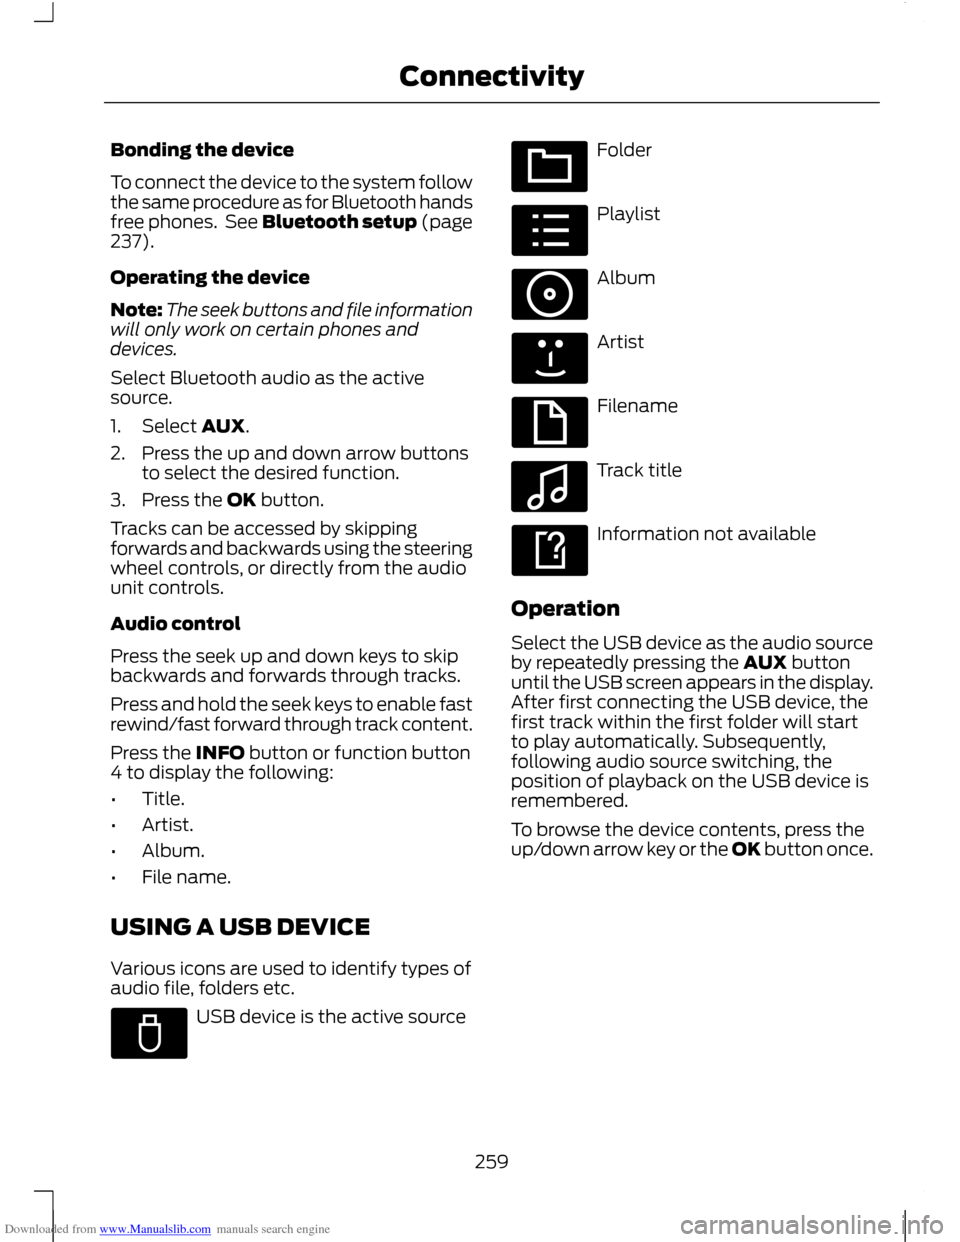
Various icons are used to identify types of
audio file, folders etc. USB device is the active source Folder
Playlist
Album
Artist
Filename
Track title
Information not available
Operation
Select the USB device as the audio source
by repeatedly pressing the AUX button
until the USB screen appears in the display.
After first connecting the USB device, the
first track within the first folder will start
to play automatically. Subsequently,
following audio source switching, the
position of playback on the USB device is
remembered.
To browse the device contents, press the
up/down arrow key or the OK button once.
259
ConnectivityE100029 E100022 E100023 E100024 E100025 E100026 E100027 E100028
Page 262 of 296
Downloaded from www.Manualslib.com manuals search engine The display will show the track
information, together with other important
information described below:
•
A vertical scroll bar on the right side of
the display shows the current position
of the folder view.
• ">" after an entry indicates a further
level down is readable (for example a
folder named after an album, with
individual album tracks within that
folder).
• "<" before the list indicates that a
further level up is readable.
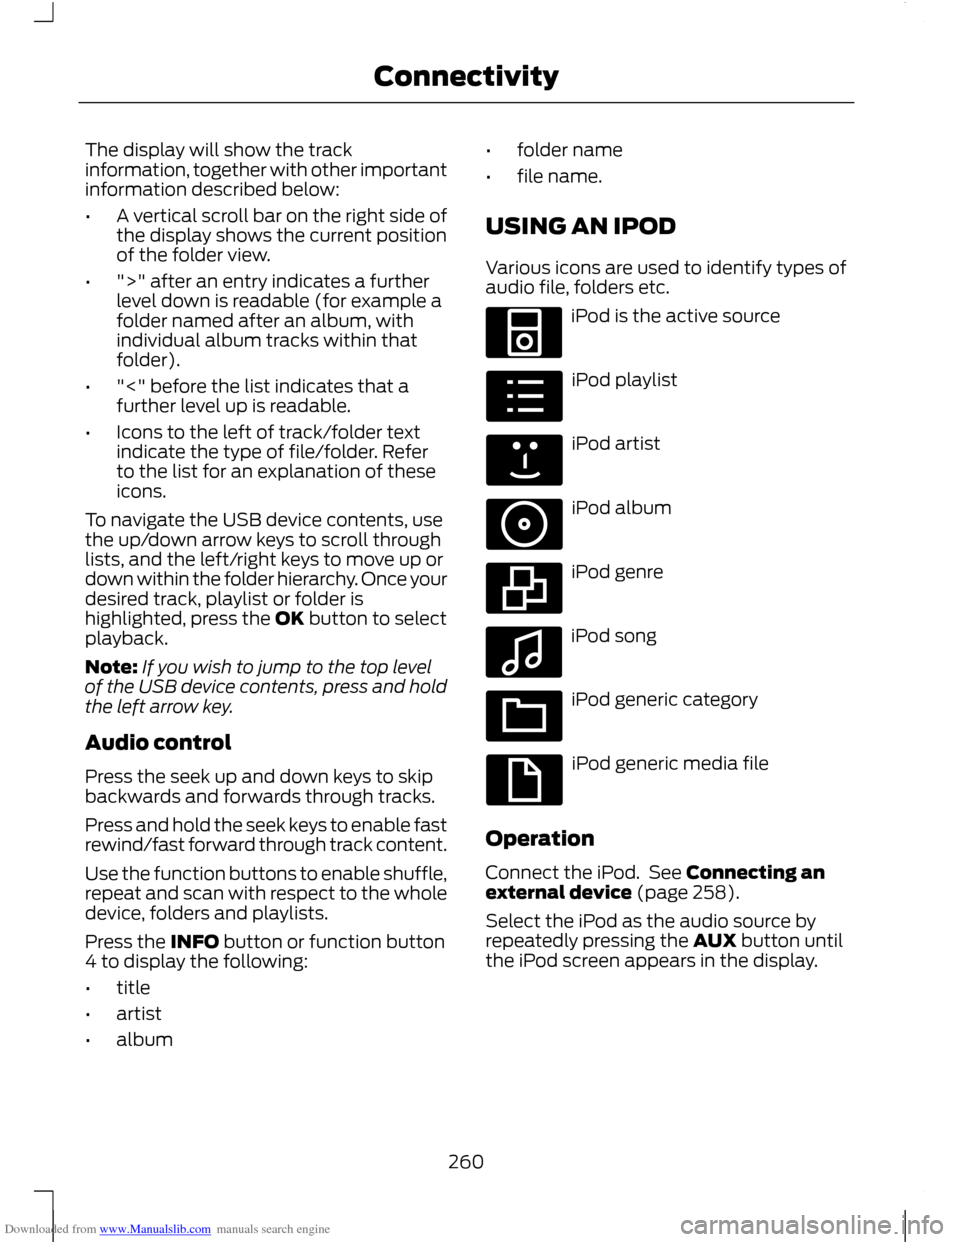
• Icons to the left of track/folder text
indicate the type of file/folder. Refer
to the list for an explanation of these
icons.
To navigate the USB device contents, use
the up/down arrow keys to scroll through
lists, and the left/right keys to move up or
down within the folder hierarchy. Once your
desired track, playlist or folder is
highlighted, press the OK button to select
playback.
Note: If you wish to jump to the top level
of the USB device contents, press and hold
the left arrow key.
Audio control
Press the seek up and down keys to skip
backwards and forwards through tracks.
Press and hold the seek keys to enable fast
rewind/fast forward through track content.
Use the function buttons to enable shuffle,
repeat and scan with respect to the whole
device, folders and playlists.
Press the INFO button or function button
4 to display the following:
• title
• artist
• album •
folder name
• file name.
USING AN IPOD
Various icons are used to identify types of
audio file, folders etc. iPod is the active source
iPod playlist
iPod artist
iPod album
iPod genre
iPod song
iPod generic category
iPod generic media file
Operation
Connect the iPod. See Connecting an
external device (page 258).
Select the iPod as the audio source by
repeatedly pressing the AUX button until
the iPod screen appears in the display.
260
ConnectivityE100030 E100031 E100032 E100033 E100034 E100035 E100036 E100037
Page 263 of 296
Downloaded from www.Manualslib.com manuals search engine The iPod menu list for browsing contents
will be available through the radio display.
Navigation of the contents follows the
same principles as for iPod standalone use
(for example search by artist, title, etc.).
To browse the iPod contents, press the
up/down arrow key or the OK button once.
The display will show the track
information, together with other important
information described below:
•
A vertical scroll bar on the right side of
the display shows the current position
of the list view.
• ">" after an entry indicates a further
level down is readable (for example all
albums by a particular artist).
• "<" before the list indicates that a
further level up is readable.
• An icon on the left side indicates the
type of the currently displayed list (for
example list of albums). Refer to the
list for an explanation of these icons.
To navigate the iPod contents, use the
up/down arrow keys to scroll through lists,
and the left/right keys to move up or down
within the hierarchy. Once your desired
track, playlist, album, artist or genre is
highlighted, press the OK button to select
playback.
Note: If you wish to jump to the top level
of the iPod contents, press and hold the left
arrow key.
Audio control
Press the seek up and down keys to skip
backwards and forwards through tracks.
Press and hold the seek keys to enable fast
rewind/fast forward through track content.
Use the function buttons to enable shuffle
and repeat with respect to playlists.
Press function button 3 to scan the whole
device or a playlist if it is in operation. Press the INFO button or function button
4 to display the following:
•
title
• artist
• album.
261
Connectivity