check engine FORD C MAX 2011 2.G Owners Manual
[x] Cancel search | Manufacturer: FORD, Model Year: 2011, Model line: C MAX, Model: FORD C MAX 2011 2.GPages: 296, PDF Size: 7.87 MB
Page 3 of 296
Downloaded from www.Manualslib.com manuals search engine Introduction
About This Manual...........................................7
Symbols Glossary.............................................7
Parts and Accessories.....................................7
At a Glance
At a Glance........................................................10
Child Safety
Child Seats.........................................................19
Booster Seats..................................................20
Child Seat Positioning...................................21
ISOFIX Anchor Points...................................24
Child Safety Locks..........................................25
Occupant protection
Principle of Operation...................................27
Fastening the seat belts..............................29
Seat belt height adjustment......................33
Seat belt reminder.........................................33
Using seat belts during pregnancy..........33
Disabling the passenger airbag................34
Keys and Remote Controls
General Information on Radio
Frequencies..................................................36
Programming the remote control............36
Changing the remote control battery............................................................36
Locks
Locking and Unlocking.................................39
Keyless Entry....................................................43
Global Opening and Closing......................45
Engine immobiliser
Principle of Operation...................................47
Coded keys........................................................47
Arming the engine immobiliser.................47
Disarming the engine immobiliser...........47 Alarm
Principle of Operation..................................48
Arming the alarm...........................................49
Disarming the alarm.....................................49
Steering Wheel
Adjusting the Steering Wheel...................50
Audio Control..................................................50
Voice Control.....................................................51
Wipers and Washers
Windscreen Wipers.......................................52
Autowipers........................................................52
Windscreen Washers....................................53
Rear Window Wiper and Washers...........53
Headlamp Washers......................................54
Checking the Wiper Blades........................54
Changing the Wiper Blades.......................54
Technical Specifications.............................56
Lighting
Lighting Control...............................................57
Autolamps........................................................58
Front Fog Lamps............................................58
Rear Fog Lamps.............................................58
Adjusting the Headlamps - Vehicles
With: Adaptive Front Lighting/Xenon
Headlamps...................................................59
Headlamp Levelling......................................59
Hazard Warning Flashers............................59
Direction Indicators.......................................60
Cornering Lamps...........................................60
Interior Lamps..................................................61
Removing a Headlamp................................62
Changing a Bulb.............................................62
Bulb Specification Chart.............................69
Windows and Mirrors
Power Windows...............................................71
1
Table of Contents
Page 6 of 296
Downloaded from www.Manualslib.com manuals search engine Engine Oil Dipstick - 1.6L Duratec-16V
Ti-VCT (Sigma)........................................190
Engine Oil Dipstick - 1.6L Duratorq-TDCi (DV) Diesel/2.0L Duratorq-TDCi (DW)
Diesel............................................................190
Engine Oil Check..........................................190
Engine Coolant Check.................................191
Brake and Clutch Fluid Check...................191
Washer Fluid Check.....................................192
Technical Specifications............................192
Vehicle Care
Cleaning the Exterior...................................195
Cleaning the Interior....................................195
Repairing Minor Paint Damage...............196
Vehicle battery
Jump-Starting the Vehicle........................197
Changing the Vehicle Battery..................198
Battery connection points........................198
Wheels and Tyres
General Information....................................199
Changing a Road Wheel............................199
Tyre Repair Kit..............................................204
Tyre Care.........................................................207
Using Winter Tyres......................................208
Using Snow Chains....................................208
Tyre Pressure Monitoring System.........208
Technical Specifications..........................209
Vehicle identification
Vehicle Identification Plate.......................214
Vehicle Identification Number.................215
Capacities and Specific- ations
Technical Specifications............................216 Audio introduction
Important audio information...................219
Audio unit overview
Audio unit overview....................................220
Audio system security
Security code.................................................226
Audio unit operation
On/off control................................................227
Sound button.................................................227
Waveband button........................................227
Station tuning control................................227
Station preset buttons..............................228
Autostore control.........................................228
Traffic information control.......................228
Audio unit menus
Automatic volume control.......................230
Digital signal processing (DSP).............230
News broadcasts.........................................230
Alternative frequencies.............................230
Regional mode (REG).................................231
Compact disc player
Compact disc playback.............................232
Track selection..............................................232
Fast forward/reverse..................................232
Shuffle/random............................................232
Repeat compact disc tracks....................232
Compact disc track scanning..................233
MP3 file playback........................................233
MP3 display options...................................233
Ending compact disc playback..............234
Auxiliary input (AUX IN)
socket
Auxiliary input (AUX IN) socket..............235
4
Table of Contents
Page 21 of 296
Downloaded from www.Manualslib.com manuals search engine CHILD SEATS
WARNINGS
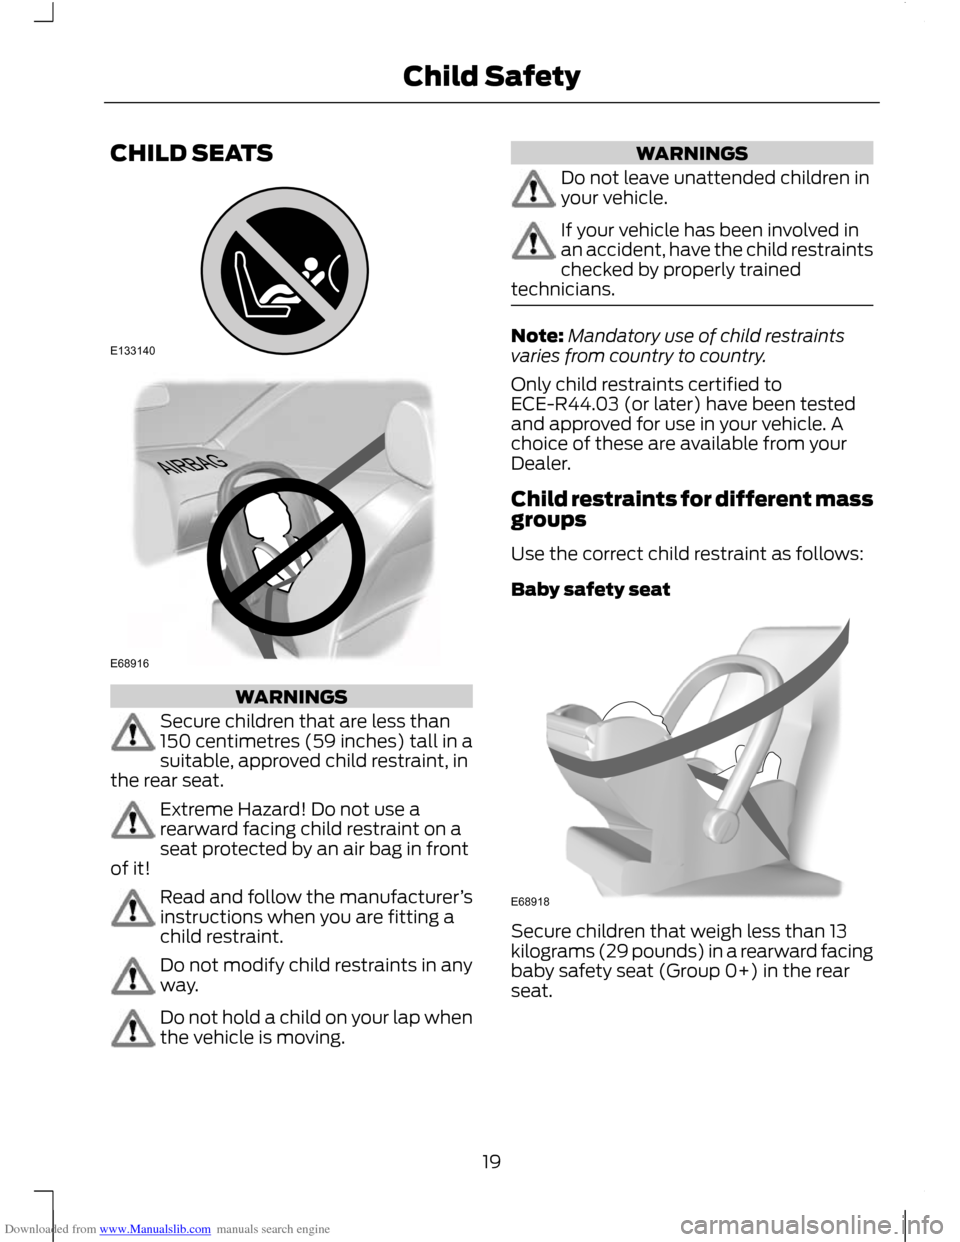
Secure children that are less than
150 centimetres (59 inches) tall in a
suitable, approved child restraint, in
the rear seat. Extreme Hazard! Do not use a
rearward facing child restraint on a
seat protected by an air bag in front
of it! Read and follow the manufacturer
’s
instructions when you are fitting a
child restraint. Do not modify child restraints in any
way.
Do not hold a child on your lap when
the vehicle is moving. WARNINGS
Do not leave unattended children in
your vehicle.
If your vehicle has been involved in
an accident, have the child restraints
checked by properly trained
technicians. Note:
Mandatory use of child restraints
varies from country to country.
Only child restraints certified to
ECE-R44.03 (or later) have been tested
and approved for use in your vehicle. A
choice of these are available from your
Dealer.
Child restraints for different mass
groups
Use the correct child restraint as follows:
Baby safety seat Secure children that weigh less than 13
kilograms (29 pounds) in a rearward facing
baby safety seat (Group 0+) in the rear
seat.
19
Child SafetyE133140 E68916 E68918
Page 30 of 296
Downloaded from www.Manualslib.com manuals search engine Side airbags
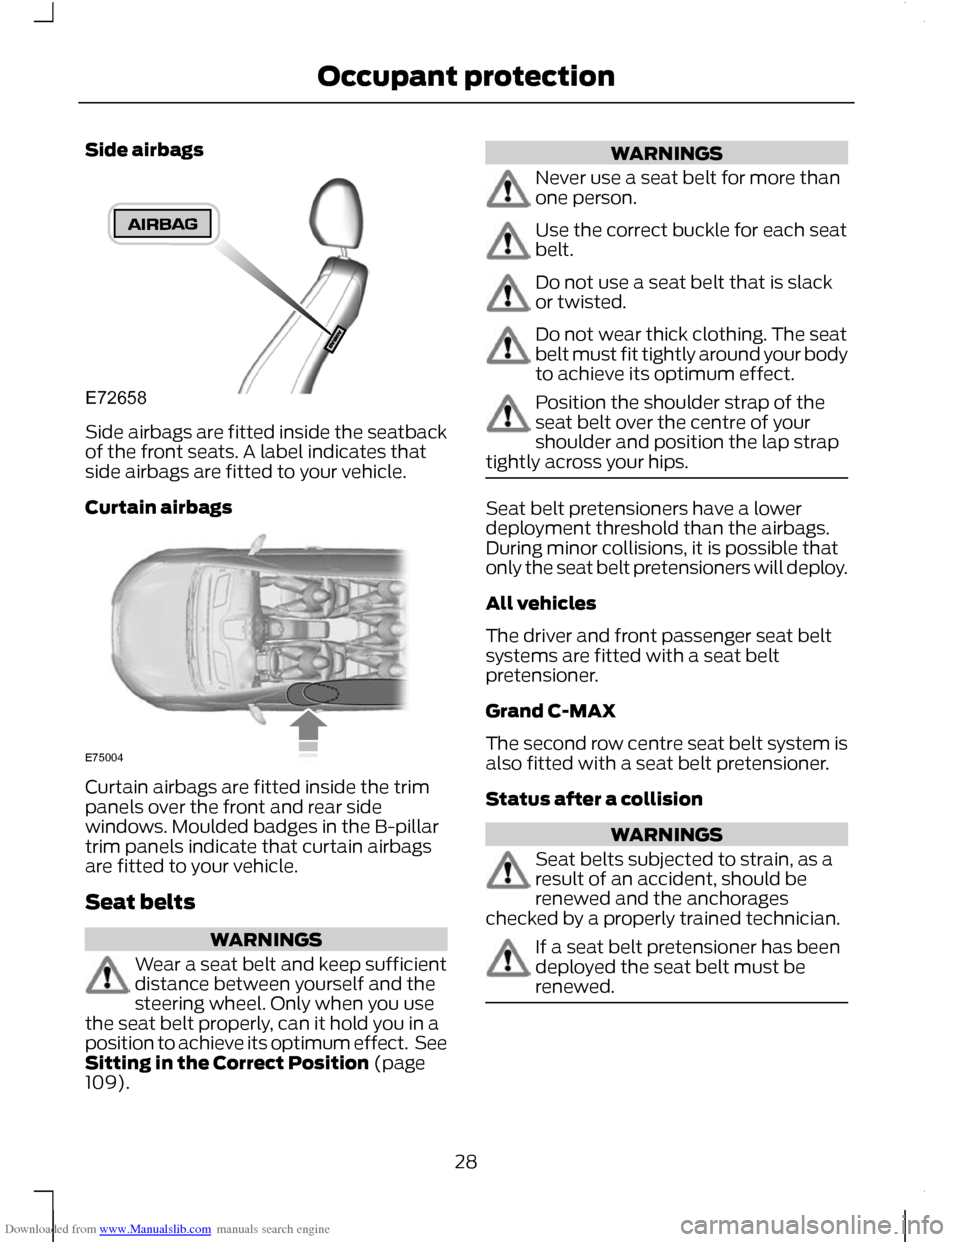
Side airbags are fitted inside the seatback
of the front seats. A label indicates that
side airbags are fitted to your vehicle.
Curtain airbags
Curtain airbags are fitted inside the trim
panels over the front and rear side
windows. Moulded badges in the B-pillar
trim panels indicate that curtain airbags
are fitted to your vehicle.
Seat belts
WARNINGS
Wear a seat belt and keep sufficient
distance between yourself and the
steering wheel. Only when you use
the seat belt properly, can it hold you in a
position to achieve its optimum effect. See
Sitting in the Correct Position (page
109). WARNINGS
Never use a seat belt for more than
one person.
Use the correct buckle for each seat
belt.
Do not use a seat belt that is slack
or twisted.
Do not wear thick clothing. The seat
belt must fit tightly around your body
to achieve its optimum effect.
Position the shoulder strap of the
seat belt over the centre of your
shoulder and position the lap strap
tightly across your hips. Seat belt pretensioners have a lower
deployment threshold than the airbags.
During minor collisions, it is possible that
only the seat belt pretensioners will deploy.
All vehicles
The driver and front passenger seat belt
systems are fitted with a seat belt
pretensioner.
Grand C-MAX
The second row centre seat belt system is
also fitted with a seat belt pretensioner.
Status after a collision
WARNINGS
Seat belts subjected to strain, as a
result of an accident, should be
renewed and the anchorages
checked by a properly trained technician. If a seat belt pretensioner has been
deployed the seat belt must be
renewed.
28
Occupant protectionE72658 E75004
Page 36 of 296
Downloaded from www.Manualslib.com manuals search engine WARNING
Position the seat belt correctly for
your safety and that of your unborn
child. Do not use only the lap strap
or the shoulder strap. Position the lap strap comfortably across
your hips and low beneath your pregnant
abdomen. Position the shoulder strap
between your breasts, above and to the
side of your pregnant abdomen.
DISABLING THE PASSENGER
AIRBAG
WARNING
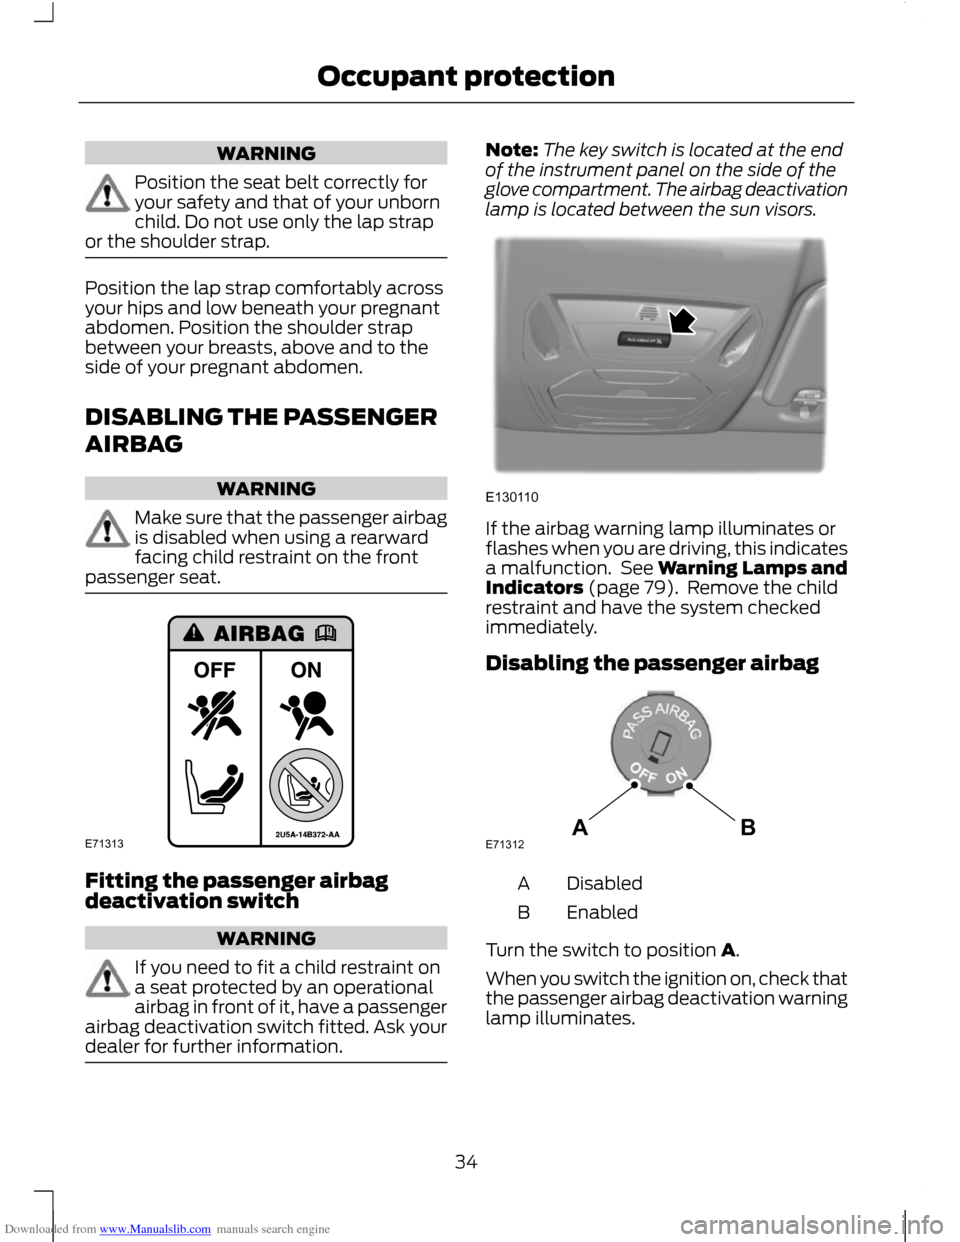
Make sure that the passenger airbag
is disabled when using a rearward
facing child restraint on the front
passenger seat. Fitting the passenger airbag
deactivation switch
WARNING
If you need to fit a child restraint on
a seat protected by an operational
airbag in front of it, have a passenger
airbag deactivation switch fitted. Ask your
dealer for further information. Note:
The key switch is located at the end
of the instrument panel on the side of the
glove compartment. The airbag deactivation
lamp is located between the sun visors. If the airbag warning lamp illuminates or
flashes when you are driving, this indicates
a malfunction. See Warning Lamps and
Indicators (page 79). Remove the child
restraint and have the system checked
immediately.
Disabling the passenger airbag
Disabled
A
Enabled
B
Turn the switch to position A.
When you switch the ignition on, check that
the passenger airbag deactivation warning
lamp illuminates.
34
Occupant protectionE71313 E130110 ABE71312
Page 38 of 296
Downloaded from www.Manualslib.com manuals search engine GENERAL INFORMATION ON
RADIO FREQUENCIES
CAUTIONS
The radio frequency used by your
remote control can also be used by
other short distance radio
transmissions (e.g. amateur radios,
medical equipment, wireless headphones,
remote controls and alarm systems). If the
frequencies are jammed, you will not be
able to use your remote control. You can
lock and unlock the doors with the key. Check your vehicle is locked before
leaving it unattended. This will
safeguard against any potential
malicious frequency blocking. Note:
You could unlock the doors if you
press the buttons on the remote control
unintentionally.
The operating range between your remote
control and your vehicle varies depending
on the environment.
PROGRAMMING THE REMOTE
CONTROL
You can programme a maximum of eight
remote controls to use with your vehicle
(including any supplied with your vehicle).
Programming a new remote
control
1. Insert the key in the ignition.
2. Cycle the key from position 0 to II and
then back to 0 four times within six
seconds.
3. Leave the key in position 0 and press any button on the remote control
within 10 seconds. You will receive
confirmation via a chime or LED that
programming has been successful. Note:
Further remote controls may be
programmed at this stage.
4. Press any button on each additional remote control within 10 seconds of
each other.
Reprogramming the unlocking
function
Note: When you press the unlock button
either all the doors are unlocked or only the
driver ’s door is unlocked. Pressing the unlock
button again unlocks all the doors.
Press and hold the unlock and lock buttons
on the remote key simultaneously for at
least four seconds with the ignition off. The
direction indicators will flash twice to
confirm the change.
To return to the original unlocking function,
repeat the process.
CHANGING THE REMOTE
CONTROL BATTERY Make sure that you dispose of
old batteries in an
environmentally friendly way.
Seek advice from your local authority
regarding recycling.
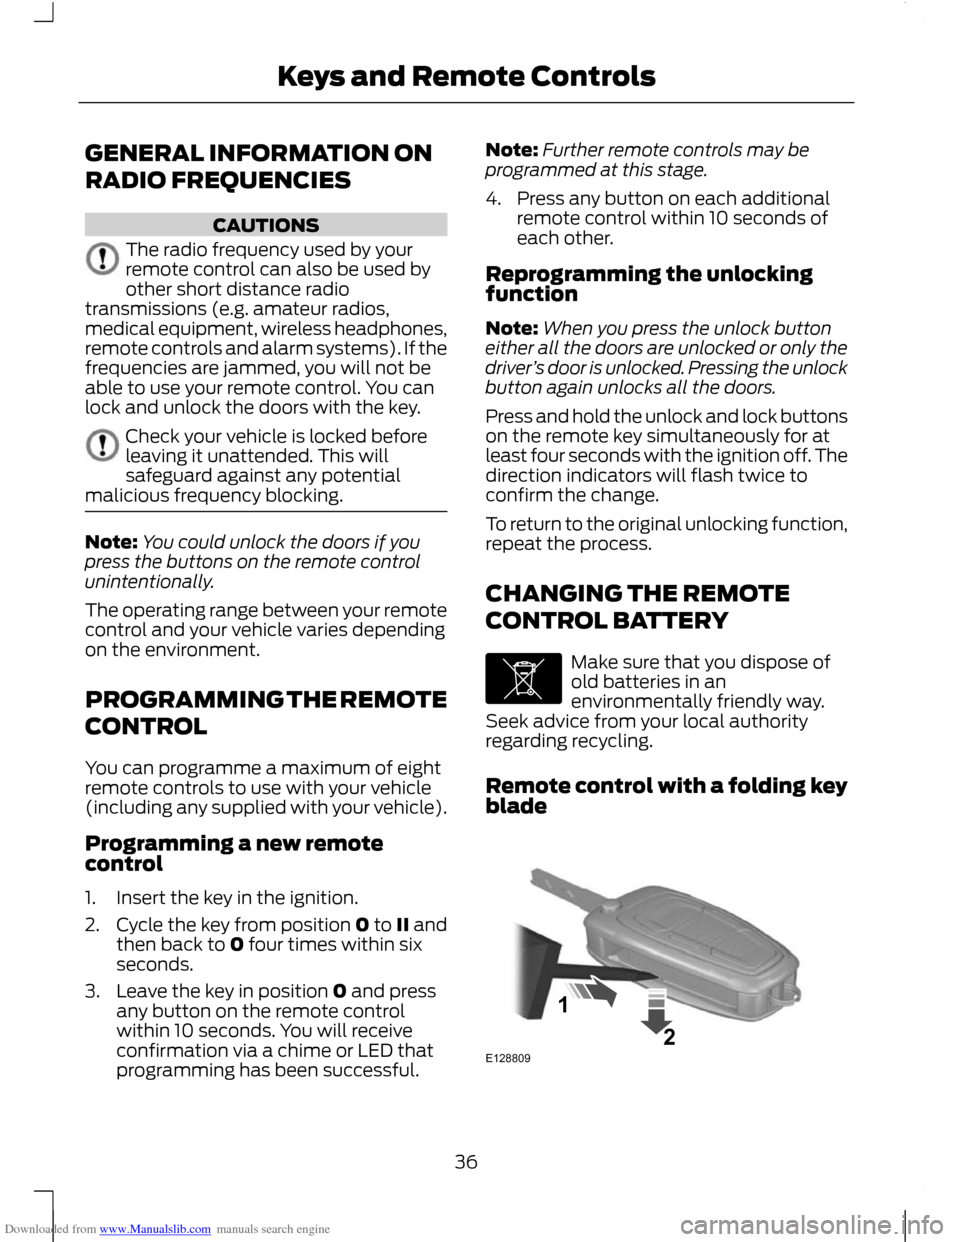
Remote control with a folding key
blade 36
Keys and Remote ControlsE107998 E12880921
Page 41 of 296
Downloaded from www.Manualslib.com manuals search engine LOCKING AND UNLOCKING
CAUTION
Check your vehicle is locked before
leaving it unattended.
Note:
Do not leave your keys in the vehicle.
Locking
Locking with the key
Turn the top of the key towards the front
of the vehicle.
Locking with the remote control
Note: The driver ’s door can be locked with
the key. This needs to be used if the remote
control is not functioning.
Note: Your vehicle can be locked with a rear
door open. The door will be locked when it
is closed. Press the button.
Double locking WARNING
Do not activate double locking when
persons or animals are inside the
vehicle. You will not be able to
unlock the doors from the inside if you have
double locked them. Note:
If you double lock your vehicle whilst
inside, switch the ignition on to return the
door locks to a single locked state.
Note: Your vehicle can be double locked
with a rear door open. The door will be
double locked when it is closed.
Double locking is a theft protection feature
that prevents someone from opening the
doors from the inside. Double locking with the key
Turn the key to the lock position twice
within three seconds.
Double locking with the remote control
Press the button twice within
three seconds.
Unlocking
Unlocking with the key
Turn the top of the key towards the rear of
the vehicle.
Unlocking with the remote control
Note: The driver ’s door can be unlocked
with the key. This needs to be used if the
remote control is not functioning.
Note: If the vehicle remains locked for
several weeks, the remote control will be
disabled. The vehicle must be unlocked and
the engine started using the key. Unlocking
and starting the vehicle once will enable the
remote control. Press the button.
Automatic relocking
The doors will relock automatically if you
do not open a door within 45 seconds of
unlocking the doors with the remote
control. The door locks and the alarm will
return to their previous state.
Reprogramming the unlocking function
The unlocking function may be
reprogrammed so that only the driver ’s
door is unlocked ( See Programming the
remote control (page 36). ).
39
Locks
Page 56 of 296
Downloaded from www.Manualslib.com manuals search engine Reverse gear wipe
The rear wiper will be activated
automatically when selecting reverse gear
if the rear wiper is not already switched on
and the front wiper is operating.
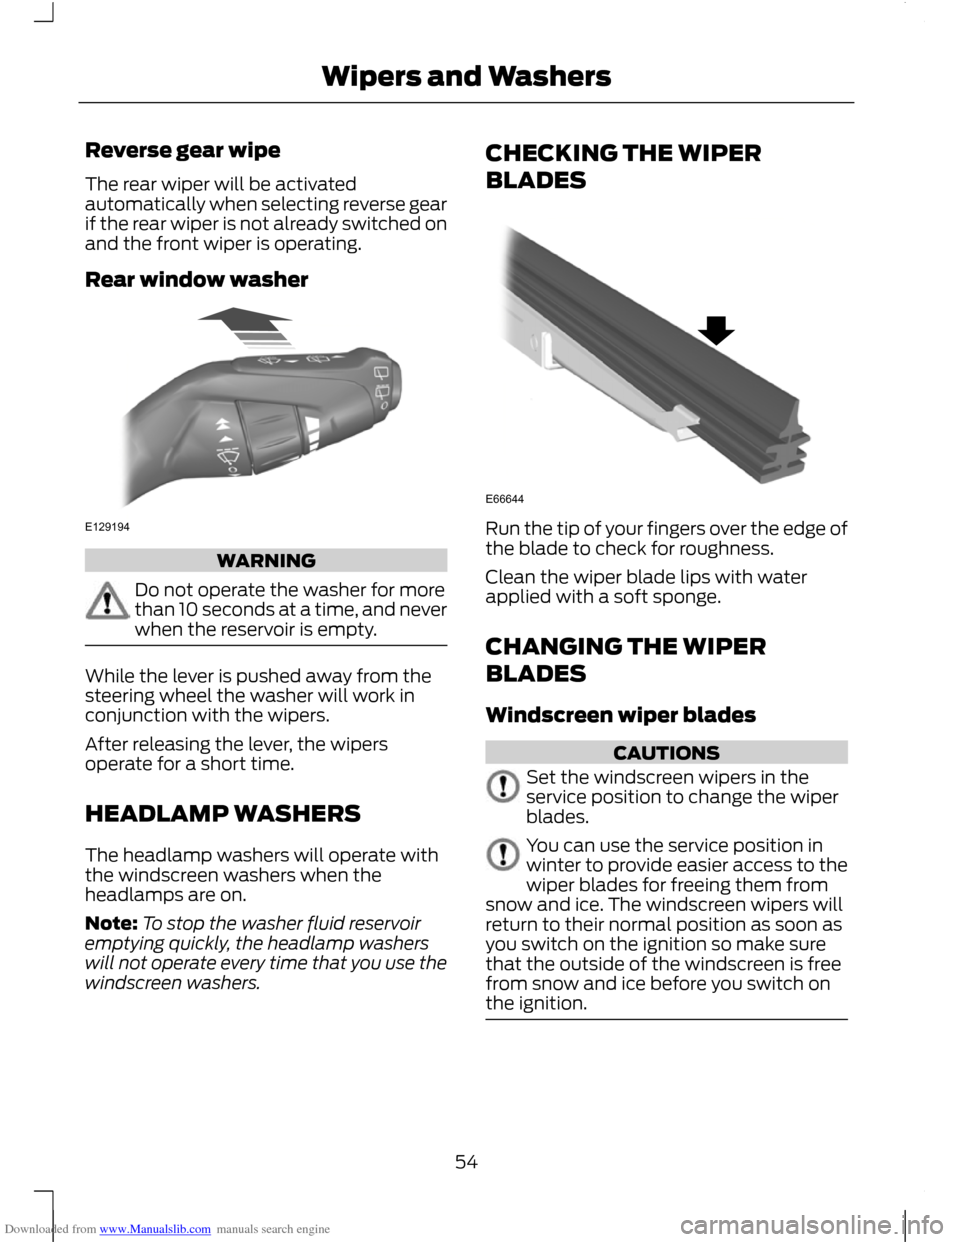
Rear window washer
WARNING
Do not operate the washer for more
than 10 seconds at a time, and never
when the reservoir is empty.
While the lever is pushed away from the
steering wheel the washer will work in
conjunction with the wipers.
After releasing the lever, the wipers
operate for a short time.
HEADLAMP WASHERS
The headlamp washers will operate with
the windscreen washers when the
headlamps are on.
Note:
To stop the washer fluid reservoir
emptying quickly, the headlamp washers
will not operate every time that you use the
windscreen washers. CHECKING THE WIPER
BLADES
Run the tip of your fingers over the edge of
the blade to check for roughness.
Clean the wiper blade lips with water
applied with a soft sponge.
CHANGING THE WIPER
BLADES
Windscreen wiper blades
CAUTIONS
Set the windscreen wipers in the
service position to change the wiper
blades.
You can use the service position in
winter to provide easier access to the
wiper blades for freeing them from
snow and ice. The windscreen wipers will
return to their normal position as soon as
you switch on the ignition so make sure
that the outside of the windscreen is free
from snow and ice before you switch on
the ignition. 54
Wipers and WashersE129194 E66644
Page 74 of 296
Downloaded from www.Manualslib.com manuals search engine The electric windows will stop
automatically while closing and reverse
some distance if there is an obstacle in the
way.
Overriding the anti-trap function
WARNING
While you close the window for the
third time, the anti-trap function is
disabled. Make sure there are no
obstacles in the way of the closing window. To override this protection function when
there is a resistance, e.g. in the winter,
proceed as follows:
1.
Close the window twice until it reaches
the resistance and let it reverse.
2. Close the window a third time to the resistance. The anti-trap function is
disabled and you cannot close the
window automatically. The window
will override the resistance and you can
close it fully.
3. If the window does not close after the third attempt, have it checked by an
expert.
Resetting the memory of the
electric windows WARNING
The anti-trap function is deactivated
until you have reset the memory.
After the battery has been disconnected
from the vehicle you must reset the
memory separately for each window:
Note:
On vehicles with a convertible top,
the roof and doors must be fully closed
before carrying out the following procedure.
1. Lift and hold the switch until the window is fully closed.
2. Release the switch. 3. Lift the switch again for one more
second.
4. Push and hold the switch until the window is fully open.
5. Release the switch.
6. Lift and hold the switch until the window is fully closed.
7. Open the window and try to close it automatically.
8. Reset and repeat procedure if the window does not close automatically.
EXTERIOR MIRRORS WARNING
Do not overestimate the distance of
the objects that you see in the
convex mirror. Objects seen in
convex mirrors will appear smaller and
further away than they actually are. Manual folding mirrors
Folding
Push the mirror towards the door window
glass.
Unfolding
Make sure that you fully engage the mirror
in its support when returning it to its
original position.
72
Windows and Mirrors
Page 80 of 296
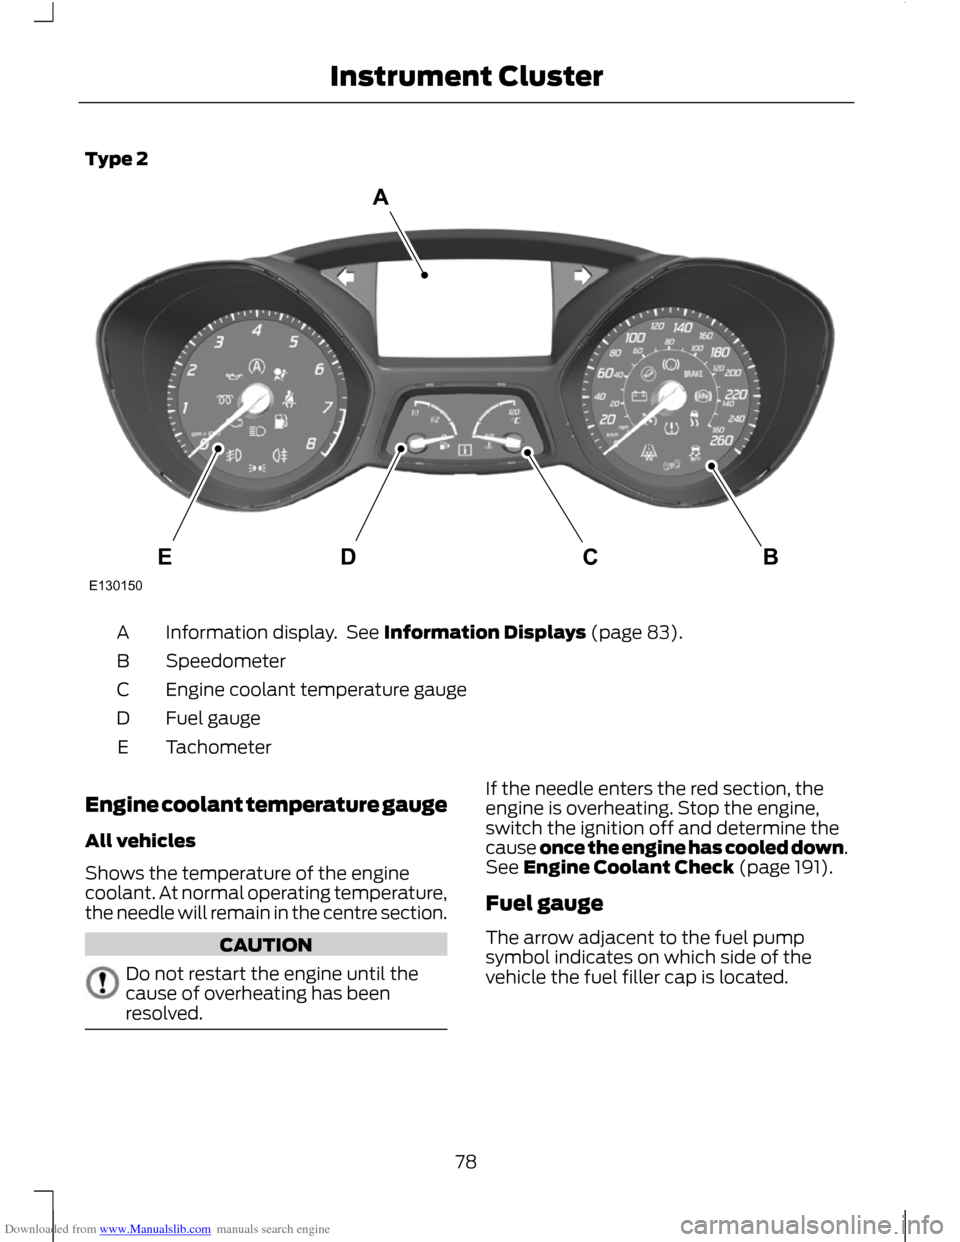
Downloaded from www.Manualslib.com manuals search engine Type 2
Information display. See Information Displays (page 83).
A
Speedometer
B
Engine coolant temperature gauge
C
Fuel gauge
D
Tachometer
E
Engine coolant temperature gauge
All vehicles
Shows the temperature of the engine
coolant. At normal operating temperature,
the needle will remain in the centre section. CAUTION
Do not restart the engine until the
cause of overheating has been
resolved. If the needle enters the red section, the
engine is overheating. Stop the engine,
switch the ignition off and determine the
cause once the engine has cooled down.
See Engine Coolant Check (page 191).
Fuel gauge
The arrow adjacent to the fuel pump
symbol indicates on which side of the
vehicle the fuel filler cap is located.
78
Instrument ClusterBCDEAE130150