light FORD C MAX 2015 Owners Manual
[x] Cancel search | Manufacturer: FORD, Model Year: 2015, Model line: C MAX, Model: FORD C MAX 2015Pages: 469, PDF Size: 6.16 MB
Page 384 of 469
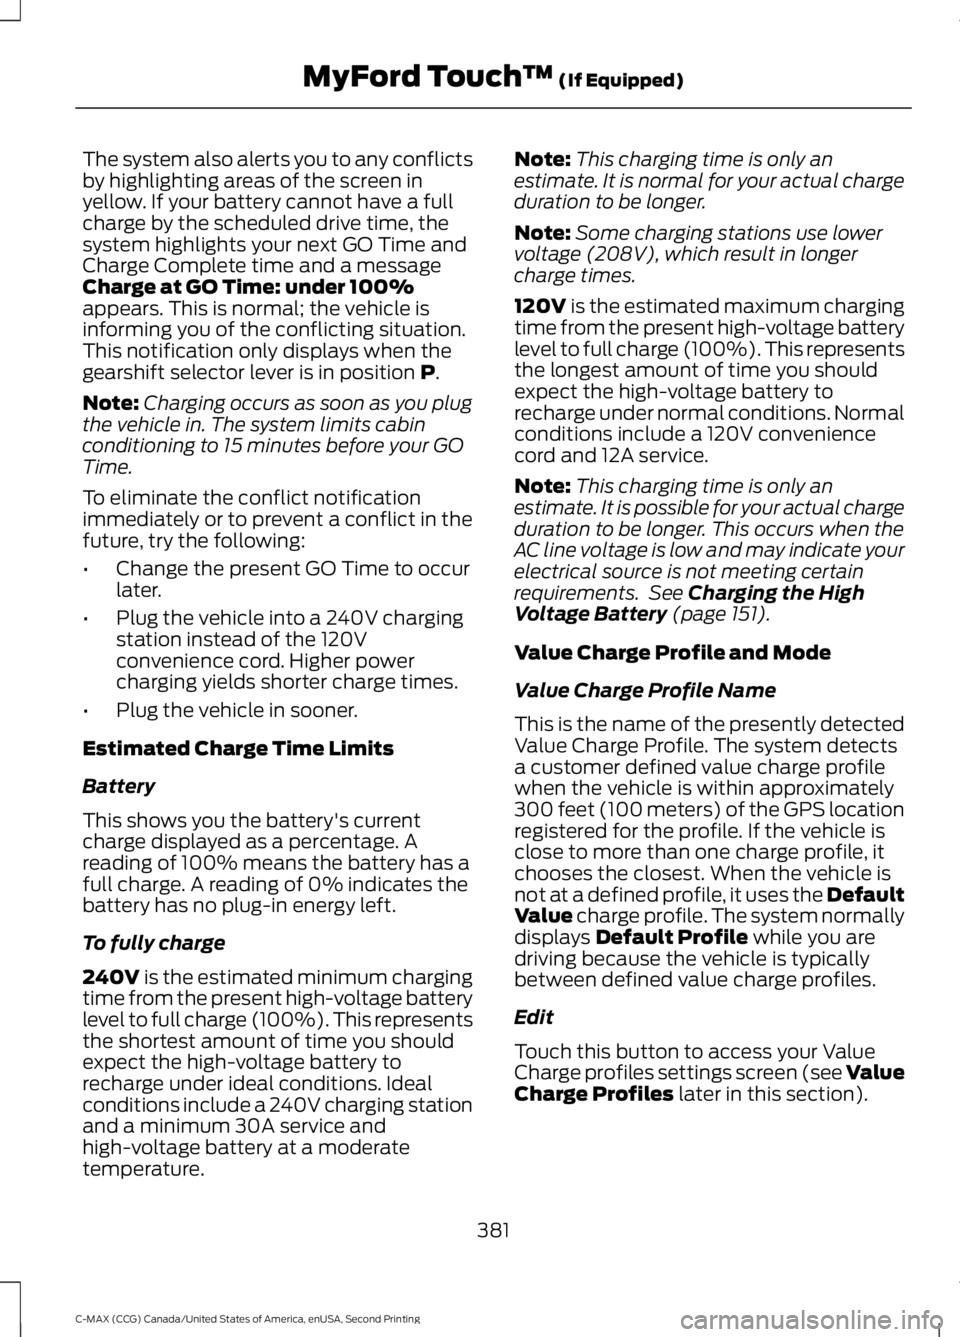
The system also alerts you to any conflicts
by highlighting areas of the screen in
yellow. If your battery cannot have a full
charge by the scheduled drive time, the
system highlights your next GO Time and
Charge Complete time and a message
Charge at GO Time: under 100%
appears. This is normal; the vehicle is
informing you of the conflicting situation.
This notification only displays when the
gearshift selector lever is in position P.
Note: Charging occurs as soon as you plug
the vehicle in. The system limits cabin
conditioning to 15 minutes before your GO
Time.
To eliminate the conflict notification
immediately or to prevent a conflict in the
future, try the following:
• Change the present GO Time to occur
later.
• Plug the vehicle into a 240V charging
station instead of the 120V
convenience cord. Higher power
charging yields shorter charge times.
• Plug the vehicle in sooner.
Estimated Charge Time Limits
Battery
This shows you the battery's current
charge displayed as a percentage. A
reading of 100% means the battery has a
full charge. A reading of 0% indicates the
battery has no plug-in energy left.
To fully charge
240V
is the estimated minimum charging
time from the present high-voltage battery
level to full charge (100%). This represents
the shortest amount of time you should
expect the high-voltage battery to
recharge under ideal conditions. Ideal
conditions include a 240V charging station
and a minimum 30A service and
high-voltage battery at a moderate
temperature. Note:
This charging time is only an
estimate. It is normal for your actual charge
duration to be longer.
Note: Some charging stations use lower
voltage (208V), which result in longer
charge times.
120V
is the estimated maximum charging
time from the present high-voltage battery
level to full charge (100%). This represents
the longest amount of time you should
expect the high-voltage battery to
recharge under normal conditions. Normal
conditions include a 120V convenience
cord and 12A service.
Note: This charging time is only an
estimate. It is possible for your actual charge
duration to be longer. This occurs when the
AC line voltage is low and may indicate your
electrical source is not meeting certain
requirements. See
Charging the High
Voltage Battery (page 151).
Value Charge Profile and Mode
Value Charge Profile Name
This is the name of the presently detected
Value Charge Profile. The system detects
a customer defined value charge profile
when the vehicle is within approximately
300 feet (100 meters) of the GPS location
registered for the profile. If the vehicle is
close to more than one charge profile, it
chooses the closest. When the vehicle is
not at a defined profile, it uses the Default
Value
charge profile. The system normally
displays Default Profile while you are
driving because the vehicle is typically
between defined value charge profiles.
Edit
Touch this button to access your Value
Charge profiles settings screen (see Value
Charge Profiles
later in this section).
381
C-MAX (CCG) Canada/United States of America, enUSA, Second Printing MyFord Touch
™
(If Equipped)
Page 386 of 469
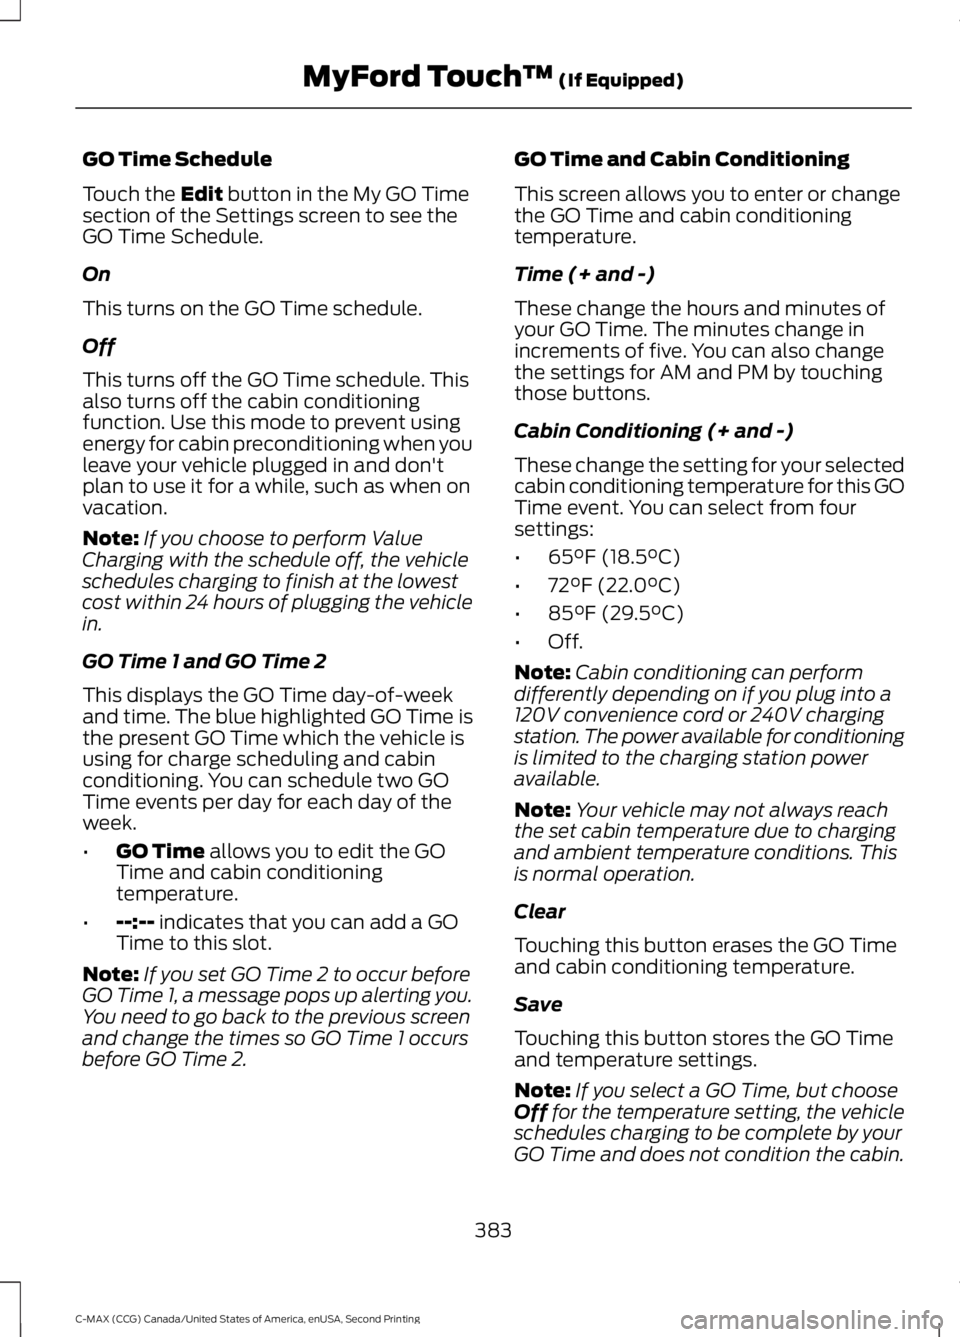
GO Time Schedule
Touch the Edit button in the My GO Time
section of the Settings screen to see the
GO Time Schedule.
On
This turns on the GO Time schedule.
Off
This turns off the GO Time schedule. This
also turns off the cabin conditioning
function. Use this mode to prevent using
energy for cabin preconditioning when you
leave your vehicle plugged in and don't
plan to use it for a while, such as when on
vacation.
Note: If you choose to perform Value
Charging with the schedule off, the vehicle
schedules charging to finish at the lowest
cost within 24 hours of plugging the vehicle
in.
GO Time 1 and GO Time 2
This displays the GO Time day-of-week
and time. The blue highlighted GO Time is
the present GO Time which the vehicle is
using for charge scheduling and cabin
conditioning. You can schedule two GO
Time events per day for each day of the
week.
• GO Time
allows you to edit the GO
Time and cabin conditioning
temperature.
• --:--
indicates that you can add a GO
Time to this slot.
Note: If you set GO Time 2 to occur before
GO Time 1, a message pops up alerting you.
You need to go back to the previous screen
and change the times so GO Time 1 occurs
before GO Time 2. GO Time and Cabin Conditioning
This screen allows you to enter or change
the GO Time and cabin conditioning
temperature.
Time (+ and -)
These change the hours and minutes of
your GO Time. The minutes change in
increments of five. You can also change
the settings for AM and PM by touching
those buttons.
Cabin Conditioning (+ and -)
These change the setting for your selected
cabin conditioning temperature for this GO
Time event. You can select from four
settings:
•
65°F (18.5°C)
• 72°F (22.0°C)
• 85°F (29.5°C)
• Off.
Note: Cabin conditioning can perform
differently depending on if you plug into a
120V convenience cord or 240V charging
station. The power available for conditioning
is limited to the charging station power
available.
Note: Your vehicle may not always reach
the set cabin temperature due to charging
and ambient temperature conditions. This
is normal operation.
Clear
Touching this button erases the GO Time
and cabin conditioning temperature.
Save
Touching this button stores the GO Time
and temperature settings.
Note: If you select a GO Time, but choose
Off
for the temperature setting, the vehicle
schedules charging to be complete by your
GO Time and does not condition the cabin.
383
C-MAX (CCG) Canada/United States of America, enUSA, Second Printing MyFord Touch
™
(If Equipped)
Page 388 of 469
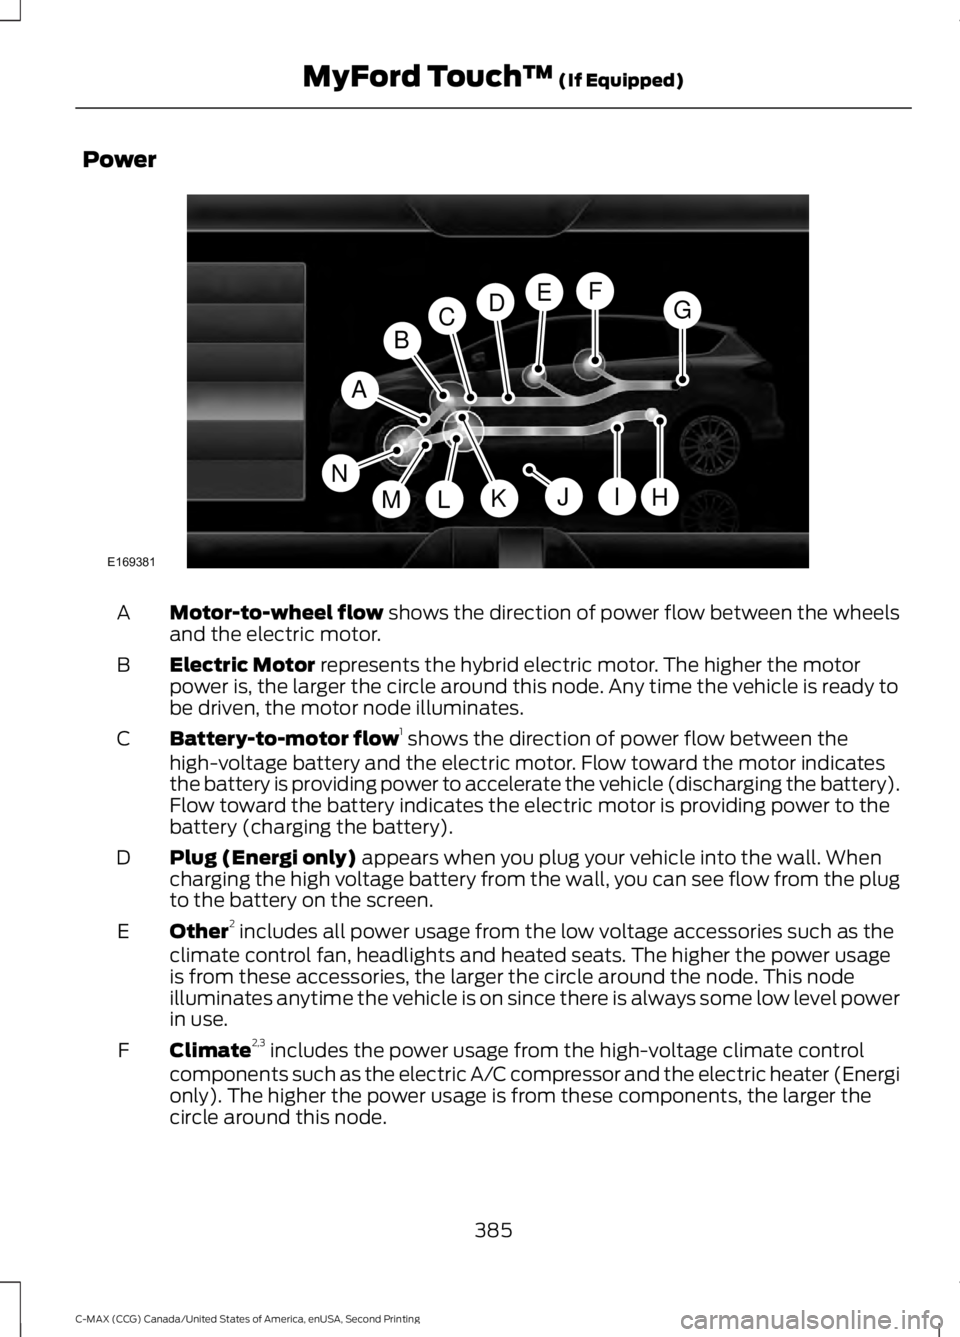
Power
Motor-to-wheel flow shows the direction of power flow between the wheels
and the electric motor.
A
Electric Motor
represents the hybrid electric motor. The higher the motor
power is, the larger the circle around this node. Any time the vehicle is ready to
be driven, the motor node illuminates.
B
Battery-to-motor flow 1
shows the direction of power flow between the
high-voltage battery and the electric motor. Flow toward the motor indicates
the battery is providing power to accelerate the vehicle (discharging the battery).
Flow toward the battery indicates the electric motor is providing power to the
battery (charging the battery).
C
Plug (Energi only)
appears when you plug your vehicle into the wall. When
charging the high voltage battery from the wall, you can see flow from the plug
to the battery on the screen.
D
Other 2
includes all power usage from the low voltage accessories such as the
climate control fan, headlights and heated seats. The higher the power usage
is from these accessories, the larger the circle around the node. This node
illuminates anytime the vehicle is on since there is always some low level power
in use.
E
Climate 2,3
includes the power usage from the high-voltage climate control
components such as the electric A/C compressor and the electric heater (Energi
only). The higher the power usage is from these components, the larger the
circle around this node.
F
385
C-MAX (CCG) Canada/United States of America, enUSA, Second Printing MyFord Touch
™
(If Equipped)A
H
DGEF
BC
IKMLJ
E169381
N
Page 389 of 469
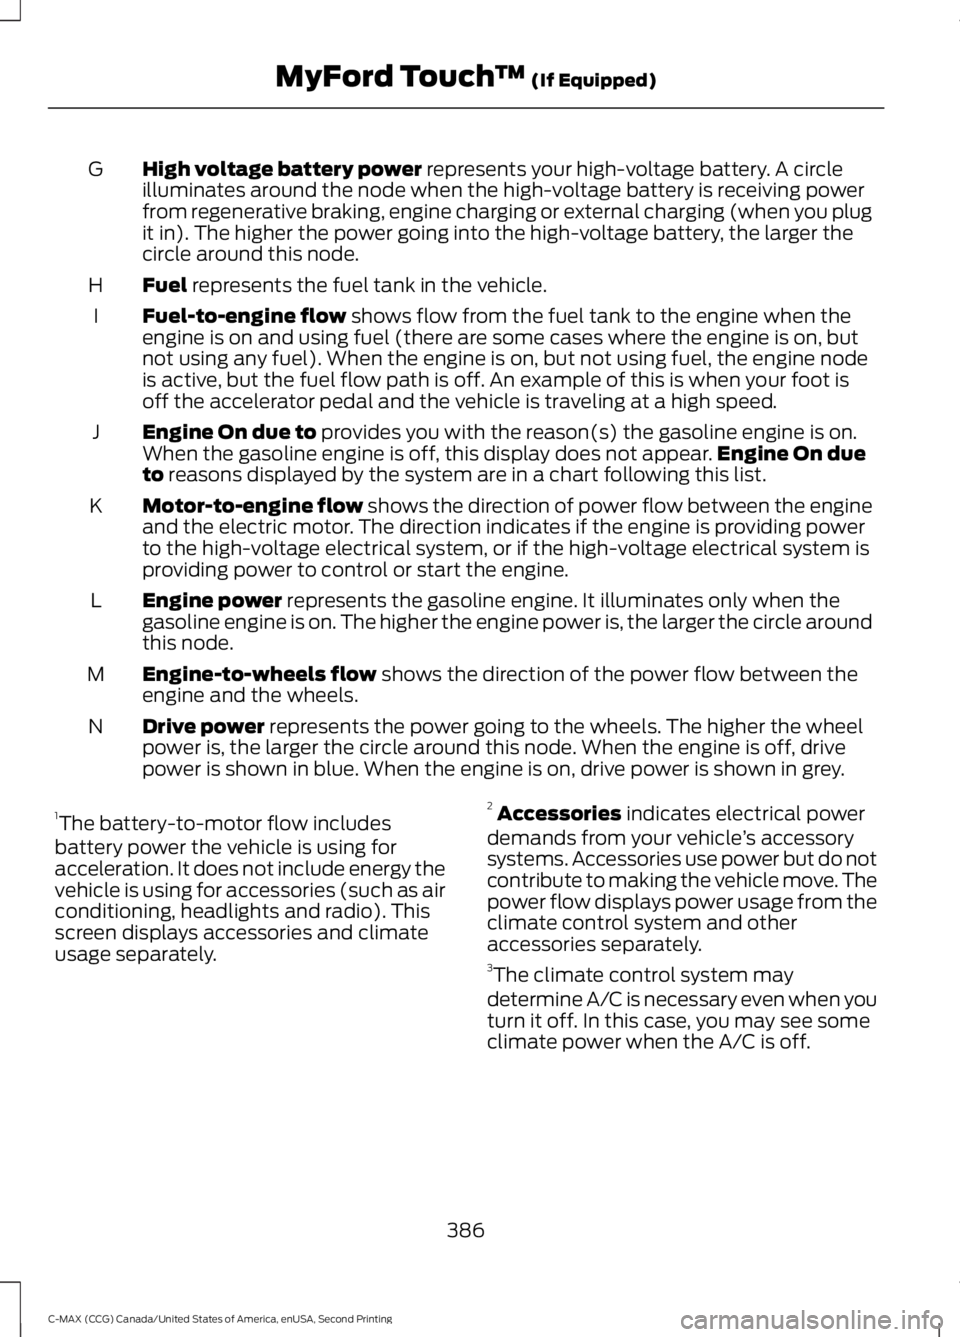
High voltage battery power represents your high-voltage battery. A circle
illuminates around the node when the high-voltage battery is receiving power
from regenerative braking, engine charging or external charging (when you plug
it in). The higher the power going into the high-voltage battery, the larger the
circle around this node.
G
Fuel
represents the fuel tank in the vehicle.
H
Fuel-to-engine flow
shows flow from the fuel tank to the engine when the
engine is on and using fuel (there are some cases where the engine is on, but
not using any fuel). When the engine is on, but not using fuel, the engine node
is active, but the fuel flow path is off. An example of this is when your foot is
off the accelerator pedal and the vehicle is traveling at a high speed.
I
Engine On due to
provides you with the reason(s) the gasoline engine is on.
When the gasoline engine is off, this display does not appear. Engine On due
to
reasons displayed by the system are in a chart following this list.
J
Motor-to-engine flow
shows the direction of power flow between the engine
and the electric motor. The direction indicates if the engine is providing power
to the high-voltage electrical system, or if the high-voltage electrical system is
providing power to control or start the engine.
K
Engine power
represents the gasoline engine. It illuminates only when the
gasoline engine is on. The higher the engine power is, the larger the circle around
this node.
L
Engine-to-wheels flow
shows the direction of the power flow between the
engine and the wheels.
M
Drive power
represents the power going to the wheels. The higher the wheel
power is, the larger the circle around this node. When the engine is off, drive
power is shown in blue. When the engine is on, drive power is shown in grey.
N
1 The battery-to-motor flow includes
battery power the vehicle is using for
acceleration. It does not include energy the
vehicle is using for accessories (such as air
conditioning, headlights and radio). This
screen displays accessories and climate
usage separately. 2
Accessories
indicates electrical power
demands from your vehicle ’s accessory
systems. Accessories use power but do not
contribute to making the vehicle move. The
power flow displays power usage from the
climate control system and other
accessories separately.
3 The climate control system may
determine A/C is necessary even when you
turn it off. In this case, you may see some
climate power when the A/C is off.
386
C-MAX (CCG) Canada/United States of America, enUSA, Second Printing MyFord Touch
™
(If Equipped)
Page 404 of 469
NAVIGATION
Note:
The navigation SD card must be in
the SD card slot to operate the navigation
system. If you need a replacement SD card,
see an authorized dealer.
Note: The SD card slot is spring-loaded. To
remove the SD card, just push the card in
and release it. Do not attempt to pull the
card out to remove it; this could cause
damage.
Your navigation system is comprised of
two main features, destination mode and
map mode.
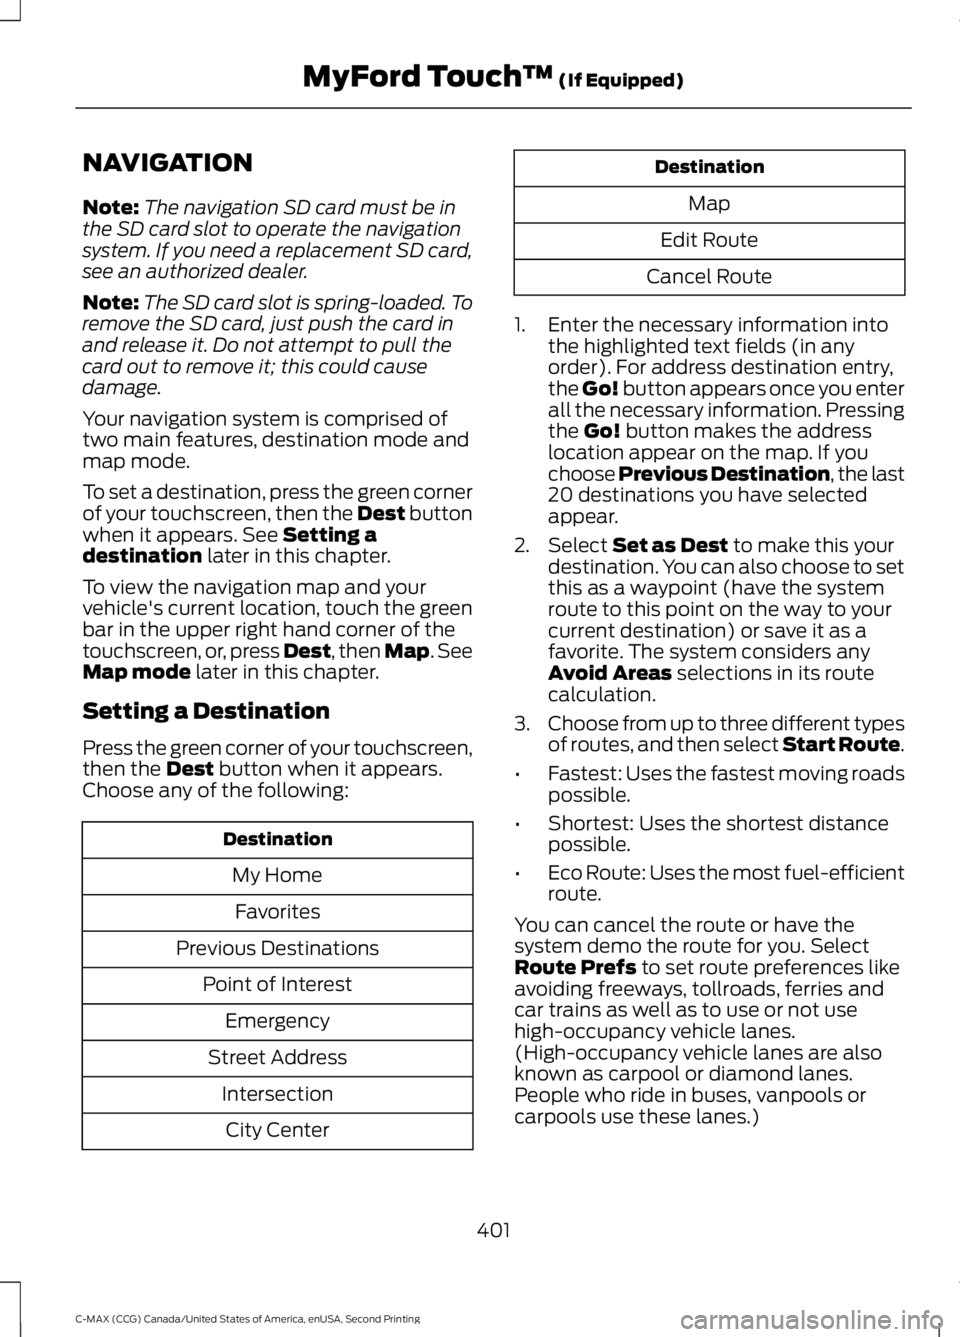
To set a destination, press the green corner
of your touchscreen, then the Dest button
when it appears. See Setting a
destination later in this chapter.
To view the navigation map and your
vehicle's current location, touch the green
bar in the upper right hand corner of the
touchscreen, or, press Dest, then Map. See
Map mode
later in this chapter.
Setting a Destination
Press the green corner of your touchscreen,
then the
Dest button when it appears.
Choose any of the following: Destination
My HomeFavorites
Previous Destinations Point of InterestEmergency
Street Address IntersectionCity Center Destination
Map
Edit Route
Cancel Route
1. Enter the necessary information into the highlighted text fields (in any
order). For address destination entry,
the Go! button appears once you enter
all the necessary information. Pressing
the
Go! button makes the address
location appear on the map. If you
choose Previous Destination, the last
20 destinations you have selected
appear.
2. Select
Set as Dest to make this your
destination. You can also choose to set
this as a waypoint (have the system
route to this point on the way to your
current destination) or save it as a
favorite. The system considers any
Avoid Areas
selections in its route
calculation.
3. Choose from up to three different types
of routes, and then select Start Route.
• Fastest: Uses the fastest moving roads
possible.
• Shortest: Uses the shortest distance
possible.
• Eco Route: Uses the most fuel-efficient
route.
You can cancel the route or have the
system demo the route for you. Select
Route Prefs
to set route preferences like
avoiding freeways, tollroads, ferries and
car trains as well as to use or not use
high-occupancy vehicle lanes.
(High-occupancy vehicle lanes are also
known as carpool or diamond lanes.
People who ride in buses, vanpools or
carpools use these lanes.)
401
C-MAX (CCG) Canada/United States of America, enUSA, Second Printing MyFord Touch
™
(If Equipped)
Page 406 of 469
Range Rings and Charge Points (Energi Only)
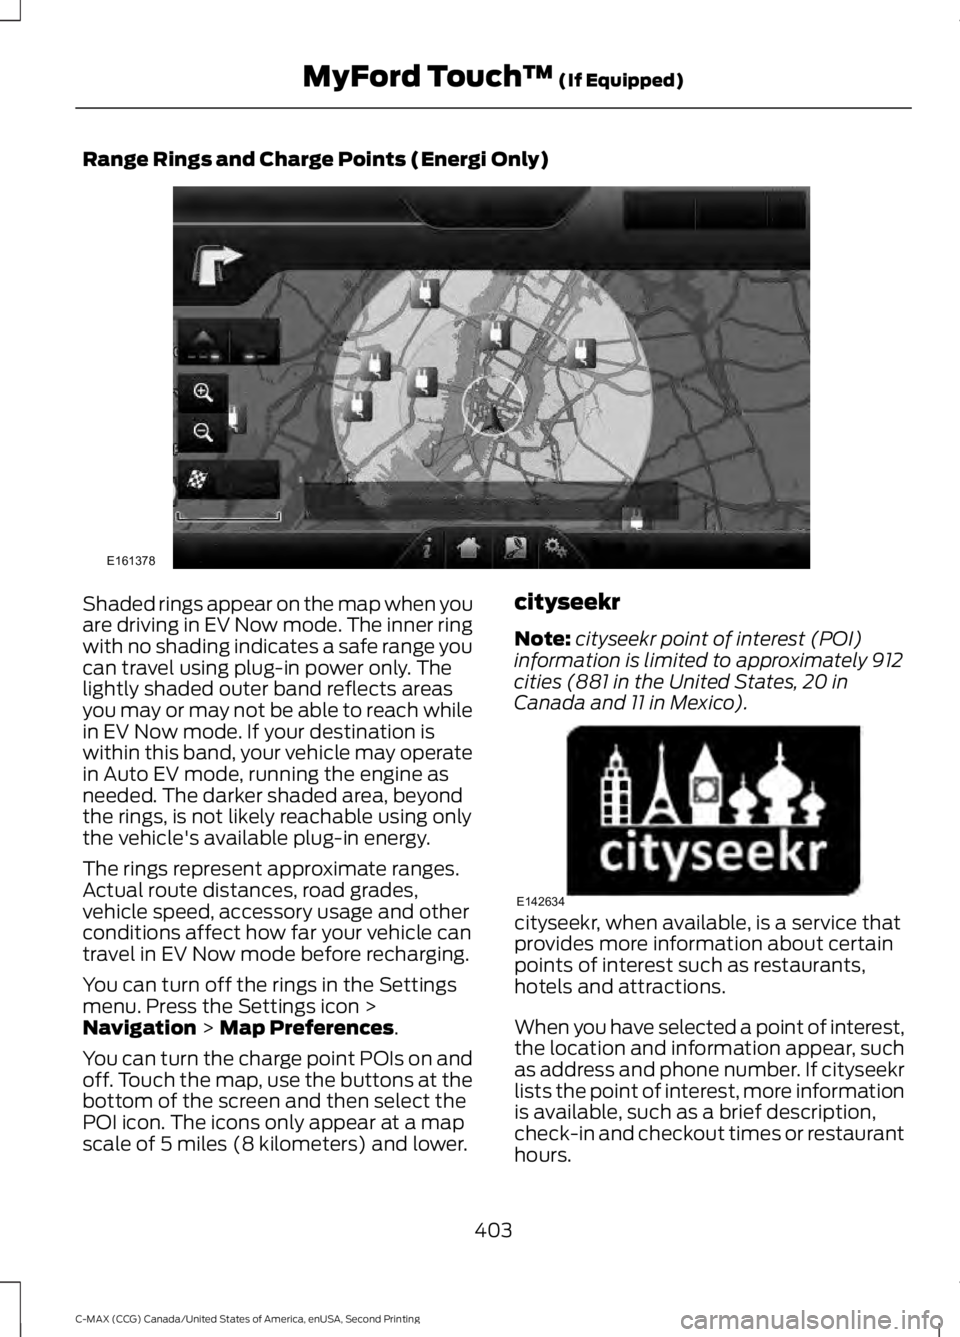
Shaded rings appear on the map when you
are driving in EV Now mode. The inner ring
with no shading indicates a safe range you
can travel using plug-in power only. The
lightly shaded outer band reflects areas
you may or may not be able to reach while
in EV Now mode. If your destination is
within this band, your vehicle may operate
in Auto EV mode, running the engine as
needed. The darker shaded area, beyond
the rings, is not likely reachable using only
the vehicle's available plug-in energy.
The rings represent approximate ranges.
Actual route distances, road grades,
vehicle speed, accessory usage and other
conditions affect how far your vehicle can
travel in EV Now mode before recharging.
You can turn off the rings in the Settings
menu. Press the Settings icon >
Navigation > Map Preferences.
You can turn the charge point POIs on and
off. Touch the map, use the buttons at the
bottom of the screen and then select the
POI icon. The icons only appear at a map
scale of 5 miles (8 kilometers) and lower. cityseekr
Note:
cityseekr point of interest (POI)
information is limited to approximately 912
cities (881 in the United States, 20 in
Canada and 11 in Mexico). cityseekr, when available, is a service that
provides more information about certain
points of interest such as restaurants,
hotels and attractions.
When you have selected a point of interest,
the location and information appear, such
as address and phone number. If cityseekr
lists the point of interest, more information
is available, such as a brief description,
check-in and checkout times or restaurant
hours.
403
C-MAX (CCG) Canada/United States of America, enUSA, Second Printing MyFord Touch
™
(If Equipped)E161378 E142634
Page 409 of 469
2D city maps show detailed outlines of
buildings, visible land use and land
elements and detailed railway
infrastructure for the most essential cities
around the globe. These maps also contain
features, such as town blocks, building
footprints and railways.
3D landmarks appear as clear, visible
objects that are typically recognizable and
have a certain tourist value. The 3D
landmarks appear in 3D map mode only.
Coverage varies, and improves with
updated map releases.
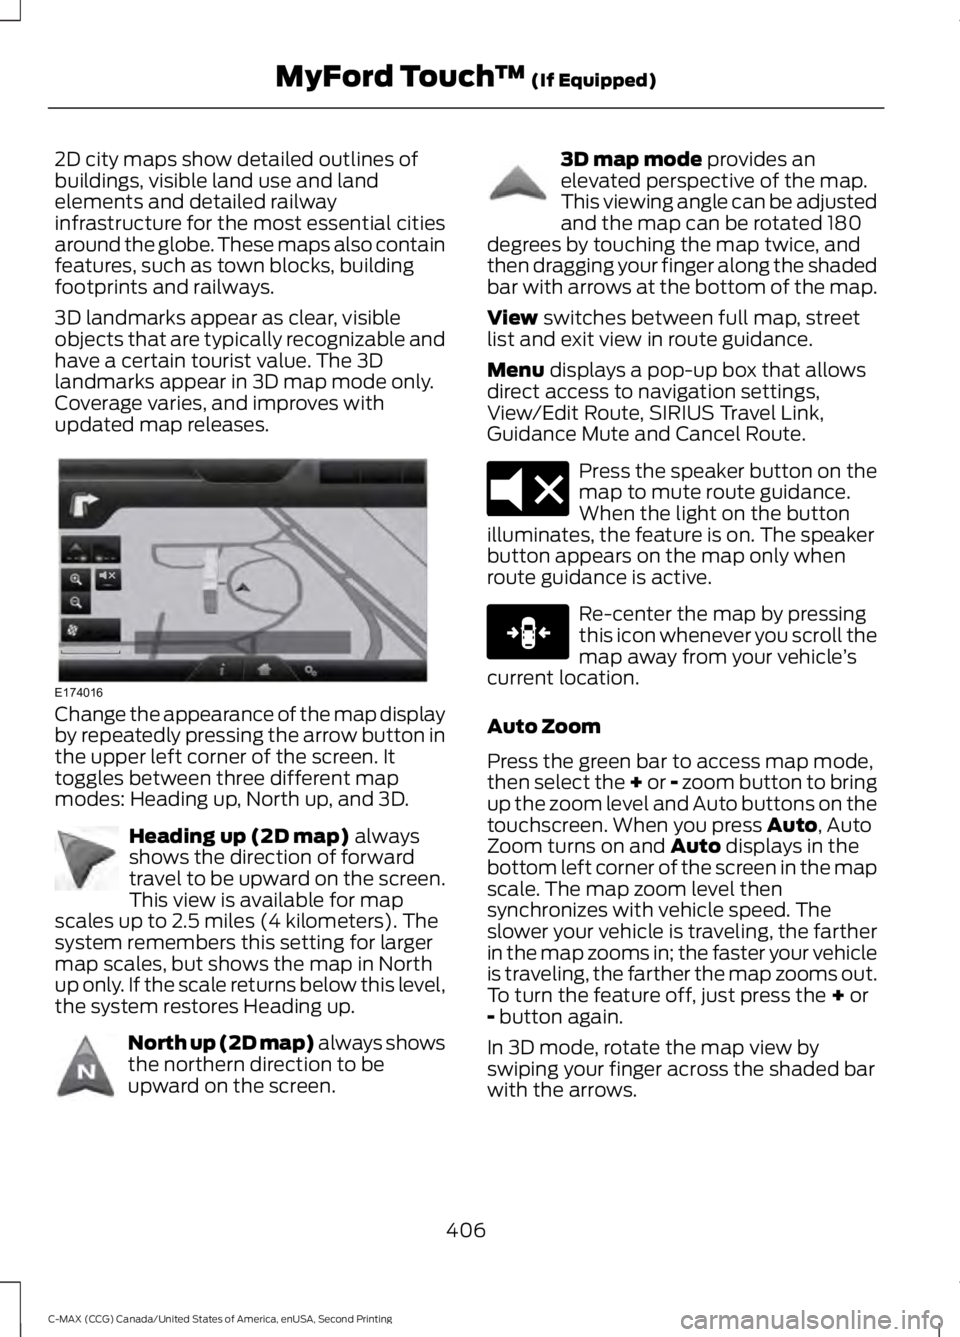
Change the appearance of the map display
by repeatedly pressing the arrow button in
the upper left corner of the screen. It
toggles between three different map
modes: Heading up, North up, and 3D.
Heading up (2D map) always
shows the direction of forward
travel to be upward on the screen.
This view is available for map
scales up to 2.5 miles (4 kilometers). The
system remembers this setting for larger
map scales, but shows the map in North
up only. If the scale returns below this level,
the system restores Heading up. North up (2D map) always shows
the northern direction to be
upward on the screen. 3D map mode
provides an
elevated perspective of the map.
This viewing angle can be adjusted
and the map can be rotated 180
degrees by touching the map twice, and
then dragging your finger along the shaded
bar with arrows at the bottom of the map.
View
switches between full map, street
list and exit view in route guidance.
Menu
displays a pop-up box that allows
direct access to navigation settings,
View/Edit Route, SIRIUS Travel Link,
Guidance Mute and Cancel Route. Press the speaker button on the
map to mute route guidance.
When the light on the button
illuminates, the feature is on. The speaker
button appears on the map only when
route guidance is active. Re-center the map by pressing
this icon whenever you scroll the
map away from your vehicle
’s
current location.
Auto Zoom
Press the green bar to access map mode,
then select the + or - zoom button to bring
up the zoom level and Auto buttons on the
touchscreen. When you press
Auto, Auto
Zoom turns on and Auto displays in the
bottom left corner of the screen in the map
scale. The map zoom level then
synchronizes with vehicle speed. The
slower your vehicle is traveling, the farther
in the map zooms in; the faster your vehicle
is traveling, the farther the map zooms out.
To turn the feature off, just press the
+ or
- button again.
In 3D mode, rotate the map view by
swiping your finger across the shaded bar
with the arrows.
406
C-MAX (CCG) Canada/United States of America, enUSA, Second Printing MyFord Touch
™
(If Equipped)E174016 E142642 E142643 E142644 E174017 E146188
Page 419 of 469
For a complete listing of the
accessories that are available for your
vehicle, please contact your authorized
dealer or visit our online store at:
Web Address
www.Accessories.Ford.com
You can also visit: Web Address
www.Ford.ca
Ford Motor Company will repair or replace
any properly authorized dealer-installed
Ford Genuine Accessory found to be
defective in factory-supplied materials or
workmanship during the warranty period,
as well as any component damaged by the
defective accessories. Ford Motor
Company will warrant your accessory
through the warranty that provides the
greatest benefit:
• 24 months, unlimited mileage.
• The remainder of your new vehicle
limited warranty.
Contact an authorized dealer for details
and a copy of the warranty.
Exterior style
• Hood deflector*.
• Side window deflectors.
• Splash guards.
• Custom graphics*.
Interior style
• Floor mats.
• Accent lighting.
• Cargo area protector. Lifestyle
•
Ash cup or smoker's packages.
• Soft cargo organizers.
• Cargo net*.
• Roof racks and carriers*.
Peace of mind
• Keyless entry keypad.
• Remote start.
• Vehicle security systems.
• Wheel locks.
• Bumper-mounted parking assist
system*.
• Rear bumper protector.
• Car covers.
• Charge cord storage bag*.
*Ford Licensed Accessory. The accessory
manufacturer designs, develops and
therefore warrants Ford Licensed
Accessories, and does not design or test
these accessories to Ford Motor Company
engineering requirements. Contact an
authorized Ford dealer for the
manufacturer's limited warranty details,
and request a copy of the Ford Licensed
Accessories product limited warranty from
the accessory manufacturer.
416
C-MAX (CCG) Canada/United States of America, enUSA, Second Printing Accessories
Page 425 of 469
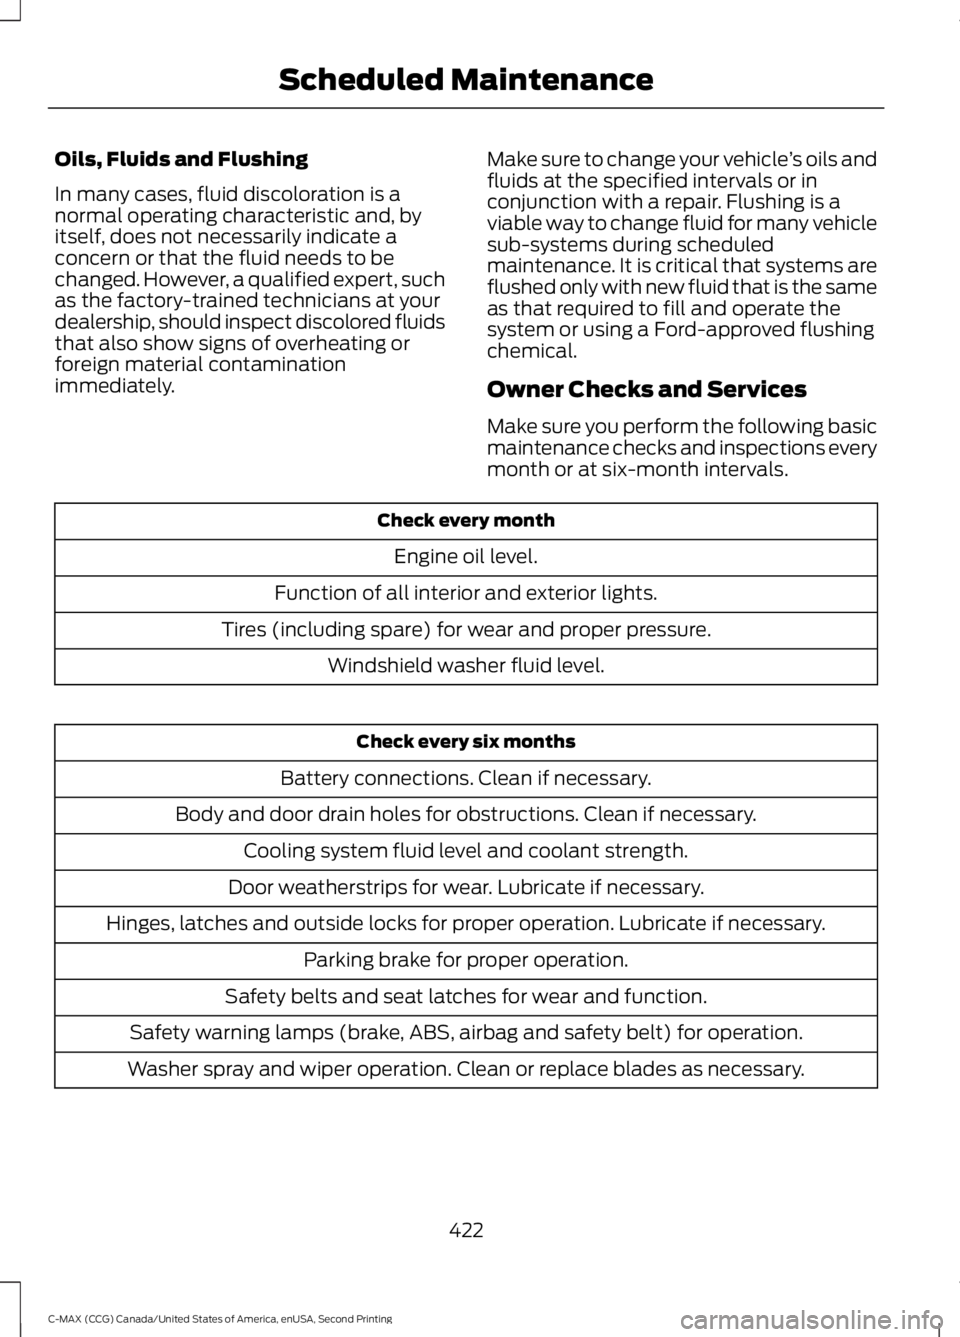
Oils, Fluids and Flushing
In many cases, fluid discoloration is a
normal operating characteristic and, by
itself, does not necessarily indicate a
concern or that the fluid needs to be
changed. However, a qualified expert, such
as the factory-trained technicians at your
dealership, should inspect discolored fluids
that also show signs of overheating or
foreign material contamination
immediately.
Make sure to change your vehicle
’s oils and
fluids at the specified intervals or in
conjunction with a repair. Flushing is a
viable way to change fluid for many vehicle
sub-systems during scheduled
maintenance. It is critical that systems are
flushed only with new fluid that is the same
as that required to fill and operate the
system or using a Ford-approved flushing
chemical.
Owner Checks and Services
Make sure you perform the following basic
maintenance checks and inspections every
month or at six-month intervals. Check every month
Engine oil level.
Function of all interior and exterior lights.
Tires (including spare) for wear and proper pressure. Windshield washer fluid level. Check every six months
Battery connections. Clean if necessary.
Body and door drain holes for obstructions. Clean if necessary. Cooling system fluid level and coolant strength.
Door weatherstrips for wear. Lubricate if necessary.
Hinges, latches and outside locks for proper operation. Lubricate if necessary. Parking brake for proper operation.
Safety belts and seat latches for wear and function.
Safety warning lamps (brake, ABS, airbag and safety belt) for operation.
Washer spray and wiper operation. Clean or replace blades as necessary.
422
C-MAX (CCG) Canada/United States of America, enUSA, Second Printing Scheduled Maintenance
Page 460 of 469
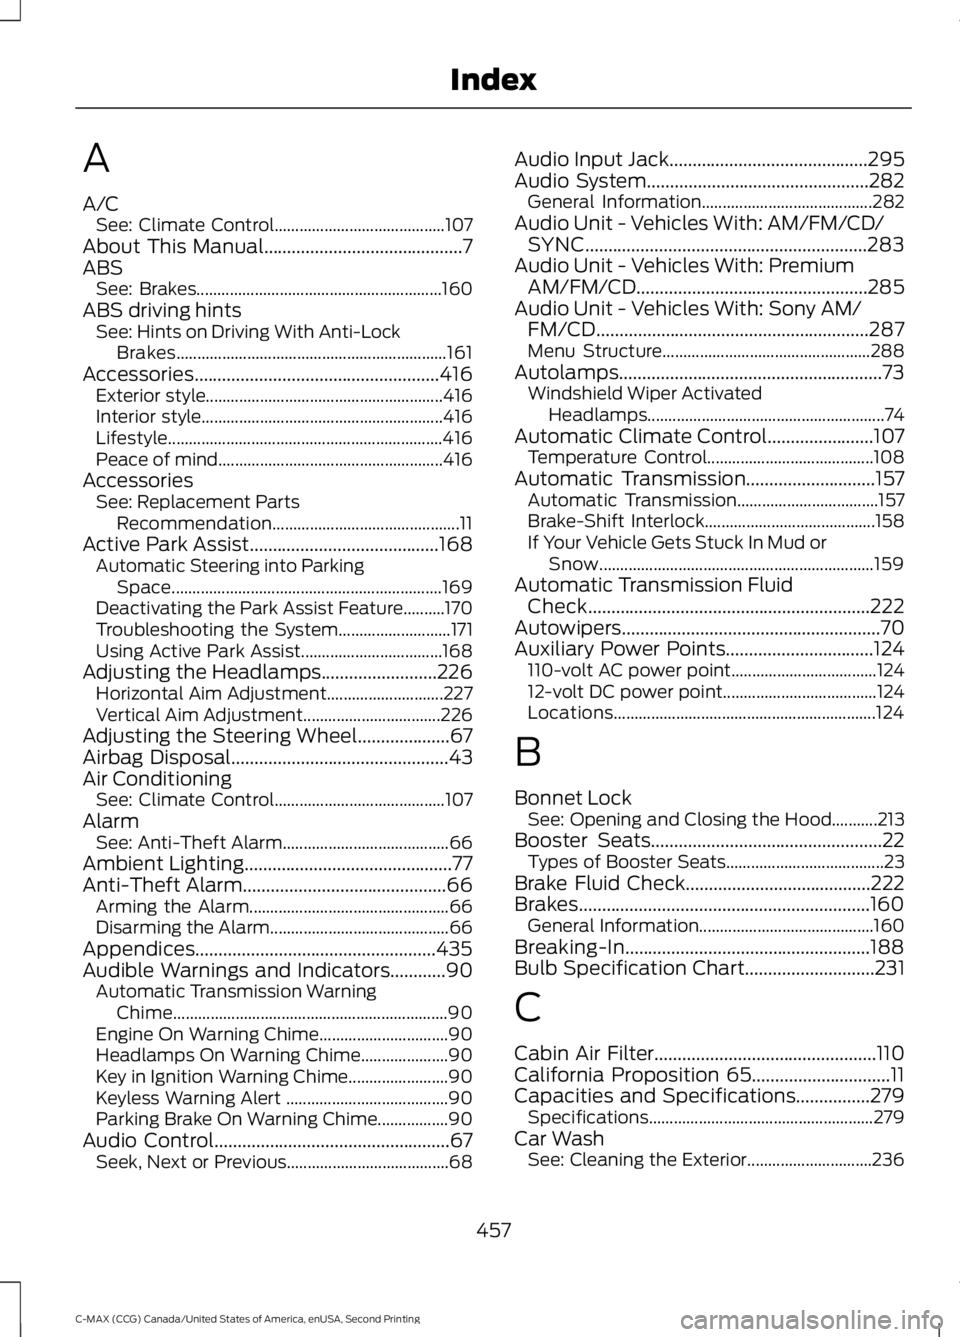
A
A/C
See: Climate Control......................................... 107
About This Manual...........................................7
ABS See: Brakes........................................................... 160
ABS driving hints See: Hints on Driving With Anti-Lock
Brakes................................................................. 161
Accessories.....................................................416 Exterior style......................................................... 416
Interior style.......................................................... 416
Lifestyle.................................................................. 416
Peace of mind...................................................... 416
Accessories See: Replacement Parts
Recommendation............................................. 11
Active Park Assist.........................................168 Automatic Steering into Parking
Space................................................................. 169
Deactivating the Park Assist Feature..........170
Troubleshooting the System........................... 171
Using Active Park Assist.................................. 168
Adjusting the Headlamps.........................226 Horizontal Aim Adjustment............................ 227
Vertical Aim Adjustment................................. 226
Adjusting the Steering Wheel
....................67
Airbag Disposal...............................................43
Air Conditioning See: Climate Control......................................... 107
Alarm See: Anti-Theft Alarm........................................ 66
Ambient Lighting.............................................77
Anti-Theft Alarm............................................66 Arming the Alarm................................................ 66
Disarming the Alarm........................................... 66
Appendices....................................................435
Audible Warnings and Indicators............90 Automatic Transmission Warning
Chime.................................................................. 90
Engine On Warning Chime............................... 90
Headlamps On Warning Chime..................... 90
Key in Ignition Warning Chime........................ 90
Keyless Warning Alert ....................................... 90
Parking Brake On Warning Chime.................90
Audio Control...................................................67 Seek, Next or Previous....................................... 68Audio Input Jack
...........................................295
Audio System................................................282
General Information......................................... 282
Audio Unit - Vehicles With: AM/FM/CD/ SYNC.............................................................283
Audio Unit - Vehicles With: Premium AM/FM/CD..................................................285
Audio Unit - Vehicles With: Sony AM/ FM/CD
...........................................................287
Menu Structure.................................................. 288
Autolamps.........................................................73 Windshield Wiper Activated
Headlamps......................................................... 74
Automatic Climate Control.......................107 Temperature Control........................................ 108
Automatic Transmission............................157 Automatic Transmission.................................. 157
Brake-Shift Interlock......................................... 158
If Your Vehicle Gets Stuck In Mud or Snow.................................................................. 159
Automatic Transmission Fluid Check
.............................................................222
Autowipers........................................................70
Auxiliary Power Points
................................124
110-volt AC power point................................... 124
12-volt DC power point..................................... 124
Locations............................................................... 124
B
Bonnet Lock See: Opening and Closing the Hood...........213
Booster Seats
..................................................22
Types of Booster Seats...................................... 23
Brake Fluid Check........................................222
Brakes...............................................................160 General Information.......................................... 160
Breaking-In.....................................................188
Bulb Specification Chart............................231
C
Cabin Air Filter
................................................110
California Proposition 65..............................11
Capacities and Specifications................279 Specifications...................................................... 279
Car Wash See: Cleaning the Exterior.............................. 236
457
C-MAX (CCG) Canada/United States of America, enUSA, Second Printing Index