Hood FORD C MAX 2016 User Guide
[x] Cancel search | Manufacturer: FORD, Model Year: 2016, Model line: C MAX, Model: FORD C MAX 2016Pages: 395, PDF Size: 5.78 MB
Page 200 of 395
Note:
When you try to restart your vehicle
after a fuel shutoff, the vehicle makes sure
that the electrical system is safe to restart.
Once your vehicle determines that the
electrical system is safe, then the vehicle
will allow you to restart.
Note: In the event that your vehicle does
not restart after your third attempt, contact
an authorized dealer.
JUMP STARTING THE VEHICLE WARNINGS
The gases around the battery can
explode if exposed to flames, sparks
or lit cigarettes. An explosion could
result in injury or vehicle damage. Batteries contain sulfuric acid which
can burn skin, eyes and clothing, if
contacted.
Do not attempt to push-start your
automatic transmission vehicle. Automatic
transmissions do not have push-start
capability. Attempting to push-start a
vehicle with an automatic transmission
may cause transmission damage.
Preparing Your Vehicle
Note:
Use only a 12-volt supply to start your
vehicle.
Note: Do not disconnect the battery of the
disabled vehicle as this could damage the
vehicle's electrical system.
1. Park the booster vehicle close to the hood of the disabled vehicle making
sure the two vehicles do not touch. Set
the parking brake on both vehicles and
stay clear of the engine cooling fan and
other moving parts.
2. Check all battery terminals and remove
any excessive corrosion before you
attach the battery cables. Ensure that
vent caps are tight and level. 3.
Turn the heater fan on in both vehicles
to protect from any electrical surges.
Turn all other accessories off.
Connecting the Jumper Cables
Your vehicle has a 12-volt battery that has
two prongs accessible from under the
hood. Your vehicle can be jumped the
same way conventional vehicles can by
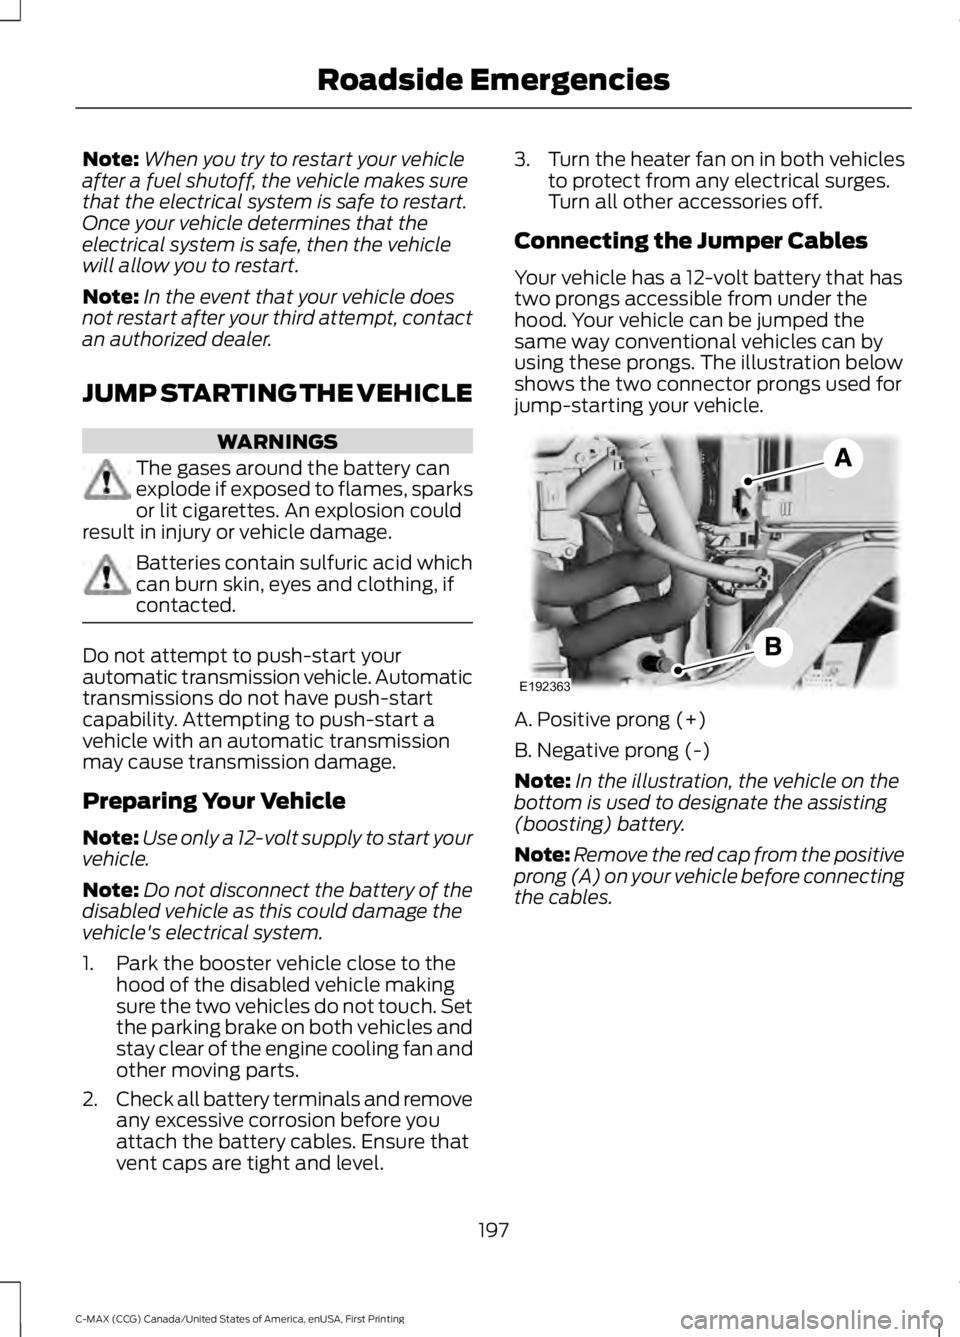
using these prongs. The illustration below
shows the two connector prongs used for
jump-starting your vehicle. A. Positive prong (+)
B. Negative prong (-)
Note:
In the illustration, the vehicle on the
bottom is used to designate the assisting
(boosting) battery.
Note: Remove the red cap from the positive
prong (A) on your vehicle before connecting
the cables.
197
C-MAX (CCG) Canada/United States of America, enUSA, First Printing Roadside EmergenciesE192363
Page 221 of 395
GENERAL INFORMATION
Have your vehicle serviced regularly to help
maintain its roadworthiness and resale
value. There is a large network of
authorized dealers that are there to help
you with their professional servicing
expertise. We believe that their specially
trained technicians are best qualified to
service your vehicle properly and expertly.
They are supported by a wide range of
highly specialized tools developed
specifically for servicing your vehicle.
If your vehicle requires professional service,
an authorized dealer can provide the
necessary parts and service. Check your
warranty information to find out which
parts and services are covered.
Use only recommended fuels, lubricants,
fluids and service parts conforming to
specifications. Motorcraft® parts are
designed and built to provide the best
performance in your vehicle.
Precautions
•
Do not work on a hot engine.
• Make sure that nothing gets caught in
moving parts.
• Do not work on a vehicle with the
engine running in an enclosed space,
unless you are sure you have enough
ventilation.
• Keep all open flames and other burning
material (such as cigarettes) away
from the battery and all fuel related
parts.
Working with the Engine Off
1. Set the parking brake and shift to park
(P).
2. Switch off the engine.
3. Block the wheels. Working with the Engine On WARNING
To reduce the risk of vehicle damage
and/or personal burn injuries, do not
start your engine with the air cleaner
removed and do not remove it while the
engine is running. 1.
Set the parking brake and shift to park
(P).
2. Block the wheels.
OPENING AND CLOSING THE
HOOD
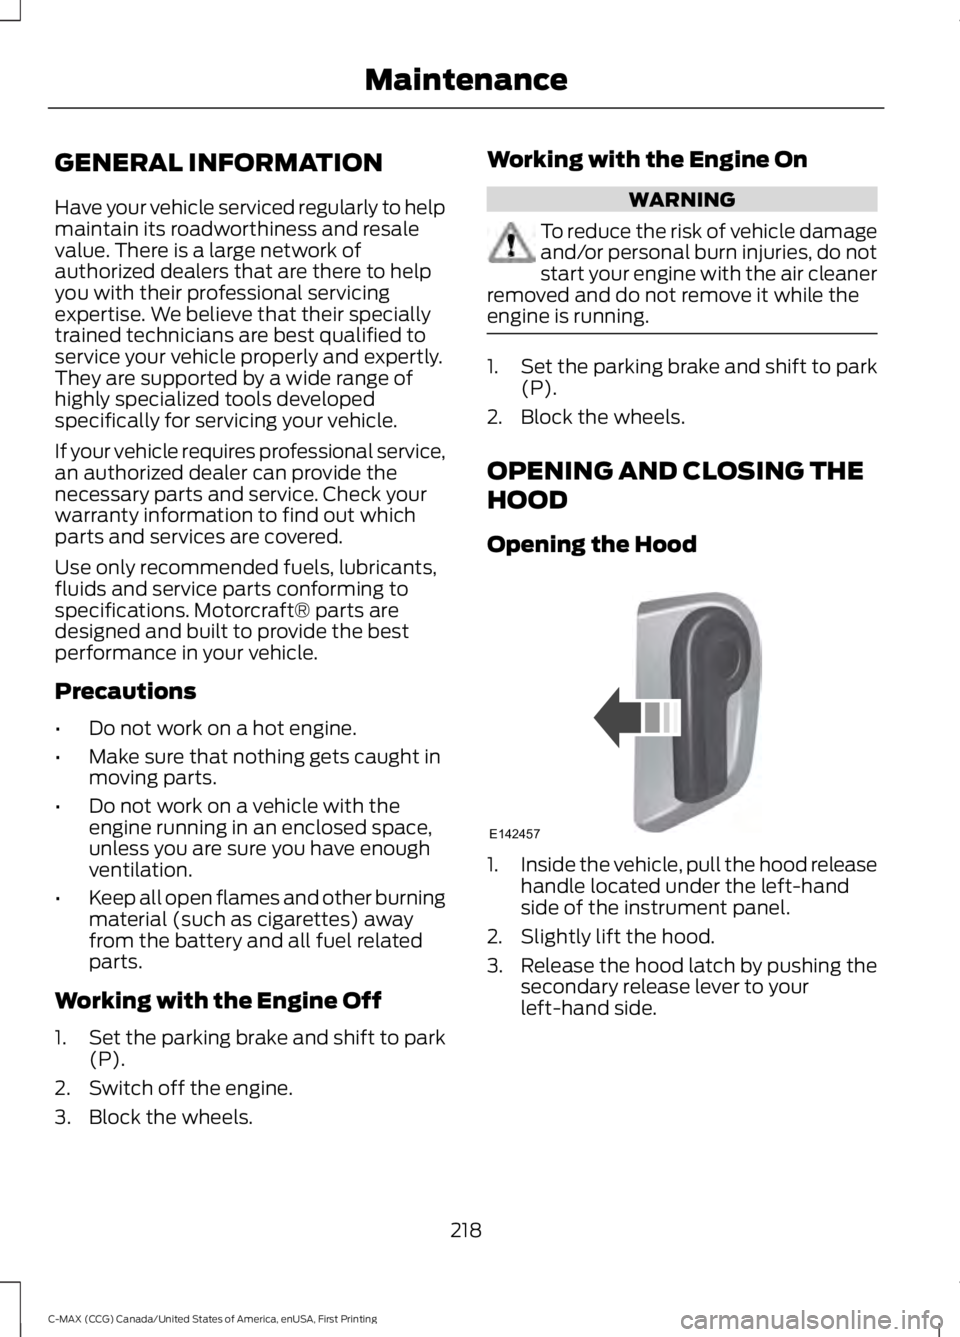
Opening the Hood 1.
Inside the vehicle, pull the hood release
handle located under the left-hand
side of the instrument panel.
2. Slightly lift the hood.
3. Release the hood latch by pushing the secondary release lever to your
left-hand side.
218
C-MAX (CCG) Canada/United States of America, enUSA, First Printing MaintenanceE142457
Page 222 of 395
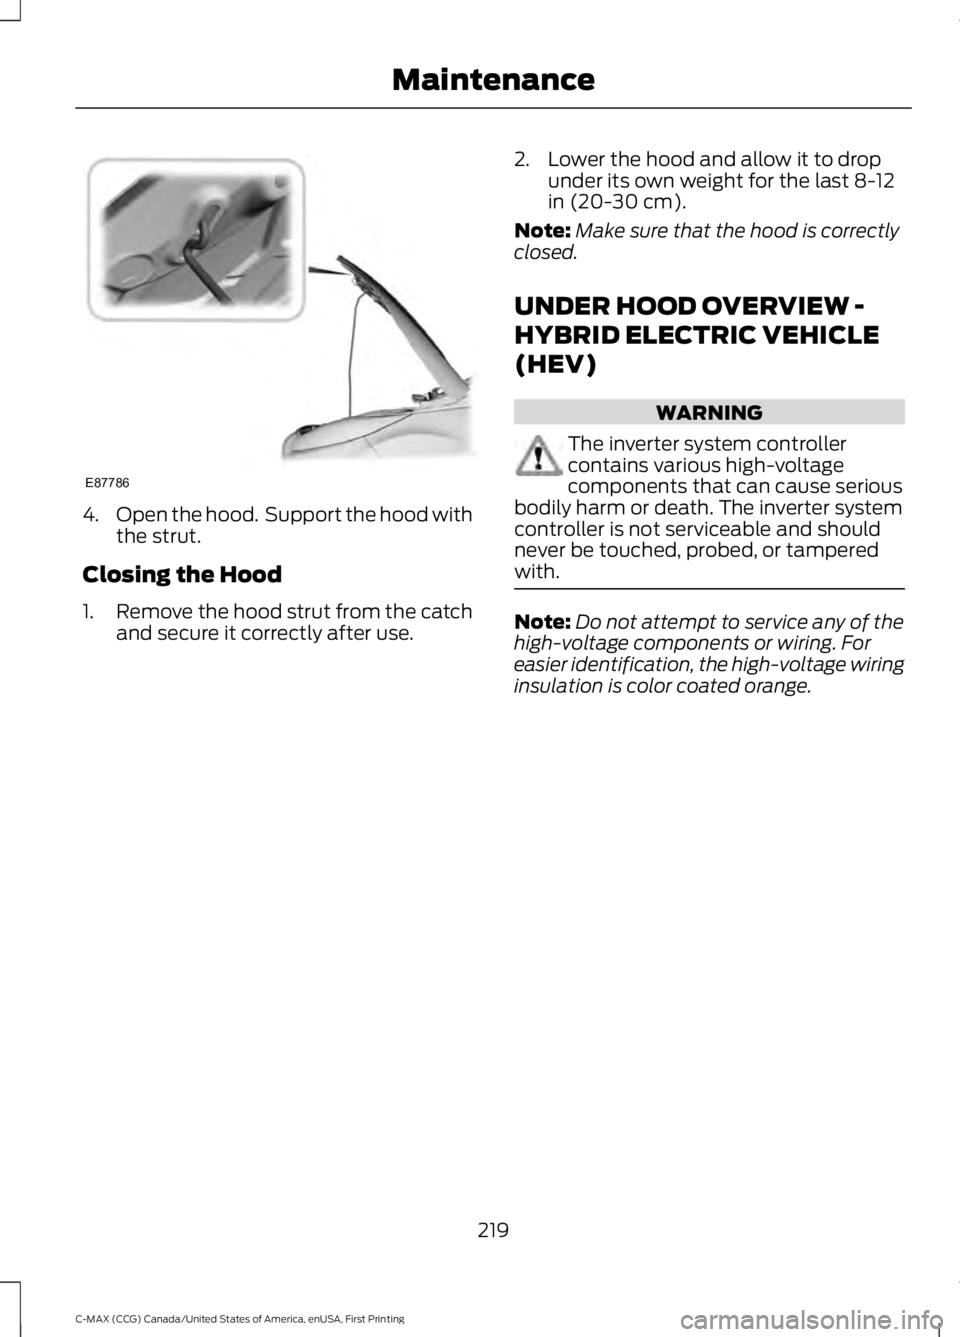
4.
Open the hood. Support the hood with
the strut.
Closing the Hood
1. Remove the hood strut from the catch
and secure it correctly after use. 2. Lower the hood and allow it to drop
under its own weight for the last 8-12
in (20-30 cm).
Note: Make sure that the hood is correctly
closed.
UNDER HOOD OVERVIEW -
HYBRID ELECTRIC VEHICLE
(HEV) WARNING
The inverter system controller
contains various high-voltage
components that can cause serious
bodily harm or death. The inverter system
controller is not serviceable and should
never be touched, probed, or tampered
with. Note:
Do not attempt to service any of the
high-voltage components or wiring. For
easier identification, the high-voltage wiring
insulation is color coated orange.
219
C-MAX (CCG) Canada/United States of America, enUSA, First Printing MaintenanceE87786
Page 224 of 395
UNDER HOOD OVERVIEW -
PLUG-IN HYBRID ELECTRIC
VEHICLE (PHEV)
WARNING
The inverter system controller
contains various high-voltage
components that can cause serious
bodily harm or death. The inverter system
controller is not serviceable and should
never be touched, probed, or tampered
with. Note:
Do not attempt to service any of the
high-voltage components or wiring. For
easier identification, the high-voltage wiring
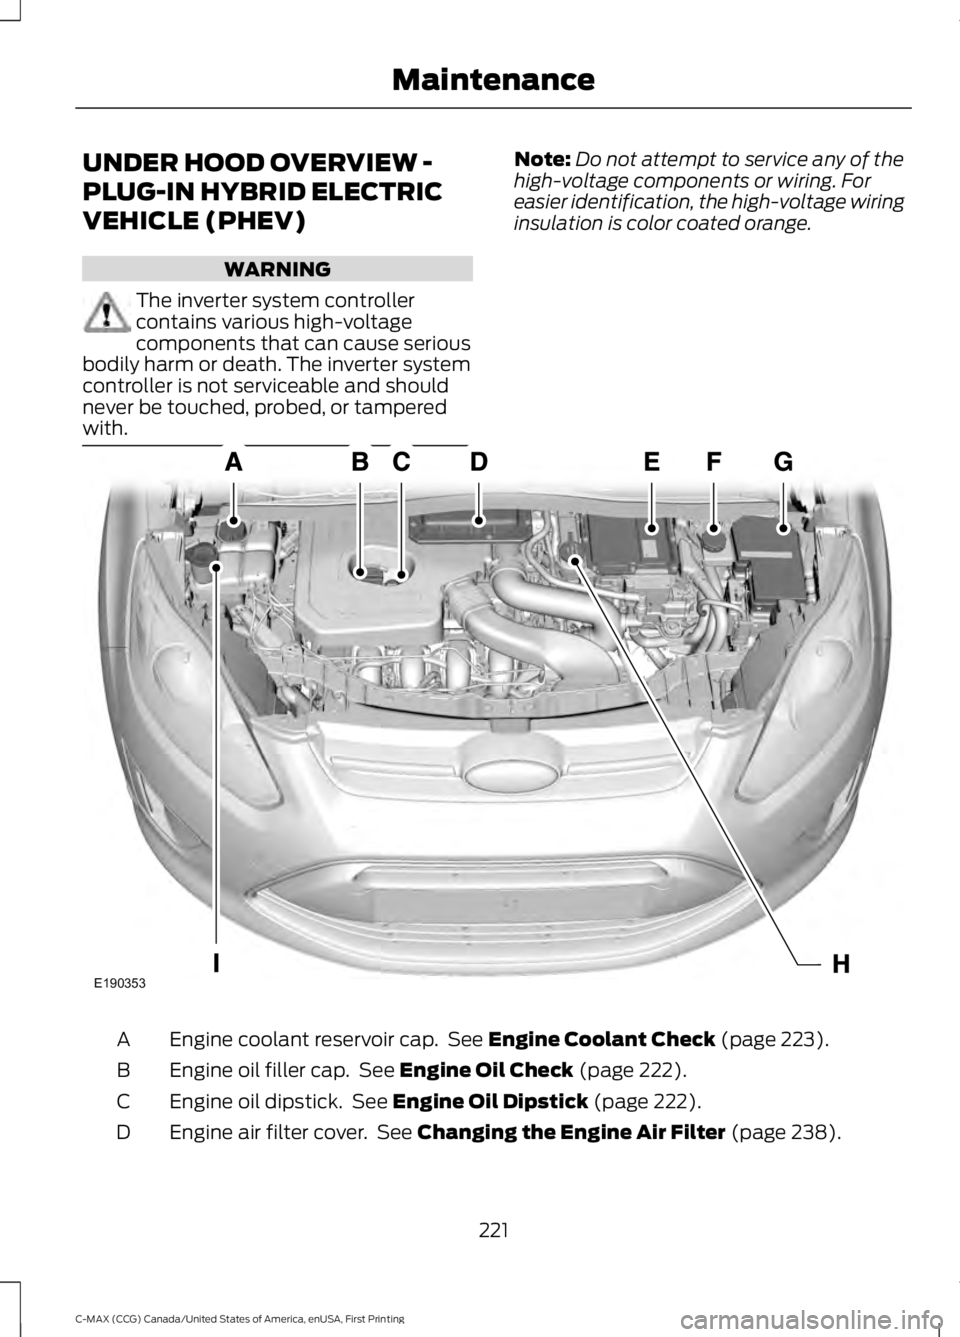
insulation is color coated orange. Engine coolant reservoir cap. See Engine Coolant Check (page 223).
A
Engine oil filler cap. See
Engine Oil Check (page 222).
B
Engine oil dipstick. See
Engine Oil Dipstick (page 222).
C
Engine air filter cover. See
Changing the Engine Air Filter (page 238).
D
221
C-MAX (CCG) Canada/United States of America, enUSA, First Printing MaintenanceE190353
Page 234 of 395

2. Slightly rotate the wiper blade.
3. Disengage the wiper blade from the
wiper arm.
4. Remove the wiper blade.
5. Install in the reverse order.
Note: Make sure that the wiper blade locks
into place.
ADJUSTING THE HEADLAMPS
Vertical Aim Adjustment
The headlamps on your vehicle are
properly aimed at the assembly plant. If
your vehicle has been in an accident, the
alignment of your headlamps should be
checked by your authorized dealer. 8 feet (2.4 meters)
A
Center height of lamp to ground
B
25 feet (7.6 meters)
C
Horizontal reference line
D
1. Park the vehicle directly in front of a wall or screen on a level surface,
approximately 25 feet (7.6 meters)
away.
Note: To see a clearer light pattern for
adjusting, you may want to block the light
from one headlamp while adjusting the
other.
2. Measure the height of the headlamp bulb center from the ground and mark
an 8 foot (2.4 meter) horizontal
reference line on the vertical wall or
screen at this height.
3. Turn on the low beam headlamps to illuminate the wall or screen and open
the hood.
231
C-MAX (CCG) Canada/United States of America, enUSA, First Printing MaintenanceE130060
3
2 E142592
Page 235 of 395
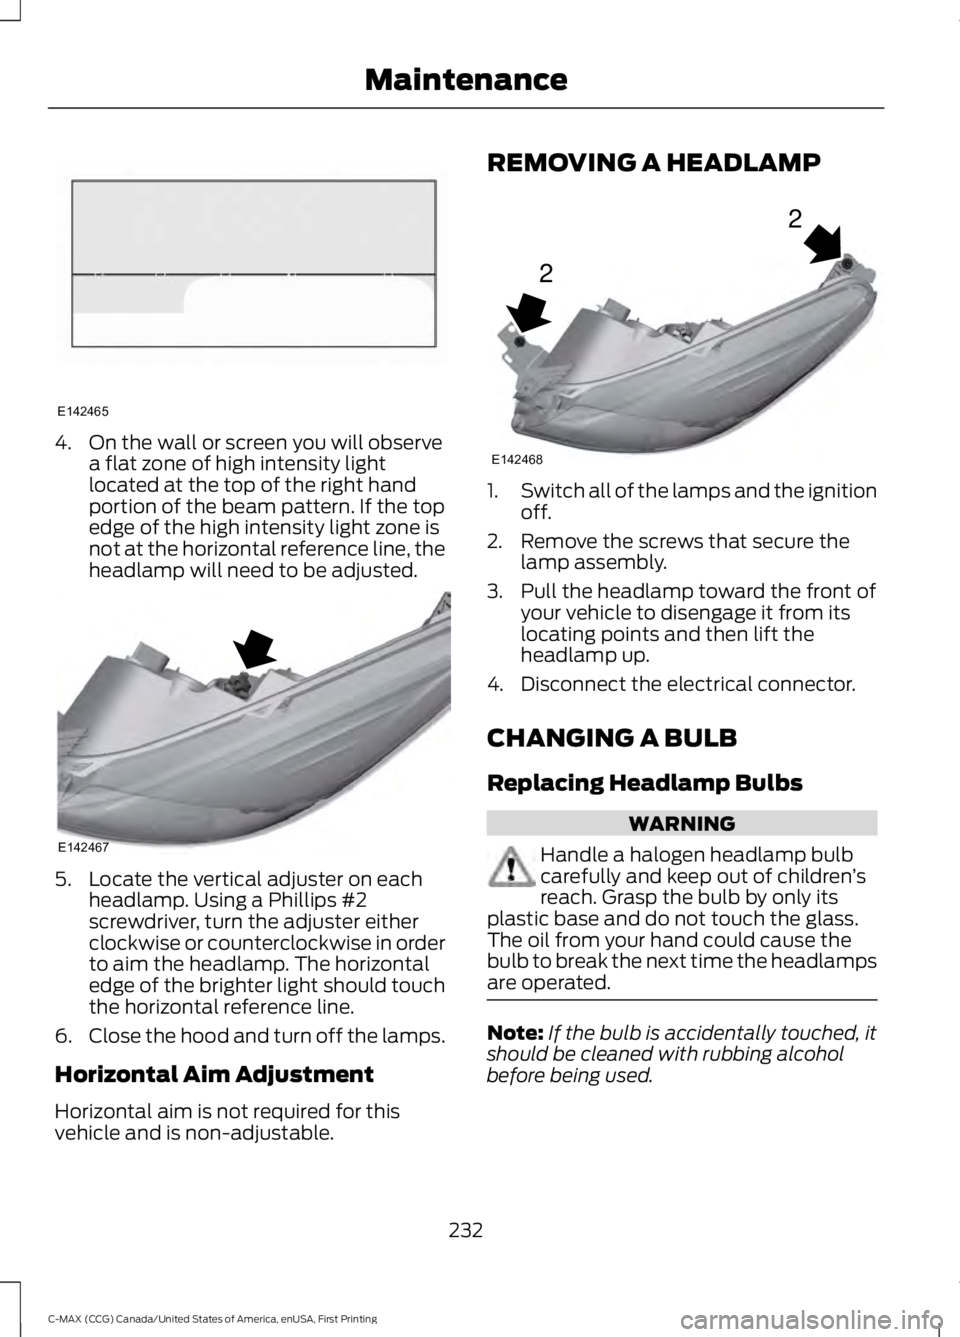
4. On the wall or screen you will observe
a flat zone of high intensity light
located at the top of the right hand
portion of the beam pattern. If the top
edge of the high intensity light zone is
not at the horizontal reference line, the
headlamp will need to be adjusted. 5. Locate the vertical adjuster on each
headlamp. Using a Phillips #2
screwdriver, turn the adjuster either
clockwise or counterclockwise in order
to aim the headlamp. The horizontal
edge of the brighter light should touch
the horizontal reference line.
6. Close the hood and turn off the lamps.
Horizontal Aim Adjustment
Horizontal aim is not required for this
vehicle and is non-adjustable. REMOVING A HEADLAMP
1.
Switch all of the lamps and the ignition
off.
2. Remove the screws that secure the lamp assembly.
3. Pull the headlamp toward the front of your vehicle to disengage it from its
locating points and then lift the
headlamp up.
4. Disconnect the electrical connector.
CHANGING A BULB
Replacing Headlamp Bulbs WARNING
Handle a halogen headlamp bulb
carefully and keep out of children
’s
reach. Grasp the bulb by only its
plastic base and do not touch the glass.
The oil from your hand could cause the
bulb to break the next time the headlamps
are operated. Note:
If the bulb is accidentally touched, it
should be cleaned with rubbing alcohol
before being used.
232
C-MAX (CCG) Canada/United States of America, enUSA, First Printing MaintenanceE142465 E142467 2
2
E142468
Page 249 of 395
Note:
Industrial-strength or heavy-duty
cleaners in combination with brush agitation
to remove brake dust and dirt, could wear
away the clear coat finish over a period time.
Note: Do not use hydrofluoric acid-based
or high caustic-based wheel cleaners, steel
wool, fuels or strong household detergents.
Note: If you intend parking your vehicle for
an extended period after cleaning the
wheels with a wheel cleaner, drive your
vehicle for a few minutes before doing so.
This will reduce the risk of increased
corrosion of the brake discs.
Alloy wheels and wheel covers are coated
with a clear coat paint finish. To maintain
their condition we recommend that you:
• Clean the wheels weekly using
Motorcraft Wheel and Tire Cleaner.
Apply using manufacturer's
instructions.
• Use a sponge to remove heavy
deposits of dirt and brake dust
accumulation.
• Rinse thoroughly with a strong stream
of water when you have completed the
cleaning process.
• To remove tar and grease, use
Motorcraft Bug and Tar Remover.
VEHICLE STORAGE
If you plan on storing your vehicle for 30
days or more, read the following
maintenance recommendations to make
sure your vehicle stays in good operating
condition.
We engineer and test all motor vehicles
and their components for reliable, regular
driving. Under various conditions,
long-term storage may lead to degraded
engine performance or failure unless you
use specific precautions to preserve engine
components. General
•
Store all vehicles in a dry, ventilated
place.
• Protect from sunlight, if possible.
• If you store vehicles outside, they
require regular maintenance to protect
against rust and damage.
Body
• Wash your vehicle thoroughly to
remove dirt, grease, oil, tar or mud from
exterior surfaces, rear-wheel housing
and the underside of front fenders.
• Periodically wash your vehicle if you
store it in exposed locations.
• Touch-up exposed or primed metal to
prevent rust.
• Cover chrome and stainless steel parts
with a thick coat of auto wax to prevent
discoloration. Re-wax as necessary
when you wash your vehicle.
• Lubricate all hood, door and luggage
compartment hinges and latches with
a light grade oil.
• Cover interior trim to prevent fading.
• Keep all rubber parts free from oil and
solvents.
Engine
• Change the engine oil and filter prior to
storage because used engine oil
contains contaminates which may
cause engine damage.
• Start the engine every 15 days for a
minimum of 15 minutes. Run at fast idle
with the climate controls set to defrost
until the engine reaches normal
operating temperature.
246
C-MAX (CCG) Canada/United States of America, enUSA, First Printing Vehicle Care
Page 251 of 395
•
Check under the hood for any foreign
material that may have collected
during storage such as mice or squirrel
nests.
• Check the exhaust for any foreign
material that may have collected
during storage.
• Check tire pressures and set tire
inflation per the Tire Label.
• Check brake pedal operation. Drive
your vehicle 15 ft (4.5 m) back and
forth to remove rust build-up.
• Check fluid levels (including coolant
and gas) to make sure there are no
leaks, and fluids are at recommended
levels.
• If you remove the 12-volt battery, clean
the cable ends and inspect.
Contact an authorized dealer if you have
any concerns or issues.
248
C-MAX (CCG) Canada/United States of America, enUSA, First Printing Vehicle Care
Page 347 of 395
For a complete listing of the accessories
that are available for your vehicle, please
contact your authorized dealer or visit the
online store web site:
Web Address (United States)
www.Accessories.Ford.com Web Address (Canada)
www.Accessories.Ford.ca
Ford Motor Company will repair or replace
any properly authorized dealer-installed
Ford Original Accessory found to be
defective in factory-supplied materials or
workmanship during the warranty period,
as well as any component damaged by the
defective accessories.
Ford Motor Company warrants your
vehicle's accessory through the warranty
that provides the greatest benefit:
• 24 months, unlimited mileage.
• The remainder of your new vehicle
limited warranty.
Contact an authorized dealer for details
and a copy of the warranty.
Exterior style
• Custom graphics*.
• Hood deflector*.
• Side window deflectors.
• Splash guards.
Interior style
• Accent lighting.
• Cargo area protector.
• Door sill plates.
• Floor mats. Lifestyle
•
Ash cup or smoker's packages.
• Cargo net*.
• Roof racks and carriers*.
• Soft cargo organizers.
Peace of mind
• Bumper-mounted parking assist
system*.
• Car covers.
• Charge cord storage bag*.
• Keyless entry keypad.
• Rear bumper protector.
• Remote start.
• Vehicle security systems.
• Wheel locks.
344
C-MAX (CCG) Canada/United States of America, enUSA, First Printing Accessories
Page 386 of 395
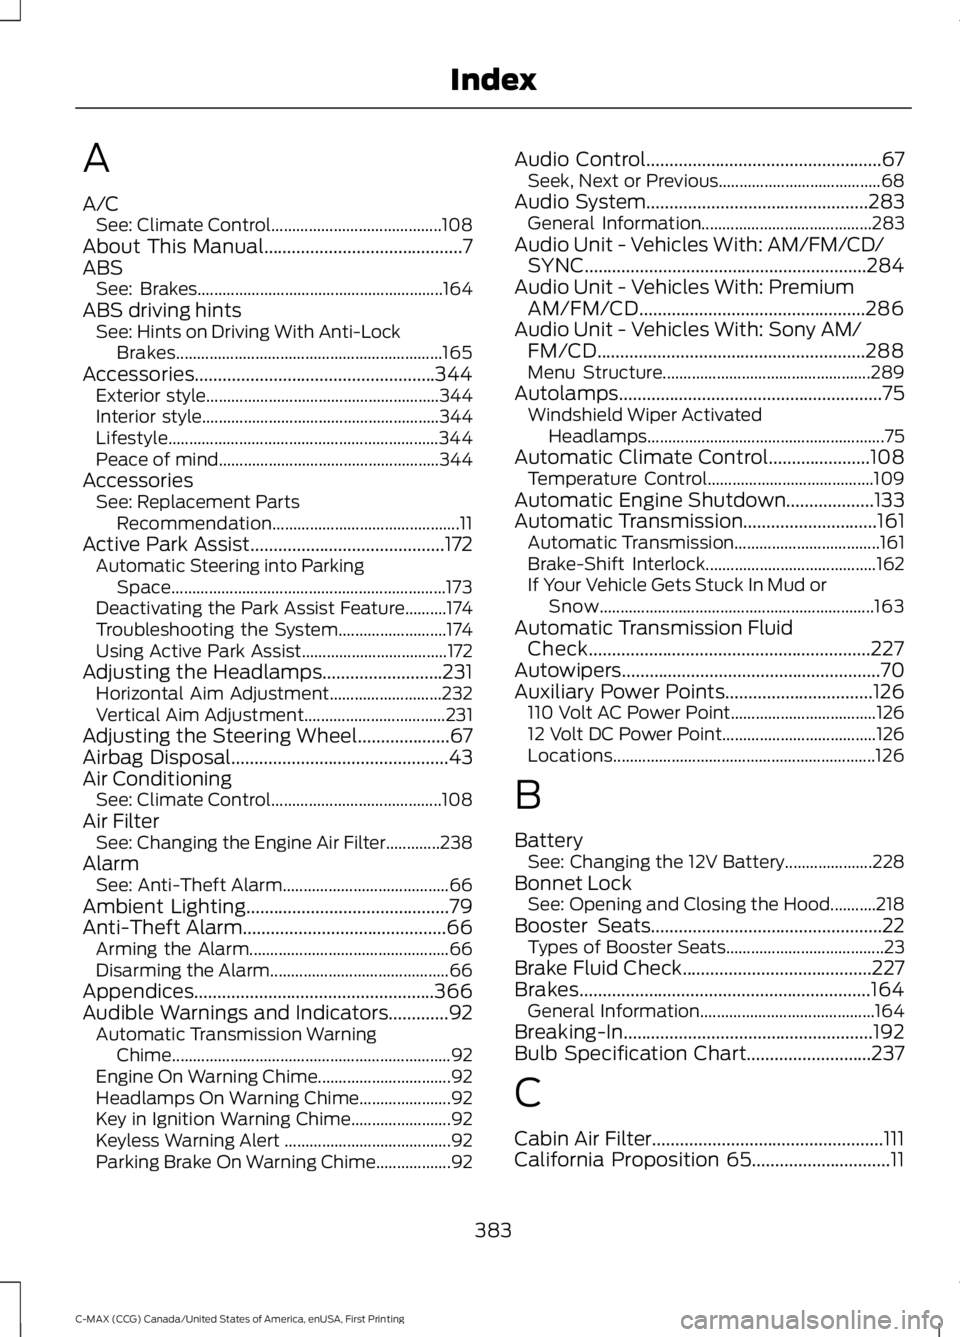
A
A/C
See: Climate Control......................................... 108
About This Manual...........................................7
ABS See: Brakes........................................................... 164
ABS driving hints See: Hints on Driving With Anti-Lock
Brakes................................................................ 165
Accessories....................................................344 Exterior style........................................................ 344
Interior style......................................................... 344
Lifestyle................................................................. 344
Peace of mind..................................................... 344
Accessories See: Replacement Parts
Recommendation............................................. 11
Active Park Assist
..........................................172
Automatic Steering into Parking
Space.................................................................. 173
Deactivating the Park Assist Feature..........174
Troubleshooting the System.......................... 174
Using Active Park Assist................................... 172
Adjusting the Headlamps..........................231 Horizontal Aim Adjustment........................... 232
Vertical Aim Adjustment.................................. 231
Adjusting the Steering Wheel
....................67
Airbag Disposal...............................................43
Air Conditioning See: Climate Control......................................... 108
Air Filter See: Changing the Engine Air Filter.............238
Alarm See: Anti-Theft Alarm........................................ 66
Ambient Lighting............................................79
Anti-Theft Alarm............................................66 Arming the Alarm................................................ 66
Disarming the Alarm........................................... 66
Appendices....................................................366
Audible Warnings and Indicators.............92 Automatic Transmission Warning
Chime................................................................... 92
Engine On Warning Chime................................ 92
Headlamps On Warning Chime...................... 92
Key in Ignition Warning Chime........................ 92
Keyless Warning Alert ........................................ 92
Parking Brake On Warning Chime.................. 92Audio Control...................................................67
Seek, Next or Previous....................................... 68
Audio System
................................................283
General Information......................................... 283
Audio Unit - Vehicles With: AM/FM/CD/ SYNC.............................................................284
Audio Unit - Vehicles With: Premium AM/FM/CD.................................................286
Audio Unit - Vehicles With: Sony AM/ FM/CD
..........................................................288
Menu Structure.................................................. 289
Autolamps.........................................................75 Windshield Wiper Activated
Headlamps......................................................... 75
Automatic Climate Control......................108 Temperature Control........................................ 109
Automatic Engine Shutdown...................133
Automatic Transmission
.............................161
Automatic Transmission................................... 161
Brake-Shift Interlock......................................... 162
If Your Vehicle Gets Stuck In Mud or Snow.................................................................. 163
Automatic Transmission Fluid Check.............................................................227
Autowipers........................................................70
Auxiliary Power Points................................126 110 Volt AC Power Point................................... 126
12 Volt DC Power Point..................................... 126
Locations............................................................... 126
B
Battery See: Changing the 12V Battery..................... 228
Bonnet Lock See: Opening and Closing the Hood...........218
Booster Seats
..................................................22
Types of Booster Seats...................................... 23
Brake Fluid Check.........................................227
Brakes
...............................................................164
General Information.......................................... 164
Breaking-In......................................................192
Bulb Specification Chart...........................237
C
Cabin Air Filter..................................................111
California Proposition 65..............................11
383
C-MAX (CCG) Canada/United States of America, enUSA, First Printing Index