ignition FORD C MAX 2016 Repair Manual
[x] Cancel search | Manufacturer: FORD, Model Year: 2016, Model line: C MAX, Model: FORD C MAX 2016Pages: 395, PDF Size: 5.78 MB
Page 194 of 395
•
Maximum speed is 35 mph (56 km/h).
• Maximum distance is 50 miles (80
kilometers).
Recreational Towing
Note: Put your climate control system in
recirculated air mode to prevent exhaust
fumes from entering the vehicle. See
Climate Control (page 108).
Follow these guidelines if you have a need
for recreational (RV) towing. An example
of recreational towing would be towing
your vehicle behind a motorhome. We
designed these guidelines to prevent
damage to your transmission.
You can tow your vehicle with all four
wheels on the ground or with the front
wheels off the ground by using a tow dolly.
If you are using a tow dolly follow the
instructions specified by the equipment
provider.
If you tow your vehicle with all four wheels
on the ground:
• Tow only in the forward direction.
• Release the parking brake.
Vehicles with Push Button Start
1. Start the vehicle by pressing the brake pedal, and then pressing the ENGINE
START/STOP button until the vehicle
starts.
2. Press the brake pedal and shift the transmission into position
N.
3. Turn the vehicle off by pressing the ENGINE START/STOP button once.
(Trip Summary appears in the left
instrument cluster screen when the
vehicle is off.)
Note: You can remove the key fob from the
vehicle while towing. Vehicles with Ignition Key
1. Start the vehicle by pressing the brake
pedal, and then turning the ignition key
until the vehicle starts.
2. Press the brake pedal and shift the transmission into position
N.
3. Turn the vehicle off by turning the ignition key past the accessory position.
The key position is between the
accessory and off positions. See
Ignition Switch
(page 129). (Trip
Summary appears in the left
instrument cluster screen when the
vehicle is off.)
Note: If your vehicle is equipped with an
ignition key, you cannot remove the key from
the ignition cylinder when the transmission
is in position
N and the vehicle is off.
All Vehicles
• Do not exceed 70 mph (113 km/h).
• Place the transmission in position
P,
start the vehicle, and allow the engine
to run for one minute at the beginning
of each day (you may need to press the
accelerator pedal in order to start the
engine). After allowing the vehicle to
run, place the transmission back into
position
N and the ignition in the off
position.
Note: A
SHIFT TO PARK or
TRANSMISSION NOT IN PARK message
may appear in the information display when
the transmission is in position
N and the
ignition is in the off position.
191
C-MAX (CCG) Canada/United States of America, enUSA, First Printing Towing
Page 199 of 395
This program is separate from the New
Vehicle Limited Warranty, but the coverage
is concurrent with the powertrain coverage
period of your vehicle.
Canadian customers who require roadside
assistance, call 1-800-665-2006.
Vehicles Sold in Canada: Using
Roadside Assistance
Complete the roadside assistance
identification card and place it in your
wallet for quick reference.
In Canada, this card is found in the
Warranty Guide in the glove compartment
of your vehicle.
Vehicles Sold in Canada: Roadside
Assistance Program Coverage
The service is available 24 hours a day,
seven days a week.
Canadian roadside coverage and benefits
may differ from the U.S. coverage.
For complete program coverage details
you may contact your dealer, you can call
us in Canada at 1-800-665-2006, or visit
our website at www.ford.ca.
HAZARD WARNING FLASHERS
Note:
If used when the vehicle is not
running, the battery will lose charge. There
may be insufficient power to restart your
vehicle. The hazard warning button is
located on the instrument panel.
Use it when your vehicle is
creating a safety hazard for other
motorists.
• Press the button to turn on the hazard
warning function, and the front and
rear direction indicators will flash.
• Press the button again to turn them
off. FUEL SHUTOFF WARNING
Failure to inspect and, if necessary,
repair fuel leaks after a collision may
increase the risk of fire and serious
injury. Ford Motor Company recommends
that the fuel system be inspected by an
authorized dealer after any collision. In the event of a moderate to severe
collision, this vehicle has a fuel pump
shut-off feature that stops the flow of fuel
to the engine. Not every impact will cause
a shut-off.
Should your vehicle shut off after a
collision, you may restart your vehicle.
For vehicles equipped with a key system:
1. Switch off the ignition.
2. Switch on the ignition.
3. Check the information display for the
Ready to Drive light as the gasoline
engine may not start, but the electric
motor may be running. If you do not see
the Ready to Drive light, repeat Steps
1 and 2 up to two more times.
For vehicles equipped with a push button
start system:
1. Press the push button start to switch off the ignition.
2. Press the brake pedal and press the push button start to switch on the
ignition.
3. Check the information display for the Ready to Drive light as the gasoline
engine may not start, but the electric
motor may be running. If you do not see
the Ready to Drive light, repeat Steps
1 and 2 up to two more times.
196
C-MAX (CCG) Canada/United States of America, enUSA, First Printing Roadside Emergencies
Page 214 of 395
Protected components
Fuse amp rating
Fuse or relay number
Motor electronic cooling pump.
10A*
F25
Electronic power assist steering module
15.
5A*
F26
Mass air flow sensor.
5A*
F27
Powertrain control module.
15A*
F28
Electronic air conditioning compressor.
10A*
F29
Positive temperature coefficient heater.
Engine control module.
10A*
F30
Powertrain control module.
Charge port light ring (C-MAX Energi).
5A*
F31
Vehicle power 2.
20A*
F32
Vehicle power 4.
15A*
F33
Injectors.
10A*
F34
Vehicle power 3.
10A*
F35
Vehicle power 1.
20A*
F36
Vacuum pump.
Micro relay
R1
Horn.
Micro relay
R2
Hybrid powertrain control.
Micro relay
R3
Front wiper.
Micro relay
R4
Vacuum pump.
Micro relay
R5
Front and rear wiper high-low.
Micro relay
R6
Not used.
—
R7
Ignition feed.
Power relay
R8
Not used.
—
R9
Not used.
—
R10
Not used.
—
R11
Cooling fan.
Power relay
R12
211
C-MAX (CCG) Canada/United States of America, enUSA, First Printing Fuses
Page 217 of 395
Protected components
Fuse amp rating
Fuse or relay number
Washer pump.
20A
F77
Ignition switch, Start button.
5A
F78
Radio.
15A
F79
Hazard light switch.
Not used (spare).
20A
F80
Power sun shade.
5A
F81
Remote receiver antenna.
Washer pump ground.
20A
F82
Central locking ground.
20A
F83
Drive door unlock ground.
20A
F84
Electronic 15 feed.
7.5A
F85
Restraints control module.
10A
F86
Passenger air bag deactivation indicator.
Not used (spare).
15A
F87
Not used (spare).
25A
F88
Not used.
—
F89
Luggage Compartment Fuse Panel
The fuse panel is located in the luggage
compartment behind the left side wheel
well. Remove the fuse panel cover to gain
access to the fuses.
214
C-MAX (CCG) Canada/United States of America, enUSA, First Printing Fuses
Page 218 of 395
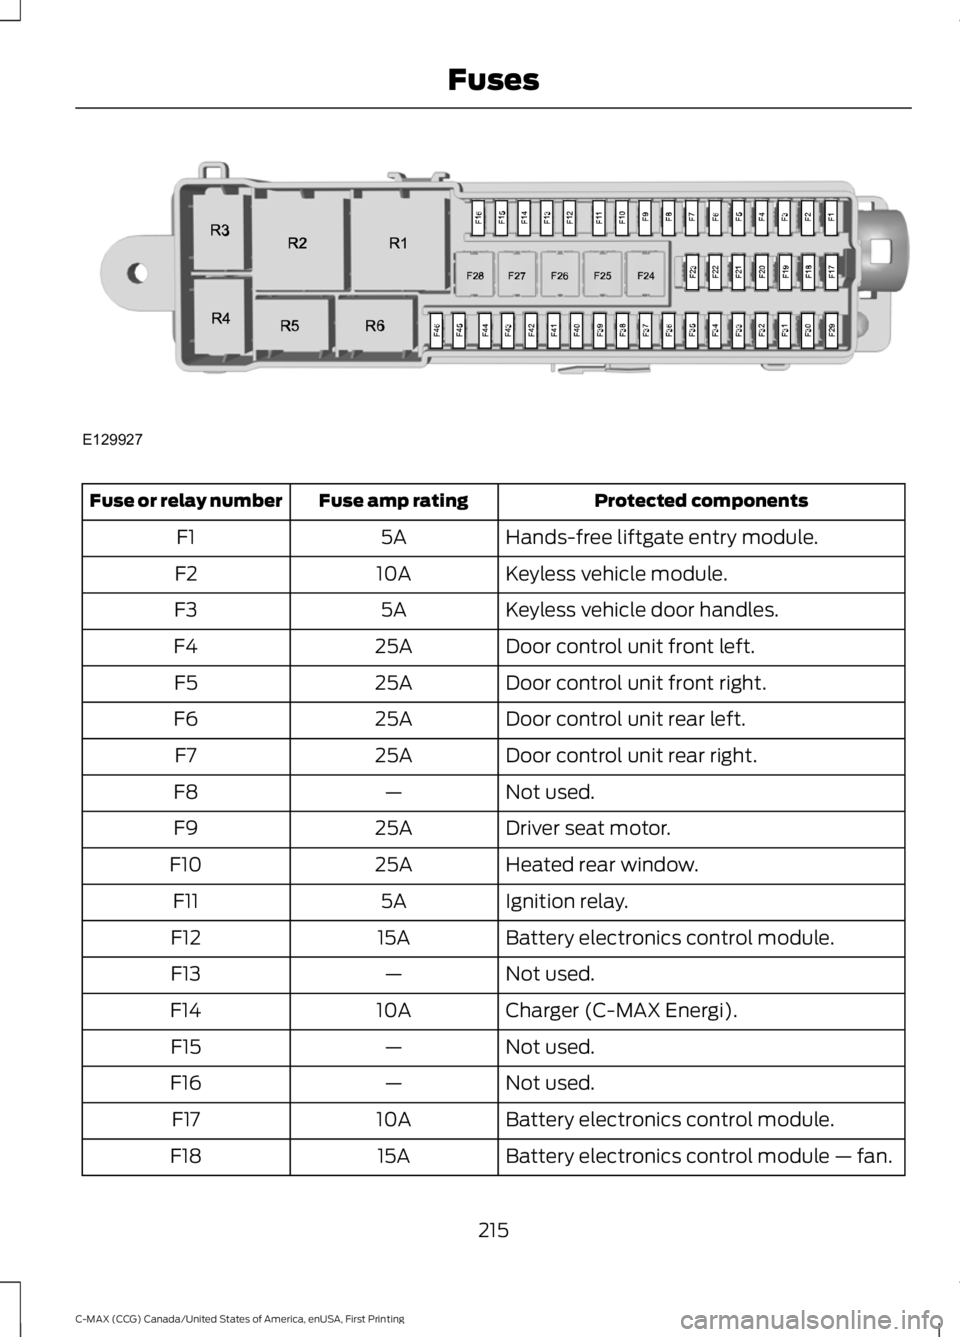
Protected components
Fuse amp rating
Fuse or relay number
Hands-free liftgate entry module.
5A
F1
Keyless vehicle module.
10A
F2
Keyless vehicle door handles.
5A
F3
Door control unit front left.
25A
F4
Door control unit front right.
25A
F5
Door control unit rear left.
25A
F6
Door control unit rear right.
25A
F7
Not used.
—
F8
Driver seat motor.
25A
F9
Heated rear window.
25A
F10
Ignition relay.
5A
F11
Battery electronics control module.
15A
F12
Not used.
—
F13
Charger (C-MAX Energi).
10A
F14
Not used.
—
F15
Not used.
—
F16
Battery electronics control module.
10A
F17
Battery electronics control module — fan.
15A
F18
215
C-MAX (CCG) Canada/United States of America, enUSA, First Printing FusesE129927
Page 232 of 395
presets, are also maintained in memory by
power from the low voltage battery. When
a technician disconnects and connects the
low voltage battery, these settings are
erased. Complete the following procedure
in order to restore the settings:
1. With the vehicle at a complete stop,
set the parking brake.
2. Shift into park (P).
3. Switch off all accessories.
4. Fully press the brake pedal and start the vehicle.
5. Run the engine until it reaches normal operating temperature. While the
engine is warming up, complete the
following: Reset the clock. See Audio
System (page 283). Reset the power
windows bounce-back feature. See
Windows and Mirrors
(page 80).
Reset the radio station presets. See
Audio System
(page 283).
6. Allow the engine to idle for at least one
minute. If the engine turns off, press
the accelerator pedal to start the
engine.
7. While the engine is running, press the brake pedal and shift into neutral (N).
8. Allow the engine to run for at least one
minute by pressing on the accelerator
pedal.
9. Drive the vehicle at least 12 mi (20 km)
to completely relearn the idle and fuel
trim strategy.
Note: If you do not allow the engine to
relearn the idle and fuel trim strategy, the
idle quality of your vehicle may be adversely
affected until the engine computer
eventually relearns the idle trim and fuel
trim strategy.
Make sure that you dispose of old batteries
in an environmentally friendly way. Seek
advice from your local authority about
recycling old batteries. CHECKING THE WIPER
BLADES
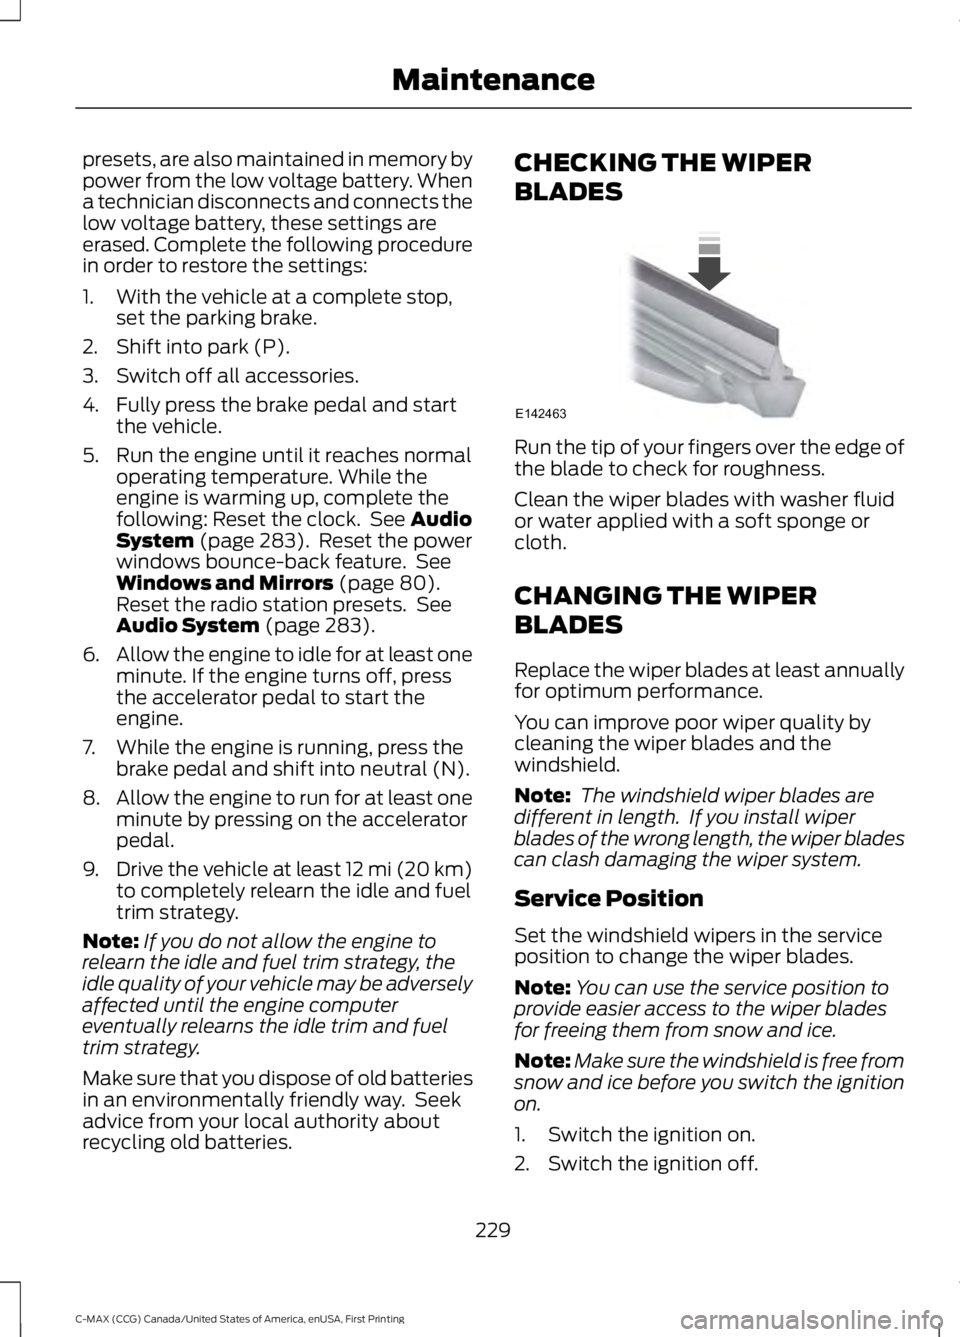
Run the tip of your fingers over the edge of
the blade to check for roughness.
Clean the wiper blades with washer fluid
or water applied with a soft sponge or
cloth.
CHANGING THE WIPER
BLADES
Replace the wiper blades at least annually
for optimum performance.
You can improve poor wiper quality by
cleaning the wiper blades and the
windshield.
Note:
The windshield wiper blades are
different in length. If you install wiper
blades of the wrong length, the wiper blades
can clash damaging the wiper system.
Service Position
Set the windshield wipers in the service
position to change the wiper blades.
Note: You can use the service position to
provide easier access to the wiper blades
for freeing them from snow and ice.
Note: Make sure the windshield is free from
snow and ice before you switch the ignition
on.
1. Switch the ignition on.
2. Switch the ignition off.
229
C-MAX (CCG) Canada/United States of America, enUSA, First Printing MaintenanceE142463
Page 233 of 395
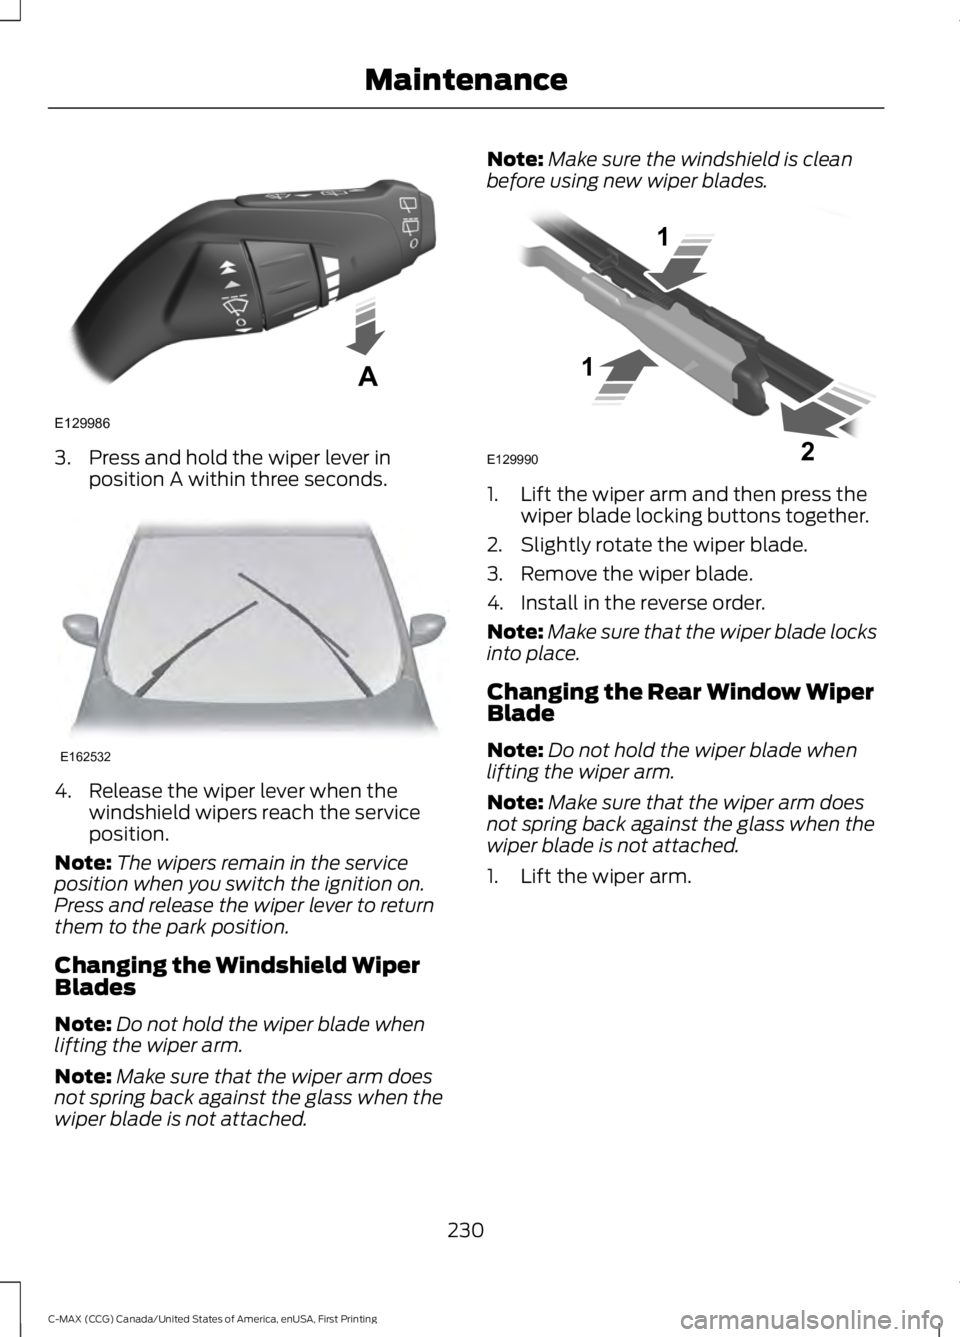
3. Press and hold the wiper lever in
position A within three seconds. 4. Release the wiper lever when the
windshield wipers reach the service
position.
Note: The wipers remain in the service
position when you switch the ignition on.
Press and release the wiper lever to return
them to the park position.
Changing the Windshield Wiper
Blades
Note: Do not hold the wiper blade when
lifting the wiper arm.
Note: Make sure that the wiper arm does
not spring back against the glass when the
wiper blade is not attached. Note:
Make sure the windshield is clean
before using new wiper blades. 1. Lift the wiper arm and then press the
wiper blade locking buttons together.
2. Slightly rotate the wiper blade.
3. Remove the wiper blade.
4. Install in the reverse order.
Note: Make sure that the wiper blade locks
into place.
Changing the Rear Window Wiper
Blade
Note: Do not hold the wiper blade when
lifting the wiper arm.
Note: Make sure that the wiper arm does
not spring back against the glass when the
wiper blade is not attached.
1. Lift the wiper arm.
230
C-MAX (CCG) Canada/United States of America, enUSA, First Printing MaintenanceE129986
A E162532 E129990
1
1 2
Page 235 of 395
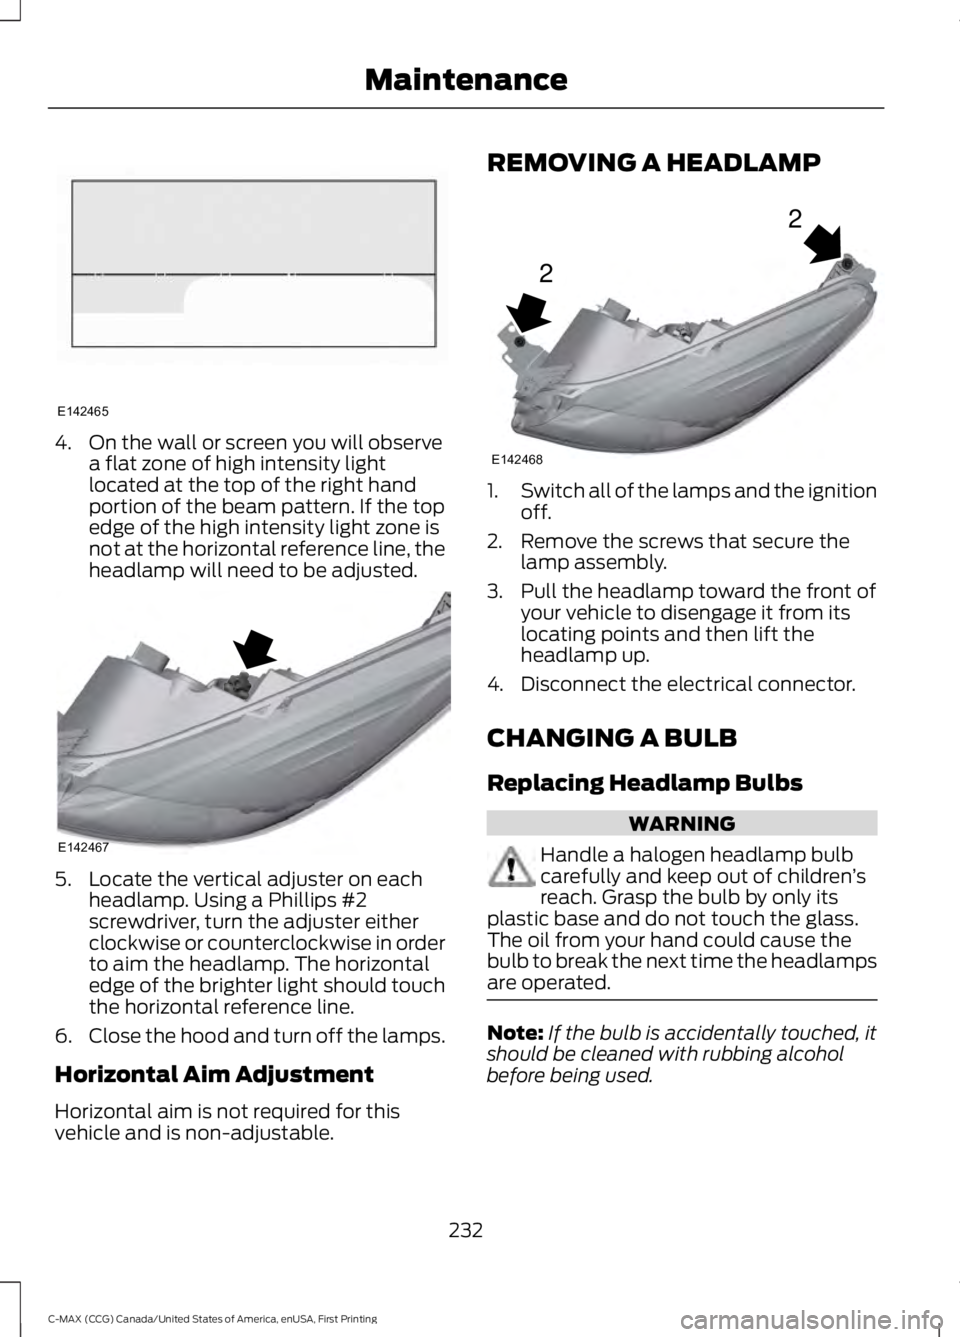
4. On the wall or screen you will observe
a flat zone of high intensity light
located at the top of the right hand
portion of the beam pattern. If the top
edge of the high intensity light zone is
not at the horizontal reference line, the
headlamp will need to be adjusted. 5. Locate the vertical adjuster on each
headlamp. Using a Phillips #2
screwdriver, turn the adjuster either
clockwise or counterclockwise in order
to aim the headlamp. The horizontal
edge of the brighter light should touch
the horizontal reference line.
6. Close the hood and turn off the lamps.
Horizontal Aim Adjustment
Horizontal aim is not required for this
vehicle and is non-adjustable. REMOVING A HEADLAMP
1.
Switch all of the lamps and the ignition
off.
2. Remove the screws that secure the lamp assembly.
3. Pull the headlamp toward the front of your vehicle to disengage it from its
locating points and then lift the
headlamp up.
4. Disconnect the electrical connector.
CHANGING A BULB
Replacing Headlamp Bulbs WARNING
Handle a halogen headlamp bulb
carefully and keep out of children
’s
reach. Grasp the bulb by only its
plastic base and do not touch the glass.
The oil from your hand could cause the
bulb to break the next time the headlamps
are operated. Note:
If the bulb is accidentally touched, it
should be cleaned with rubbing alcohol
before being used.
232
C-MAX (CCG) Canada/United States of America, enUSA, First Printing MaintenanceE142465 E142467 2
2
E142468
Page 246 of 395
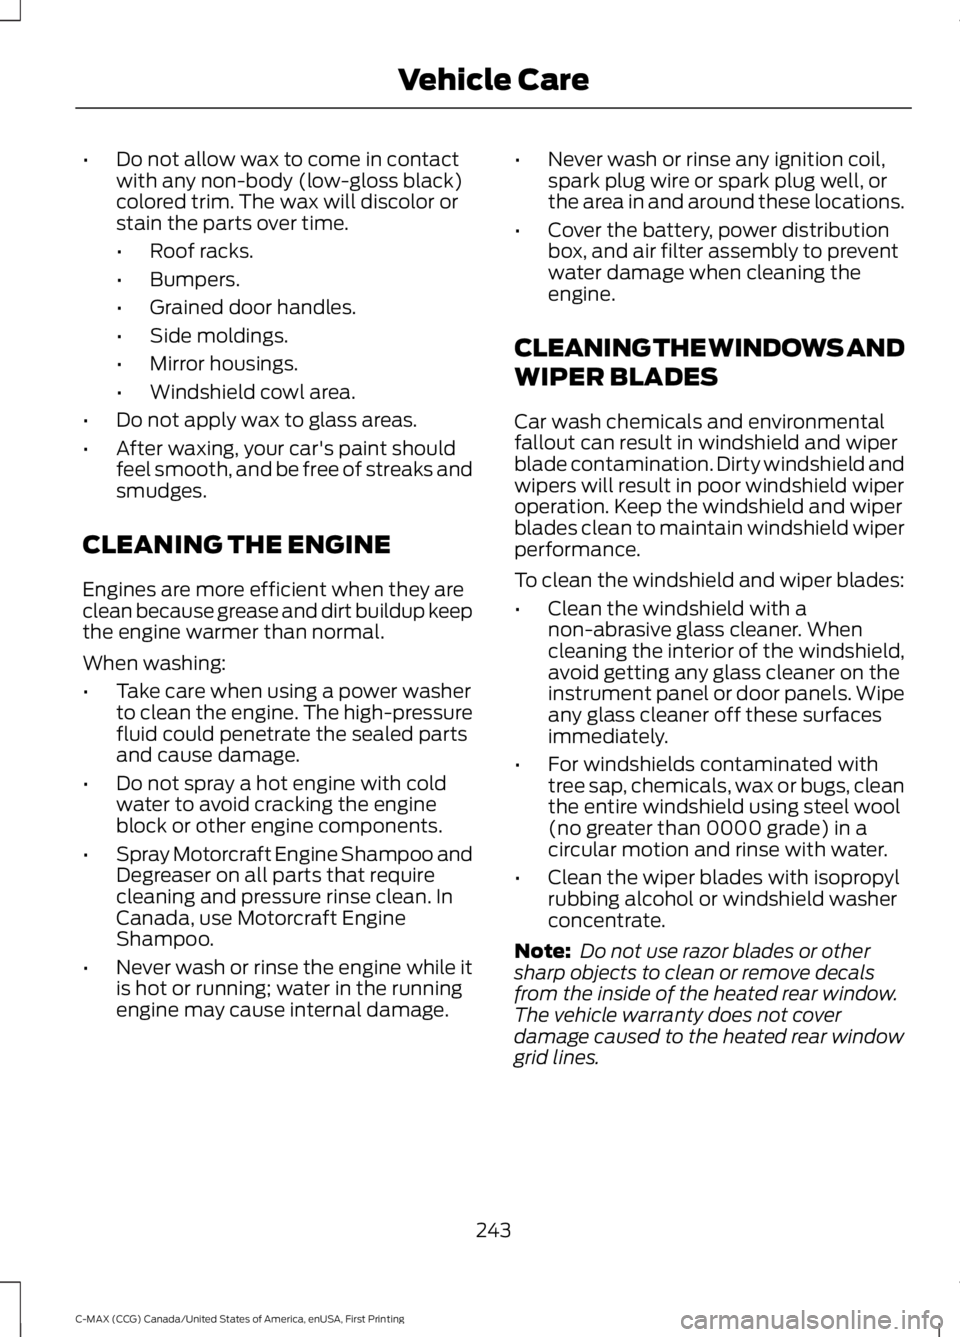
•
Do not allow wax to come in contact
with any non-body (low-gloss black)
colored trim. The wax will discolor or
stain the parts over time.
•Roof racks.
• Bumpers.
• Grained door handles.
• Side moldings.
• Mirror housings.
• Windshield cowl area.
• Do not apply wax to glass areas.
• After waxing, your car's paint should
feel smooth, and be free of streaks and
smudges.
CLEANING THE ENGINE
Engines are more efficient when they are
clean because grease and dirt buildup keep
the engine warmer than normal.
When washing:
• Take care when using a power washer
to clean the engine. The high-pressure
fluid could penetrate the sealed parts
and cause damage.
• Do not spray a hot engine with cold
water to avoid cracking the engine
block or other engine components.
• Spray Motorcraft Engine Shampoo and
Degreaser on all parts that require
cleaning and pressure rinse clean. In
Canada, use Motorcraft Engine
Shampoo.
• Never wash or rinse the engine while it
is hot or running; water in the running
engine may cause internal damage. •
Never wash or rinse any ignition coil,
spark plug wire or spark plug well, or
the area in and around these locations.
• Cover the battery, power distribution
box, and air filter assembly to prevent
water damage when cleaning the
engine.
CLEANING THE WINDOWS AND
WIPER BLADES
Car wash chemicals and environmental
fallout can result in windshield and wiper
blade contamination. Dirty windshield and
wipers will result in poor windshield wiper
operation. Keep the windshield and wiper
blades clean to maintain windshield wiper
performance.
To clean the windshield and wiper blades:
• Clean the windshield with a
non-abrasive glass cleaner. When
cleaning the interior of the windshield,
avoid getting any glass cleaner on the
instrument panel or door panels. Wipe
any glass cleaner off these surfaces
immediately.
• For windshields contaminated with
tree sap, chemicals, wax or bugs, clean
the entire windshield using steel wool
(no greater than 0000 grade) in a
circular motion and rinse with water.
• Clean the wiper blades with isopropyl
rubbing alcohol or windshield washer
concentrate.
Note: Do not use razor blades or other
sharp objects to clean or remove decals
from the inside of the heated rear window.
The vehicle warranty does not cover
damage caused to the heated rear window
grid lines.
243
C-MAX (CCG) Canada/United States of America, enUSA, First Printing Vehicle Care
Page 279 of 395
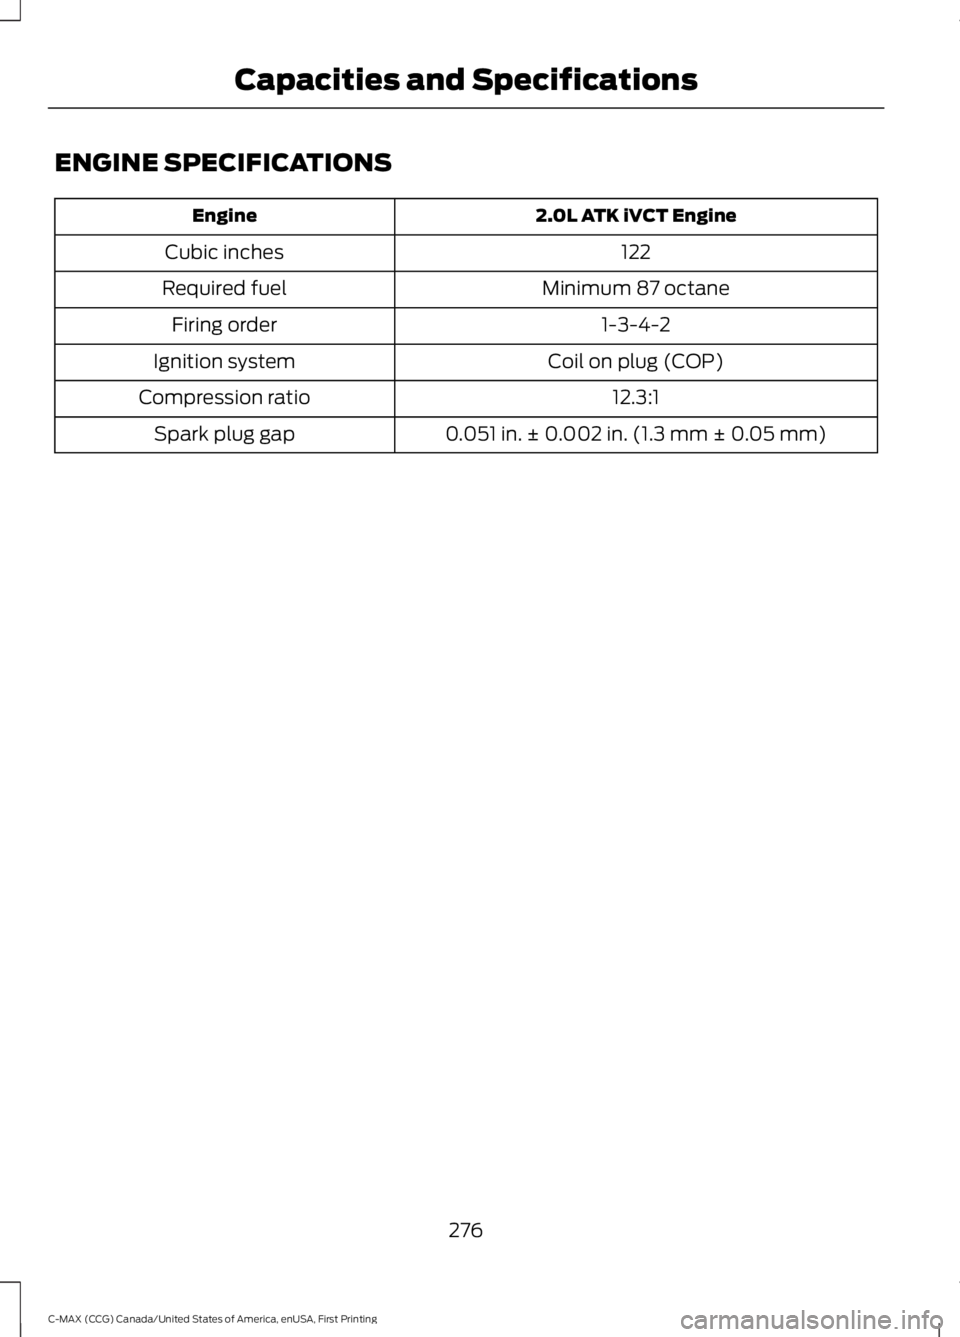
ENGINE SPECIFICATIONS
2.0L ATK iVCT Engine
Engine
122
Cubic inches
Minimum 87 octane
Required fuel
1-3-4-2
Firing order
Coil on plug (COP)
Ignition system
12.3:1
Compression ratio
0.051 in. ± 0.002 in. (1.3 mm ± 0.05 mm)
Spark plug gap
276
C-MAX (CCG) Canada/United States of America, enUSA, First Printing Capacities and Specifications