instrument panel FORD C MAX HYBRID 2015 2.G Quick Reference Guide
[x] Cancel search | Manufacturer: FORD, Model Year: 2015, Model line: C MAX HYBRID, Model: FORD C MAX HYBRID 2015 2.GPages: 10, PDF Size: 1.65 MB
Page 2 of 10
energy saving tips 2
C-MAX Energi smart start 3–4
unique C-MAX Energi features 5
instrument panel 6 –7
SYNC with MyFord Touch 8–12
parking aids 13
convenience 14
C-MAX Energi
power management 15
comfort 16
function 17
essential information 18–19
energy saving tips
HELP MAXIMIZE YOUR FUEL ECONOMY BY UTILIZING THESE FEW TIPS
1. Use smooth acceleration and braking.
According to the United States
Department of Energy, aggressive driving
can lower your gas mileage by up to
33 percent at highway speeds and
5 percent in the city.
2. Carry the bare essentials.
The Department of Energy estimates
that an extra 100 pounds (45 kilograms)
in your vehicle could reduce your fuel
economy by up to 2 percent.
3. Seasonal fuel makes a difference.
Winter fuel contains slightly less energy
than summer fuel, so the fuel blend you
fill up with can impact your efficiency. 4.
Idling burns fuel, too.
You can burn up to half a gallon (1.9 liters)
of fuel per hour while idling. Minimize your
morning warm-up and parking lot waits
to get the most out of filling your tank.
5. Avoid extreme temperatures.
Find a shady or sheltered spot to help
keep your lithium-ion battery operating
efficiently, and minimize the amount of
energy required to heat or cool your cabin.
6. Use accessories wisely.
Heat and air conditioning reduce
your vehicle’s electric range and can
prompt the gasoline engine to operate.
Use energy from your home outlet or charging station by taking advantage of
the preconditioning feature and setting
your GO Times in advance. When you
precondition your vehicle, you can reduce
the amount of heating or air conditioning
you need at the start of your drive. See
page 3 for more SmartGauge details.
7. Check your tires.
Proper tire inflation can help you
improve your fuel economy by up to
3.3 percent, according to the Department
of Energy, while under-inflation could
lower your fuel economy by 0.3 percent
for every 1 psi drop in pressure of all four
tires. Check your vehicle’s door sticker for
recommended cold tire inflation pressure.
SMARTGAUGE® WITH ECOGUIDE
Use your 5-way steering wheel controls to scroll through your menu
choices. Select the following screens from the Display/Trip and
Fuel Economy menus to help improve your fuel efficiency:
Engage: Provides gas and electric power-split information, plus
instant and average fuel economy.
Empower: Provides a power demand gauge with an engine on and
off threshold, plus instant and average fuel economy.
MyView: Lets you choose your preferred information to create
your own custom display.
Energy Use: Helps you achieve your initial electric range estimate.
Use the climate power gauge to see how much power
you are losing to your climate control use.
Efficiency
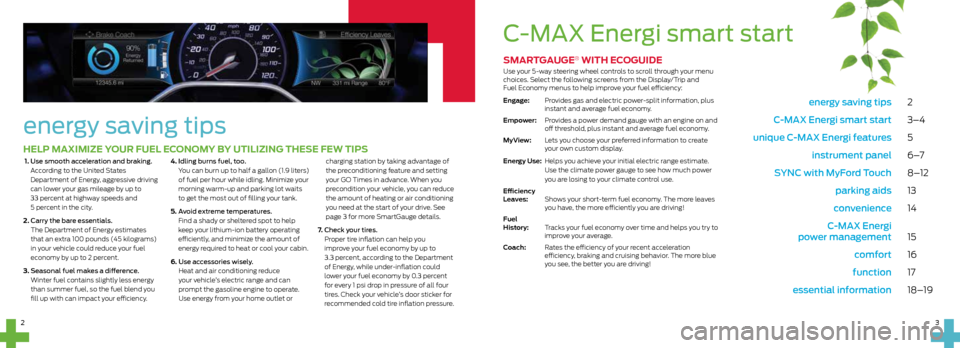
Leaves: Shows your short-term fuel economy. The more leaves
you have, the more efficiently you are driving!
Fuel
History: Tracks your fuel economy over time and helps you try to
improve your average.
Coach: Rates the efficiency of your recent acceleration
efficiency, braking and cruising behavior. The more blue
you see, the better you are driving!
C-MAX Energi smart start
3
2
Page 3 of 10
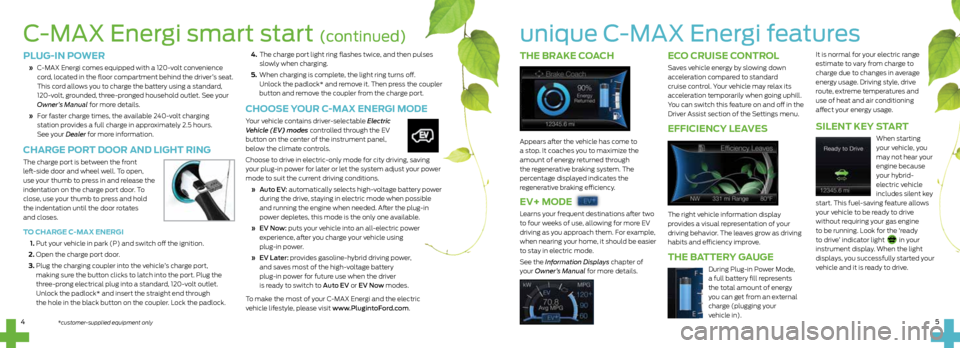
THE BRAKE COACH
Appears after the vehicle has come to
a stop. It coaches you to maximize the
amount of energy returned through
the regenerative braking system. The
percentage displayed indicates the
regenerative braking efficiency.
EV+ MODE
Learns your frequent destinations after two
to four weeks of use, allowing for more EV
driving as you approach them. For example,
when nearing your home, it should be easier
to stay in electric mode.
See the Information Displays chapter of
your Owner’s Manual for more details.
ECO CRUISE CONTROL
Saves vehicle energy by slowing down
acceleration compared to standard
cruise control. Your vehicle may relax its
acceleration temporarily when going uphill.
You can switch this feature on and off in the
Driver Assist section of the Settings menu.
EFFICIENCY LEAVES
The right vehicle information display
provides a visual representation of your
driving behavior. The leaves grow as driving
habits and efficiency improve.
THE BATTERY GAUGE
During Plug-in Power Mode,
a full battery fill represents
the total amount of energy
you can get from an external
charge (plugging your
vehicle in).
It is normal for your electric range
estimate to vary from charge to
charge due to changes in average
energy usage. Driving style, drive
route, extreme temperatures and
use of heat and air conditioning
affect your energy usage.
SILENT KEY START
When starting
your vehicle, you
may not hear your
engine because
your hybrid-
electric vehicle
includes silent key
start. This fuel-saving feature allows
your vehicle to be ready to drive
without requiring your gas engine
to be running. Look for the ‘ready
to drive’ indicator light
in your
instrument display. When the light
displays, you successfully started your
vehicle and it is ready to drive.
unique C-MAX Energi features
4. The charge port light ring flashes twice, and then pulses
slowly when charging.
5. When charging is complete, the light ring turns off.
Unlock the padlock* and remove it. Then press the coupler
button and remove the coupler from the charge port.
CHOOSE YOUR C-MAX ENERGI MODE
Your vehicle contains driver-selectable Electric
Vehicle (EV) modes controlled through the EV
button on the center of the instrument panel,
below the climate controls.
Choose to drive in electric-only mode for city driving, saving
your plug-in power for later or let the system adjust your power
mode to suit the current driving conditions.
» Auto EV: automatically selects high-voltage battery power
during the drive, staying in electric mode when possible
and running the engine when needed. After the plug-in
power depletes, this mode is the only one available.
» EV Now: puts your vehicle into an all-electric power
experience, after you charge your vehicle using
plug-in power.
» EV Later: provides gasoline-hybrid driving power,
and saves most of the high-voltage battery
plug-in power for future use when the driver
is ready to switch to Auto EV or EV Now modes.
To make the most of your C-MAX Energi and the electric
vehicle lifestyle, please visit www.PlugintoFord.com.
PLUG-IN POWER
» C-MAX Energi comes equipped with a 120-volt convenience
cord, located in the floor compartment behind the driver’s seat.
This cord allows you to charge the battery using a standard,
120-volt, grounded, three-pronged household outlet. See your
Owner’s Manual for more details.
» For faster charge times, the available 240-volt charging
station provides a full charge in approximately 2.5 hours.
See your Dealer for more information.
CHARGE PORT DOOR AND LIGHT RING
The charge port is between the front
left-side door and wheel well. To open,
use your thumb to press in and release the
indentation on the charge port door. To
close, use your thumb to press and hold
the indentation until the door rotates
and closes.
TO CHARGE C-MAX ENERGI
1. Put your vehicle in park (P) and switch off the ignition.
2. Open the charge port door.
3. Plug the charging coupler into the vehicle’s charge port,
making sure the button clicks to latch into the port. Plug the
three-prong electrical plug into a standard, 120-volt outlet.
Unlock the padlock* and insert the straight end through
the hole in the black button on the coupler. Lock the padlock.
C-MAX Energi smart start (continued)
5
4*customer-supplied equipment only
Page 4 of 10
instrument
panel
7
4
5
4
2
2
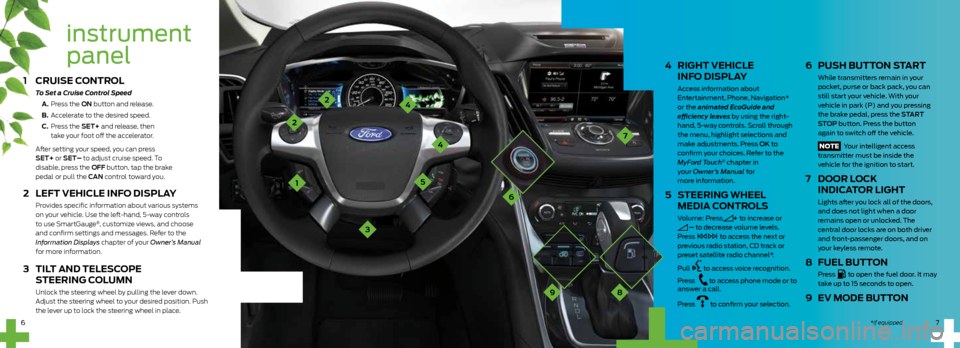
4 RIGHT VEHICLE
INFO DISPLAY
Access information about
Entertainment, Phone, Navigation*
or the animated EcoGuide and
efficiency leaves by using the right-
hand, 5-way controls. Scroll through
the menu, highlight selections and
make adjustments. Press OK to
confirm your choices. Refer to the
MyFord Touch
® chapter in
your Owner’s Manual for
more information.
5 STEERING WHEEL MEDIA CONTROLS
Volume: Press+ to increase or – to decrease volume levels.
Press to access the next or
previous radio station, CD track or
preset satellite radio channel*.
Pull
t o access voice recognition.
Press
to access phone mode or to
answer a call.
Press
to confirm your selection.
6 PUSH BUTTON START
While transmitters remain in your
pocket, purse or back pack, you can
still start your vehicle. With your
vehicle in park (P) and you pressing
the brake pedal, press the START
STOP button. Press the button
again to switch off the vehicle.
NOTE Your intelligent access
transmitter must be inside the
vehicle for the ignition to start.
7 DOOR LOCK
INDICATOR LIGHT
Lights after you lock all of the doors,
and does not light when a door
remains open or unlocked. The
central door locks are on both driver
and front-passenger doors, and on
your keyless remote.
8 FUEL BUTTON
Press to open the fuel door. It may
take up to 15 seconds to open.
9 EV MODE BUTTON
1
CRUISE CONTROL
To Set a Cruise Control Speed
A. Press the ON button and release.
B. Accelerate to the desired speed.
C. Press the SET+ and release, then
take your foot off the accelerator.
After setting your speed, you can press
SET+ or SET– to adjust cruise speed. To
disable, press the OFF button, tap the brake
pedal or pull the CAN control toward you.
2 LEFT VEHICLE INFO DISPLAY
Provides specific information about various systems
on your vehicle. Use the left-hand, 5-way controls
to use SmartGauge
®, customize views, and choose
and confirm settings and messages. Refer to the
Information Displays chapter of your Owner’s Manual
for more information.
3 TILT AND TELESCOPE
STEERING COLUMN
Unlock the steering wheel by pulling the lever down.
Adjust the steering wheel to your desired position. Push
the lever up to lock the steering wheel in place.
3
6
1
8
7
6
9
*if equipped
Page 7 of 10
parking aids
FORWARD* AND REVERSE*
SENSING SYSTEMS
Sounds an audible warning tone if there is an obstacle
near the vehicle’s front or rear bumpers. As the vehicle
moves closer to the obstacle, the rate of the warning
tone increases in frequency.
NOTE The driver is always responsible for controlling
the vehicle, supervising the system and intervening if
required. Visibility aids do not replace the need to watch
where the vehicle is moving. Refer to your Owner’s
Manual for safety information, more details
and limitations.
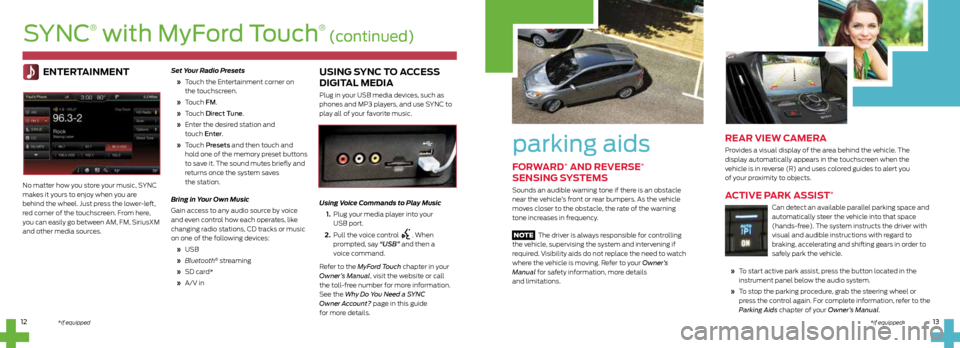
REAR VIEW CAMERA
Provides a visual display of the area behind the vehicle. The
display automatically appears in the touchscreen when the
vehicle is in reverse (R) and uses colored guides to alert you
of your proximity to objects.
ACTIVE PARK ASSIST*
Can detect an available parallel parking space and
automatically steer the vehicle into that space
(hands-free). The system instructs the driver with
visual and audible instructions with regard to
braking, accelerating and shifting gears in order to
safely park the vehicle.
» To start active park assist, press the button located in the
instrument panel below the audio system.
» To stop the parking procedure, grab the steering wheel or
press the control again. For complete information, refer to the
Parking Aids chapter of your Owner’s Manual.
ENTERTAINMENT
No matter how you store your music, SYNC
makes it yours to enjoy when you are
behind the wheel. Just press the lower-left,
red corner of the touchscreen. From here,
you can easily go between AM, FM, SiriusXM
and other media sources. Set Your Radio Presets
» Touch the Entertainment corner on
the touchscreen.
» Touch FM.
» Touch Direct Tune.
» Enter the desired station and
touch Enter.
» Touch Presets and then touch and
hold one of the memory preset buttons
to save it. The sound mutes briefly and
returns once the system saves
the station.
Bring in Your Own Music
Gain access to any audio source by voice
and even control how each operates, like
changing radio stations, CD tracks or music
on one of the following devices:
» USB
» Bluetooth
® streaming
» SD card*
» A/V in
USING SYNC TO ACCESS
DIGITAL MEDIA
Plug in your USB media devices, such as
phones and MP3 players, and use SYNC to
play all of your favorite music.
Using Voice Commands to Play Music
1. Plug your media player into your
USB port.
2. Pull the voice control
. When
prompted, say “USB” and then a
voice command.
Refer to the MyFord Touch chapter in your
Owner’s Manual, visit the website or call
the toll-free number for more information.
See the Why Do You Need a SYNC
Owner Account? page in this guide
for more details.
13
12
SYNC
®
with MyFord Touch
® (continued)
*if equipped*if equipped
Page 8 of 10
15
14
15
convenience
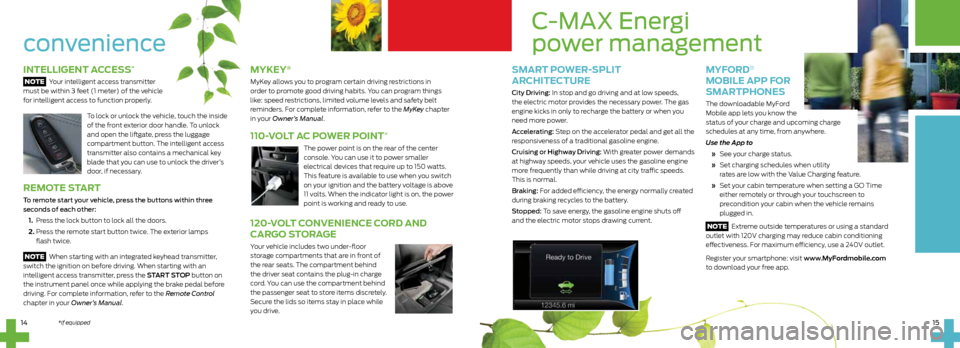
INTELLIGENT ACCESS*
NOTE Your intelligent access transmitter
must be within 3 feet (1 meter) of the vehicle
for intelligent access to function properly.
To lock or unlock the vehicle, touch the inside
of the front exterior door handle. To unlock
and open the liftgate, press the luggage
compartment button. The intelligent access
transmitter also contains a mechanical key
blade that you can use to unlock the driver’s
door, if necessary.
REMOTE START
To remote start your vehicle, press the buttons within three
seconds of each other:
1. Press the lock button to lock all the doors.
2. Press the remote start button twice. The exterior lamps
flash twice.
NOTE When starting with an integrated keyhead transmitter,
switch the ignition on before driving. When starting with an
intelligent access transmitter, press the START STOP button on
the instrument panel once while applying the brake pedal before
driving. For complete information, refer to the Remote Control
chapter in your Owner’s Manual.
MYKEY®
MyKey allows you to program certain driving restrictions in
order to promote good driving habits. You can program things
like: speed restrictions, limited volume levels and safety belt
reminders. For complete information, refer to the MyKey chapter
in your Owner’s Manual.
110-VOLT AC POWER POINT*
The power point is on the rear of the center
console. You can use it to power smaller
electrical devices that require up to 150 watts.
This feature is available to use when you switch
on your ignition and the battery voltage is above
11 volts. When the indicator light is on, the power
point is working and ready to use.
*if equipped
120-VOLT CONVENIENCE CORD AND
CARGO STORAGE
Your vehicle includes two under-floor
storage compartments that are in front of
the rear seats. The compartment behind
the driver seat contains the plug-in charge
cord. You can use the compartment behind
the passenger seat to store items discretely.
Secure the lids so items stay in place while
you drive.
SMART POWER-SPLIT
ARCHITECTURE
City Driving: In stop and go driving and at low speeds,
the electric motor provides the necessary power. The gas
engine kicks in only to recharge the battery or when you
need more power.
Accelerating: Step on the accelerator pedal and get all the
responsiveness of a traditional gasoline engine.
Cruising or Highway Driving: With greater power demands
at highway speeds, your vehicle uses the gasoline engine
more frequently than while driving at city traffic speeds.
This is normal.
Braking: For added efficiency, the energy normally created
during braking recycles to the battery.
Stopped: To save energy, the gasoline engine shuts off
and the electric motor stops drawing current.
MYFORD®
MOBILE APP FOR
SMARTPHONES
The downloadable MyFord
Mobile app lets you know the
status of your charge and upcoming charge
schedules at any time, from anywhere.
Use the App to
» See your charge status.
» Set charging schedules when utility
rates are low with the Value Charging feature.
» Set your cabin temperature when setting a GO Time
either remotely or through your touchscreen to
precondition your cabin when the vehicle remains
plugged in.
NOTE Extreme outside temperatures or using a standard
outlet with 120V charging may reduce cabin conditioning
effectiveness. For maximum efficiency, use a 240V outlet.
Register your smartphone: visit www.MyFordmobile.com
to download your free app.
C-MAX Energi
power management
Page 9 of 10
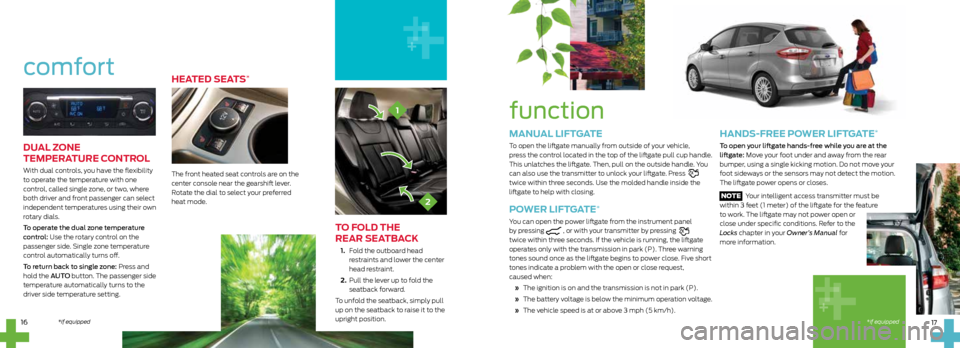
DUAL ZONE
TEMPERATURE CONTROL
With dual controls, you have the flexibility
to operate the temperature with one
control, called single zone, or two, where
both driver and front passenger can select
independent temperatures using their own
rotary dials.
To operate the dual zone temperature
control: Use the rotary control on the
passenger side. Single zone temperature
control automatically turns off.
To return back to single zone: Press and
hold the AUTO button. The passenger side
temperature automatically turns to the
driver side temperature setting.
HEATED SEATS*
The front heated seat controls are on the
center console near the gearshift lever.
Rotate the dial to select your preferred
heat mode.comfort
16
2
1function
MANUAL LIFTGATE
To open the liftgate manually from outside of your vehicle,
press the control located in the top of the liftgate pull cup handle.
This unlatches the liftgate. Then, pull on the outside handle. You
can also use the transmitter to unlock your liftgate. Press
twice within three seconds. Use the molded handle inside the
liftgate to help with closing.
POWER LIFTGATE*
You can open the power liftgate from the instrument panel
by pressing
, or with your transmitter by pressing
twice within three seconds. If the vehicle is running, the liftgate
operates only with the transmission in park (P). Three warning
tones sound once as the liftgate begins to power close. Five short
tones indicate a problem with the open or close request,
caused when:
» The ignition is on and the transmission is not in park (P).
» The battery voltage is below the minimum operation voltage.
» The vehicle speed is at or above 3 mph (5 km/h).
*if equipped *if equipped
TO FOLD THE
REAR SEATBACK
1. Fold the outboard head
restraints and lower the center
head restraint.
2. Pull the lever up to fold the
seatback forward.
To unfold the seatback, simply pull
up on the seatback to raise it to the
upright position.
17
HANDS-FREE POWER LIFTGATE*
To open your liftgate hands-free while you are at the
liftgate: Move your foot under and away from the rear
bumper, using a single kicking motion. Do not move your
foot sideways or the sensors may not detect the motion.
The liftgate power opens or closes.
NOTE Your intelligent access transmitter must be
within 3 feet (1 meter) of the liftgate for the feature
to work. The liftgate may not power open or
close under specific conditions. Refer to the
Locks chapter in your Owner’s Manual for
more information.