high beam FORD CROWN VICTORIA 1998 2.G Owners Manual
[x] Cancel search | Manufacturer: FORD, Model Year: 1998, Model line: CROWN VICTORIA, Model: FORD CROWN VICTORIA 1998 2.GPages: 160, PDF Size: 1.24 MB
Page 9 of 160

Anti-lock brake system (ABS) (If equipped)
Momentarily illuminates when the
ignition is turned on and the engine
is off. If the light does not illuminate
momentarily at start up, remains on
or continues to flash, the ABS needs
to be serviced. With the ABS light on, the anti-lock brake system is
disabled and normal braking is still effective unless the brake warning
light also remains illuminated with parking brake released.
Turn signal
Illuminates when the left or right
turn signal or the hazard lights are
turned on. If one or both of the
indicators stay on continuously or
flash faster, check for a burned-out
turn signal bulb. Refer toExterior bulbsin theMaintenance and care
chapter.
High beams
Illuminates when the high beam
headlamps are turned on.
Charging system
Illuminates when the ignition is
turned to the ON position and the
engine is off. The light also
illuminates when the battery is not
charging properly, requiring
electrical system service.
ABS
Instrumentation
9
Page 23 of 160

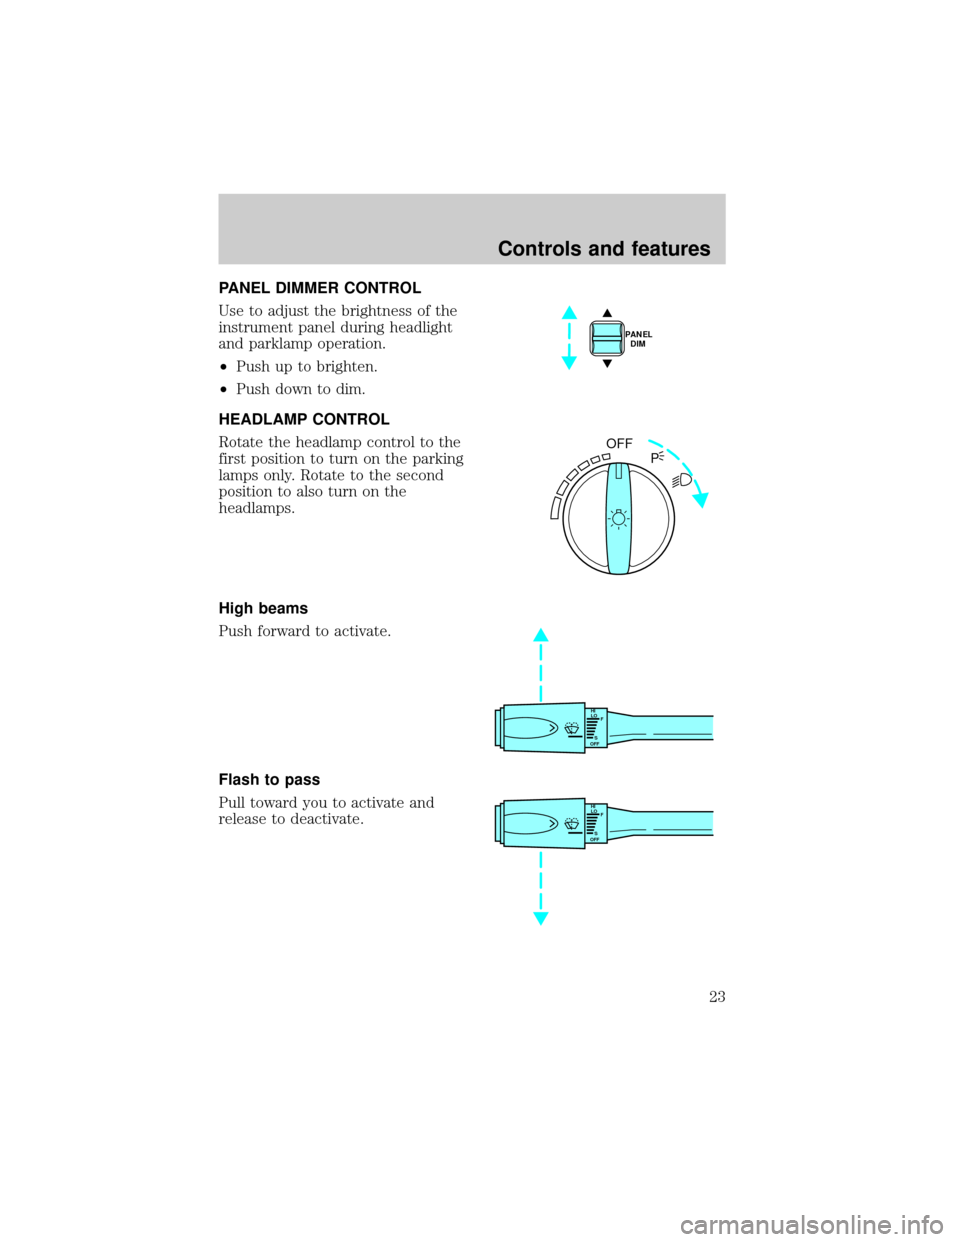
PANEL DIMMER CONTROL
Use to adjust the brightness of the
instrument panel during headlight
and parklamp operation.
²Push up to brighten.
²Push down to dim.
HEADLAMP CONTROL
Rotate the headlamp control to the
first position to turn on the parking
lamps only. Rotate to the second
position to also turn on the
headlamps.
High beams
Push forward to activate.
Flash to pass
Pull toward you to activate and
release to deactivate.
PANEL
DIM
OFF
P
HI
LO
F
S
OFF
HI
LO
F
S
OFF
Controls and features
23
Page 24 of 160

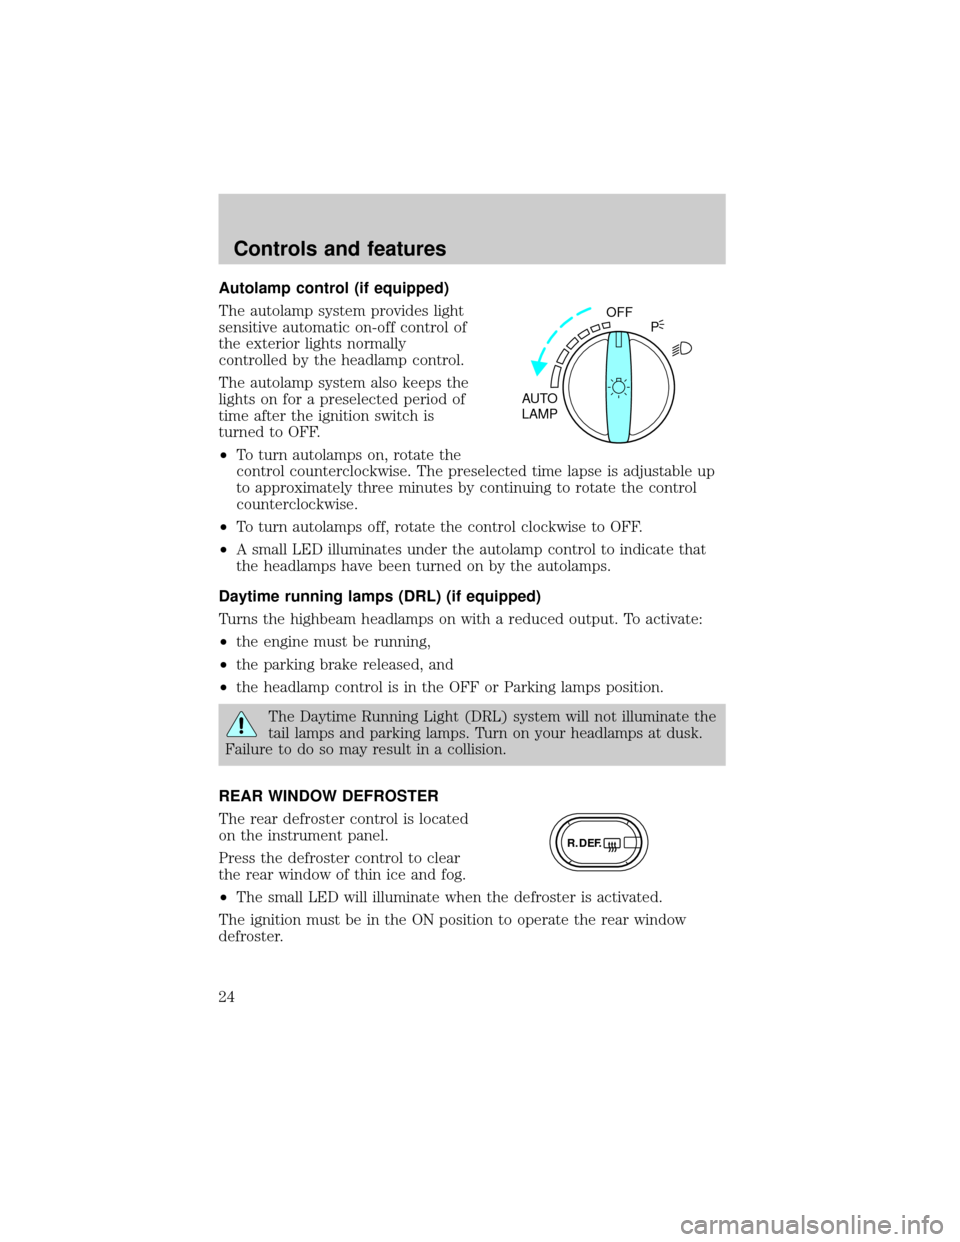
Autolamp control (if equipped)
The autolamp system provides light
sensitive automatic on-off control of
the exterior lights normally
controlled by the headlamp control.
The autolamp system also keeps the
lights on for a preselected period of
time after the ignition switch is
turned to OFF.
²To turn autolamps on, rotate the
control counterclockwise. The preselected time lapse is adjustable up
to approximately three minutes by continuing to rotate the control
counterclockwise.
²To turn autolamps off, rotate the control clockwise to OFF.
²A small LED illuminates under the autolamp control to indicate that
the headlamps have been turned on by the autolamps.
Daytime running lamps (DRL) (if equipped)
Turns the highbeam headlamps on with a reduced output. To activate:
²the engine must be running,
²the parking brake released, and
²the headlamp control is in the OFF or Parking lamps position.
The Daytime Running Light (DRL) system will not illuminate the
tail lamps and parking lamps. Turn on your headlamps at dusk.
Failure to do so may result in a collision.
REAR WINDOW DEFROSTER
The rear defroster control is located
on the instrument panel.
Press the defroster control to clear
the rear window of thin ice and fog.
²The small LED will illuminate when the defroster is activated.
The ignition must be in the ON position to operate the rear window
defroster.
OFF
AUTO
LAMPP
R.DEF.
Controls and features
24
Page 138 of 160

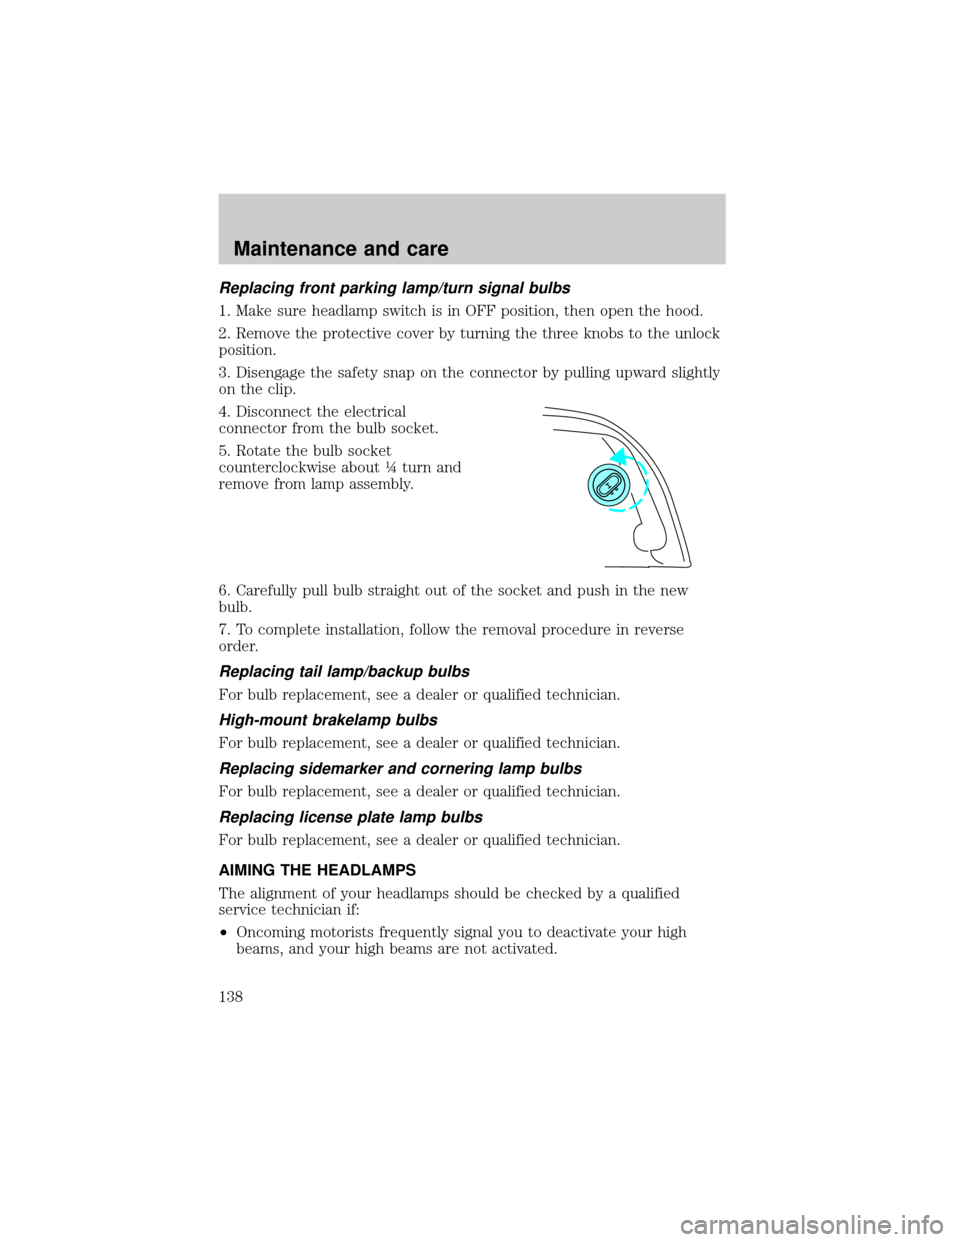
Replacing front parking lamp/turn signal bulbs
1. Make sure headlamp switch is in OFF position, then open the hood.
2. Remove the protective cover by turning the three knobs to the unlock
position.
3. Disengage the safety snap on the connector by pulling upward slightly
on the clip.
4. Disconnect the electrical
connector from the bulb socket.
5. Rotate the bulb socket
counterclockwise about ò turn and
remove from lamp assembly.
6. Carefully pull bulb straight out of the socket and push in the new
bulb.
7. To complete installation, follow the removal procedure in reverse
order.
Replacing tail lamp/backup bulbs
For bulb replacement, see a dealer or qualified technician.
High-mount brakelamp bulbs
For bulb replacement, see a dealer or qualified technician.
Replacing sidemarker and cornering lamp bulbs
For bulb replacement, see a dealer or qualified technician.
Replacing license plate lamp bulbs
For bulb replacement, see a dealer or qualified technician.
AIMING THE HEADLAMPS
The alignment of your headlamps should be checked by a qualified
service technician if:
²Oncoming motorists frequently signal you to deactivate your high
beams, and your high beams are not activated.
Maintenance and care
138
Page 139 of 160

²The headlamps do not seem to provide enough light for clear night
vision.
²The headlamp beams are pointed substantially away from a slightly
down and to the right position.
REPLACING THE INTERIOR BULBS
Check the operation of the following interior bulbs frequently:
²interior overhead lamp
²map lamp
Using the right bulbs
Function Trade Number
Headlamp 9007
Park lamp and turn lamp (front) 3457 NAK
Side marker (front) 194 NA
Cornering lamp (front) 3156K
Tail, stop, turn (rear) 3157 K
Side marker (rear) 194
Backup lamp 3156K
License plate lamp 168
High-mount brakelamp 912
Luggage compartment lamp 212-2
Dome lamp 906
Rear reading lamp 211-2
Map lamp 168
Illuminated visor mirror 168
Dual floorwell lamp 906
Glove compartment 168
To replace all instrument panel lights - see your dealer.
Maintenance and care
139
Page 153 of 160

Hazard flashers ...........................95
Headlamps ...................................23
autolamp system .......................24
daytime running lights .............24
flashing ......................................23
high beam .................................23
Heating ........................................25
High beams
indicator light .............................9
Hood
release lever ............................110
Ignition
positions of the ignition ...........35
Instrument panel
cleaning ...................................143
lighting up panel and interior .23
Keyless entry system
autolock .....................................50
keypad .......................................55
programming entry code ....56,57
Keys
key in ignition chime ...............11
Lamps
headlamps ...............................136
high-mount brakelamp ...........138
interior lamps .........................139
parking lamps .........................138
tail lamps .................................138
License plate lamps ..................138
Lights, warning and indicator
air bag ..........................................8
air suspension ...........................10
anti-lock brakes (ABS) .........9,22
brake .......................................8,22
charging system ..........................9
check engine ...............................7
fuel reset .....................................6
low coolant ................................10
oil pressure ...............................10
overdrive off ..............................11
safety belt ...................................8
turn signal indicator ...................9Lubricant specifications ...........147
Message center ...........................17
reset button .........................17,18
select button .............................18
Mirrors
automatic dimming rearview
mirror ........................................42
side view mirrors (power) .......47
Motorcraft parts ........................145
Odometer .....................................14
Panic alarm feature, remote
entry system ................................51
Parking brake ..............................84
Power door locks ........................47
Power steering
fluid, checking and adding ....121
Radio ............................................33
Refill capacities for fluids ........146
Relays ...................................96,101
Remote entry system .................48
illuminated entry ......................51
locking/unlocking doors ...........49
replacement/additional
transmitters ...............................53
replacing the batteries .............52
Reporting safety defects ..........151
Safety restraints
center front lap belt .................65
cleaning the safety belts ........143
extension assembly ..................66
for children ...............................72
warning light and
chime ...............................11,66,67
Safety seats for children
attaching with tether straps ....77
in rear seat ................................77
tether anchorage hardware .....77
Seat belts (see Safety
restraints) ....................................61
Seats ............................................58
adjusting the seat, manual ..58,59
adjusting the seat, power ...59,61
Index
153