change time FORD E-350 2019 Owners Manual
[x] Cancel search | Manufacturer: FORD, Model Year: 2019, Model line: E-350, Model: FORD E-350 2019Pages: 329, PDF Size: 6.24 MB
Page 2 of 329
The information contained in this publication was correct at the time of going to print. In the interest of
continuous development, we reserve the right to change specifications, design or equipment at any time
without notice or obligation. No part of this publication may be reproduced, transmitted, stored in a
retrieval system or translated into any language in any form by any means without our written permission.
Errors and omissions excepted.
© Ford Motor Company 2019
All rights reserved.
Part Number: 201804 20190222213557
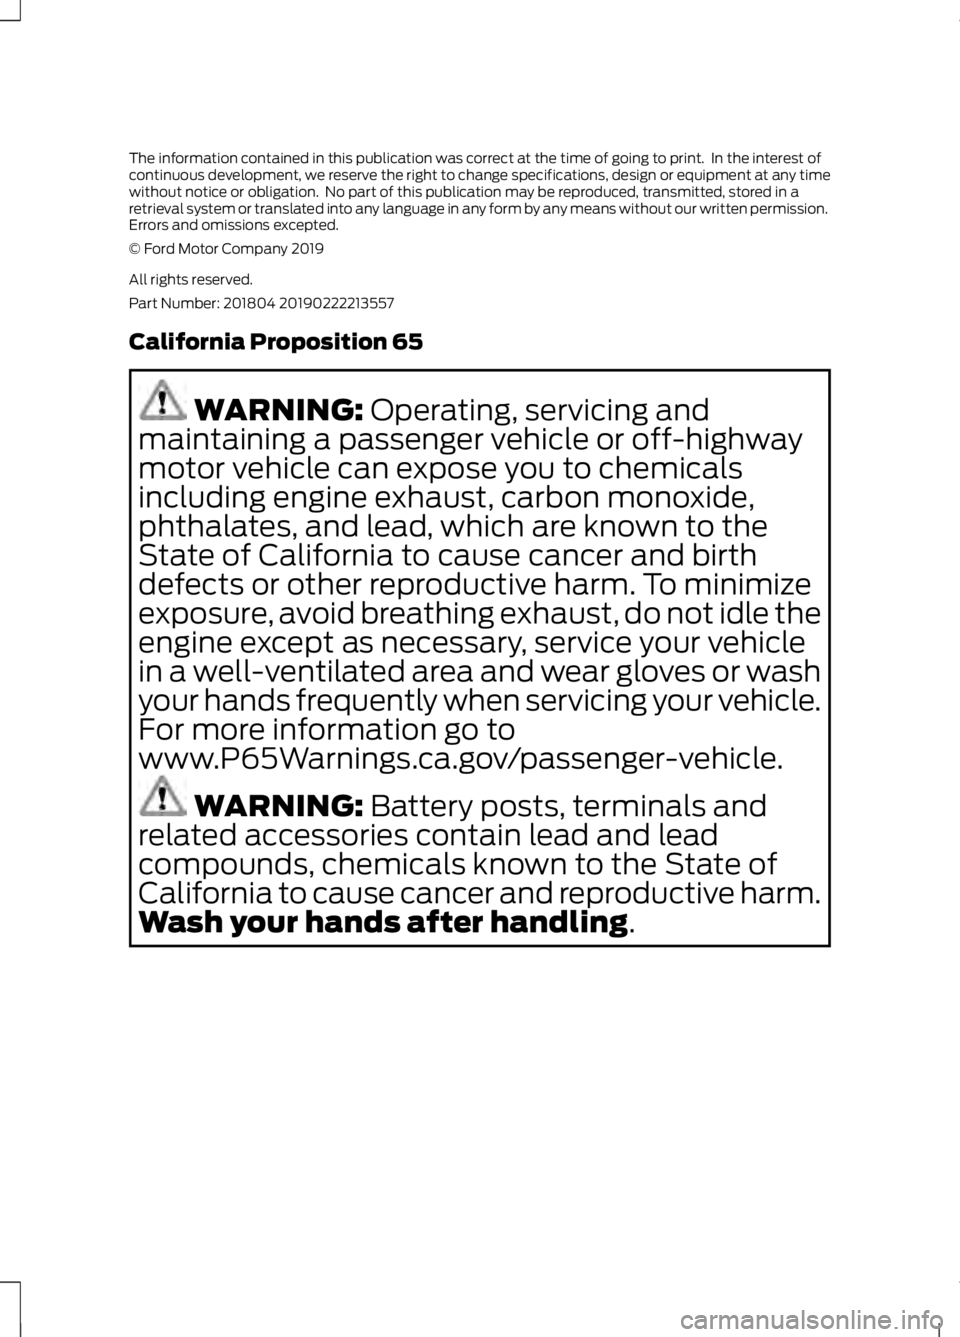
California Proposition 65
WARNING: Operating, servicing and
maintaining a passenger vehicle or off-highway
motor vehicle can expose you to chemicals
including engine exhaust, carbon monoxide,
phthalates, and lead, which are known to the
State of California to cause cancer and birth
defects or other reproductive harm. To minimize
exposure, avoid breathing exhaust, do not idle the
engine except as necessary, service your vehicle
in a well-ventilated area and wear gloves or wash
your hands frequently when servicing your vehicle.
For more information go to
www.P65Warnings.ca.gov/passenger-vehicle. WARNING:
Battery posts, terminals and
related accessories contain lead and lead
compounds, chemicals known to the State of
California to cause cancer and reproductive harm.
Wash your hands after handling
.
Page 10 of 329
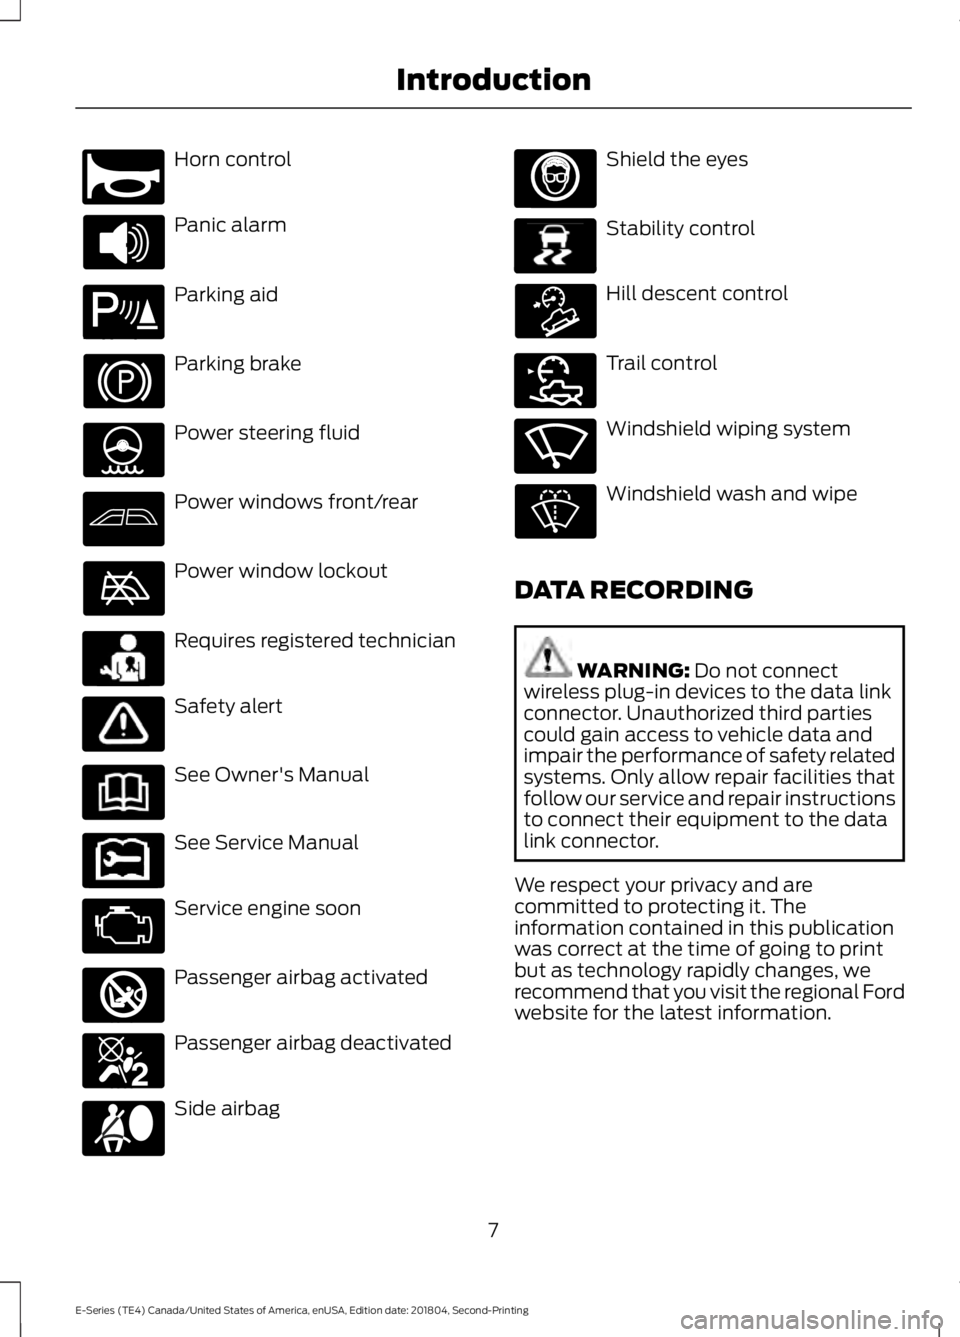
Horn control
Panic alarm
Parking aid
Parking brake
Power steering fluid
Power windows front/rear
Power window lockout
Requires registered technician
Safety alert
See Owner's Manual
See Service Manual
Service engine soon
Passenger airbag activated
Passenger airbag deactivated
Side airbag Shield the eyes
Stability control
Hill descent control
Trail control
Windshield wiping system
Windshield wash and wipe
DATA RECORDING WARNING: Do not connect
wireless plug-in devices to the data link
connector. Unauthorized third parties
could gain access to vehicle data and
impair the performance of safety related
systems. Only allow repair facilities that
follow our service and repair instructions
to connect their equipment to the data
link connector.
We respect your privacy and are
committed to protecting it. The
information contained in this publication
was correct at the time of going to print
but as technology rapidly changes, we
recommend that you visit the regional Ford
website for the latest information.
7
E-Series (TE4) Canada/United States of America, enUSA, Edition date: 201804, Second-Printing IntroductionE270945 E139213 E231159 E231158 E270849 E270850 E167012 E138639 E163957 E272858 E270969
Page 45 of 329
LOCKING AND UNLOCKING
You can use the power door lock control
or the remote control to lock and unlock
your vehicle.
Power Door Locks (If Equipped)
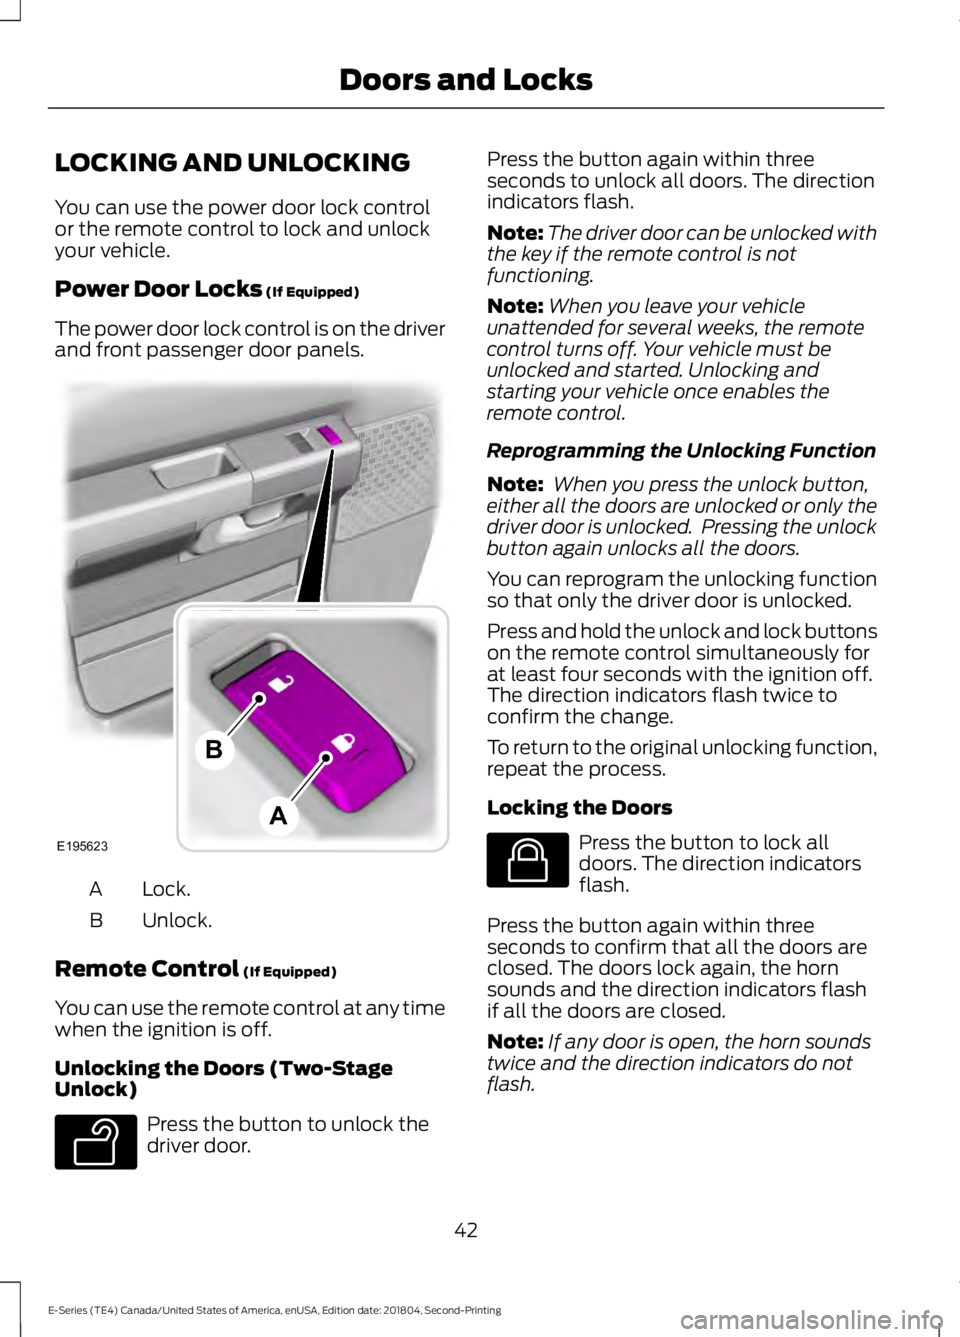
The power door lock control is on the driver
and front passenger door panels. Lock.
A
Unlock.
B
Remote Control
(If Equipped)
You can use the remote control at any time
when the ignition is off.
Unlocking the Doors (Two-Stage
Unlock) Press the button to unlock the
driver door. Press the button again within three
seconds to unlock all doors. The direction
indicators flash.
Note:
The driver door can be unlocked with
the key if the remote control is not
functioning.
Note: When you leave your vehicle
unattended for several weeks, the remote
control turns off. Your vehicle must be
unlocked and started. Unlocking and
starting your vehicle once enables the
remote control.
Reprogramming the Unlocking Function
Note: When you press the unlock button,
either all the doors are unlocked or only the
driver door is unlocked. Pressing the unlock
button again unlocks all the doors.
You can reprogram the unlocking function
so that only the driver door is unlocked.
Press and hold the unlock and lock buttons
on the remote control simultaneously for
at least four seconds with the ignition off.
The direction indicators flash twice to
confirm the change.
To return to the original unlocking function,
repeat the process.
Locking the Doors Press the button to lock all
doors. The direction indicators
flash.
Press the button again within three
seconds to confirm that all the doors are
closed. The doors lock again, the horn
sounds and the direction indicators flash
if all the doors are closed.
Note: If any door is open, the horn sounds
twice and the direction indicators do not
flash.
42
E-Series (TE4) Canada/United States of America, enUSA, Edition date: 201804, Second-Printing Doors and LocksE195623
A
B E138629 E138623
Page 52 of 329
GENERAL INFORMATION
Condensation in the Exterior Front
Lamps and Rear Lamps
Exterior front lamps and rear lamps have
vents to accommodate normal changes
in air pressure.
Condensation can be a natural by-product
of this design. When moist air enters the
lamp assembly through the vents, there is
a possibility that condensation can occur
when the temperature is cold. When
normal condensation occurs, a fine mist
can form on the interior of the lens. The
fine mist eventually clears and exits
through the vents during normal operation.
Clearing time may take as long as 48 hours
under dry weather conditions.
Examples of acceptable condensation are:
•
The presence of a fine mist (no streaks,
drip marks or large droplets).
• A fine mist covers less than 50% of the
lens.
Examples of unacceptable condensation
are:
• A water puddle inside the lamp.
• Streaks, drip marks or large droplets
present on the interior of the lens.
If you see any unacceptable condensation,
have your vehicle checked by an authorized
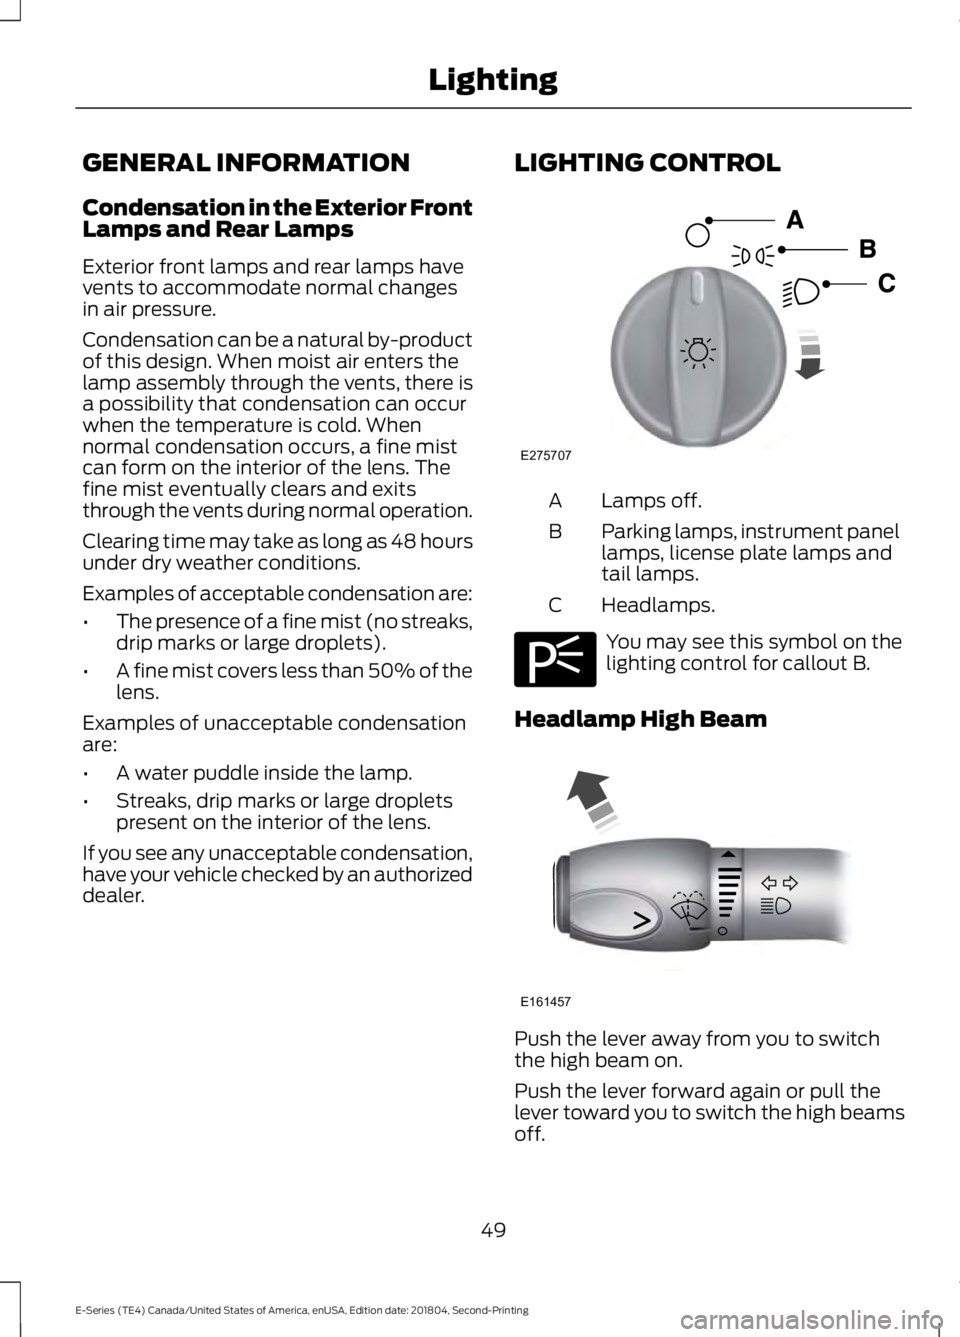
dealer. LIGHTING CONTROL Lamps off.
A
Parking lamps, instrument panel
lamps, license plate lamps and
tail lamps.
B
Headlamps.
C You may see this symbol on the
lighting control for callout B.
Headlamp High Beam Push the lever away from you to switch
the high beam on.
Push the lever forward again or pull the
lever toward you to switch the high beams
off.
49
E-Series (TE4) Canada/United States of America, enUSA, Edition date: 201804, Second-Printing LightingE275707 E275706 E161457
Page 53 of 329
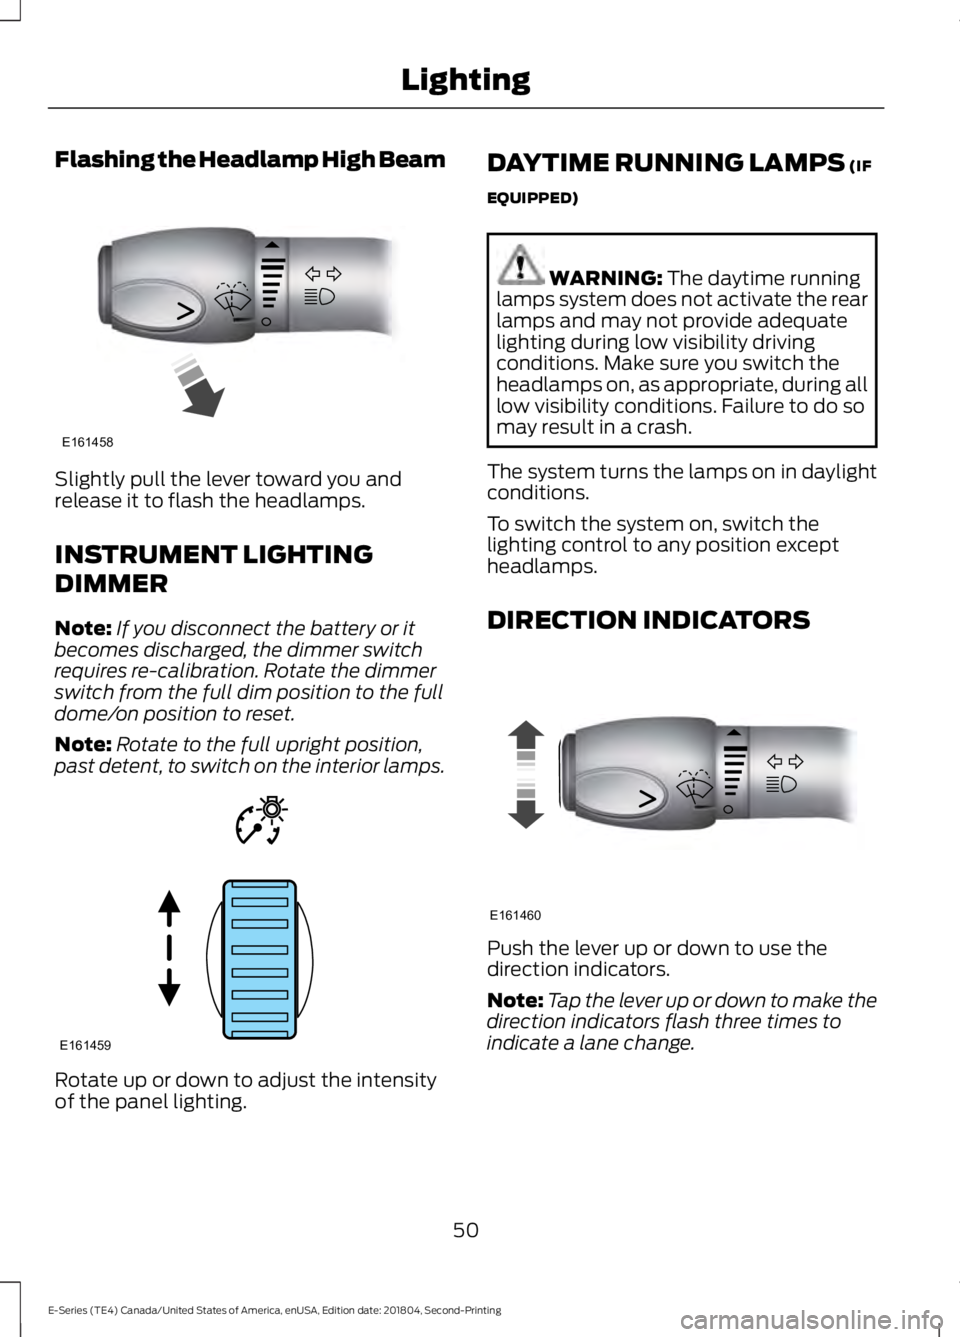
Flashing the Headlamp High Beam
Slightly pull the lever toward you and
release it to flash the headlamps.
INSTRUMENT LIGHTING
DIMMER
Note:
If you disconnect the battery or it
becomes discharged, the dimmer switch
requires re-calibration. Rotate the dimmer
switch from the full dim position to the full
dome/on position to reset.
Note: Rotate to the full upright position,
past detent, to switch on the interior lamps. Rotate up or down to adjust the intensity
of the panel lighting. DAYTIME RUNNING LAMPS (IF
EQUIPPED) WARNING:
The daytime running
lamps system does not activate the rear
lamps and may not provide adequate
lighting during low visibility driving
conditions. Make sure you switch the
headlamps on, as appropriate, during all
low visibility conditions. Failure to do so
may result in a crash.
The system turns the lamps on in daylight
conditions.
To switch the system on, switch the
lighting control to any position except
headlamps.
DIRECTION INDICATORS Push the lever up or down to use the
direction indicators.
Note:
Tap the lever up or down to make the
direction indicators flash three times to
indicate a lane change.
50
E-Series (TE4) Canada/United States of America, enUSA, Edition date: 201804, Second-Printing LightingE161458 E161459 E161460
Page 65 of 329
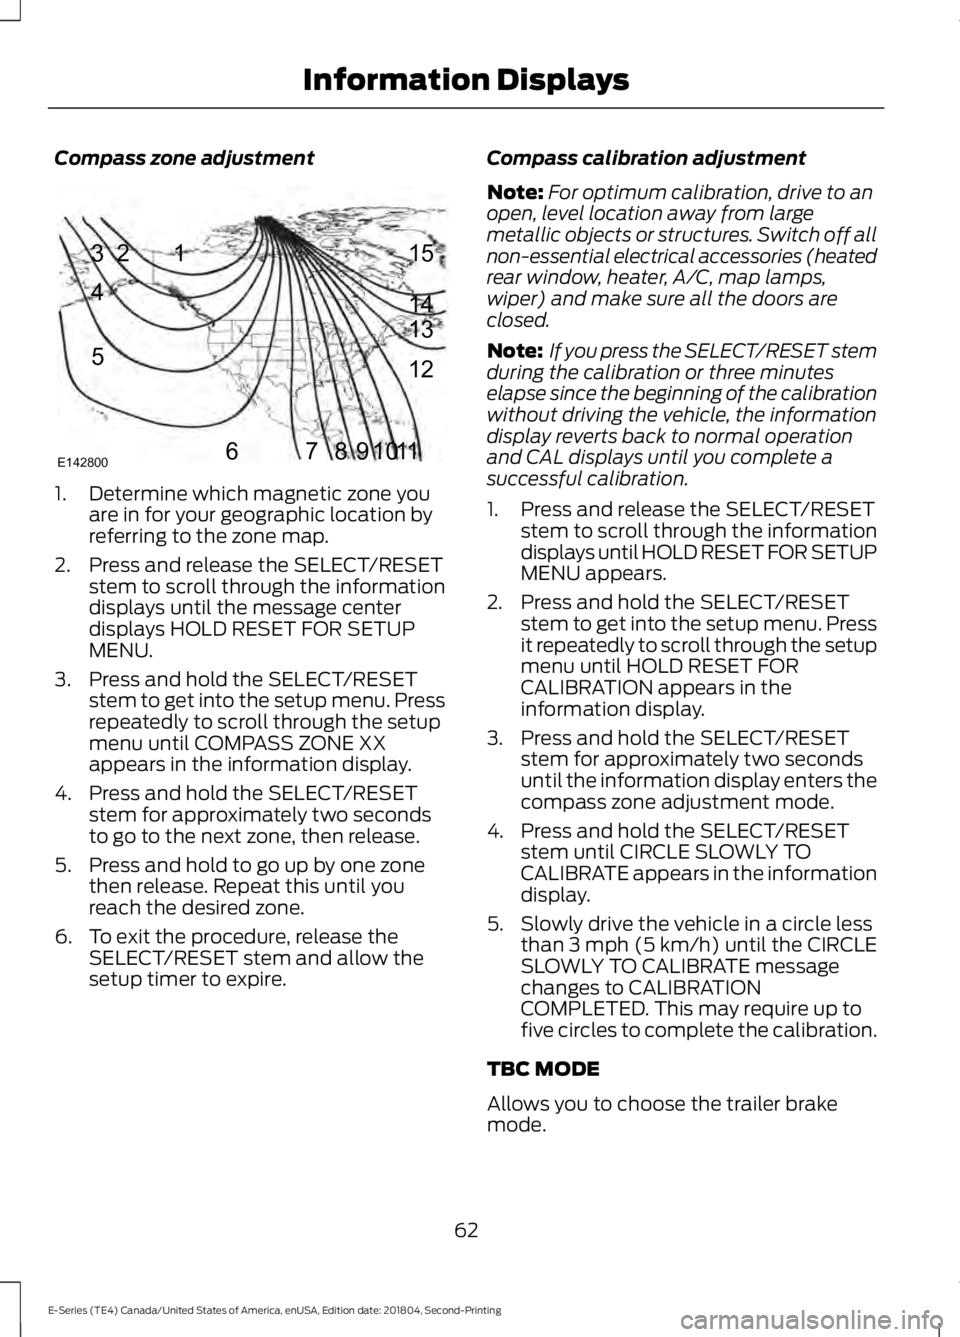
Compass zone adjustment
1. Determine which magnetic zone you
are in for your geographic location by
referring to the zone map.
2. Press and release the SELECT/RESET stem to scroll through the information
displays until the message center
displays HOLD RESET FOR SETUP
MENU.
3. Press and hold the SELECT/RESET stem to get into the setup menu. Press
repeatedly to scroll through the setup
menu until COMPASS ZONE XX
appears in the information display.
4. Press and hold the SELECT/RESET stem for approximately two seconds
to go to the next zone, then release.
5. Press and hold to go up by one zone then release. Repeat this until you
reach the desired zone.
6. To exit the procedure, release the SELECT/RESET stem and allow the
setup timer to expire. Compass calibration adjustment
Note:
For optimum calibration, drive to an
open, level location away from large
metallic objects or structures. Switch off all
non-essential electrical accessories (heated
rear window, heater, A/C, map lamps,
wiper) and make sure all the doors are
closed.
Note: If you press the SELECT/RESET stem
during the calibration or three minutes
elapse since the beginning of the calibration
without driving the vehicle, the information
display reverts back to normal operation
and CAL displays until you complete a
successful calibration.
1. Press and release the SELECT/RESET stem to scroll through the information
displays until HOLD RESET FOR SETUP
MENU appears.
2. Press and hold the SELECT/RESET stem to get into the setup menu. Press
it repeatedly to scroll through the setup
menu until HOLD RESET FOR
CALIBRATION appears in the
information display.
3. Press and hold the SELECT/RESET stem for approximately two seconds
until the information display enters the
compass zone adjustment mode.
4. Press and hold the SELECT/RESET stem until CIRCLE SLOWLY TO
CALIBRATE appears in the information
display.
5. Slowly drive the vehicle in a circle less than 3 mph (5 km/h) until the CIRCLE
SLOWLY TO CALIBRATE message
changes to CALIBRATION
COMPLETED. This may require up to
five circles to complete the calibration.
TBC MODE
Allows you to choose the trailer brake
mode.
62
E-Series (TE4) Canada/United States of America, enUSA, Edition date: 201804, Second-Printing Information Displays1
2
3
4
5
678910 1112 13 14 15
E142800
Page 81 of 329
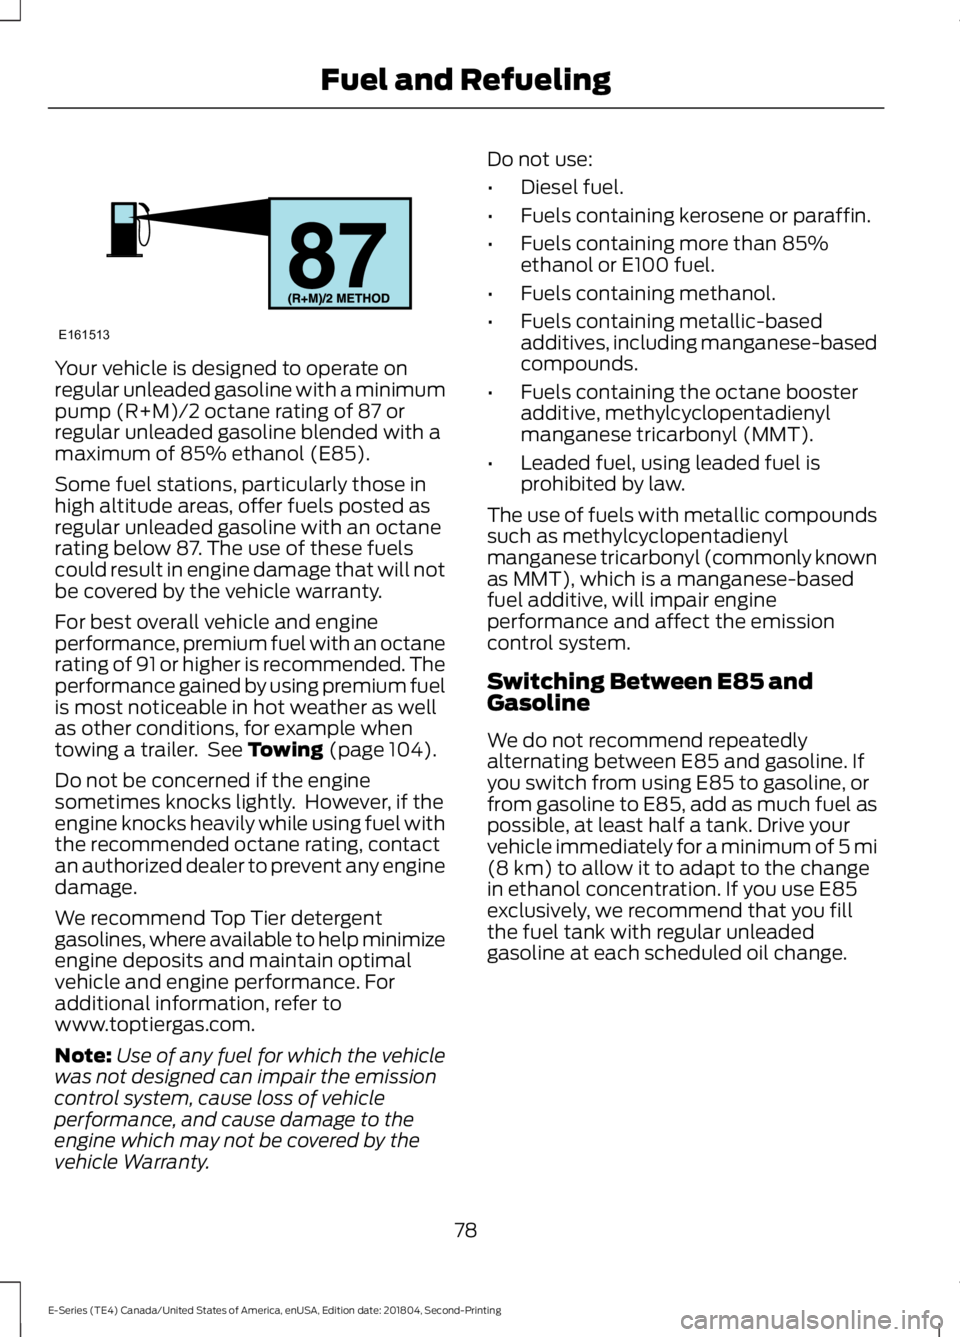
Your vehicle is designed to operate on
regular unleaded gasoline with a minimum
pump (R+M)/2 octane rating of 87 or
regular unleaded gasoline blended with a
maximum of 85% ethanol (E85).
Some fuel stations, particularly those in
high altitude areas, offer fuels posted as
regular unleaded gasoline with an octane
rating below 87. The use of these fuels
could result in engine damage that will not
be covered by the vehicle warranty.
For best overall vehicle and engine
performance, premium fuel with an octane
rating of 91 or higher is recommended. The
performance gained by using premium fuel
is most noticeable in hot weather as well
as other conditions, for example when
towing a trailer. See Towing (page 104).
Do not be concerned if the engine
sometimes knocks lightly. However, if the
engine knocks heavily while using fuel with
the recommended octane rating, contact
an authorized dealer to prevent any engine
damage.
We recommend Top Tier detergent
gasolines, where available to help minimize
engine deposits and maintain optimal
vehicle and engine performance. For
additional information, refer to
www.toptiergas.com.
Note: Use of any fuel for which the vehicle
was not designed can impair the emission
control system, cause loss of vehicle
performance, and cause damage to the
engine which may not be covered by the
vehicle Warranty. Do not use:
•
Diesel fuel.
• Fuels containing kerosene or paraffin.
• Fuels containing more than 85%
ethanol or E100 fuel.
• Fuels containing methanol.
• Fuels containing metallic-based
additives, including manganese-based
compounds.
• Fuels containing the octane booster
additive, methylcyclopentadienyl
manganese tricarbonyl (MMT).
• Leaded fuel, using leaded fuel is
prohibited by law.
The use of fuels with metallic compounds
such as methylcyclopentadienyl
manganese tricarbonyl (commonly known
as MMT), which is a manganese-based
fuel additive, will impair engine
performance and affect the emission
control system.
Switching Between E85 and
Gasoline
We do not recommend repeatedly
alternating between E85 and gasoline. If
you switch from using E85 to gasoline, or
from gasoline to E85, add as much fuel as
possible, at least half a tank. Drive your
vehicle immediately for a minimum of 5 mi
(8 km)
to allow it to adapt to the change
in ethanol concentration. If you use E85
exclusively, we recommend that you fill
the fuel tank with regular unleaded
gasoline at each scheduled oil change.
78
E-Series (TE4) Canada/United States of America, enUSA, Edition date: 201804, Second-Printing Fuel and RefuelingE161513
Page 88 of 329
Illumination of the service engine soon
indicator, charging system warning light or
the temperature warning light, fluid leaks,
strange odors, smoke or loss of engine
power could indicate that the emission
control system is not working properly.
An improperly operating or damaged
exhaust system may allow exhaust to
enter the vehicle. Have a damaged or
improperly operating exhaust system
inspected and repaired immediately.
Do not make any unauthorized changes to
your vehicle or engine. By law, vehicle
owners and anyone who manufactures,
repairs, services, sells, leases, trades
vehicles, or supervises a fleet of vehicles
are not permitted to intentionally remove
an emission control device or prevent it
from working. Information about your
vehicle
’s emission system is on the Vehicle
Emission Control Information Decal
located on or near the engine. This decal
also lists engine displacement.
Please consult your warranty information
for complete details.
On-Board Diagnostics (OBD-II)
Your vehicle has a computer known as the
on-board diagnostics system (OBD-II) that
monitors the engine ’s emission control
system. The system protects the
environment by making sure that your
vehicle continues to meet government
emission standards. The OBD-II system
also assists a service technician in properly
servicing your vehicle. When the service engine soon
indicator illuminates, the OBD-II
system has detected a
malfunction. Temporary malfunctions may
cause the service engine soon indicator to
illuminate. Examples are: 1. Your vehicle has run out of fuel
—the
engine may misfire or run poorly.
2. Poor fuel quality or water in the fuel —the engine may misfire or run
poorly.
3. The fuel fill inlet may not have closed properly. See Refueling (page 80).
4. Driving through deep water —the
electrical system may be wet.
You can correct these temporary
malfunctions by filling the fuel tank with
good quality fuel, properly closing the fuel
fill inlet or letting the electrical system dry
out. After three driving cycles without these
or any other temporary malfunctions
present, the service engine soon indicator
should stay off the next time you start the
engine. A driving cycle consists of a cold
engine startup followed by mixed city and
highway driving. No additional vehicle
service is required.
If the service engine soon indicator remains
on, have your vehicle serviced at the first
available opportunity. Although some
malfunctions detected by the OBD-II may
not have symptoms that are apparent,
continued driving with the service engine
soon indicator on can result in increased
emissions, lower fuel economy, reduced
engine and transmission smoothness and
lead to more costly repairs.
Readiness for Inspection and
Maintenance (I/M) Testing
Some state and provincial and local
governments may have
Inspection/Maintenance (I/M) programs
to inspect the emission control equipment
on your vehicle. Failure to pass this
inspection could prevent you from getting
a vehicle registration. If the service engine soon
indicator is on or the bulb does
not work, your vehicle may need
service. See On-Board Diagnostics.
85
E-Series (TE4) Canada/United States of America, enUSA, Edition date: 201804, Second-Printing Engine Emission Control
Page 116 of 329
Points to Remember
Note:
Do not attempt removal of the trailer
brake controller without consulting the
Workshop Manual. Damage to the unit may
result.
• Adjust gain setting before using the
trailer brake controller for the first time.
• Adjust gain setting, using the procedure
above, whenever road, weather and
trailer or vehicle loading conditions
change from when the gain was initially
set.
• Only use the manual control lever for
proper adjustment of the gain during
trailer setup. Misuse, such as
application during trailer sway, could
cause instability of trailer or tow
vehicle.
• Avoid towing in adverse weather
conditions. The trailer brake controller
does not provide anti-lock control of
the trailer wheels. Trailer wheels can
lock up on slippery surfaces, resulting
in reduced stability of trailer and tow
vehicle.
• The trailer brake controller is equipped
with a feature that reduces output at
vehicle speeds below 11 mph (18 km/h)
so trailer and vehicle braking is not jerky
or harsh. This feature is only available
when applying the brakes using your
vehicle's brake pedal, not the
controller.
• The controller interacts with the brake
control system and powertrain control
system of your vehicle to provide the
best performance on different road
conditions.
• Your vehicle's brake system and the
trailer brake system work
independently of each other. Changing
the gain setting on the controller does
not affect the operation of your
vehicle's brakes whether you attach a
trailer or not. •
When you switch the engine off, the
controller output is disabled and the
display and module shut down. The
controller module and display turn on
when you switch the ignition on.
• The trailer brake controller is only a
factory-installed or dealer-installed
item. Ford is not responsible for
warranty or performance of the
controller due to misuse or customer
installation.
Trailer Lamps WARNING: Never connect any
trailer lamp wiring to the vehicle's tail
lamp wiring; this may damage the
electrical system resulting in fire. Contact
your authorized dealer as soon as
possible for assistance in proper trailer
tow wiring installation. Additional
electrical equipment may be required.
Trailer lamps are required on most towed
vehicles. Make sure all running lights, brake
lights, direction indicators and hazard lights
are working.
Before Towing a Trailer
Practice turning, stopping and backing up
to get the feel of your vehicle-trailer
combination before starting on a trip.
When turning, make wider turns so the
trailer wheels clear curbs and other
obstacles.
When Towing a Trailer
• Do not drive faster than
70 mph
(113 km/h) during the first 500 mi
(800 km).
• Do not make full-throttle starts.
• Check your hitch, electrical connections
and trailer wheel lug nuts thoroughly
after you have traveled 50 mi (80 km).
113
E-Series (TE4) Canada/United States of America, enUSA, Edition date: 201804, Second-Printing Towing
Page 117 of 329
•
When stopped in congested or heavy
traffic during hot weather, place the
gearshift in position P to aid engine and
transmission cooling and to help A/C
performance.
• Switch off the speed control with
heavy loads or in hilly terrain. The
speed control may turn off
automatically when you are towing on
long, steep grades.
• Shift to a lower gear when driving down
a long or steep hill. Do not apply the
brakes continuously, as they may
overheat and become less effective.
• If your transmission is equipped with a
Grade Assist or Tow/Haul feature, use
this feature when towing. This provides
engine braking and helps eliminate
excessive transmission shifting for
optimum fuel economy and
transmission cooling.
• If your vehicle is equipped with
AdvanceTrac with RSC, this system
may turn on during typical cornering
maneuvers with a heavily loaded trailer.
This is normal. Turning the corner at a
slower speed while towing may reduce
this tendency.
• If you are towing a trailer frequently in
hot weather, hilly conditions, at the
gross combined weight rating (or any
combination of these factors), consider
refilling your rear axle with synthetic
gear lubricant. See Capacities and
Specifications (page 198).
• Allow more distance for stopping with
a trailer attached. Anticipate stops and
brake gradually.
• Avoid parking on a grade. However, if
you must park on a grade:
1. Turn the steering wheel to point your vehicle tires away from traffic flow.
2. Set your vehicle parking brake.
3. Place the automatic transmission in position
P. 4. Place wheel chocks in front and back
of the trailer wheels. (Chocks not
included with vehicle.)
Your vehicle may be equipped with a
temporary or conventional spare tire. A
"temporary" spare tire is different in size
(diameter or width), tread-type
(All-Season or All Terrain) or is from a
different manufacturer than the road tires
on your vehicle. Consult information on the
tire label or Safety Compliance label for
limitations when using.
Launching or Retrieving a Boat or
Personal Watercraft (PWC)
Note: Disconnect the wiring to the trailer
before
backing the trailer into the water.
Note: Reconnect the wiring to the trailer
after
removing the trailer from the water.
When backing down a ramp during boat
launching or retrieval:
• Do not allow the static water level to
rise above the bottom edge of the rear
bumper.
• Do not allow waves to break higher
than
6 in (15 cm) above the bottom
edge of the rear bumper.
Exceeding these limits may allow water to
enter vehicle components:
• Causing internal damage to the
components.
• Affecting driveability, emissions and
reliability.
Replace the rear axle lubricant anytime
the rear axle has been submerged in water.
Water may have contaminated the rear
axle lubricant, which is not normally
checked or changed unless a leak is
suspected or other axle repair is required.
114
E-Series (TE4) Canada/United States of America, enUSA, Edition date: 201804, Second-Printing Towing