key FORD E SERIES 1999 4.G Owners Manual
[x] Cancel search | Manufacturer: FORD, Model Year: 1999, Model line: E SERIES, Model: FORD E SERIES 1999 4.GPages: 208, PDF Size: 1.93 MB
Page 11 of 208

High beams
Illuminates when the high beam
headlamps are turned on.
Oil pressure/Engine coolant
This light will come on when the
key is in the ON position and the:
²engine coolant temperature is
very high
²engine oil pressure is low
The light serves as a notice that a system needs your attention and to
check the engine coolant temperature gauge and the engine oil pressure
gauge.
Refer toEngine coolant temperature gaugeandEngine oil pressure
gaugein this chapter for more information.
Safety belt warning chime
Chimes to remind you to fasten your safety belts.
For information on the safety belt warning chime, refer to theSeating
and safety restraintschapter.
Supplemental restraint system (SRS) warning chime
For information on the SRS warning chime, refer to theSeating and
safety restraintschapter.
Key-in-ignition warning chime
Sounds when the key is left in the ignition in the OFF/LOCK or ACC
position and the driver's door is opened.
Headlamps on warning chime (if equipped)
Sounds when the headlamps or parking lamps are on, the ignition is off
(and the key is not in the ignition) and the driver's door is opened.
Instrumentation
11
Page 12 of 208
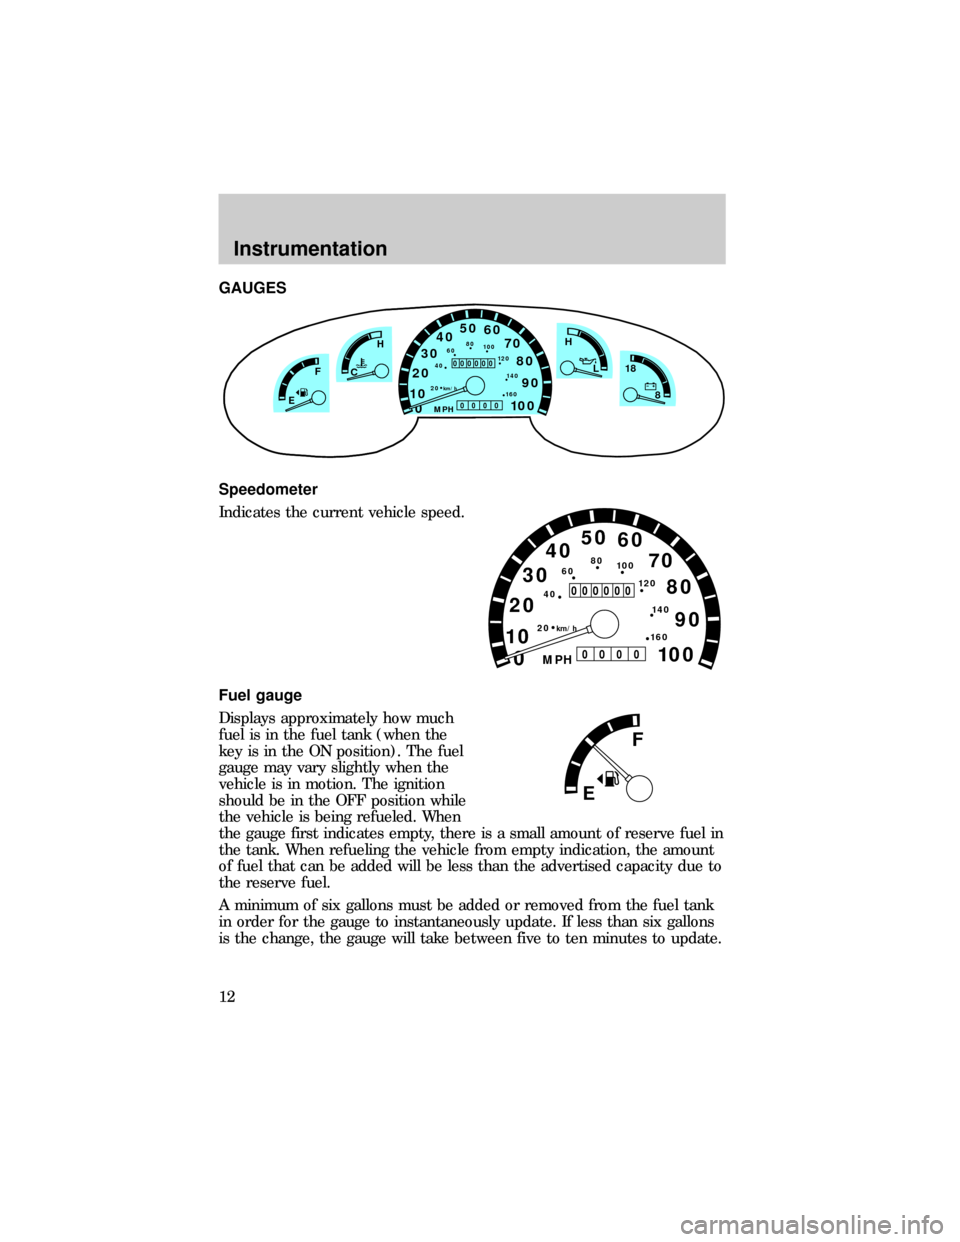
GAUGES
Speedometer
Indicates the current vehicle speed.
Fuel gauge
Displays approximately how much
fuel is in the fuel tank (when the
key is in the ON position). The fuel
gauge may vary slightly when the
vehicle is in motion. The ignition
should be in the OFF position while
the vehicle is being refueled. When
the gauge first indicates empty, there is a small amount of reserve fuel in
the tank. When refueling the vehicle from empty indication, the amount
of fuel that can be added will be less than the advertised capacity due to
the reserve fuel.
A minimum of six gallons must be added or removed from the fuel tank
in order for the gauge to instantaneously update. If less than six gallons
is the change, the gauge will take between five to ten minutes to update.
0 1020304050
60
70
80
90
10 0
20 km/h
406080
10 0
12 0
14 0
H
L
16 0
MPH
000000
0000
18
8FH
C
E
0 1020304050
60
70
80
90
10 0
20 km/h
406080
10 0
12 0
14 0
16 0
MPH
000000
0000
F
E
Instrumentation
12
Page 56 of 208
Radio reception factors
Three factors can affect radio reception:
²Distance/strength.The further an FM signal travels, the weaker it is.
The listenable range of the average FM station is approximately 40 km
(24 miles). This range can be affected by ªsignal modulation.º Signal
modulation is a process radio stations use to increase their
strength/volume relative to other stations.
²Terrain.Hills, mountains and tall buildings between your vehicle's
antenna and the radio station signal can cause FM reception problems.
Static can be caused on AM stations by power lines, electric fences,
traffic lights and thunderstorms. Moving away from an interfering
structure (out of its ªshadowº) returns your reception to normal.
²Station overload.Weak signals are sometimes captured by stronger
signals when you pass a broadcast tower. A stronger signal may
temporarily overtake a weaker signal and play while the weak station
frequency is displayed.
The audio system automatically switches to single channel reception if it
will improve the reception of a station normally received in stereo.
Audio system warranties and service
Refer to the ªWarranty Guideº for audio system warranty information.
If service is necessary, see your dealer or a qualified technician.
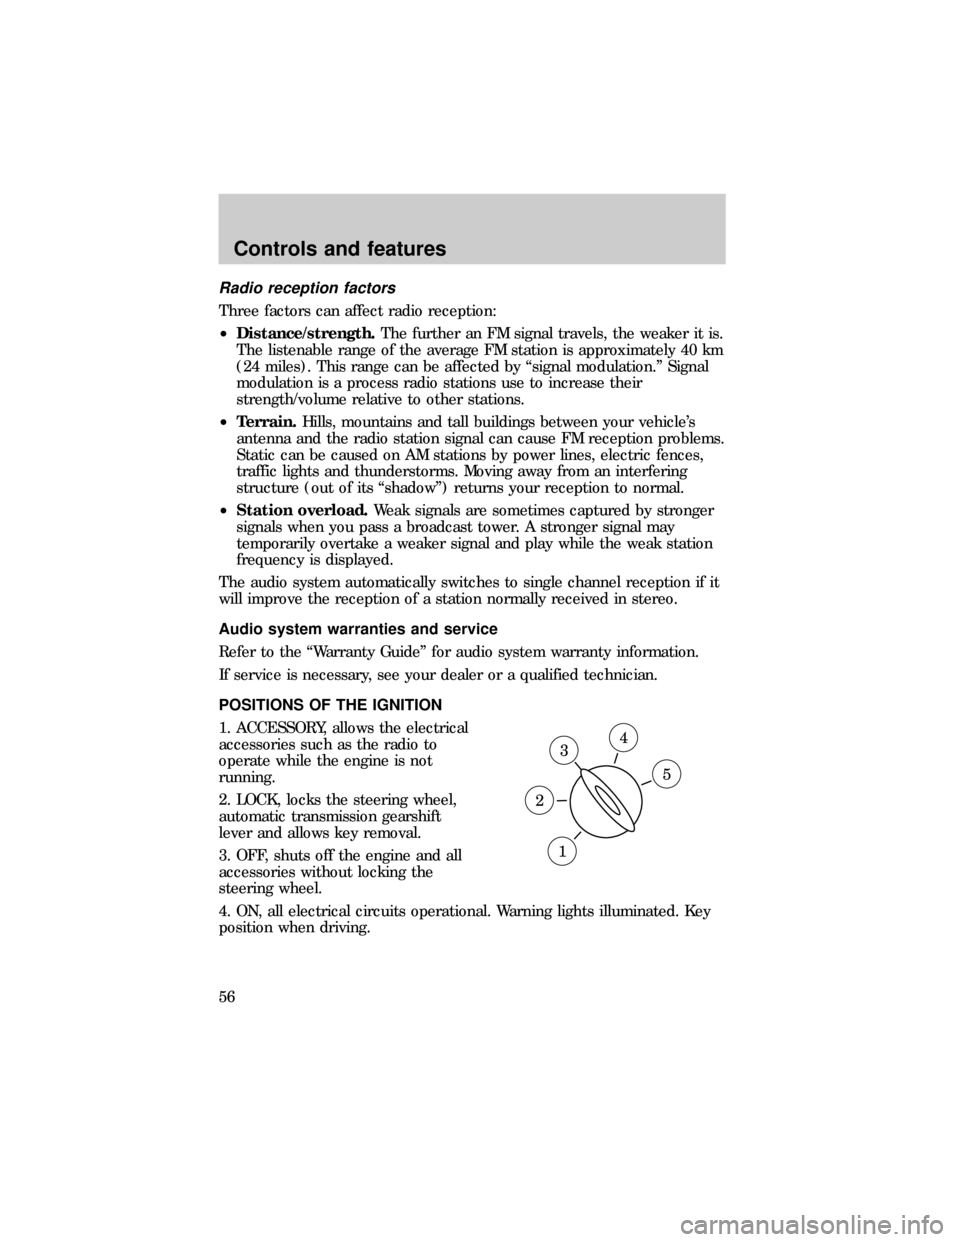
POSITIONS OF THE IGNITION
1. ACCESSORY, allows the electrical
accessories such as the radio to
operate while the engine is not
running.
2. LOCK, locks the steering wheel,
automatic transmission gearshift
lever and allows key removal.
3. OFF, shuts off the engine and all
accessories without locking the
steering wheel.
4. ON, all electrical circuits operational. Warning lights illuminated. Key
position when driving.
3
1
2
5
4
Controls and features
56
Page 57 of 208
5. START, cranks the engine. Release the key as soon as the engine
starts.
HAZARD FLASHER
For information on the hazard flasher control, refer toHazard flasherin
theRoadside emergencieschapter.
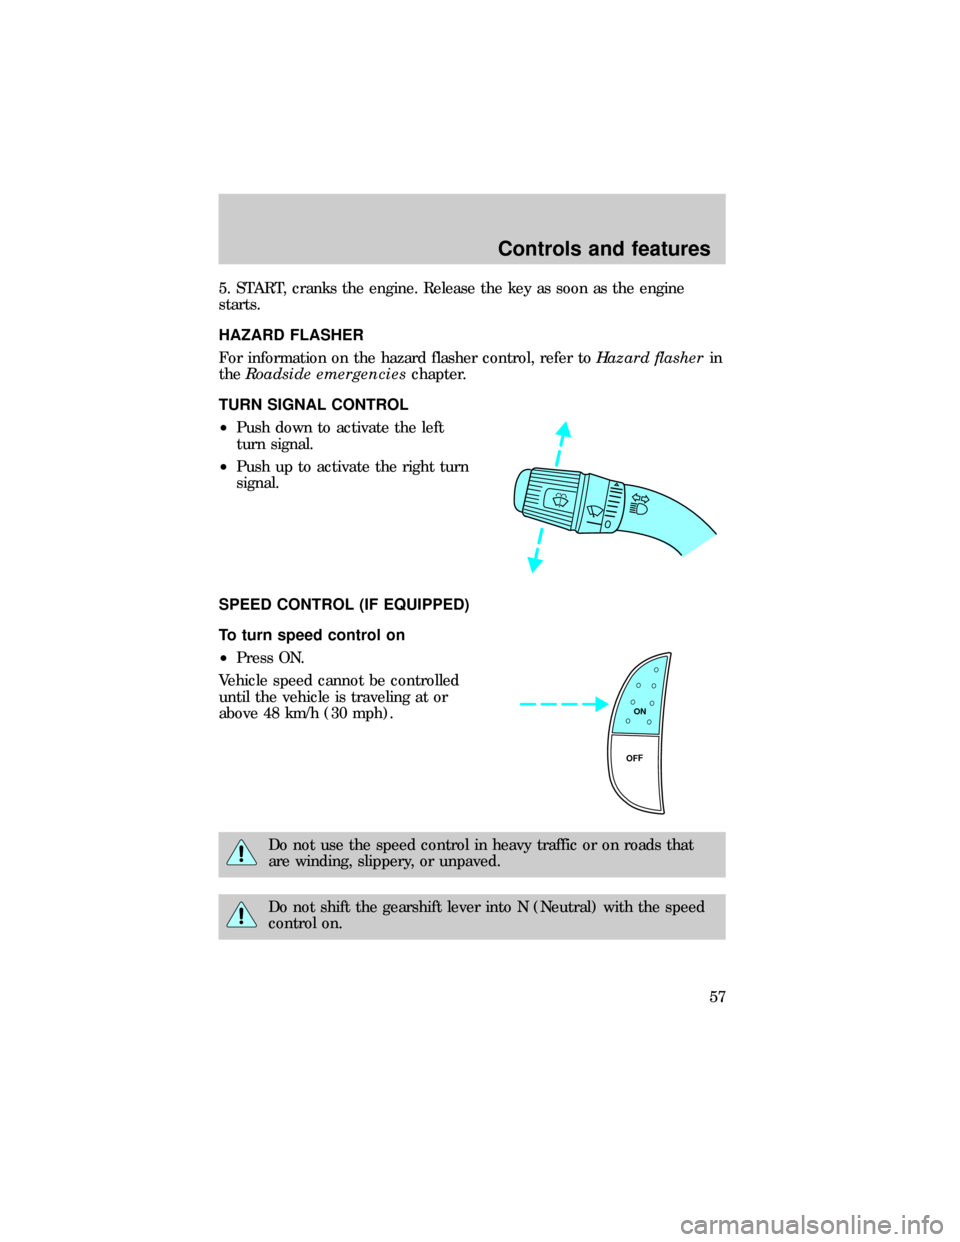
TURN SIGNAL CONTROL
²Push down to activate the left
turn signal.
²Push up to activate the right turn
signal.
SPEED CONTROL (IF EQUIPPED)
To turn speed control on
²Press ON.
Vehicle speed cannot be controlled
until the vehicle is traveling at or
above 48 km/h (30 mph).
Do not use the speed control in heavy traffic or on roads that
are winding, slippery, or unpaved.
Do not shift the gearshift lever into N (Neutral) with the speed
control on.
ON
OFF
Controls and features
57
Page 65 of 208
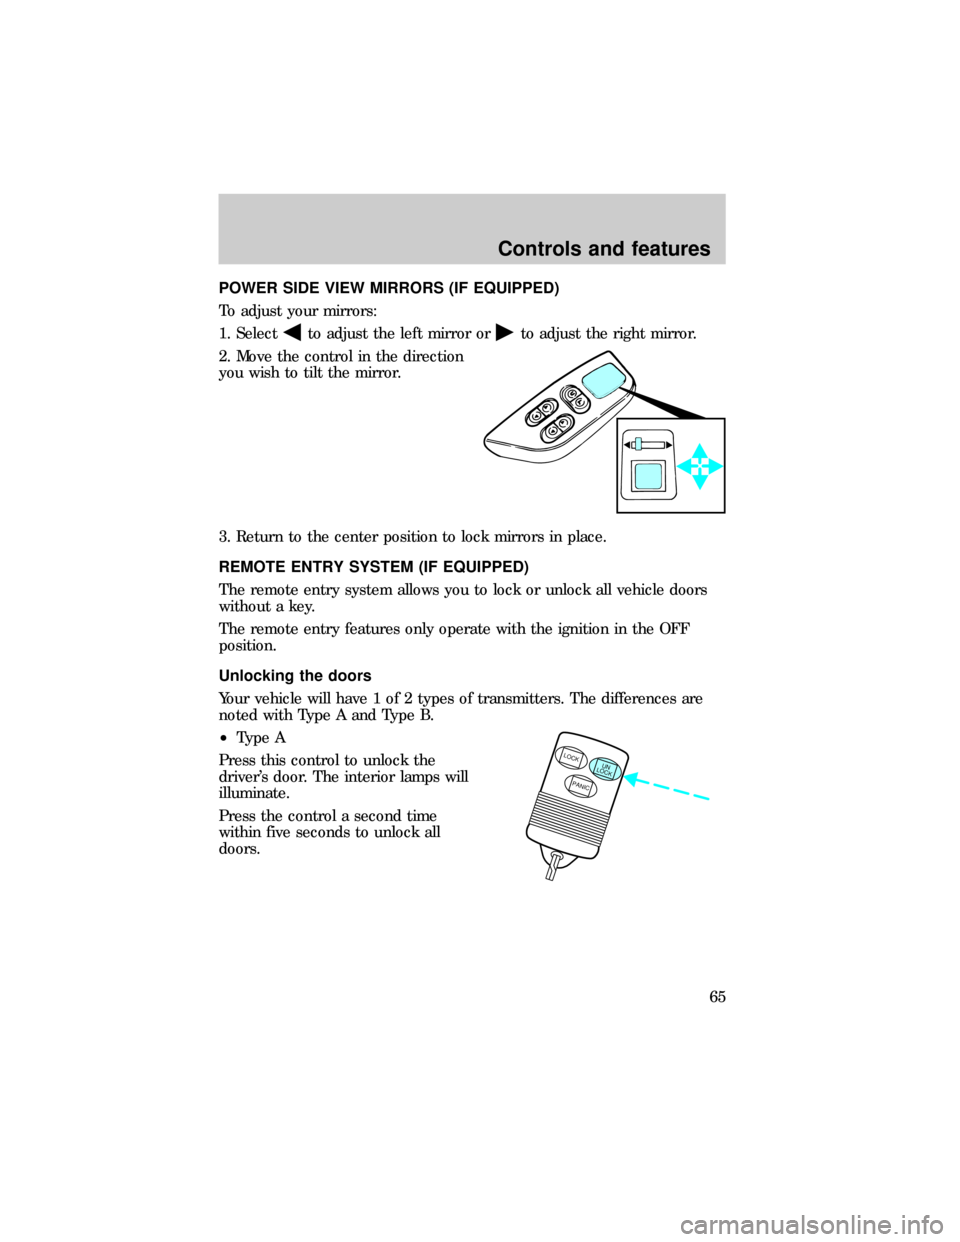
POWER SIDE VIEW MIRRORS (IF EQUIPPED)
To adjust your mirrors:
1. Select
to adjust the left mirror orto adjust the right mirror.
2. Move the control in the direction
you wish to tilt the mirror.
3. Return to the center position to lock mirrors in place.
REMOTE ENTRY SYSTEM (IF EQUIPPED)
The remote entry system allows you to lock or unlock all vehicle doors
without a key.
The remote entry features only operate with the ignition in the OFF
position.
Unlocking the doors
Your vehicle will have 1 of 2 types of transmitters. The differences are
noted with Type A and Type B.
²Type A
Press this control to unlock the
driver's door. The interior lamps will
illuminate.
Press the control a second time
within five seconds to unlock all
doors.
LOCKUN
LOCK
PANIC
Controls and features
65
Page 68 of 208
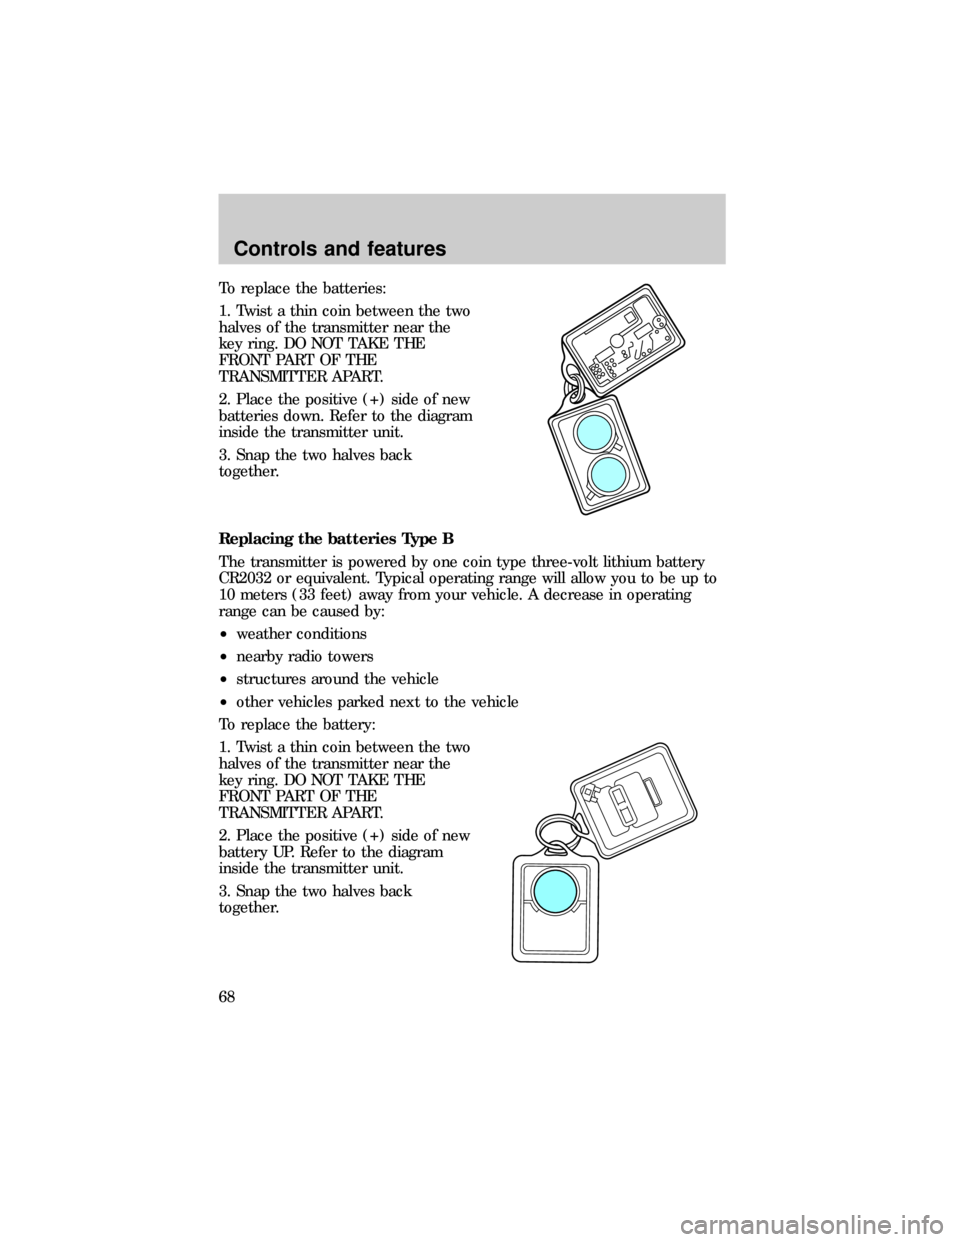
To replace the batteries:
1. Twist a thin coin between the two
halves of the transmitter near the
key ring. DO NOT TAKE THE
FRONT PART OF THE
TRANSMITTER APART.
2. Place the positive (+) side of new
batteries down. Refer to the diagram
inside the transmitter unit.
3. Snap the two halves back
together.
Replacing the batteries Type B
The transmitter is powered by one coin type three-volt lithium battery
CR2032 or equivalent. Typical operating range will allow you to be up to
10 meters (33 feet) away from your vehicle. A decrease in operating
range can be caused by:
²weather conditions
²nearby radio towers
²structures around the vehicle
²other vehicles parked next to the vehicle
To replace the battery:
1. Twist a thin coin between the two
halves of the transmitter near the
key ring. DO NOT TAKE THE
FRONT PART OF THE
TRANSMITTER APART.
2. Place the positive (+) side of new
battery UP. Refer to the diagram
inside the transmitter unit.
3. Snap the two halves back
together.
Controls and features
68
Page 69 of 208
Replacement of the battery willnotcause the remote transmitter to
become deprogrammed from your vehicle. The remote transmitter should
operate normally after battery replacement.
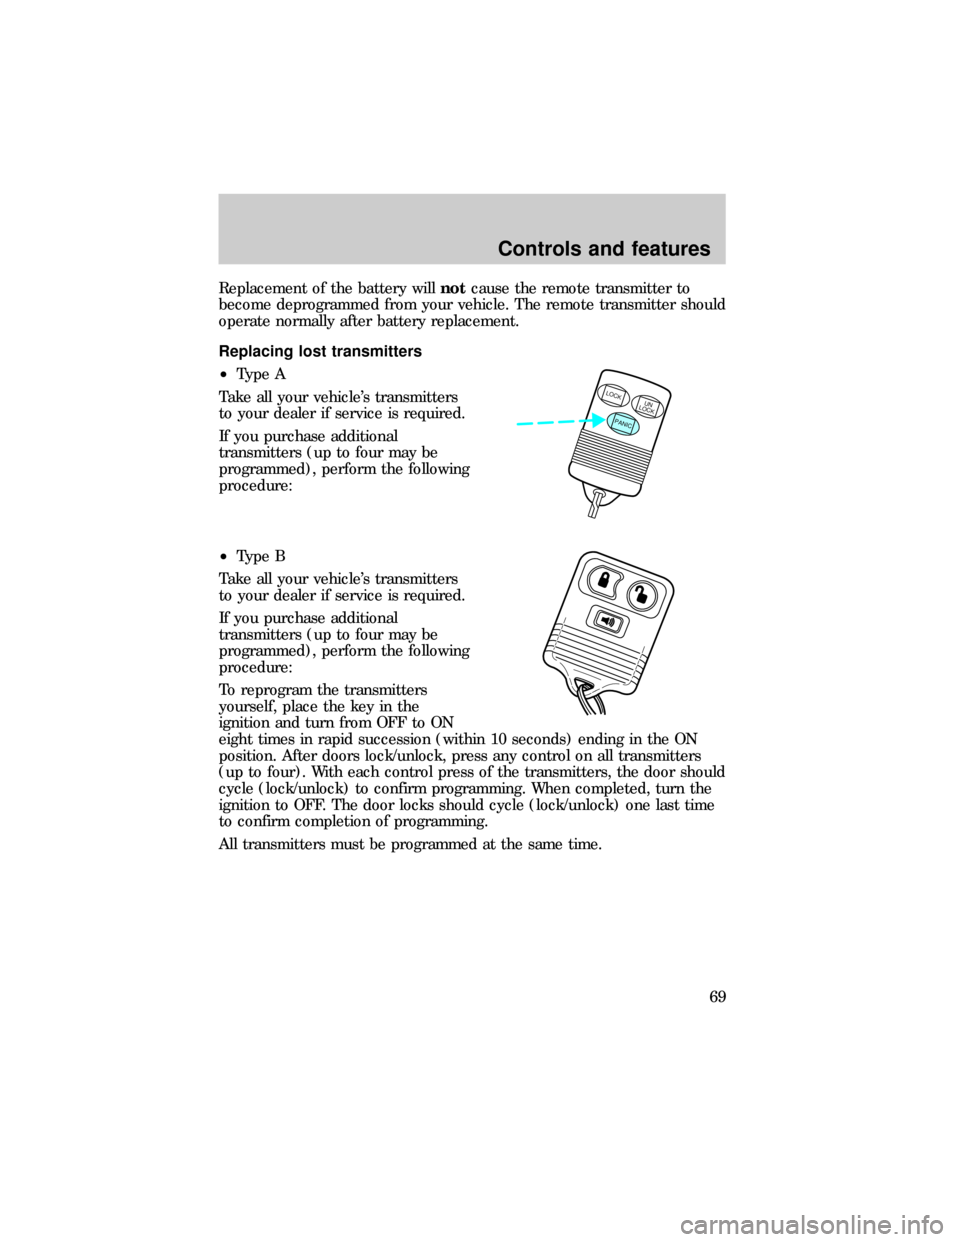
Replacing lost transmitters
²Type A
Take all your vehicle's transmitters
to your dealer if service is required.
If you purchase additional
transmitters (up to four may be
programmed), perform the following
procedure:
²Type B
Take all your vehicle's transmitters
to your dealer if service is required.
If you purchase additional
transmitters (up to four may be
programmed), perform the following
procedure:
To reprogram the transmitters
yourself, place the key in the
ignition and turn from OFF to ON
eight times in rapid succession (within 10 seconds) ending in the ON
position. After doors lock/unlock, press any control on all transmitters
(up to four). With each control press of the transmitters, the door should
cycle (lock/unlock) to confirm programming. When completed, turn the
ignition to OFF. The door locks should cycle (lock/unlock) one last time
to confirm completion of programming.
All transmitters must be programmed at the same time.
LOCKUN
LOCK
PANIC
Controls and features
69
Page 73 of 208
Using the manual lumbar support
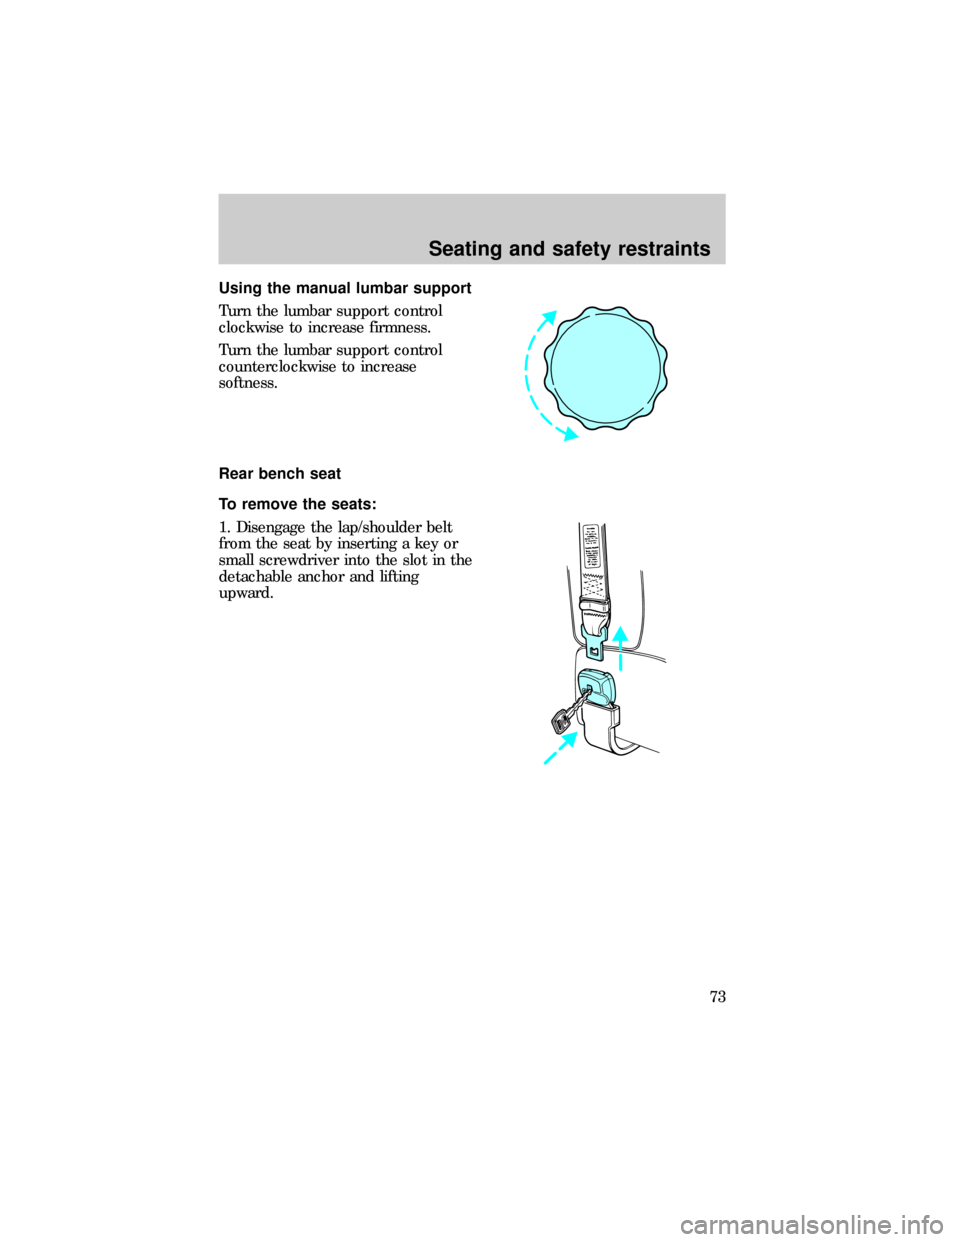
Turn the lumbar support control
clockwise to increase firmness.
Turn the lumbar support control
counterclockwise to increase
softness.
Rear bench seat
To remove the seats:
1. Disengage the lap/shoulder belt
from the seat by inserting a key or
small screwdriver into the slot in the
detachable anchor and lifting
upward.
Seating and safety restraints
73
Page 75 of 208
Always latch the vehicle seat to the floor, whether the seat is
occupied or empty. If not latched, the seat may cause injury
during a sudden stop.
Quick release captains chair
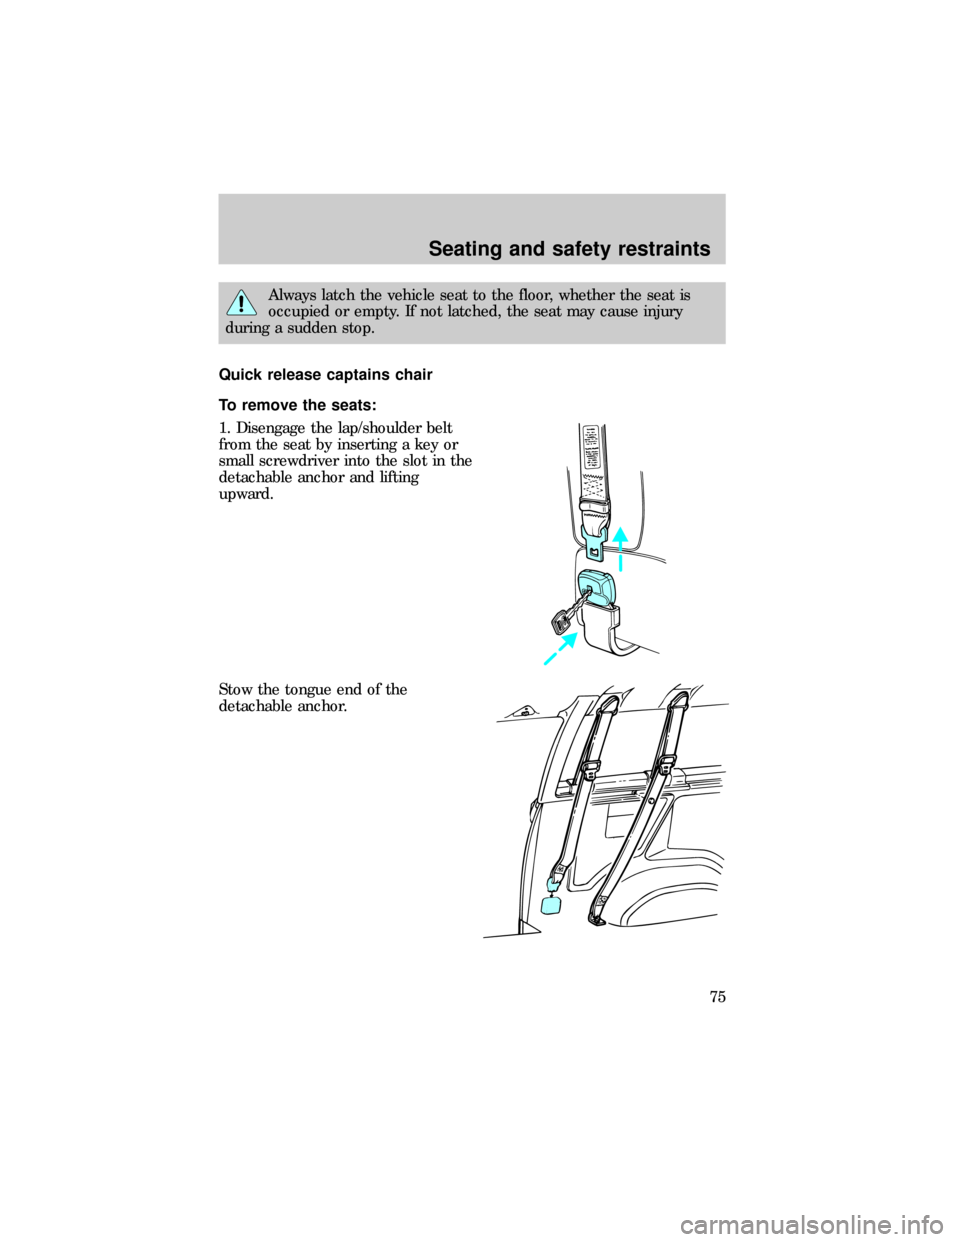
To remove the seats:
1. Disengage the lap/shoulder belt
from the seat by inserting a key or
small screwdriver into the slot in the
detachable anchor and lifting
upward.
Stow the tongue end of the
detachable anchor.
Seating and safety restraints
75
Page 99 of 208
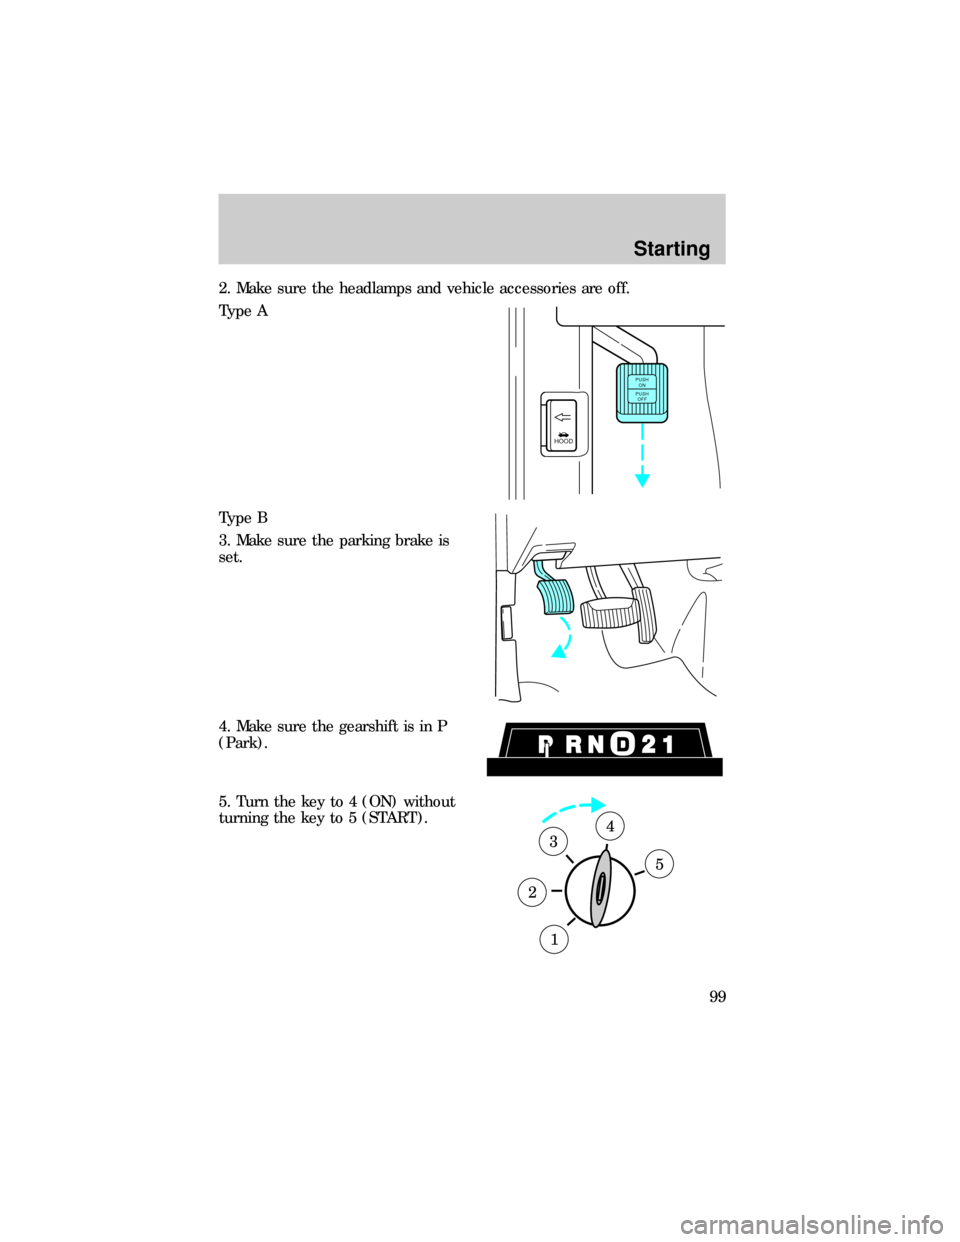
2. Make sure the headlamps and vehicle accessories are off.
Type A
Type B
3. Make sure the parking brake is
set.
4. Make sure the gearshift is in P
(Park).
5. Turn the key to 4 (ON) without
turning the key to 5 (START).
HOOD
PUSH
ON
PUSH
OFF
1
2
34
5
Starting
99