display FORD E SERIES 2000 4.G Owners Manual
[x] Cancel search | Manufacturer: FORD, Model Year: 2000, Model line: E SERIES, Model: FORD E SERIES 2000 4.GPages: 232, PDF Size: 2.58 MB
Page 14 of 232
Key-in-ignition warning chime/buzzer
Sounds when the key is left in the ignition in the OFF/LOCK or ACC
position and the driver's door is opened.
Headlamps on warning chime (if equipped)
Sounds when the headlamps or parking lamps are on, the ignition is off
(and the key is not in the ignition) and the driver's door is opened.
GAUGES
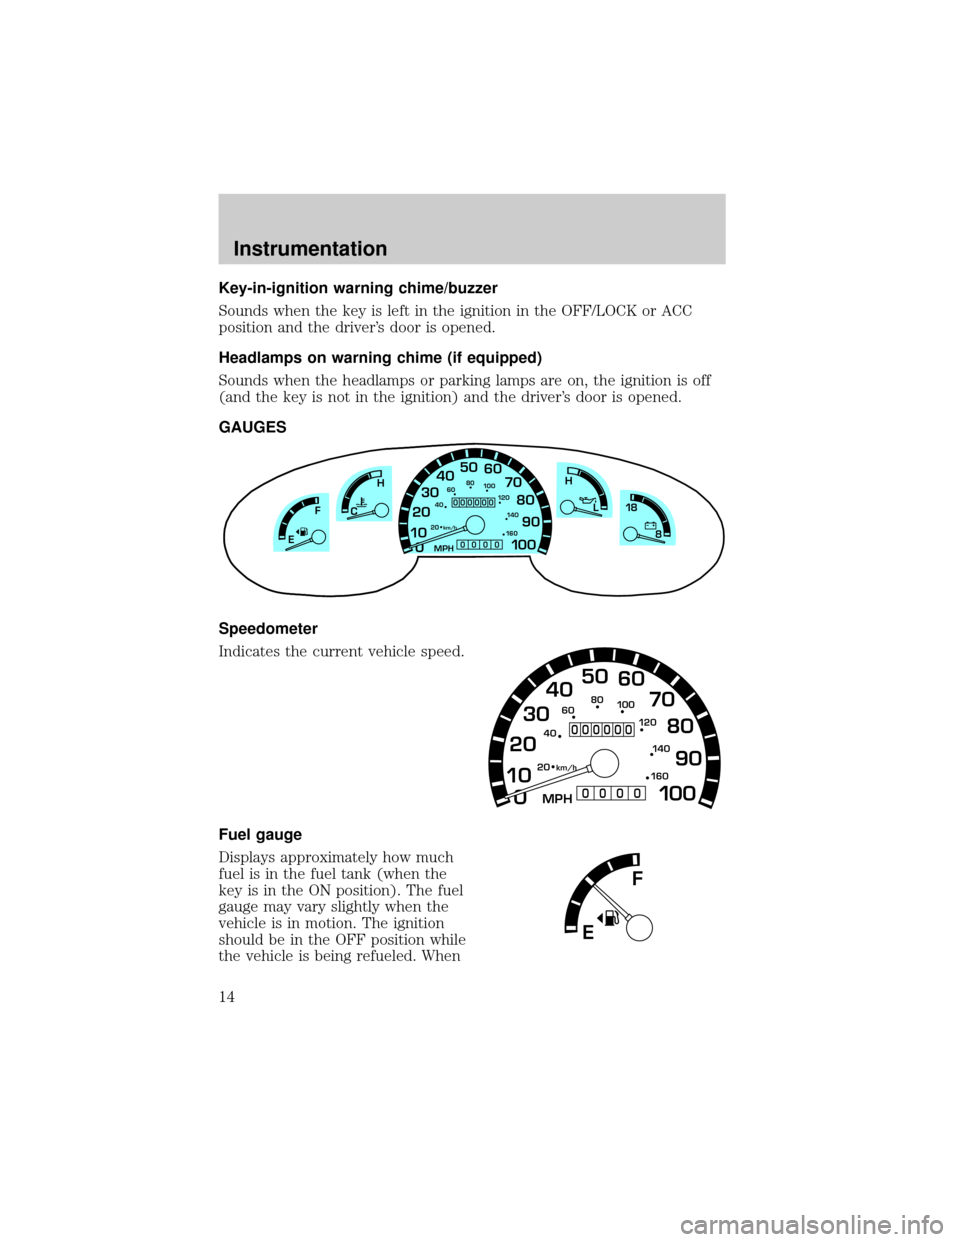
Speedometer
Indicates the current vehicle speed.
Fuel gauge
Displays approximately how much
fuel is in the fuel tank (when the
key is in the ON position). The fuel
gauge may vary slightly when the
vehicle is in motion. The ignition
should be in the OFF position while
the vehicle is being refueled. When
0 1020304050
60
70
80
90
10 0
20 km/h
406080
10 0
12 0
14 0
H
L
16 0
MPH
000000
0000
18
8FH
C
E
0 1020304050
60
70
80
90
10 0
20 km/h
406080
10 0
12 0
14 0
16 0
MPH
000000
0000
F
E
Instrumentation
14
Page 29 of 232
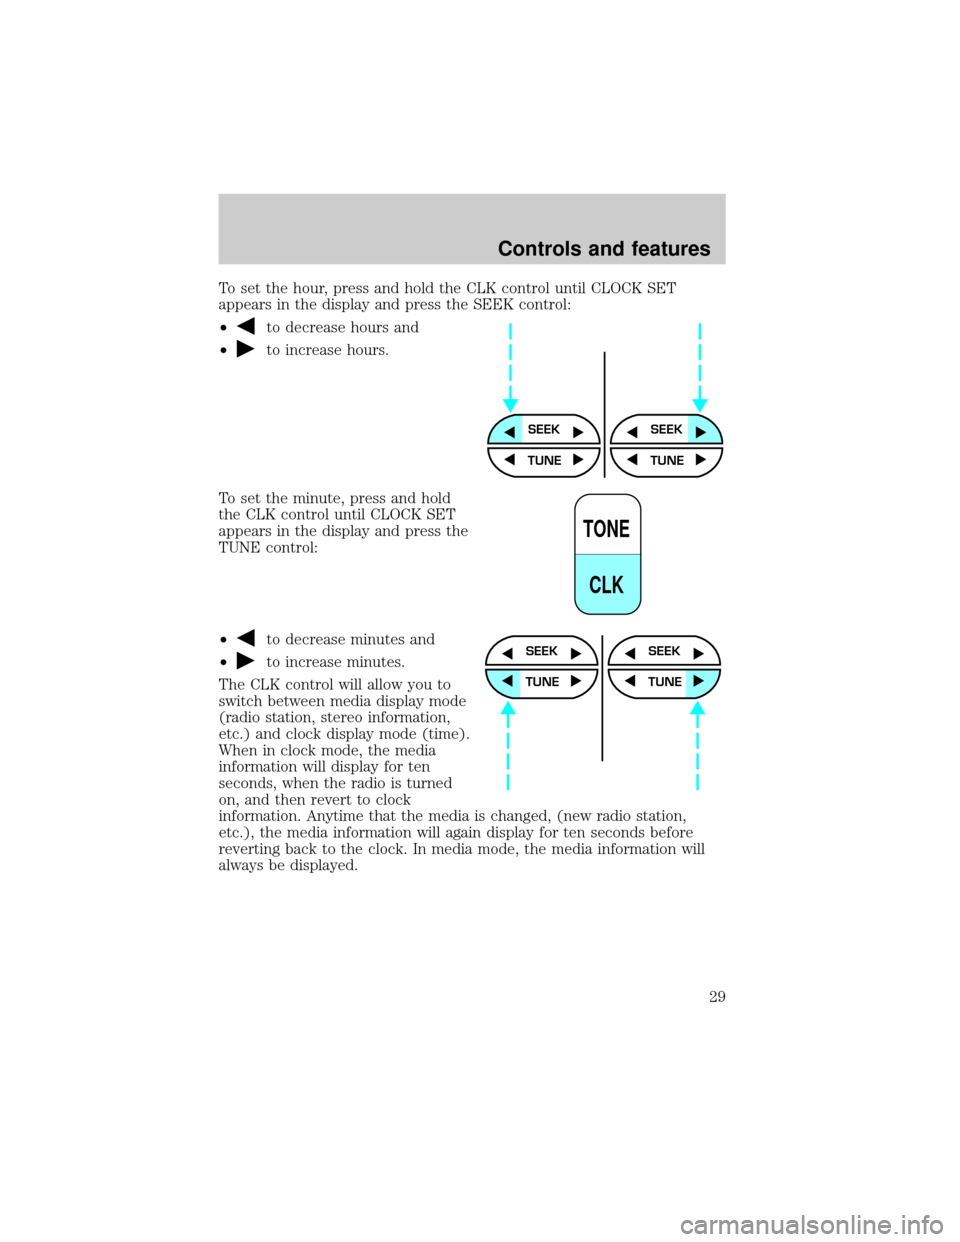
To set the hour, press and hold the CLK control until CLOCK SET
appears in the display and press the SEEK control:
²
to decrease hours and
²
to increase hours.
To set the minute, press and hold
the CLK control until CLOCK SET
appears in the display and press the
TUNE control:
²
to decrease minutes and
²
to increase minutes.
The CLK control will allow you to
switch between media display mode
(radio station, stereo information,
etc.) and clock display mode (time).
When in clock mode, the media
information will display for ten
seconds, when the radio is turned
on, and then revert to clock
information. Anytime that the media is changed, (new radio station,
etc.), the media information will again display for ten seconds before
reverting back to the clock. In media mode, the media information will
always be displayed.
SEEKSEEK
TUNE TUNE
TONE
CLK
SEEK
TUNE
SEEK
TUNE
Controls and features
29
Page 36 of 232
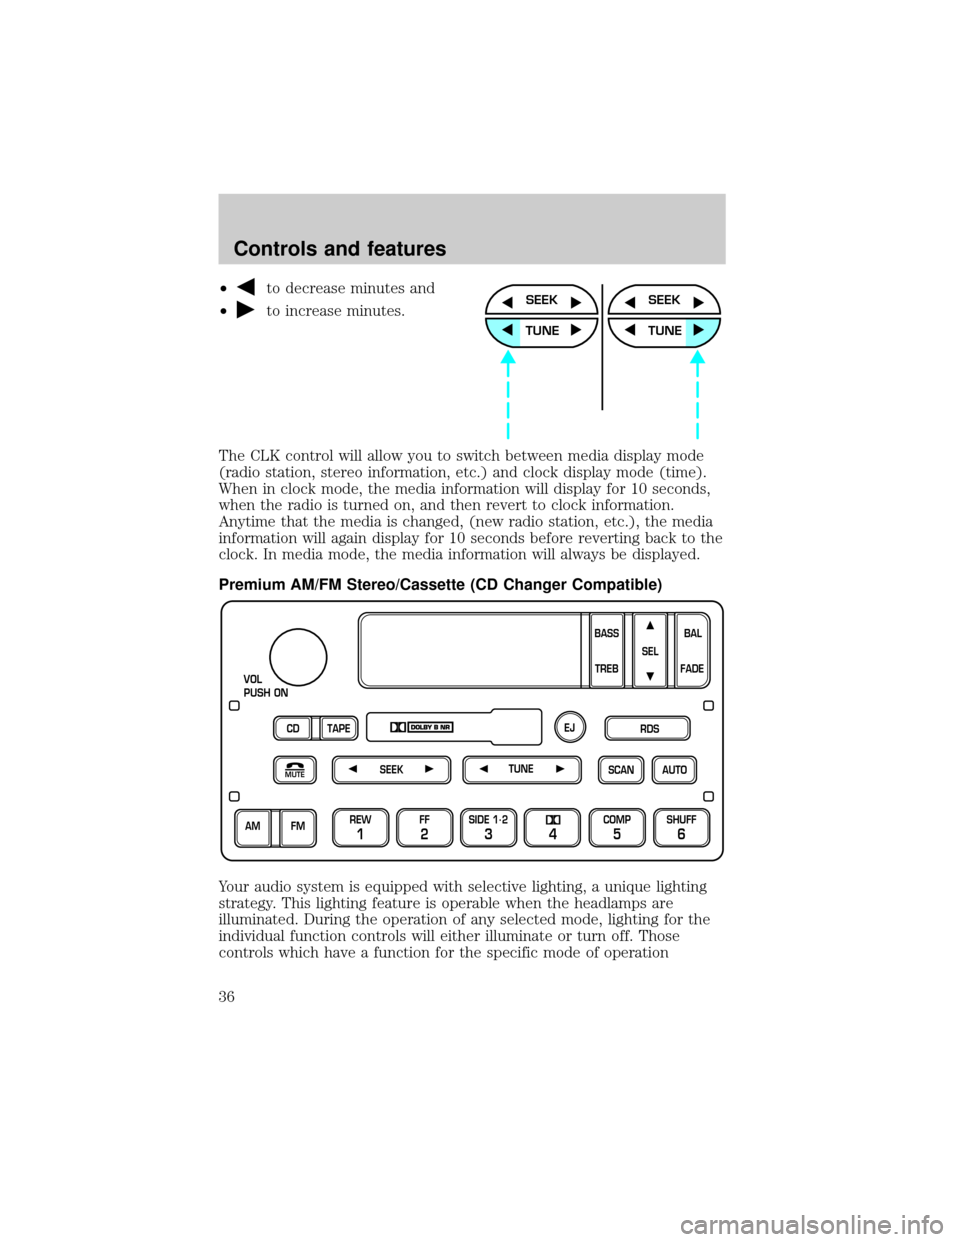
²to decrease minutes and
²
to increase minutes.
The CLK control will allow you to switch between media display mode
(radio station, stereo information, etc.) and clock display mode (time).
When in clock mode, the media information will display for 10 seconds,
when the radio is turned on, and then revert to clock information.
Anytime that the media is changed, (new radio station, etc.), the media
information will again display for 10 seconds before reverting back to the
clock. In media mode, the media information will always be displayed.
Premium AM/FM Stereo/Cassette (CD Changer Compatible)
Your audio system is equipped with selective lighting, a unique lighting
strategy. This lighting feature is operable when the headlamps are
illuminated. During the operation of any selected mode, lighting for the
individual function controls will either illuminate or turn off. Those
controls which have a function for the specific mode of operationSEEK
TUNE
SEEK
TUNE
SCAN
VOL
PUSH ON
REW
1
FF
2
SIDE 1.
2
34
COMP
5
SHUFF
6
AUTO TUNE
SEEK
SEL
BAL
FADE
MUTE
FM AM
EJ
BASS
TREB
CD TAPERDS
Controls and features
36
Page 37 of 232
selected will be lit, while the controls which have no function for that
mode will be turned off.
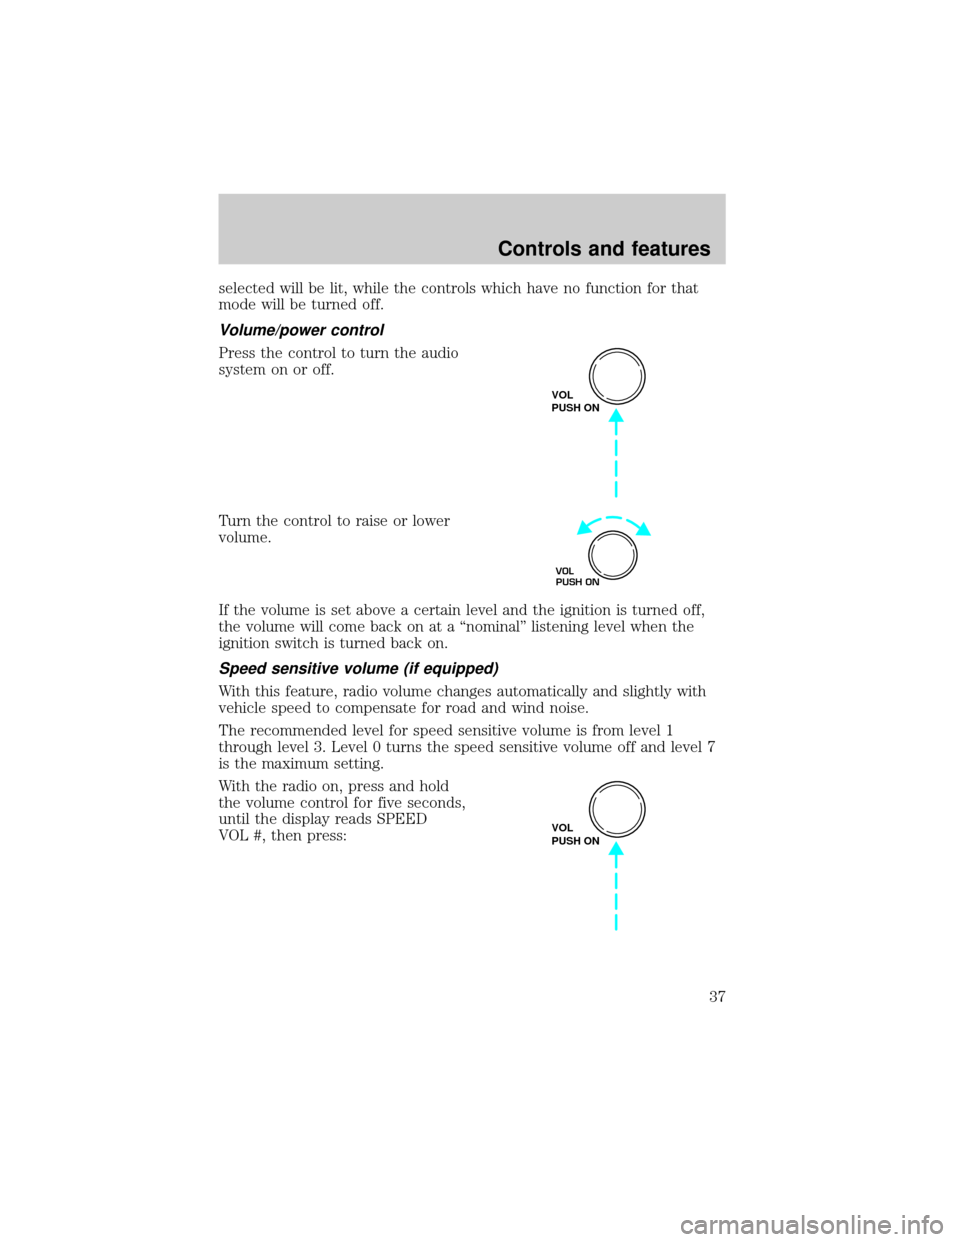
Volume/power control
Press the control to turn the audio
system on or off.
Turn the control to raise or lower
volume.
If the volume is set above a certain level and the ignition is turned off,
the volume will come back on at a ªnominalº listening level when the
ignition switch is turned back on.
Speed sensitive volume (if equipped)
With this feature, radio volume changes automatically and slightly with
vehicle speed to compensate for road and wind noise.
The recommended level for speed sensitive volume is from level 1
through level 3. Level 0 turns the speed sensitive volume off and level 7
is the maximum setting.
With the radio on, press and hold
the volume control for five seconds,
until the display reads SPEED
VOL #, then press:
VOL
PUSH ON
VOL
PUSH ON
VOL
PUSH ON
Controls and features
37
Page 44 of 232
shuffle feature continues to the next disc after all tracks are played.
Press the SHUFFLE control to start this feature. Random order play will
continue until the SHUFFLE control is pressed again.
Radio data system (RDS) feature
This feature allows your audio
system to receive station
identification or program type from
RDS-equipped FM radio stations.
The Federal Communications Commission (FCC) and the Canadian Radio
and Telecommunications Commission (CRTC) recommend FM radio
broadcasters to use RDS technology to transmit information. FM radio
stations are independently operated and individually elect to use RDS
technology to transmit station ID and program type as desired.
Press and hold the control for five seconds to turn the feature on or off.
Press the control to scroll through the following selections:
Traffic
²Press the RDS control until
TRAFFIC is displayed.
²Use the SEL control to select ON
or OFF. With the feature on, use
the SEEK or SCAN control to
find a radio station broadcasting a
traffic report (if it is broadcasting
RDS data).
Traffic information is not available in most U.S. markets.
Program type
²Press the RDS control until the
FIND program type is displayed.
²Use the SEL control to select the
program type. With the feature
on, use the SEEK or SCAN
control to find the desired
program type from the following
selections:
RDS
RDS
SEL
RDS
SEL
Controls and features
44
Page 45 of 232
²Classic
²Country
²Info
²Jazz
²Oldies
²R&B
²Religious
²Rock
²Soft
²To p 4 0
Show
²With RDS activated, press the
RDS control until SHOW is
displayed.
²Use the SEL control to select
TYPE (the display shows the
program type), NAME (the
display shows the call letters of
the station) or NONE.
RDS clock feature
Refer toSetting the clockfor information.
Mute mode
Press the control to mute the
playing media. Press the control
again to return to the playing media.
Setting the clock with radio data system (RDS) feature
Press the RDS control until SELECT
HOUR or SELECT MINS is
displayed.
RDS
SEL
MUTE
RDS
Controls and features
45
Page 55 of 232
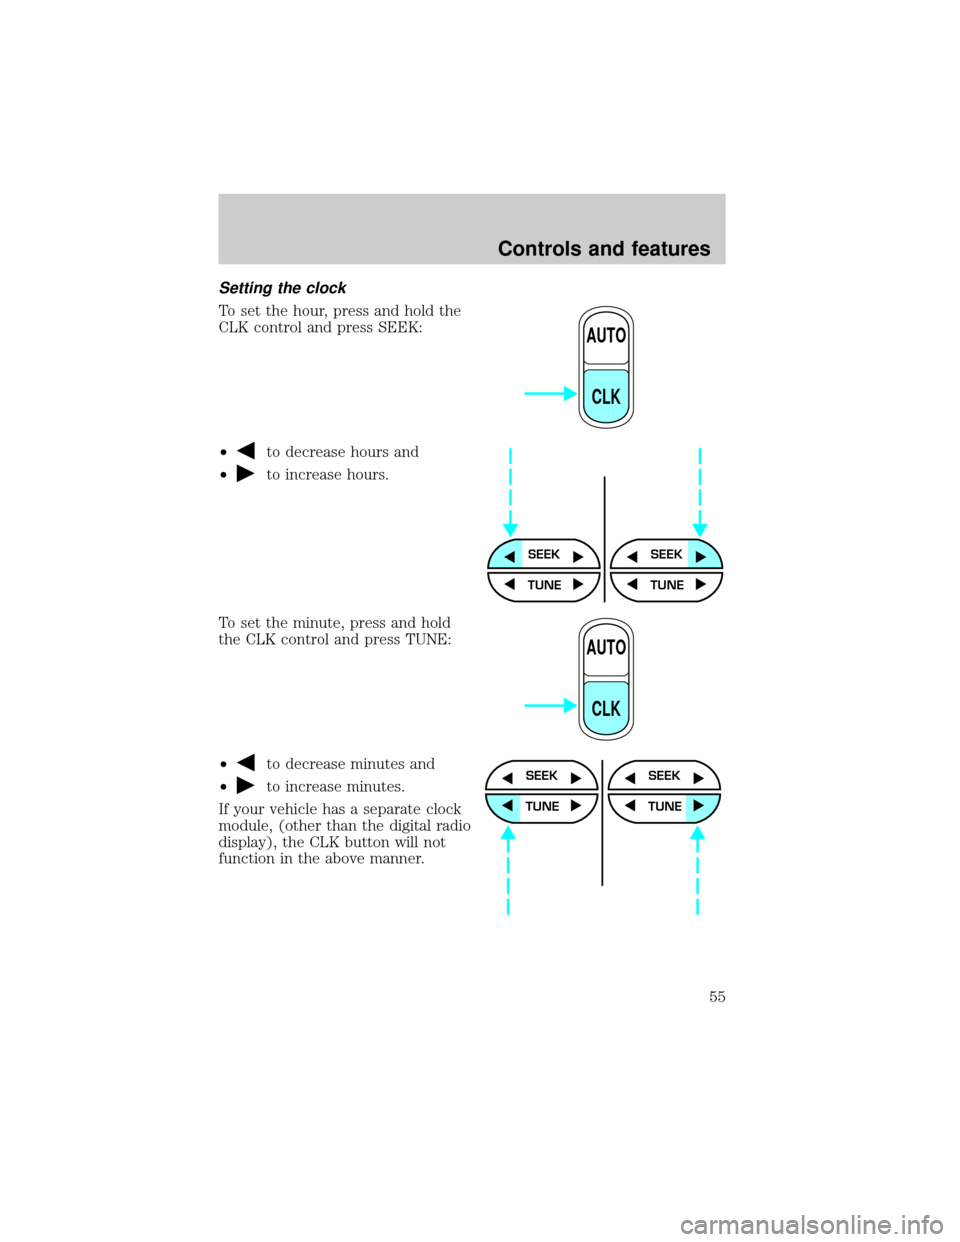
Setting the clock
To set the hour, press and hold the
CLK control and press SEEK:
²
to decrease hours and
²
to increase hours.
To set the minute, press and hold
the CLK control and press TUNE:
²
to decrease minutes and
²
to increase minutes.
If your vehicle has a separate clock
module, (other than the digital radio
display), the CLK button will not
function in the above manner.
AUTO
CLK
SEEKSEEK
TUNE TUNE
AUTO
CLK
SEEK
TUNE
SEEK
TUNE
Controls and features
55
Page 56 of 232
The CLK button will allow you to
switch between media display mode
(radio station, stereo information,
etc.) and clock display mode (time).
When in clock mode, the media
information will display for 10
seconds, when the radio is turned
on, and then revert to clock
information. Anytime that the media
is changed, (new radio station, etc.), the media information will again
display for 10 seconds before reverting back to the clock. In media mode,
the media information will always be displayed.
Mute mode
Press the control to mute the
playing media. Press the control
again to return to the playing media.
Troubleshooting the CD player (if equipped)
The laser beam used in the compact disc player is harmful to the
eyes. Do not attempt to disassemble the case.
If sound skips:
²You may be traveling on a rough road, playing badly scratched discs or
the disc may be dirty. Skipping will not scratch the discs or damage
the player.
If your changer does not work, it may be that:
²A disc is already loaded where you want to insert a disc.
²The disc is inserted with the label surface downward.
²The disc is dusty or defective.
²The player's internal temperature is above 60ÉC (140ÉF). Allow the
player to cool down before operating.
AUTO
CLK
EJ
MUTE
Controls and features
56
Page 58 of 232
Radio reception factors
Three factors can affect radio reception:
²Distance/strength.The further an FM signal travels, the weaker it is.
The listenable range of the average FM station is approximately 40 km
(24 miles). This range can be affected by ªsignal modulation.º Signal
modulation is a process radio stations use to increase their
strength/volume relative to other stations.
²Terrain.Hills, mountains and tall buildings between your vehicle's
antenna and the radio station signal can cause FM reception problems.
Static can be caused on AM stations by power lines, electric fences,
traffic lights and thunderstorms. Moving away from an interfering
structure (out of its ªshadowº) returns your reception to normal.
²Station overload.Weak signals are sometimes captured by stronger
signals when you pass a broadcast tower. A stronger signal may
temporarily overtake a weaker signal and play while the weak station
frequency is displayed.
The audio system automatically switches to single channel reception if it
will improve the reception of a station normally received in stereo.
Audio system warranties and service
Refer to the ªWarranty Guideº for audio system warranty information.
If service is necessary, see your dealer or a qualified technician.
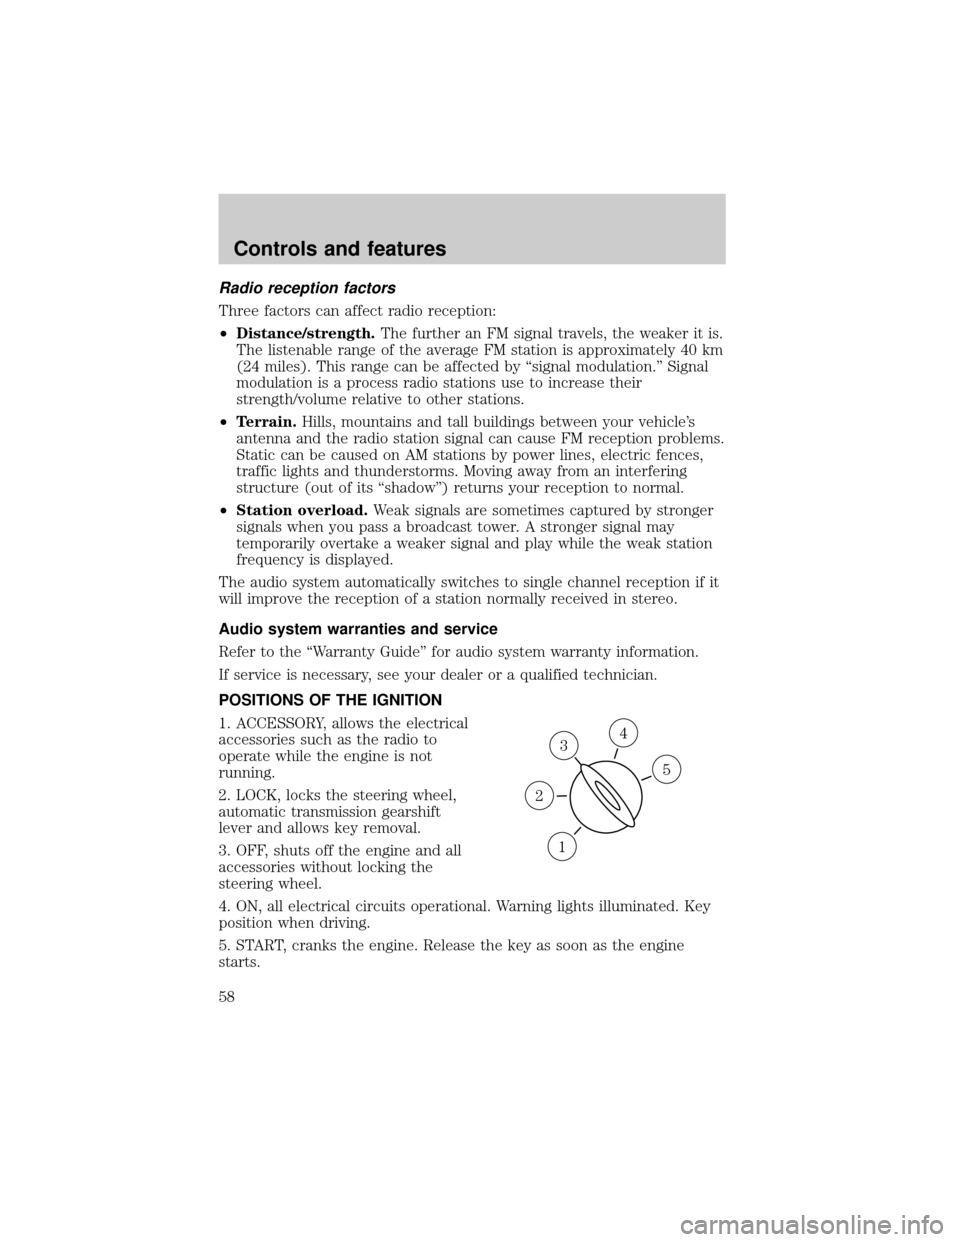
POSITIONS OF THE IGNITION
1. ACCESSORY, allows the electrical
accessories such as the radio to
operate while the engine is not
running.
2. LOCK, locks the steering wheel,
automatic transmission gearshift
lever and allows key removal.
3. OFF, shuts off the engine and all
accessories without locking the
steering wheel.
4. ON, all electrical circuits operational. Warning lights illuminated. Key
position when driving.
5. START, cranks the engine. Release the key as soon as the engine
starts.
3
1
2
5
4
Controls and features
58
Page 116 of 232
Always set the parking brake fully and make sure the gearshift
lever is latched in P (Park). Turn off the ignition whenever you
leave your vehicle.
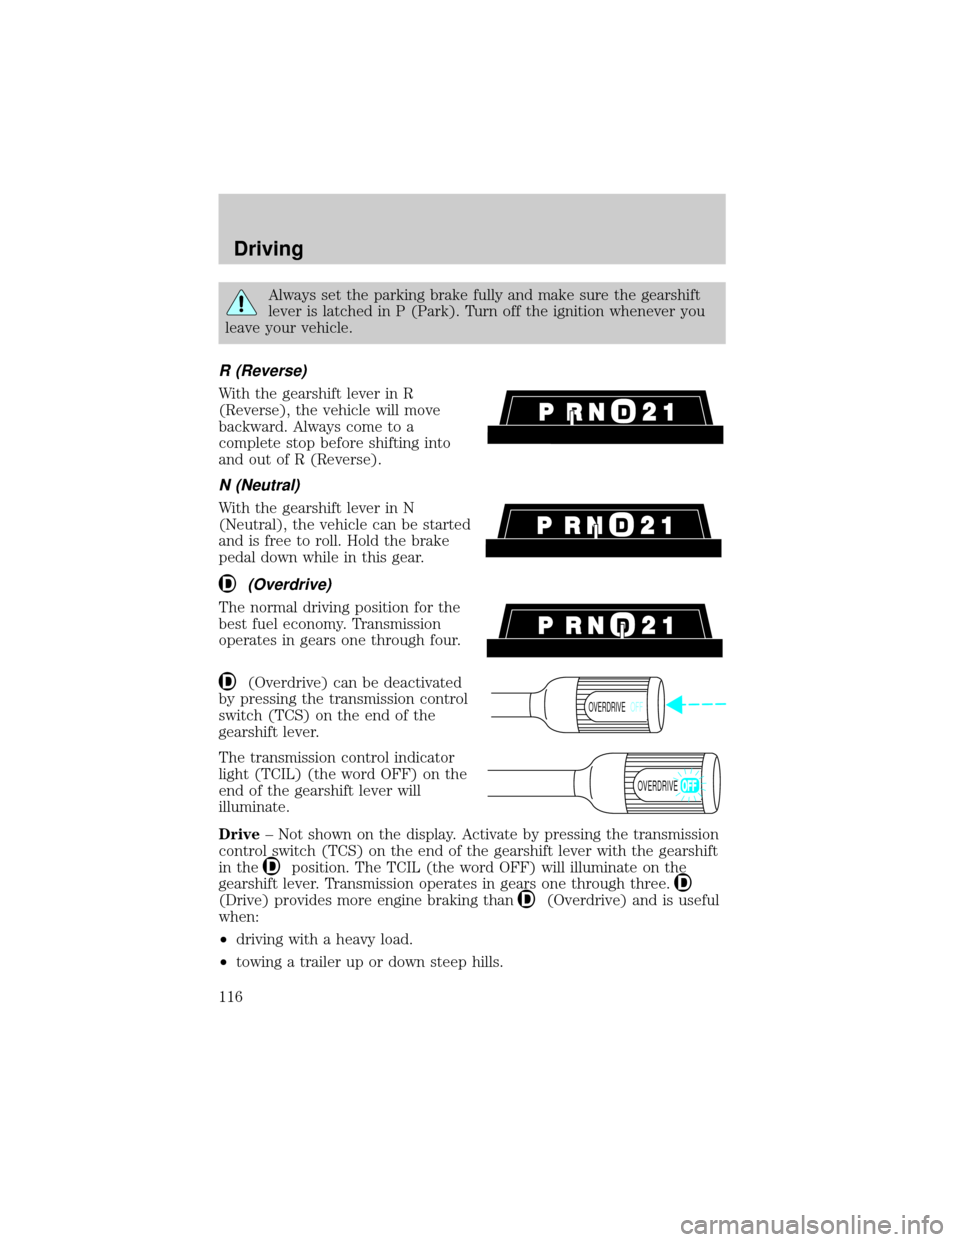
R (Reverse)
With the gearshift lever in R
(Reverse), the vehicle will move
backward. Always come to a
complete stop before shifting into
and out of R (Reverse).
N (Neutral)
With the gearshift lever in N
(Neutral), the vehicle can be started
and is free to roll. Hold the brake
pedal down while in this gear.
(Overdrive)
The normal driving position for the
best fuel economy. Transmission
operates in gears one through four.
(Overdrive) can be deactivated
by pressing the transmission control
switch (TCS) on the end of the
gearshift lever.
The transmission control indicator
light (TCIL) (the word OFF) on the
end of the gearshift lever will
illuminate.
Drive± Not shown on the display. Activate by pressing the transmission
control switch (TCS) on the end of the gearshift lever with the gearshift
in the
position. The TCIL (the word OFF) will illuminate on the
gearshift lever. Transmission operates in gears one through three.
(Drive) provides more engine braking than(Overdrive) and is useful
when:
²driving with a heavy load.
²towing a trailer up or down steep hills.
OVERDRIVEOFF
OVERDRIVE
Driving
116