key FORD E SERIES 2002 4.G Owners Manual
[x] Cancel search | Manufacturer: FORD, Model Year: 2002, Model line: E SERIES, Model: FORD E SERIES 2002 4.GPages: 272, PDF Size: 2.6 MB
Page 1 of 272
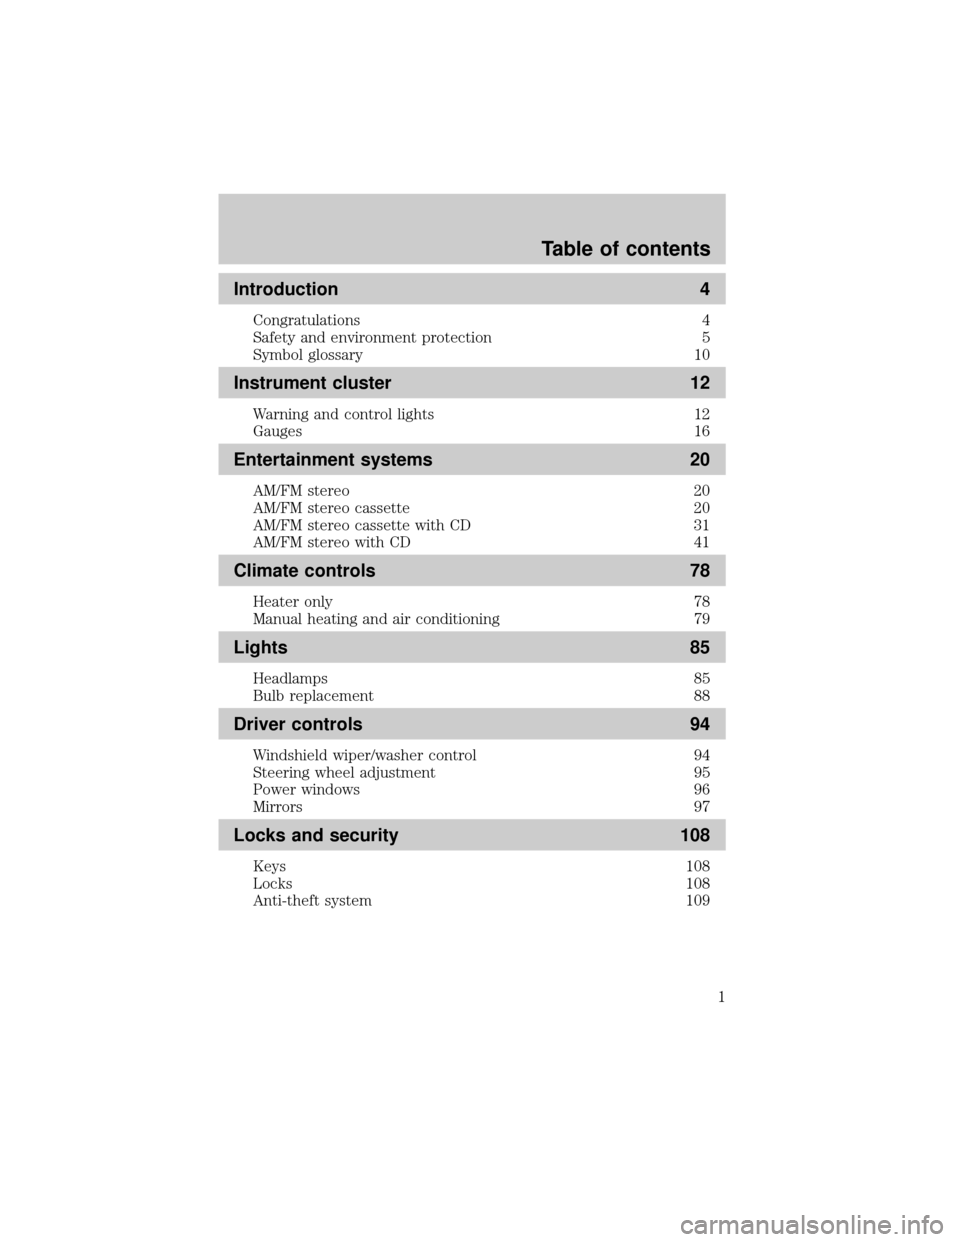
Introduction 4
Congratulations 4
Safety and environment protection 5
Symbol glossary 10
Instrument cluster 12
Warning and control lights 12
Gauges 16
Entertainment systems 20
AM/FM stereo 20
AM/FM stereo cassette 20
AM/FM stereo cassette with CD 31
AM/FM stereo with CD 41
Climate controls 78
Heater only 78
Manual heating and air conditioning 79
Lights 85
Headlamps 85
Bulb replacement 88
Driver controls 94
Windshield wiper/washer control 94
Steering wheel adjustment 95
Power windows 96
Mirrors 97
Locks and security 108
Keys 108
Locks 108
Anti-theft system 109
Table of contents
1
Page 16 of 272
Supplemental restraint system (SRS) warning chime
Sounds when a malfunction in the supplemental restraint system (front
or side airbags) has been detected. Have the supplemental restraint
system inspected immediately.
Headlamps on warning chime (if equipped)
Sounds when the headlamps or parking lamps are on, the key is removed
from the ignition and the driver's door is opened.
Key-in-ignition warning chime/buzzer
Sounds when the key is left in the ignition and the driver's door is
opened.
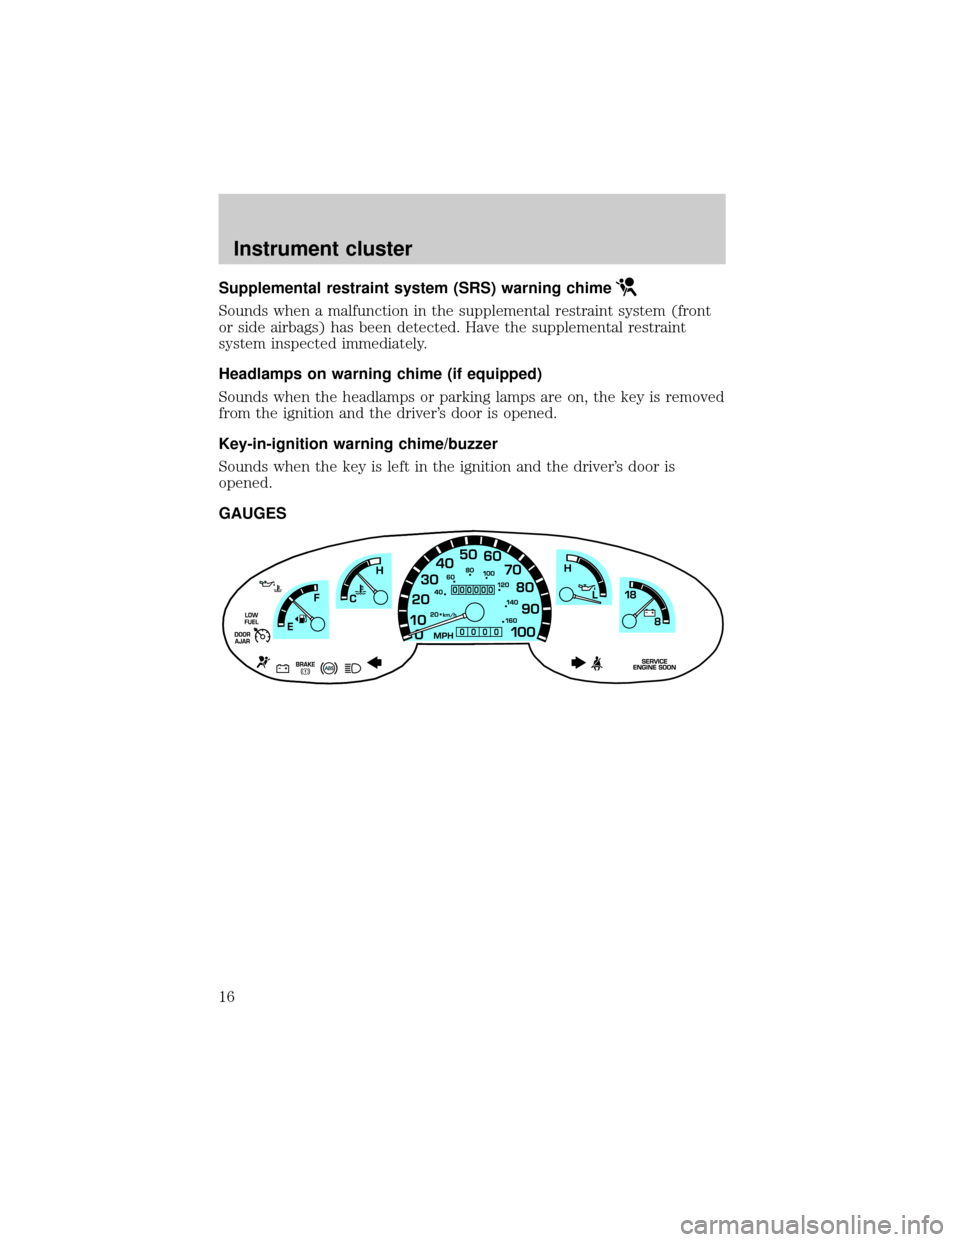
GAUGES
Instrument cluster
16
Page 59 of 272
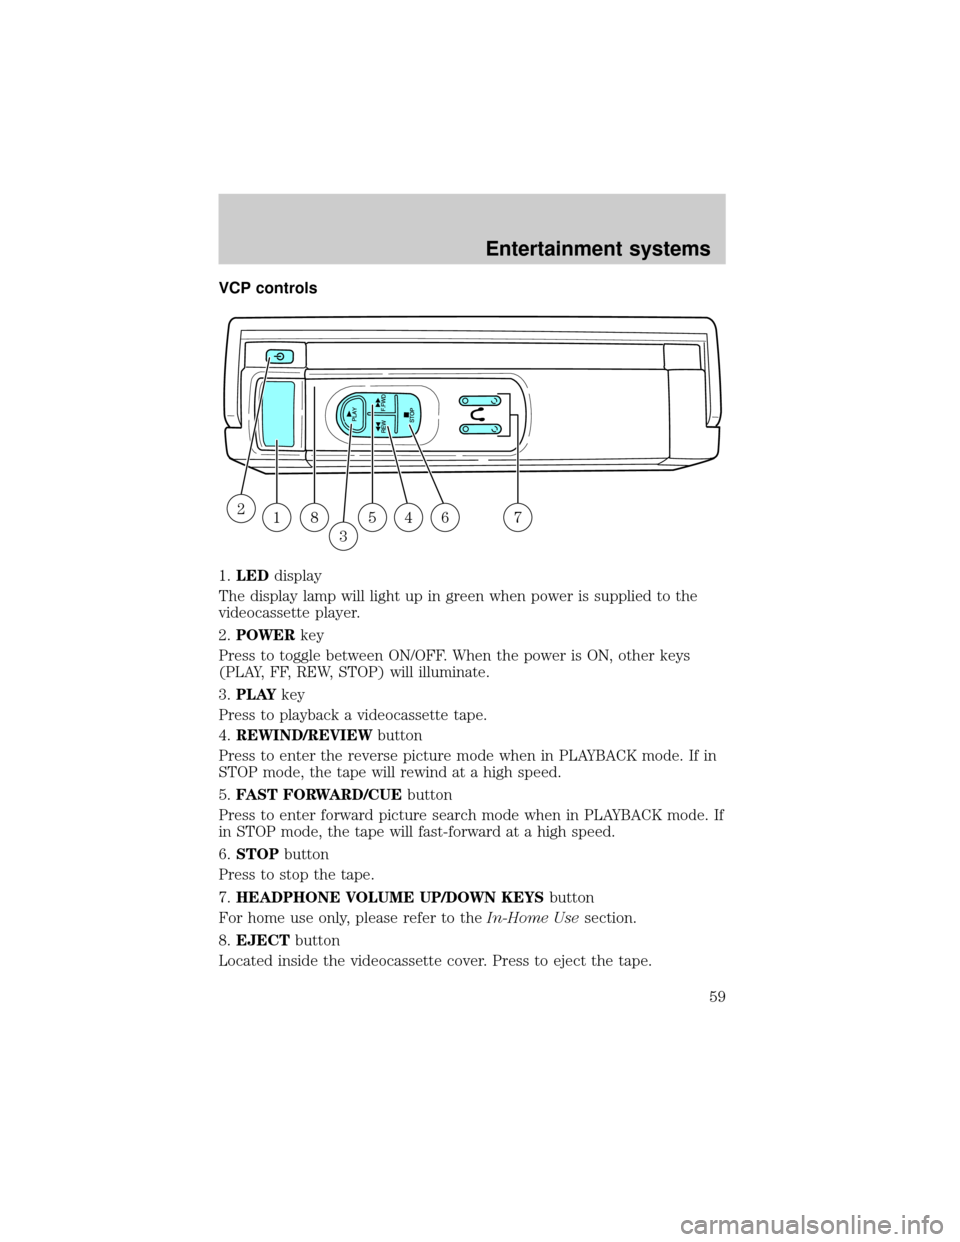
VCP controls
1.LEDdisplay
The display lamp will light up in green when power is supplied to the
videocassette player.
2.POWERkey
Press to toggle between ON/OFF. When the power is ON, other keys
(PLAY, FF, REW, STOP) will illuminate.
3.PLAYkey
Press to playback a videocassette tape.
4.REWIND/REVIEWbutton
Press to enter the reverse picture mode when in PLAYBACK mode. If in
STOP mode, the tape will rewind at a high speed.
5.FAST FORWARD/CUEbutton
Press to enter forward picture search mode when in PLAYBACK mode. If
in STOP mode, the tape will fast-forward at a high speed.
6.STOPbutton
Press to stop the tape.
7.HEADPHONE VOLUME UP/DOWN KEYSbutton
For home use only, please refer to theIn-Home Usesection.
8.EJECTbutton
Located inside the videocassette cover. Press to eject the tape.
18
3
54672
Entertainment systems
59
Page 69 of 272

On-screen indicators
Playback operation
1. Press the POWER control on the VCP.
2. Insert a videocassette into the VCP.
3. The videocassette should automatically begin playback, and the
picture will appear within approximately nine seconds.
4. Press the STOP control to stop playback or press EJECT to remove
the cassette.
Fast-forward or rewind (no picture)
1. Press the FF/REW control on the VCP.
2. Press the STOP control to stop or press EJECT to remove the
cassette.
The tape will fast forward or rewind until it has reached the end or the
beginning.
Fast-forward or rewind (with picture)
1. While in playback mode, momentarily press the FF/REW key. The VCP
will search the playback direction five times faster than normal playback
mode.
2. Press the PLAY key to resume normal playback.
Special effects playback
Still playback/ Frame-to-frame playback (on remote control)
1. Press the STILL/F.ADV key while in playback mode. The playback
picture becomes still.
2. Press the STILL/F.ADV key again. Each time the control is pressed,
the pictures are played back one frame at a time.
The still playback feature can also be used in REW (reverse) mode.
If still playback/or frame-to-frame playback is engaged for five minutes or
longer, the VCP will automatically begin playback to protect the tape.
Automatic tracking is automatically activated the moment the VCP is
turned ON or a cassette is inserted.
If a videocassette is in poor shape (i.e., badly recorded), any tracking
adjustment may result in failure. The VCP will eject the videocassette.
Entertainment systems
69
Page 104 of 272
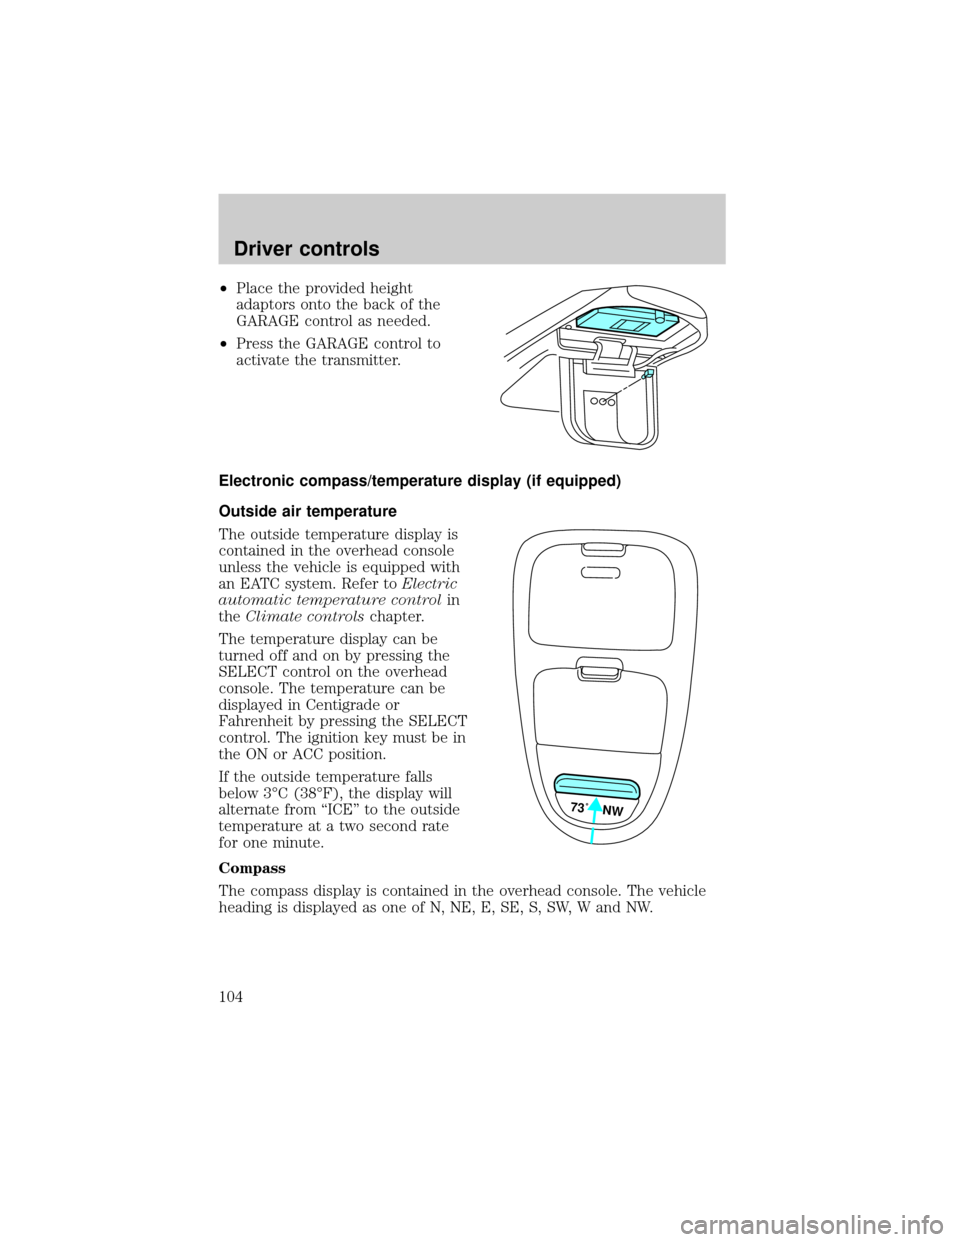
²Place the provided height
adaptors onto the back of the
GARAGE control as needed.
²Press the GARAGE control to
activate the transmitter.
Electronic compass/temperature display (if equipped)
Outside air temperature
The outside temperature display is
contained in the overhead console
unless the vehicle is equipped with
an EATC system. Refer toElectric
automatic temperature controlin
theClimate controlschapter.
The temperature display can be
turned off and on by pressing the
SELECT control on the overhead
console. The temperature can be
displayed in Centigrade or
Fahrenheit by pressing the SELECT
control. The ignition key must be in
the ON or ACC position.
If the outside temperature falls
below 3ÉC (38ÉF), the display will
alternate from ªICEº to the outside
temperature at a two second rate
for one minute.
Compass
The compass display is contained in the overhead console. The vehicle
heading is displayed as one of N, NE, E, SE, S, SW, W and NW.
73˚ NW
Driver controls
104
Page 108 of 272
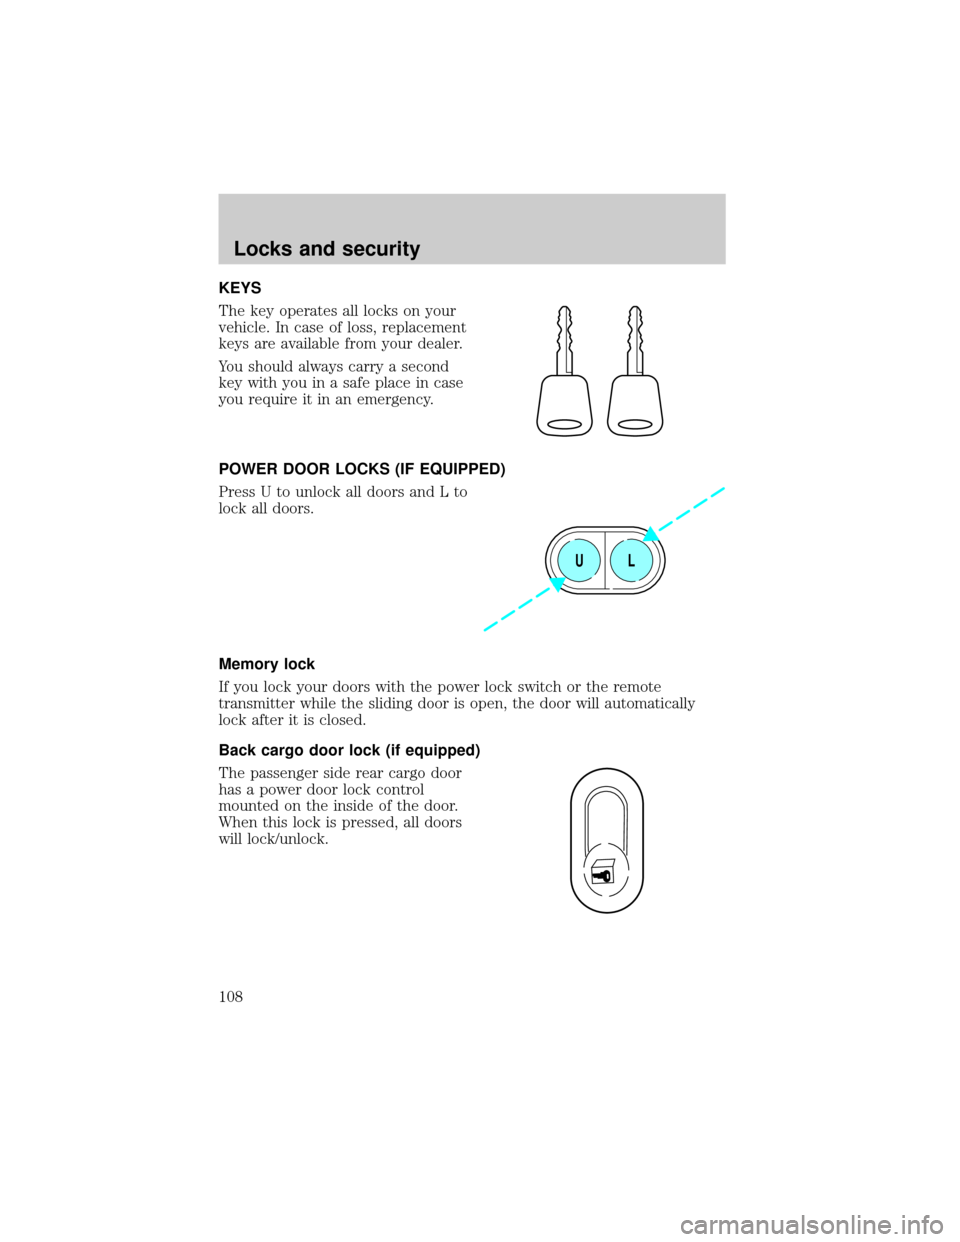
KEYS
The key operates all locks on your
vehicle. In case of loss, replacement
keys are available from your dealer.
You should always carry a second
key with you in a safe place in case
you require it in an emergency.
POWER DOOR LOCKS (IF EQUIPPED)
Press U to unlock all doors and L to
lock all doors.
Memory lock
If you lock your doors with the power lock switch or the remote
transmitter while the sliding door is open, the door will automatically
lock after it is closed.
Back cargo door lock (if equipped)
The passenger side rear cargo door
has a power door lock control
mounted on the inside of the door.
When this lock is pressed, all doors
will lock/unlock.
UL
Locks and security
108
Page 109 of 272
REMOTE ENTRY SYSTEM (IF EQUIPPED)
This device complies with part 15 of the FCC rules and with RS-210 of
Industry Canada. Operation is subject to the following two conditions:
(1) This device may not cause harmful interference, and (2) This device
must accept any interference received, including interference that may
cause undesired operation.
Changes or modifications not expressly approved by the party
responsible for compliance could void the user's authority to
operate the equipment.
The remote entry system allows you to lock or unlock all vehicle doors
without a key.
The remote entry features only operate with the ignition in the LOCK
position.
If there is any potential remote keyless entry problem with your vehicle,
ensureALL key fobs(remote entry transmitters) are brought to the
dealership, to aid in troubleshooting.
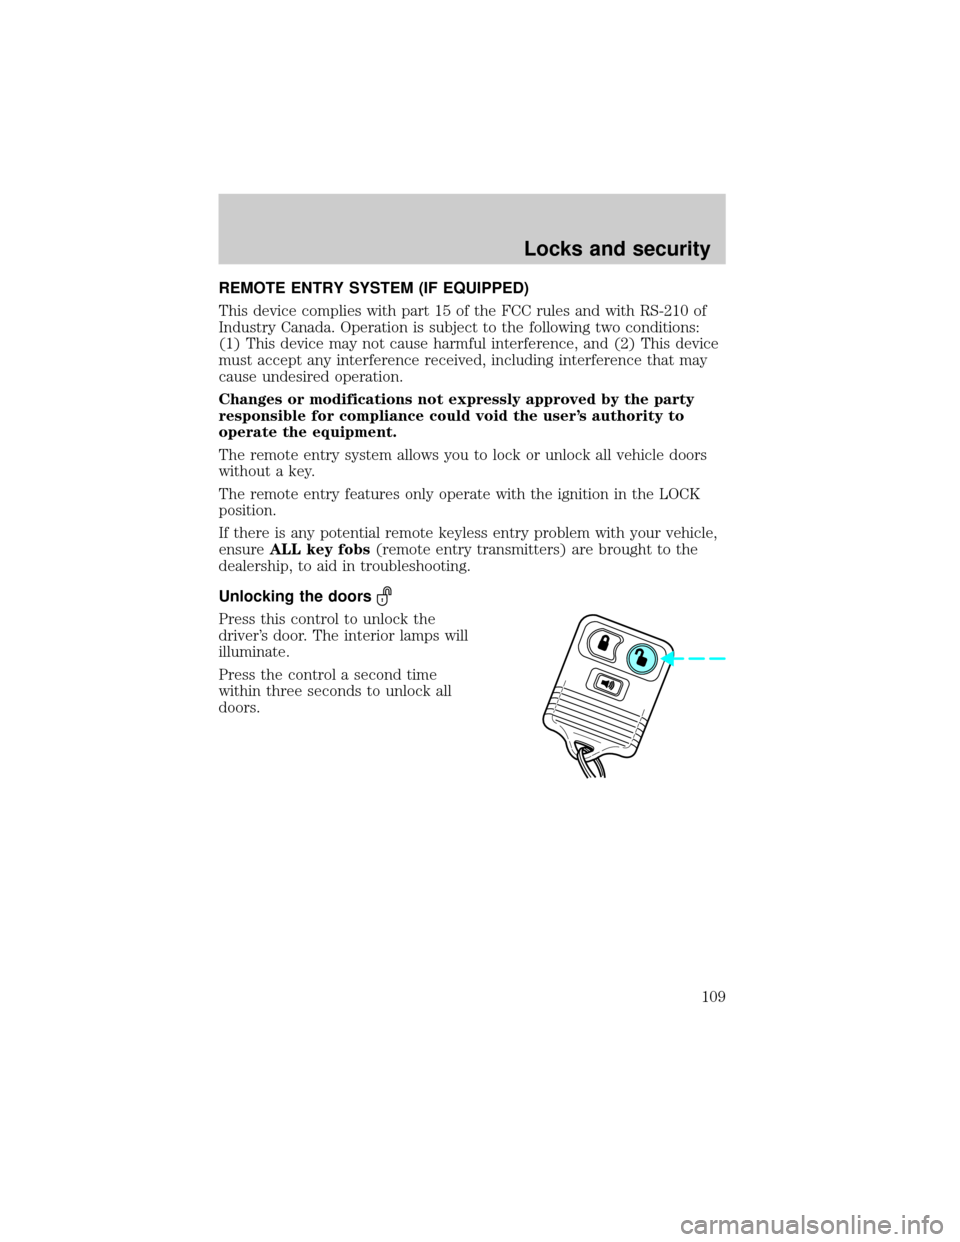
Unlocking the doors
Press this control to unlock the
driver's door. The interior lamps will
illuminate.
Press the control a second time
within three seconds to unlock all
doors.
Locks and security
109
Page 111 of 272
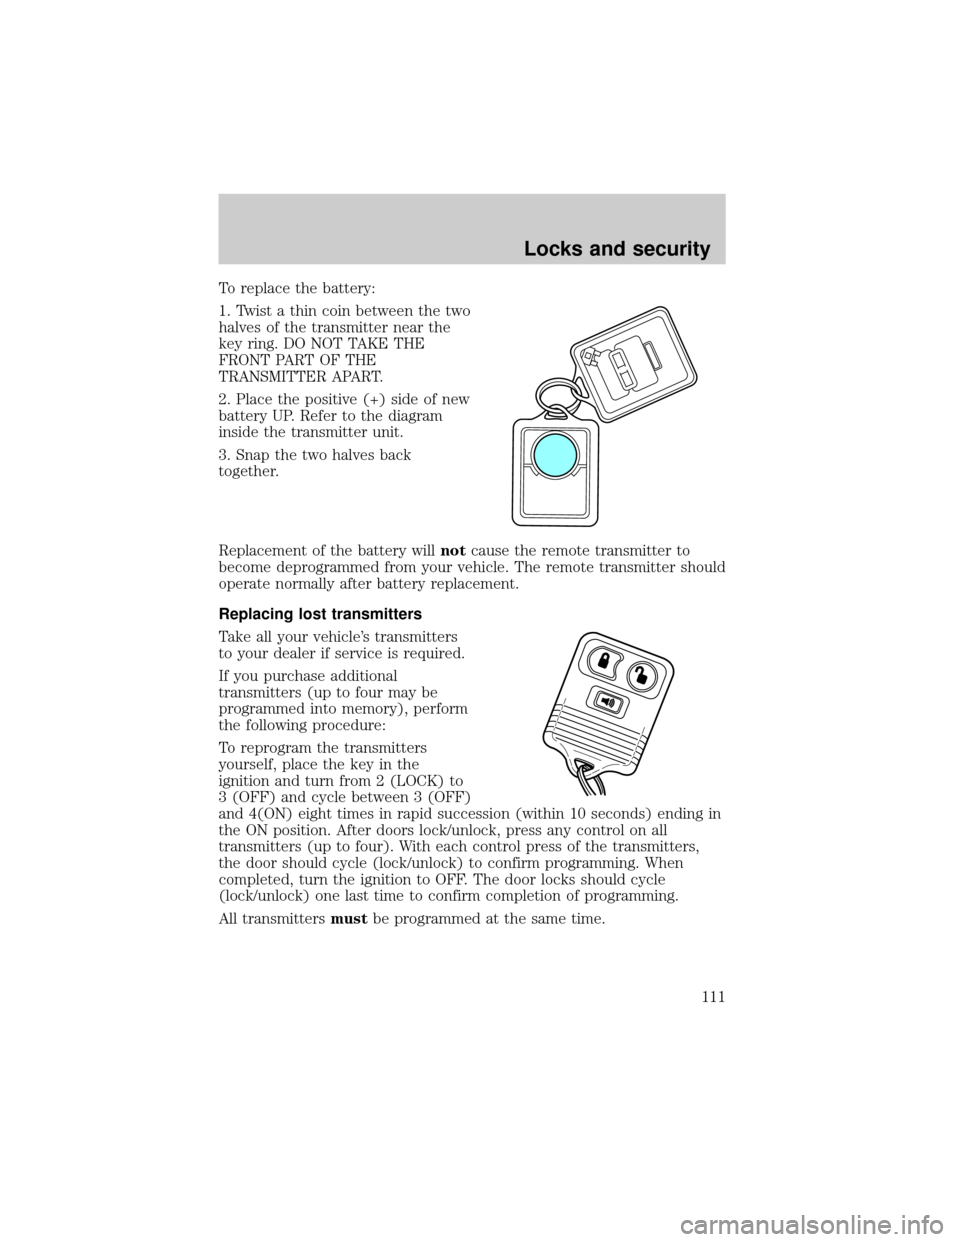
To replace the battery:
1. Twist a thin coin between the two
halves of the transmitter near the
key ring. DO NOT TAKE THE
FRONT PART OF THE
TRANSMITTER APART.
2. Place the positive (+) side of new
battery UP. Refer to the diagram
inside the transmitter unit.
3. Snap the two halves back
together.
Replacement of the battery willnotcause the remote transmitter to
become deprogrammed from your vehicle. The remote transmitter should
operate normally after battery replacement.
Replacing lost transmitters
Take all your vehicle's transmitters
to your dealer if service is required.
If you purchase additional
transmitters (up to four may be
programmed into memory), perform
the following procedure:
To reprogram the transmitters
yourself, place the key in the
ignition and turn from 2 (LOCK) to
3 (OFF) and cycle between 3 (OFF)
and 4(ON) eight times in rapid succession (within 10 seconds) ending in
the ON position. After doors lock/unlock, press any control on all
transmitters (up to four). With each control press of the transmitters,
the door should cycle (lock/unlock) to confirm programming. When
completed, turn the ignition to OFF. The door locks should cycle
(lock/unlock) one last time to confirm completion of programming.
All transmittersmustbe programmed at the same time.
Locks and security
111
Page 116 of 272
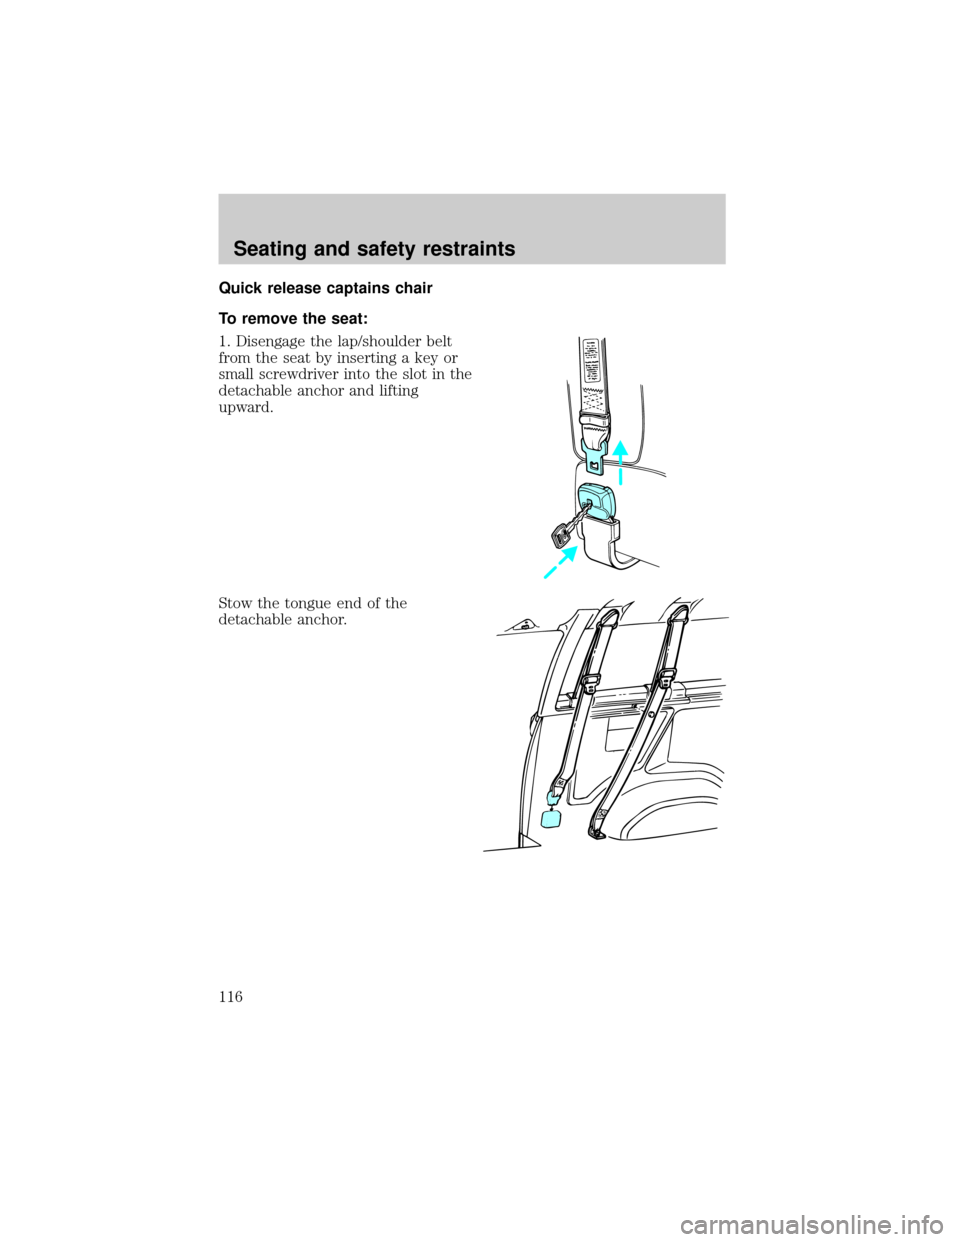
Quick release captains chair
To remove the seat:
1. Disengage the lap/shoulder belt
from the seat by inserting a key or
small screwdriver into the slot in the
detachable anchor and lifting
upward.
Stow the tongue end of the
detachable anchor.
Seating and safety restraints
116
Page 119 of 272
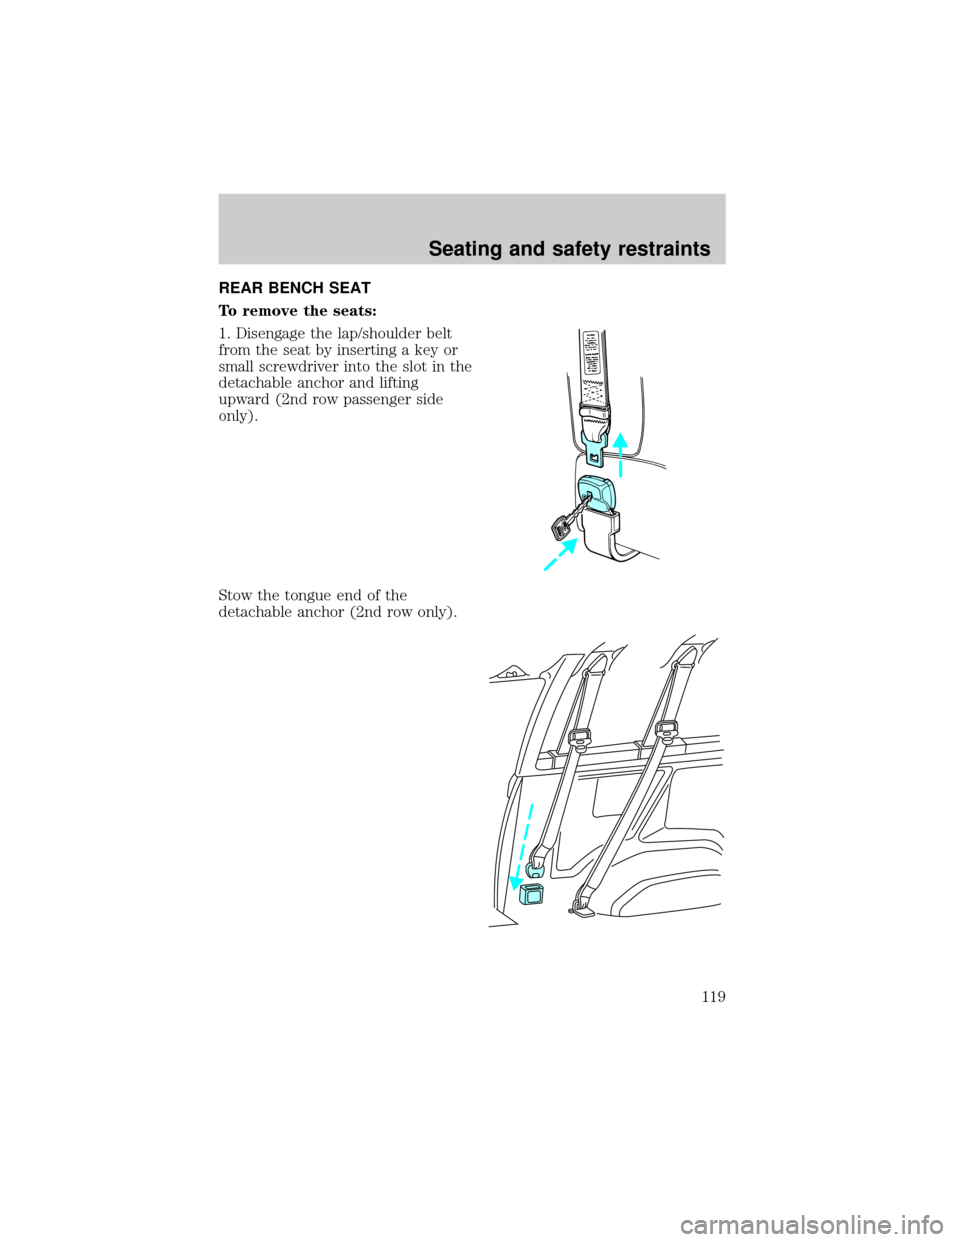
REAR BENCH SEAT
To remove the seats:
1. Disengage the lap/shoulder belt
from the seat by inserting a key or
small screwdriver into the slot in the
detachable anchor and lifting
upward (2nd row passenger side
only).
Stow the tongue end of the
detachable anchor (2nd row only).
Seating and safety restraints
119