navigation system FORD E SERIES 2009 4.G Owners Manual
[x] Cancel search | Manufacturer: FORD, Model Year: 2009, Model line: E SERIES, Model: FORD E SERIES 2009 4.GPages: 321, PDF Size: 2.31 MB
Page 1 of 321
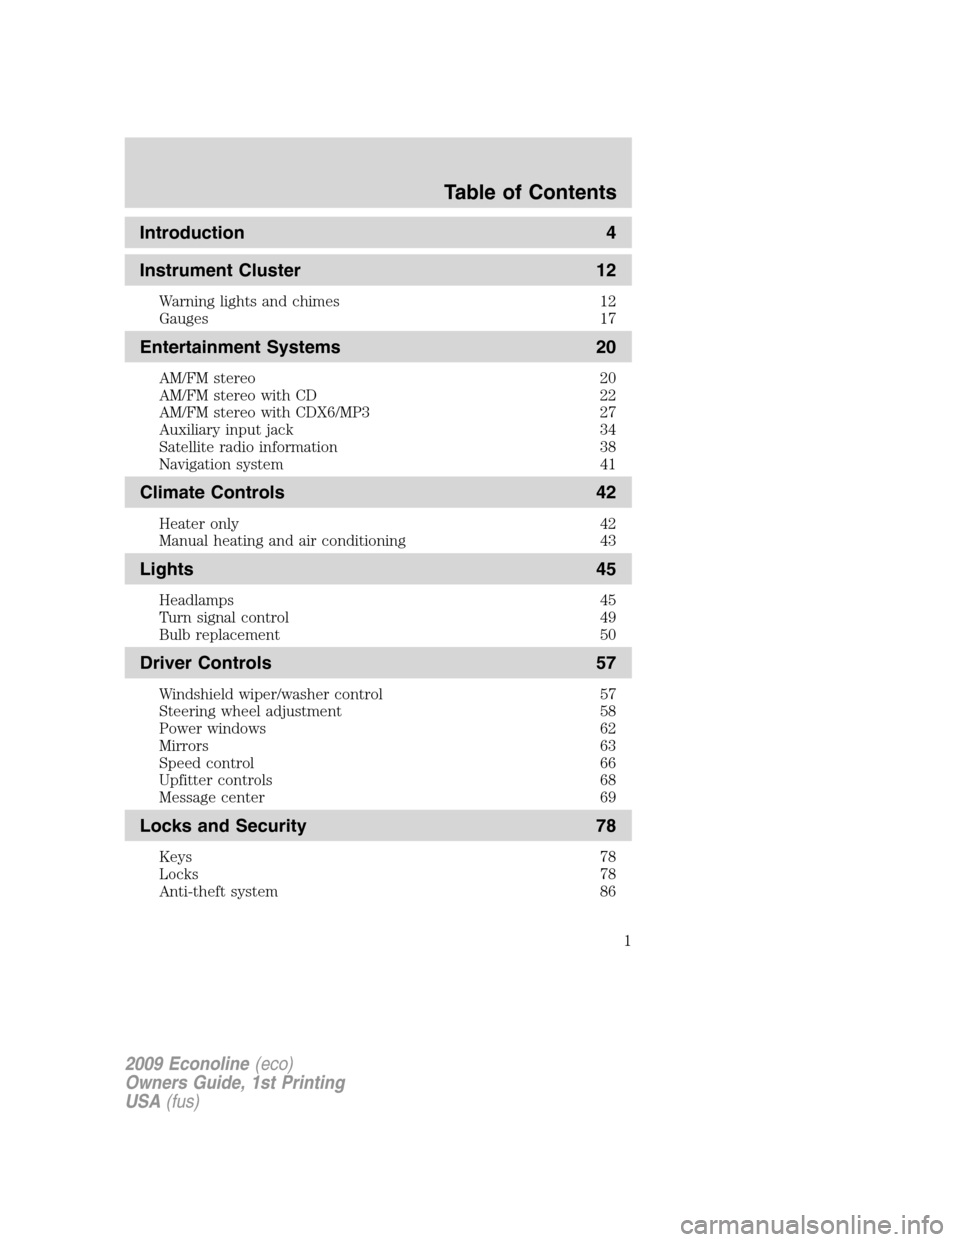
Introduction 4
Instrument Cluster 12
Warning lights and chimes 12
Gauges 17
Entertainment Systems 20
AM/FM stereo 20
AM/FM stereo with CD 22
AM/FM stereo with CDX6/MP3 27
Auxiliary input jack 34
Satellite radio information 38
Navigation system 41
Climate Controls 42
Heater only 42
Manual heating and air conditioning 43
Lights 45
Headlamps 45
Turn signal control 49
Bulb replacement 50
Driver Controls 57
Windshield wiper/washer control 57
Steering wheel adjustment 58
Power windows 62
Mirrors 63
Speed control 66
Upfitter controls 68
Message center 69
Locks and Security 78
Keys 78
Locks 78
Anti-theft system 86
Table of Contents
1
2009 Econoline(eco)
Owners Guide, 1st Printing
USA(fus)
Page 34 of 321
19.CD slot:Insert a CD label side
up.
Auxiliary input jack (if equipped)
WARNING:Driving while distracted can result in loss of vehicle
control, accident and injury. Ford strongly recommends that
drivers use extreme caution when using any device that may take their
focus off the road. The driver’s primary responsibility is the safe
operation of their vehicle. Only use cell phones and other devices not
essential to the driving task when it is safe to do so.
Your vehicle may be equipped with an Auxiliary Input Jack (AIJ). The
Auxiliary Input Jack, located on the instrument panel near the radio,
provides a way to connect your portable music player to the in-vehicle
audio system. This allows the audio from a portable music player to be
played through the vehicle speakers with high fidelity. To achieve optimal
performance, please observe the following instructions when attaching
your portable music device to the audio system.
If your vehicle is equipped with a navigation system, refer toAuxiliary
input jacksection in theAudio featureschapter of yourNavigation
systemsupplement.
Required equipment:
1. Any portable music player designed to be used with headphones
2. An audio extension cable with stereo male 1/8 in. (3.5 mm)
connectors at each end
To play your portable music player using the auxiliary input jack:
1. Begin with the vehicle parked and the radio turned off.
2. Ensure that the battery in your portable music player is new or fully
charged and that the device is turned off.
3. Attach one end of the audio extension cable to the headphone output
of your player and the other end of the audio extension cable to the AIJ
in your vehicle.
4. Turn the radio on, using either a tuned FM station or a CD loaded into
the system. Adjust the volume to a comfortable listening level.
5. Turn the portable music player on and adjust the volume to 1/2 the
volume.
2009 Econoline(eco)
Owners Guide, 1st Printing
USA(fus)
Entertainment Systems
34
Page 37 of 321
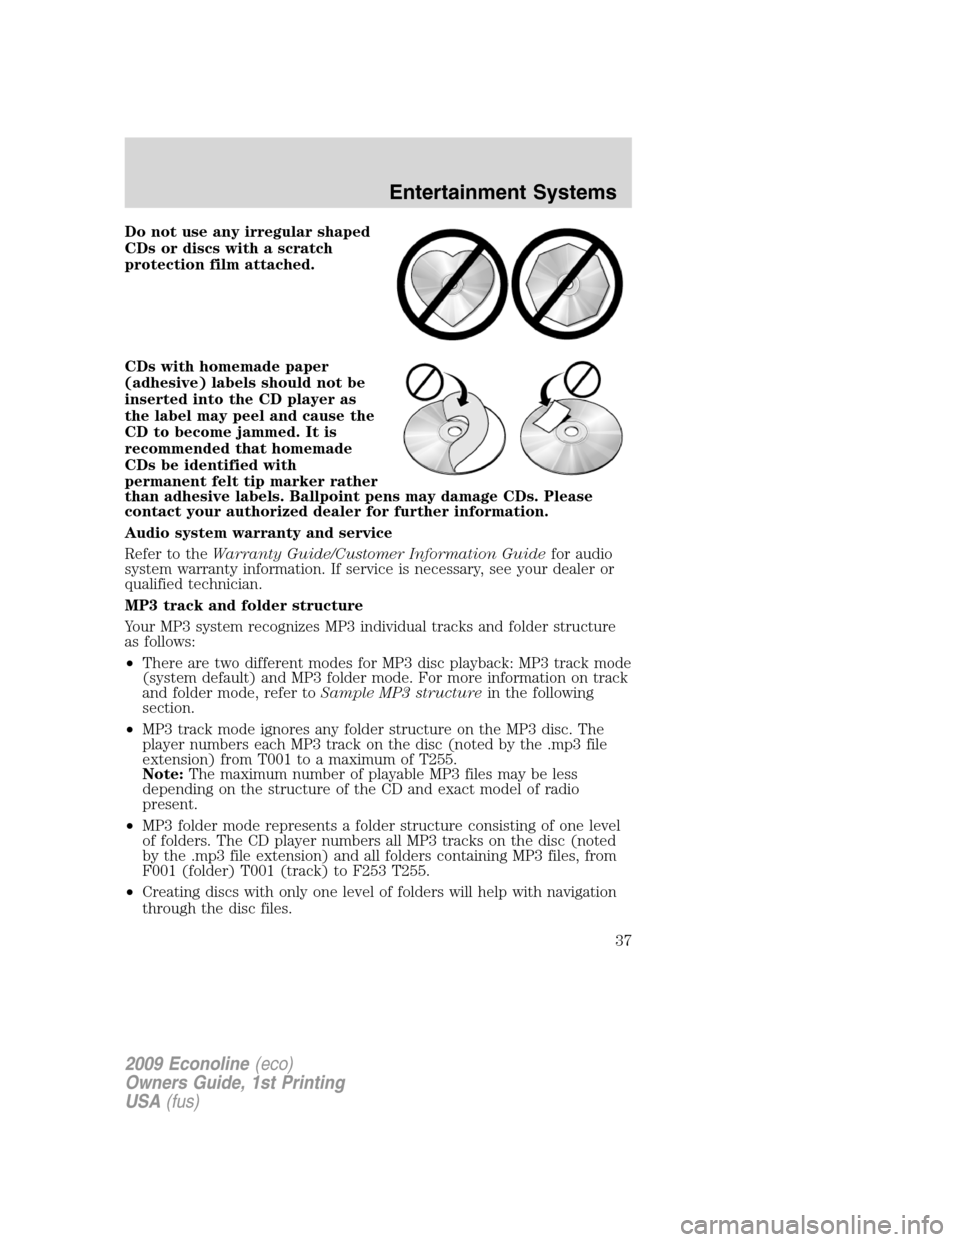
Do not use any irregular shaped
CDs or discs with a scratch
protection film attached.
CDs with homemade paper
(adhesive) labels should not be
inserted into the CD player as
the label may peel and cause the
CD to become jammed. It is
recommended that homemade
CDs be identified with
permanent felt tip marker rather
than adhesive labels. Ballpoint pens may damage CDs. Please
contact your authorized dealer for further information.
Audio system warranty and service
Refer to theWarranty Guide/Customer Information Guidefor audio
system warranty information. If service is necessary, see your dealer or
qualified technician.
MP3 track and folder structure
Your MP3 system recognizes MP3 individual tracks and folder structure
as follows:
•There are two different modes for MP3 disc playback: MP3 track mode
(system default) and MP3 folder mode. For more information on track
and folder mode, refer toSample MP3 structurein the following
section.
•MP3 track mode ignores any folder structure on the MP3 disc. The
player numbers each MP3 track on the disc (noted by the .mp3 file
extension) from T001 to a maximum of T255.
Note:The maximum number of playable MP3 files may be less
depending on the structure of the CD and exact model of radio
present.
•MP3 folder mode represents a folder structure consisting of one level
of folders. The CD player numbers all MP3 tracks on the disc (noted
by the .mp3 file extension) and all folders containing MP3 files, from
F001 (folder) T001 (track) to F253 T255.
•Creating discs with only one level of folders will help with navigation
through the disc files.
2009 Econoline(eco)
Owners Guide, 1st Printing
USA(fus)
Entertainment Systems
37
Page 41 of 321
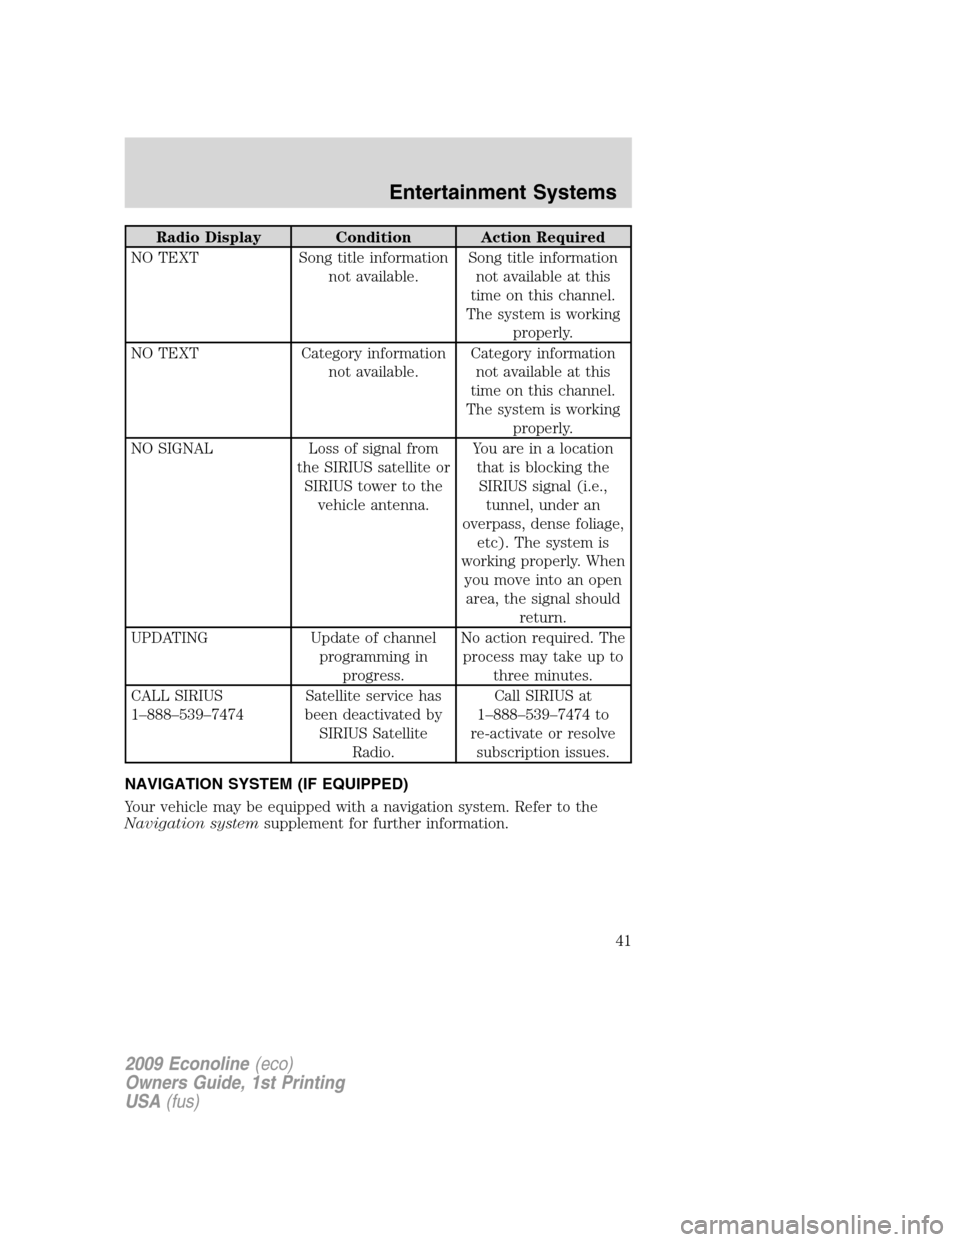
Radio Display Condition Action Required
NO TEXT Song title information
not available.Song title information
not available at this
time on this channel.
The system is working
properly.
NO TEXT Category information
not available.Category information
not available at this
time on this channel.
The system is working
properly.
NO SIGNAL Loss of signal from
the SIRIUS satellite or
SIRIUS tower to the
vehicle antenna.You are in a location
that is blocking the
SIRIUS signal (i.e.,
tunnel, under an
overpass, dense foliage,
etc). The system is
working properly. When
you move into an open
area, the signal should
return.
UPDATING Update of channel
programming in
progress.No action required. The
process may take up to
three minutes.
CALL SIRIUS
1–888–539–7474Satellite service has
been deactivated by
SIRIUS Satellite
Radio.Call SIRIUS at
1–888–539–7474 to
re-activate or resolve
subscription issues.
NAVIGATION SYSTEM (IF EQUIPPED)
Your vehicle may be equipped with a navigation system. Refer to the
Navigation systemsupplement for further information.
2009 Econoline(eco)
Owners Guide, 1st Printing
USA(fus)
Entertainment Systems
41
Page 64 of 321
The mirror will automatically return to the normal state whenever the
vehicle is placed in R (Reverse) to ensure a bright clear view when
backing up.
Do not block the sensors on the front and back of the interior
rear view mirror since this may impair proper mirror
performance.
Do not clean the housing or glass of any mirror with harsh
abrasives, fuel or other petroleum-based cleaning products.
Note:If equipped with a reverse camera system, a video image will
display in the mirror or the Navigation system display (if equipped)
when the vehicle is put in R (Reverse). As you shift into any other gear
from R (Reverse), the image will remain for a few seconds and then turn
off. Refer toReverse camera systemin theDrivingchapter.
EXTERIOR MIRRORS
Power side view mirrors (if equipped)
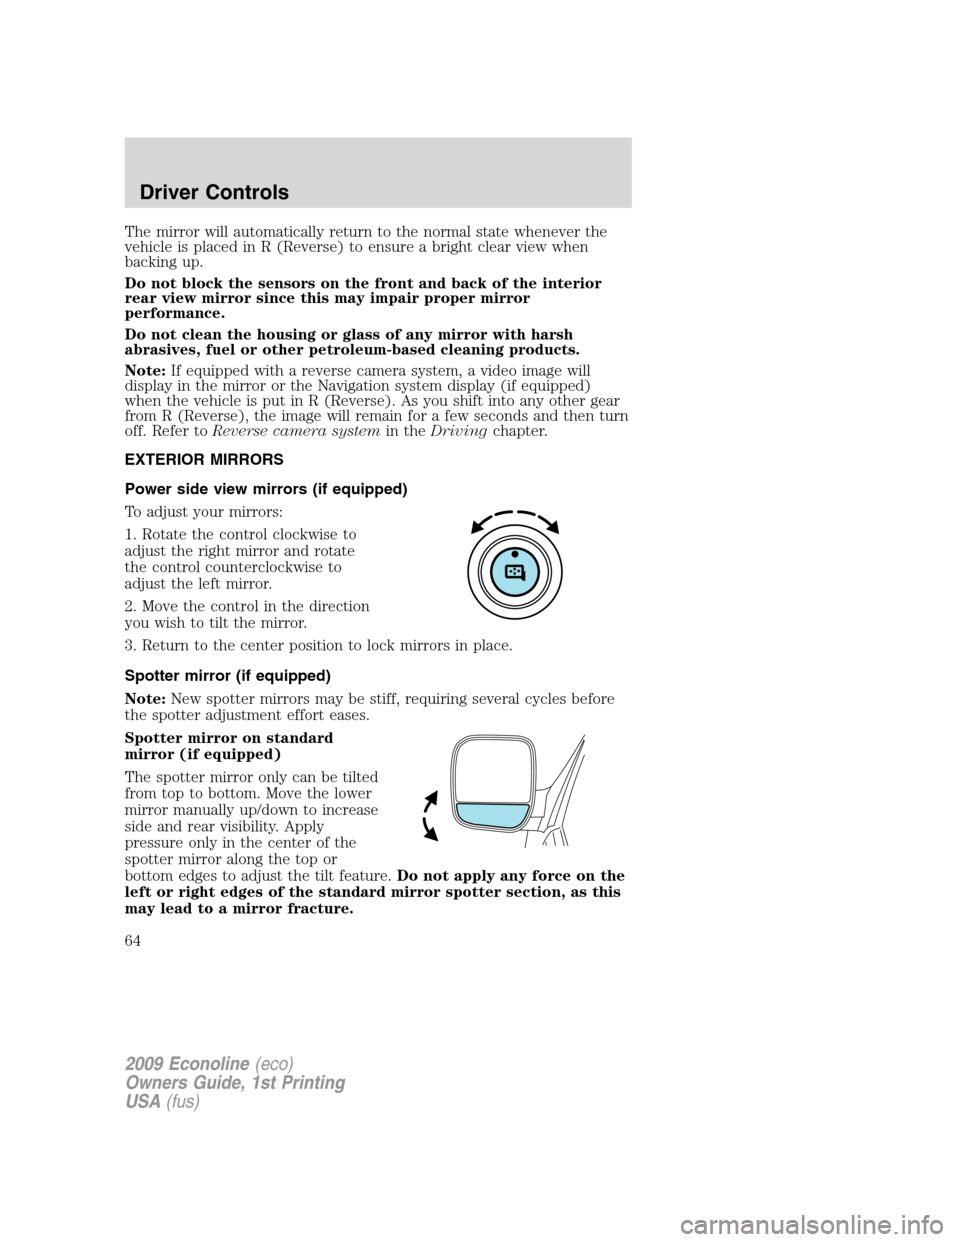
To adjust your mirrors:
1. Rotate the control clockwise to
adjust the right mirror and rotate
the control counterclockwise to
adjust the left mirror.
2. Move the control in the direction
you wish to tilt the mirror.
3. Return to the center position to lock mirrors in place.
Spotter mirror (if equipped)
Note:New spotter mirrors may be stiff, requiring several cycles before
the spotter adjustment effort eases.
Spotter mirror on standard
mirror (if equipped)
The spotter mirror only can be tilted
from top to bottom. Move the lower
mirror manually up/down to increase
side and rear visibility. Apply
pressure only in the center of the
spotter mirror along the top or
bottom edges to adjust the tilt feature.Do not apply any force on the
left or right edges of the standard mirror spotter section, as this
may lead to a mirror fracture.
2009 Econoline(eco)
Owners Guide, 1st Printing
USA(fus)
Driver Controls
64
Page 217 of 321
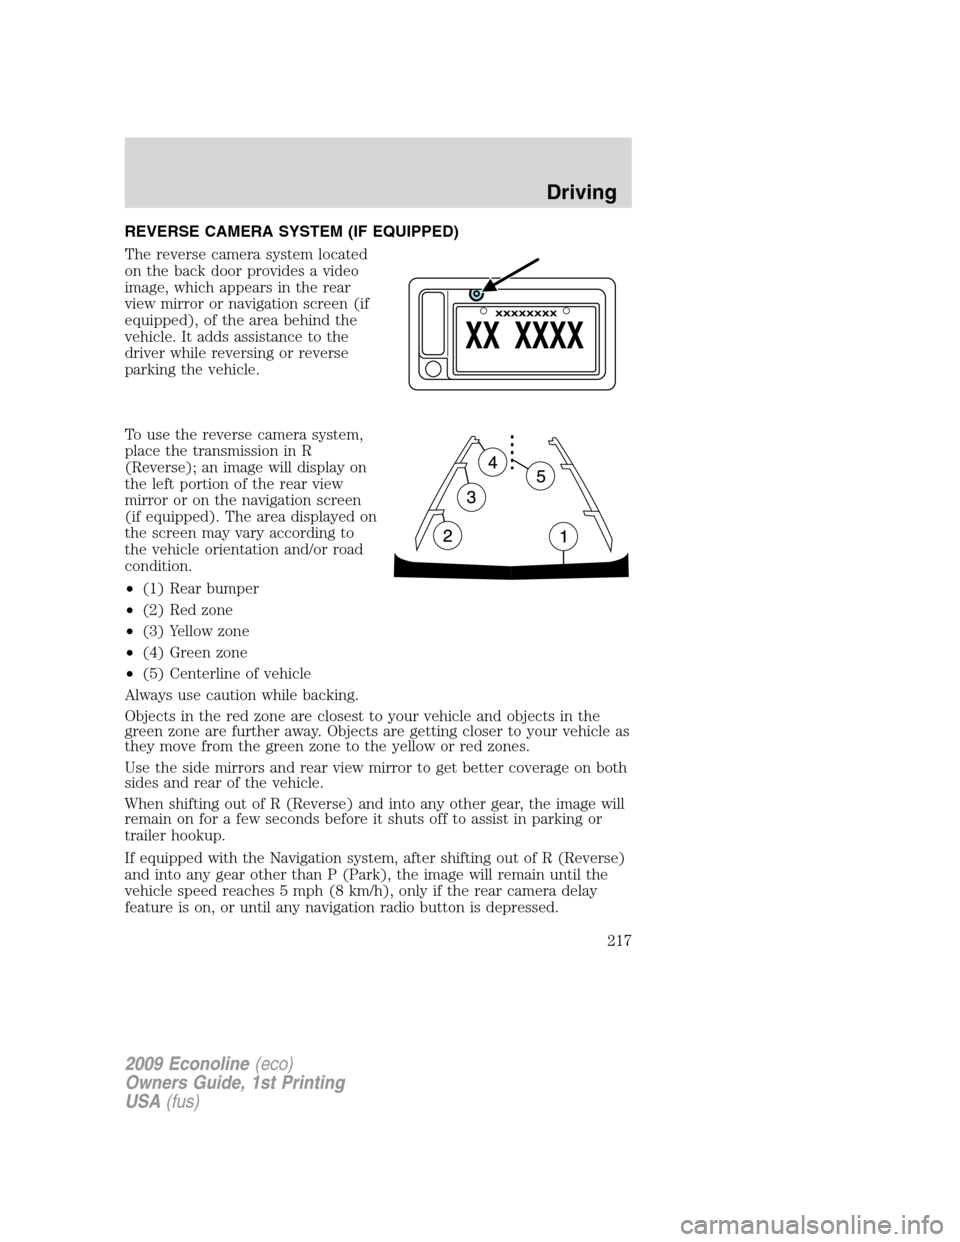
REVERSE CAMERA SYSTEM (IF EQUIPPED)
The reverse camera system located
on the back door provides a video
image, which appears in the rear
view mirror or navigation screen (if
equipped), of the area behind the
vehicle. It adds assistance to the
driver while reversing or reverse
parking the vehicle.
To use the reverse camera system,
place the transmission in R
(Reverse); an image will display on
the left portion of the rear view
mirror or on the navigation screen
(if equipped). The area displayed on
the screen may vary according to
the vehicle orientation and/or road
condition.
•(1) Rear bumper
•(2) Red zone
•(3) Yellow zone
•(4) Green zone
•(5) Centerline of vehicle
Always use caution while backing.
Objects in the red zone are closest to your vehicle and objects in the
green zone are further away. Objects are getting closer to your vehicle as
they move from the green zone to the yellow or red zones.
Use the side mirrors and rear view mirror to get better coverage on both
sides and rear of the vehicle.
When shifting out of R (Reverse) and into any other gear, the image will
remain on for a few seconds before it shuts off to assist in parking or
trailer hookup.
If equipped with the Navigation system, after shifting out of R (Reverse)
and into any gear other than P (Park), the image will remain until the
vehicle speed reaches 5 mph (8 km/h), only if the rear camera delay
feature is on, or until any navigation radio button is depressed.
2009 Econoline(eco)
Owners Guide, 1st Printing
USA(fus)
Driving
217
Page 218 of 321
Note:The default setting for the rear camera delay is off. Push the
“Settings” button found on the navigation screen (if equipped) to set the
rear camera delay feature to on or off.
When towing, the reverse camera system will only see what is being
towed behind the vehicle; this might not provide adequate coverage as it
usually provides in normal operation and some objects might not be
seen.
The camera lens for the reverse camera system is located on the
backdoor, above the license plate. Keep the lens clean so the video image
remains clear and undistorted. Clean the lens with a soft, lint-free cloth
and non-abrasive cleaner.
Note:If the reverse camera system image is not clear or seems
distorted, it may be covered with water droplets, snow, mud or any other
substance. If this occurs, clean the camera lens before using the reverse
camera system.
WARNING:The reverse camera system is a reverse aid
supplement device that still requires the driver to use it in
conjunction with the rear view mirror and the side mirrors for
maximum coverage.
WARNING:Objects that are close to either corner of the
bumper or under the bumper, might not be seen on the screen
due to the limited coverage of the reverse camera system.
WARNING:Backup as slow as possible since higher speeds
might limit your reaction time to stop the vehicle.
WARNING:Do not use the reverse camera system with the
backdoor open.
If the back end of the vehicle is hit or damaged, then check with your
authorized dealer to have your rear video system checked for proper
coverage and operation.
2009 Econoline(eco)
Owners Guide, 1st Printing
USA(fus)
Driving
218
Page 228 of 321
Fuse/Relay
LocationFuse Amp
RatingProtected Circuits
36 5A PATS RF module
37 10A Climate control, Stripped chassis
IP #1 run/start
38 20A Not used (spare)
39 20A Radio, Navigation
40 20A Amplifier
41 15A Radio, Switch illumination,
Reverse camera mirror
42 10A Upfitter switch
43 10A Overhead console, Stripped
chassis IP1
44 10A Auxiliary Battery Relay
45 5A Wipers, Stripped chassis Engine
connector 3
46 7.5A PADI
47 30A circuit
breakerWindows accessory delay
48 Relay Delayed accessory
Power distribution box
The power distribution box is located in the engine compartment. The
power distribution box contains high-current fuses that protect your
vehicle’s main electrical systems from overloads.
WARNING:Always disconnect the battery before servicing high
current fuses.
WARNING:To reduce risk of electrical shock, always replace
the cover to the Power Distribution Box before reconnecting the
battery or refilling fluid reservoirs.
If your vehicle is equipped with an auxiliary battery,
disconnecting the primary under-hood battery DOES NOT remove
power from all circuits.
If the battery has been disconnected and reconnected, refer to the
Batterysection of theMaintenance and Specificationschapter.
2009 Econoline(eco)
Owners Guide, 1st Printing
USA(fus)
Roadside Emergencies
228
Page 319 of 321
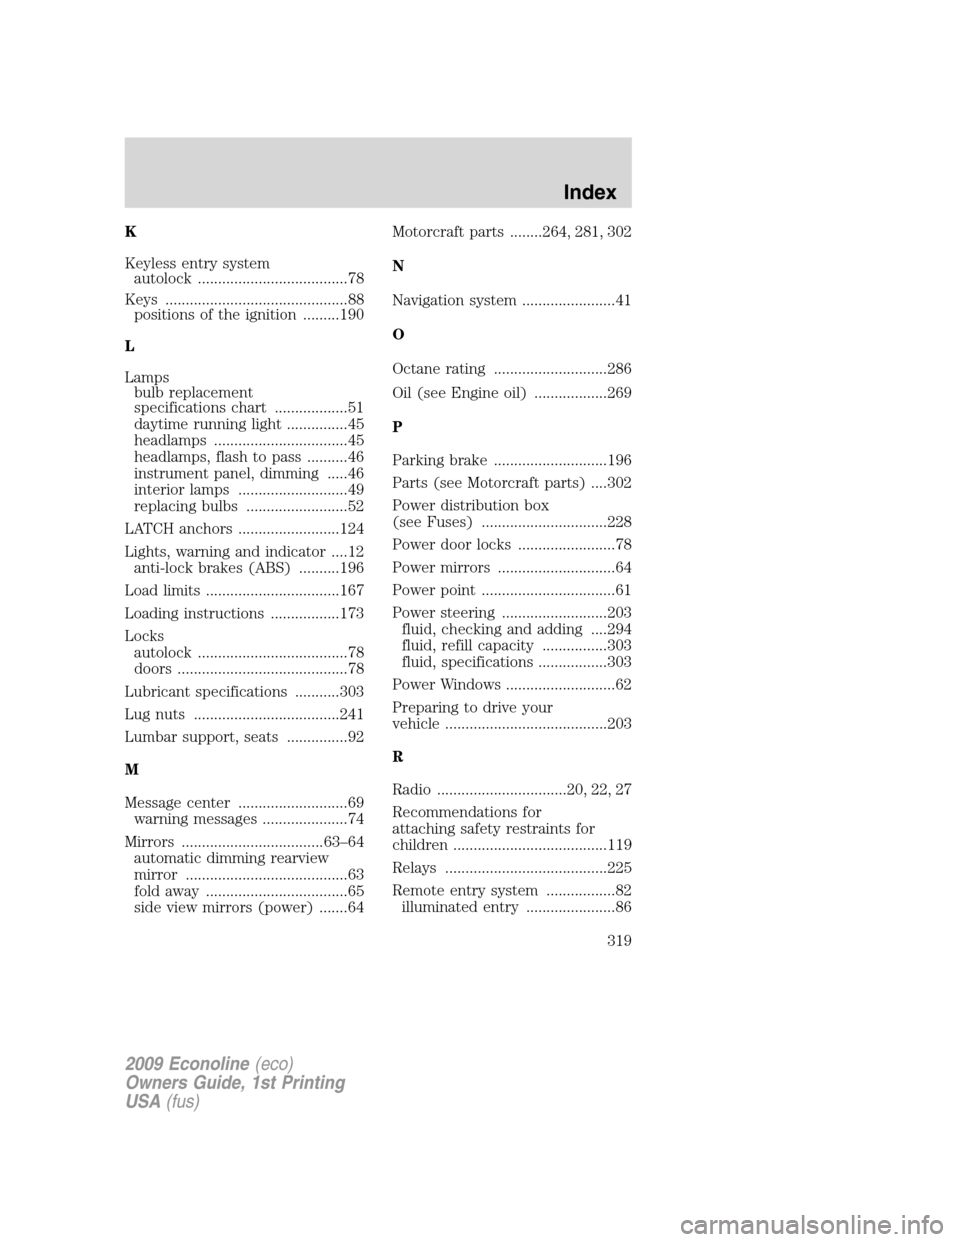
K
Keyless entry system
autolock .....................................78
Keys .............................................88
positions of the ignition .........190
L
Lamps
bulb replacement
specifications chart ..................51
daytime running light ...............45
headlamps .................................45
headlamps, flash to pass ..........46
instrument panel, dimming .....46
interior lamps ...........................49
replacing bulbs .........................52
LATCH anchors .........................124
Lights, warning and indicator ....12
anti-lock brakes (ABS) ..........196
Load limits .................................167
Loading instructions .................173
Locks
autolock .....................................78
doors ..........................................78
Lubricant specifications ...........303
Lug nuts ....................................241
Lumbar support, seats ...............92
M
Message center ...........................69
warning messages .....................74
Mirrors ...................................63–64
automatic dimming rearview
mirror ........................................63
fold away ...................................65
side view mirrors (power) .......64Motorcraft parts ........264, 281, 302
N
Navigation system .......................41
O
Octane rating ............................286
Oil (see Engine oil) ..................269
P
Parking brake ............................196
Parts (see Motorcraft parts) ....302
Power distribution box
(see Fuses) ...............................228
Power door locks ........................78
Power mirrors .............................64
Power point .................................61
Power steering ..........................203
fluid, checking and adding ....294
fluid, refill capacity ................303
fluid, specifications .................303
Power Windows ...........................62
Preparing to drive your
vehicle ........................................203
R
Radio ................................20, 22, 27
Recommendations for
attaching safety restraints for
children ......................................119
Relays ........................................225
Remote entry system .................82
illuminated entry ......................86
2009 Econoline(eco)
Owners Guide, 1st Printing
USA(fus)
Index
319