towing FORD E SERIES 2016 4.G Owners Manual
[x] Cancel search | Manufacturer: FORD, Model Year: 2016, Model line: E SERIES, Model: FORD E SERIES 2016 4.GPages: 319, PDF Size: 6.18 MB
Page 5 of 319
Information Displays
General Information......................................55
Information Messages
.................................60
Climate Control
Manual Climate Control..............................63
Hints on Controlling the Interior Climate..........................................................65
Rear Passenger Climate Controls
............66
Seats
Sitting in the Correct Position....................67
Head Restraints
..............................................67
Manual Seats
..................................................68
Power Seats
.....................................................69
Auxiliary Power Points
Auxiliary Power Points..................................70
Starting and Stopping the Engine
General Information
......................................72
Ignition Switch
.................................................72
Starting a Gasoline Engine..........................72
Engine Block Heater......................................74
Fuel and Refueling
Safety Precautions
.........................................75
Fuel Quality
......................................................76
Fuel Quality
......................................................76
Running Out of Fuel.......................................77
Refueling............................................................77
Fuel Consumption
.........................................79
Emission Control System...........................80
Transmission
Automatic Transmission
.............................83 Brakes
General Information
.....................................88
Hints on Driving With Anti-Lock Brakes............................................................88
Parking Brake
..................................................89
Traction Control
Principle of Operation..................................90
Using Traction Control.................................90
Cruise Control
Principle of Operation...................................91
Using Cruise Control
......................................91
Driving Aids
Steering..............................................................92
Load Carrying
Load Limit.........................................................93
Towing
Towing a Trailer.............................................100
Trailer Sway Control.....................................101
Recommended Towing Weights.............101
Essential Towing Checks...........................103
Transporting the Vehicle............................110
Towing the Vehicle on Four Wheels.......110
Driving Hints
Breaking-In.......................................................112
Reduced Engine Performance..................112
Economical Driving
.......................................112
Driving Through Water.................................113
Floor Mats
.........................................................113
Roadside Emergencies
Roadside Assistance
....................................115
Hazard Warning Flashers
...........................116
Fuel Shutoff
.....................................................116
2
E-Series (TE4) Canada/United States of America, enUSA, Edition date: 03/2015, Second Printing Table of Contents
Page 50 of 319
Telescoping Mirrors (If Equipped)
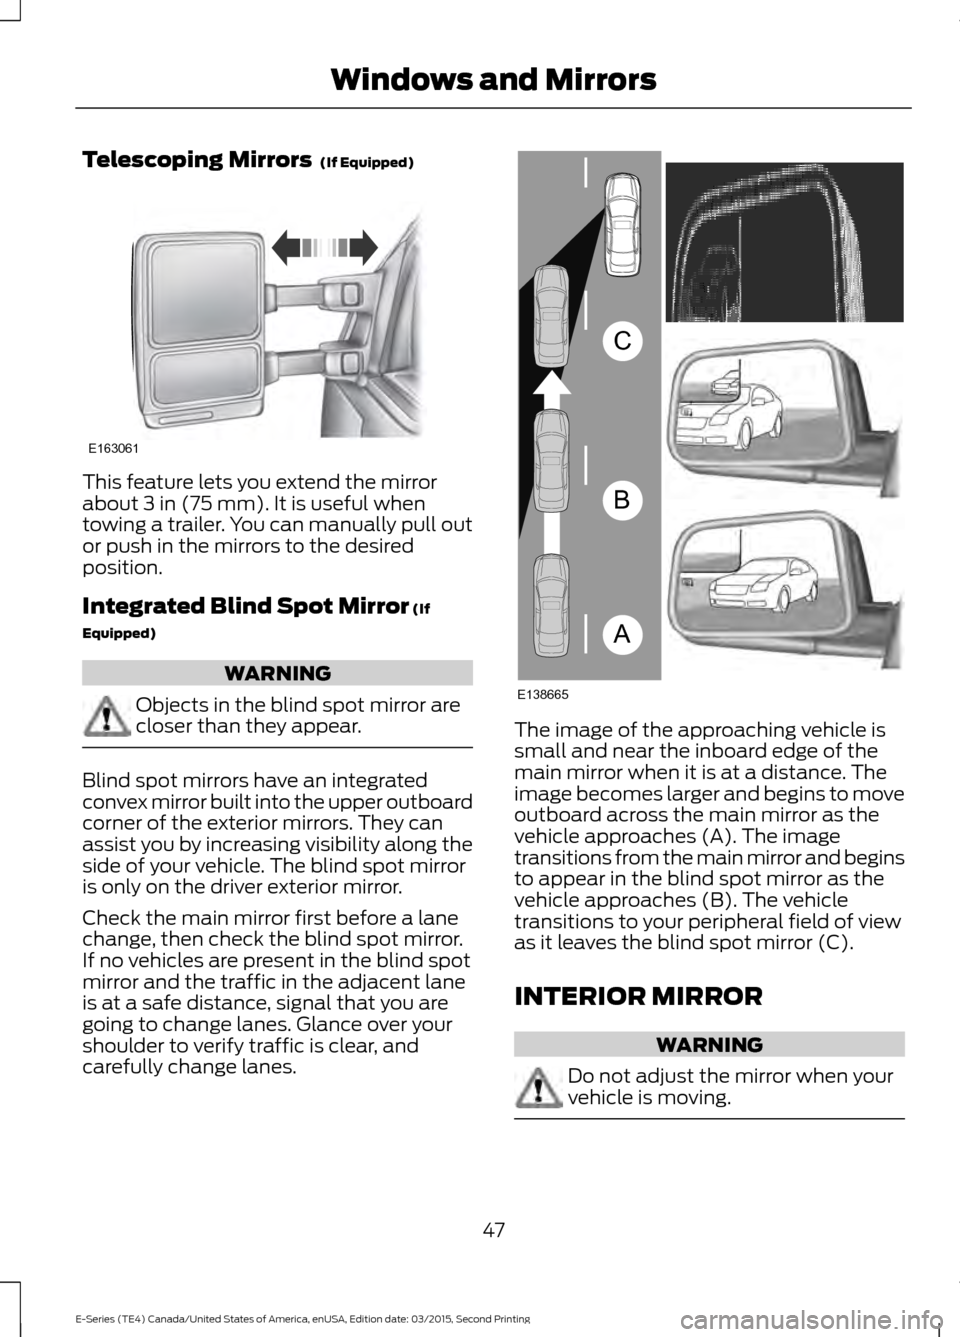
This feature lets you extend the mirror
about
3 in (75 mm). It is useful when
towing a trailer. You can manually pull out
or push in the mirrors to the desired
position.
Integrated Blind Spot Mirror
(If
Equipped) WARNING
Objects in the blind spot mirror are
closer than they appear.
Blind spot mirrors have an integrated
convex mirror built into the upper outboard
corner of the exterior mirrors. They can
assist you by increasing visibility along the
side of your vehicle. The blind spot mirror
is only on the driver exterior mirror.
Check the main mirror first before a lane
change, then check the blind spot mirror.
If no vehicles are present in the blind spot
mirror and the traffic in the adjacent lane
is at a safe distance, signal that you are
going to change lanes. Glance over your
shoulder to verify traffic is clear, and
carefully change lanes. The image of the approaching vehicle is
small and near the inboard edge of the
main mirror when it is at a distance. The
image becomes larger and begins to move
outboard across the main mirror as the
vehicle approaches (A). The image
transitions from the main mirror and begins
to appear in the blind spot mirror as the
vehicle approaches (B). The vehicle
transitions to your peripheral field of view
as it leaves the blind spot mirror (C).
INTERIOR MIRROR
WARNING
Do not adjust the mirror when your
vehicle is moving.
47
E-Series (TE4) Canada/United States of America, enUSA, Edition date: 03/2015, Second Printing Windows and MirrorsE163061 A
B
C
E138665
Page 53 of 319
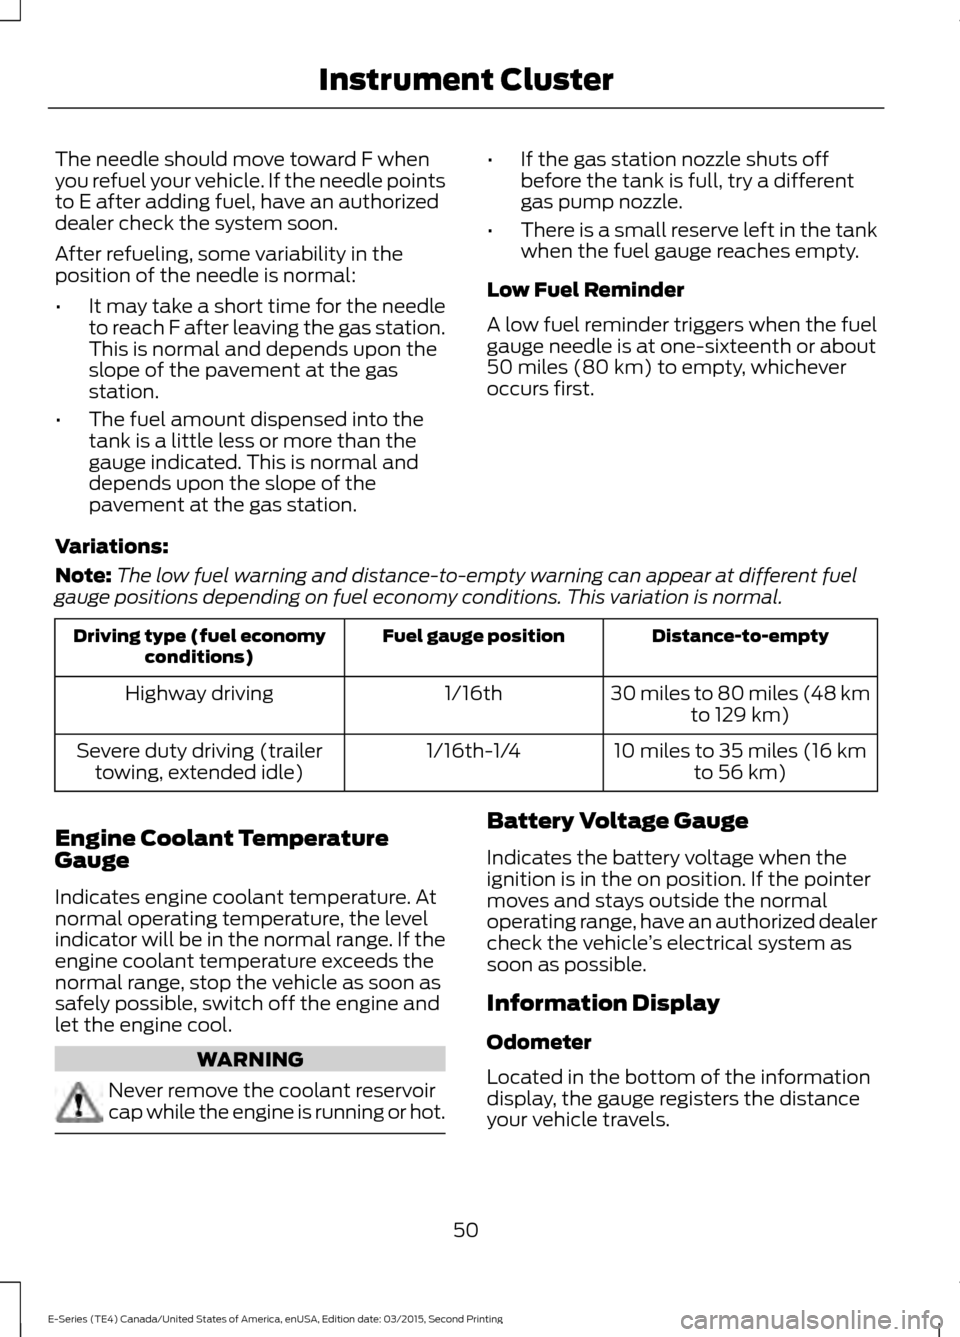
The needle should move toward F when
you refuel your vehicle. If the needle points
to E after adding fuel, have an authorized
dealer check the system soon.
After refueling, some variability in the
position of the needle is normal:
•
It may take a short time for the needle
to reach F after leaving the gas station.
This is normal and depends upon the
slope of the pavement at the gas
station.
• The fuel amount dispensed into the
tank is a little less or more than the
gauge indicated. This is normal and
depends upon the slope of the
pavement at the gas station. •
If the gas station nozzle shuts off
before the tank is full, try a different
gas pump nozzle.
• There is a small reserve left in the tank
when the fuel gauge reaches empty.
Low Fuel Reminder
A low fuel reminder triggers when the fuel
gauge needle is at one-sixteenth or about
50 miles (80 km) to empty, whichever
occurs first.
Variations:
Note: The low fuel warning and distance-to-empty warning can appear at different fuel
gauge positions depending on fuel economy conditions. This variation is normal. Distance-to-empty
Fuel gauge position
Driving type (fuel economy
conditions)
30 miles to 80 miles (48 kmto 129 km)
1/16th
Highway driving
10 miles to 35 miles (16 kmto 56 km)
1/16th-1/4
Severe duty driving (trailer
towing, extended idle)
Engine Coolant Temperature
Gauge
Indicates engine coolant temperature. At
normal operating temperature, the level
indicator will be in the normal range. If the
engine coolant temperature exceeds the
normal range, stop the vehicle as soon as
safely possible, switch off the engine and
let the engine cool. WARNING
Never remove the coolant reservoir
cap while the engine is running or hot. Battery Voltage Gauge
Indicates the battery voltage when the
ignition is in the on position. If the pointer
moves and stays outside the normal
operating range, have an authorized dealer
check the vehicle
’s electrical system as
soon as possible.
Information Display
Odometer
Located in the bottom of the information
display, the gauge registers the distance
your vehicle travels.
50
E-Series (TE4) Canada/United States of America, enUSA, Edition date: 03/2015, Second Printing Instrument Cluster
Page 65 of 319
Trailer
Action
Message
Displays along with a single tone in response to faultssensed by the TBC. See Essential Towing Checks
(page 103).
TRAILER BRAKE MODULE
FAULT
Displays when a correct trailer connection (a trailerwith electric trailer brakes) is sensed during a given ignition cycle.
TRAILER CONNECTED
Displays when a trailer connection becomes discon-
nected, either intentionally or unintentionally, and has been sensed during a given ignition cycle. Disregard
this status if your vehicle is not equipped with a factory installed trailer brake controller. This message may
appear when you use an aftermarket TBC even when the trailer is connected.
TRAILER DISCONNECTED
Displays if there are certain faults in the vehicle wiringand trailer wiring or brake system. See
Essential
Towing Checks (page 103).
WIRING FAULT ON TRAILER
Transmission Action
Message
A reminder to apply the brakes, then shift to park.
SHIFT TO PARK
62
E-Series (TE4) Canada/United States of America, enUSA, Edition date: 03/2015, Second Printing Information Displays
Page 87 of 319
Tow/Haul Mode
To activate tow/haul, press the
button on the gearshift lever.
The TOW HAUL indicator light
illuminates in the instrument cluster.
The tow/haul feature:
• Delays upshifts to reduce the frequency
of transmission shifting.
• Provides engine braking in all forward
gears, which slows your vehicle and
assists you in controlling your vehicle
when descending a grade.
• Depending on driving conditions and
load conditions, may downshift the
transmission, slow your vehicle and
control your vehicle speed when
descending a hill, without pressing the
accelerator pedal. The amount of
downshift braking provided varies
based upon the amount you press the
brake pedal.
The tow/haul feature improves
transmission operation when towing a
trailer or a heavy load. All transmission
gear ranges are available when using
tow/haul.
To deactivate the tow/haul feature and
return to normal driving mode, press the
button on the gearshift lever again. The
TOW HAUL light deactivates. Tow/haul
also deactivates when you power down
your vehicle. WARNING
Do not use the tow/haul feature
when driving in icy or slippery
conditions as the increased engine
braking can cause the rear wheels to slide
and your vehicle to swing around with the
possible loss of vehicle control. Understanding the Shift Positions
of a 6–
Speed Automatic
Transmission Putting your vehicle in or out of gear:
1. Fully press down the brake pedal.
2. Move the gearshift lever into the
desired gear.
3. Come to a complete stop.
4. Move the gearshift lever and securely latch it in park (P).
Park (P)
This position locks the transmission and
prevents the wheels from turning.
Reverse (R)
With the transmission in reverse (R), your
vehicle moves backward. Always come to
a complete stop before shifting into and
out of reverse (R).
Neutral (N)
With the transmission in neutral (N), you
can start your vehicle and it is free to roll.
Hold the brake pedal down while in this
position.
Drive (D)
Drive (D) is the normal driving position for
the best fuel economy. The overdrive
function allows automatic upshifts and
downshifts through gears one through six.
84
E-Series (TE4) Canada/United States of America, enUSA, Edition date: 03/2015, Second Printing TransmissionE161509 E198819
Page 88 of 319
Fourth (4)
Trasnmission operates in fourth (4) gear
only. Used for improved traction on
slippery roads.
Second (2)
Transmission operates in second (2) gear
only. Use second (2) gear to start-up on
slippery roads.
First (1)
•
Transmission operates in first (1) gear
only.
• Provides maximum engine braking.
• Allows upshifts by moving gearshift
lever.
• Does not downshift into first (1) gear
at high speeds; allows for first (1) gear
when vehicle reaches slower speeds.
Forced downshifts
• Allowed in drive (D) with the tow/haul
feature on or off.
• Press the accelerator to the floor.
• Allows transmission to select an
appropriate gear.
Tow/Haul Mode To activate tow/haul, press the
button on the gearshift lever.
The TOW HAUL indicator light
illuminates in the instrument cluster. The tow/haul feature:
•
Delays upshifts to reduce the frequency
of transmission shifting.
• Provides engine braking in all forward
gears, which slows your vehicle and
assists you in controlling your vehicle
when descending a grade.
• Depending on driving conditions and
load conditions, may downshift the
transmission, slow your vehicle and
control your vehicle speed when
descending a hill, without pressing the
accelerator pedal. The amount of
downshift braking provided will vary
based upon the amount you press the
brake pedal.
The tow/haul feature improves
transmission operation when towing a
trailer or a heavy load. All transmission
gear ranges are available when using
tow/haul.
To deactivate the tow/haul feature and
return to normal driving mode, press the
button on the gearshift lever again. The
TOW HAUL light deactivates. Tow/haul
also deactivates when you power down
your vehicle. WARNING
Do not use the tow/haul feature
when driving in icy or slippery
conditions as the increased engine
braking can cause the rear wheels to slide
and your vehicle to swing around with the
possible loss of vehicle control. Brake-Shift Interlock
WARNINGS
Do not drive your vehicle until you
verify that the brake lamps are
working.
85
E-Series (TE4) Canada/United States of America, enUSA, Edition date: 03/2015, Second Printing TransmissionE161509
Page 98 of 319
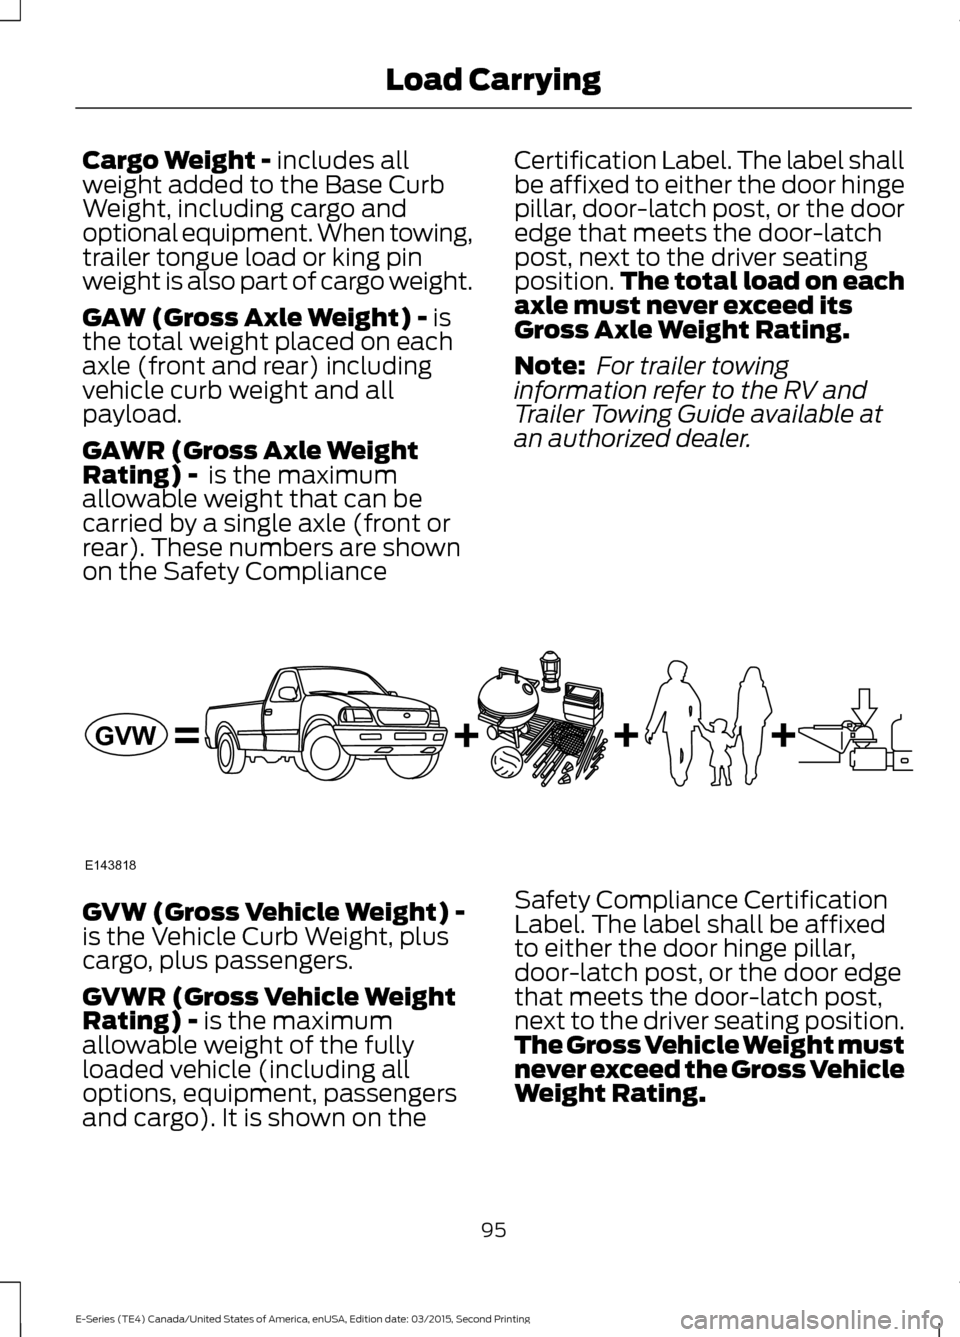
Cargo Weight - includes all
weight added to the Base Curb
Weight, including cargo and
optional equipment. When towing,
trailer tongue load or king pin
weight is also part of cargo weight.
GAW (Gross Axle Weight) -
is
the total weight placed on each
axle (front and rear) including
vehicle curb weight and all
payload.
GAWR (Gross Axle Weight
Rating) -
is the maximum
allowable weight that can be
carried by a single axle (front or
rear). These numbers are shown
on the Safety Compliance Certification Label. The label shall
be affixed to either the door hinge
pillar, door-latch post, or the door
edge that meets the door-latch
post, next to the driver seating
position.
The total load on each
axle must never exceed its
Gross Axle Weight Rating.
Note: For trailer towing
information refer to the RV and
Trailer Towing Guide available at
an authorized dealer. GVW (Gross Vehicle Weight) -
is the Vehicle Curb Weight, plus
cargo, plus passengers.
GVWR (Gross Vehicle Weight
Rating) -
is the maximum
allowable weight of the fully
loaded vehicle (including all
options, equipment, passengers
and cargo). It is shown on the Safety Compliance Certification
Label. The label shall be affixed
to either the door hinge pillar,
door-latch post, or the door edge
that meets the door-latch post,
next to the driver seating position.
The Gross Vehicle Weight must
never exceed the Gross Vehicle
Weight Rating.
95
E-Series (TE4) Canada/United States of America, enUSA, Edition date: 03/2015, Second Printing Load CarryingE143818GVW
Page 100 of 319
GCW (Gross Combined Weight)
- is the Gross Vehicle Weight plus
the weight of the fully loaded
trailer.
GCWR (Gross Combined
Weight Rating) - is the maximum
allowable weight of the vehicle
and the loaded trailer, including
all cargo and passengers, that the
vehicle can handle without risking
damage. (Important: The towing
vehicle ’s braking system is rated
for operation at Gross Vehicle
Weight Rating, not at Gross
Combined Weight Rating.)
Separate functional brakes should
be used for safe control of towed
vehicles and for trailers where the
Gross Combined Weight of the
towing vehicle plus the trailer
exceed the Gross Vehicle Weight
Rating of the towing vehicle. The
Gross Combined Weight must
never exceed the Gross
Combined Weight Rating.
Maximum Loaded Trailer
Weight -
is the highest possible
weight of a fully loaded trailer the
vehicle can tow. It assumes a
vehicle with mandatory options,
driver and front passenger weight
(150 pounds [68 kilograms]
each), no cargo weight (internal
or external) and a tongue load of
10– 15% (conventional trailer) or
king pin weight of 15– 25% (fifth
wheel trailer). Consult an
authorized dealer (or the RV and
Trailer Towing Guide available at
an authorized dealer) for more
detailed information. Tongue Load or Fifth Wheel
King Pin Weight -
refers to the
amount of the weight that a trailer
pushes down on a trailer hitch.
Examples:
For a 5000 pound
(2268 kilogram) conventional
trailer, multiply 5000 by 0.10 and
0.15 to obtain a proper tongue
load range of 500 to 750 pounds
(227 to 340 kilograms). For an
11500 pound (5216 kilogram) fifth
wheel trailer, multiply by 0.15 and
0.25 to obtain a proper king pin
load range of 1725 to 2875 pounds
(782 to 1304 kilograms). WARNINGS
Do not exceed the GVWR or
the GAWR specified on the
Safety Compliance Certification
Label. Do not use replacement tires
with lower load carrying
capacities than the original tires
because they may lower the
vehicle ’s GVWR and GAWR
limitations. Replacement tires
with a higher limit than the original
tires do not increase the GVWR
and GAWR limitations. Exceeding any vehicle weight
rating limitation could result
in serious damage to the vehicle
and/or personal injury. Steps for determining the
correct load limit:
97
E-Series (TE4) Canada/United States of America, enUSA, Edition date: 03/2015, Second Printing Load Carrying
Page 101 of 319
1. Locate the statement "The
combined weight of occupants
and cargo should never exceed
XXX kg or XXX lb." on your
vehicle ’s placard.
2. Determine the combined
weight of the driver and
passengers that will be riding
in your vehicle.
3. Subtract the combined weight
of the driver and passengers
from XXX kg or XXX lb.
4. The resulting figure equals the
available amount of cargo and
luggage load capacity. For
example, if the “XXX” amount
equals 1,400 lb. and there will
be five 150 lb. passengers in
your vehicle, the amount of
available cargo and luggage
load capacity is 650 lb.
(1400-750 (5 x 150) = 650 lb.).
5. Determine the combined
weight of luggage and cargo
being loaded on the vehicle.
That weight may not safely
exceed the available cargo and
luggage load capacity
calculated in Step 4.
6. If your vehicle will be towing a
trailer, load from your trailer
will be transferred to your
vehicle. Consult this manual to
determine how this reduces the
available cargo and luggage
load capacity of your vehicle.
The following gives you a few
examples on how to calculate the
available amount of cargo and
luggage load capacity: *Suppose your vehicle has a
1400-pound (635-kilogram) cargo
and luggage capacity. You decide
to go golfing. Is there enough load
capacity to carry you, four of your
friends and all the golf bags? You
and four friends average 220
pounds (99 kilograms) each and
the golf bags weigh approximately
30 pounds (13.5 kilograms) each.
The calculation would be: 1400 -
(5 x 220) - (5 x 30) = 1400 - 1100
- 150 = 150 pounds. Yes, you have
enough load capacity in your
vehicle to transport four friends
and your golf bags. In metric units,
the calculation would be: 635
kilograms - (5 x 99 kilograms) -
(5 x 13.5 kilograms) = 635 - 495 -
67.5 = 72.5 kilograms.
*Suppose your vehicle has a
1400-pound (635-kilogram) cargo
and luggage capacity. You and
one of your friends decide to pick
up cement from the local home
improvement store to finish that
patio you have been planning for
the past two years. Measuring the
inside of the vehicle with the rear
seat folded down, you have room
for twelve 100-pound
(45-kilogram) bags of cement. Do
you have enough load capacity to
transport the cement to your
home? If you and your friend each
weigh 220 pounds (99 kilograms),
the calculation would be: 1400 -
(2 x 220) - (12 x 100) = 1400 - 440
- 1200 = - 240 pounds. No, you do
not have enough cargo capacity
to carry that much weight. In
metric units, the calculation would
98
E-Series (TE4) Canada/United States of America, enUSA, Edition date: 03/2015, Second Printing Load Carrying
Page 103 of 319
TOWING A TRAILER
WARNINGS
Do not exceed the Gross
Vehicle Weight Rating or the
Gross Axle Weight Rating
specified on the certification label. Towing trailers beyond the
maximum recommended
gross trailer weight exceeds the
limit of the vehicle and could
result in engine damage,
transmission damage, structural
damage, loss of vehicle control,
vehicle rollover and personal
injury. Your vehicle may have electrical
items, for example fuses or relays,
related to towing. See Fuses
(page 127).
Your vehicle's load capacity
designation is by weight, not by
volume, so you cannot necessarily
use all available space when
loading your vehicle.
Towing a trailer places an extra
load on your vehicle's engine,
transmission, axle, brakes, tires
and suspension. Inspect these
components periodically during,
and after, any towing operation. Load Placement
To help minimize how trailer
movement affects your vehicle
when driving:
•
Load the heaviest items closest
to the trailer floor.
• Load the heaviest items
centered between the left and
right side trailer tires.
• Load the heaviest items above
the trailer axles or just slightly
forward toward the trailer
tongue. Do not allow the final
trailer tongue weight to go
above or below 10-15% of the
loaded trailer weight.
• Select a tow bar with the
correct rise or drop. When both
the loaded vehicle and trailer
are connected, the trailer frame
should be level, or slightly
angled down toward your
vehicle, when viewed from the
side.
When driving with a trailer or
payload, a slight takeoff vibration
or shudder may be present due to
the increased payload weight.
Additional information regarding
correct trailer loading and setting
your vehicle up for towing is
located in another chapter of this
Owner's Manual. See
Load Limit
(page 93). You can also find the
information in the RV & Trailer
Towing Guide. See an authorized
dealer.
100
E-Series (TE4) Canada/United States of America, enUSA, Edition date: 03/2015, Second Printing Towing