load FORD E SERIES 2019 Owners Manual
[x] Cancel search | Manufacturer: FORD, Model Year: 2019, Model line: E SERIES, Model: FORD E SERIES 2019Pages: 329, PDF Size: 2.92 MB
Page 5 of 329
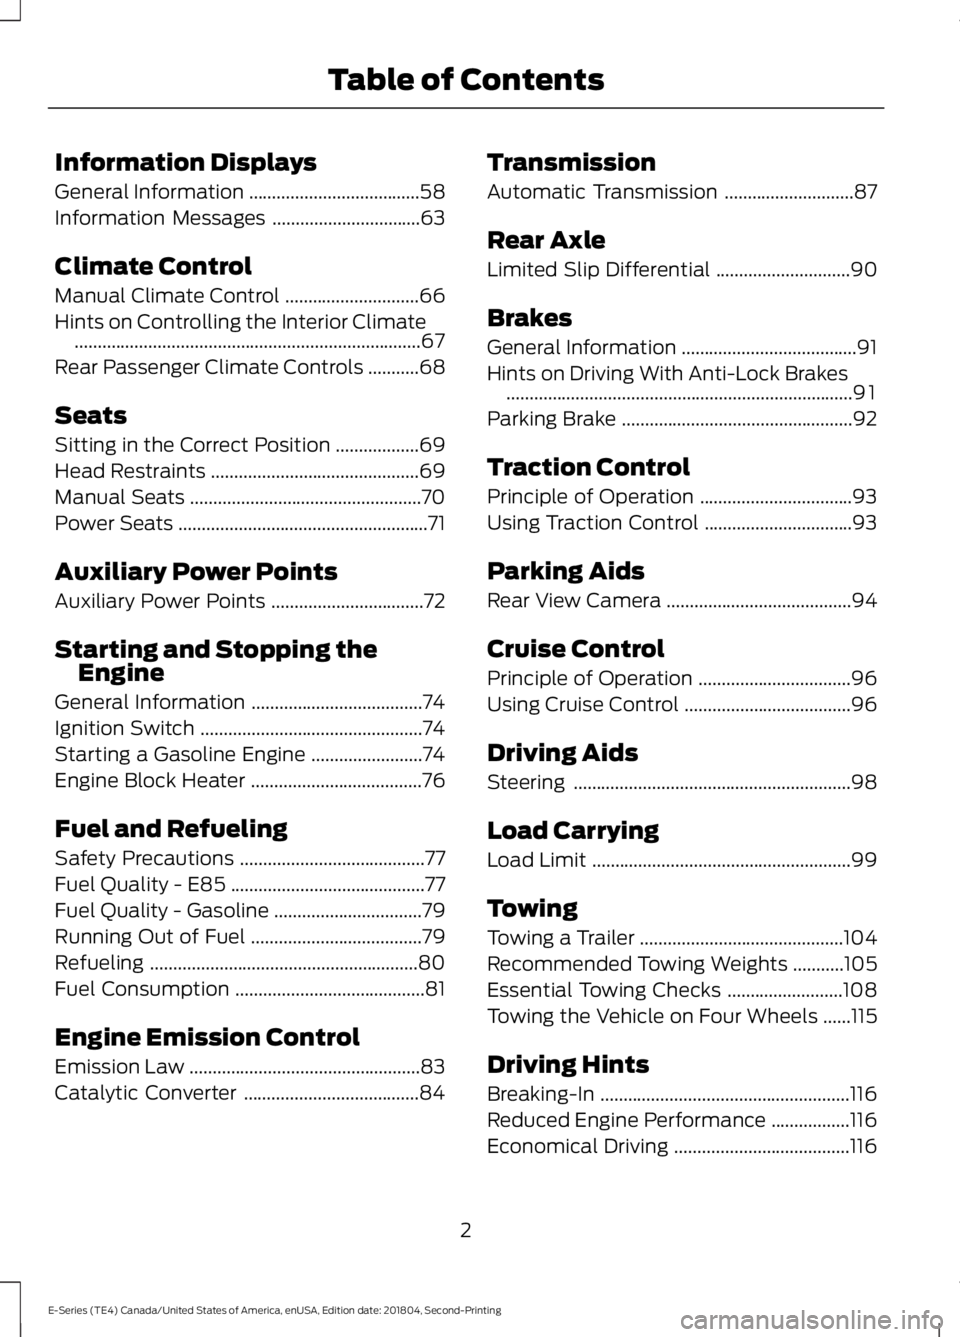
Information Displays
General Information.....................................58
Information Messages................................63
Climate Control
Manual Climate Control.............................66
Hints on Controlling the Interior Climate...........................................................................67
Rear Passenger Climate Controls...........68
Seats
Sitting in the Correct Position..................69
Head Restraints.............................................69
Manual Seats..................................................70
Power Seats......................................................71
Auxiliary Power Points
Auxiliary Power Points.................................72
Starting and Stopping theEngine
General Information.....................................74
Ignition Switch................................................74
Starting a Gasoline Engine........................74
Engine Block Heater.....................................76
Fuel and Refueling
Safety Precautions........................................77
Fuel Quality - E85..........................................77
Fuel Quality - Gasoline................................79
Running Out of Fuel.....................................79
Refueling..........................................................80
Fuel Consumption.........................................81
Engine Emission Control
Emission Law..................................................83
Catalytic Converter......................................84
Transmission
Automatic Transmission............................87
Rear Axle
Limited Slip Differential.............................90
Brakes
General Information......................................91
Hints on Driving With Anti-Lock Brakes...........................................................................91
Parking Brake..................................................92
Traction Control
Principle of Operation.................................93
Using Traction Control................................93
Parking Aids
Rear View Camera........................................94
Cruise Control
Principle of Operation.................................96
Using Cruise Control....................................96
Driving Aids
Steering............................................................98
Load Carrying
Load Limit........................................................99
Towing
Towing a Trailer............................................104
Recommended Towing Weights...........105
Essential Towing Checks.........................108
Towing the Vehicle on Four Wheels......115
Driving Hints
Breaking-In......................................................116
Reduced Engine Performance.................116
Economical Driving......................................116
2
E-Series (TE4) Canada/United States of America, enUSA, Edition date: 201804, Second-Printing
Table of Contents
Page 75 of 329
12 Volt DC Power Point
WARNING: Do not plug optionalelectrical accessories into the cigarlighter socket. Incorrect use of the cigarlighter can cause damage not coveredby the vehicle warranty, and can resultin fire or serious injury.
Note:When you switch the ignition on, youcan use the socket to power 12 voltappliances with a maximum current ratingof 15 amps.
If the power supply does not work after youswitch the ignition off, switch the ignitionon.Note:Do not hang any accessory from theaccessory plug.
Note:Do not use the power point over thevehicle capacity of 12 volt DC 180 watts ora fuse may blow.
Note:Always keep the power point capsclosed when not in use.
Do not insert objects other than anaccessory plug into the power point. Thisdamages the power point and may blowthe fuse.
Run the vehicle for full capacity use of thepower point.
To prevent the battery from running out ofcharge:
•Do not use the power point longer thannecessary when the vehicle is notrunning.
•Do not leave devices plugged inovernight or when you park your vehiclefor extended periods.
Locations
Power points may be in the followinglocations:
•On the instrument panel.
•Inside the glove box.
•Behind the driver's seat, upper trimpanel.
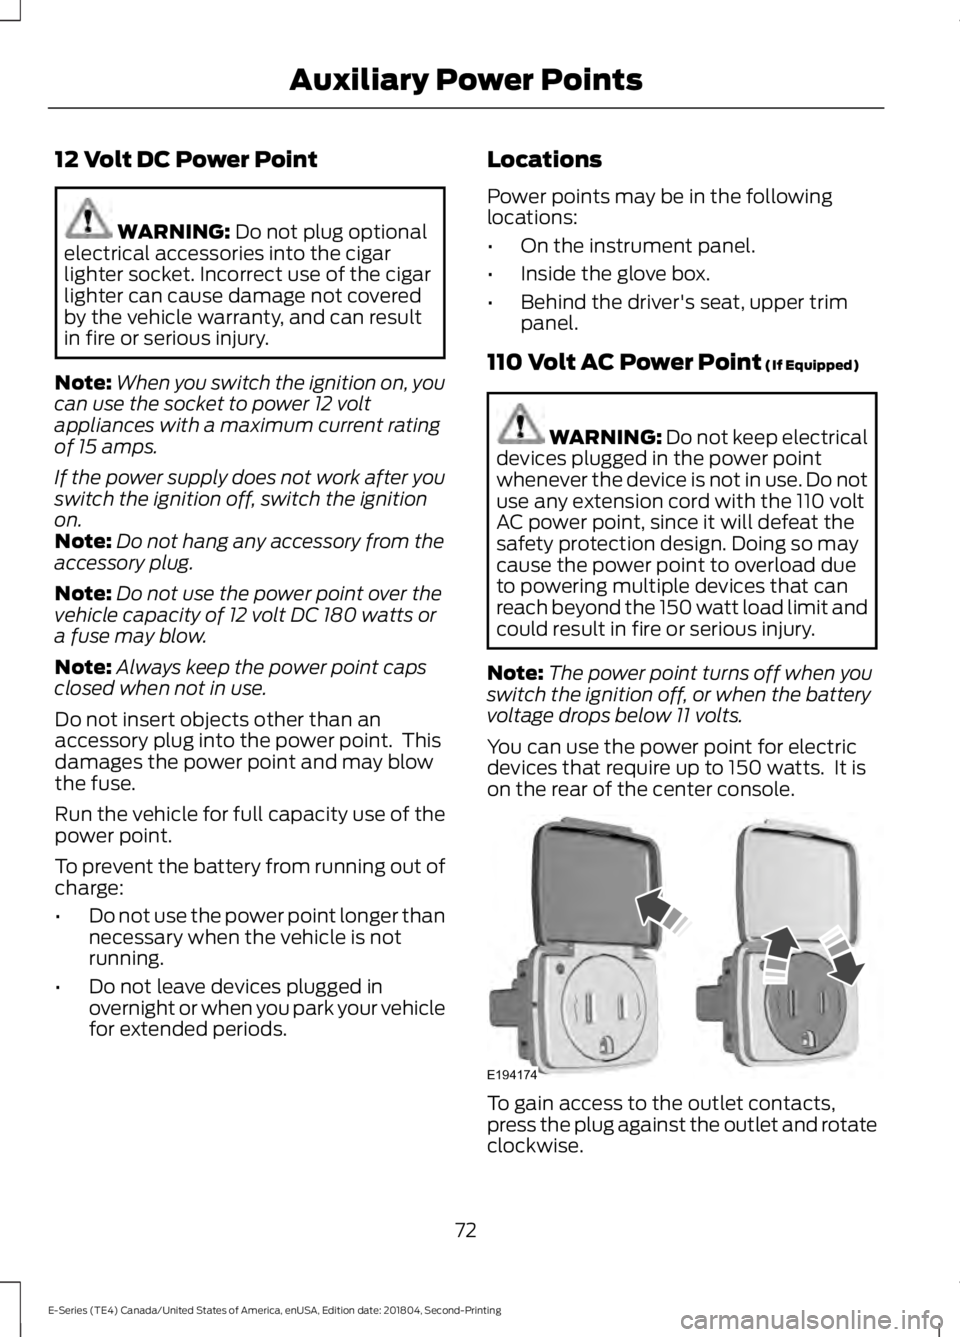
110 Volt AC Power Point (If Equipped)
WARNING: Do not keep electricaldevices plugged in the power pointwhenever the device is not in use. Do notuse any extension cord with the 110 voltAC power point, since it will defeat thesafety protection design. Doing so maycause the power point to overload dueto powering multiple devices that canreach beyond the 150 watt load limit andcould result in fire or serious injury.
Note:The power point turns off when youswitch the ignition off, or when the batteryvoltage drops below 11 volts.
You can use the power point for electricdevices that require up to 150 watts. It ison the rear of the center console.
To gain access to the outlet contacts,press the plug against the outlet and rotateclockwise.
72
E-Series (TE4) Canada/United States of America, enUSA, Edition date: 201804, Second-Printing
Auxiliary Power PointsE194174
Page 76 of 329
When the indicator light on the power pointis:
•On: The power point is working, theignition is on and a device is pluggedin.
•Off: The power point is off, the ignitionis off or no device is plugged in.
•Flashing: The power point is in faultmode.
The power outlet temporarily turns offpower when in fault mode if the deviceexceeds the 150 watt limit. Unplug yourdevice and switch the ignition off. Switchthe ignition back on, but do not plug yourdevice back in. Let the system cool off andswitch the ignition off to reset the faultmode. Switch the ignition back on andmake sure the indicator light remains on.
Do not use the power point for certainelectric devices, including:
•Cathode-ray, tube-type televisions.
•Motor loads, such as vacuum cleaners,electric saws and other electric powertools or compressor-drivenrefrigerators.
•Measuring devices, which processprecise data, such as medicalequipment or measuring equipment.
•Other appliances requiring anextremely stable power supply such asmicrocomputer-controlled electricblankets or touch-sensor lamps.
73
E-Series (TE4) Canada/United States of America, enUSA, Edition date: 201804, Second-Printing
Auxiliary Power Points
Page 85 of 329
Impacting Fuel Economy
•Incorrect tire inflation pressures.
•Fully loading your vehicle.
•Carrying unnecessary weight.
•Adding certain accessories to yourvehicle such as bug deflectors, rollbarsor light bars, running boards and skiracks.
•Using fuel blended with alcohol. SeeFuel Quality (page 77).
•Fuel economy may decrease with lowertemperatures.
•Fuel economy may decrease whendriving short distances.
•You may get better fuel economy whendriving on flat terrain than when drivingon hilly terrain.
82
E-Series (TE4) Canada/United States of America, enUSA, Edition date: 201804, Second-Printing
Fuel and Refueling
Page 91 of 329
Tow/Haul Mode
To activate tow/haul, press thebutton on the gearshift lever.The TOW HAUL indicator lightilluminates in the instrument cluster.
The tow/haul feature:
•Delays upshifts to reduce the frequencyof transmission shifting.
•Provides engine braking in all forwardgears, which slows your vehicle andassists you in controlling your vehiclewhen descending a slope.
•Depending on driving conditions andload conditions, may downshift thetransmission, slow your vehicle andcontrol your vehicle speed whendescending a hill, without pressing theaccelerator pedal. The amount ofdownshift braking provided will varybased upon the amount you press thebrake pedal.
The tow/haul feature improvestransmission operation when towing atrailer or a heavy load. All transmissiongear ranges are available when usingtow/haul.
To deactivate the tow/haul feature andreturn to normal driving mode, press thebutton on the gearshift lever again. TheTOW HAUL light deactivates. Tow/haulalso deactivates when you power downyour vehicle.
WARNING: Do not use tow/haulwhen the road surface is slippery. Failureto follow this instruction could result inthe loss of control of your vehicle.
Brake-Shift Interlock
WARNING: When doing thisprocedure, you need to take thetransmission out of park (P) whichmeans your vehicle can roll freely. Toavoid unwanted vehicle movement,always fully apply the parking brake priorto doing this procedure. Use wheelschocks if appropriate.
WARNING: If the parking brake isfully released, but the brake warninglamp remains illuminated, the brakesmay not be working properly. Have yourvehicle checked as soon as possible.
Note:Do not drive your vehicle until youverify that the brake lamps are working.
Your vehicle has a brake-shift interlockfeature that prevents the gearshift leverfrom moving from park (P) when theignition is in the 3 (on) position and thebrake pedal is not pressed.
If you cannot move the gearshift lever outof park (P) position with the ignition in the4 (on) position and the brake pedalpressed, a malfunction may have occurred.It is possible that a fuse has blown or yourvehicle’s brake lamps are not operatingproperly. See Fuse Specification Chart(page 131).
If the fuse is not blown and the brakelamps are working properly, the followingprocedure allows you to move the gearshiftlever from park (P):
1. Apply the parking brake and turn theignition on.
2.Use a screwdriver to remove the lowertrim panel under the steering column.Make sure not to disturb the wires onthe electrical connector.
88
E-Series (TE4) Canada/United States of America, enUSA, Edition date: 201804, Second-Printing
TransmissionE161509
Page 102 of 329
LOAD LIMIT
Vehicle Loading - with andwithout a Trailer
This section guides you in theproper loading of your vehicle,trailer, or both. Keep your loadedvehicle weight within its designrating capability, with or withouta trailer. Properly loading yourvehicle provides maximum returnof vehicle design performance.Before you load your vehicle,become familiar with thefollowing terms for determiningyour vehicle’s weight rating, withor without a trailer, from thevehicle’s Tire and LoadingInformation label or SafetyCompliance Certification label.
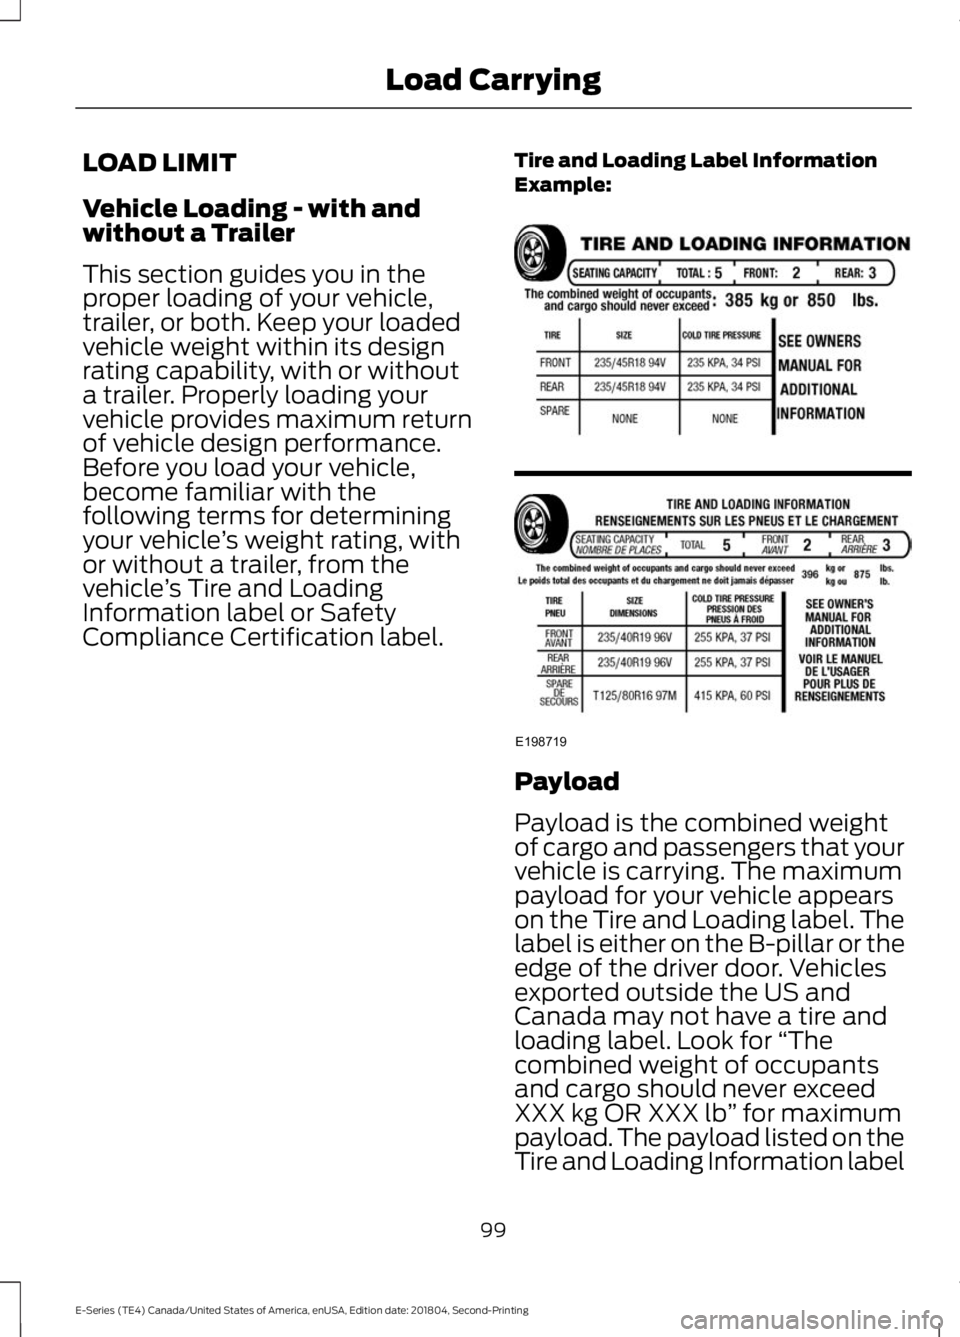
Tire and Loading Label InformationExample:
Payload
Payload is the combined weightof cargo and passengers that yourvehicle is carrying. The maximumpayload for your vehicle appearson the Tire and Loading label. Thelabel is either on the B-pillar or theedge of the driver door. Vehiclesexported outside the US andCanada may not have a tire andloading label. Look for “Thecombined weight of occupantsand cargo should never exceedXXX kg OR XXX lb” for maximumpayload. The payload listed on theTire and Loading Information label
99
E-Series (TE4) Canada/United States of America, enUSA, Edition date: 201804, Second-Printing
Load CarryingE198719
Page 103 of 329
is the maximum payload for yourvehicle as built by the assemblyplant. If you install any additionalequipment on your vehicle, youmust determine the new payload.Subtract the weight of theequipment from the payload listedon the Tire and Loading label.When towing, trailer tongueweight or king pin weight is alsopart of payload.
WARNING: Theappropriate loading capacity ofyour vehicle can be limited eitherby volume capacity (how muchspace is available) or by payloadcapacity (how much weight thevehicle should carry). Once youhave reached the maximumpayload of your vehicle, do notadd more cargo, even if there isspace available. Overloading orimproperly loading your vehiclecan contribute to loss of vehiclecontrol and vehicle rollover.
GAWR (Gross Axle WeightRating)
GAWR is the maximum allowableweight that a single axle (front orrear) can carry. These numbersare on the Safety ComplianceCertification label. The label islocated on the door hinge pillar,door-latch post, or the door edgethat meets the door-latch post,next to the driver seating position.
The total load on each axle mustnever exceed its Gross AxleWeight Rating.
GVWR (Gross Vehicle WeightRating)
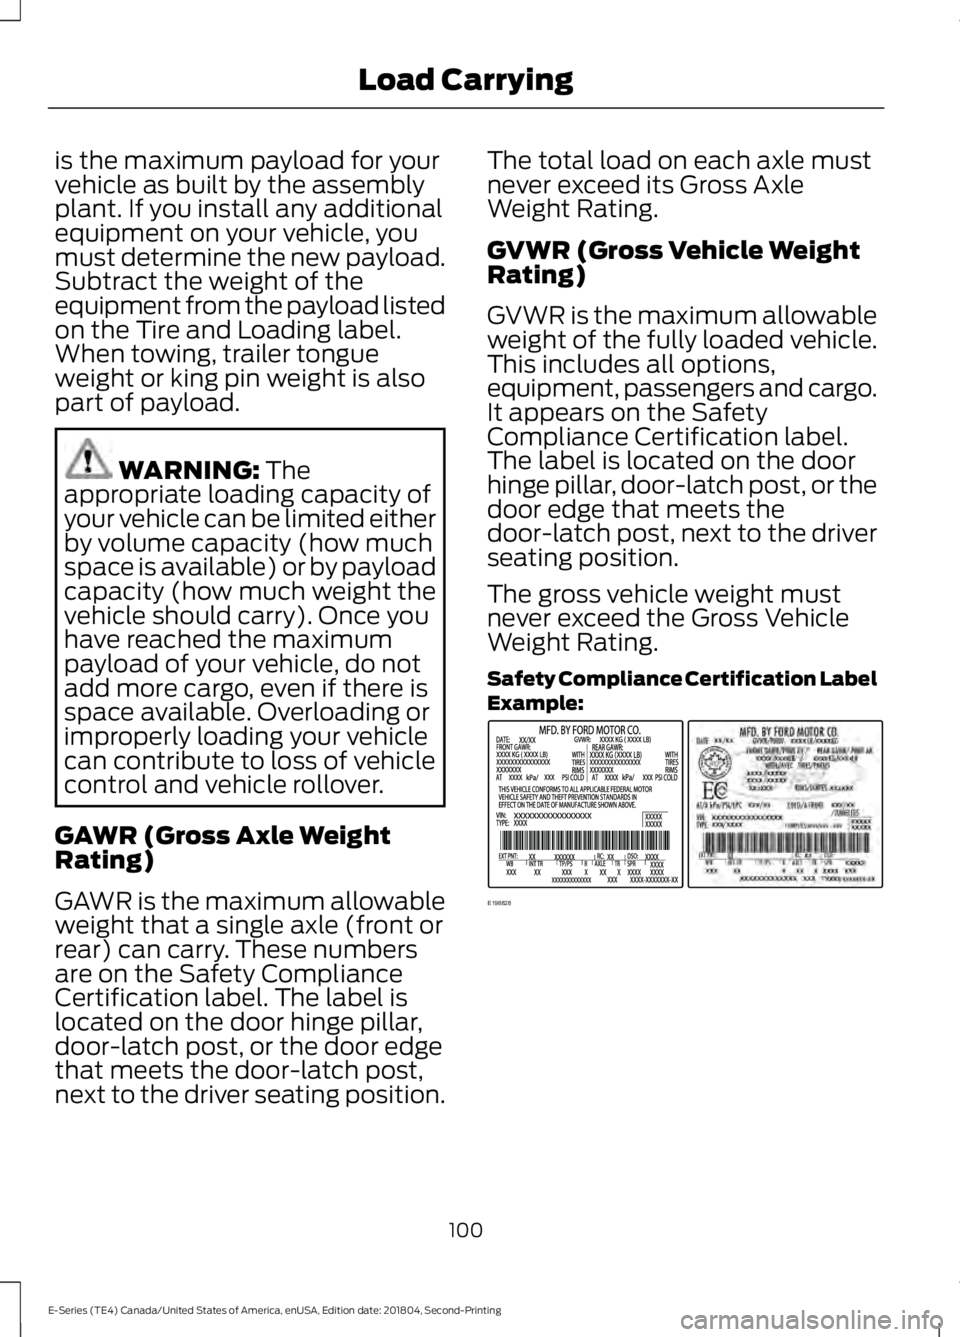
GVWR is the maximum allowableweight of the fully loaded vehicle.This includes all options,equipment, passengers and cargo.It appears on the SafetyCompliance Certification label.The label is located on the doorhinge pillar, door-latch post, or thedoor edge that meets thedoor-latch post, next to the driverseating position.
The gross vehicle weight mustnever exceed the Gross VehicleWeight Rating.
Safety Compliance Certification LabelExample:
100
E-Series (TE4) Canada/United States of America, enUSA, Edition date: 201804, Second-Printing
Load CarryingE198828
Page 104 of 329
WARNING: Exceeding theSafety Compliance Certificationlabel vehicle weight limits canadversely affect theperformance and handling ofyour vehicle, cause vehicledamage and can result in theloss of control of your vehicle,serious personal injury or death.
Maximum Loaded TrailerWeight
Maximum loaded trailer weight isthe highest possible weight of afully loaded trailer the vehicle cantow. Consult an authorized dealer(or the RV and Trailer TowingGuide available at an authorizeddealer) for more detailed
information.
GCWR (Gross CombinedWeight Rating)
GCWR is the maximum allowableweight of the vehicle and theloaded trailer, including all cargoand passengers, that the vehiclecan handle without riskingdamage. (Important: The towingvehicle’s braking system is ratedfor operation at Gross Vehicle
Weight Rating, not at GrossCombined Weight Rating.)Separate functional brakes shouldbe used for safe control of towedvehicles and for trailers where theGross Combined Weight of thetowing vehicle plus the trailerexceed the Gross Vehicle WeightRating of the towing vehicle.
The gross combined weight mustnever exceed the Gross CombinedWeight Rating.
Note: For trailer towinginformation refer to the RV andTrailer Towing Guide available atan authorized dealer.
WARNING: Do not exceedthe GVWR or the GAWRspecified on the certificationlabel.
WARNING: Do not usereplacement tires with lowerload carrying capacities than theoriginal tires because they maylower your vehicle's GVWR andGAWR limitations. Replacementtires with a higher limit than the
original tires do not increase theGVWR and GAWR limitations.
WARNING: Exceeding anyvehicle weight rating canadversely affect theperformance and handling ofyour vehicle, cause vehicledamage and can result in theloss of control of your vehicle,serious personal injury or death.
Steps for determining thecorrect load limit:
1. Locate the statement "Thecombined weight of occupantsand cargo should never exceedXXX kg or XXX lb." on yourvehicle’s placard.
101
E-Series (TE4) Canada/United States of America, enUSA, Edition date: 201804, Second-Printing
Load Carrying
Page 105 of 329
2.Determine the combinedweight of the driver andpassengers that will be ridingin your vehicle.
3.Subtract the combined weightof the driver and passengersfrom XXX kg or XXX lb.
4.The resulting figure equals theavailable amount of cargo andluggage load capacity. Forexample, if the “XXX” amountequals 1,400 lb. and there willbe five 150 lb. passengers inyour vehicle, the amount ofavailable cargo and luggageload capacity is 650 lb.(1400-750 (5 x 150) = 650 lb.)
5.Determine the combinedweight of luggage and cargobeing loaded on the vehicle.That weight may not safelyexceed the available cargo andluggage load capacitycalculated in Step 4.
6.If your vehicle will be towing atrailer, load from your trailerwill be transferred to yourvehicle. Consult this manual todetermine how this reduces theavailable cargo and luggageload capacity of your vehicle.
Helpful examples for calculatingthe available amount of cargoand luggage load capacity
Suppose your vehicle has a1400-pound (635-kilogram) cargoand luggage capacity. You decideto go golfing. Is there enough loadcapacity to carry you, four of yourfriends and all the golf bags? Youand four friends average 220pounds (99 kilograms) each andthe golf bags weigh approximately30 pounds (13.5 kilograms) each.The calculation would be: 1400 -(5 x 220) - (5 x 30) = 1400 - 1100- 150 = 150 pounds. Yes, you haveenough load capacity in yourvehicle to transport four friendsand your golf bags. In metric units,the calculation would be: 635kilograms - (5 x 99 kilograms) -(5 x 13.5 kilograms) = 635 - 495 -67.5 = 72.5 kilograms.
Suppose your vehicle has a1400-pound (635-kilogram) cargoand luggage capacity. You andone of your friends decide to pickup cement from the local homeimprovement store to finish thatpatio you have been planning forthe past two years. Measuring theinside of the vehicle with the rearseat folded down, you have roomfor twelve 100-pound(45-kilogram) bags of cement. Doyou have enough load capacity totransport the cement to yourhome? If you and your friend eachweigh 220 pounds (99 kilograms),
the calculation would be: 1400 -(2 x 220) - (12 x 100) = 1400 - 440
102
E-Series (TE4) Canada/United States of America, enUSA, Edition date: 201804, Second-Printing
Load Carrying
Page 106 of 329
- 1200 = - 240 pounds. No, you donot have enough cargo capacityto carry that much weight. Inmetric units, the calculation wouldbe: 635 kilograms - (2 x 99kilograms) - (12 x 45 kilograms) =635 - 198 - 540 = -103 kilograms.You will need to reduce the loadweight by at least 240 pounds(104 kilograms). If you removethree 100-pound (45-kilogram)cement bags, then the loadcalculation would be:1400 - (2 x220) - (9 x 100) = 1400 - 440 -900 = 60 pounds. Now you havethe load capacity to transport thecement and your friend home. Inmetric units, the calculation wouldbe: 635 kilograms - (2 x 99kilograms) - (9 x 45 kilograms) =635 - 198 - 405 = 32 kilograms.
The above calculations alsoassume that the loads arepositioned in your vehicle in amanner that does not overloadthe front or the rear gross axleweight rating specified for yourvehicle on the Safety ComplianceCertification label.
Special Loading Instructionsfor Owners of Pick-up Trucksand Utility-type Vehicles
WARNING: When loadingthe roof racks, we recommendyou evenly distribute the load,as well as maintain a low centerof gravity. Loaded vehicles, with
higher centers of gravity, may
handle differently than unloadedvehicles. Take extra precautions,such as slower speeds andincreased stopping distance,when driving a heavily loadedvehicle.
103
E-Series (TE4) Canada/United States of America, enUSA, Edition date: 201804, Second-Printing
Load Carrying