ESP FORD E SERIES 2022 User Guide
[x] Cancel search | Manufacturer: FORD, Model Year: 2022, Model line: E SERIES, Model: FORD E SERIES 2022Pages: 300, PDF Size: 3.18 MB
Page 56 of 300
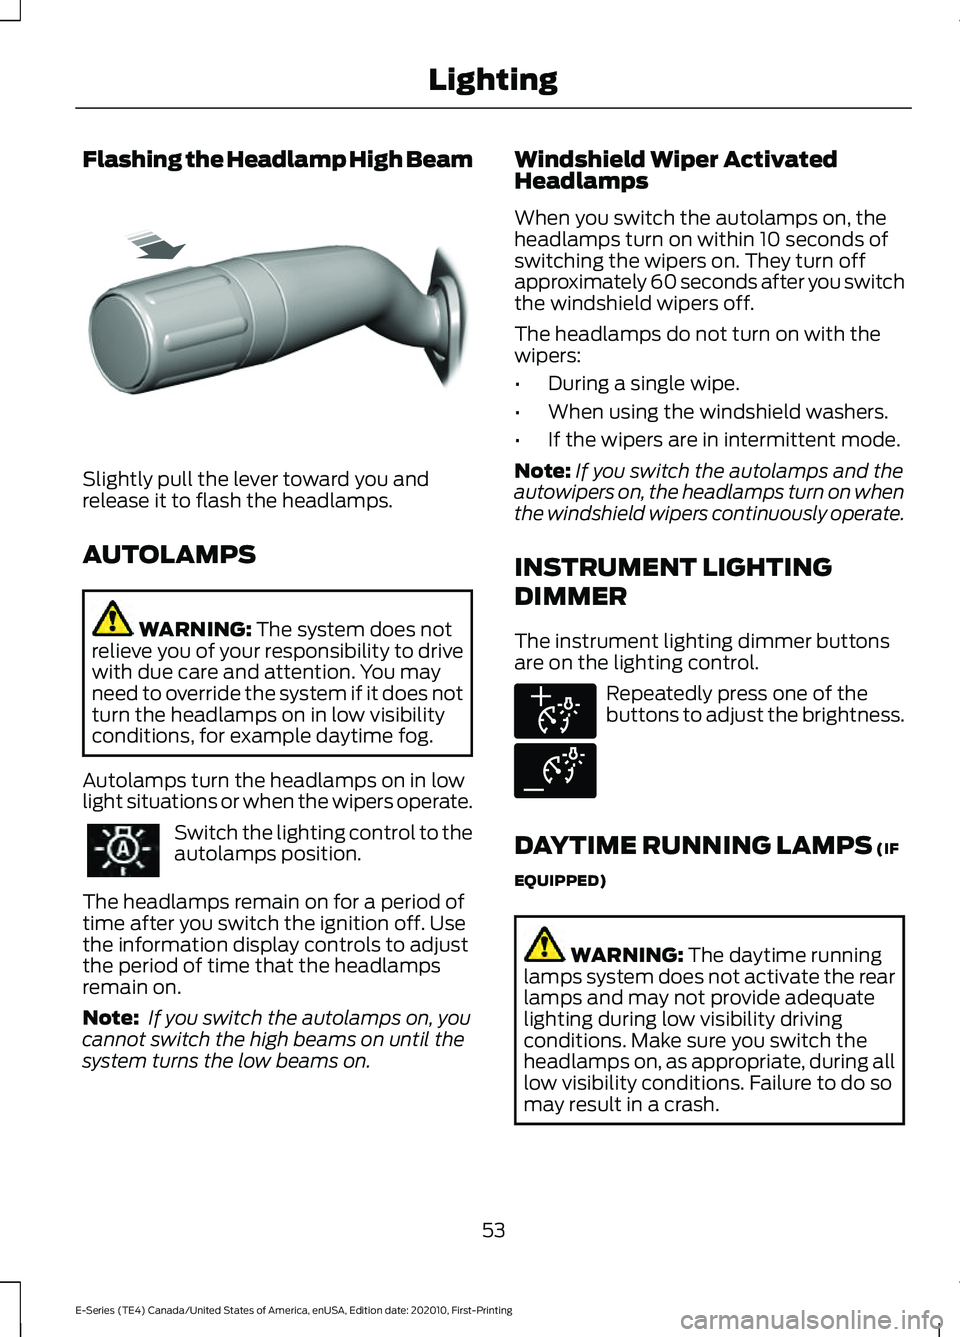
Flashing the Headlamp High Beam
Slightly pull the lever toward you and
release it to flash the headlamps.
AUTOLAMPS
WARNING: The system does not
relieve you of your responsibility to drive
with due care and attention. You may
need to override the system if it does not
turn the headlamps on in low visibility
conditions, for example daytime fog.
Autolamps turn the headlamps on in low
light situations or when the wipers operate. Switch the lighting control to the
autolamps position.
The headlamps remain on for a period of
time after you switch the ignition off. Use
the information display controls to adjust
the period of time that the headlamps
remain on.
Note: If you switch the autolamps on, you
cannot switch the high beams on until the
system turns the low beams on. Windshield Wiper Activated
Headlamps
When you switch the autolamps on, the
headlamps turn on within 10 seconds of
switching the wipers on. They turn off
approximately 60 seconds after you switch
the windshield wipers off.
The headlamps do not turn on with the
wipers:
•
During a single wipe.
• When using the windshield washers.
• If the wipers are in intermittent mode.
Note: If you switch the autolamps and the
autowipers on, the headlamps turn on when
the windshield wipers continuously operate.
INSTRUMENT LIGHTING
DIMMER
The instrument lighting dimmer buttons
are on the lighting control. Repeatedly press one of the
buttons to adjust the brightness.
DAYTIME RUNNING LAMPS
(IF
EQUIPPED) WARNING:
The daytime running
lamps system does not activate the rear
lamps and may not provide adequate
lighting during low visibility driving
conditions. Make sure you switch the
headlamps on, as appropriate, during all
low visibility conditions. Failure to do so
may result in a crash.
53
E-Series (TE4) Canada/United States of America, enUSA, Edition date: 202010, First-Printing LightingE311233 E291299 E291298
Page 58 of 300
WHAT IS AUTOMATIC HIGH
BEAM CONTROL
The system turns on high beams if it is dark
enough and no other traffic is present. If it
detects an approaching vehicle
’s
headlamps or tail lamps, or street lighting
ahead, the system turns the high beams
off. Low beams remain on.
A camera sensor, centrally mounted
behind the windshield of your vehicle,
continuously monitors conditions to turn
the high beams on and off.
SWITCHING AUTOMATIC HIGH
BEAM CONTROL ON AND OFF
Switch the system on or off using the
information display. See General
Information (page 65).
Activating the Automatic High
Beam Control Switch the lighting control to the
autolamps position to activate.
See
Autolamps (page 53).
Note: Automatic high beams are not
available when autolamps are not turned
on.
When active, the high beams turn on if:
• The ambient light level is low enough.
• There is no traffic in front of your
vehicle.
• The vehicle speed is greater than
approximately
32 mph (52 km/h).
When active, the high beams turn off if:
• The ambient light level is high enough
that high beams are not required.
• The system detects an approaching
vehicle's headlamps or tail lamps.
• The system detects severe rain, snow
or fog. •
The camera is blocked.
• The vehicle speed falls below
approximately
27 mph (44 km/h).
Note: The deactivation speed is lower on
curves.
Note: High beam reactivation may be
delayed in certain curvy road situations.
Note: The system may not operate properly
if the sensor is blocked. Keep the windshield
free from obstruction or damage.
Note: The system may not operate properly
in cold or inclement conditions. You can
switch on the high beams by overriding the
system.
Note: If the system detects a blockage, for
example bird droppings, bug splatter, snow
or ice, the system goes into low beam mode
until you clear the blockage. A message may
appear in the information display if the
camera is blocked.
Note: Using much larger tires or equipping
vehicle accessories such as snowplows can
modify your vehicle's ride height and
degrade automatic high beam control
performance.
AUTOMATIC HIGH BEAM
CONTROL INDICATORS The indicator illuminates to
confirm when the system is
ready to assist.
OVERRIDING AUTOMATIC
HIGH BEAM CONTROL WARNING:
The system does not
relieve you of your responsibility to drive
with due care and attention. You may
need to override the system if it does not
turn the high beams on or off.
55
E-Series (TE4) Canada/United States of America, enUSA, Edition date: 202010, First-Printing Automatic High Beam Control
Page 65 of 300
WARNING LAMPS AND
INDICATORS
The following warning lamps and
indicators alert you to a vehicle condition
that may become serious. Some lamps
illuminate when you start your vehicle to
make sure they work. If any lamps remain
on after starting your vehicle, refer to the
respective system warning lamp for further
information.
Note:
Some warning indicators appear in
the information display and operate the
same as a warning lamp but do not
illuminate when you start your vehicle.
Airbag Warning Lamp If it does not illuminate when you
switch the ignition on, continues
to flash or remains on when the
engine is running, this indicates a
malfunction. Have your vehicle checked
as soon as possible.
Anti-Lock Brake System Warning
Lamp If it illuminates when you are
driving, this indicates a
malfunction. Your vehicle
continues to have normal braking without
the anti-lock brake system function. Have
your vehicle checked as soon as possible.
Battery If it illuminates while driving, it
indicates a malfunction. Switch
off all unnecessary electrical
equipment and have an authorized dealer
check the system immediately. Brake System Warning Lamp WARNING: Driving your vehicle
with the warning lamp on is dangerous.
A significant decrease in braking
performance may occur. It may take you
longer to stop your vehicle. Have your
vehicle checked as soon as possible.
Driving extended distances with the
parking brake engaged can cause brake
failure and the risk of personal injury.
Note: Indicators vary depending on region.
This lamp is a dual function lamp and will
illuminate when:
• You apply the parking brake with the
ignition on.
• Your vehicle has a brake fault or low
brake fluid level, regardless of parking
brake position. If the lamp illuminates while you
are moving, you may have the
parking brake applied. Be sure
that the parking brake is off.
Have your vehicle checked as
soon as possible if the lamp
continues to illuminate.
Cruise Control Indicator
(If Equipped) It illuminates when you switch
the system on.
See
What Is Cruise Control
(page 109).
Direction Indicator Illuminates when you switch on
the left or right direction
indicator or the hazard warning
flasher. If the indicators stay on or flash
faster, check for a burned out bulb.
62
E-Series (TE4) Canada/United States of America, enUSA, Edition date: 202010, First-Printing Instrument ClusterE67017 E270480 E71340
Page 68 of 300
GENERAL INFORMATION
WARNING: Driving while distracted
can result in loss of vehicle control, crash
and injury. We strongly recommend that
you use extreme caution when using any
device that may take your focus off the
road. Your primary responsibility is the
safe operation of your vehicle. We
recommend against the use of any
hand-held device while driving and
encourage the use of voice-operated
systems when possible. Make sure you
are aware of all applicable local laws
that may affect the use of electronic
devices while driving.
Note: Trailer options are not available if
your vehicle speed is greater than 3 mph
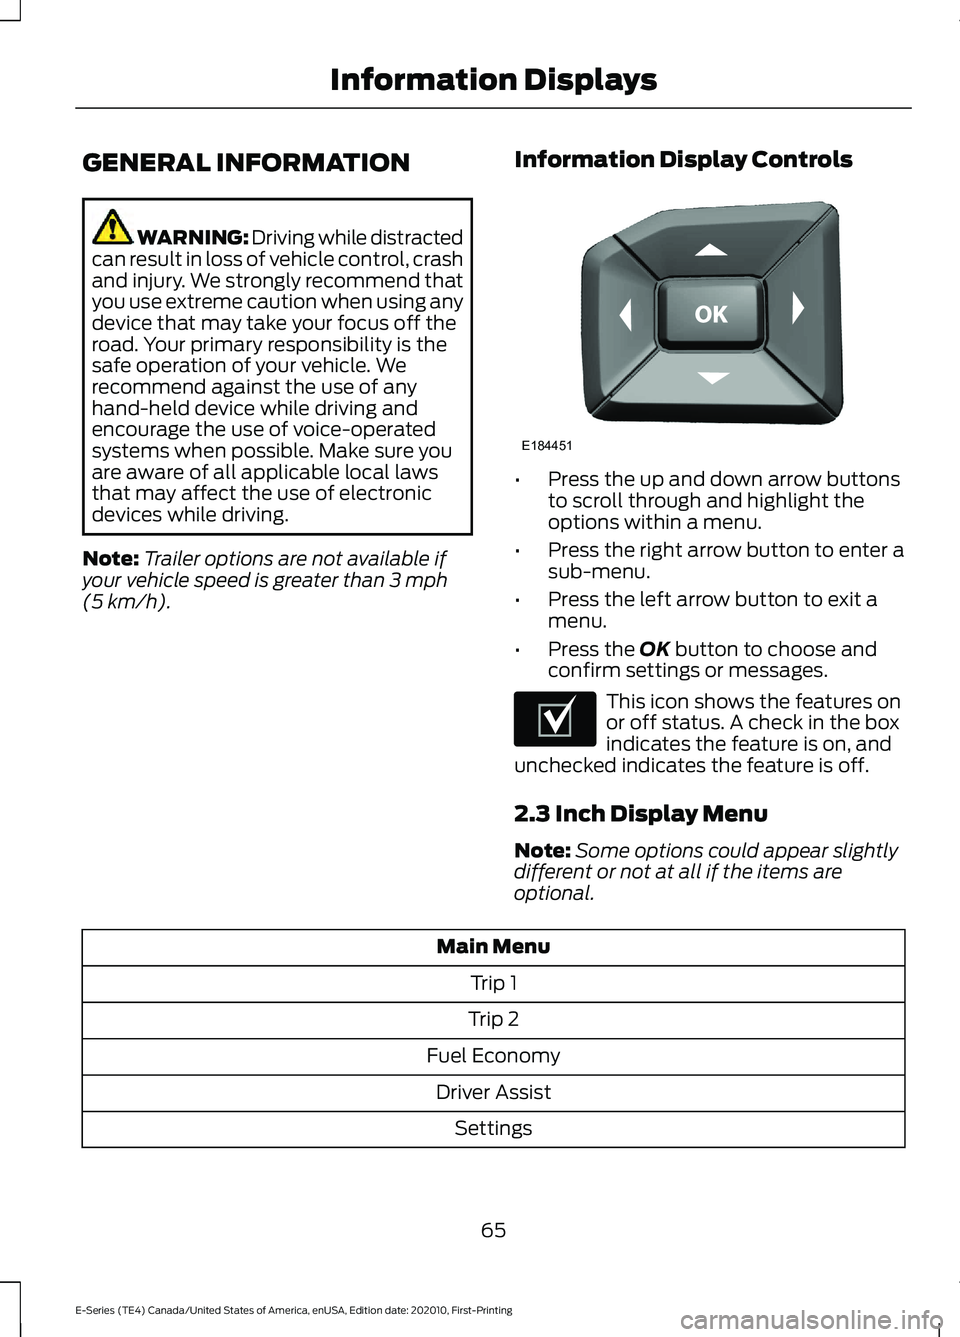
(5 km/h). Information Display Controls •
Press the up and down arrow buttons
to scroll through and highlight the
options within a menu.
• Press the right arrow button to enter a
sub-menu.
• Press the left arrow button to exit a
menu.
• Press the
OK button to choose and
confirm settings or messages. This icon shows the features on
or off status. A check in the box
indicates the feature is on, and
unchecked indicates the feature is off.
2.3 Inch Display Menu
Note: Some options could appear slightly
different or not at all if the items are
optional. Main Menu
Trip 1
Trip 2
Fuel Economy Driver Assist Settings
65
E-Series (TE4) Canada/United States of America, enUSA, Edition date: 202010, First-Printing Information DisplaysE184451 E204495
Page 87 of 300
ENGINE BLOCK HEATER (IF
EQUIPPED) WARNING:
Failure to follow engine
block heater instructions could result in
property damage or serious personal
injury. WARNING: Do not use your heater
with ungrounded electrical systems or
two-pronged adapters. There is a risk of
electrical shock. WARNING:
Do not fully close the
hood, or allow it to drop under its own
weight when using the engine block
heater. This could damage the power
cable and may cause an electrical short
resulting in fire, injury and property
damage.
Note: The heater is most effective when
outdoor temperatures are below
0°F
(-18°C).
The heater acts as a starting aid by
warming the engine coolant. This allows
the climate control system to respond
quickly. The equipment includes a heater
element, installed in the engine block and
a wire harness. You can connect the
system to a grounded 120-volt AC
electrical source.
We recommend that you do the following
for a safe and correct operation:
• Use a 16-gauge outdoor extension cord
that is product certified by
Underwriter ’s Laboratory (UL) or
Canadian Standards Association
(CSA). This extension cord must be
suitable for use outdoors, in cold temperatures, and be clearly marked
Suitable for Use with Outdoor
Appliances. Do not use an indoor
extension cord outdoors. This could
result in an electric shock or become a
fire hazard.
• Use as short an extension cord as
possible.
• Do not use multiple extension cords.
• Make sure that when in operation, the
extension cord plug and heater cord
plug connections are free and clear of
water. This could cause an electric
shock or fire.
• If the block heater cord is under the
hood, Do Not remove the wiring from
its original location. Do Not close the
hood on the extension wiring.
• Make sure your vehicle is parked in a
clean area, clear of combustibles.
• Make sure the heater, heater cord and
extension cord are firmly connected.
• Check for heat anywhere in the
electrical hookup once the system has
been operating for approximately 30
minutes.
• Make sure the system is unplugged and
properly stowed before starting and
driving your vehicle. Make sure the
protective cover seals the prongs of the
block heater cord plug when not in use.
• Make sure the heater system is
checked for proper operation before
winter.
Using the Engine Block Heater
Make sure the receptacle terminals are
clean and dry prior to use. Clean them with
a dry cloth if necessary.
84
E-Series (TE4) Canada/United States of America, enUSA, Edition date: 202010, First-Printing Starting and Stopping the Engine
Page 89 of 300
SAFETY PRECAUTIONS
WARNING: Do not overfill the fuel
tank. The pressure in an overfilled tank
may cause leakage and lead to fuel spray
and fire. WARNING:
The fuel system may
be under pressure. If you hear a hissing
sound near the fuel filler inlet, do not
refuel until the sound stops. Otherwise,
fuel may spray out, which could cause
serious personal injury. WARNING: Fuels can cause serious
injury or death if misused or mishandled. WARNING:
Fuel may contain
benzene, which is a cancer-causing
agent. WARNING: When refueling always
shut the engine off and never allow
sparks or open flames near the fuel tank
filler valve. Never smoke or use a cell
phone while refueling. Fuel vapor is
extremely hazardous under certain
conditions. Avoid inhaling excess fumes.
Follow these guidelines when refueling:
• Extinguish all smoking materials and
any open flames before refueling your
vehicle.
• Always switch the engine off before
refueling.
• Automotive fuels can be harmful or
fatal if swallowed. Fuel is highly toxic
and if swallowed can cause death or
permanent injury. If fuel is swallowed
immediately call a physician, even if no
symptoms are immediately apparent.
The toxic effects of fuel may not be
apparent for hours. •
Avoid inhaling fuel vapors. Inhaling fuel
vapor can lead to eye and respiratory
tract irritation. In severe cases,
excessive or prolonged breathing of
fuel vapor can cause serious illness and
permanent injury.
• Avoid getting fuel in your eyes. If you
splash fuel in your eyes, immediately
remove contact lenses (if worn), flush
with water for 15 minutes and seek
medical attention. Failure to seek
proper medical attention could lead to
permanent injury.
• Fuels can be harmful if absorbed
through the skin. If you splash fuel on
your skin, clothing or both, promptly
remove contaminated clothing and
thoroughly wash your skin with soap
and water. Repeated or prolonged skin
contact causes skin irritation.
• Be particularly careful if you are taking
Antabuse or other forms of Disulfiram
for the treatment of alcoholism.
Breathing fuel vapors could cause an
adverse reaction, serious personal
injury or sickness. Immediately call a
physician if you experience any adverse
reactions.
FUEL QUALITY - E85
Choosing the Right Fuel - Flex Fuel
Vehicles
Flex fuel vehicles have one of the following
identifiers:
• Yellow fuel filler cap.
• Yellow bezel around the fuel filler inlet.
• Yellow fuel filler housing.
• Yellow E85 label on the fuel tank filler
door.
86
E-Series (TE4) Canada/United States of America, enUSA, Edition date: 202010, First-Printing Fuel and Refueling
Page 105 of 300
The sound of the pump operating may be
heard by the driver. This is a normal
characteristic of the system.
The reserve system provides reduced
braking power, so the vehicle should be
operated under these conditions with
caution, and only to seek service repair and
removal of the vehicle from the roadway.
Note:
For vehicles with the Hydromax
system operating under normal conditions,
the noise of the fluid flowing through the
booster may be heard whenever you apply
the brake. This condition is normal. Vehicle
service is not required.
If braking performance or pedal response
becomes very poor, even when you
strongly press the pedal, it may indicate
the presence of air in the hydraulic system
or leakage of fluid. Stop your vehicle as
soon as it is safe to do so. Have the system
checked as soon as possible.
HINTS ON DRIVING WITH
ANTI-LOCK BRAKES
The anti-lock braking system does not
eliminate the risks when:
• You drive too closely to the vehicle in
front of you.
• Your vehicle is hydroplaning.
• You take corners too fast.
• The road surface is poor.
Note: If the system activates, the brake
pedal may pulse and may travel further.
Maintain pressure on the brake pedal. You
may also hear a noise from the system. This
is normal. PARKING BRAKE WARNING: Apply the parking
brake, shift into park (P), switch the
ignition off and remove the key before
you leave your vehicle. Failure to follow
this instruction could result in personal
injury or death.
Apply the parking brake whenever you park
your vehicle.
• For vehicles with a foot operated
parking brake, press the pedal down.
• For vehicles with a hand operated
parking brake, pull the parking brake
lever up. It illuminates when you switch
the ignition on and apply the
parking brake. It also illuminates
momentarily when you switch
the ignition on to confirm the
lamp is functional. If it does not
illuminate when you switch the ignition on
or begins to flash at any time, have the
system checked by an authorized dealer.
If it illuminates when your vehicle is
moving, make sure you disengage the
parking brake.
If the parking brake is disengaged, this
indicates a low brake fluid level or a brake
system fault. Have your vehicle checked
as soon as possible.
To release the parking brake:
• For vehicles with a foot operated
parking brake, pull the parking brake
release lever.
• For vehicles with a hand operated
parking brake, push the parking brake
lever down.
102
E-Series (TE4) Canada/United States of America, enUSA, Edition date: 202010, First-Printing BrakesE270480
Page 106 of 300
HILL START ASSIST
WARNING: The system does not
replace the parking brake. When you
leave your vehicle, always apply the
parking brake. WARNING:
You must remain in
your vehicle when the system turns on.
At all times, you are responsible for
controlling your vehicle, supervising the
system and intervening, if required.
Failure to take care may result in the loss
of control of your vehicle, serious
personal injury or death. WARNING:
The system will turn
off if a malfunction is apparent or if you
rev the engine excessively. Failure to take
care may result in the loss of control of
your vehicle, serious personal injury or
death.
The system makes it easier to pull away
when your vehicle is on a slope without the
need to use the parking brake.
When the system is active, your vehicle
remains stationary on the slope for two to
three seconds after you release the brake
pedal. This allows time to move your foot
from the brake to the accelerator pedal.
The system releases the brakes
automatically once the engine has
developed sufficient torque to prevent your
vehicle from rolling down the slope. This
is an advantage when pulling away on a
slope, for example from a car park ramp,
traffic lights or when reversing uphill into
a parking space.
The system activates on any slope that
causes your vehicle to roll.
Note: There is no warning light to indicate
the system is either on or off. Using Hill Start Assist
1. Press the brake pedal to bring your
vehicle to a complete standstill. Keep
the brake pedal pressed and shift into
first gear when facing uphill or reverse
(R) when facing downhill.
2. If the sensors detect that your vehicle is on a slope, the system activates
automatically.
3. When you remove your foot from the brake pedal, your vehicle remains on
the slope without rolling away for
about two to three seconds. This hold
time automatically extends if you are
in the process of driving off.
4. Drive off in the normal manner. The system releases the brakes
automatically.
Note: When you remove your foot from the
brake pedal and press the pedal again when
the system is active, you will experience
significantly reduced brake pedal travel. This
is normal.
Switching the System On and Off
Vehicles with Manual Transmission
You can switch this feature on or off in the
information display. The system
remembers the last setting when you start
your vehicle.
Vehicles with Automatic Transmission
You cannot turn the system on or off.
When you switch the ignition on, the
system automatically turns on.
103
E-Series (TE4) Canada/United States of America, enUSA, Edition date: 202010, First-Printing Brakes
Page 113 of 300
CANCELING THE SET SPEED
Press the button, or tap the
brake pedal to cancel the set
speed.
Note: The system remembers the set
speed.
Note: The system cancels if the vehicle
speed drops below 10 mph (16 km/h) under
the set speed when driving uphill.
RESUMING THE SET SPEED Press the button.
CRUISE CONTROL
INDICATORS Illuminates when you switch the
system on.
USING ADAPTIVE CRUISE
CONTROL WARNING: You are responsible for
controlling your vehicle at all times. The
system is designed to be an aid and does
not relieve you of your responsibility to
drive with due care and attention. Failure
to follow this instruction could result in
the loss of control of your vehicle,
personal injury or death. WARNING: Pay close attention to
changing road conditions such as
entering or leaving a highway, on roads
with intersections or roundabouts, roads
without visible lanes of travel, roads that
are winding, slippery, unpaved, or steep
slopes. WARNING:
Do not use the system
in poor visibility, for example fog, heavy
rain, spray or snow. WARNING:
Do not use the system
when towing a trailer that has
aftermarket electronic trailer brake
controls. Failure to follow this instruction
could result in the loss of control of your
vehicle, personal injury or death. WARNING:
Do not use tire sizes
other than those recommended because
this can affect the normal operation of
the system. Failure to do so may result
in a loss of vehicle control, which could
result in serious injury. WARNING:
The system may not
detect stationary or slow moving
vehicles below
6 mph (10 km/h). WARNING:
The system does not
detect pedestrians or objects in the road. WARNING:
The system does not
detect oncoming vehicles in the same
lane. WARNING:
The system is not a
crash warning or avoidance system. WARNING:
Do not use the system
with a snow plow blade installed.
The system adjusts your vehicle speed to
maintain the set gap between you and the
vehicle in front of you in the same lane.
You can select four gap settings.
110
E-Series (TE4) Canada/United States of America, enUSA, Edition date: 202010, First-Printing Cruise Control
(If Equipped)E265298 E71340
Page 115 of 300
WARNING: The system only warns
of vehicles detected by the radar sensor.
In some cases there may be no warning
or a delayed warning. Apply the brakes
when necessary. Failure to follow this
instruction could result in personal injury
or death.
Note: When you are following a vehicle and
you switch on a direction indicator, adaptive
cruise control may provide a small
temporary acceleration to help you pass.
Note: The brakes may emit noise when
applied by the system.
When a vehicle ahead of you enters the
same lane or a slower vehicle is ahead in
the same lane, the vehicle speed adjusts
to maintain a preset gap distance. A
vehicle graphic illuminates in the
instrument cluster.
Your vehicle maintains a consistent gap
from the vehicle ahead until:
• The vehicle in front of you accelerates
to a speed above the set speed.
• The vehicle in front of you moves out
of the lane you are in.
• Your vehicle speed falls below
12 mph
(20 km/h).
• You set a new gap distance.
The system applies the brakes to slow your
vehicle to maintain a safe gap distance
from the vehicle in front. The system only
applies limited braking. You can override
the system by applying the brakes.
If the system determines that its maximum
braking level is not sufficient, an audible
warning sounds, a message appears in the
information display and an indicator
flashes when the system continues to
brake. Take immediate action. Setting the Gap Distance
You can decrease or increase the distance
between your vehicle and the vehicle in
front by pressing the gap control. Press and release to decrease
the gap distance.
Press and release to increase the
gap distance.
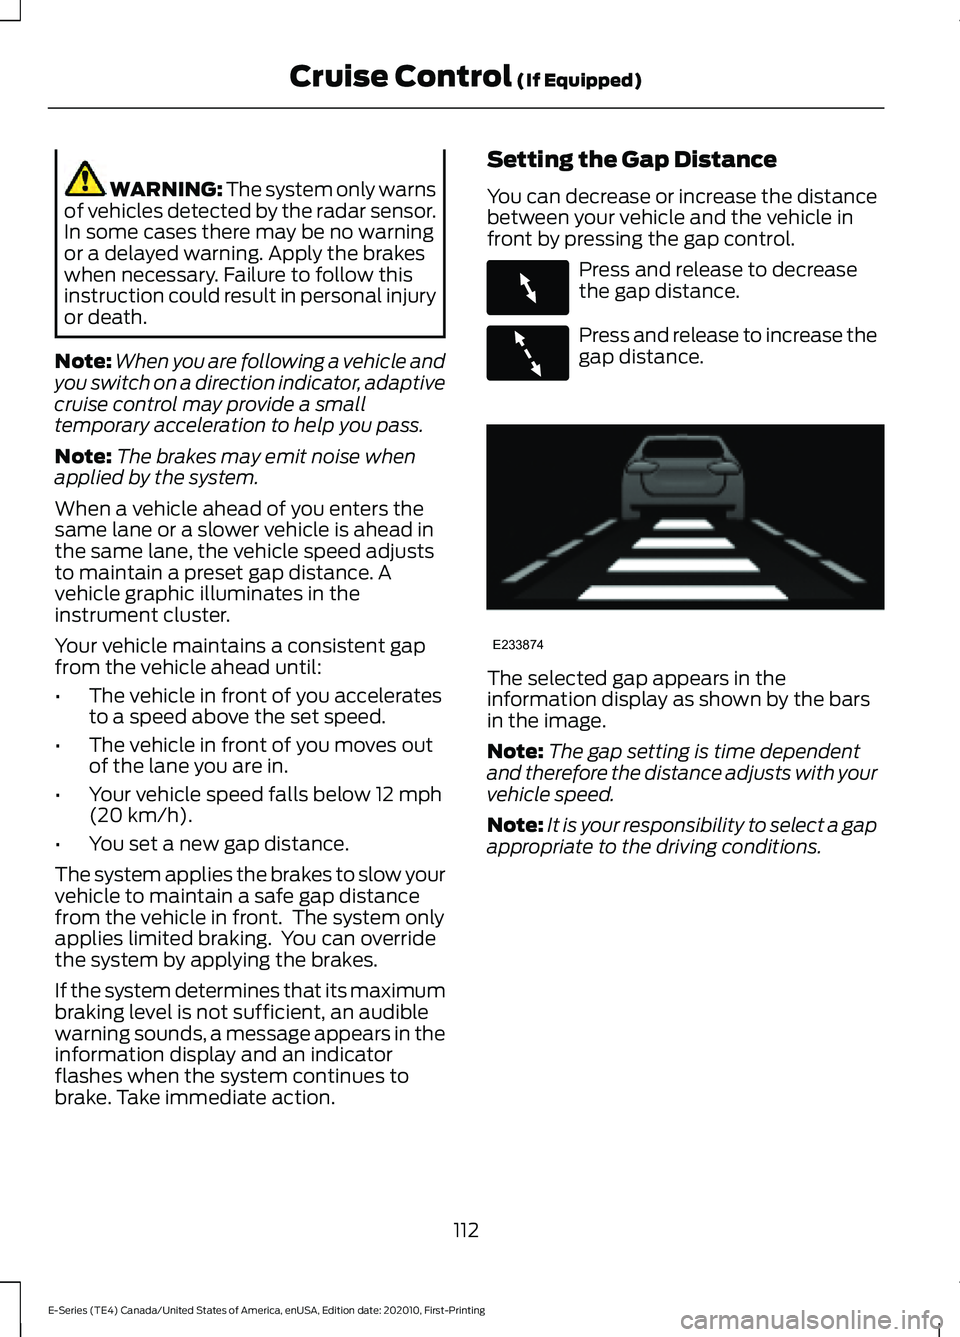
The selected gap appears in the
information display as shown by the bars
in the image.
Note:
The gap setting is time dependent
and therefore the distance adjusts with your
vehicle speed.
Note: It is your responsibility to select a gap
appropriate to the driving conditions.
112
E-Series (TE4) Canada/United States of America, enUSA, Edition date: 202010, First-Printing Cruise Control
(If Equipped)E263697 E263696 E233874