tow FORD E SERIES 2022 Owners Manual
[x] Cancel search | Manufacturer: FORD, Model Year: 2022, Model line: E SERIES, Model: FORD E SERIES 2022Pages: 300, PDF Size: 3.18 MB
Page 6 of 300
Switching Cruise Control On and Off
........................................................................\
109
Setting the Cruise Control Speed .........
109
Canceling the Set Speed ...........................
110
Resuming the Set Speed ...........................
110
Cruise Control Indicators ...........................
110
Using Adaptive Cruise Control ................
110
Driving Aids
Driver Alert ......................................................
118
Lane Keeping System .................................
119
Steering ............................................................
122
Pre-Collision Assist .....................................
123
Load Carrying
Load Limit .......................................................
127
Towing
Towing a Trailer .............................................
132
Recommended Towing Weights ............
133
Essential Towing Checks ..........................
134
Towing the Vehicle on Four Wheels ......
140
Driving Hints
Reduced Engine Performance .................
141
Economical Driving ......................................
141
Breaking-In .....................................................
142
Driving Through Water ...............................
142
Floor Mats .......................................................
142
Roadside Emergencies
Roadside Assistance ..................................
144
Hazard Flashers ...........................................
145
Fuel Shutoff ...................................................
145
Jump Starting the Vehicle ........................
146
Transporting the Vehicle ...........................
147
Customer Assistance
Getting the Services You Need ..............
149In California (U.S. Only)
............................
150
The Better Business Bureau (BBB) Auto Line Program (U.S. Only) .......................
151
Getting Assistance Outside the U.S. and Canada ........................................................
152
Ordering Additional Owner's Literature ........................................................................\
.
153
Reporting Safety Defects (U.S. Only) ........................................................................\
.
153
Reporting Safety Defects (Canada Only) ........................................................................\
.
154
Fuses
Fuse Specification Chart ..........................
155
Changing a Fuse ..........................................
163
Maintenance
General Information ...................................
165
Opening and Closing the Hood ..............
165
Under Hood Overview ...............................
166
Engine Oil Dipstick .......................................
167
Engine Oil Check ..........................................
167
Oil Change Indicator Reset ......................
168
Changing the Engine Air Filter ................
168
Engine Coolant Check ...............................
169
Automatic Transmission Fluid Check ........................................................................\
.
173
Brake Fluid Check ........................................
176
Power Steering Fluid Check ......................
177
Changing the 12V Battery ..........................
177
Adjusting the Headlamps .........................
179
Washer Fluid Check ...................................
180
Fuel Filter ........................................................
180
Checking the Wiper Blades .....................
180
Changing the Wiper Blades ....................
180
Removing a Headlamp ...............................
181
Changing a Bulb ............................................
181
Vehicle Care
General Information ...................................
184
Cleaning Products .......................................
184
3
E-Series (TE4) Canada/United States of America, enUSA, Edition date: 202010, First-Printing Table of Contents
Page 15 of 300
Entertainment Data
Data recorded includes, for example:
•
Music, videos or album art.
• Contacts and corresponding address
book entries.
• Navigation destinations.
Services That We Provide
If you use our services, we collect and use
data, for example, account information,
vehicle location and driving characteristics,
that could identify you. We transmit this
data through a dedicated, protected
connection. We only collect and use data
to enable your use of our services to which
you have subscribed, with your consent or
where permitted by law. For additional
information, see the terms and conditions
of the services to which you have
subscribed.
Services That Third Parties
Provide
We recommend that you review the terms
and conditions and data privacy
information for any services to which you
subscribe. We take no responsibility for
services that third parties provide.
Vehicles With a Connectivity
Device (If Equipped) The connectivity device has a
SIM. The connectivity device was
enabled when your vehicle was
built and periodically sends messages to
stay connected to the cell phone network.
These messages could include information
that identifies your vehicle, the SIM and the
electronic serial number of the connectivity
device. Cell phone network service
providers could have access to additional
information, for example, cell phone
network tower identification. Note:
The connectivity device continues to
send this information unless you disable the
connectivity device. To find out more about
having the connectivity device disabled,
contact the Ford Customer Relationship
Center. See Connected Vehicle (page 235).
If FordPass is connected to your vehicle,
Ford also receives additional information,
for example, location and vehicle data. See
FordPass Terms and Privacy Policy. For
additional information about our privacy
policy, visit
www .For dC onne c t e d . c om or
refer to your local Ford website.
Note: To stop the connectivity device from
sharing this information, for example,
location and vehicle data, see your
Connectivity Settings through the FordPass
app. You may also remove the vehicle from
your FordPass account.
Note: The service can be unavailable or
interrupted for a number of reasons, for
example, environmental or topographical
conditions and data plan coverage.
Note: To find out if your vehicle has
connectivity technology, visit
www .For dC onne c t e d . c om .
Note: If you plan to no longer use your
vehicle, for example, by selling or donating
it, remember to remove the vehicle from
your FordPass account. If you recently
purchased the vehicle and want to disable
or establish new connectivity, please
contact the Ford Customer Relationship
Center through the FordPass app or by using
the e-mail address on the local Ford
website.
12
E-Series (TE4) Canada/United States of America, enUSA, Edition date: 202010, First-Printing IntroductionE314755
Page 20 of 300
PROTECTING THE
ENVIRONMENT
Sustainability is a priority at Ford. We are
constantly looking for ways to reduce our
impact on the planet while providing
customers with great products and
delivering a strong business. You should
play your part in protecting the
environment. Correct vehicle usage and
the authorized disposal of waste, cleaning
and lubrication materials are significant
steps toward this aim.
For additional information about our
sustainability progress and initiatives, visit
www
.sus t ainabilit y .f or d . c om .
17
E-Series (TE4) Canada/United States of America, enUSA, Edition date: 202010, First-Printing Environment
Page 27 of 300
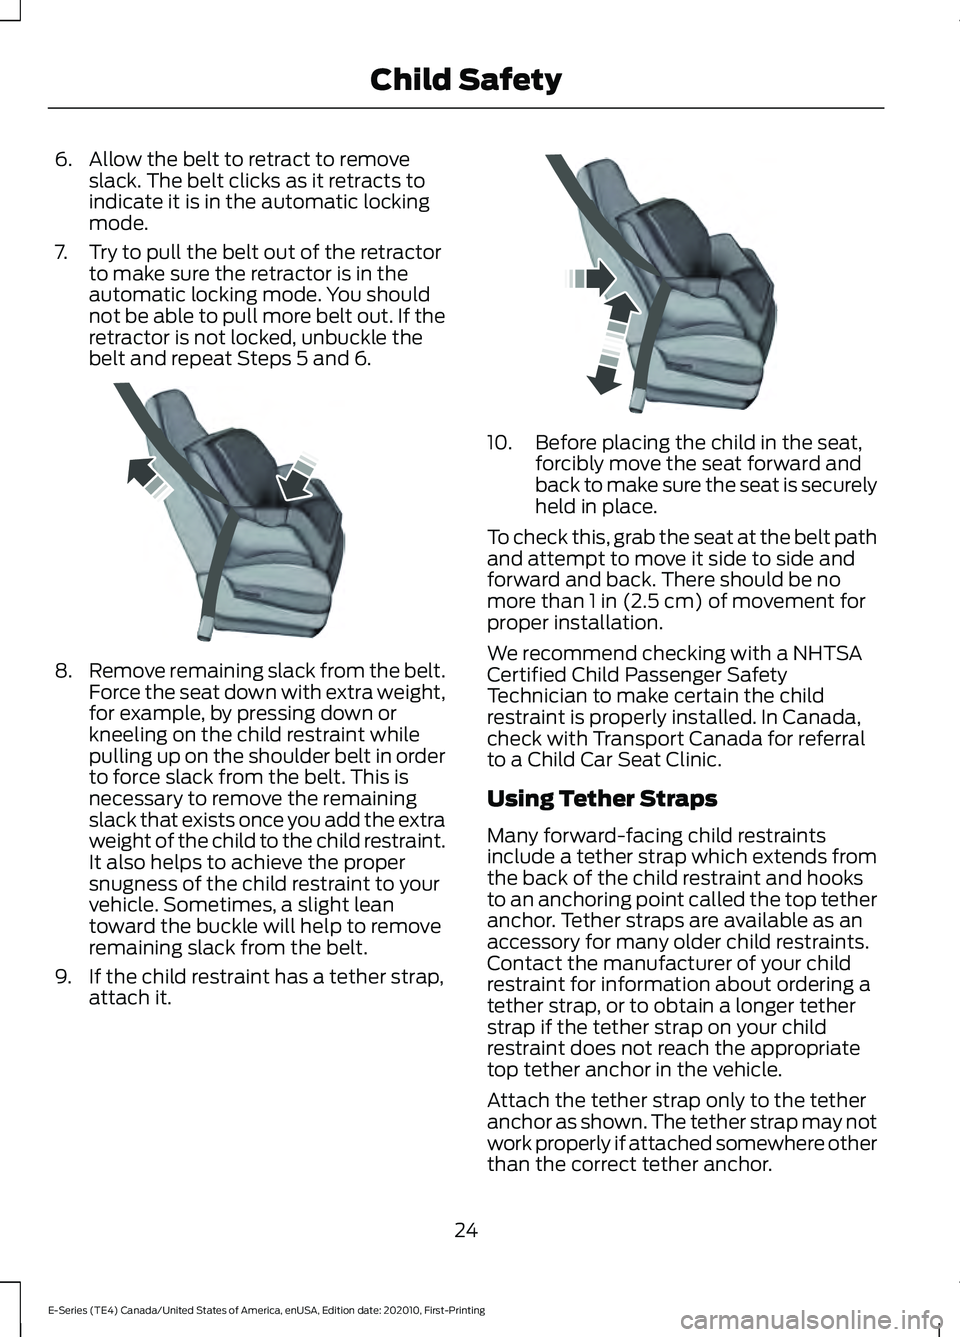
6. Allow the belt to retract to remove
slack. The belt clicks as it retracts to
indicate it is in the automatic locking
mode.
7. Try to pull the belt out of the retractor to make sure the retractor is in the
automatic locking mode. You should
not be able to pull more belt out. If the
retractor is not locked, unbuckle the
belt and repeat Steps 5 and 6. 8.
Remove remaining slack from the belt.
Force the seat down with extra weight,
for example, by pressing down or
kneeling on the child restraint while
pulling up on the shoulder belt in order
to force slack from the belt. This is
necessary to remove the remaining
slack that exists once you add the extra
weight of the child to the child restraint.
It also helps to achieve the proper
snugness of the child restraint to your
vehicle. Sometimes, a slight lean
toward the buckle will help to remove
remaining slack from the belt.
9. If the child restraint has a tether strap, attach it. 10. Before placing the child in the seat,
forcibly move the seat forward and
back to make sure the seat is securely
held in place.
To check this, grab the seat at the belt path
and attempt to move it side to side and
forward and back. There should be no
more than 1 in (2.5 cm) of movement for
proper installation.
We recommend checking with a NHTSA
Certified Child Passenger Safety
Technician to make certain the child
restraint is properly installed. In Canada,
check with Transport Canada for referral
to a Child Car Seat Clinic.
Using Tether Straps
Many forward-facing child restraints
include a tether strap which extends from
the back of the child restraint and hooks
to an anchoring point called the top tether
anchor. Tether straps are available as an
accessory for many older child restraints.
Contact the manufacturer of your child
restraint for information about ordering a
tether strap, or to obtain a longer tether
strap if the tether strap on your child
restraint does not reach the appropriate
top tether anchor in the vehicle.
Attach the tether strap only to the tether
anchor as shown. The tether strap may not
work properly if attached somewhere other
than the correct tether anchor.
24
E-Series (TE4) Canada/United States of America, enUSA, Edition date: 202010, First-Printing Child SafetyE142533 E142534
Page 31 of 300
If the booster seat slides on the vehicle
seat upon which it is being used, placing a
rubberized mesh sold as shelf or carpet
liner under the booster seat may improve
this condition. Do not introduce any item
thicker than this under the booster seat.
Check with the booster seat
manufacturer's instructions.
CHILD RESTRAINT
POSITIONING
WARNING: Do not place a
rearward facing child restraint in front of
an active airbag. Failure to follow this
instruction could result in personal injury
or death. WARNING:
Properly secure
children 12 years old and under in a rear
seating position whenever possible. If
you are unable to properly secure all
children in a rear seating position,
properly secure the largest child on the
front seat. If you must use a forward
facing child restraint on the front seat,
move the seat as far back as possible.
Failure to follow these instructions could
result in personal injury or death. WARNING: Always carefully follow
the instructions and warnings provided
by the manufacturer of any child
restraint to determine if the restraint
device is appropriate for your child's size,
height, weight, or age. Follow the child
restraint manufacturer's instructions and
warnings provided for installation and
use in conjunction with the instructions and warnings provided by your vehicle
manufacturer. A safety seat that is
improperly installed or utilized, is
inappropriate for your child's height, age,
or weight or does not properly fit the
child may increase the risk of serious
injury or death.
WARNING:
Do not allow a
passenger to hold a child on their lap
when your vehicle is moving. Failure to
follow this instruction could result in
personal injury or death in the event of a
sudden stop or crash. WARNING:
Do not use pillows,
books or towels to boost your child's
height. Failure to follow this instruction
could result in personal injury or death. WARNING:
Properly secure child
restraints or booster seats when they are
not in use. They could become projectiles
in a sudden stop or crash. Failure to
follow this instruction could result in
personal injury or death. WARNING: Do not put the shoulder
section of the seatbelt or allow the child
to put the shoulder section of the
seatbelt under their arm or behind their
back. Failure to follow this instruction
could reduce the effectiveness of the
seatbelt and increase the risk of injury or
death in a crash. WARNING:
Do not leave children
or pets unattended in your vehicle.
Failure to follow this instruction could
result in personal injury or death.
28
E-Series (TE4) Canada/United States of America, enUSA, Edition date: 202010, First-Printing Child Safety
Page 35 of 300
Pregnant women should always wear their
seatbelt. Position the lap belt portion of a
combination lap and shoulder belt low
across the hips below the belly and worn
as tight as comfort allows. Position the
shoulder belt to cross the middle of the
shoulder and the center of the chest.
Seatbelt Locking Modes
WARNING: If your vehicle is
involved in a crash, have the seatbelts
and associated components inspected
as soon as possible. Failure to follow this
instruction could result in personal injury
or death.
All safety restraints in the vehicle are
combination lap and shoulder belts. The
driver seatbelt has the first type of locking
mode. The front outboard passenger
seatbelt has both types of locking modes
described as follows:
Vehicle Sensitive Mode
This is the normal retractor mode, which
allows free shoulder belt length
adjustment to your movements and
locking in response to vehicle movement.
For example, if the driver brakes suddenly
or turns a corner sharply, or the vehicle
receives an impact of about
5 mph
(8 km/h) or more, the combination
seatbelts lock to help reduce forward
movement of the driver and passengers.
In addition, the retractor is designed to lock
if you pull the webbing out too quickly. If
the seatbelt retractor locks, slowly lower
the height adjuster to allow the seatbelt
to retract. If the retractor does not unlock,
pull the seatbelt out slowly then feed a small length of webbing back toward the
stowed position. For rear seatbelts, recline
the rear seat backrest or push the seat
backrest cushion away from the seatbelt.
Feed a small length of webbing back
toward the stowed position.
Automatic Locking Mode
In this mode, the shoulder belt
automatically pre-locks. The belt will still
retract to remove any slack in the shoulder
belt. The automatic locking mode is not
available on the driver seatbelt.
When to Use the Automatic Locking
Mode
Use this mode any time a child safety seat,
except a booster, is installed in the
passenger front seating position. See
Child Safety
(page 20).
How to Use the Automatic Locking
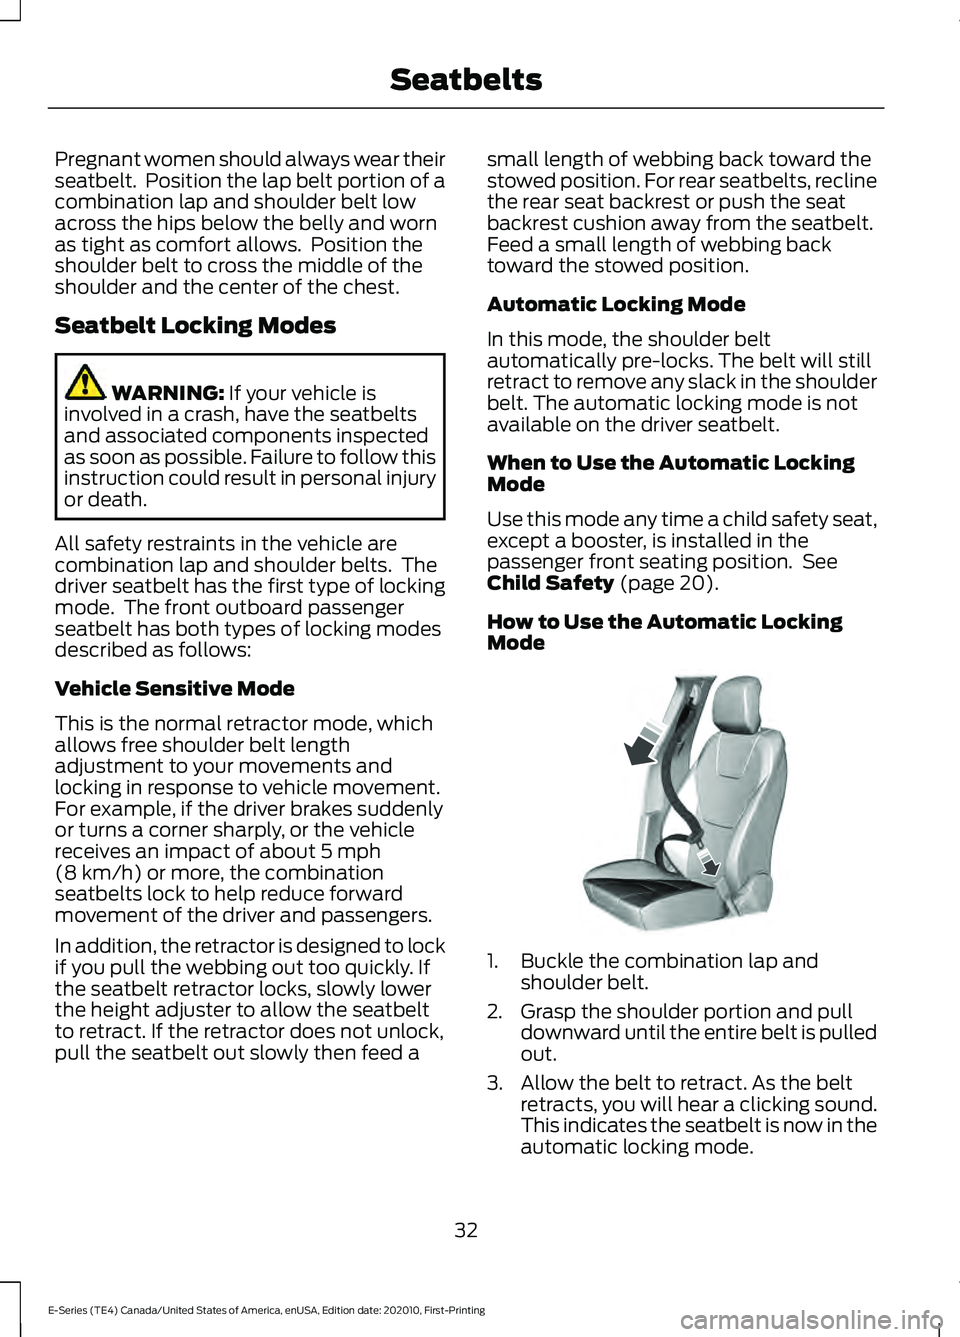
Mode 1. Buckle the combination lap and
shoulder belt.
2. Grasp the shoulder portion and pull downward until the entire belt is pulled
out.
3. Allow the belt to retract. As the belt retracts, you will hear a clicking sound.
This indicates the seatbelt is now in the
automatic locking mode.
32
E-Series (TE4) Canada/United States of America, enUSA, Edition date: 202010, First-Printing SeatbeltsE142591
Page 43 of 300
Proper Driver and Front Passenger
Seating Adjustment
WARNING: National Highway
Traffic Safety Administration (NHTSA)
recommends a minimum distance of at
least
10 in (25 cm) between an
occupant's chest and the driver airbag
module.
To properly position yourself away from
the airbag:
• Move your seat to the rear as far as you
can while still reaching the pedals
comfortably.
• Recline the seat slightly (one or two
degrees) from the upright position.
After all occupants have adjusted their
seats and put on seatbelts, it is very
important that they continue to sit
properly. Properly seated occupants sit
upright, lean against the seat back, and
center themselves on the seat cushion,
with their feet comfortably extended on
the floor. Sitting improperly can increase
the chance of injury in a crash event. For
example, if an occupant slouches, lies
down, turns sideways, sits forward, leans
forward or sideways, or puts one or both
feet up, the chance of injury during a crash
is greatly increased.
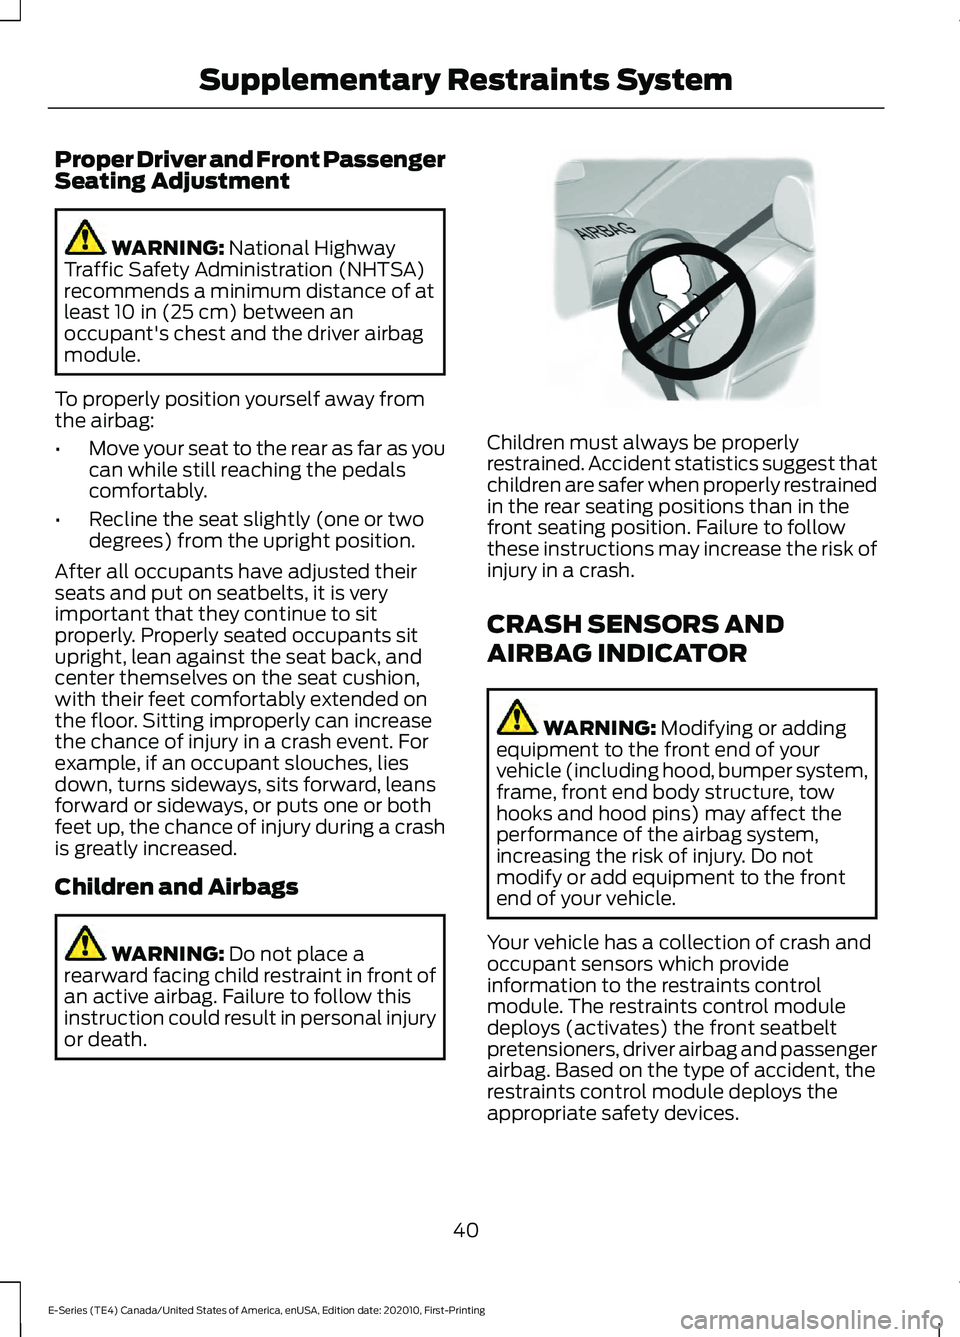
Children and Airbags WARNING:
Do not place a
rearward facing child restraint in front of
an active airbag. Failure to follow this
instruction could result in personal injury
or death. Children must always be properly
restrained. Accident statistics suggest that
children are safer when properly restrained
in the rear seating positions than in the
front seating position. Failure to follow
these instructions may increase the risk of
injury in a crash.
CRASH SENSORS AND
AIRBAG INDICATOR
WARNING:
Modifying or adding
equipment to the front end of your
vehicle (including hood, bumper system,
frame, front end body structure, tow
hooks and hood pins) may affect the
performance of the airbag system,
increasing the risk of injury. Do not
modify or add equipment to the front
end of your vehicle.
Your vehicle has a collection of crash and
occupant sensors which provide
information to the restraints control
module. The restraints control module
deploys (activates) the front seatbelt
pretensioners, driver airbag and passenger
airbag. Based on the type of accident, the
restraints control module deploys the
appropriate safety devices.
40
E-Series (TE4) Canada/United States of America, enUSA, Edition date: 202010, First-Printing Supplementary Restraints SystemE142846
Page 45 of 300
GENERAL INFORMATION ON
RADIO FREQUENCIES
This device complies with Part 15 of the
FCC Rules and with Licence exempt RSS
Standards of Industry Canada. Operation
is subject to the following two conditions:
•
This device may not cause harmful
interference, and
• This device must accept any
interference received, including
interference that may cause undesired
operation. WARNING: Changes or
modifications not expressively approved
by the party responsible for compliance
could void the user's authority to operate
the equipment. The term "IC:" before the
radio certification number only signifies
that Industry Canada technical
specifications were met.
The typical operating range for your
transmitter is approximately
33 ft (10 m).
Vehicles with the remote start feature will
have a greater range. One of the following
could cause a decrease in operating range:
• Weather conditions.
• Nearby radio towers.
• Structures around the vehicle.
• Other vehicles parked next to your
vehicle.
Other short distance radio transmissions,
for example amateur radios, medical
equipment, wireless headphones, remote
controls and alarm systems can also use
the radio frequency used by your remote
control. If the frequencies are jammed, you
will not be able to use your remote control.
You can lock and unlock the doors with the
key.
Note: Make sure to lock your vehicle before
leaving it unattended. Note:
If you are in range, the remote control
will operate if you press any button
unintentionally.
Note: The remote control contains sensitive
electrical components. Exposure to moisture
or impact may cause permanent damage.
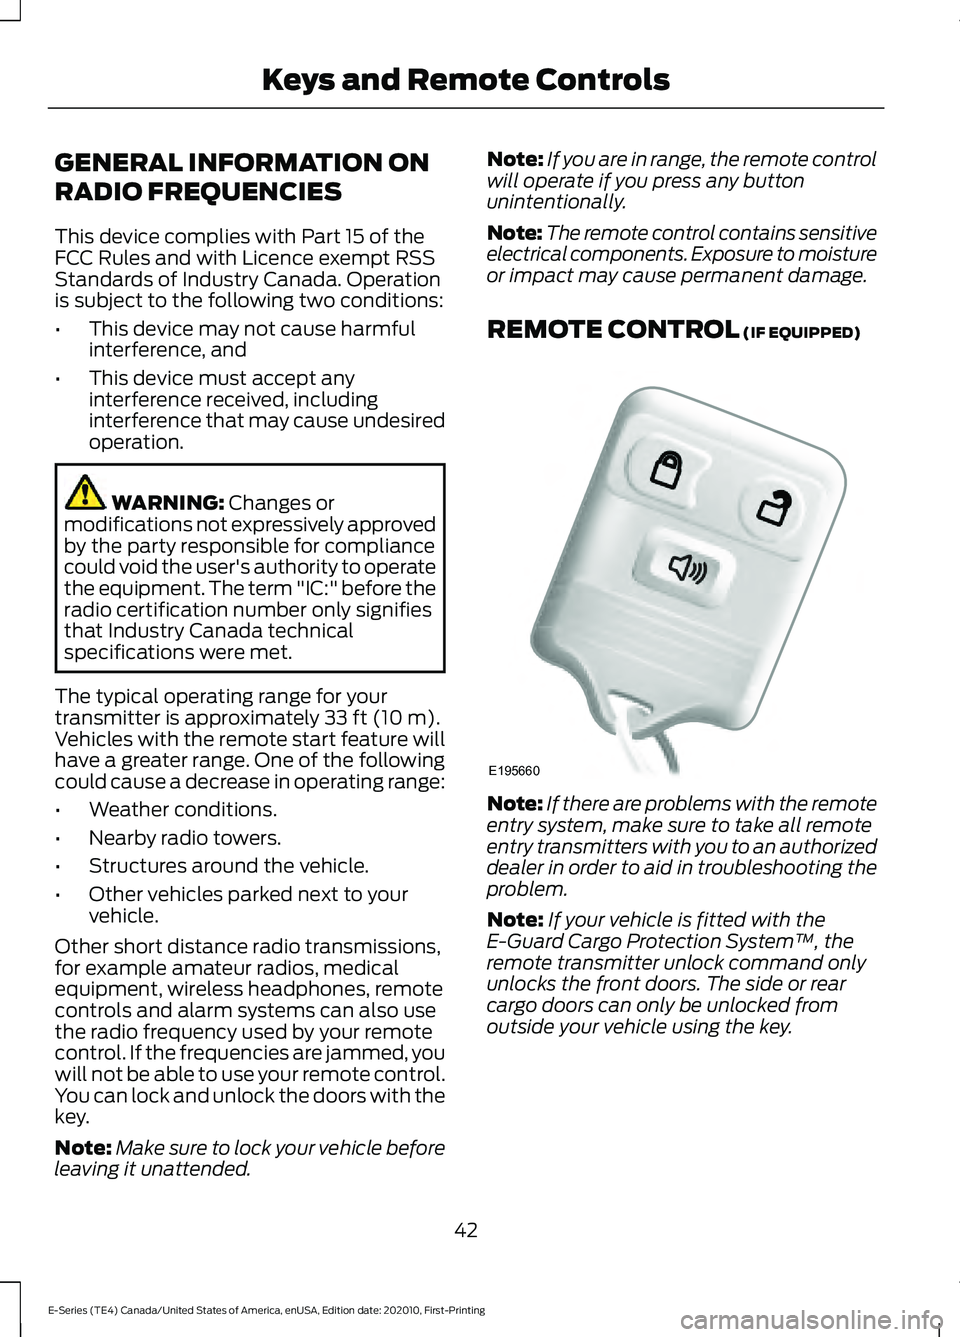
REMOTE CONTROL
(IF EQUIPPED) Note:
If there are problems with the remote
entry system, make sure to take all remote
entry transmitters with you to an authorized
dealer in order to aid in troubleshooting the
problem.
Note: If your vehicle is fitted with the
E-Guard Cargo Protection System ™, the
remote transmitter unlock command only
unlocks the front doors. The side or rear
cargo doors can only be unlocked from
outside your vehicle using the key.
42
E-Series (TE4) Canada/United States of America, enUSA, Edition date: 202010, First-Printing Keys and Remote ControlsE195660
Page 51 of 300
PASSIVE ANTI-THEFT
SYSTEM
Note:
The system is not compatible with
non-Ford aftermarket remote start systems.
Use of these systems could result in engine
starting problems and a loss of security
protection.
Note: Prevent these objects from touching
the coded key when starting your vehicle.
Metallic objects, electronic devices or a
second coded key on the same key chain
could result in vehicle starting problems,
especially if they are too close to the key
when starting your vehicle. Switch the
ignition off, move all objects on the key
chain away from the coded key and restart
your vehicle if a problem occurs.
Note: Do not leave a duplicate coded key
in your vehicle. Always take your keys and
lock all doors when leaving your vehicle.
SecuriLock®
The system helps prevent the engine from
starting unless you use a coded key
programmed to your vehicle. Using the
wrong key may prevent your vehicle from
starting. A message may appear in the
information display.
If you are unable to start your vehicle with
a coded key, it is not operating correctly.
A message may appear in the information
display.
Automatic Arming
The system arms when you switch the
ignition off.
Automatic Disarming
The system disarms when you switch the
ignition on with a coded key. Replacement Keys
Your vehicle may have two integrated
keyhead transmitters.
The integrated keyhead transmitter
functions as a programmed ignition key
that starts your vehicle.
If your programmed transmitters or
standard SecuriLock coded keys become
lost or stolen and you do not have an extra
coded key, you need to have your vehicle
towed to an authorized dealer. You need
to erase the key codes from your vehicle
and program new coded keys.
Store an extra programmed key away from
your vehicle in a safe place. To purchase
additional spare or replacement keys,
contact an authorized dealer.
If you have a spare key, you need to
program it. See Replacing a Lost Key or
Remote Control (page 44).
48
E-Series (TE4) Canada/United States of America, enUSA, Edition date: 202010, First-Printing Security
Page 54 of 300
WINDSHIELD WIPERS
Note:
Fully defrost the windshield before
you switch the windshield wipers on.
Note: Make sure you switch the windshield
wipers off before entering a car wash.
Note: If streaks or smears appear on the
windshield, clean the windshield and the
wiper blades. If that does not resolve the
issue, install new wiper blades.
Note: Do not operate the wipers on a dry
windshield. This may scratch the glass,
damage the wiper blades or cause the wiper
motor to burn out. Always use the
windshield washers before wiping a dry
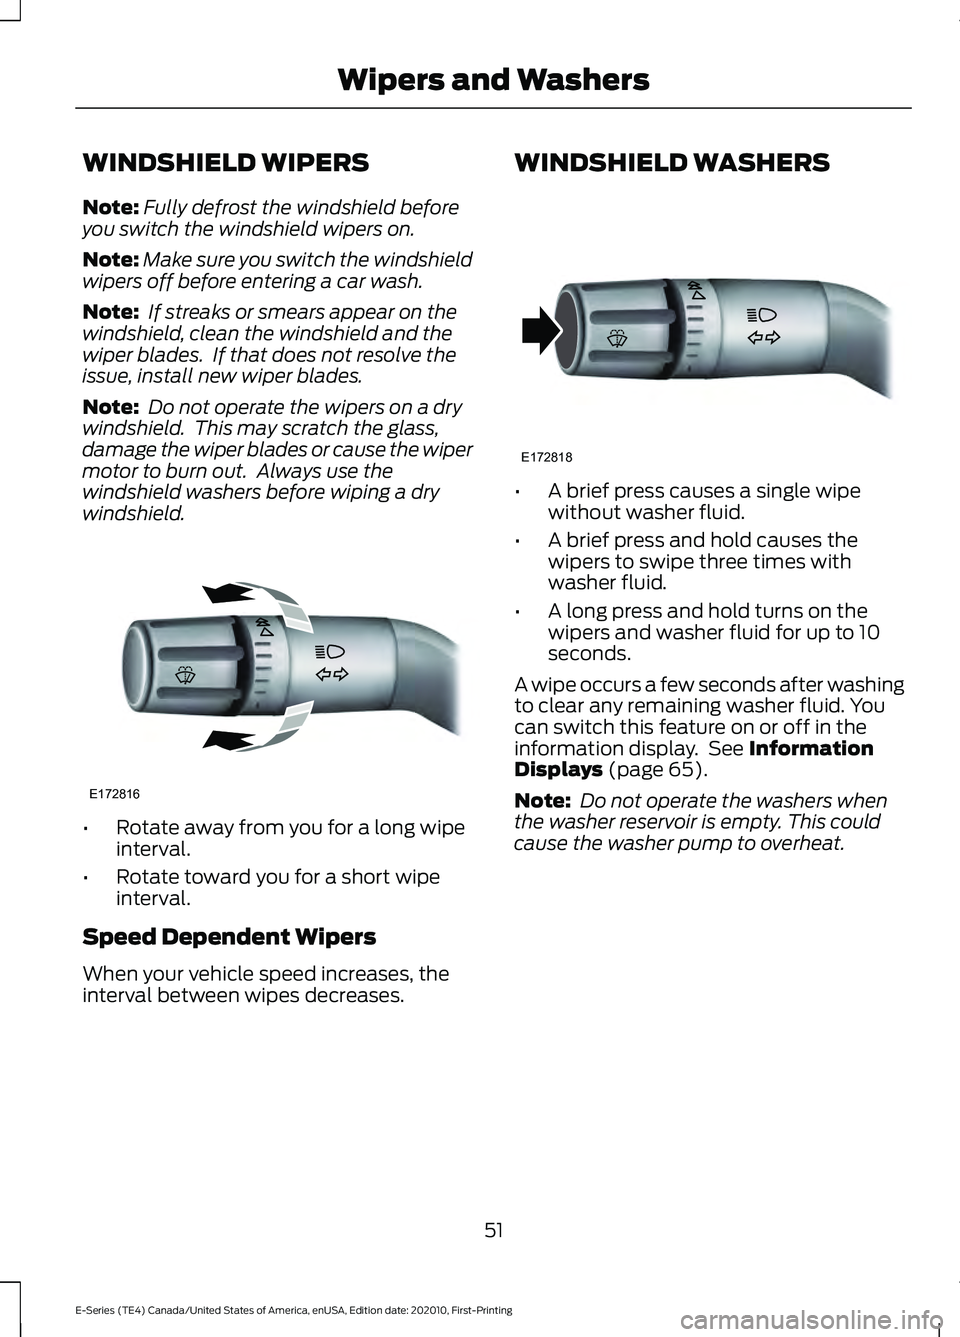
windshield. •
Rotate away from you for a long wipe
interval.
• Rotate toward you for a short wipe
interval.
Speed Dependent Wipers
When your vehicle speed increases, the
interval between wipes decreases. WINDSHIELD WASHERS
•
A brief press causes a single wipe
without washer fluid.
• A brief press and hold causes the
wipers to swipe three times with
washer fluid.
• A long press and hold turns on the
wipers and washer fluid for up to 10
seconds.
A wipe occurs a few seconds after washing
to clear any remaining washer fluid. You
can switch this feature on or off in the
information display. See Information
Displays (page 65).
Note: Do not operate the washers when
the washer reservoir is empty. This could
cause the washer pump to overheat.
51
E-Series (TE4) Canada/United States of America, enUSA, Edition date: 202010, First-Printing Wipers and WashersE172816 E172818