warning lights FORD E SERIES 2022 Owners Manual
[x] Cancel search | Manufacturer: FORD, Model Year: 2022, Model line: E SERIES, Model: FORD E SERIES 2022Pages: 300, PDF Size: 3.18 MB
Page 106 of 300
HILL START ASSIST
WARNING: The system does not
replace the parking brake. When you
leave your vehicle, always apply the
parking brake. WARNING:
You must remain in
your vehicle when the system turns on.
At all times, you are responsible for
controlling your vehicle, supervising the
system and intervening, if required.
Failure to take care may result in the loss
of control of your vehicle, serious
personal injury or death. WARNING:
The system will turn
off if a malfunction is apparent or if you
rev the engine excessively. Failure to take
care may result in the loss of control of
your vehicle, serious personal injury or
death.
The system makes it easier to pull away
when your vehicle is on a slope without the
need to use the parking brake.
When the system is active, your vehicle
remains stationary on the slope for two to
three seconds after you release the brake
pedal. This allows time to move your foot
from the brake to the accelerator pedal.
The system releases the brakes
automatically once the engine has
developed sufficient torque to prevent your
vehicle from rolling down the slope. This
is an advantage when pulling away on a
slope, for example from a car park ramp,
traffic lights or when reversing uphill into
a parking space.
The system activates on any slope that
causes your vehicle to roll.
Note: There is no warning light to indicate
the system is either on or off. Using Hill Start Assist
1. Press the brake pedal to bring your
vehicle to a complete standstill. Keep
the brake pedal pressed and shift into
first gear when facing uphill or reverse
(R) when facing downhill.
2. If the sensors detect that your vehicle is on a slope, the system activates
automatically.
3. When you remove your foot from the brake pedal, your vehicle remains on
the slope without rolling away for
about two to three seconds. This hold
time automatically extends if you are
in the process of driving off.
4. Drive off in the normal manner. The system releases the brakes
automatically.
Note: When you remove your foot from the
brake pedal and press the pedal again when
the system is active, you will experience
significantly reduced brake pedal travel. This
is normal.
Switching the System On and Off
Vehicles with Manual Transmission
You can switch this feature on or off in the
information display. The system
remembers the last setting when you start
your vehicle.
Vehicles with Automatic Transmission
You cannot turn the system on or off.
When you switch the ignition on, the
system automatically turns on.
103
E-Series (TE4) Canada/United States of America, enUSA, Edition date: 202010, First-Printing Brakes
Page 107 of 300
PRINCIPLE OF OPERATION
The traction control system helps avoid
drive wheel spin and loss of traction.
If your vehicle begins to slide, the system
applies the brakes to individual wheels
and, when needed, reduces engine power
at the same time. If the wheels spin when
accelerating on slippery or loose surfaces,
the system reduces engine power in order
to increase traction.
USING TRACTION CONTROL
WARNING: The stability and
traction control light illuminates steadily
if the system detects a failure. Make sure
you did not manually disable the traction
control system using the information
display controls or the switch. If the
stability control and traction control light
is still illuminating steadily, have the
system serviced by an authorized dealer
immediately. Operating your vehicle with
the traction control disabled could lead
to an increased risk of loss of vehicle
control, vehicle rollover, personal injury
and death.
The system automatically turns on each
time you switch the ignition on.
If your vehicle is stuck in mud or snow,
switching traction control off may be
beneficial as this allows the wheels to spin.
Switching the System Off The switch for the traction
control system is located on the
instrument panel.
When you switch the system off, an
illuminated icon appears on the instrument
cluster. Use the switch again to return the traction
control system to normal operation.
System Indicator Lights and
Messages The traction control light
temporarily illuminates on
engine start-up and flashes
when a driving condition activates the
system. The traction control off light
temporarily illuminates on
engine start-up and stays on:
• When you switch the traction control
system off.
• If a problem occurs in the system.
104
E-Series (TE4) Canada/United States of America, enUSA, Edition date: 202010, First-Printing Traction ControlE194301 E138639 E225466
Page 119 of 300
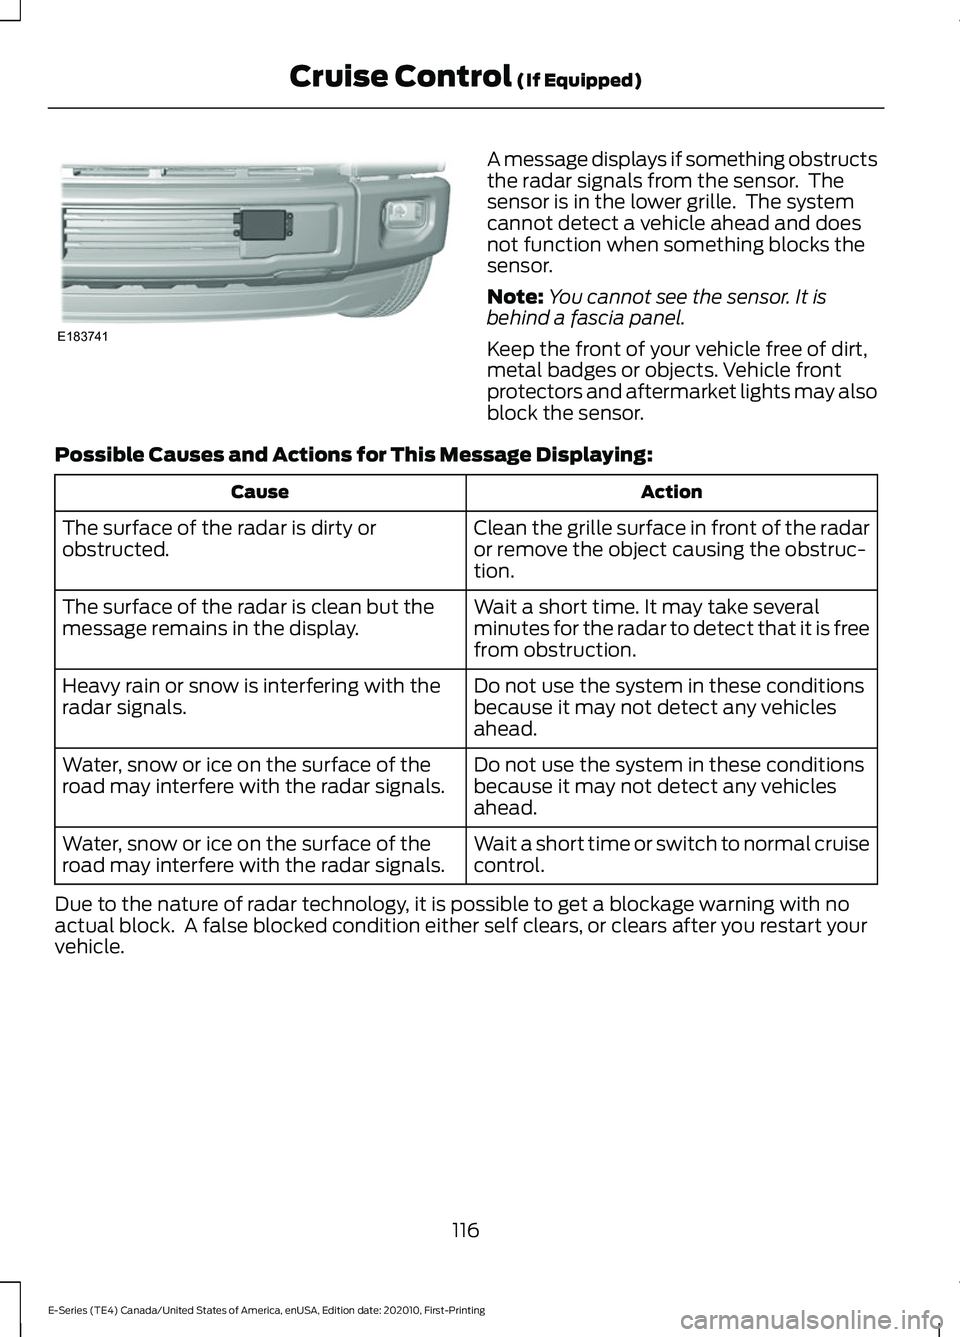
A message displays if something obstructs
the radar signals from the sensor. The
sensor is in the lower grille. The system
cannot detect a vehicle ahead and does
not function when something blocks the
sensor.
Note:
You cannot see the sensor. It is
behind a fascia panel.
Keep the front of your vehicle free of dirt,
metal badges or objects. Vehicle front
protectors and aftermarket lights may also
block the sensor.
Possible Causes and Actions for This Message Displaying: Action
Cause
Clean the grille surface in front of the radar
or remove the object causing the obstruc-
tion.
The surface of the radar is dirty or
obstructed.
Wait a short time. It may take several
minutes for the radar to detect that it is free
from obstruction.
The surface of the radar is clean but the
message remains in the display.
Do not use the system in these conditions
because it may not detect any vehicles
ahead.
Heavy rain or snow is interfering with the
radar signals.
Do not use the system in these conditions
because it may not detect any vehicles
ahead.
Water, snow or ice on the surface of the
road may interfere with the radar signals.
Wait a short time or switch to normal cruise
control.
Water, snow or ice on the surface of the
road may interfere with the radar signals.
Due to the nature of radar technology, it is possible to get a blockage warning with no
actual block. A false blocked condition either self clears, or clears after you restart your
vehicle.
116
E-Series (TE4) Canada/United States of America, enUSA, Edition date: 202010, First-Printing Cruise Control (If Equipped)E183741
Page 137 of 300
ESSENTIAL TOWING CHECKS
Follow these guidelines for safe towing:
•
Do not tow a trailer until you drive your
vehicle at least 1,000 mi (1,600 km).
• Consult your local motor vehicle laws
for towing a trailer.
• See the instructions included with
towing accessories for the proper
installation and adjustment
specifications.
• Service your vehicle more frequently if
you tow a trailer. See your scheduled
maintenance information.
See
Scheduled Maintenance (page 251).
• If you use a rental trailer, follow the
instructions the rental agency gives
you.
See
Load limits in the Load Carrying
chapter for load specification terms found
on the tire label and Safety Compliance
label and instructions on calculating your
vehicle's load.
Remember to account for the trailer
tongue weight as part of your vehicle load
when calculating the total vehicle weight.
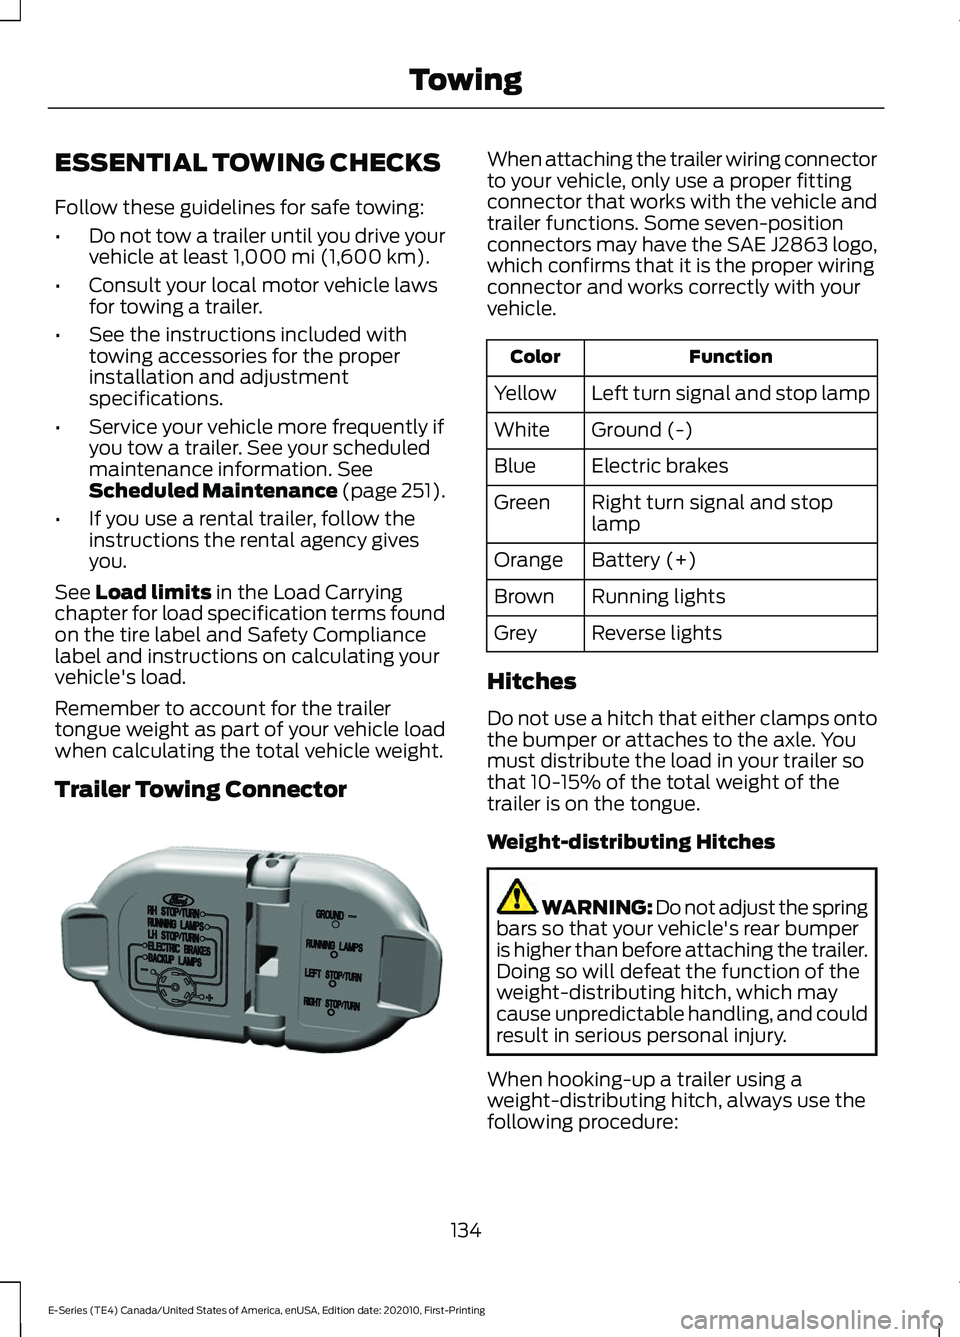
Trailer Towing Connector When attaching the trailer wiring connector
to your vehicle, only use a proper fitting
connector that works with the vehicle and
trailer functions. Some seven-position
connectors may have the SAE J2863 logo,
which confirms that it is the proper wiring
connector and works correctly with your
vehicle.
Function
Color
Left turn signal and stop lamp
Yellow
Ground (-)
White
Electric brakes
Blue
Right turn signal and stop
lamp
Green
Battery (+)
Orange
Running lights
Brown
Reverse lights
Grey
Hitches
Do not use a hitch that either clamps onto
the bumper or attaches to the axle. You
must distribute the load in your trailer so
that 10-15% of the total weight of the
trailer is on the tongue.
Weight-distributing Hitches WARNING: Do not adjust the spring
bars so that your vehicle's rear bumper
is higher than before attaching the trailer.
Doing so will defeat the function of the
weight-distributing hitch, which may
cause unpredictable handling, and could
result in serious personal injury.
When hooking-up a trailer using a
weight-distributing hitch, always use the
following procedure:
134
E-Series (TE4) Canada/United States of America, enUSA, Edition date: 202010, First-Printing TowingE163167
Page 141 of 300
Points to Remember
Note:
Do not attempt removal of the trailer
brake controller without consulting the
Workshop Manual. Damage to the unit may
result.
• Adjust gain setting before using the
trailer brake controller for the first time.
• Adjust gain setting, using the procedure
above, whenever road, weather and
trailer or vehicle loading conditions
change from when the gain was initially
set.
• Only use the manual control lever for
proper adjustment of the gain during
trailer setup. Misuse, such as
application during trailer sway, could
cause instability of trailer or tow
vehicle.
• Avoid towing in adverse weather
conditions. The trailer brake controller
does not provide anti-lock control of
the trailer wheels. Trailer wheels can
lock up on slippery surfaces, resulting
in reduced stability of trailer and tow
vehicle.
• The trailer brake controller is equipped
with a feature that reduces output at
vehicle speeds below 11 mph (18 km/h)
so trailer and vehicle braking is not jerky
or harsh. This feature is only available
when applying the brakes using your
vehicle's brake pedal, not the
controller.
• The controller interacts with the brake
control system and powertrain control
system of your vehicle to provide the
best performance on different road
conditions.
• Your vehicle's brake system and the
trailer brake system work
independently of each other. Changing
the gain setting on the controller does
not affect the operation of your
vehicle's brakes whether you attach a
trailer or not. •
When you switch the engine off, the
controller output is disabled and the
display and module shut down. The
controller module and display turn on
when you switch the ignition on.
• The trailer brake controller is only a
factory-installed or dealer-installed
item. Ford is not responsible for
warranty or performance of the
controller due to misuse or customer
installation.
Trailer Lamps WARNING: Never connect any
trailer lamp wiring to the vehicle's tail
lamp wiring; this may damage the
electrical system resulting in fire. Contact
your authorized dealer as soon as
possible for assistance in proper trailer
tow wiring installation. Additional
electrical equipment may be required.
Trailer lamps are required on most towed
vehicles. Make sure all running lights, brake
lights, direction indicators and hazard lights
are working.
Before Towing a Trailer
Practice turning, stopping and backing up
to get the feel of your vehicle-trailer
combination before starting on a trip.
When turning, make wider turns so the
trailer wheels clear curbs and other
obstacles.
When Towing a Trailer
• Do not drive faster than
70 mph
(113 km/h) during the first 500 mi
(800 km).
• Do not make full-throttle starts.
• Check your hitch, electrical connections
and trailer wheel lug nuts thoroughly
after you have traveled 50 mi (80 km).
138
E-Series (TE4) Canada/United States of America, enUSA, Edition date: 202010, First-Printing Towing
Page 145 of 300
•
Avoid adding particular accessories to
your vehicle (e.g. bug deflectors,
rollbars/light bars, running boards, ski
racks).
• Avoid driving with the wheels out of
alignment.
BREAKING-IN
You need to break in new tires for
approximately 300 mi (480 km). During
this time, your vehicle may exhibit some
unusual driving characteristics.
Avoid driving too fast during the first
1,000 mi (1,600 km)
. Vary your speed
frequently and change up through the
gears early. Do not labor the engine.
Do not tow during the first
1,000 mi
(1,600 km).
DRIVING THROUGH WATER WARNING:
Do not drive through
flowing or deep water as you may lose
control of your vehicle.
Note: Driving through standing water can
cause vehicle damage.
Note: Engine damage can occur if water
enters the air filter.
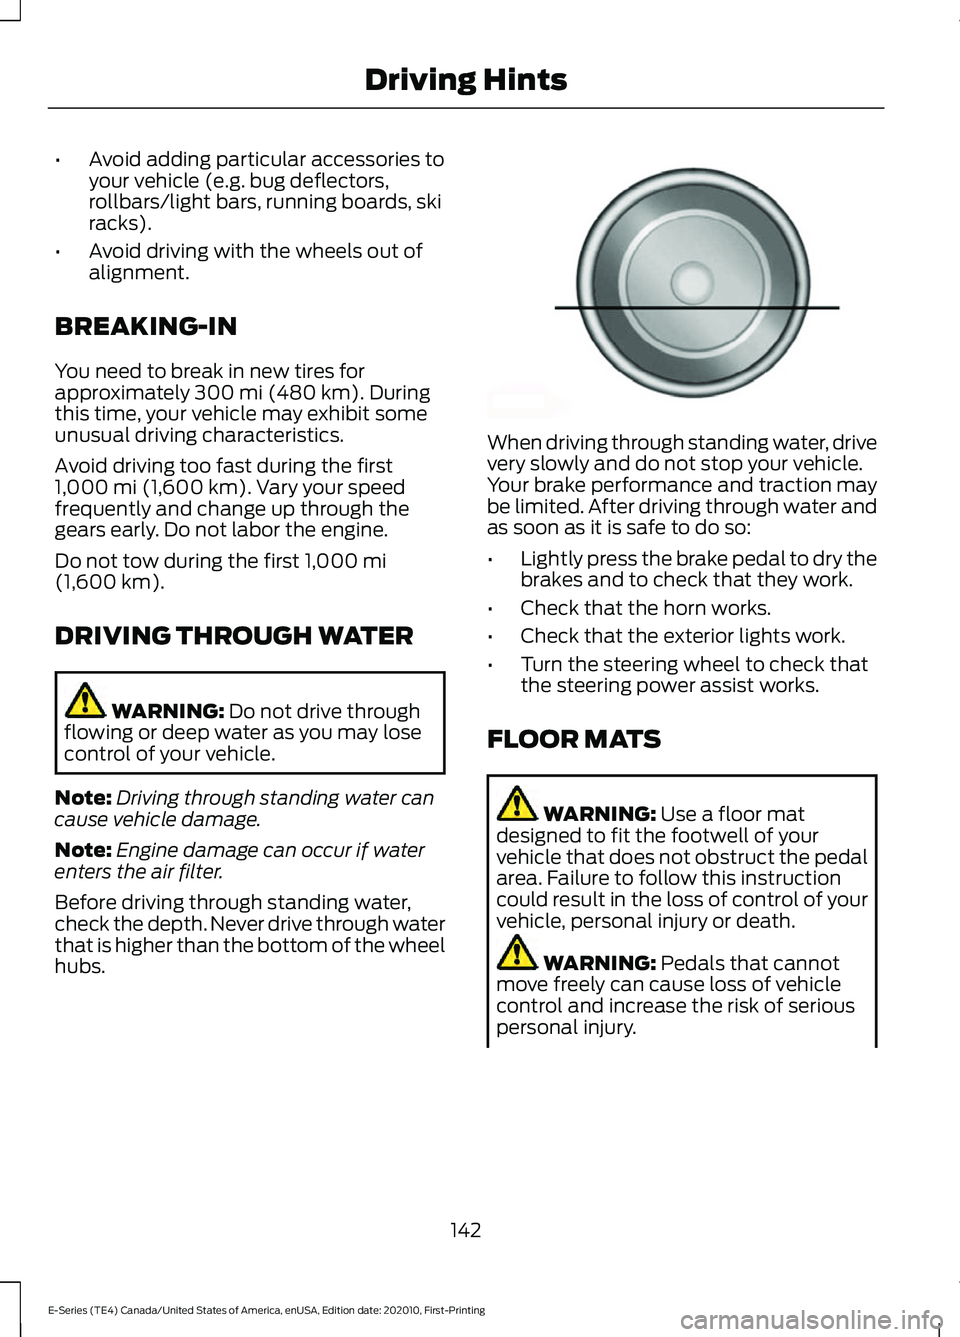
Before driving through standing water,
check the depth. Never drive through water
that is higher than the bottom of the wheel
hubs. When driving through standing water, drive
very slowly and do not stop your vehicle.
Your brake performance and traction may
be limited. After driving through water and
as soon as it is safe to do so:
•
Lightly press the brake pedal to dry the
brakes and to check that they work.
• Check that the horn works.
• Check that the exterior lights work.
• Turn the steering wheel to check that
the steering power assist works.
FLOOR MATS WARNING:
Use a floor mat
designed to fit the footwell of your
vehicle that does not obstruct the pedal
area. Failure to follow this instruction
could result in the loss of control of your
vehicle, personal injury or death. WARNING:
Pedals that cannot
move freely can cause loss of vehicle
control and increase the risk of serious
personal injury.
142
E-Series (TE4) Canada/United States of America, enUSA, Edition date: 202010, First-Printing Driving HintsE176913
Page 299 of 300
Transporting the Vehicle............................147
U
Under Hood Overview................................166
USB Port.........................................................245
Using Adaptive Cruise Control.................110 Automatic Cancellation.................................... 113
Blocked Sensor..................................................... 115
Canceling the Set Speed.................................. 113
Changing the Set Speed................................... 113
Detection Issues................................................... 114
Following a Vehicle.............................................. 111
Hilly Condition and Trailer Tow Usage.........114
Overriding the Set Speed.................................. 113
Resuming the Set Speed.................................. 113
Setting the Adaptive Cruise Speed................111
Setting the Gap Distance.................................. 112
Switching Adaptive Cruise Control Off........................................................................\
. 114
Switching Adaptive Cruise Control On.........111
Switching to Normal Cruise Control.............117
System Not Available......................................... 115
Using Snow Chains
.......................................211
Using Stability Control...............................106
Using Traction Control...............................104 Switching the System Off .............................. 104
System Indicator Lights and Messages.......................................................... 104
Using Voice Recognition
...........................245
Phone Voice Service......................................... 245
V
Vehicle Care....................................................184 General Information.......................................... 184
Vehicle Identification Number
................234
Locating the Vehicle Identification
Number............................................................. 234
Vehicle Identification Number Overview.......................................................... 234
Vehicle Identification
..................................234
Vehicle Identification Number...................... 234
Vehicle Storage
.............................................189
Body........................................................................\
190
Brakes..................................................................... 190
Cooling system................................................... 190
Disconnecting Your 12 Volt Battery.............190 Engine.....................................................................
190
Fuel system.......................................................... 190
General................................................................... 189
Miscellaneous..................................................... 190
Removing Vehicle From Storage................... 191
Tires........................................................................\
. 190
Ventilation See: Climate Control........................................... 74
W
Warning Lamps and Indicators.................62 Airbag Warning Lamp......................................... 62
Anti-Lock Brake System Warning Lamp
.................................................................... 62
Battery...................................................................... 62
Brake System Warning Lamp.......................... 62
Cruise Control Indicator..................................... 62
Direction Indicator................................................ 62
Engine Coolant Temperature Warning Lamp.................................................................... 63
Engine Oil................................................................ 63
Fasten Seatbelt Warning Lamp...................... 63
Headlamp High Beam Indicator..................... 63
Low Fuel Level Warning Lamp........................ 63
Low Tire Pressure Warning Lamp.................. 63
Powertrain Malfunction/Electronic Throttle Control................................................................. 63
Service Engine Soon........................................... 63
Tow Haul Indicator.............................................. 64
Traction Control Indicator................................. 64
Traction Control System Off............................ 64
Washer Fluid Check....................................180
Washer Fluid Specification......................229
Washers See: Cleaning the Exterior............................... 185
See: Wipers and Washers.................................. 51
Waxing..............................................................186
What Is Automatic High Beam Control.............................................................55
What Is Cruise Control...............................109 Requirements...................................................... 109
Wheel Nuts See: Changing a Road Wheel......................... 217
Wheels and Tires..........................................192 General Information.......................................... 192
Technical Specifications.................................. 221
Windows and Mirrors....................................57
296
E-Series (TE4) Canada/United States of America, enUSA, Edition date: 202010, First-Printing Index