stop start FORD E SERIES 2023 Owner's Manual
[x] Cancel search | Manufacturer: FORD, Model Year: 2023, Model line: E SERIES, Model: FORD E SERIES 2023Pages: 292, PDF Size: 6.81 MB
Page 212 of 292
•Drive cautiously. If you hear the chainsrub or bang against your vehicle, stopand retighten the chains. If this doesnot work, remove the chains to preventdamage to your vehicle.
•Remove the snow chains when theyare no longer needed. Do not use snowchains on dry roads.
Please contact your upfitter for approvedsnow chain types/sizes and otherrecommendations for snow chain use.
TIRE PRESSURE MONITORING
SYSTEM (IF EQUIPPED)
WARNING: Changes ormodifications not expressively approvedby the party responsible for compliancecould void the user's authority to operatethe equipment. The term "IC:" before theradio certification number only signifiesthat Industry Canada technicalspecifications were met.
WARNING: The tire pressuremonitoring system is not a substitute formanually checking tire pressures. Youshould periodically check tire pressuresusing a pressure gauge. Failure tocorrectly maintain tire pressures couldincrease the risk of tire failure, loss ofcontrol, vehicle rollover and personalinjury.
Note: Only use tire sealants in roadsideemergencies as they may cause damage tothe tire pressure monitoring system sensor.
Note: If the tire pressure monitoring systemsensor becomes damaged, it may notfunction.
Each tire, including the spare, ifprovided, should be checkedmonthly when cold and inflatedto the inflation pressure recommended bythe vehicle manufacturer on the vehicleplacard or tire inflation pressure label. Ifyour vehicle has tires of a different sizethan the size indicated on the vehicleplacard or tire inflation pressure label, youshould determine the proper tire inflationpressure for those tires.
As an added safety feature, your vehiclehas been equipped with a Tire PressureMonitoring System (TPMS) thatilluminates a low tire pressure telltalewhen one or more of your tires issignificantly under-inflated. Accordingly,when the low tire pressure telltaleilluminates, you should stop and checkyour tires as soon as possible, and inflatethem to the proper pressure. Driving on asignificantly under-inflated tire causes thetire to overheat and can lead to tire failure.Under-inflation also reduces fuel efficiencyand tire tread life, and may affect thevehicle’s handling and stopping ability.
Please note that the TPMS is not asubstitute for proper tire maintenance, andit is the driver's responsibility to maintaincorrect tire pressure, even if under-inflationhas not reached the level to triggerillumination of the TPMS low tire pressuretelltale.
Your vehicle has a TPMS malfunctionindicator to indicate when the system isnot operating properly. The TPMSmalfunction indicator is combined with thelow tire pressure telltale. When the systemdetects a malfunction, the telltale flashesfor approximately one minute and thenremains continuously illuminated. Thissequence continues upon subsequentvehicle start-ups as long as themalfunction exists.
209
2023 E-Series (TE4) Canada/United States of America, enUSA, Edition date: 202111, First-PrintingWheels and Tires
Page 216 of 292
•To reduce the chances of interferencefrom another vehicle, perform thesystem reset procedure at least 3 ft(1 m) away from another vehicleundergoing the system reset procedureat the same time.
•Do not wait more than two minutesbetween resetting each tire sensor orthe system can time-out and you haveto repeat the entire procedure on allfour wheels.
•A double horn sounds indicating theneed to repeat the procedure.
Performing the System Reset Procedure- Single Rear Wheel
Read the entire procedure beforeattempting.
1.Drive the vehicle above 20 mph(32 km/h) for at least two minutes,then park in a safe location where youcan easily get to all four tires and haveaccess to an air pump.
2.Place the ignition in the off position andkeep the key in the ignition.
3.Cycle the ignition to the on positionwith the engine off.
4.Turn the hazard flashers on then offthree times. You must accomplish thiswithin 10 seconds. If you successfullyenter the reset mode, the horn soundsonce, the system indicator flashes anda message shows in the informationdisplay. If this does not occur, pleasetry again starting at step 2. If afterrepeated attempts to enter the resetmode, the horn does not sound, thesystem indicator does not flash and nomessage shows in the informationdisplay, have the system checked assoon as possible.
5.Train the tire pressure monitoringsystem sensors in the tires using thefollowing system reset sequencestarting with the left front tire in thefollowing clockwise order: Left front -driver side front tire, Right front -passenger side front tire, Right rear -passenger side rear tire, Left rear -driver side rear tire.
6.Remove the valve cap from the valvestem on the left front tire. Decrease theair pressure until the horn sounds.
Note:The single horn tone confirms thatthe sensor identification code has beenlearned by the module for this position. Ifyou hear a double horn, the reset procedurewas unsuccessful, and you must repeat it.
7.Remove the valve cap from the valvestem on the right front tire. Decreasethe air pressure until the horn sounds.
8.Remove the valve cap from the valvestem on the right rear tire. Decrease theair pressure until the horn sounds.
9.Remove the valve cap from the valvestem on the left rear tire. Decrease theair pressure until the horn sounds.Training is complete after the hornsounds for the last tire trained, driverside rear tire, the system indicatorstops flashing, and a message showsin the information display.
10.Turn the ignition off. If you hear twoshort tones, the reset procedure wasunsuccessful and you must repeat it.If you hear two short beeps when theignition is off after repeating theprocedure, have the system checkedas soon as possible
213
2023 E-Series (TE4) Canada/United States of America, enUSA, Edition date: 202111, First-PrintingWheels and Tires
Page 217 of 292
11.Set all four tires to the recommendedair pressure as indicated on theSafety Compliance CertificationLabel, affixed to either the door hingepillar, door-latch post, or the dooredge that meets the door-latch post,next to the driver seating position orTire Label located on the B-Pillar orthe edge of the driver door.
Performing the System Reset Procedure- Dual Rear Wheel
For further information seeUnderstanding Your Tire PressureMonitoring System and refer to DualRear Wheel, earlier in this section.
Read the entire procedure beforeattempting.
1.Drive the vehicle above 20 mph(32 km/h) for at least two minutes,then park in a safe location where youcan easily get to all six tires and haveaccess to an air pump.
2.Place the ignition in the off position andkeep the key in the ignition.
3.Cycle the ignition to the on positionwith the engine off.
4.Turn the hazard flashers on then offthree times. You must accomplish thiswithin 10 seconds. If you successfullyenter the reset mode, the horn soundsonce, the system indicator flashes anda message shows in the informationdisplay. If this does not occur, pleasetry again starting at step 2. If afterrepeated attempts to enter the resetmode, the horn does not sound, thesystem indicator does not flash and nomessage shows in the informationdisplay, seek service from yourauthorized dealer.
5.Train the tire pressure monitoringsystem sensors in the tires using thefollowing system reset sequencestarting with the left front tire in thefollowing order: Left front - driver sidefront tire, Right front - passenger sidefront tire, Right outer rear -passengerside rear outer tire, Right inner rear -passenger side rear inner tire, Left outerrear - driver side rear outer tire, Leftinner rear - driver side rear inner tire.
6.Remove the valve cap from the valvestem on the left front tire. Decrease theair pressure until the horn sounds.
Note:The single horn chirp confirms thatthe sensor identification code has beenlearned by the module for this position. If adouble horn is heard, the reset procedurewas unsuccessful, and you must repeat it.
7.Remove the valve cap from the valvestem on the right front tire. Decreasethe air pressure until the horn sounds.
8.Remove the valve cap from the valvestem on the right outer rear tire.Decrease the air pressure until the hornsounds.
9.Remove the valve cap from the valvestem on the right inner rear tire.Decrease the air pressure until the hornsounds.
10.Remove the valve cap from the valvestem on the left outer rear tire.Decrease the air pressure until thehorn sounds.
11.Remove the valve cap from the valvestem on the left inner rear tire.Decrease the air pressure until thehorn sounds. Training is completeafter the horn sounds for the last tiretrained, the system indicator stopsflashing, and a message is shown inthe information display.
214
2023 E-Series (TE4) Canada/United States of America, enUSA, Edition date: 202111, First-PrintingWheels and Tires
Page 224 of 292
with the valve stem facing outward.For vehicles with dual rear wheels, thevalve stem of the spare must faceoutward when replacing an innerwheel, but must face inward whenreplacing an outboard wheel.
2.Install the lug nuts and finger tighten.Do not fully tighten the lug nuts untilthe wheel has been lowered.
3.Lower the vehicle completely byturning the jack handlecounterclockwise.
Note:For hydraulic jacks, insert the releasevalve, open release valve slightly by turningthe handle counterclockwise. Stop turningthe release valve when vehicle start tolower. Close the valve when the vehicle iscompletely lowered.
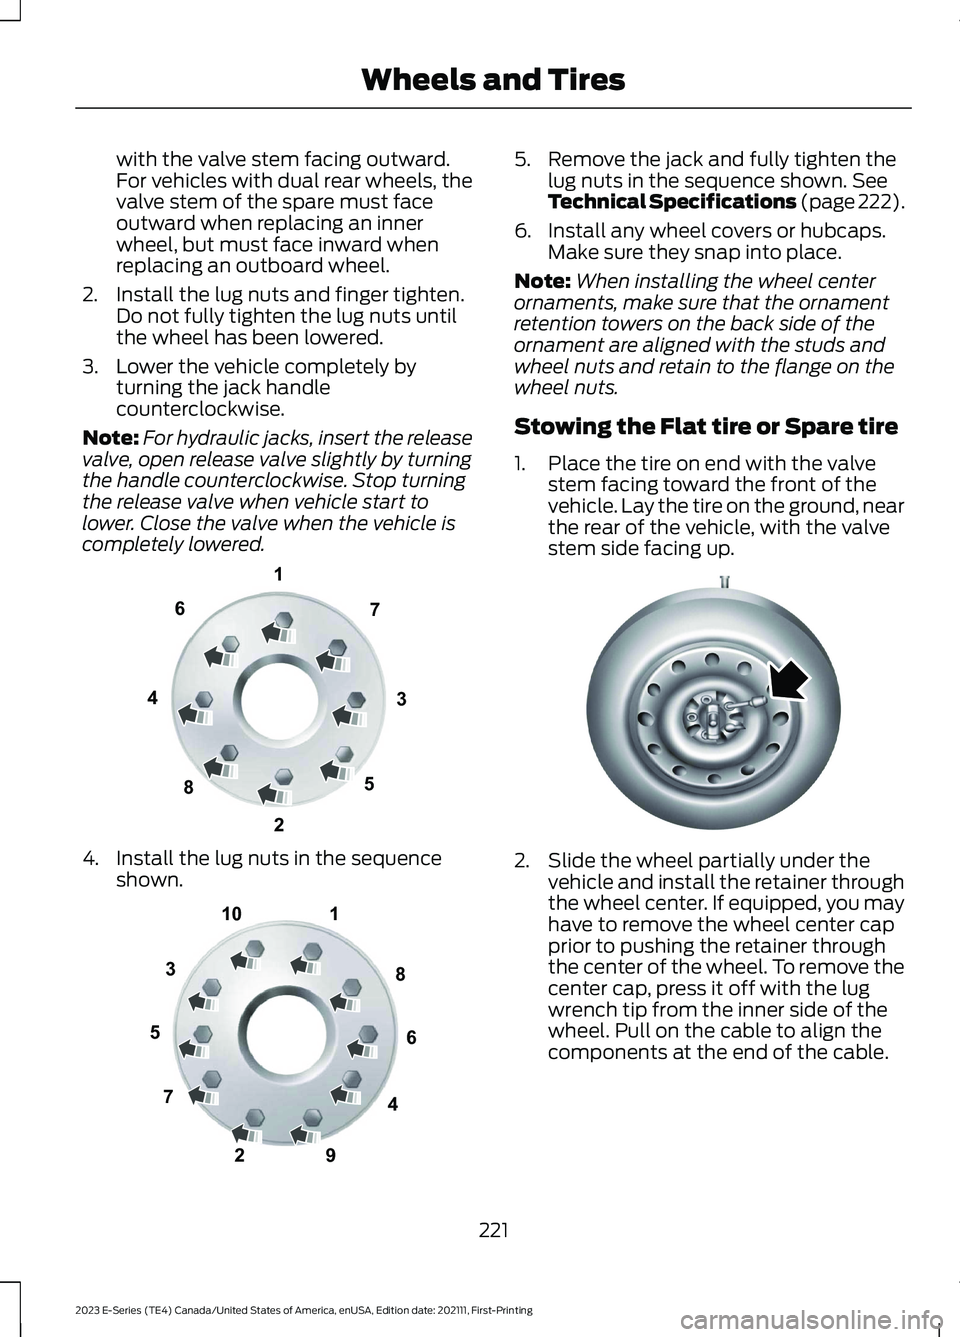
4.Install the lug nuts in the sequenceshown.
5.Remove the jack and fully tighten thelug nuts in the sequence shown. SeeTechnical Specifications (page 222).
6.Install any wheel covers or hubcaps.Make sure they snap into place.
Note:When installing the wheel centerornaments, make sure that the ornamentretention towers on the back side of theornament are aligned with the studs andwheel nuts and retain to the flange on thewheel nuts.
Stowing the Flat tire or Spare tire
1.Place the tire on end with the valvestem facing toward the front of thevehicle. Lay the tire on the ground, nearthe rear of the vehicle, with the valvestem side facing up.
2.Slide the wheel partially under thevehicle and install the retainer throughthe wheel center. If equipped, you mayhave to remove the wheel center capprior to pushing the retainer throughthe center of the wheel. To remove thecenter cap, press it off with the lugwrench tip from the inner side of thewheel. Pull on the cable to align thecomponents at the end of the cable.
221
2023 E-Series (TE4) Canada/United States of America, enUSA, Edition date: 202111, First-PrintingWheels and Tires13427658E161441 12345678910E169375 E162800
Page 291 of 292
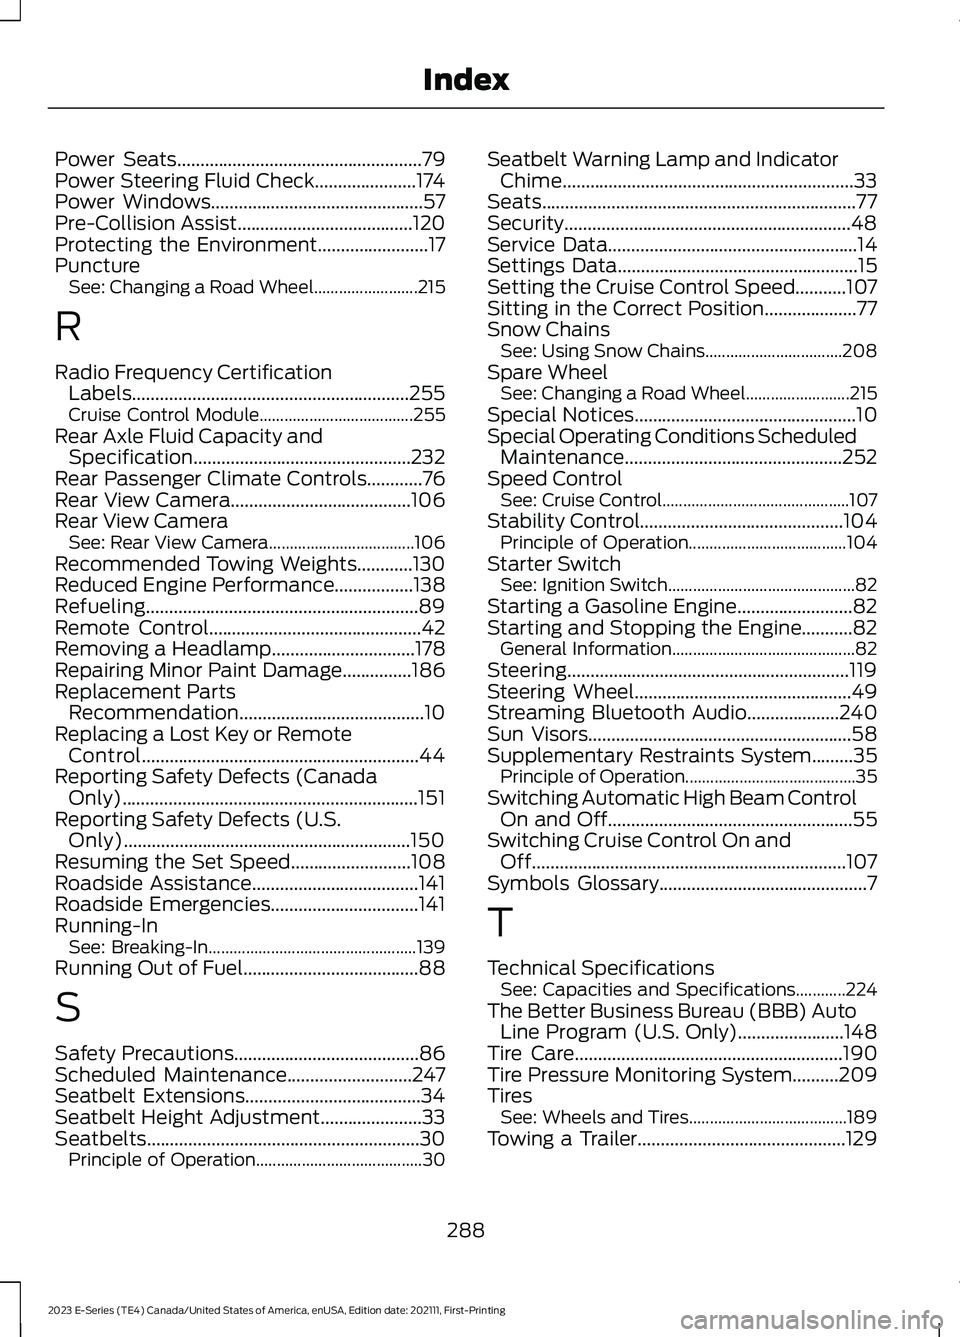
Power Seats.....................................................79Power Steering Fluid Check......................174Power Windows..............................................57Pre-Collision Assist......................................120Protecting the Environment........................17PunctureSee: Changing a Road Wheel.........................215
R
Radio Frequency CertificationLabels............................................................255Cruise Control Module.....................................255Rear Axle Fluid Capacity andSpecification...............................................232Rear Passenger Climate Controls............76Rear View Camera.......................................106Rear View CameraSee: Rear View Camera...................................106Recommended Towing Weights............130Reduced Engine Performance.................138Refueling...........................................................89Remote Control..............................................42Removing a Headlamp...............................178Repairing Minor Paint Damage...............186Replacement PartsRecommendation........................................10Replacing a Lost Key or RemoteControl............................................................44Reporting Safety Defects (CanadaOnly)................................................................151Reporting Safety Defects (U.S.Only)..............................................................150Resuming the Set Speed..........................108Roadside Assistance....................................141Roadside Emergencies................................141Running-InSee: Breaking-In..................................................139Running Out of Fuel......................................88
S
Safety Precautions........................................86Scheduled Maintenance...........................247Seatbelt Extensions......................................34Seatbelt Height Adjustment......................33Seatbelts...........................................................30Principle of Operation........................................30
Seatbelt Warning Lamp and IndicatorChime...............................................................33Seats....................................................................77Security..............................................................48Service Data......................................................14Settings Data....................................................15Setting the Cruise Control Speed...........107Sitting in the Correct Position....................77Snow ChainsSee: Using Snow Chains.................................208Spare WheelSee: Changing a Road Wheel.........................215Special Notices................................................10Special Operating Conditions ScheduledMaintenance...............................................252Speed ControlSee: Cruise Control.............................................107Stability Control............................................104Principle of Operation......................................104Starter SwitchSee: Ignition Switch.............................................82Starting a Gasoline Engine.........................82Starting and Stopping the Engine...........82General Information............................................82Steering.............................................................119Steering Wheel...............................................49Streaming Bluetooth Audio....................240Sun Visors.........................................................58Supplementary Restraints System.........35Principle of Operation.........................................35Switching Automatic High Beam ControlOn and Off.....................................................55Switching Cruise Control On andOff....................................................................107Symbols Glossary.............................................7
T
Technical SpecificationsSee: Capacities and Specifications............224The Better Business Bureau (BBB) AutoLine Program (U.S. Only).......................148Tire Care..........................................................190Tire Pressure Monitoring System..........209TiresSee: Wheels and Tires......................................189Towing a Trailer.............................................129
288
2023 E-Series (TE4) Canada/United States of America, enUSA, Edition date: 202111, First-PrintingIndex