tow bar FORD E SERIES 2023 Owners Manual
[x] Cancel search | Manufacturer: FORD, Model Year: 2023, Model line: E SERIES, Model: FORD E SERIES 2023Pages: 292, PDF Size: 6.81 MB
Page 43 of 292
Proper Driver and Front PassengerSeating Adjustment
WARNING: National HighwayTraffic Safety Administration (NHTSA)recommends a minimum distance of atleast 10 in (25 cm) between anoccupant's chest and the driver airbagmodule.
To properly position yourself away fromthe airbag:
•Move your seat to the rear as far as youcan while still reaching the pedalscomfortably.
•Recline the seat slightly (one or twodegrees) from the upright position.
After all occupants have adjusted theirseats and put on seatbelts, it is veryimportant that they continue to sitproperly. Properly seated occupants situpright, lean against the seat back, andcenter themselves on the seat cushion,with their feet comfortably extended onthe floor. Sitting improperly can increasethe chance of injury in a crash event. Forexample, if an occupant slouches, liesdown, turns sideways, sits forward, leansforward or sideways, or puts one or bothfeet up, the chance of injury during a crashis greatly increased.
Children and Airbags
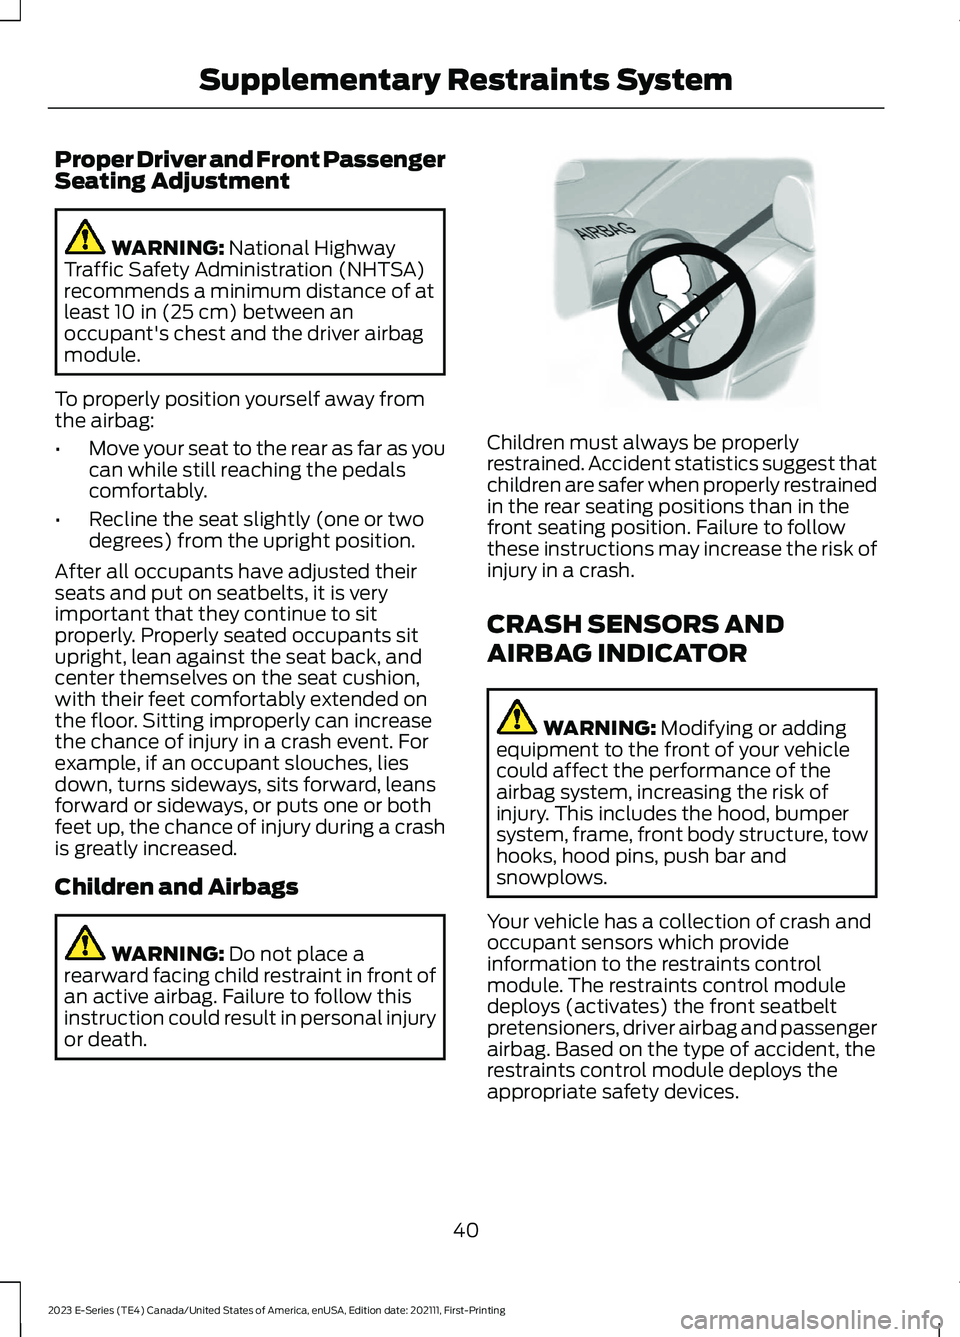
WARNING: Do not place arearward facing child restraint in front ofan active airbag. Failure to follow thisinstruction could result in personal injuryor death.
Children must always be properlyrestrained. Accident statistics suggest thatchildren are safer when properly restrainedin the rear seating positions than in thefront seating position. Failure to followthese instructions may increase the risk ofinjury in a crash.
CRASH SENSORS AND
AIRBAG INDICATOR
WARNING: Modifying or addingequipment to the front of your vehiclecould affect the performance of theairbag system, increasing the risk ofinjury. This includes the hood, bumpersystem, frame, front body structure, towhooks, hood pins, push bar andsnowplows.
Your vehicle has a collection of crash andoccupant sensors which provideinformation to the restraints controlmodule. The restraints control moduledeploys (activates) the front seatbeltpretensioners, driver airbag and passengerairbag. Based on the type of accident, therestraints control module deploys theappropriate safety devices.
40
2023 E-Series (TE4) Canada/United States of America, enUSA, Edition date: 202111, First-PrintingSupplementary Restraints SystemE142846
Page 115 of 292
Automatic cancellation can occur whenthe tires lose traction or you apply theparking brake.
Hilly Condition and Trailer TowUsage
You should select a lower gear when thesystem is active in situations such asprolonged downhill driving on steepgrades, for example in mountainous areas.The system needs additional enginebraking in these situations to reduce theload on the vehicle’s regular brake systemto prevent it from overheating.
Note:An audible alarm sounds and thesystem shuts down if it applies the brakesfor an extended period of time. This allowsthe brakes to cool. The system functionsnormally again after the brakes cool.
Note:When towing with adaptive cruisecontrol, switch on Tow/Haul Mode.
Switching Adaptive Cruise ControlOff
Press and release the buttonwhen the system is in standbymode, or switch the ignition off.
Note:The set speed and gap setting iserased when you switch the system off.
Detection Issues
WARNING: On rare occasions,detection issues can occur due to theroad infrastructures, for example bridges,tunnels and safety barriers. In thesecases, the system may brake late orunexpectedly. At all times, you areresponsible for controlling your vehicle,supervising the system and intervening,if required.
WARNING: If the systemmalfunctions, have your vehicle checkedas soon as possible.
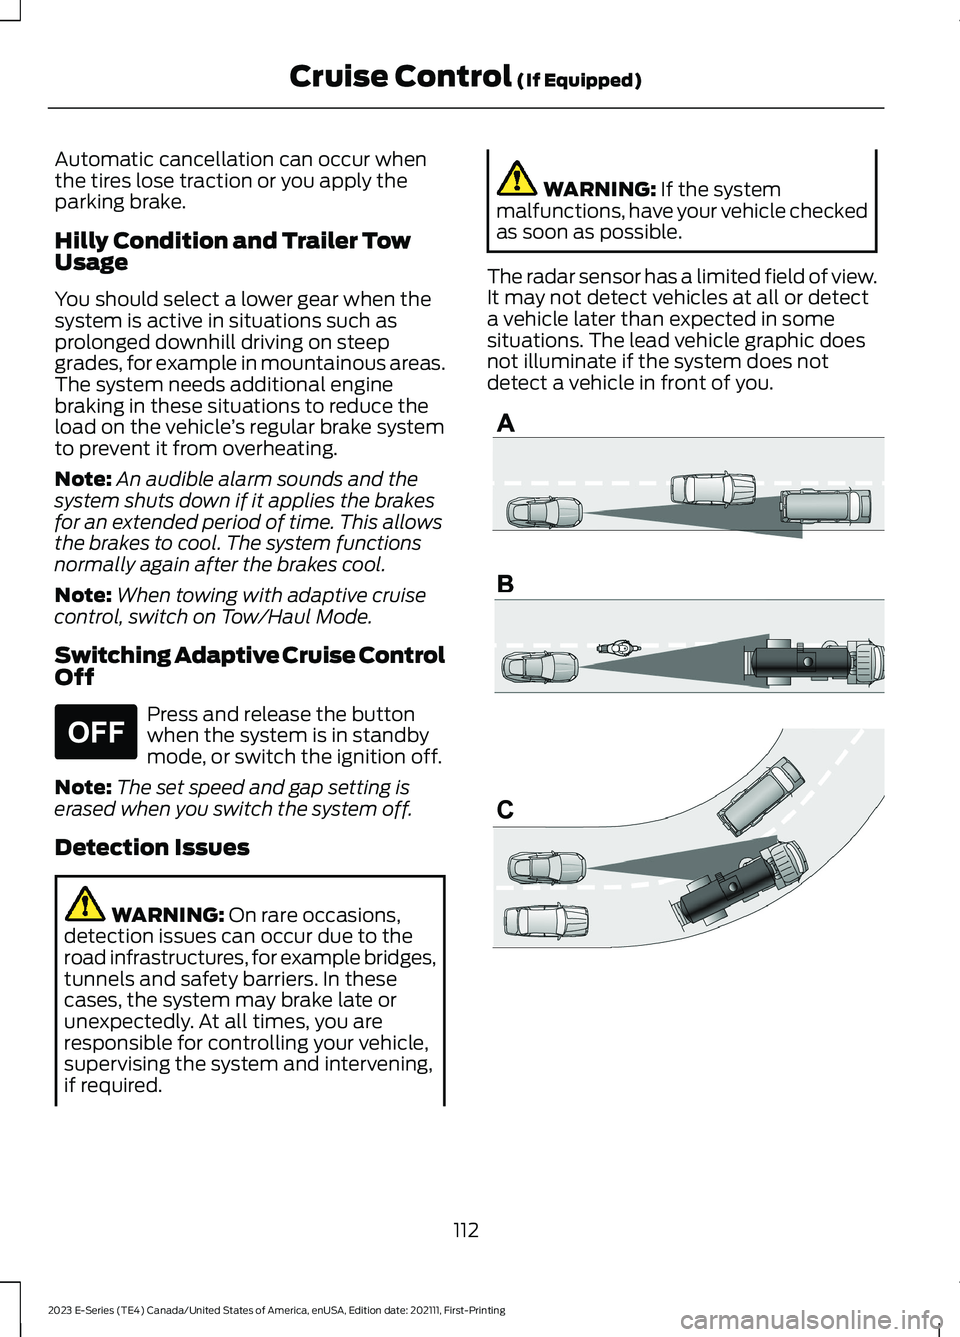
The radar sensor has a limited field of view.It may not detect vehicles at all or detecta vehicle later than expected in somesituations. The lead vehicle graphic doesnot illuminate if the system does notdetect a vehicle in front of you.
112
2023 E-Series (TE4) Canada/United States of America, enUSA, Edition date: 202111, First-PrintingCruise Control (If Equipped)E265297 E71621
Page 132 of 292
TOWING A TRAILER
WARNING: Do not exceedthe GVWR or the GAWRspecified on the certificationlabel.
WARNING: Towing trailersbeyond the maximumrecommended gross trailerweight exceeds the limit of yourvehicle and could result in enginedamage, transmission damage,structural damage, loss ofvehicle control, vehicle rolloverand personal injury.
Your vehicle may have electricalitems, for example fuses or relays,related to towing. See Fuses(page 152).
Your vehicle's load capacitydesignation is by weight, not byvolume, so you cannot necessarilyuse all available space whenloading your vehicle.
Towing a trailer places an extraload on your vehicle's engine,transmission, axle, brakes, tiresand suspension. Inspect thesecomponents periodically during,and after, any towing operation.
Load Placement
To help minimize how trailermovement affects your vehiclewhen driving:
•Load the heaviest items closestto the trailer floor.
•Load the heaviest itemscentered between the left andright side trailer tires.
•Load the heaviest items abovethe trailer axles or just slightlyforward toward the trailertongue. Do not allow the finaltrailer tongue weight to goabove or below 10-15% of theloaded trailer weight.
•Select a draw bar with thecorrect rise or drop. When boththe loaded vehicle and trailerare connected, the trailer frameshould be level, or slightlyangled down toward yourvehicle, when viewed from theside.
When driving with a trailer orpayload, a slight takeoff vibrationor shudder may be present due tothe increased payload weight.Additional information regardingcorrect trailer loading and settingyour vehicle up for towing islocated in another chapter of thisOwner's Manual. See Load Limit(page 124). You can also find theinformation in the RV & TrailerTowing Guide. See an authorizeddealer.
129
2023 E-Series (TE4) Canada/United States of America, enUSA, Edition date: 202111, First-PrintingTowing
Page 134 of 292
ESSENTIAL TOWING CHECKS
Follow these guidelines for safe towing:
•Do not tow a trailer until you drive yourvehicle at least 1,000 mi (1,600 km).
•Consult your local motor vehicle lawsfor towing a trailer.
•See the instructions included withtowing accessories for the properinstallation and adjustmentspecifications.
•Service your vehicle more frequently ifyou tow a trailer. See your scheduledmaintenance information. SeeScheduled Maintenance (page 247).
•If you use a rental trailer, follow theinstructions the rental agency givesyou.
See Load limits in the Load Carryingchapter for load specification terms foundon the tire label and Safety Compliancelabel and instructions on calculating yourvehicle's load.
Remember to account for the trailertongue weight as part of your vehicle loadwhen calculating the total vehicle weight.
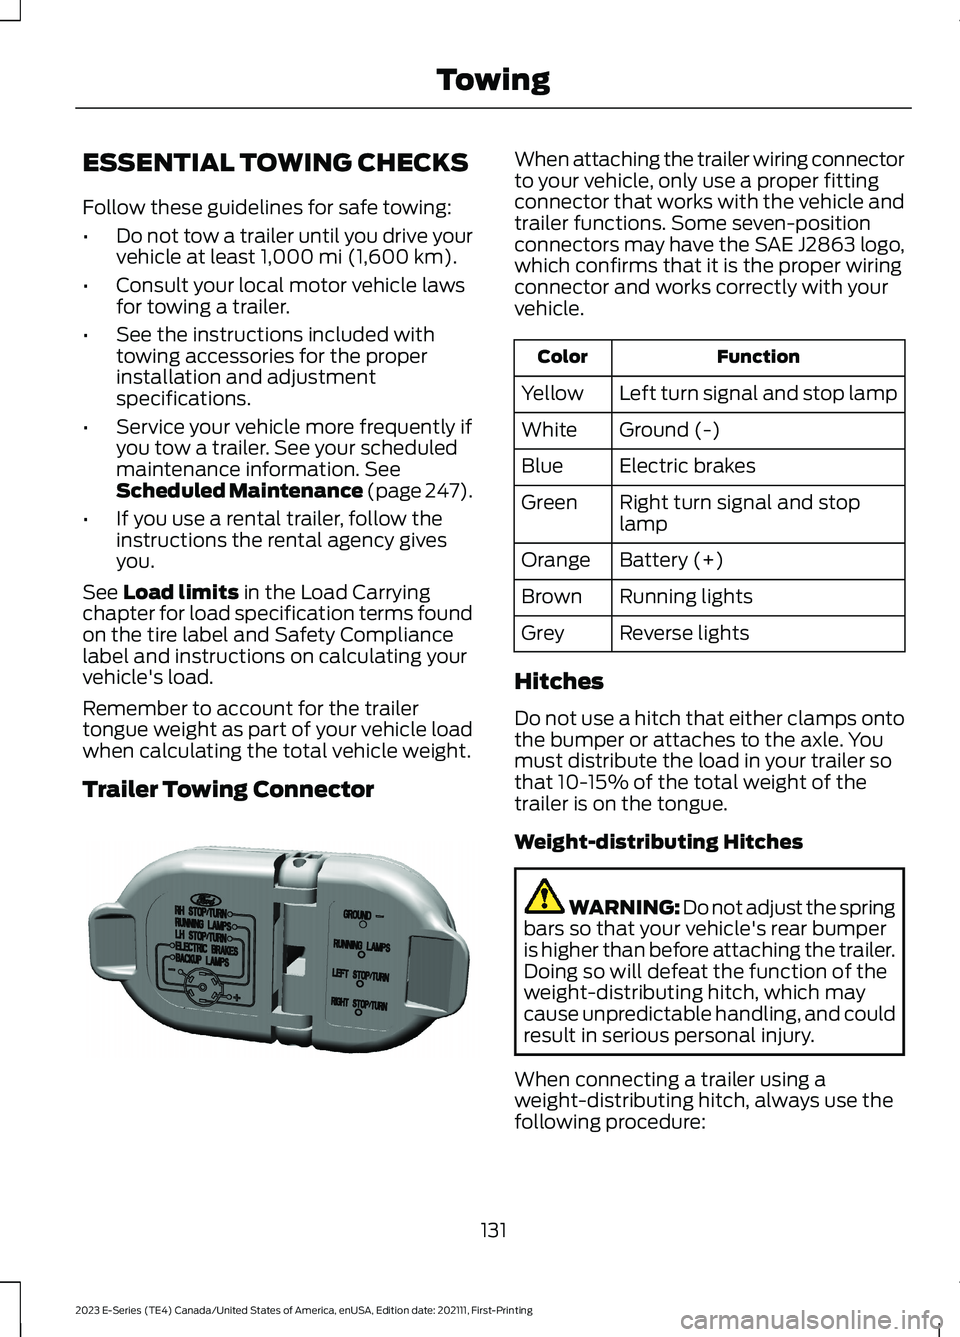
Trailer Towing Connector
When attaching the trailer wiring connectorto your vehicle, only use a proper fittingconnector that works with the vehicle andtrailer functions. Some seven-positionconnectors may have the SAE J2863 logo,which confirms that it is the proper wiringconnector and works correctly with yourvehicle.
FunctionColor
Left turn signal and stop lampYellow
Ground (-)White
Electric brakesBlue
Right turn signal and stoplampGreen
Battery (+)Orange
Running lightsBrown
Reverse lightsGrey
Hitches
Do not use a hitch that either clamps ontothe bumper or attaches to the axle. Youmust distribute the load in your trailer sothat 10-15% of the total weight of thetrailer is on the tongue.
Weight-distributing Hitches
WARNING: Do not adjust the springbars so that your vehicle's rear bumperis higher than before attaching the trailer.Doing so will defeat the function of theweight-distributing hitch, which maycause unpredictable handling, and couldresult in serious personal injury.
When connecting a trailer using aweight-distributing hitch, always use thefollowing procedure:
131
2023 E-Series (TE4) Canada/United States of America, enUSA, Edition date: 202111, First-PrintingTowingE163167
Page 135 of 292
1.Park the loaded vehicle, without thetrailer, on a level surface.
2.Measure the height to the top of yourvehicle's front wheel opening on thefender. This is H1.
3.Attach the loaded trailer to your vehiclewithout the weight-distributing barsconnected.
4.Measure the height to the top of yourvehicle's front wheel opening on thefender a second time. This is H2.
5.Install and adjust the tension in theweight-distributing bars so that theheight of your vehicle's front wheelopening on the fender is approximatelyhalfway down from H2, toward H1.
6.Check that the trailer is level or slightlynose down toward your vehicle. If not,adjust the ball height accordingly andrepeat Steps 2-6.
When the trailer is level or slightly nosedown toward the vehicle:
•Lock the bar tension adjuster in place.
•Check that the trailer tongue securelyattaches and locks onto the hitch.
•Install safety chains, lighting and trailerbrake controls as required by law or thetrailer manufacturer.
Safety Chains
Note:Do not attach safety chains to thebumper.
Always connect the safety chains to theframe or hook retainers of your vehiclehitch.
To connect the safety chains, cross thechains under the trailer tongue and allowenough slack for turning tight corners. Donot allow the chains to drag on the ground.
Trailer Brakes
WARNING: Do not connect atrailer's hydraulic brake system directlyto your vehicle's brake system. Yourvehicle may not have enough brakingpower and your chances of having acollision greatly increase.
Electric brakes and manual, automatic orsurge-type trailer brakes are safe if youinstall them properly and adjust them tothe manufacturer's specifications. Thetrailer brakes must meet local and federalregulations.
The rating for the tow vehicle's brakingsystem operation is at the gross vehicleweight rating, not the gross combinedweight rating.
Separate functioning brake systemsare required for safe control of towedvehicles and trailers weighing morethan 1500 lb (680 kg) when loaded.
Integrated Trailer Brake Controller (IfEquipped)
WARNING: Use the integratedtrailer brake controller to properly adjustthe trailer brakes and check allconnections before towing a trailer.Failure to follow this instruction couldresult in the loss of control of yourvehicle, personal injury or death.
Note:The Ford trailer brake controller hasbeen verified to be compatible with trailershaving electric-actuated drum brakes (oneto four axles) and electric-over-hydraulicbrakes. It will not activate hydraulicsurge-style trailer brakes. It is theresponsibility of the customer to ensure thatthe trailer brakes are adjusted appropriately,functioning normally and all electricconnections are properly made.
132
2023 E-Series (TE4) Canada/United States of America, enUSA, Edition date: 202111, First-PrintingTowing
Page 136 of 292
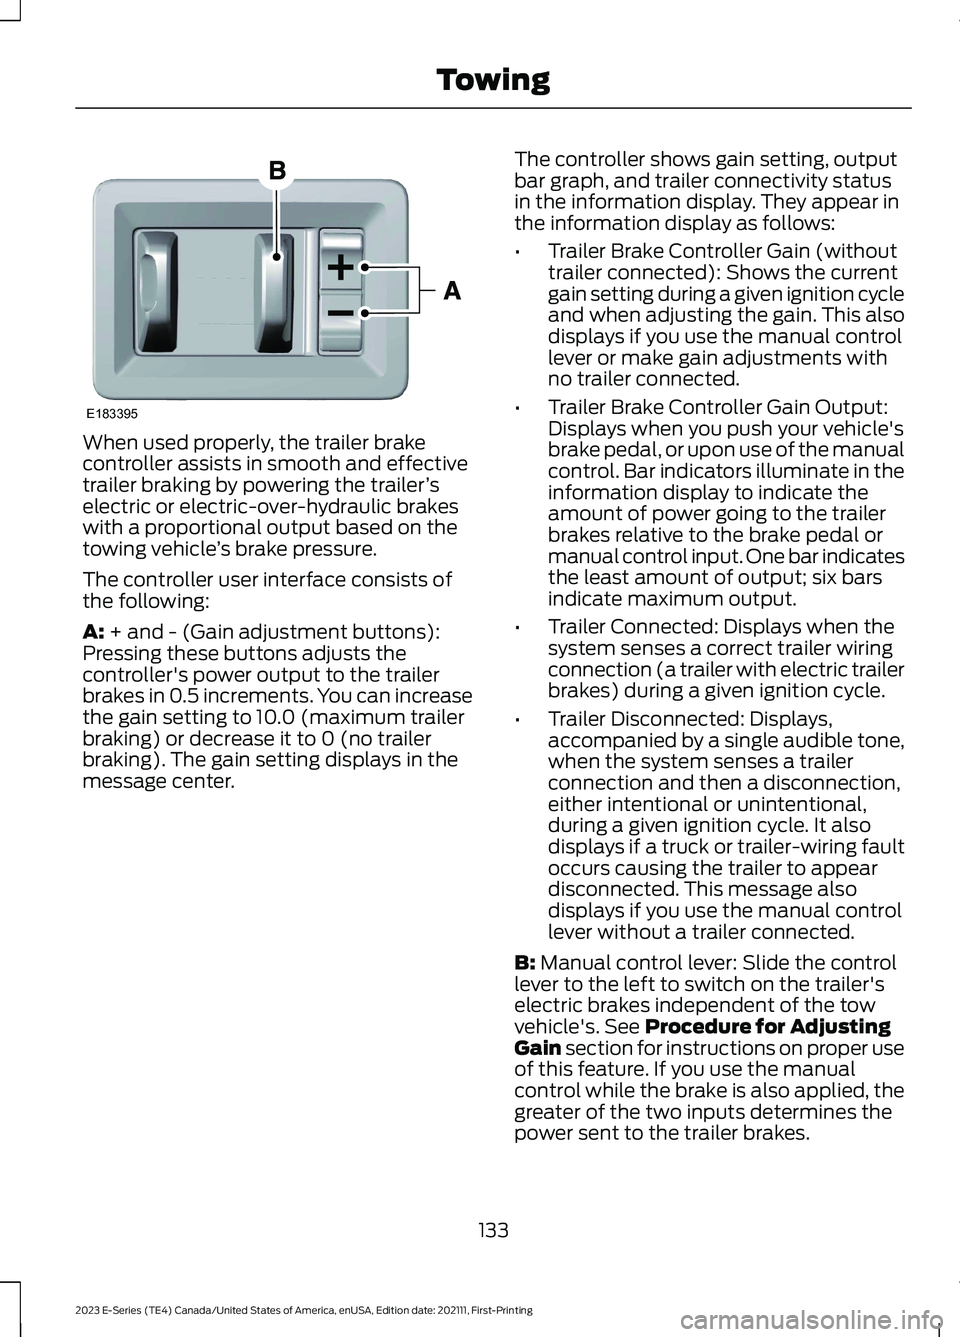
When used properly, the trailer brakecontroller assists in smooth and effectivetrailer braking by powering the trailer’selectric or electric-over-hydraulic brakeswith a proportional output based on thetowing vehicle’s brake pressure.
The controller user interface consists ofthe following:
A: + and - (Gain adjustment buttons):Pressing these buttons adjusts thecontroller's power output to the trailerbrakes in 0.5 increments. You can increasethe gain setting to 10.0 (maximum trailerbraking) or decrease it to 0 (no trailerbraking). The gain setting displays in themessage center.
The controller shows gain setting, outputbar graph, and trailer connectivity statusin the information display. They appear inthe information display as follows:
•Trailer Brake Controller Gain (withouttrailer connected): Shows the currentgain setting during a given ignition cycleand when adjusting the gain. This alsodisplays if you use the manual controllever or make gain adjustments withno trailer connected.
•Trailer Brake Controller Gain Output:Displays when you push your vehicle'sbrake pedal, or upon use of the manualcontrol. Bar indicators illuminate in theinformation display to indicate theamount of power going to the trailerbrakes relative to the brake pedal ormanual control input. One bar indicatesthe least amount of output; six barsindicate maximum output.
•Trailer Connected: Displays when thesystem senses a correct trailer wiringconnection (a trailer with electric trailerbrakes) during a given ignition cycle.
•Trailer Disconnected: Displays,accompanied by a single audible tone,when the system senses a trailerconnection and then a disconnection,either intentional or unintentional,during a given ignition cycle. It alsodisplays if a truck or trailer-wiring faultoccurs causing the trailer to appeardisconnected. This message alsodisplays if you use the manual controllever without a trailer connected.
B: Manual control lever: Slide the controllever to the left to switch on the trailer'selectric brakes independent of the towvehicle's. See Procedure for AdjustingGain section for instructions on proper useof this feature. If you use the manualcontrol while the brake is also applied, thegreater of the two inputs determines thepower sent to the trailer brakes.
133
2023 E-Series (TE4) Canada/United States of America, enUSA, Edition date: 202111, First-PrintingTowingE183395
Page 142 of 292
•Avoid adding particular accessories toyour vehicle (e.g. bug deflectors,rollbars/light bars, running boards, skiracks).
•Avoid driving with the wheels out ofalignment.
BREAKING-IN
You need to break in new tires forapproximately 300 mi (480 km). Duringthis time, your vehicle may exhibit someunusual driving characteristics.
Avoid driving too fast during the first1,000 mi (1,600 km). Vary your speedfrequently and change up through thegears early. Do not labor the engine.
Do not tow during the first 1,000 mi(1,600 km).
DRIVING THROUGH WATER
WARNING: Do not drive throughflowing or deep water as you may losecontrol of your vehicle.
Note:Driving through standing water cancause vehicle damage.
Note:Engine damage can occur if waterenters the air filter.
Before driving through standing water,check the depth. Never drive through waterthat is higher than the bottom of the wheelhubs.
When driving through standing water, drivevery slowly and do not stop your vehicle.Your brake performance and traction maybe limited. After driving through water andas soon as it is safe to do so:
•Lightly press the brake pedal to dry thebrakes and to check that they work.
•Check that the horn works.
•Check that the exterior lights work.
•Turn the steering wheel to check thatthe steering power assist works.
FLOOR MATS
WARNING: Use a floor matdesigned to fit the footwell of yourvehicle that does not obstruct the pedalarea. Failure to follow this instructioncould result in the loss of control of yourvehicle, personal injury or death.
WARNING: Pedals that cannotmove freely can cause loss of vehiclecontrol and increase the risk of seriouspersonal injury.
139
2023 E-Series (TE4) Canada/United States of America, enUSA, Edition date: 202111, First-PrintingDriving HintsE176913