light FORD E SERIES 2024 User Guide
[x] Cancel search | Manufacturer: FORD, Model Year: 2024, Model line: E SERIES, Model: FORD E SERIES 2024Pages: 303, PDF Size: 6.95 MB
Page 42 of 303
The passenger side airbag should alwaysbe on (the airbag off light should not beilluminated) unless the passenger is aperson who meets the requirements statedeither in Category 1, 2 or 3 of the NationalHighway Traffic SafetyAdministration/Transport Canadadeactivation criteria which follows.
The vast majority of drivers and passengersare much safer with an airbag thanwithout. To do their job and reduce the riskof life threatening injuries, airbags mustopen with great force, and this force canpose a potentially deadly risk in somesituations, particularly when a front seatoccupant is not properly buckled up. Themost effective way to reduce the risk ofunnecessary airbag injuries withoutreducing the overall safety of the vehicleis to make sure all occupants are properlyrestrained in the vehicle, especially in thefront seat. This provides the protection ofseatbelts and permits the airbags toprovide the additional protection they weredesigned to provide. If you choose todeactivate your airbag, you are losing thevery significant risk reducing benefits ofthe airbag and you are also reducing theeffectiveness of the seatbelts, becauseseatbelts in modern vehicles are designedto work as a safety system with theairbags.
National Highway Traffic SafetyAdministration Deactivation Criteria(Excluding Canada)
WARNING: This vehicle has specialenergy management seatbelts for thedriver and right front passenger. Theseparticular seatbelts are specificallydesigned to work with airbags to helpreduce the risk of injury in a crash. Theenergy management seatbelt gives orreleases additional seatbelt webbing insome accidents to reduce the
concentration of force on an occupant'schest and to reduce the risk of certainbone fractures and injuries to underlyingorgans. In a crash, if the airbag is off, thisenergy management seatbelt mightpermit the passenger wearing theseatbelt to move forward enough tohave a serious or fatal injury. The moresevere the crash, and the heavier theoccupant, the greater the risk. Make surethe airbag is on for any passenger whodoes not qualify under the NationalHighway Traffic Safety Administrationdeactivation criteria.
1.Infant. An infant (less than 1 year old)must ride in the front seat because:
•The vehicle has no rear seat.
•The vehicle has a rear seat too smallto accommodate a rear-facing infantseat.
•The infant has a medical conditionwhich, according to the infant'sphysician, makes it necessary for theinfant to ride in the front so that thedriver can constantly monitor thechild's condition.
2.Child age 1 to 12. A child age 1 to 12 mustride in the front seat because:
•The vehicle has no rear seat.
•Although children ages 1 to 12 ride inthe rear seat(s) whenever possible,children ages 1 to 12 sometimes mustride in the front because no space isavailable in the rear seat(s) of thevehicle.
•The child has a medical conditionwhich, according to the child'sphysician, makes it necessary for thechild to ride in the front seat so that thedriver can constantly monitor thechild's condition.
38
2024 E-Series (TE4) Canada/United States of America, enUSA, Edition date: 202210, First-PrintingSupplementary Restraints System
Page 44 of 303
Proper Driver and Front PassengerSeating Adjustment
WARNING: National HighwayTraffic Safety Administration (NHTSA)recommends a minimum distance of atleast 10 in (25 cm) between anoccupant's chest and the driver airbagmodule.
To properly position yourself away fromthe airbag:
•Move your seat to the rear as far as youcan while still reaching the pedalscomfortably.
•Recline the seat slightly (one or twodegrees) from the upright position.
After all occupants have adjusted theirseats and put on seatbelts, it is veryimportant that they continue to sitproperly. Properly seated occupants situpright, lean against the seat back, andcenter themselves on the seat cushion,with their feet comfortably extended onthe floor. Sitting improperly can increasethe chance of injury in a crash event. Forexample, if an occupant slouches, liesdown, turns sideways, sits forward, leansforward or sideways, or puts one or bothfeet up, the chance of injury during a crashis greatly increased.
Children and Airbags
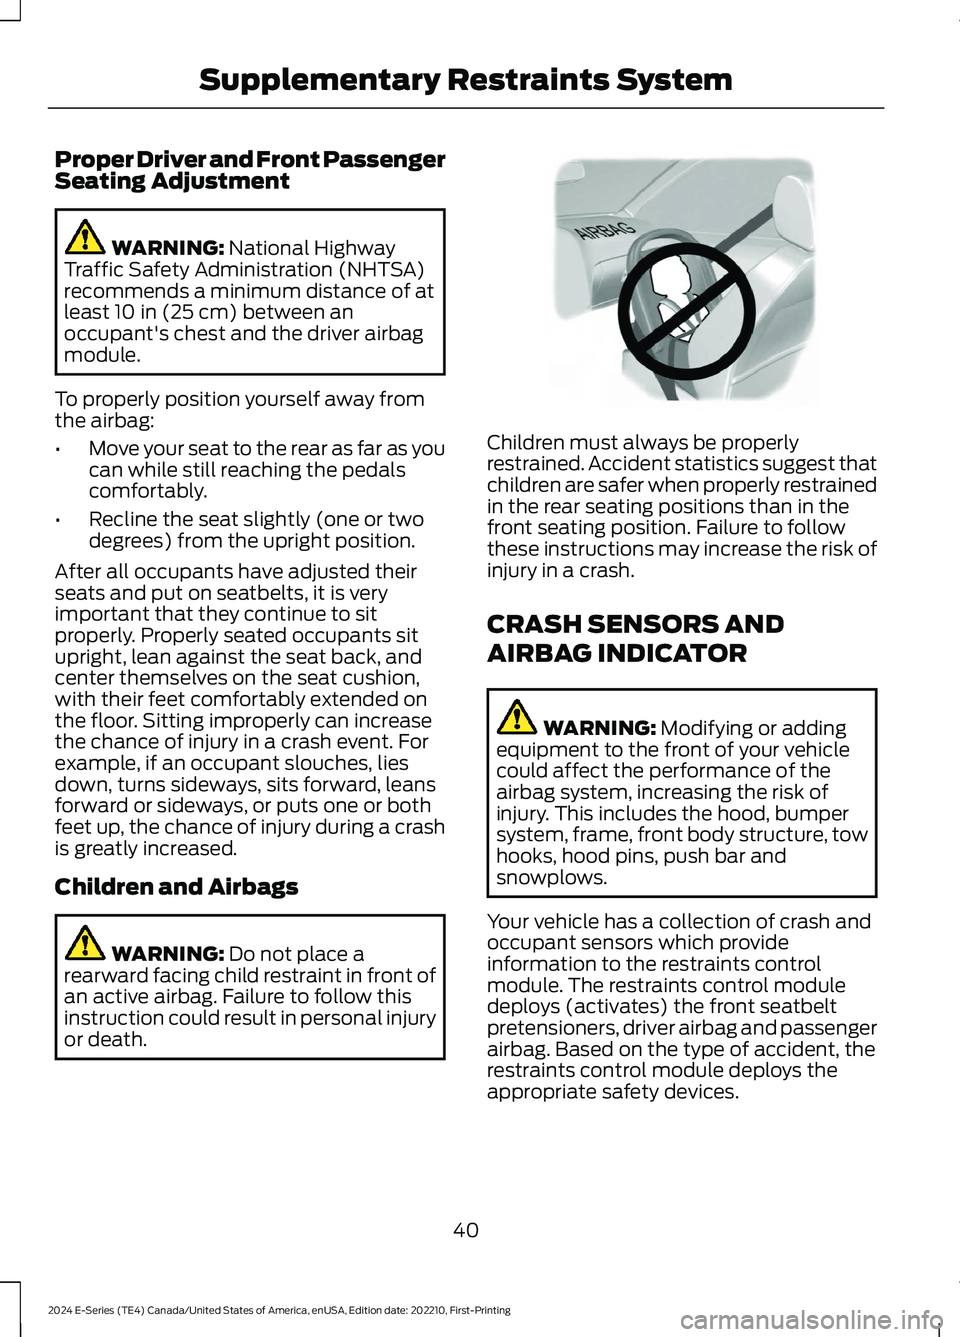
WARNING: Do not place arearward facing child restraint in front ofan active airbag. Failure to follow thisinstruction could result in personal injuryor death.
Children must always be properlyrestrained. Accident statistics suggest thatchildren are safer when properly restrainedin the rear seating positions than in thefront seating position. Failure to followthese instructions may increase the risk ofinjury in a crash.
CRASH SENSORS AND
AIRBAG INDICATOR
WARNING: Modifying or addingequipment to the front of your vehiclecould affect the performance of theairbag system, increasing the risk ofinjury. This includes the hood, bumpersystem, frame, front body structure, towhooks, hood pins, push bar andsnowplows.
Your vehicle has a collection of crash andoccupant sensors which provideinformation to the restraints controlmodule. The restraints control moduledeploys (activates) the front seatbeltpretensioners, driver airbag and passengerairbag. Based on the type of accident, therestraints control module deploys theappropriate safety devices.
40
2024 E-Series (TE4) Canada/United States of America, enUSA, Edition date: 202210, First-PrintingSupplementary Restraints SystemE142846
Page 45 of 303
The restraints control module alsomonitors the readiness of the above safetydevices plus the crash sensors. Thereadiness of the safety system is indicatedby a warning indicator light in theinstrument cluster or by a backup tone ifthe warning light is not working. SeeInstrument Cluster (page 58). Routinemaintenance of the airbag is not required.
A difficulty with the system is indicated byone or more of the following:
The readiness light will notilluminate immediately after youswitch the ignition on.
•The readiness light either flashes orstays lit.
•You hear a series of five tones. Thetone pattern repeats periodically untilthe problem, the light or both arerepaired.
If any of these things happen, evenintermittently, have the supplementalrestraint system serviced at an authorizeddealer immediately. Unless serviced, thesystem may not function properly in theevent of a crash.
The seatbelt pretensioners and the airbagsupplemental restraint system aredesigned to activate when the vehiclesustains frontal deceleration sufficient tocause the restraints control module todeploy a safety device.
The fact that the seatbelt pretensionersor airbags did not activate in a crash doesnot mean that something is wrong with thesystem. Rather, it means the restraintscontrol module determined the accidentconditions (such as crash severity, beltusage) were not appropriate to activatethese safety devices.
•The design of the front airbags is toactivate only in frontal and near-frontalcrashes (not rollovers, side impacts orrear impacts) unless the crash causessufficient frontal deceleration.
•The design of the seatbeltpretensioners is to activate in frontalor near-frontal crashes and deploy inrollovers.
AIRBAG DISPOSAL
Contact your authorized dealer as soon aspossible. Airbags must be disposed of byqualified personnel.
41
2024 E-Series (TE4) Canada/United States of America, enUSA, Edition date: 202210, First-PrintingSupplementary Restraints SystemE67017
Page 50 of 303

Note:If any door is open, the horn soundstwice and the direction indicators do notflash.
Autolock
Autolock locks all the doors when all of thefollowing occur:
•All doors are closed.
•The ignition is on.
•The vehicle reaches a speed greaterthan 12 mph (20 km/h).
Autolock repeats when:
•The vehicle is stopped.
•Any door opens and closes while theignition is on.
•The vehicle reaches a speed greaterthan 12 mph (20 km/h).
Autounlock
Autounlock unlocks all the doors when allof the following occur:
•All the doors are closed and yourvehicle is moving at a speed greaterthan 12 mph (20 km/h).
•Your vehicle comes to a stop.
•You open the driver door within 10minutes of switching the ignition off orto the accessory position.
Note:If you open the driver door after 10minutes, autounlock does not unlock allother doors.
Enabling or Disabling Autounlock
(If Equipped)
You can enable or disable the autounlockfeature in the instrument cluster display oran authorized dealer can do it for you.
To enable or disable autounlock, do thefollowing:
1.Switch the ignition on.
2.Press the power door unlock controlthree times.
3.Switch the ignition off.
4.Press the power door unlock controlthree times.
5.Switch the ignition on. The hornsounds indicating your vehicle is inprogramming mode.
6.Press the power door lock control andwithin five seconds, press the powerdoor unlock control. The horn soundsonce if disabled or twice if enabled.
7.Switch the ignition off. The horn soundsindicating programming is complete.
Note:You can also switch this feature onor off using the instrument cluster display.See Information Displays (page 64).
Illuminated Entry
The interior lamps and some exteriorlamps illuminate when you unlock thedoors with the remote control.
The lamps turn off if:
•The ignition is on.
•You press the lock button on theremote control.
•25 seconds have elapsed.
The lamps do not turn off if:
•You switch them on with the lightingcontrol.
•Any door is open.
46
2024 E-Series (TE4) Canada/United States of America, enUSA, Edition date: 202210, First-PrintingDoors and Locks
Page 55 of 303

GENERAL INFORMATION
Condensation in the Exterior FrontLamps and Rear Lamps
Exterior front lamps and rear lamps havevents to accommodate normal changesin air pressure.
Condensation can be a natural by-productof this design. When moist air enters thelamp assembly through the vents, there isa possibility that condensation can occurwhen the temperature is cold. Whennormal condensation occurs, a fine mistcan form on the interior of the lens. Thefine mist eventually clears and exitsthrough the vents during normal operation.
Clearing time may take as long as 48 hoursunder dry weather conditions.
Examples of acceptable condensation are:
•The presence of a fine mist (no streaks,drip marks or large droplets).
•A fine mist covers less than 50% of thelens.
Examples of unacceptable condensationare:
•A water puddle inside the lamp.
•Streaks, drip marks or large dropletspresent on the interior of the lens.
If you see any unacceptable condensation,have your vehicle checked by an authorizeddealer.
LIGHTING CONTROL
Lamps off.A
Parking lamps, instrument panellamps, license plate lamps andrear lamps.
B
Headlamps.C
Headlamp High Beam
Push the lever away from you toswitch the high beam on.
Push the lever forward again or pull thelever toward you to switch the high beamsoff.
51
2024 E-Series (TE4) Canada/United States of America, enUSA, Edition date: 202210, First-PrintingLightingE142449 E308790 E67019
Page 56 of 303
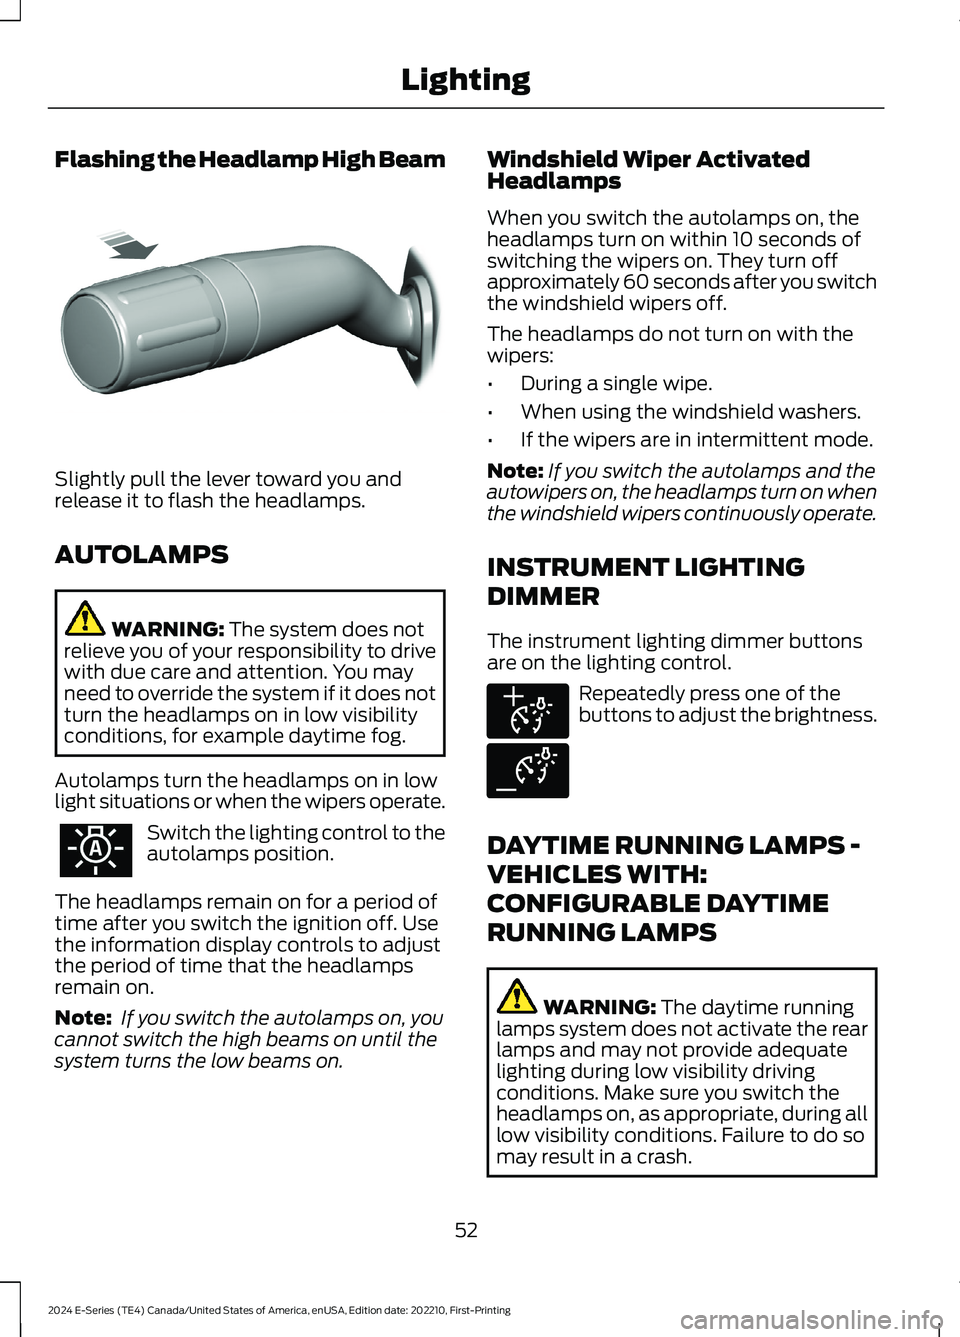
Flashing the Headlamp High Beam
Slightly pull the lever toward you andrelease it to flash the headlamps.
AUTOLAMPS
WARNING: The system does notrelieve you of your responsibility to drivewith due care and attention. You mayneed to override the system if it does notturn the headlamps on in low visibilityconditions, for example daytime fog.
Autolamps turn the headlamps on in lowlight situations or when the wipers operate.
Switch the lighting control to theautolamps position.
The headlamps remain on for a period oftime after you switch the ignition off. Usethe information display controls to adjustthe period of time that the headlampsremain on.
Note: If you switch the autolamps on, youcannot switch the high beams on until thesystem turns the low beams on.
Windshield Wiper ActivatedHeadlamps
When you switch the autolamps on, theheadlamps turn on within 10 seconds ofswitching the wipers on. They turn offapproximately 60 seconds after you switchthe windshield wipers off.
The headlamps do not turn on with thewipers:
•During a single wipe.
•When using the windshield washers.
•If the wipers are in intermittent mode.
Note:If you switch the autolamps and theautowipers on, the headlamps turn on whenthe windshield wipers continuously operate.
INSTRUMENT LIGHTING
DIMMER
The instrument lighting dimmer buttonsare on the lighting control.
Repeatedly press one of thebuttons to adjust the brightness.
DAYTIME RUNNING LAMPS -
VEHICLES WITH:
CONFIGURABLE DAYTIME
RUNNING LAMPS
WARNING: The daytime runninglamps system does not activate the rearlamps and may not provide adequatelighting during low visibility drivingconditions. Make sure you switch theheadlamps on, as appropriate, during alllow visibility conditions. Failure to do somay result in a crash.
52
2024 E-Series (TE4) Canada/United States of America, enUSA, Edition date: 202210, First-PrintingLightingE311233 E291299 E291298
Page 57 of 303
Switch the daytime running lamps on oroff using the touchscreen:
1.Select Settings.
2.Select Vehicle.
3.Select Lighting.
The daytime running lamps turn on when:
1.The lamps are on in the informationdisplay.
2.You switch the ignition on.
3.The transmission is not in park (P) forvehicles with automatic transmissionsor you release the parking brake forvehicles with manual transmissions.
4.The lighting control is in the autolampsposition.
5.The headlamps are off.
The other lighting control switch positionsdo not turn on the daytime running lamps.
If the daytime running lamps are off in theinformation display, the lamps stay off inall switch positions.
DAYTIME RUNNING LAMPS -
VEHICLES WITH: DAYTIME
RUNNING LAMPS (DRL)
WARNING: The daytime runninglamps system does not activate the rearlamps and may not provide adequatelighting during low visibility drivingconditions. Make sure you switch theheadlamps on, as appropriate, during alllow visibility conditions. Failure to do somay result in a crash.
The system turns the lamps on in daylightconditions.
To switch the system on, switch thelighting control to any position exceptheadlamps.
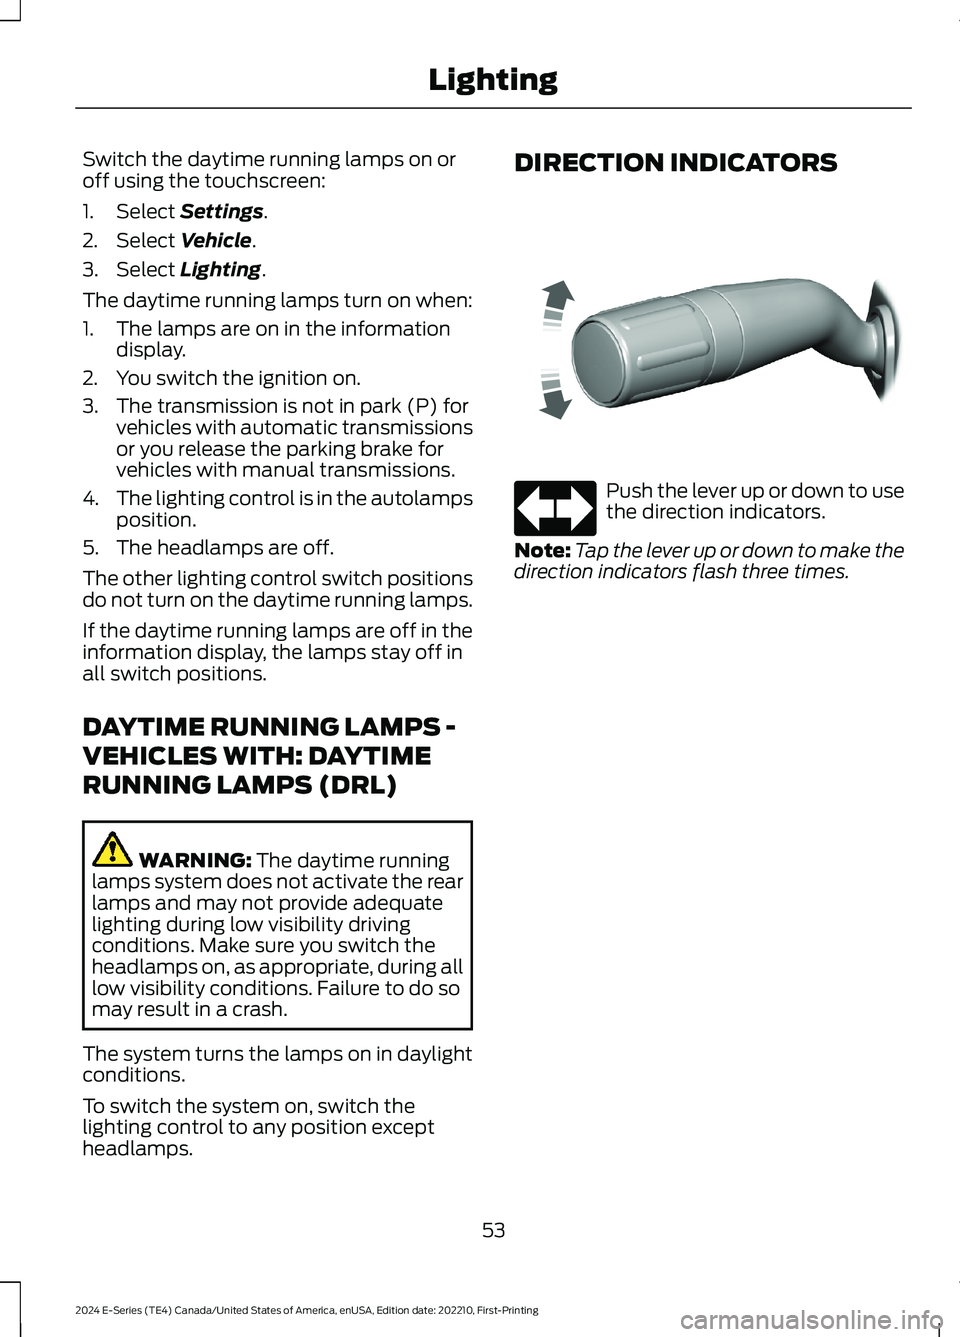
DIRECTION INDICATORS
Push the lever up or down to usethe direction indicators.
Note:Tap the lever up or down to make thedirection indicators flash three times.
53
2024 E-Series (TE4) Canada/United States of America, enUSA, Edition date: 202210, First-PrintingLightingE311431 E67018
Page 58 of 303
WHAT IS AUTOMATIC HIGH
BEAM CONTROL
The system turns on high beams if it is darkenough and no other traffic is present. If itdetects an approaching vehicle’sheadlamps or tail lamps, or street lightingahead, the system turns the high beamsoff. Low beams remain on.
A camera sensor, centrally mountedbehind the windshield of your vehicle,continuously monitors conditions to turnthe high beams on and off.
SWITCHING AUTOMATIC HIGH
BEAM CONTROL ON AND OFF
Switch the system on or off using theinformation display. See GeneralInformation (page 64).
Activating the Automatic HighBeam Control
Switch the lighting control to theautolamps position to activate.See Autolamps (page 52).
Note:Automatic high beams are notavailable when you do not turn onautolamps.
When active, the high beams turn on if allof the following occur:
•The ambient light level is low enough.
•There is no traffic in front of yourvehicle.
•The vehicle speed is greater thanapproximately 32 mph (52 km/h).
When active, the high beams turn off if anyof the following occur:
•The ambient light level is high enoughthat it does not require high beams.
•The system detects an approachingvehicle's headlamps or tail lamps.
•The system detects severe rain, snowor fog.
•The camera is blocked.
•The vehicle speed falls belowapproximately 27 mph (44 km/h).
Note:The deactivation speed is lower oncurves.
Note:There could be a delay in high beamreactivation in certain curvy road situations.
Note:If you have a blocked sensor, thesystem may not operate properly. Keep thewindshield free from obstruction or damage.
Note:The system may not operate properlyin cold or inclement conditions. You canswitch on the high beams by overriding thesystem.
Note:If the system detects a blockage, forexample bird droppings, bug splatter, snowor ice, the system goes into low beam modeuntil you clear the blockage. If you have ablocked camera, a message may appear inthe information display.
Note:Using much larger tires or equippingvehicle accessories such as snowplows canmodify your vehicle's ride height anddegrade automatic high beam controlperformance.
AUTOMATIC HIGH BEAM
CONTROL INDICATORS
The indicator illuminates toconfirm when the system isready to assist.
54
2024 E-Series (TE4) Canada/United States of America, enUSA, Edition date: 202210, First-PrintingAutomatic High Beam Control (If Equipped) E146105
Page 60 of 303
POWER WINDOWS (IF EQUIPPED)
WARNING: Do not leave childrenunattended in your vehicle and do notlet them play with the power windows.Failure to follow this instruction couldresult in personal injury.
WARNING: When closing thepower windows, verify they are free ofobstruction and make sure that childrenand pets are not in the proximity of thewindow openings.
Note:You may hear a pulsing noise whenjust one of the windows is open. Lower theopposite window slightly to reduce thisnoise.
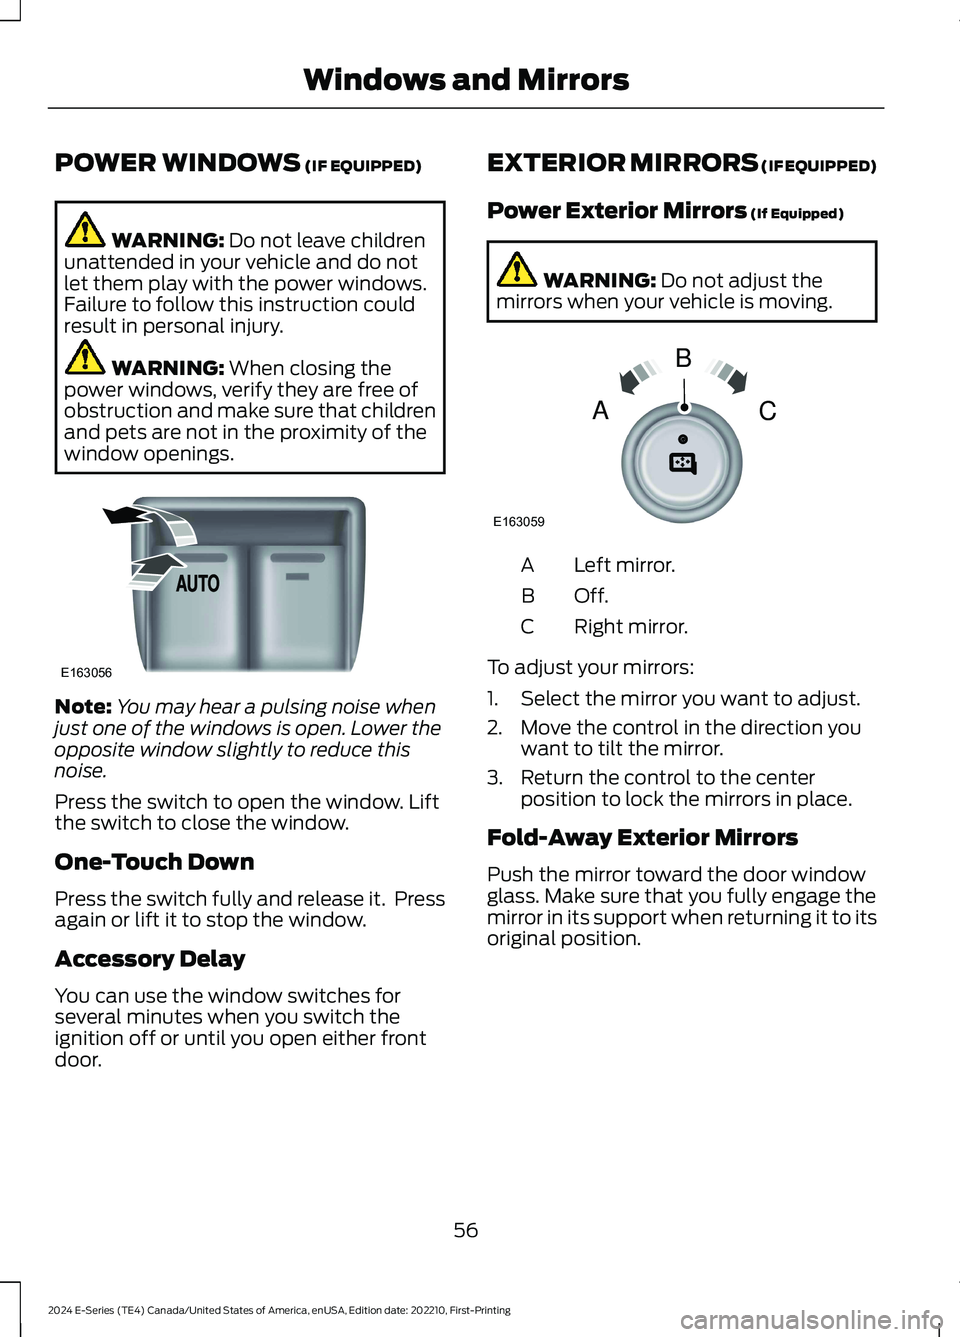
Press the switch to open the window. Liftthe switch to close the window.
One-Touch Down
Press the switch fully and release it. Pressagain or lift it to stop the window.
Accessory Delay
You can use the window switches forseveral minutes when you switch theignition off or until you open either frontdoor.
EXTERIOR MIRRORS (IF EQUIPPED)
Power Exterior Mirrors (If Equipped)
WARNING: Do not adjust themirrors when your vehicle is moving.
Left mirror.A
Off.B
Right mirror.C
To adjust your mirrors:
1.Select the mirror you want to adjust.
2.Move the control in the direction youwant to tilt the mirror.
3.Return the control to the centerposition to lock the mirrors in place.
Fold-Away Exterior Mirrors
Push the mirror toward the door windowglass. Make sure that you fully engage themirror in its support when returning it to itsoriginal position.
56
2024 E-Series (TE4) Canada/United States of America, enUSA, Edition date: 202210, First-PrintingWindows and MirrorsE163056 E163059BAC
Page 61 of 303
Telescoping Mirrors (If Equipped)
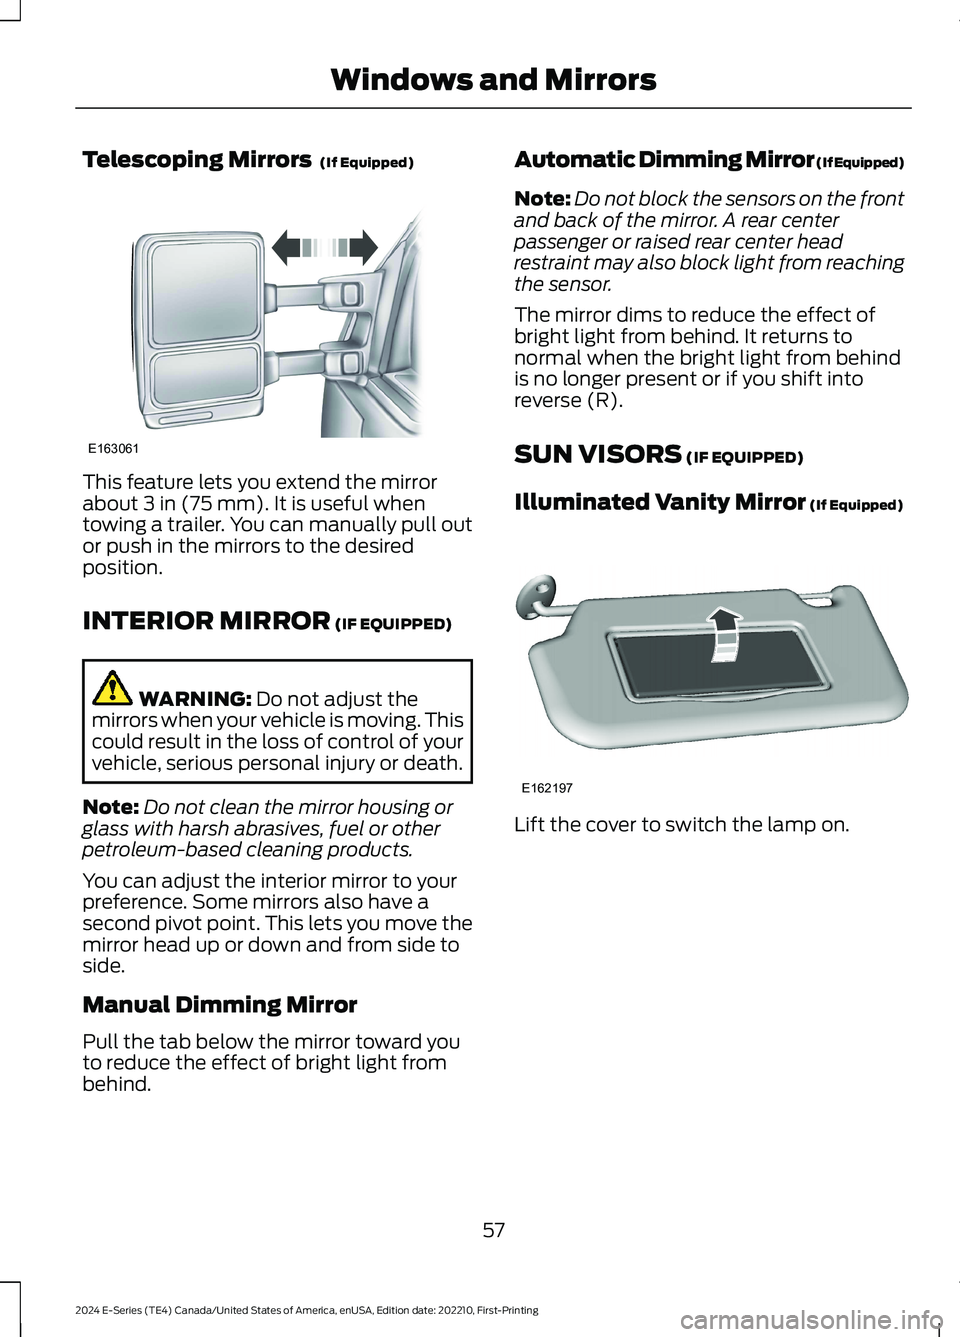
This feature lets you extend the mirrorabout 3 in (75 mm). It is useful whentowing a trailer. You can manually pull outor push in the mirrors to the desiredposition.
INTERIOR MIRROR (IF EQUIPPED)
WARNING: Do not adjust themirrors when your vehicle is moving. Thiscould result in the loss of control of yourvehicle, serious personal injury or death.
Note:Do not clean the mirror housing orglass with harsh abrasives, fuel or otherpetroleum-based cleaning products.
You can adjust the interior mirror to yourpreference. Some mirrors also have asecond pivot point. This lets you move themirror head up or down and from side toside.
Manual Dimming Mirror
Pull the tab below the mirror toward youto reduce the effect of bright light frombehind.
Automatic Dimming Mirror (If Equipped)
Note:Do not block the sensors on the frontand back of the mirror. A rear centerpassenger or raised rear center headrestraint may also block light from reachingthe sensor.
The mirror dims to reduce the effect ofbright light from behind. It returns tonormal when the bright light from behindis no longer present or if you shift intoreverse (R).
SUN VISORS (IF EQUIPPED)
Illuminated Vanity Mirror (If Equipped)
Lift the cover to switch the lamp on.
57
2024 E-Series (TE4) Canada/United States of America, enUSA, Edition date: 202210, First-PrintingWindows and MirrorsE163061 E162197