Lock FORD ECOSPORT 2018 Repair Manual
[x] Cancel search | Manufacturer: FORD, Model Year: 2018, Model line: ECOSPORT, Model: FORD ECOSPORT 2018Pages: 452, PDF Size: 17.04 MB
Page 203 of 452
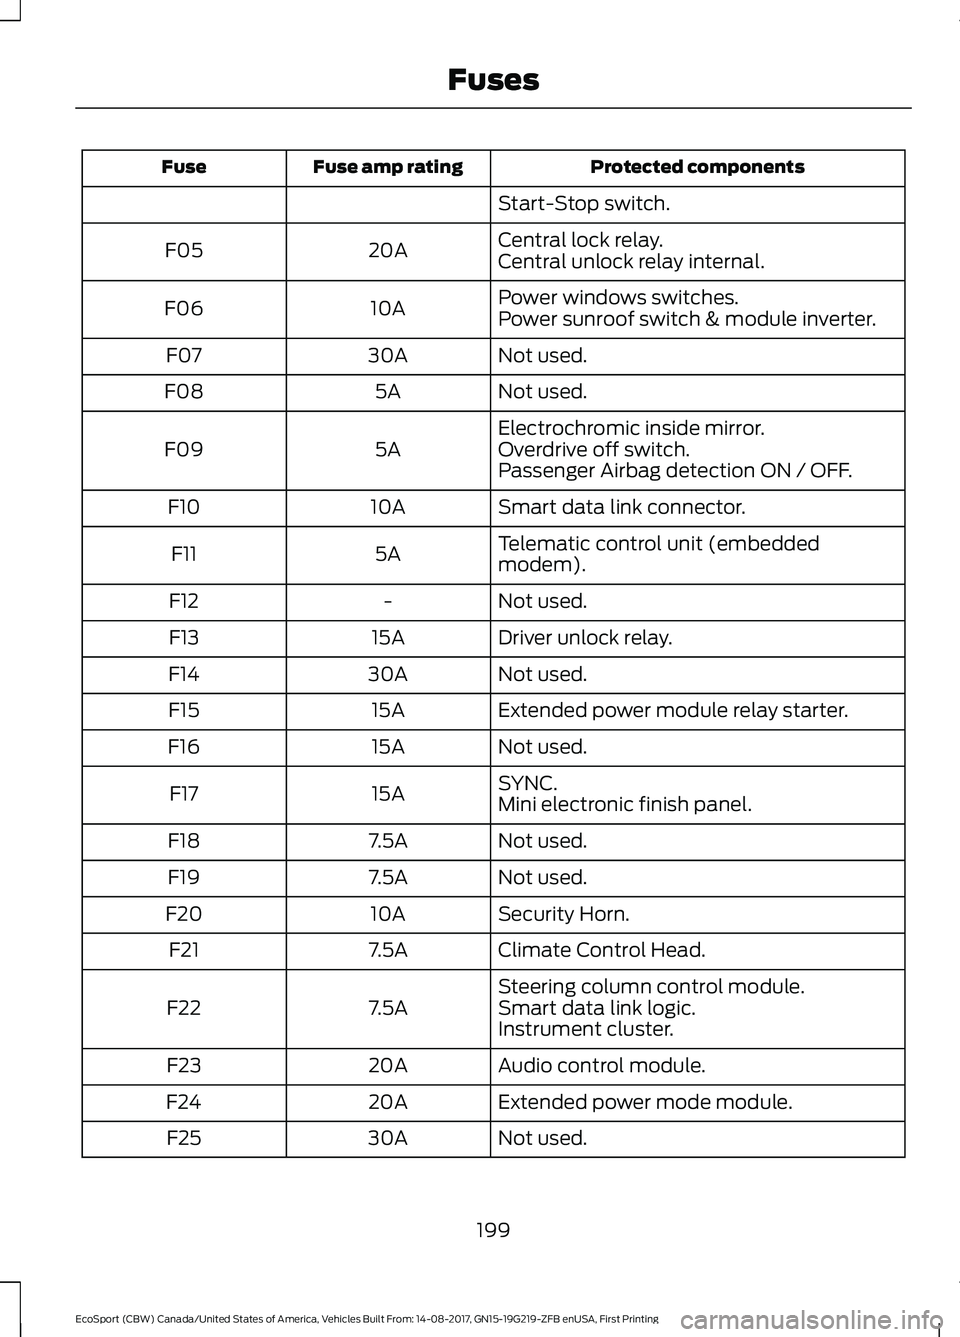
Protected componentsFuse amp ratingFuse
Start-Stop switch.
Central lock relay.20AF05Central unlock relay internal.
Power windows switches.10AF06Power sunroof switch & module inverter.
Not used.30AF07
Not used.5AF08
Electrochromic inside mirror.5AF09Overdrive off switch.Passenger Airbag detection ON / OFF.
Smart data link connector.10AF10
Telematic control unit (embeddedmodem).5AF11
Not used.-F12
Driver unlock relay.15AF13
Not used.30AF14
Extended power module relay starter.15AF15
Not used.15AF16
SYNC.15AF17Mini electronic finish panel.
Not used.7.5AF18
Not used.7.5AF19
Security Horn.10AF20
Climate Control Head.7.5AF21
Steering column control module.7.5AF22Smart data link logic.Instrument cluster.
Audio control module.20AF23
Extended power mode module.20AF24
Not used.30AF25
199EcoSport (CBW) Canada/United States of America, Vehicles Built From: 14-08-2017, GN15-19G219-ZFB enUSA, First PrintingFuses
Page 206 of 452
GENERAL INFORMATION
Have your vehicle serviced regularly to helpmaintain its roadworthiness and resalevalue. There is a large network ofauthorized dealers that are there to helpyou with their professional servicingexpertise. We believe that their speciallytrained technicians are best qualified toservice your vehicle properly and expertly.They are supported by a wide range ofhighly specialized tools developedspecifically for servicing your vehicle.
If your vehicle requires professional service,an authorized dealer can provide thenecessary parts and service. Check yourwarranty information to find out whichparts and services are covered.
Use only recommended fuels, lubricants,fluids and service parts conforming tospecifications. Motorcraft® parts aredesigned and built to provide the bestperformance in your vehicle.
Precautions
•Do not work on a hot engine.
•Make sure that nothing gets caught inmoving parts.
•Do not work on a vehicle with theengine running in an enclosed space,unless you are sure you have enoughventilation.
•Keep all open flames and other burningmaterial (such as cigarettes) awayfrom the battery and all fuel relatedparts.
Working with the Engine Off
1.Set the parking brake and shift to park(P).
2.Switch off the engine.
3.Block the wheels.
Working with the Engine On
WARNING
To reduce the risk of vehicle damageand/or personal burn injuries, do notstart your engine with the air cleanerremoved and do not remove it while theengine is running.
1.Set the parking brake and shift to park(P).
2.Block the wheels.
OPENING AND CLOSING THE
HOOD
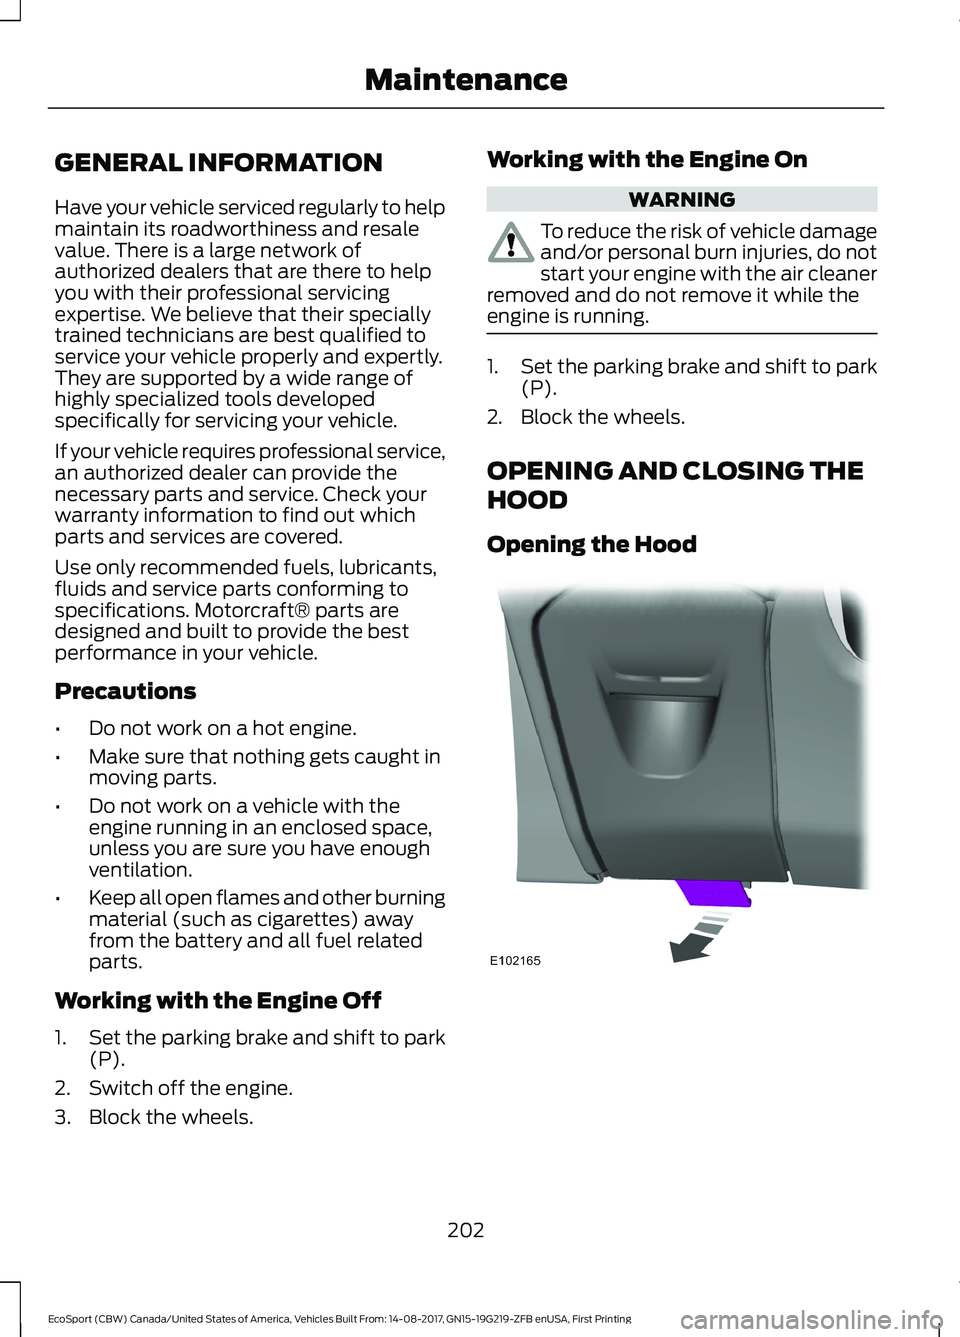
Opening the Hood
202EcoSport (CBW) Canada/United States of America, Vehicles Built From: 14-08-2017, GN15-19G219-ZFB enUSA, First PrintingMaintenance
Page 211 of 452
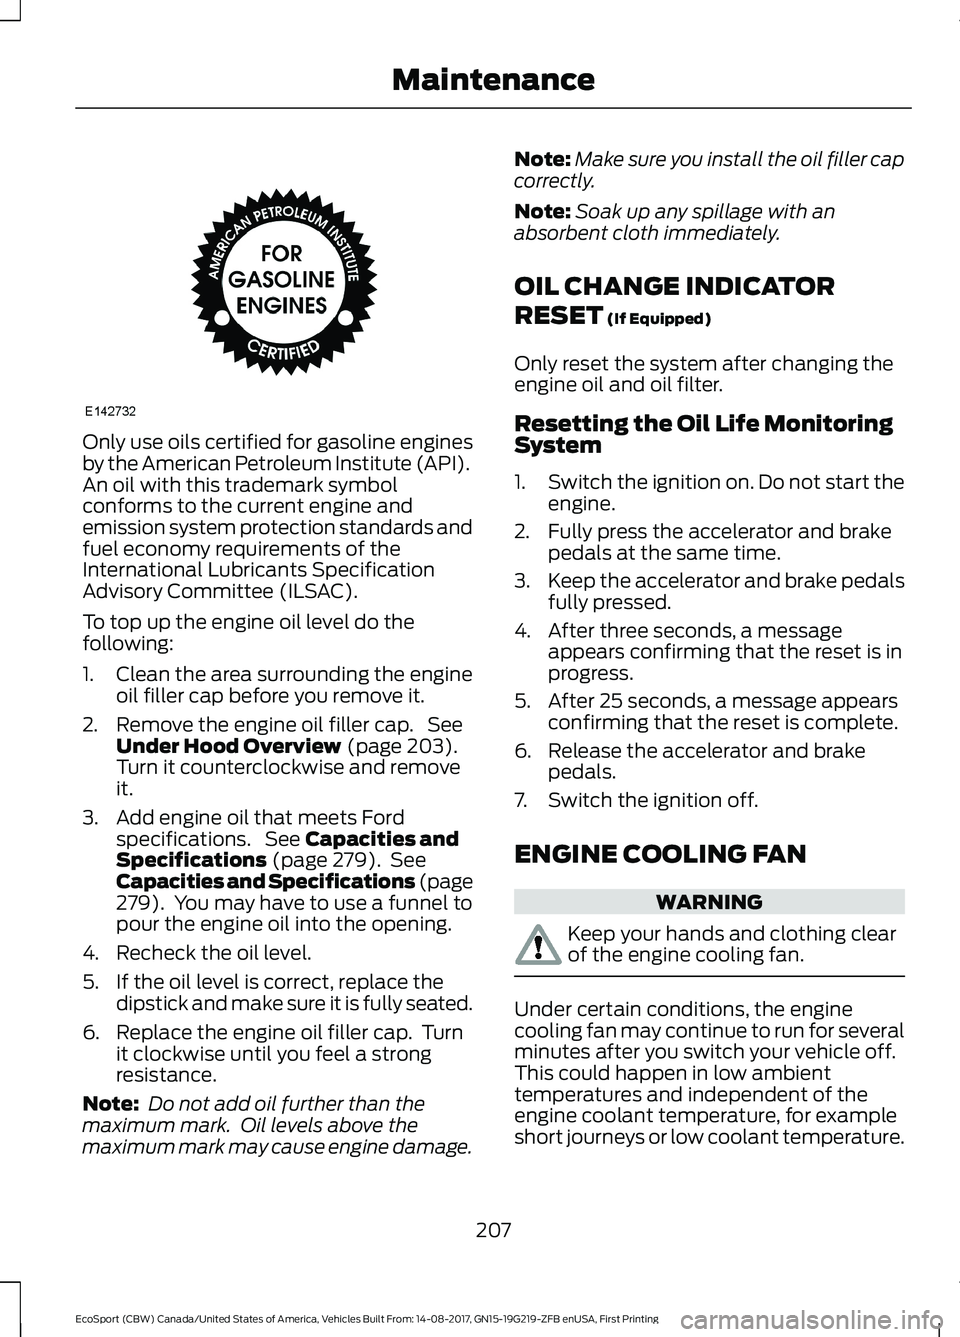
Only use oils certified for gasoline enginesby the American Petroleum Institute (API).An oil with this trademark symbolconforms to the current engine andemission system protection standards andfuel economy requirements of theInternational Lubricants SpecificationAdvisory Committee (ILSAC).
To top up the engine oil level do thefollowing:
1.Clean the area surrounding the engineoil filler cap before you remove it.
2.Remove the engine oil filler cap. SeeUnder Hood Overview (page 203).Turn it counterclockwise and removeit.
3.Add engine oil that meets Fordspecifications. See Capacities andSpecifications (page 279). SeeCapacities and Specifications (page279). You may have to use a funnel topour the engine oil into the opening.
4.Recheck the oil level.
5.If the oil level is correct, replace thedipstick and make sure it is fully seated.
6.Replace the engine oil filler cap. Turnit clockwise until you feel a strongresistance.
Note: Do not add oil further than themaximum mark. Oil levels above themaximum mark may cause engine damage.
Note:Make sure you install the oil filler capcorrectly.
Note:Soak up any spillage with anabsorbent cloth immediately.
OIL CHANGE INDICATOR
RESET (If Equipped)
Only reset the system after changing theengine oil and oil filter.
Resetting the Oil Life MonitoringSystem
1.Switch the ignition on. Do not start theengine.
2.Fully press the accelerator and brakepedals at the same time.
3.Keep the accelerator and brake pedalsfully pressed.
4.After three seconds, a messageappears confirming that the reset is inprogress.
5.After 25 seconds, a message appearsconfirming that the reset is complete.
6.Release the accelerator and brakepedals.
7.Switch the ignition off.
ENGINE COOLING FAN
WARNING
Keep your hands and clothing clearof the engine cooling fan.
Under certain conditions, the enginecooling fan may continue to run for severalminutes after you switch your vehicle off.This could happen in low ambienttemperatures and independent of theengine coolant temperature, for exampleshort journeys or low coolant temperature.
207EcoSport (CBW) Canada/United States of America, Vehicles Built From: 14-08-2017, GN15-19G219-ZFB enUSA, First PrintingMaintenance
Page 213 of 452
To top up the coolant level do thefollowing:
1.Unscrew the cap slowly. Any pressureescapes as you unscrew the cap.
2.Add prediluted coolant approved tothe correct specification. SeeCapacities and Specifications (page271).
3.Add enough prediluted coolant toreach the correct level.
4.Replace the coolant reservoir cap, turnit clockwise until you feel a strongresistance.
5.Check the coolant level in the coolantreservoir the next few times you driveyour vehicle. If necessary, add enoughprediluted engine coolant to bring thecoolant level to the correct level.
If you have to add more than 1.1 qt (1 L) ofengine coolant per month, have yourvehicle checked as soon as possible.Operating an engine with a low level ofcoolant can result in engine overheatingand possible engine damage.
Note:During normal vehicle operation, thecoolant may change color from orange topink or light red. As long as the coolant isclear and uncontaminated, this color changedoes not indicate the coolant has degradednor does it require the coolant to be drained,the system to be flushed, or the coolant tobe replaced.
Note:In case of emergency, you can add alarge amount of water without coolant inorder to reach a vehicle service location.Water alone, without coolant, can causeengine damage from corrosion, overheatingor freezing. When you reach a servicelocation, you must have the cooling systemdrained and refilled with prediluted coolantapproved to the correct specification. SeeCapacities and Specifications (page 279).
Do not use the following as a coolantsubstitute:
•Alcohol.
•Methanol.
•Brine.
•Any coolant mixed with alcohol ormethanol antifreeze.
Alcohol and other liquids can cause enginedamage from overheating or freezing.
Do not add extra inhibitors or additives tothe coolant. These can be harmful andcompromise the corrosion protection ofthe coolant.
Recycled Coolant
We do not recommend the use of recycledcoolant as an approved recycling processis not yet available.
Dispose of used engine coolant in anappropriate manner. Follow yourcommunity’s regulations and standardsfor recycling and disposing of automotivefluids.
Severe Climates
If you drive in extremely cold climates:
•It may be necessary to increase thecoolant concentration above 50%.
•A coolant concentration of 60%provides improved freeze pointprotection. Coolant concentrationsabove 60% decrease the overheatprotection characteristics of thecoolant and may cause enginedamage.
209EcoSport (CBW) Canada/United States of America, Vehicles Built From: 14-08-2017, GN15-19G219-ZFB enUSA, First PrintingMaintenance
Page 218 of 452
For longer, trouble-free operation, keep thetop of the battery clean and dry and thebattery cables tightly fastened to thebattery terminals. If any corrosion ispresent on the battery or terminals, removethe cables from the terminals and cleanwith a wire brush. You can neutralize theacid with a solution of baking soda andwater.
We recommend that you disconnect thenegative battery cable terminal from thebattery if you plan to store your vehicle foran extended period.
To maintain correct operation of thebattery management system, if you addany electrical devices to your vehicle, donot connect the ground connection directlyto the negative battery terminal. Aconnection at the negative battery terminalcan cause inaccurate measurements ofthe battery condition and potentialincorrect system operation.
Note:Electrical accessories or componentsadded to your vehicle by you or anauthorized dealer, may adversely affectbattery performance, durability and theperformance of other electrical systems onyour vehicle.
If a replacement battery is required, werecommend you use a Ford replacementbattery that matches the electricalrequirements of your vehicle.
If you disconnect or replace the batteryand your vehicle has an automatictransmission, transmission must relearnits adaptive strategy. Because of this, thetransmission may shift firmly when firstdriven. This is normal operation while thetransmission fully updates its operation tooptimum shift feel.
Remove and Reinstall the Battery
To disconnect or remove the battery, dothe following:
1.Apply the parking brake and switch theignition off.
2.Switch all electrical equipment off, forexample lights and radio.
3.Wait a minimum of two minutes beforedisconnecting the battery.
Note:The engine management system hasa power hold function and remains poweredfor a period after you switch the ignition off.This is to allow diagnostic and adaptivetables to be stored. Disconnecting thebattery without waiting can cause damagenot covered by the vehicle Warranty.
4.Disconnect the negative (-) batterycable terminal first.
5.Disconnect the positive (+) batterycable terminal last.
6.Remove the battery securing clamp.
7.Remove the battery.
8.Install in the reverse order.
Note:Before reconnecting the battery,make sure the ignition remains switched off.
Note:If you only disconnect the negativebattery cable terminal, make sure it isisolated or placed away from the batteryterminal to avoid un-intended connectionor arcing.
Note:Make sure the battery cable terminalsare fully tightened.
Note:If you disconnect or replace thebattery, you must reset the clock and thepre-set radio stations once the battery isreconnected.
Battery Disposal
Make sure that you dispose ofold batteries in anenvironmentally friendly way.Seek advice from your local authorityabout recycling old batteries.
214EcoSport (CBW) Canada/United States of America, Vehicles Built From: 14-08-2017, GN15-19G219-ZFB enUSA, First PrintingMaintenance
Page 219 of 452
CHECKING THE WIPER
BLADES
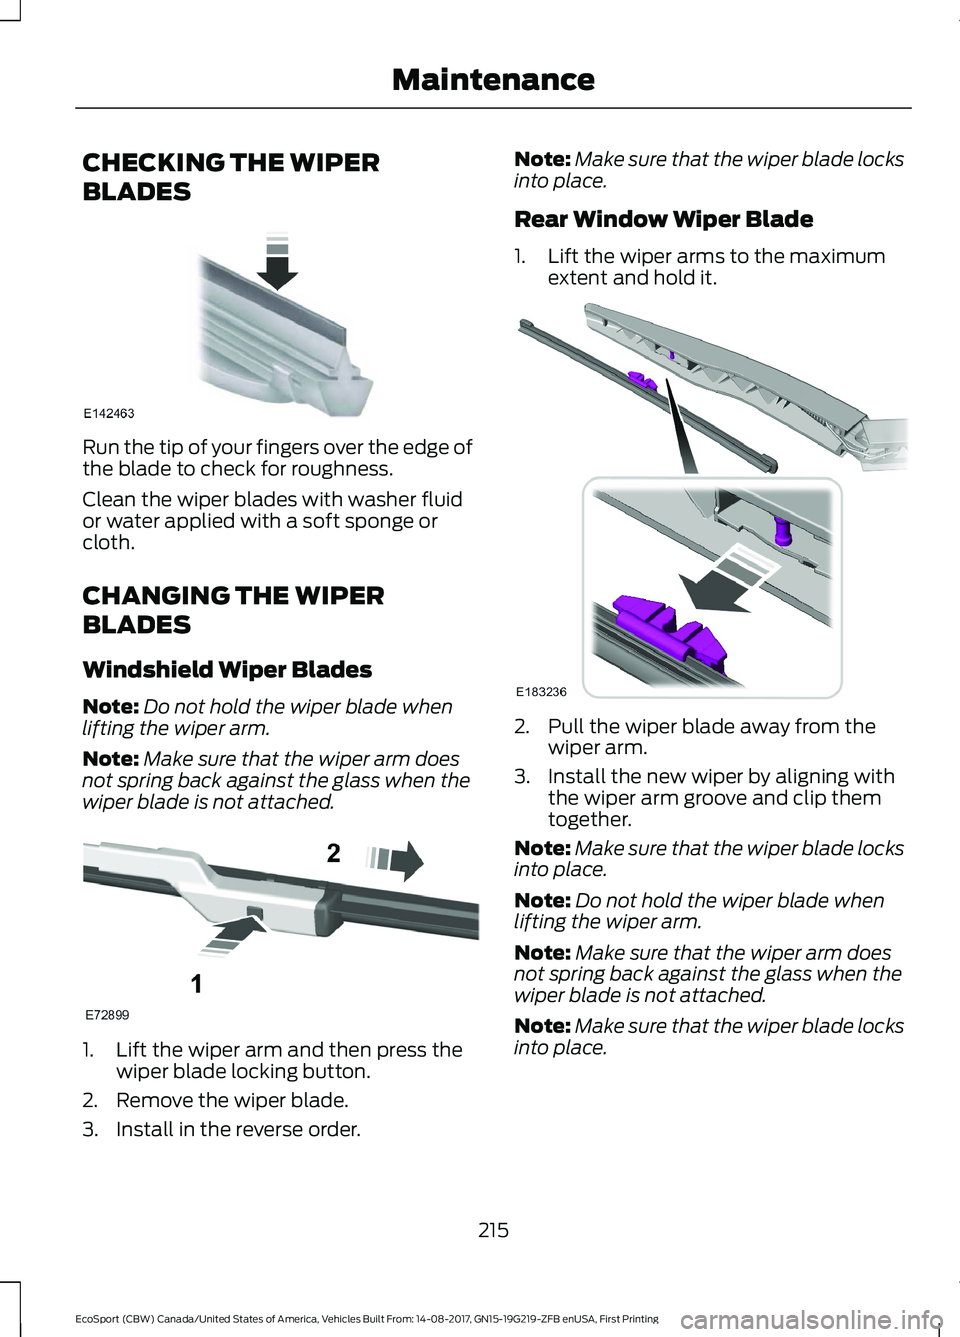
Run the tip of your fingers over the edge ofthe blade to check for roughness.
Clean the wiper blades with washer fluidor water applied with a soft sponge orcloth.
CHANGING THE WIPER
BLADES
Windshield Wiper Blades
Note:Do not hold the wiper blade whenlifting the wiper arm.
Note:Make sure that the wiper arm doesnot spring back against the glass when thewiper blade is not attached.
1.Lift the wiper arm and then press thewiper blade locking button.
2.Remove the wiper blade.
3.Install in the reverse order.
Note:Make sure that the wiper blade locksinto place.
Rear Window Wiper Blade
1.Lift the wiper arms to the maximumextent and hold it.
2.Pull the wiper blade away from thewiper arm.
3.Install the new wiper by aligning withthe wiper arm groove and clip themtogether.
Note:Make sure that the wiper blade locksinto place.
Note:Do not hold the wiper blade whenlifting the wiper arm.
Note:Make sure that the wiper arm doesnot spring back against the glass when thewiper blade is not attached.
Note:Make sure that the wiper blade locksinto place.
215EcoSport (CBW) Canada/United States of America, Vehicles Built From: 14-08-2017, GN15-19G219-ZFB enUSA, First PrintingMaintenance
Page 220 of 452
ADJUSTING THE HEADLAMPS
Vertical Aim Adjustment
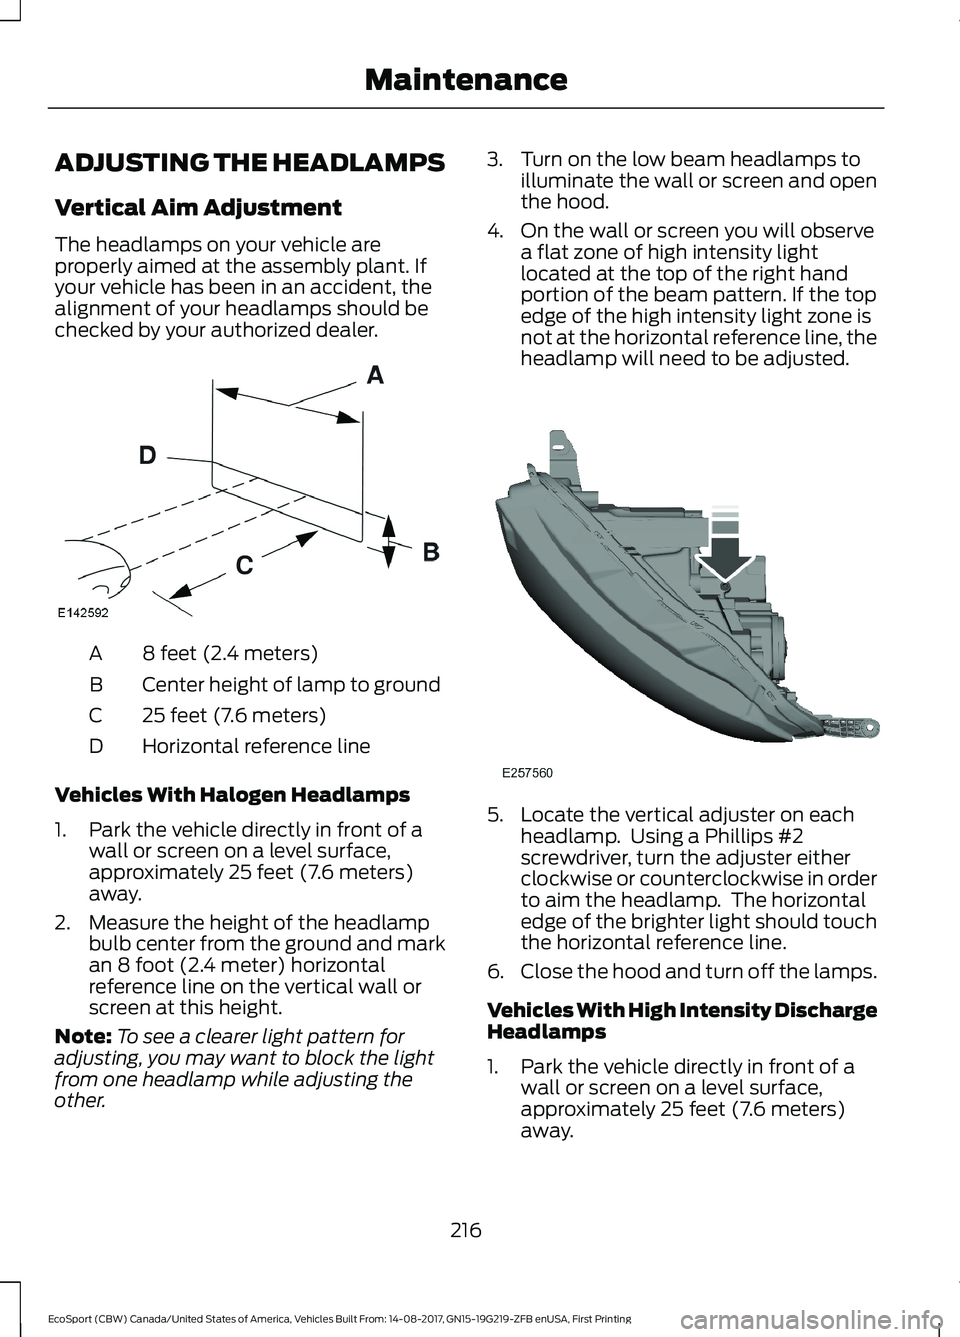
The headlamps on your vehicle areproperly aimed at the assembly plant. Ifyour vehicle has been in an accident, thealignment of your headlamps should bechecked by your authorized dealer.
8 feet (2.4 meters)A
Center height of lamp to groundB
25 feet (7.6 meters)C
Horizontal reference lineD
Vehicles With Halogen Headlamps
1.Park the vehicle directly in front of awall or screen on a level surface,approximately 25 feet (7.6 meters)away.
2.Measure the height of the headlampbulb center from the ground and markan 8 foot (2.4 meter) horizontalreference line on the vertical wall orscreen at this height.
Note:To see a clearer light pattern foradjusting, you may want to block the lightfrom one headlamp while adjusting theother.
3.Turn on the low beam headlamps toilluminate the wall or screen and openthe hood.
4.On the wall or screen you will observea flat zone of high intensity lightlocated at the top of the right handportion of the beam pattern. If the topedge of the high intensity light zone isnot at the horizontal reference line, theheadlamp will need to be adjusted.
5.Locate the vertical adjuster on eachheadlamp. Using a Phillips #2screwdriver, turn the adjuster eitherclockwise or counterclockwise in orderto aim the headlamp. The horizontaledge of the brighter light should touchthe horizontal reference line.
6.Close the hood and turn off the lamps.
Vehicles With High Intensity DischargeHeadlamps
1.Park the vehicle directly in front of awall or screen on a level surface,approximately 25 feet (7.6 meters)away.
216EcoSport (CBW) Canada/United States of America, Vehicles Built From: 14-08-2017, GN15-19G219-ZFB enUSA, First PrintingMaintenance
Page 221 of 452
2.Measure the height of the headlampbulb center from the ground and markan 8 foot (2.4 meter) horizontalreference line on the vertical wall orscreen at this height.
Note:To see a clearer light pattern foradjusting, you may want to block the lightfrom one headlamp while adjusting theother.
3.Turn on the low beam headlamps toilluminate the wall or screen and openthe hood.
4.There is a distinct cut-off (change fromlight to dark) in the left portion of thebeam pattern. The top edge of thiscut-off should be positioned twoinches (5 centimeters) below thehorizontal reference line.
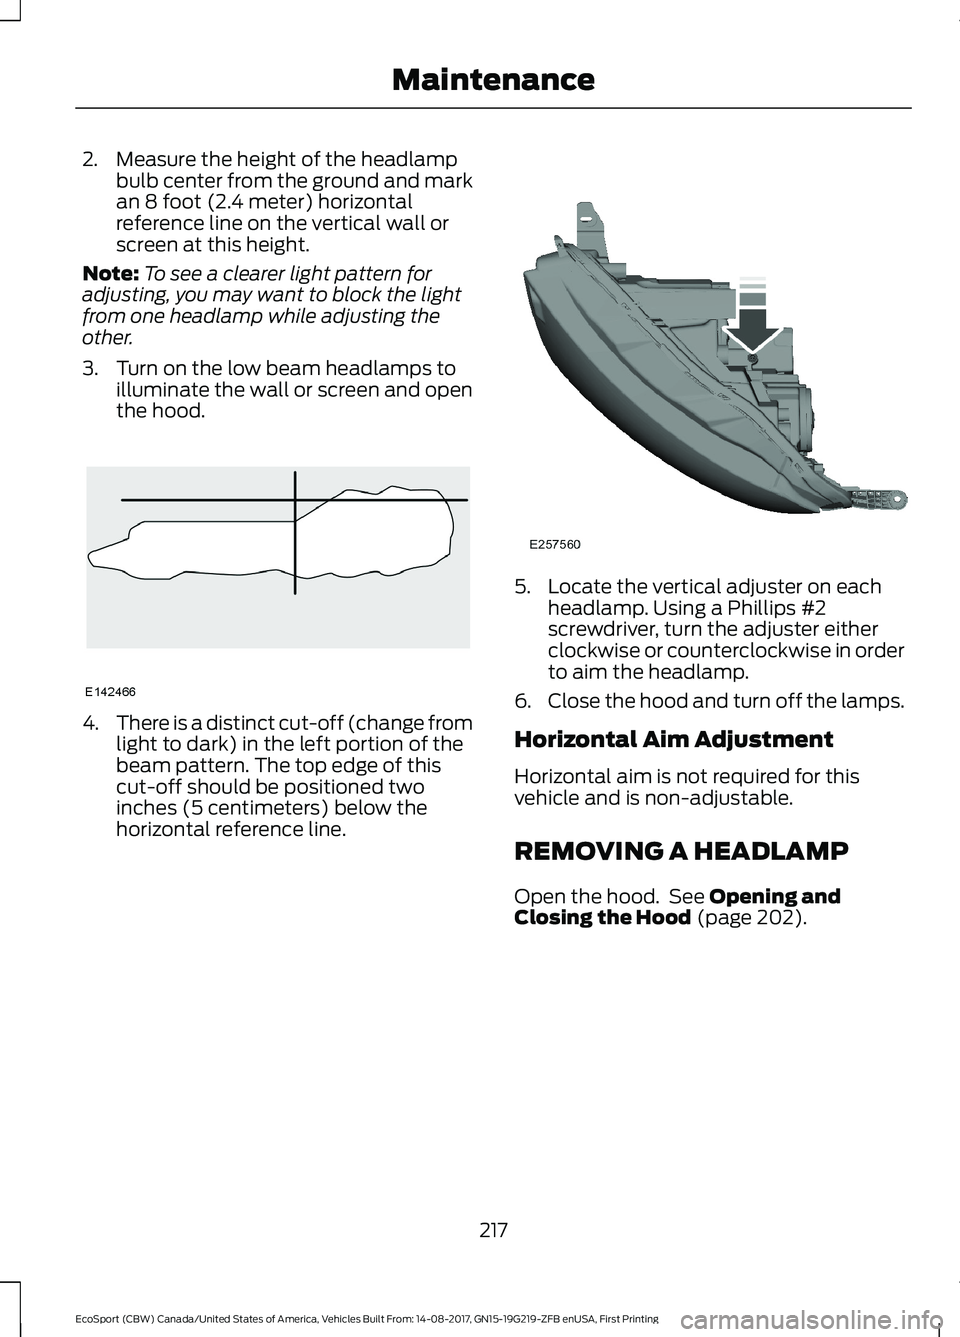
5.Locate the vertical adjuster on eachheadlamp. Using a Phillips #2screwdriver, turn the adjuster eitherclockwise or counterclockwise in orderto aim the headlamp.
6.Close the hood and turn off the lamps.
Horizontal Aim Adjustment
Horizontal aim is not required for thisvehicle and is non-adjustable.
REMOVING A HEADLAMP
Open the hood. See Opening andClosing the Hood (page 202).
217EcoSport (CBW) Canada/United States of America, Vehicles Built From: 14-08-2017, GN15-19G219-ZFB enUSA, First PrintingMaintenance
Page 225 of 452
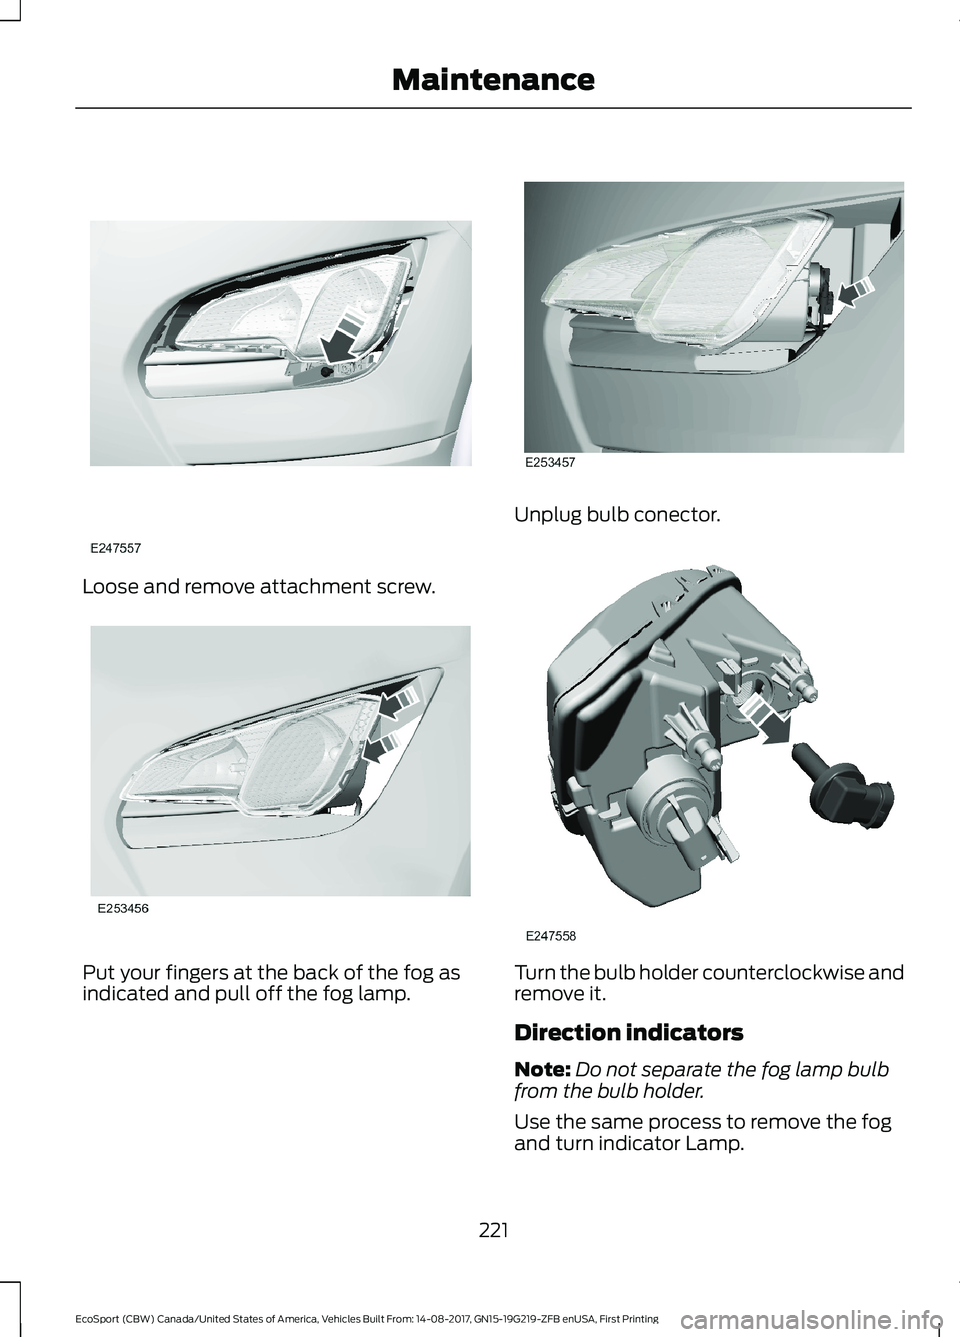
Loose and remove attachment screw.
Put your fingers at the back of the fog asindicated and pull off the fog lamp.
Unplug bulb conector.
Turn the bulb holder counterclockwise andremove it.
Direction indicators
Note:Do not separate the fog lamp bulbfrom the bulb holder.
Use the same process to remove the fogand turn indicator Lamp.
221EcoSport (CBW) Canada/United States of America, Vehicles Built From: 14-08-2017, GN15-19G219-ZFB enUSA, First PrintingMaintenance
Page 226 of 452
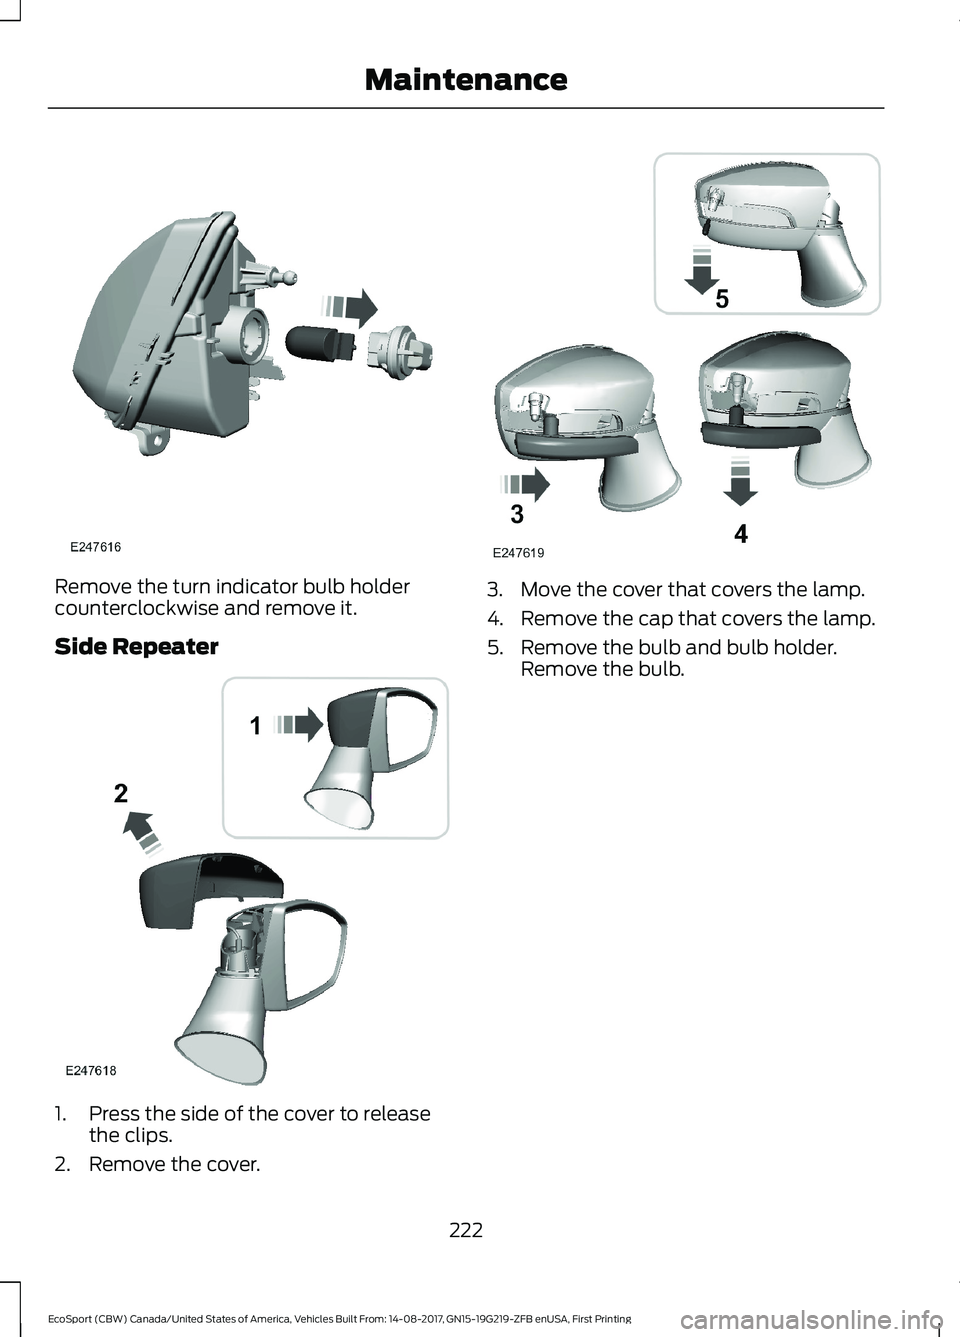
Remove the turn indicator bulb holdercounterclockwise and remove it.
Side Repeater
1.Press the side of the cover to releasethe clips.
2.Remove the cover.
3.Move the cover that covers the lamp.
4.Remove the cap that covers the lamp.
5.Remove the bulb and bulb holder.Remove the bulb.
222EcoSport (CBW) Canada/United States of America, Vehicles Built From: 14-08-2017, GN15-19G219-ZFB enUSA, First PrintingMaintenance