clock FORD ECOSPORT 2018 Owners Manual
[x] Cancel search | Manufacturer: FORD, Model Year: 2018, Model line: ECOSPORT, Model: FORD ECOSPORT 2018Pages: 452, PDF Size: 17.04 MB
Page 22 of 452
Use a child safety seat (sometimes calledan infant carrier, convertible seat, ortoddler seat) for infants, toddlers, orchildren weighing 40 lb (18 kg) or less(generally age four or younger).
Using Lap and Shoulder Belts
WARNINGS
Airbags can kill or injure a child in achild restraint. Never place arear-facing child restraint in front ofan active airbag. If you must use aforward-facing child restraint in the frontseat, move the seat upon which the childrestraint is installed all the way back.
Airbags can kill or injure a child in achild restraint. Properly restrainchildren 12 and under in the rear seatwhenever possible.
Depending on where you secure achild restraint, and depending on thechild restraint design, you may blockaccess to certain seatbelt buckleassemblies and LATCH lower anchors,rendering those features potentiallyunusable. To avoid risk of injury, make sureoccupants only use seating positionswhere they are able to be properlyrestrained.
When installing a child safety seat withcombination lap and shoulder belts:
•Use the correct safety belt buckle forthat seating position.
•Insert the belt tongue into the properbuckle until you hear a snap and feel itlatch. Make sure the tongue is securelyfastened in the buckle.
•Keep the buckle release buttonpointing up and away from the safetyseat, with the tongue between the childseat and the release button, to preventaccidental unbuckling.
•Place the vehicle seat upon which thechild seat will be installed in the uprightposition.
•Put the safety belt in the automaticlocking mode. See Step 5. This vehicledoes not require the use of a lockingclip.
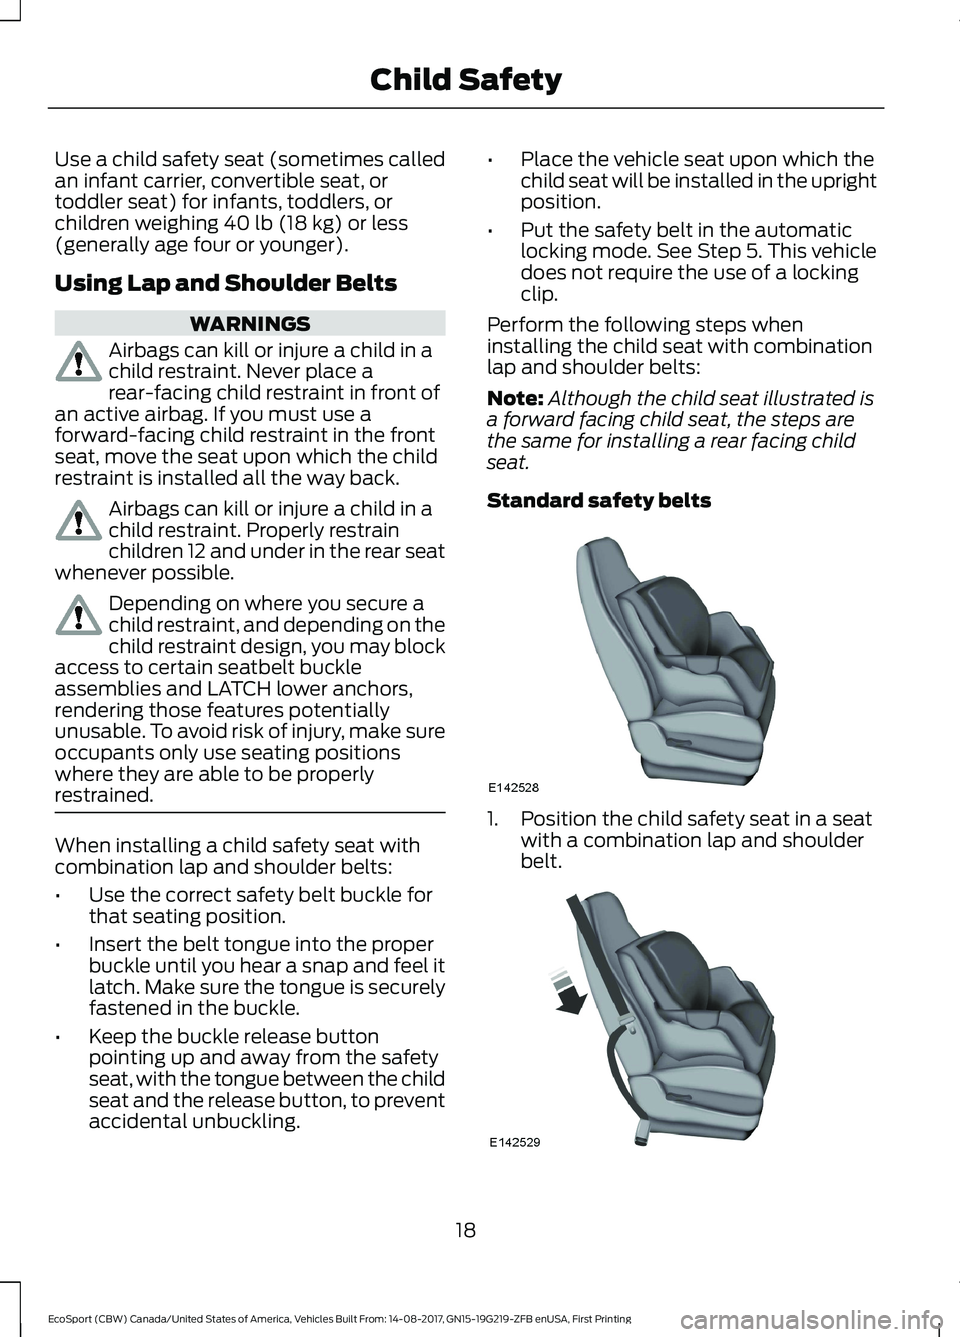
Perform the following steps wheninstalling the child seat with combinationlap and shoulder belts:
Note:Although the child seat illustrated isa forward facing child seat, the steps arethe same for installing a rear facing childseat.
Standard safety belts
1.Position the child safety seat in a seatwith a combination lap and shoulderbelt.
18EcoSport (CBW) Canada/United States of America, Vehicles Built From: 14-08-2017, GN15-19G219-ZFB enUSA, First PrintingChild Safety
Page 23 of 452
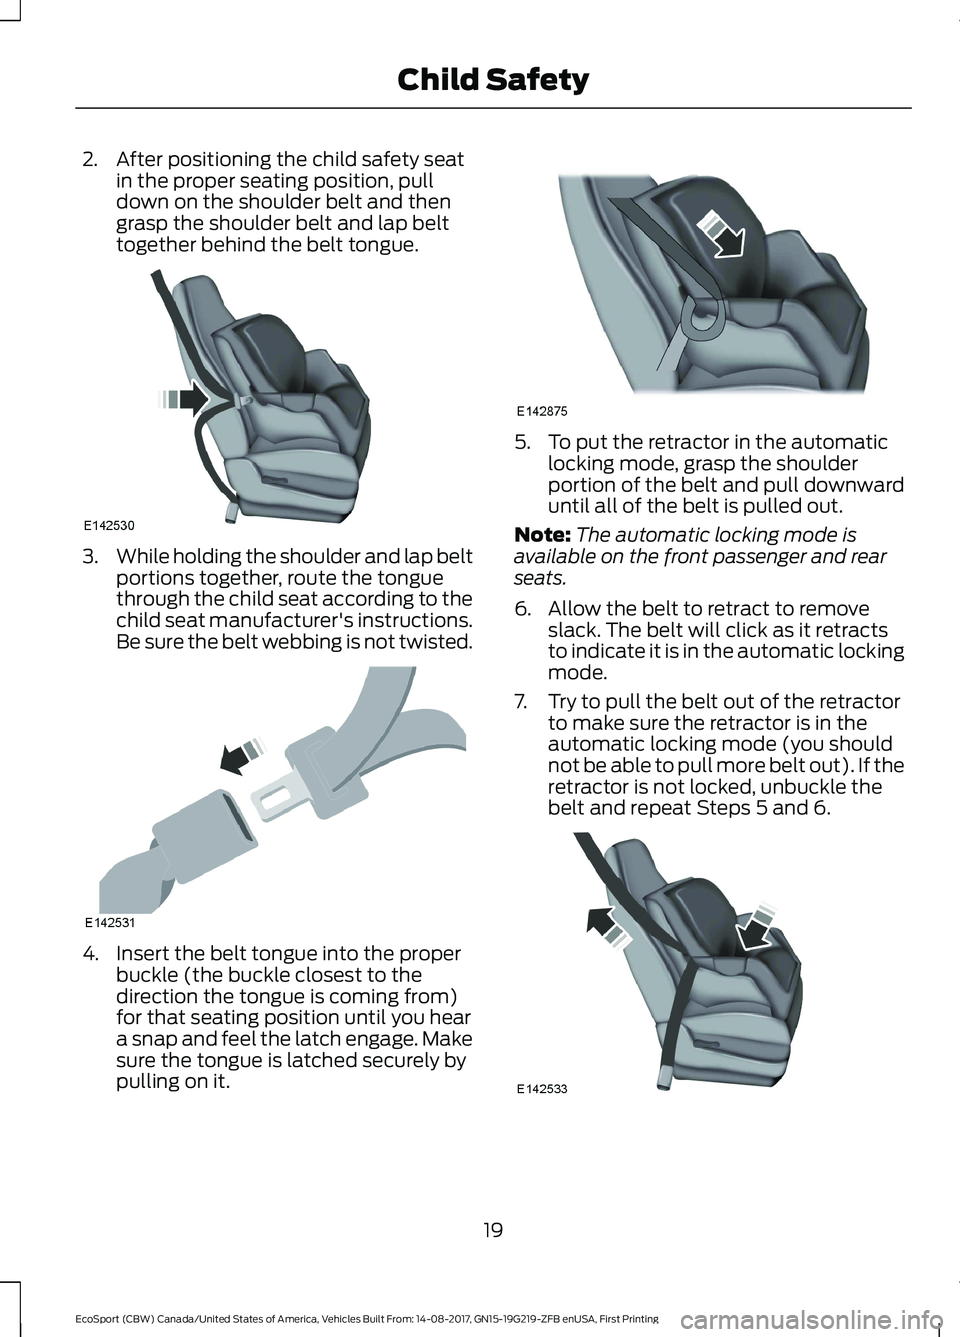
2.After positioning the child safety seatin the proper seating position, pulldown on the shoulder belt and thengrasp the shoulder belt and lap belttogether behind the belt tongue.
3.While holding the shoulder and lap beltportions together, route the tonguethrough the child seat according to thechild seat manufacturer's instructions.Be sure the belt webbing is not twisted.
4.Insert the belt tongue into the properbuckle (the buckle closest to thedirection the tongue is coming from)for that seating position until you heara snap and feel the latch engage. Makesure the tongue is latched securely bypulling on it.
5.To put the retractor in the automaticlocking mode, grasp the shoulderportion of the belt and pull downwarduntil all of the belt is pulled out.
Note:The automatic locking mode isavailable on the front passenger and rearseats.
6.Allow the belt to retract to removeslack. The belt will click as it retractsto indicate it is in the automatic lockingmode.
7.Try to pull the belt out of the retractorto make sure the retractor is in theautomatic locking mode (you shouldnot be able to pull more belt out). If theretractor is not locked, unbuckle thebelt and repeat Steps 5 and 6.
19EcoSport (CBW) Canada/United States of America, Vehicles Built From: 14-08-2017, GN15-19G219-ZFB enUSA, First PrintingChild Safety
Page 30 of 452
WARNINGS
To avoid risk of injury, do not leave
WARNINGS
children or pets unattended in your vehicle.
Recommendations for attaching child safety restraints for children
Use any attachment method as indicated below by X
Combinedweight ofchild andchild seat
RestraintType
Safety beltonlySafety beltand LATCH(loweranchorsand toptetheranchor)
Safety beltand toptetheranchor
LATCH(loweranchorsonly)
LATCH(loweranchorsand toptetheranchor)
XXUp to 65 lb(29.5 kg)Rear facingchild seat
XOver 65 lb(29.5 kg)Rear facingchild seat
XXXUp to 65 lb(29.5 kg)
Forwardfacingchild seat
XXOver 65 lb(29.5 kg)
Forwardfacingchild seat
Note:The child seat must rest tightlyagainst the vehicle seat upon which it isinstalled. It may be necessary to lift orremove the head restraint. See Seats (page104).
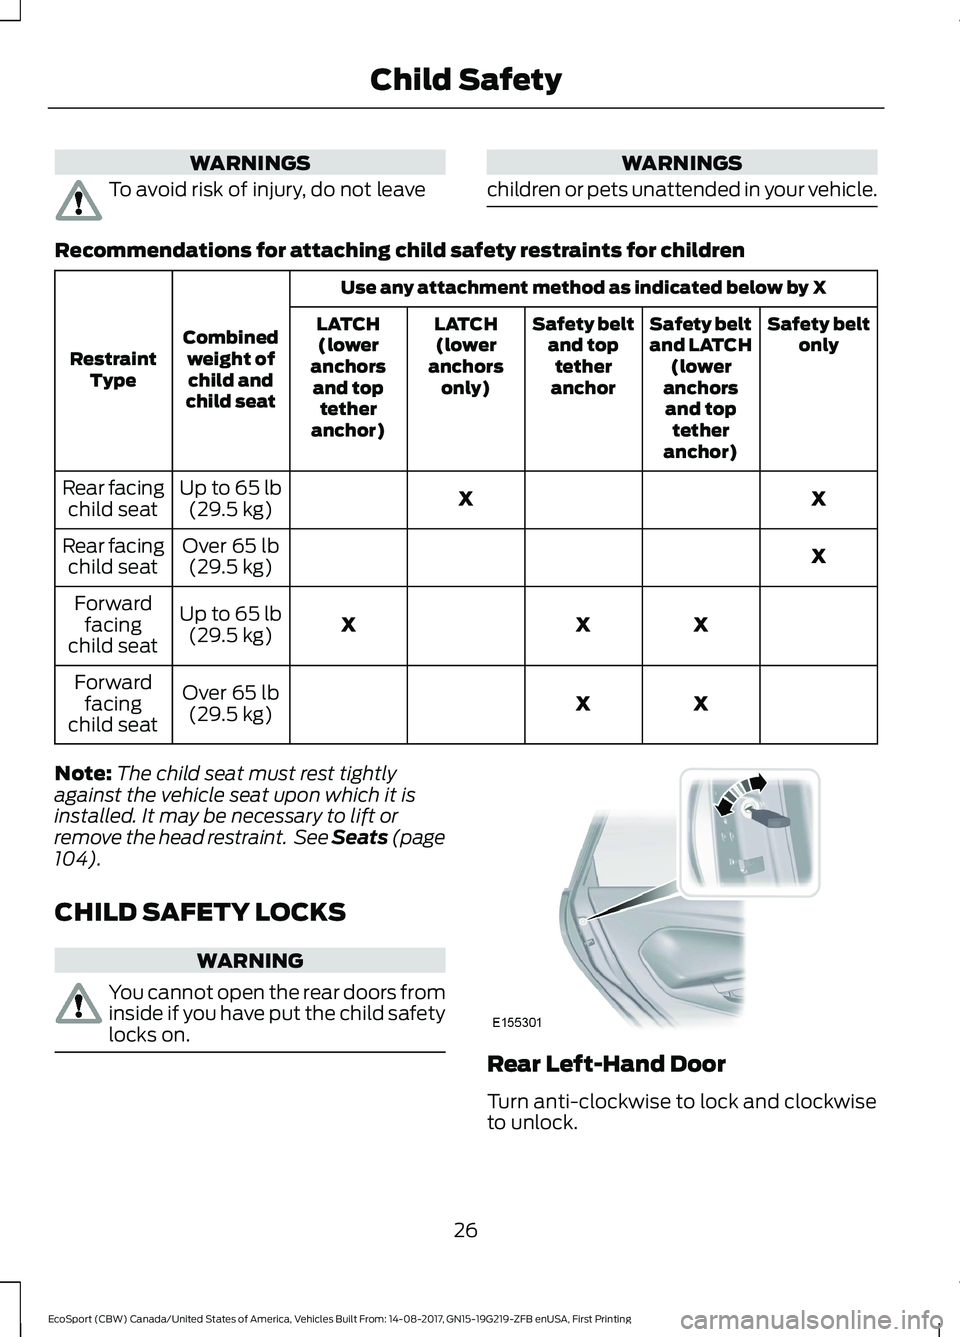
CHILD SAFETY LOCKS
WARNING
You cannot open the rear doors frominside if you have put the child safetylocks on.
Rear Left-Hand Door
Turn anti-clockwise to lock and clockwiseto unlock.
26EcoSport (CBW) Canada/United States of America, Vehicles Built From: 14-08-2017, GN15-19G219-ZFB enUSA, First PrintingChild Safety
Page 31 of 452
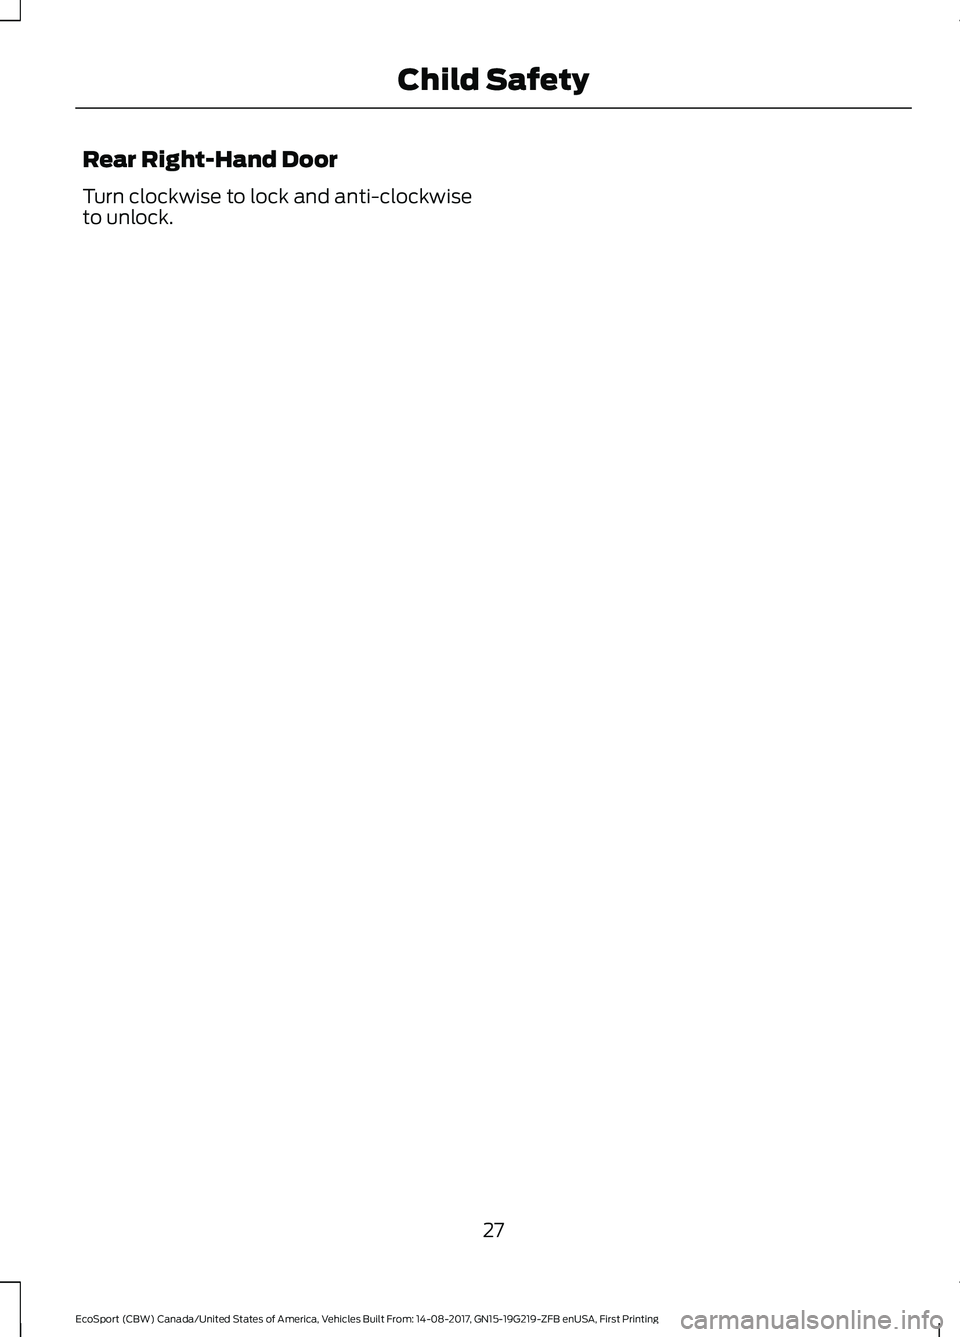
Rear Right-Hand Door
Turn clockwise to lock and anti-clockwiseto unlock.
27EcoSport (CBW) Canada/United States of America, Vehicles Built From: 14-08-2017, GN15-19G219-ZFB enUSA, First PrintingChild Safety
Page 32 of 452
PRINCIPLE OF OPERATION
WARNINGS
Always drive and ride with yourseatback upright and the lap beltsnug and low across the hips.
To reduce the risk of injury, makesure children sit where they can beproperly restrained.
Never let a passenger hold a child onhis or her lap while your vehicle ismoving. The passenger cannotprotect the child from injury in a crash.
All occupants of your vehicle,including the driver, should alwaysproperly wear their seatbelts, evenwhen an airbag supplemental restraintsystem is provided. Failure to properly wearyour seatbelts could seriously increase therisk of injury or death.
It is extremely dangerous to ride in acargo area, inside or outside of avehicle. In a crash, people riding inthese areas are more likely to be seriouslyinjured or killed. Do not allow people to ridein any area of your vehicle that is notequipped with seats and seatbelts. Be sureeveryone in your vehicle is in a seat andusing a seatbelt properly.
In a rollover crash, an unbeltedperson is significantly more likely todie than a person wearing a seatbelt.
Each seating position in your vehiclehas a specific seatbelt assemblywhich is made up of one buckle andone tongue that are designed to be usedas a pair. 1) Use the shoulder belt on theoutside shoulder only. Never wear theshoulder belt under the arm. 2) Neverswing the seatbelt around your neck overthe inside shoulder. 3) Never use a singlebelt for more than one person.
WARNINGS
When possible, all children 12 yearsold and under should be properlyrestrained in a rear seating position.Failure to follow this could seriouslyincrease the risk of injury or death.
Seatbelts and seats can become hotin a vehicle that has been closed upin sunny weather; they could burn asmall child. Check seat covers and bucklesbefore you place a child anywhere nearthem.
Front and rear seat occupants,including pregnant women, shouldwear seatbelts for optimumprotection in an accident.
All seating positions in your vehicle havelap and shoulder seatbelts. All occupantsof the vehicle should always properly weartheir seatbelts, even when an airbagsupplemental restraint system is provided.
The seatbelt system consists of:
•Lap and shoulder seatbelts.
•Shoulder seatbelt with automaticlocking mode, (except driver seatbelt).
•Height adjuster at the front outboardseating positions.
•Seatbelt pretensioner at the frontoutboard seating positions.
•Belt tension sensor at the frontoutboard passenger seating position.
· Seatbelt warning light andchime.
· Crash sensors and monitoringsystem with readiness indicator.
28EcoSport (CBW) Canada/United States of America, Vehicles Built From: 14-08-2017, GN15-19G219-ZFB enUSA, First PrintingSeatbelts
Page 35 of 452
When to Use the Automatic LockingMode
Use this mode when you install a childsafety seat, except a booster seat, in thepassenger front or rear seating positions.Properly restrain children 12 years old andunder in a rear seating position wheneverpossible. See Child Safety (page 16).
How to Use the Automatic LockingMode
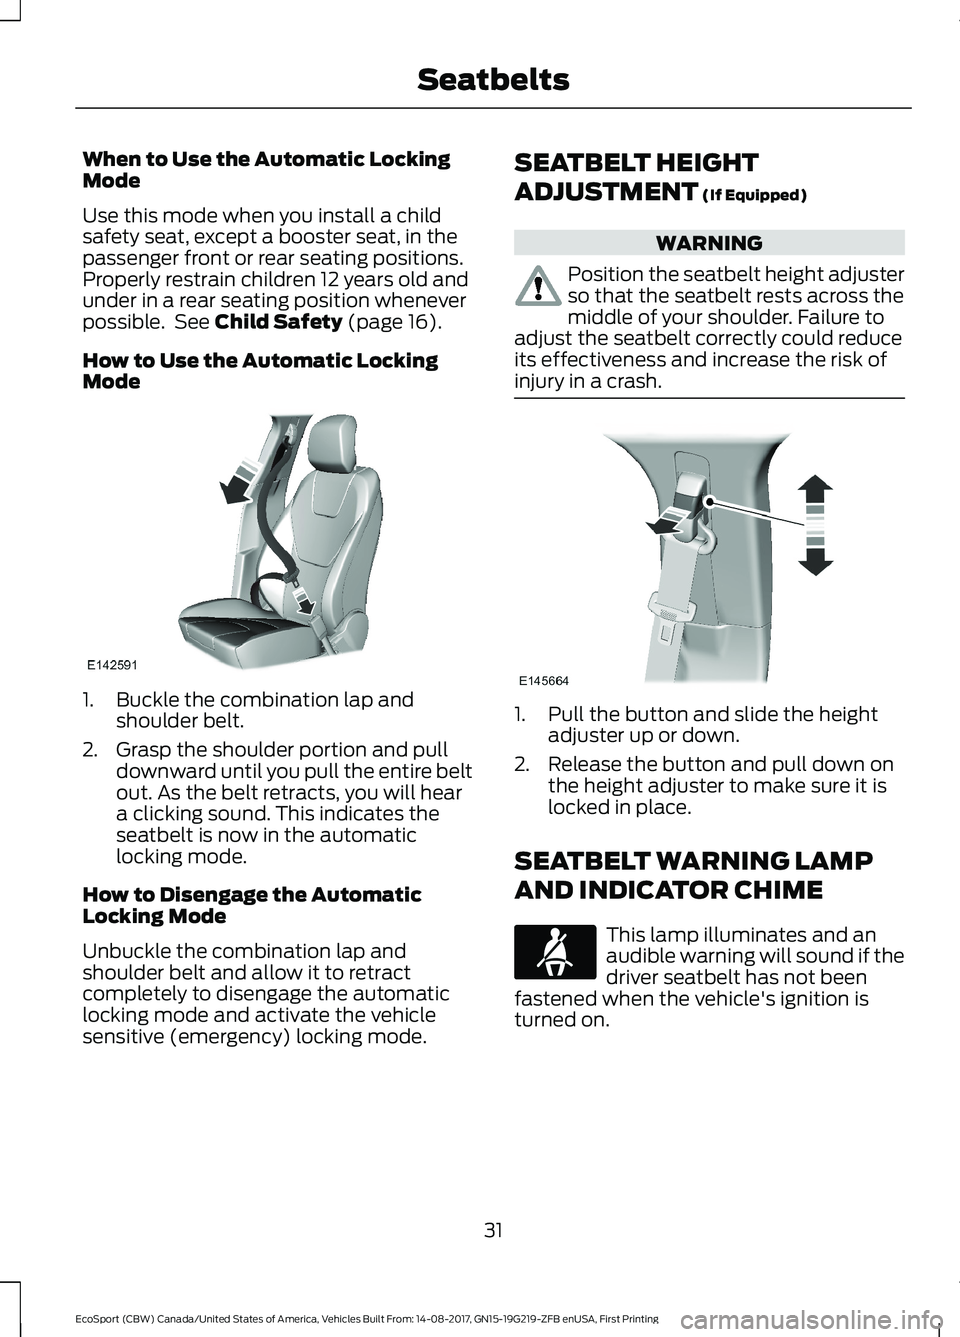
1.Buckle the combination lap andshoulder belt.
2.Grasp the shoulder portion and pulldownward until you pull the entire beltout. As the belt retracts, you will heara clicking sound. This indicates theseatbelt is now in the automaticlocking mode.
How to Disengage the AutomaticLocking Mode
Unbuckle the combination lap andshoulder belt and allow it to retractcompletely to disengage the automaticlocking mode and activate the vehiclesensitive (emergency) locking mode.
SEATBELT HEIGHT
ADJUSTMENT (If Equipped)
WARNING
Position the seatbelt height adjusterso that the seatbelt rests across themiddle of your shoulder. Failure toadjust the seatbelt correctly could reduceits effectiveness and increase the risk ofinjury in a crash.
1.Pull the button and slide the heightadjuster up or down.
2.Release the button and pull down onthe height adjuster to make sure it islocked in place.
SEATBELT WARNING LAMP
AND INDICATOR CHIME
This lamp illuminates and anaudible warning will sound if thedriver seatbelt has not beenfastened when the vehicle's ignition isturned on.
31EcoSport (CBW) Canada/United States of America, Vehicles Built From: 14-08-2017, GN15-19G219-ZFB enUSA, First PrintingSeatbelts
Page 103 of 452
MANUAL CLIMATE CONTROL
- VEHICLES WITH:
ELECTRONIC MANUAL
TEMPERATURE CONTROL
(EMTC)
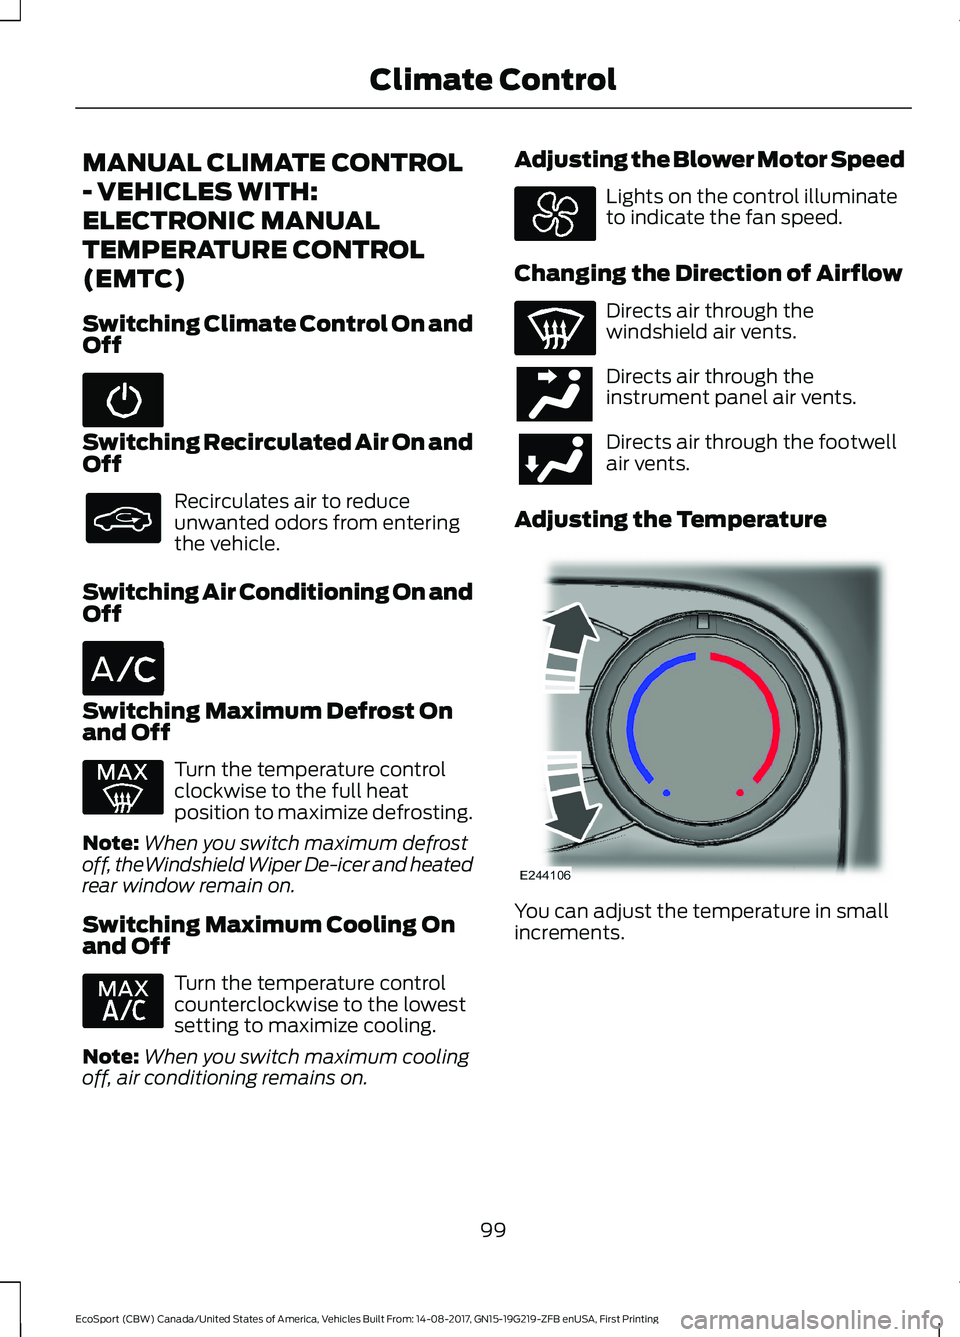
Switching Climate Control On andOff
Switching Recirculated Air On andOff
Recirculates air to reduceunwanted odors from enteringthe vehicle.
Switching Air Conditioning On andOff
Switching Maximum Defrost Onand Off
Turn the temperature controlclockwise to the full heatposition to maximize defrosting.
Note:When you switch maximum defrostoff, theWindshield Wiper De-icer and heatedrear window remain on.
Switching Maximum Cooling Onand Off
Turn the temperature controlcounterclockwise to the lowestsetting to maximize cooling.
Note:When you switch maximum coolingoff, air conditioning remains on.
Adjusting the Blower Motor Speed
Lights on the control illuminateto indicate the fan speed.
Changing the Direction of Airflow
Directs air through thewindshield air vents.
Directs air through theinstrument panel air vents.
Directs air through the footwellair vents.
Adjusting the Temperature
You can adjust the temperature in smallincrements.
99EcoSport (CBW) Canada/United States of America, Vehicles Built From: 14-08-2017, GN15-19G219-ZFB enUSA, First PrintingClimate Control
Page 106 of 452
Maximum Cooling Using theInstrument Panel and Footwell AirVents
•Select the lowest temperature.
•Switch on the air conditioning andrecirculated air.
•Select the highest blower motor speedand then adjust to suit comfort levels.
HINTS ON CONTROLLING THE
INTERIOR CLIMATE -
VEHICLES WITH: ELECTRONIC
MANUAL TEMPERATURE
CONTROL (EMTC)
General Hints
Do not place objects under the front seatsas this may interfere with the airflow to therear seats.
Remove any snow, ice or leaves from theair intake area at the base of thewindshield.
Note:You may feel a small amount of airfrom the footwell air vents regardless of theair distribution setting.
Note:To reduce humidity build-up insideyour vehicle, do not drive with the systemswitched off or with recirculated air alwaysswitched on.
Note:When you switch the system off,outside air is prevented from entering yourvehicle.
Note:To reduce fogging of the windshieldduring humid weather, direct airflow to thewindshield air vents.
Note:Prolonged use of recirculated air maycause the windows to fog up.
Quickly Heating the Interior
•Select the highest blower motor speed.
•Select the highest temperature.
•Direct the airflow to the footwell airvents.
Recommended Settings forHeating
•Select a high blower motor speed.
•Select the desired temperature.
•Direct the airflow to the footwell andwindshield air vents.
Quickly Cooling the Interior
•Select maximum cooling.
Recommended Settings forCooling
•Select the highest blower motor speed.
•Select the desired temperature.
•Direct the airflow to the instrumentpanel air vents.
•Press A/C.
Defogging the Side Windows inCold Weather
•Select maximum defrost.
Maximum Cooling Using theInstrument Panel and Footwell AirVents
•Turn the temperature controlcounterclockwise to the lowest setting.
•Switch on the air conditioning andrecirculated air.
•Select the highest blower motor speedand then adjust to suit comfort levels.
102EcoSport (CBW) Canada/United States of America, Vehicles Built From: 14-08-2017, GN15-19G219-ZFB enUSA, First PrintingClimate Control
Page 169 of 452
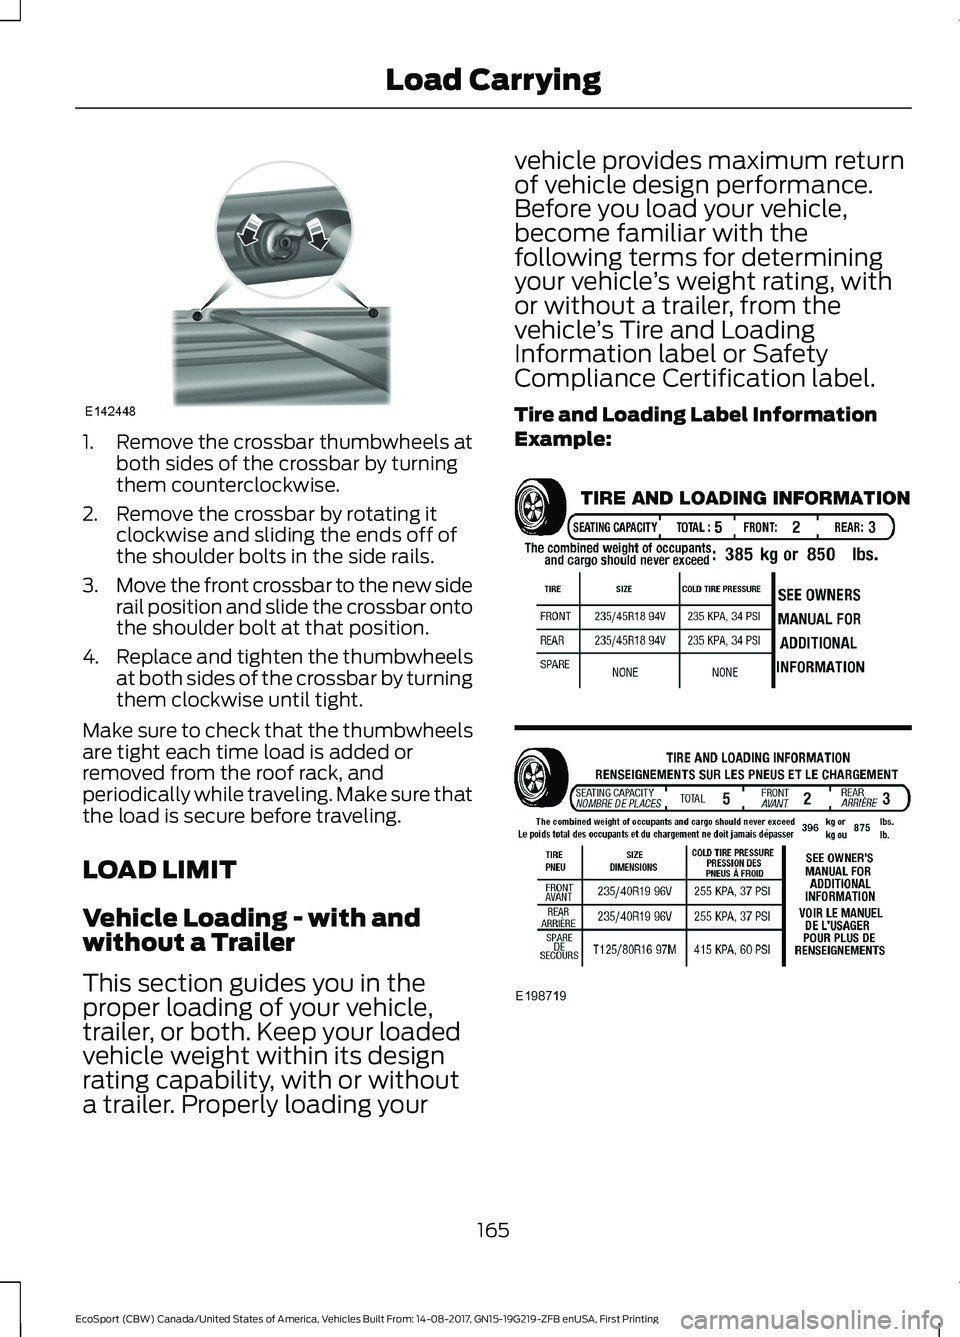
1.Remove the crossbar thumbwheels atboth sides of the crossbar by turningthem counterclockwise.
2.Remove the crossbar by rotating itclockwise and sliding the ends off ofthe shoulder bolts in the side rails.
3.Move the front crossbar to the new siderail position and slide the crossbar ontothe shoulder bolt at that position.
4.Replace and tighten the thumbwheelsat both sides of the crossbar by turningthem clockwise until tight.
Make sure to check that the thumbwheelsare tight each time load is added orremoved from the roof rack, andperiodically while traveling. Make sure thatthe load is secure before traveling.
LOAD LIMIT
Vehicle Loading - with andwithout a Trailer
This section guides you in theproper loading of your vehicle,trailer, or both. Keep your loadedvehicle weight within its designrating capability, with or withouta trailer. Properly loading your
vehicle provides maximum returnof vehicle design performance.Before you load your vehicle,become familiar with thefollowing terms for determiningyour vehicle’s weight rating, withor without a trailer, from thevehicle’s Tire and LoadingInformation label or SafetyCompliance Certification label.
Tire and Loading Label InformationExample:
165EcoSport (CBW) Canada/United States of America, Vehicles Built From: 14-08-2017, GN15-19G219-ZFB enUSA, First PrintingLoad Carrying
Page 179 of 452
TOWING POINTS
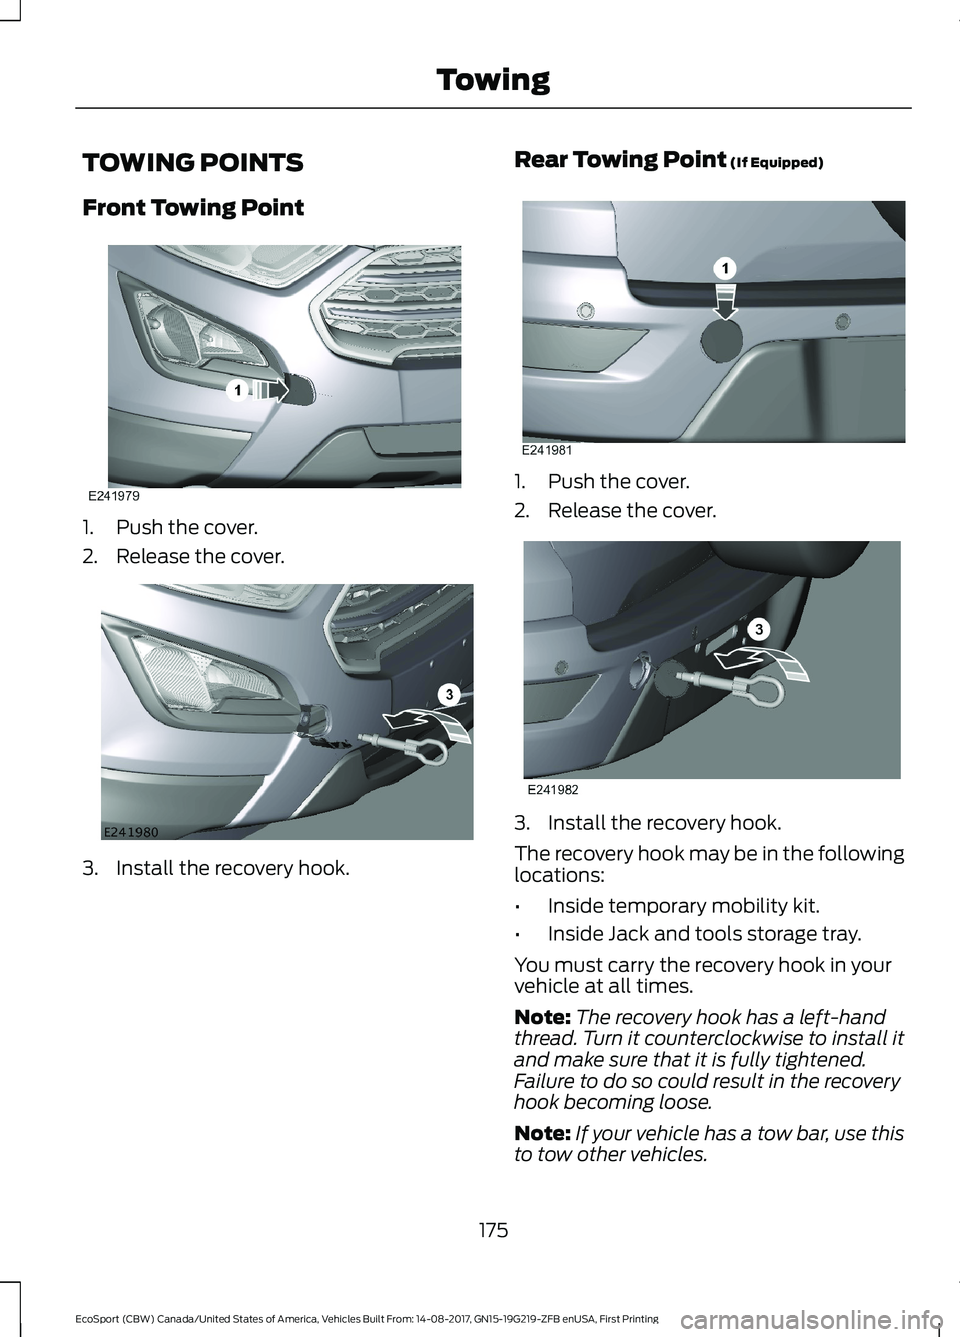
Front Towing Point
1.Push the cover.
2.Release the cover.
3.Install the recovery hook.
Rear Towing Point (If Equipped)
1.Push the cover.
2.Release the cover.
3.Install the recovery hook.
The recovery hook may be in the followinglocations:
•Inside temporary mobility kit.
•Inside Jack and tools storage tray.
You must carry the recovery hook in yourvehicle at all times.
Note:The recovery hook has a left-handthread. Turn it counterclockwise to install itand make sure that it is fully tightened.Failure to do so could result in the recoveryhook becoming loose.
Note:If your vehicle has a tow bar, use thisto tow other vehicles.
175EcoSport (CBW) Canada/United States of America, Vehicles Built From: 14-08-2017, GN15-19G219-ZFB enUSA, First PrintingTowing