set clock FORD ECOSPORT 2020 Owners Manual
[x] Cancel search | Manufacturer: FORD, Model Year: 2020, Model line: ECOSPORT, Model: FORD ECOSPORT 2020Pages: 448, PDF Size: 16.57 MB
Page 33 of 448
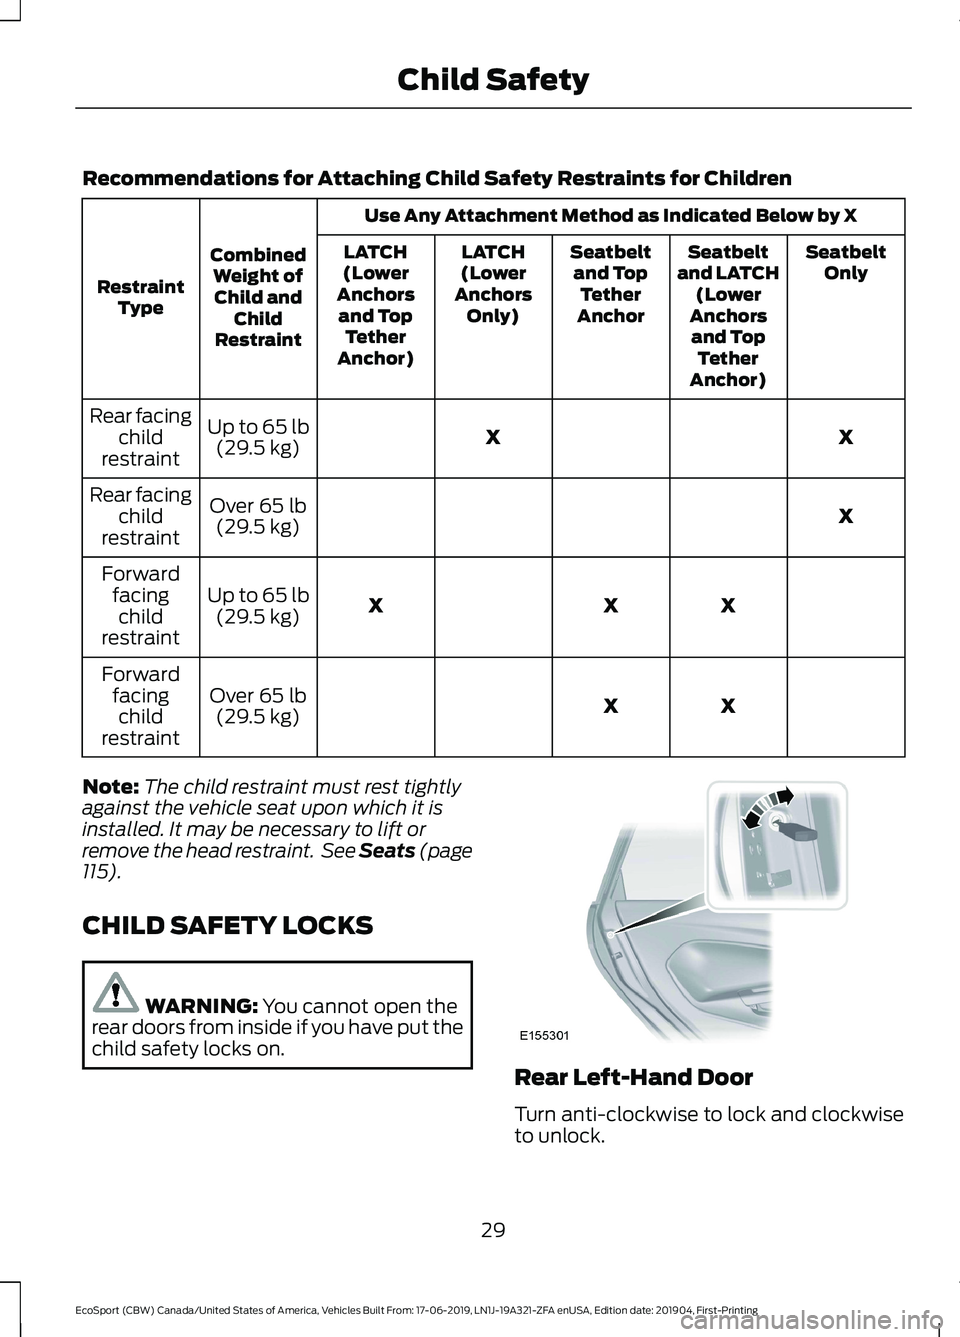
Recommendations for Attaching Child Safety Restraints for Children
Use Any Attachment Method as Indicated Below by X
CombinedWeight ofChild andChildRestraint
RestraintType
SeatbeltOnlySeatbeltand LATCH(LowerAnchorsand TopTetherAnchor)
Seatbeltand TopTetherAnchor
LATCH(LowerAnchorsOnly)
LATCH(LowerAnchorsand TopTetherAnchor)
XXUp to 65 lb(29.5 kg)
Rear facingchildrestraint
XOver 65 lb(29.5 kg)
Rear facingchildrestraint
XXXUp to 65 lb(29.5 kg)
Forwardfacingchildrestraint
XXOver 65 lb(29.5 kg)
Forwardfacingchildrestraint
Note:The child restraint must rest tightlyagainst the vehicle seat upon which it isinstalled. It may be necessary to lift orremove the head restraint. See Seats (page115).
CHILD SAFETY LOCKS
WARNING: You cannot open therear doors from inside if you have put thechild safety locks on.
Rear Left-Hand Door
Turn anti-clockwise to lock and clockwiseto unlock.
29
EcoSport (CBW) Canada/United States of America, Vehicles Built From: 17-06-2019, LN1J-19A321-ZFA enUSA, Edition date: 201904, First-PrintingChild Safety
Page 34 of 448
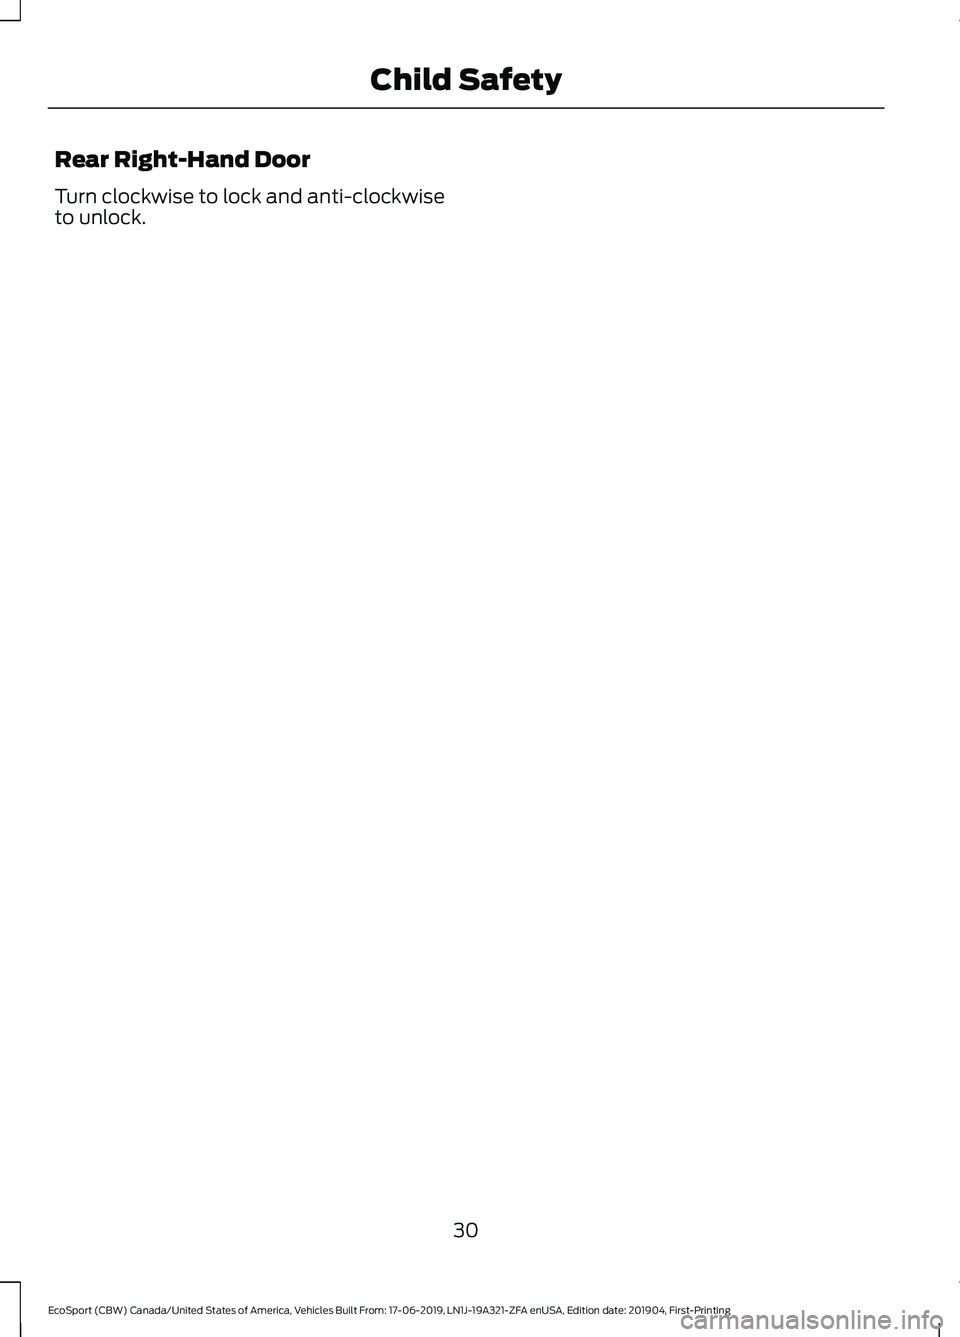
Rear Right-Hand Door
Turn clockwise to lock and anti-clockwiseto unlock.
30
EcoSport (CBW) Canada/United States of America, Vehicles Built From: 17-06-2019, LN1J-19A321-ZFA enUSA, Edition date: 201904, First-PrintingChild Safety
Page 111 of 448
MANUAL CLIMATE CONTROL
- VEHICLES WITH:
ELECTRONIC MANUAL
TEMPERATURE CONTROL
(EMTC)
Switching Climate Control On andOff
Switching Recirculated Air On andOff
Recirculates air to reduceunwanted odors from enteringthe vehicle.
Switching Air Conditioning On andOff
Switching Maximum Defrost Onand Off
Turn the temperature controlclockwise to the full heatposition to maximize defrosting.
Note:When you switch maximum defrostoff, theWindshield Wiper De-icer and heatedrear window remain on.
Switching Maximum Cooling Onand Off
Turn the temperature controlcounterclockwise to the lowestsetting to maximize cooling.
Note:When you switch maximum coolingoff, air conditioning remains on.
Adjusting the Blower Motor Speed
Lights on the control illuminateto indicate the fan speed.
Changing the Direction of Airflow
Directs air through thewindshield air vents.
Directs air through theinstrument panel air vents.
Directs air through the footwellair vents.
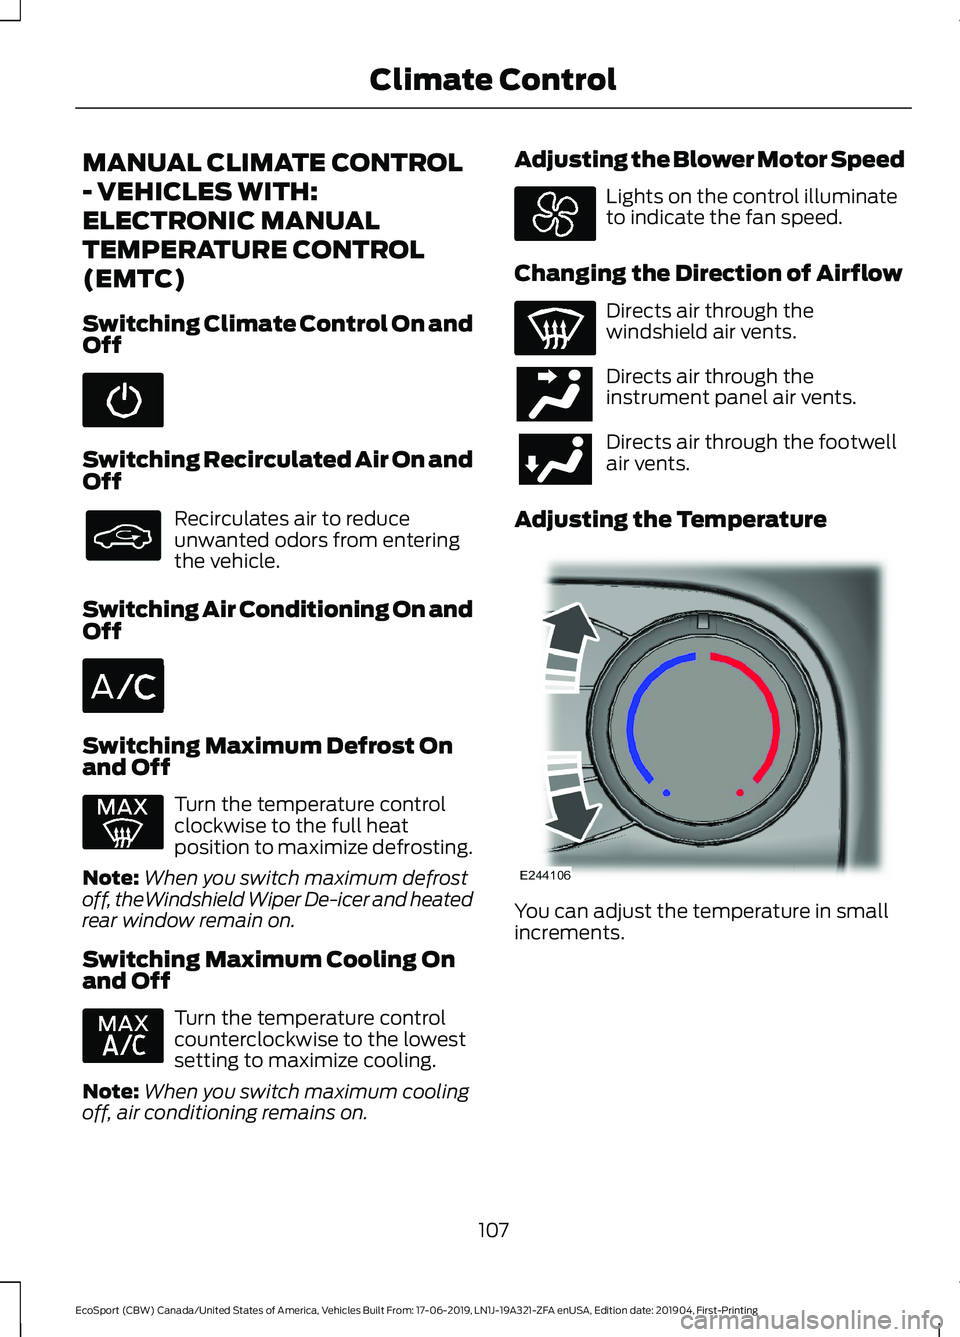
Adjusting the Temperature
You can adjust the temperature in smallincrements.
107
EcoSport (CBW) Canada/United States of America, Vehicles Built From: 17-06-2019, LN1J-19A321-ZFA enUSA, Edition date: 201904, First-PrintingClimate Control
Page 113 of 448
Auto Mode Indicator Status
DescriptionAuto Mode IndicatorStatus
One indicator illumin-ated.•The blower motor speed is reduced.
•Use this setting to minimize the amount of noise fromthe blower motor.
•This setting increases the time taken to cool theinterior.
Two indicators illumin-ated.•The blower motor speed is moderate.
Three indicators illumin-ated.•The blower motor speed is increased.
•Use this setting to reduce the time taken to cool theinterior.
•This setting increases the amout of noise from theblower motor.
Setting the Blower Motor Speed
Note:Lights on the control illuminate toindicate the blower motor speed.
Directing Air to the Windshield AirVents
Directing Air to the InstrumentPanel Air Vents
Directing Air to the Footwell AirVents
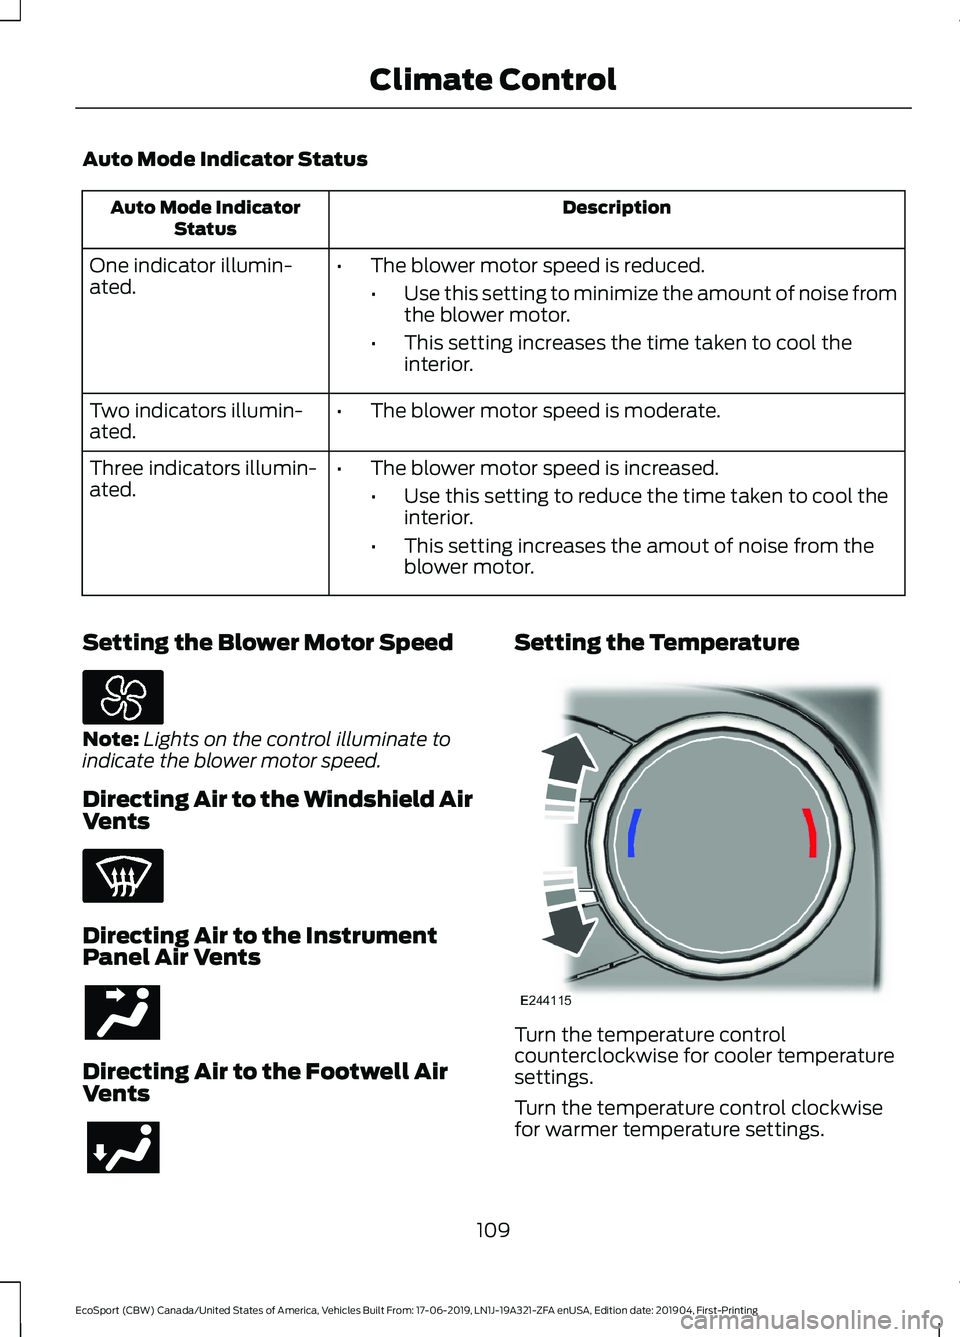
Setting the Temperature
Turn the temperature controlcounterclockwise for cooler temperaturesettings.
Turn the temperature control clockwisefor warmer temperature settings.
109
EcoSport (CBW) Canada/United States of America, Vehicles Built From: 17-06-2019, LN1J-19A321-ZFA enUSA, Edition date: 201904, First-PrintingClimate Control
Page 220 of 448
Note:The oil consumption of new enginesreaches its normal level after approximately3,000 mi (5,000 km).
Adding Engine Oil
WARNING: Do not add engine oilwhen the engine is hot. Failure to followthis instruction could result in personalinjury.
WARNING: Do not remove thefiller cap when the engine is running.
Do not use supplemental engine oiladditives because they are unnecessaryand could lead to engine damage that maynot be covered by the vehicle Warranty.
Only use oils certified for gasoline enginesby the American Petroleum Institute (API).An oil with this trademark symbolconforms to the current engine andemission system protection standards andfuel economy requirements of theInternational Lubricants SpecificationAdvisory Committee (ILSAC).
To top up the engine oil level do thefollowing:
1.Clean the area surrounding the engineoil filler cap before you remove it.
2.Remove the engine oil filler cap. SeeUnder Hood Overview (page 214).Turn it counterclockwise and removeit.
3.Add engine oil that meets ourspecifications. See Capacities andSpecifications (page 289). You mayhave to use a funnel to pour the engineoil into the opening.
4.Recheck the oil level.
5.If the oil level is correct, replace thedipstick and make sure it is fully seated.
6.Replace the engine oil filler cap. Turnit clockwise until you feel a strongresistance.
Note: Do not add oil further than themaximum mark. Oil levels above themaximum mark may cause engine damage.
Note:Make sure you install the oil filler capcorrectly.
Note:Soak up any spillage with anabsorbent cloth immediately.
OIL CHANGE INDICATOR
RESET (IF EQUIPPED)
Only reset the system after changing theengine oil and oil filter.
Resetting the Oil Life MonitoringSystem
1.Switch the ignition on. Do not start theengine.
2.Fully press the accelerator and brakepedals at the same time.
3.Keep the accelerator and brake pedalsfully pressed.
4.After three seconds, a messageappears confirming that the reset is inprogress.
5.After 25 seconds, a message appearsconfirming that the reset is complete.
216
EcoSport (CBW) Canada/United States of America, Vehicles Built From: 17-06-2019, LN1J-19A321-ZFA enUSA, Edition date: 201904, First-PrintingMaintenance
Page 228 of 448
To maintain correct operation of thebattery management system, if you addany electrical devices to your vehicle, donot connect the ground connection directlyto the negative battery terminal. Aconnection at the negative battery terminalcan cause inaccurate measurements ofthe battery condition and potentialincorrect system operation.
Note:Electrical accessories or componentsadded to your vehicle by you or anauthorized dealer, may adversely affectbattery performance, durability and theperformance of other electrical systems onyour vehicle.
If a replacement battery is required, werecommend you use a Ford replacementbattery that matches the electricalrequirements of your vehicle.
If you disconnect or replace the batteryand your vehicle has an automatictransmission, transmission must relearnits adaptive strategy. Because of this, thetransmission may shift firmly when firstdriven. This is normal operation while thetransmission fully updates its operation tooptimum shift feel.
Remove and Reinstall the Battery
To disconnect or remove the battery, dothe following:
1.Apply the parking brake and switch theignition off.
2.Switch all electrical equipment off, forexample lights and radio.
3.Wait a minimum of two minutes beforedisconnecting the battery.
Note:The engine management system hasa power hold function and remains poweredfor a period after you switch the ignition off.This is to allow diagnostic and adaptivetables to be stored. Disconnecting thebattery without waiting can cause damagenot covered by the vehicle Warranty.
4.Disconnect the negative (-) batterycable terminal first.
5.Disconnect the positive (+) batterycable terminal last.
6.Remove the battery securing clamp.
7.Remove the battery.
8.Install in the reverse order.
Note:Before reconnecting the battery,make sure the ignition remains switched off.
Note:If you only disconnect the negativebattery cable terminal, make sure it isisolated or placed away from the batteryterminal to avoid un-intended connectionor arcing.
Note:Make sure the battery cable terminalsare fully tightened.
Note:If you disconnect or replace thebattery, you must reset the clock and thepre-set radio stations once the battery isreconnected.
Battery Disposal
Make sure that you dispose ofold batteries in anenvironmentally friendly way.Seek advice from your local authorityabout recycling old batteries.
CHECKING THE WIPER
BLADES
Run the tip of your fingers over the edge ofthe blade to check for roughness.
224
EcoSport (CBW) Canada/United States of America, Vehicles Built From: 17-06-2019, LN1J-19A321-ZFA enUSA, Edition date: 201904, First-PrintingMaintenance
Page 236 of 448
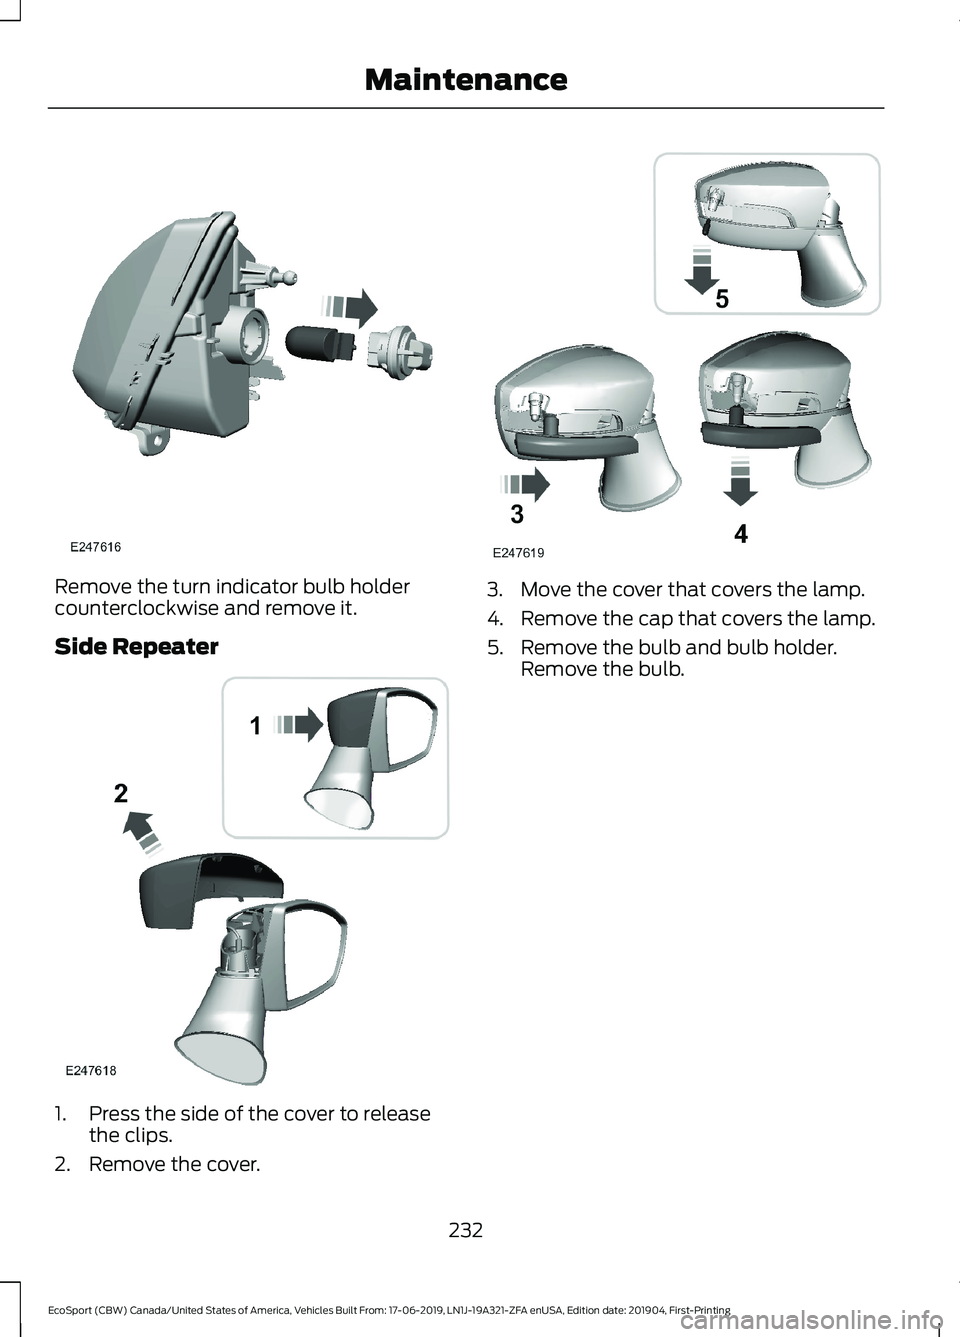
Remove the turn indicator bulb holdercounterclockwise and remove it.
Side Repeater
1.Press the side of the cover to releasethe clips.
2.Remove the cover.
3.Move the cover that covers the lamp.
4.Remove the cap that covers the lamp.
5.Remove the bulb and bulb holder.Remove the bulb.
232
EcoSport (CBW) Canada/United States of America, Vehicles Built From: 17-06-2019, LN1J-19A321-ZFA enUSA, Edition date: 201904, First-PrintingMaintenance
Page 259 of 448
2.Firmly screw the air compressor hoseonto the valve stem by turningclockwise.
3.With the compressor off, the gauge ofthe kit will display the tire inflationpressure.
Note:If you are proceeding from the Firststage: Reinflating the tire with sealingcompound and air section and have injectedsealant in the tire and the pressure is below20 psi (1.4 bar), stop and call roadsideassistance. If tire pressure is above 20 psi(1.4 bar), continue to the next step.
4.If required, turn on the compressor andadjust the tire to the recommendedinflation pressure shown on the tirelabel located on the driver's door ordoor jamb area. The tire pressureshould be checked with thecompressor turned OFF in order to getan accurate pressure reading.
5.Unscrew the compressor hose fromthe valve stem and re-install the valvecap. Leaving the sealant bottleattached to the compressor unit, safelystore in your vehicle the tire sealant andinflator kit, the bottle lid and the orangecap.
What to do after the tire has beensealed
Note:After the sealing compound has beenused, the maximum vehicle speed is 50 mph(80 km/h) and the maximum drivingdistance is 124 mi (200 km). The sealed tireshould be inspected immediately.
You can check the tire pressure any timewithin the 124 mi (200 km) by performingthe procedure from Second stage:Checking tire pressure.
Regularly check the tire pressure until thesealed tire is repaired or replaced by a tirespecialist. Before the tire is removed fromthe trim, you must inform the tire specialistthat the tire contains sealant.
After using the kit to seal your tire, you willneed to replace the sealant canister andhose. Sealant canister and hose servicekits can be obtained at an authorized Forddealer. Empty sealant canisters may bedisposed of at home. However, canistersstill containing liquid sealant should bedisposed of by your local authorized Forddealer or tire dealer, or in accordance withlocal waste disposal regulation.
TIRE CARE
Information About UniformTire Quality Grading
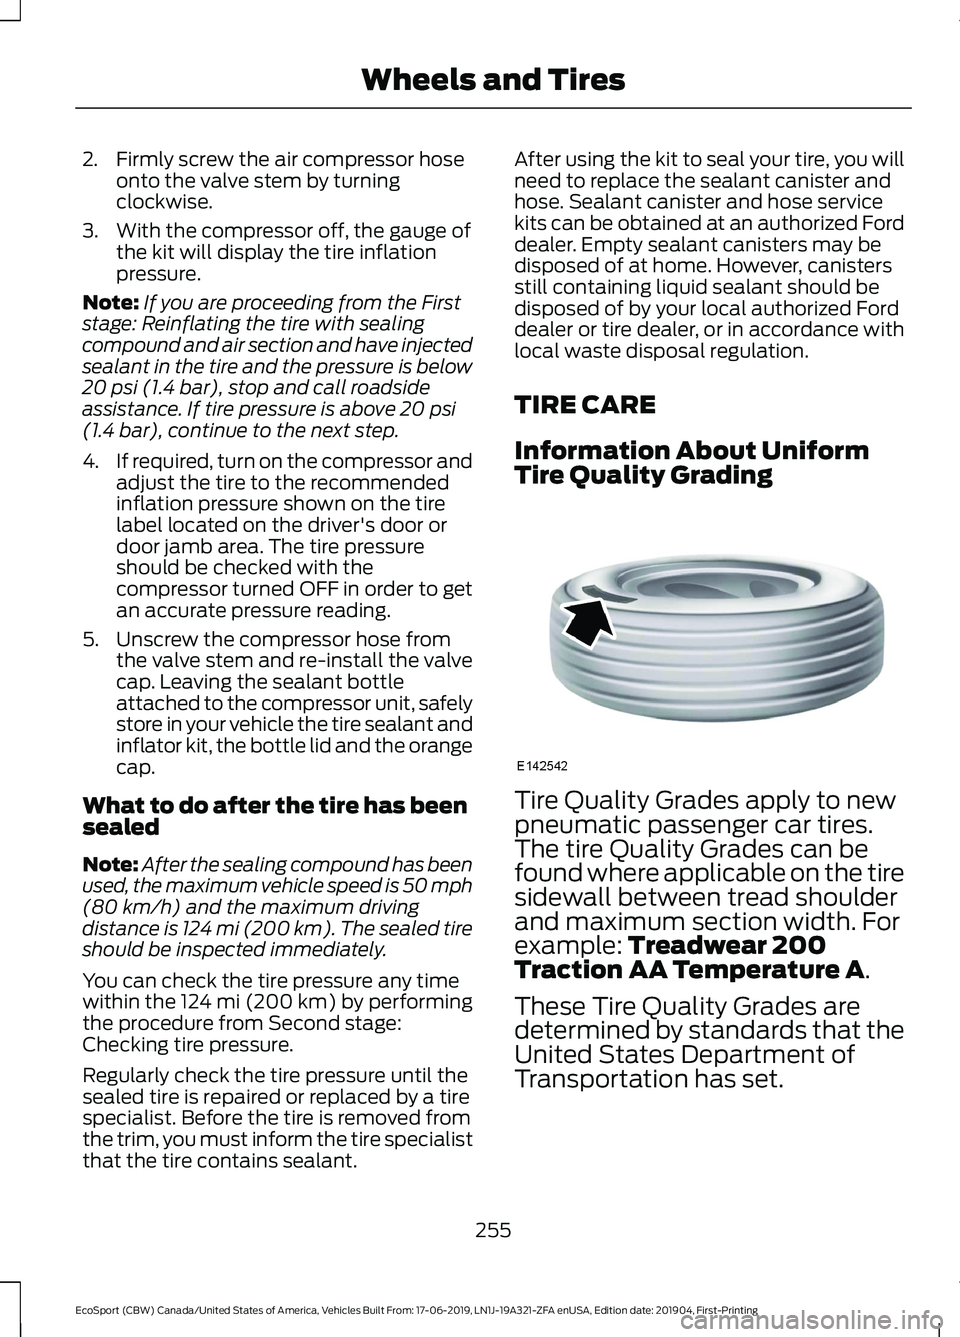
Tire Quality Grades apply to newpneumatic passenger car tires.The tire Quality Grades can befound where applicable on the tiresidewall between tread shoulderand maximum section width. Forexample: Treadwear 200Traction AA Temperature A.
These Tire Quality Grades aredetermined by standards that theUnited States Department ofTransportation has set.
255
EcoSport (CBW) Canada/United States of America, Vehicles Built From: 17-06-2019, LN1J-19A321-ZFA enUSA, Edition date: 201904, First-PrintingWheels and Tires
Page 280 of 448
•To reduce the chances of interferencefrom another vehicle, perform thesystem reset procedure at least 3 ft(1 m) away from another Ford MotorCompany vehicle undergoing thesystem reset procedure at the sametime.
•Do not wait more than two minutesbetween resetting each tire sensor orthe system can time-out and you haveto repeat the entire procedure on allfour wheels.
•A double horn sounds indicating theneed to repeat the procedure.
Performing the System Reset Procedure
Read the entire procedure beforeattempting.
1.Drive the vehicle above 20 mph(32 km/h) for at least two minutes,then park in a safe location where youcan easily get to all four tires and haveaccess to an air pump.
2.Place the ignition in the off position andkeep the key in the ignition.
3.Cycle the ignition to the on positionwith the engine off.
4.Turn the hazard flashers on then offthree times. You must accomplish thiswithin 10 seconds. If you successfullyenter the reset mode, the horn soundsonce, the system indicator flashes anda message shows in the informationdisplay. If this does not occur, pleasetry again starting at step 2. If afterrepeated attempts to enter the resetmode, the horn does not sound, thesystem indicator does not flash and nomessage shows in the informationdisplay, seek service from yourauthorized dealer.
5.Train the tire pressure monitoringsystem sensors in the tires using thefollowing system reset sequencestarting with the left front tire in thefollowing clockwise order: Left front -driver side front tire, Right front -passenger side front tire, Right rear -passenger side rear tire, Left rear -driver side rear tire.
6.Remove the valve cap from the valvestem on the left front tire. Decrease theair pressure until the horn sounds.
Note:The single horn tone confirms thatthe sensor identification code has beenlearned by the module for this position. If adouble horn is heard, the reset procedurewas unsuccessful, and you must repeat it.
7.Remove the valve cap from the valvestem on the right front tire. Decreasethe air pressure until the horn sounds.
8.Remove the valve cap from the valvestem on the right rear tire. Decrease theair pressure until the horn sounds.
9.Remove the valve cap from the valvestem on the left rear tire. Decrease theair pressure until the horn sounds.Training is complete after the hornsounds for the last tire trained, driverside rear tire, the system indicatorstops flashing, and a message showsin the information display.
10.Turn the ignition off. If two short hornbeeps are heard, the reset procedurewas unsuccessful and you mustrepeat it. If after repeating theprocedure and two short beeps areheard when the ignition is turned tooff, seek assistance from yourauthorized dealer.
276
EcoSport (CBW) Canada/United States of America, Vehicles Built From: 17-06-2019, LN1J-19A321-ZFA enUSA, Edition date: 201904, First-PrintingWheels and Tires
Page 301 of 448
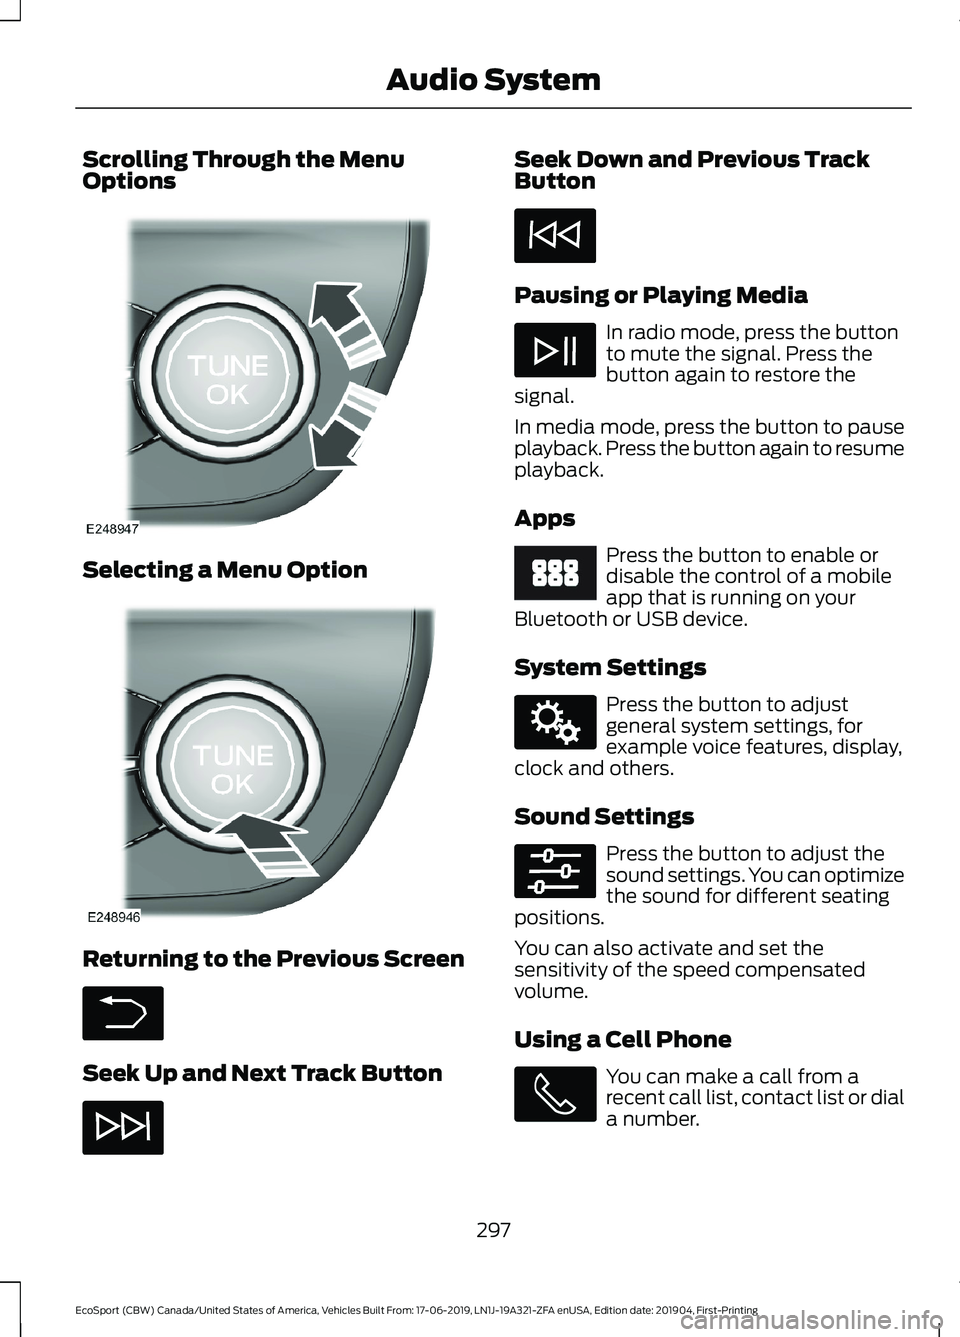
Scrolling Through the MenuOptions
Selecting a Menu Option
Returning to the Previous Screen
Seek Up and Next Track Button
Seek Down and Previous TrackButton
Pausing or Playing Media
In radio mode, press the buttonto mute the signal. Press thebutton again to restore thesignal.
In media mode, press the button to pauseplayback. Press the button again to resumeplayback.
Apps
Press the button to enable ordisable the control of a mobileapp that is running on yourBluetooth or USB device.
System Settings
Press the button to adjustgeneral system settings, forexample voice features, display,clock and others.
Sound Settings
Press the button to adjust thesound settings. You can optimizethe sound for different seatingpositions.
You can also activate and set thesensitivity of the speed compensatedvolume.
Using a Cell Phone
You can make a call from arecent call list, contact list or diala number.
297
EcoSport (CBW) Canada/United States of America, Vehicles Built From: 17-06-2019, LN1J-19A321-ZFA enUSA, Edition date: 201904, First-PrintingAudio System