headrest FORD EDGE 2013 1.G Quick Reference Guide
[x] Cancel search | Manufacturer: FORD, Model Year: 2013, Model line: EDGE, Model: FORD EDGE 2013 1.GPages: 8, PDF Size: 1.24 MB
Page 8 of 8

FUnCT iOn
REARvIEw CAm ERA* This system provides a visual display of the area
behind the vehicle. The display automatically
appears in the touch screen when the vehicle is
in R (Reverse) and uses green, yellow and red
guides to alert you of your proximity to objects.
For non-touch screen vehicles, the image will
appear in the 4.2 inch center stack display.
REvERSE SEnSIng S yS tEmThis system sounds a warning tone if there is an
obstacle near the vehicle’s rear bumper when
the vehicle is in R (Reverse) and is traveling
less than 3 mph (5 km/h). The warning tone will
increase in frequency as the object gets closer.
note: v isibility aids do not replace the need to
watch where the vehicle is moving. Refer to your
Owner’s Manual for safety information, more
detail and limitations.
b lI nd Spot Info RmA tIon
Sy StE m (blIS®) wI th CRoSS
tRAff IC AlERt (C tA)*
bli S uses radar sensors to help you determine
if a vehicle may be in your blind spot zone. The
CTA feature alerts you if a car is coming toward
you when you are backing out of a parking
space. bli S and CTA will display a yellow
indicator light in your exterior mirrors and the
CTA will also sound tones and display messages
to warn you which direction vehicles are
approaching. Refer to the Driving Aids chapter
in your Owner’s Manual for more information.
S ElEC tSh Ift A UtomA tIC™
t RA nSm ISSIon*
Gives you the ability to manually change gears if
you’d like. To use, move the gearshift lever from
D (Drive) to S (Sport). Then, simply press + or –
buttons on the gearshift lever to make shifts. if
equipped with steering wheel paddles, pull the
right paddle (+) to upshift, pull the left paddle
(–) to downshift.
myKEy®*MyKey allows you to program certain driving
restrictions in order to promote good driving
habits. You can program things like; speed
restrictions, limited volume levels and safety belt
reminders. For complete information, refer to the
MyKey chapter in your Owner’s Manual.
SECURICodE ™ KEylESS
E ntR y SyS tE m*
Allows you to lock or unlock the doors using the
touchpad. You will need your five digit factory
code located on your owner’s wallet card in the
glove box. Refer to the Locks chapter in your
Owner’s Manual for more information on how
to use SecuriCode.
* (if equipped)
14
C
OMFORT* (if equipped)
hEATED FRO
nT SEATSTo access heated seats, press the Climate
corner on your touch screen. Press
repeatedly to cycle through the various heat
modes and off. i f your vehicle is not equipped
with a touch screen, press the hard button
.
EA SYFO lD® R EAR
FO lD in G SEATS*
The controls are located near the left side
of the liftgate interior opening. Press the top
control to lower the right seat, or the bottom
control to lower the left seat. To return the
seats to their upright position, rotate the
seatbacks upward until you hear a click and
the seat latches.
note: This feature is operational when the vehicle
is in park and the liftgate has been open for less
than 10 minutes.
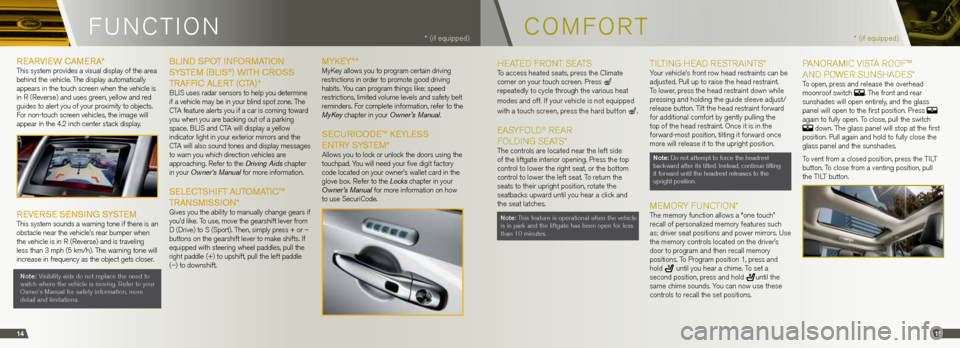
Til Tin G hEAD R ESTRAinTS*Your vehicle’s front row head restraints can be
adjusted. Pull up to raise the head restraint.
To lower, press the head restraint down while
pressing and holding the guide sleeve adjust/
release button. Tilt the head restraint forward
for additional comfort by gently pulling the
top of the head restraint. Once it is in the
forward-most position, tilting it forward once
more will release it to the upright position.
note: Do not attempt to force the headrest
backward after its tilted. instead, continue tilting
it forward until the headrest releases to the
upright position.
MEMORY FU nCT iOn*The memory function allows a “one touch”
recall of personalized memory features such
as; driver seat positions and power mirrors. Use
the memory controls located on the driver’s
door to program and then recall memory
positions. To Program position 1, press and
hold
until you hear a chime. To set a
second position, press and hold until the
same chime sounds. You can now use these
controls to recall the set positions.
P An ORAM iC vi STA R OOF™
An D POWER S UnShADES*
To open, press and release the overhead
moonroof switch . The front and rear
sunshades will open entirely, and the glass
panel will open to the first position. Press
again to fully open. To close, pull the switch
down. The glass panel will stop at the first
position. Pull again and hold to fully close the
glass panel and the sunshades.
To vent from a closed position, press the Til T
button. To close from a venting position, pull
the Til T button.
15