service indicator FORD EDGE 2015 2.G User Guide
[x] Cancel search | Manufacturer: FORD, Model Year: 2015, Model line: EDGE, Model: FORD EDGE 2015 2.GPages: 508, PDF Size: 6.2 MB
Page 173 of 508
USING ALL-WHEEL DRIVE
All-wheel drive uses all four wheels to
power the vehicle. This increases traction,
enabling you to drive over terrain and road
conditions that a conventional two-wheel
drive vehicle cannot. The AWD system is
active all the time and requires no input
from the operator.
Note:
Your AWD vehicle is not intended for
off-road use. The AWD feature gives your
vehicle some limited off-road capabilities
in which driving surfaces are relatively level,
obstruction-free and otherwise similar to
normal on-road driving conditions.
Operating your vehicle under other than
those conditions could subject the vehicle
to excessive stress which might result in
damage which is not covered under your
warranty.
Note: A warning message will be displayed
in the information display when an AWD
system fault is present See Information
Messages (page 109). An AWD system fault
will cause the AWD system to default to
front-wheel drive only mode. When this
warning message is displayed, have your
vehicle serviced at an authorized dealer
Note: A warning message will be displayed
in the information display if the AWD system
has overheated
See Information
Messages (page 109). This condition may
occur if the vehicle was operated in extreme
conditions with excessive wheel slip, such
as deep sand. To resume normal AWD
function as soon as possible, stop the
vehicle in a safe location and stop the
engine for at least 10 minutes. After the
engine has been restarted and the AWD
system has adequately cooled, the warning
message will turn off and normal AWD
function will return. Do not use a spare tire of a different size
other than the tire provided. If the
mini-spare tire is installed, the AWD
system may disable automatically and
enter front-wheel drive only mode to
protect driveline components. This
condition will be indicated by a warning in
the information display See Information
Messages (page 109). If there is a warning
message in the information display from
using the spare tire, this indicator should
turn off after reinstalling the repaired or
replaced normal road tire and cycling the
ignition off and on. It is recommended to
reinstall the repaired or replaced road tire
as soon as possible. Major dissimilar tire
sizes between the front and rear axles
could cause the AWD system to stop
functioning and default to front-wheel
drive or damage the AWD system.
Driving In Special Conditions With
All-Wheel Drive (AWD)
AWD vehicles are equipped for driving on
sand, snow, mud and rough roads and have
operating characteristics that are
somewhat different from conventional
vehicles, both on and off the highway.
Under severe operating conditions, the A/C
may cycle on and off to protect
overheating of the engine.
Basic operating principles in special
conditions
•
Drive slower in strong crosswinds which
can affect the normal steering
characteristics of your vehicle.
• Be extremely careful when driving on
pavement made slippery by loose sand,
water, gravel, snow or ice.
170
Edge/Galaxy/S-MAX (CDQ), enUSA, First Printing All-Wheel Drive
(If Equipped)
Page 183 of 508
PRINCIPLE OF OPERATION
The traction control system helps avoid
drive wheel spin and loss of traction.
If your vehicle begins to slide, the system
applies the brakes to individual wheels
and, when needed, reduces engine power
at the same time. If the wheels spin when
accelerating on slippery or loose surfaces,
the system reduces engine power in order
to increase traction.
USING TRACTION CONTROL
In certain situations for example, stuck in
snow or mud, turning the traction control
off may be beneficial as this allows the
wheels to spin with full engine power.
Depending on the type of system you have
on your vehicle, you can either turn the
system off using the information display
or by pressing the button.
Switching the System Off Using
the Information Display Controls
(If Equipped)
Your vehicle comes with this feature
already enabled. If required, you can switch
this feature off using the information
display controls. See General
Information (page 100).
Switching the System Off Using a
Switch
(If Equipped)
The button is located in the instrument
panel.
Press the button. You will see a message
in conjunction with an illuminated icon in
the display. Press the button again to
return the system to normal mode.
When you switch the traction control
system off, stability control remains fully
active. System Indicator Lights and
Messages WARNING
If a failure has been detected within
the AdvanceTrac system, the
stability control light will illuminate
steadily. Verify that the AdvanceTrac
system was not manually disabled through
the information display. If the stability
control light still illuminates steadily, have
the system serviced by an authorized
dealer immediately. Operating your vehicle
with AdvanceTrac disabled could lead to
an increased risk of loss of vehicle control,
vehicle rollover, personal injury and death. The stability control light
temporarily illuminates on
engine start-up and flashes
when a driving condition activates the
stability system. The stability control off light
temporarily illuminates on
engine start-up and stays on
when you turn the traction control system
off.
When you turn the traction control system
off or on, a message appears in the
information display showing system status.
180
Edge/Galaxy/S-MAX (CDQ), enUSA, First Printing Traction ControlE138639
Page 241 of 508
Canadian roadside coverage and benefits
may differ from the U.S. coverage. If you
require more information, please refer to
the coverage section of your warranty
guide, call us in Canada at
1-800-665-2006, or visit our website at
www.ford.ca.
Sykes Assistance Services Corporation
administers the Roadside Assistance
program. You must receive covered
services in Canada or the continental
United States. Coverage extends to
vehicles that use public, non-seasonal,
annually traveled roadways. Roadside
Assistance coverage does not extend to
vehicles involved in cross-country driving,
logging, autocross and any other form of
off-road use. Well maintained roads and
surfaces help ensure safe travel for the
supplier, and allow their representatives
to perform service as per the standard
operating procedures.
In Remote Locations
If our supplier cannot take your vehicle by
road to the nearest authorized dealership,
transportation by rail or water may be
necessary. The program covers a tow to
the dock or rail terminal and also to the
dealership at the end of the trip.
For rail or water transportation, however,
contact your authorized dealer to confirm
if you are eligible for additional coverage
before you authorize or pay for the service.
Call the Ford Roadside Assistance at
1-800-665-2006 for additional
information.
HAZARD WARNING FLASHERS
Note:
If used when the vehicle is not
running, the battery will lose charge. There
may be insufficient power to restart your
vehicle. The hazard warning button is
located on the instrument panel.
Use it when your vehicle is
creating a safety hazard for other
motorists.
• Press the button to turn on the hazard
warning function, and the front and
rear direction indicators will flash.
• Press the button again to turn them
off.
FUEL SHUTOFF WARNING
Failure to inspect and, if necessary,
repair fuel leaks after a collision may
increase the risk of fire and serious
injury. Ford Motor Company recommends
that the fuel system be inspected by an
authorized dealer after any collision. In the event of a moderate to severe
collision, this vehicle includes a fuel pump
shutoff feature that stops the flow of fuel
to the engine. Not every impact will cause
a shutoff.
Should your vehicle shut off after a
collision, you may restart your vehicle. For
vehicles equipped with a key system:
1. Switch off the ignition.
2. Switch on the ignition.
3. Repeat Steps 1 and 2 to re-enable the
fuel pump.
For vehicles equipped with a push button
start system:
1. Press the START/STOP button to
switch off the ignition.
2. Press the brake pedal and press the START/STOP
button to switch on the
ignition.
238
Edge/Galaxy/S-MAX (CDQ), enUSA, First Printing Roadside Emergencies
Page 268 of 508
Do not add extra inhibitors or additives to
the coolant. These can be harmful and
compromise the corrosion protection of
the engine coolant.
When adding coolant:
1. Unscrew the cap slowly. Pressure
escapes as you unscrew the cap.
2. Add prediluted engine coolant meeting
the Ford specification. See Capacities
and Specifications (page 321).
3. Check the coolant level in the coolant reservoir the next few times you drive
your vehicle.
4. If necessary, add enough prediluted engine coolant to bring the coolant
level to the proper level.
Recycled Engine Coolant
Ford Motor Company does not recommend
the use of recycled engine coolant since a
Ford-approved recycling process is not yet
available.
Used engine coolant should be disposed
of in an appropriate manner. Follow your
community ’s regulations and standards
for recycling and disposing of automotive
fluids.
Severe Climates
If you drive in extremely cold climates:
• It may be necessary to have an
authorized dealer increase the coolant
concentration above 50%.
• A coolant concentration of 60%
provides improved freeze point
protection. Engine coolant
concentrations above 60% decrease
the overheat protection characteristics
of the engine coolant and may cause
engine damage. If you drive in extremely hot climates:
•
It may be necessary to have an
authorized dealer decrease the coolant
concentration to 40%.
• A coolant concentration of 40%
provides improved overheat protection.
Engine coolant concentrations below
40% decrease the freeze and corrosion
protection characteristics of the engine
coolant and may cause engine
damage.
Vehicles driven year-round in non-extreme
climates should use prediluted engine
coolant for optimum cooling system and
engine protection.
What You Should Know About Fail-
Safe Cooling
If the engine coolant supply is depleted,
this feature allows the vehicle to be driven
temporarily before incremental component
damage is incurred. The fail-safe distance
depends on outside temperatures, vehicle
load and terrain.
How Fail-Safe Cooling Works
If the engine begins to overheat, the engine
coolant temperature gauge moves to the
red (hot) area and: A high engine temperature
message appears in the
information display.
The service engine soon
indicator appears in the
information display.
If the engine reaches a preset
over-temperature condition, the engine
automatically switches to alternating
cylinder operation. Each disabled cylinder
acts as an air pump and cools the engine.
265
Edge/Galaxy/S-MAX (CDQ), enUSA, First Printing Maintenance
Page 278 of 508
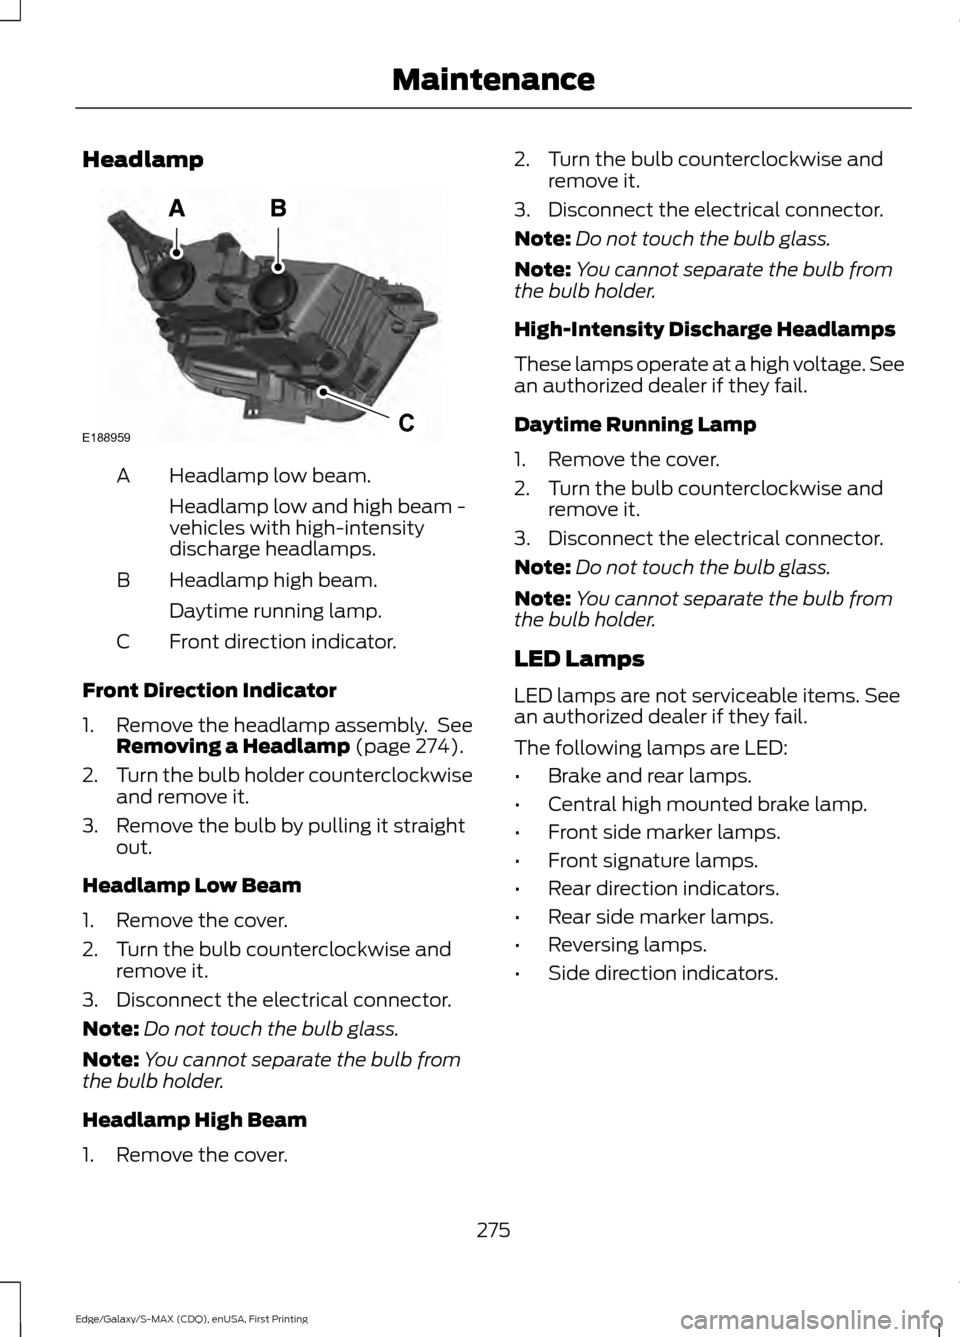
Headlamp
Headlamp low beam.
A
Headlamp low and high beam -
vehicles with high-intensity
discharge headlamps.
Headlamp high beam.
B
Daytime running lamp.
Front direction indicator.
C
Front Direction Indicator
1. Remove the headlamp assembly. See
Removing a Headlamp (page 274).
2. Turn the bulb holder counterclockwise
and remove it.
3. Remove the bulb by pulling it straight out.
Headlamp Low Beam
1. Remove the cover.
2. Turn the bulb counterclockwise and remove it.
3. Disconnect the electrical connector.
Note: Do not touch the bulb glass.
Note: You cannot separate the bulb from
the bulb holder.
Headlamp High Beam
1. Remove the cover. 2. Turn the bulb counterclockwise and
remove it.
3. Disconnect the electrical connector.
Note: Do not touch the bulb glass.
Note: You cannot separate the bulb from
the bulb holder.
High-Intensity Discharge Headlamps
These lamps operate at a high voltage. See
an authorized dealer if they fail.
Daytime Running Lamp
1. Remove the cover.
2. Turn the bulb counterclockwise and remove it.
3. Disconnect the electrical connector.
Note: Do not touch the bulb glass.
Note: You cannot separate the bulb from
the bulb holder.
LED Lamps
LED lamps are not serviceable items. See
an authorized dealer if they fail.
The following lamps are LED:
• Brake and rear lamps.
• Central high mounted brake lamp.
• Front side marker lamps.
• Front signature lamps.
• Rear direction indicators.
• Rear side marker lamps.
• Reversing lamps.
• Side direction indicators.
275
Edge/Galaxy/S-MAX (CDQ), enUSA, First Printing MaintenanceE188959C
Page 279 of 508
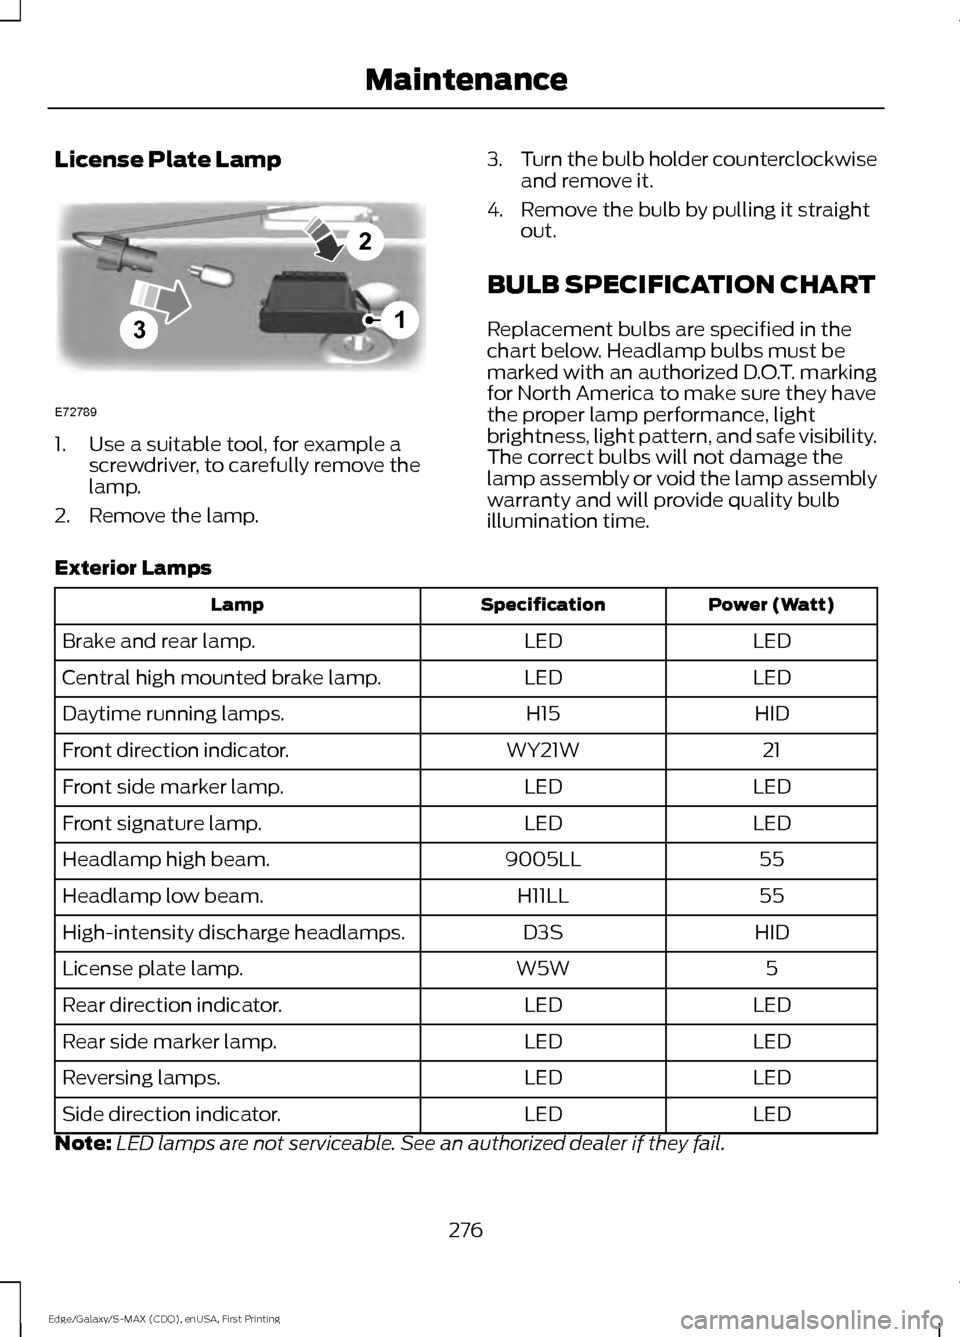
License Plate Lamp
1. Use a suitable tool, for example a
screwdriver, to carefully remove the
lamp.
2. Remove the lamp. 3.
Turn the bulb holder counterclockwise
and remove it.
4. Remove the bulb by pulling it straight out.
BULB SPECIFICATION CHART
Replacement bulbs are specified in the
chart below. Headlamp bulbs must be
marked with an authorized D.O.T. marking
for North America to make sure they have
the proper lamp performance, light
brightness, light pattern, and safe visibility.
The correct bulbs will not damage the
lamp assembly or void the lamp assembly
warranty and will provide quality bulb
illumination time.
Exterior Lamps Power (Watt)
Specification
Lamp
LED
LED
Brake and rear lamp.
LED
LED
Central high mounted brake lamp.
HID
H15
Daytime running lamps.
21
WY21W
Front direction indicator.
LED
LED
Front side marker lamp.
LED
LED
Front signature lamp.
55
9005LL
Headlamp high beam.
55
H11LL
Headlamp low beam.
HID
D3S
High-intensity discharge headlamps.
5
W5W
License plate lamp.
LED
LED
Rear direction indicator.
LED
LED
Rear side marker lamp.
LED
LED
Reversing lamps.
LED
LED
Side direction indicator.
Note: LED lamps are not serviceable. See an authorized dealer if they fail.
276
Edge/Galaxy/S-MAX (CDQ), enUSA, First Printing Maintenance3
2
1
E72789
Page 318 of 508
How Temperature Affects Your Tire
Pressure
The tire pressure monitoring system
monitors tire pressure in each pneumatic
tire. While driving in a normal manner, a
typical passenger tire inflation pressure
may increase about 2 to 4 psi (14 to 28
kPa) from a cold start situation. If the
vehicle is stationary overnight with the
outside temperature significantly lower
than the daytime temperature, the tire
pressure may decrease about 3 psi (21
kPa) for a drop of 30°F (17°C) in ambient
temperature. This lower pressure value
may be detected by the tire pressure
monitoring system as being significantly
lower than the recommended inflation
pressure and activate the system warning
light for low tire pressure. If the low tire
pressure warning light is on, visually check
each tire to verify that no tire is flat. If one
or more tires are flat, repair as necessary.
Check the air pressure in the road tires. If
any tire is under-inflated, carefully drive
the vehicle to the nearest location where
air can be added to the tires. Inflate all the
tires to the recommended inflation
pressure.
CHANGING A ROAD WHEEL
WARNINGS
The use of tire sealant may damage
your tire pressure monitoring system
and should only be used in roadside
emergencies. If you must use a sealant, the
Ford Tire Mobility Kit sealant should be
used. The tire pressure monitoring system
sensor and valve stem on the wheel must
be replaced by an authorized dealer after
use of the sealant. If the tire pressure monitor sensor
becomes damaged, it will no longer
function. See Tire Pressure
Monitoring System (page 312). Note:
The tire pressure monitoring system
indicator light will illuminate when the spare
tire is in use. To restore the full function of
the monitoring system, all road wheels
equipped with tire pressure monitoring
sensors must be mounted on the vehicle.
If you get a flat tire while driving, do not
apply the brake heavily. Instead, gradually
decrease your speed. Hold the steering
wheel firmly and slowly move to a safe
place on the side of the road.
Have a flat serviced by an authorized
dealer in order to prevent damage to the
tire pressure monitoring system sensors.
See
Tire Pressure Monitoring System
(page 312). Replace the spare tire with a
road tire as soon as possible. During
repairing or replacing of the flat tire, have
an authorized dealer inspect the tire
pressure monitoring system sensor for
damage.
Dissimilar Spare Wheel and Tire
Assembly Information WARNING
Failure to follow these guidelines
could result in an increased risk of
loss of vehicle control, injury or death.
If you have a dissimilar spare wheel and
tire, then it is intended for temporary use
only. This means that if you need to use it,
you should replace it as soon as possible
with a road wheel and tire assembly that
is the same size and type as the road tires
and wheels that were originally provided
by Ford. If the dissimilar spare tire or wheel
is damaged, it should be replaced rather
than repaired.
A dissimilar spare wheel and tire assembly
is defined as a spare wheel and tire
assembly that is different in brand, size or
appearance from the road tires and wheels
and can be one of three types:
315
Edge/Galaxy/S-MAX (CDQ), enUSA, First Printing Wheels and Tires
Page 459 of 508
When the oil change message appears in
the information display, it is time for an oil
change. Make sure you perform the oil
change within two weeks or 500 miles
(800 kilometers) of the message
appearing. Make sure you reset the
Intelligent Oil-Life Monitor after each oil
change. See Oil Change Indicator Reset
(page 263).
If your information display resets
prematurely or becomes inoperative, you
should perform the oil change interval at
six months or 5000 miles (8000
kilometers) from your last oil change.
Never exceed one year or 10000 miles
(16000 kilometers) between oil change
intervals.
Your vehicle is very sophisticated and built
with multiple, complex, performance
systems. Every manufacturer develops
these systems using different
specifications and performance features.
That is why it is important to rely upon your
dealership to properly diagnose and repair
your vehicle.
Ford Motor Company has recommended
maintenance intervals for various parts
and component systems based upon
engineering testing. Ford Motor Company
relies upon this testing to determine the
most appropriate mileage for replacement
of oils and fluids to protect your vehicle at
the lowest overall cost to you and
recommends against maintenance
schedules that deviate from the scheduled
maintenance information.
We strongly recommend the use of only
genuine Ford, Motorcraft or
Ford-authorized re-manufactured
replacement parts engineered for your
vehicle. Additives and Chemicals
This owner's manual and the Ford
Workshop Manual list the recommended
additives and chemicals for your vehicle.
We do not recommend using chemicals or
additives not approved by us as part of
your vehicle
’s normal maintenance. Please
consult your warranty information.
Oils, Fluids and Flushing
In many cases, fluid discoloration is a
normal operating characteristic and, by
itself, does not necessarily indicate a
concern or that the fluid needs to be
changed. However, a qualified expert, such
as the factory-trained technicians at your
dealership, should inspect discolored fluids
that also show signs of overheating or
foreign material contamination
immediately.
Make sure to change your vehicle ’s oils and
fluids at the specified intervals or in
conjunction with a repair. Flushing is a
viable way to change fluid for many vehicle
sub-systems during scheduled
maintenance. It is critical that systems are
flushed only with new fluid that is the same
as that required to fill and operate the
system or using a Ford-approved flushing
chemical.
Owner Checks and Services
Make sure you perform the following basic
maintenance checks and inspections every
month or at six-month intervals.
456
Edge/Galaxy/S-MAX (CDQ), enUSA, First Printing Scheduled Maintenance
Page 499 of 508
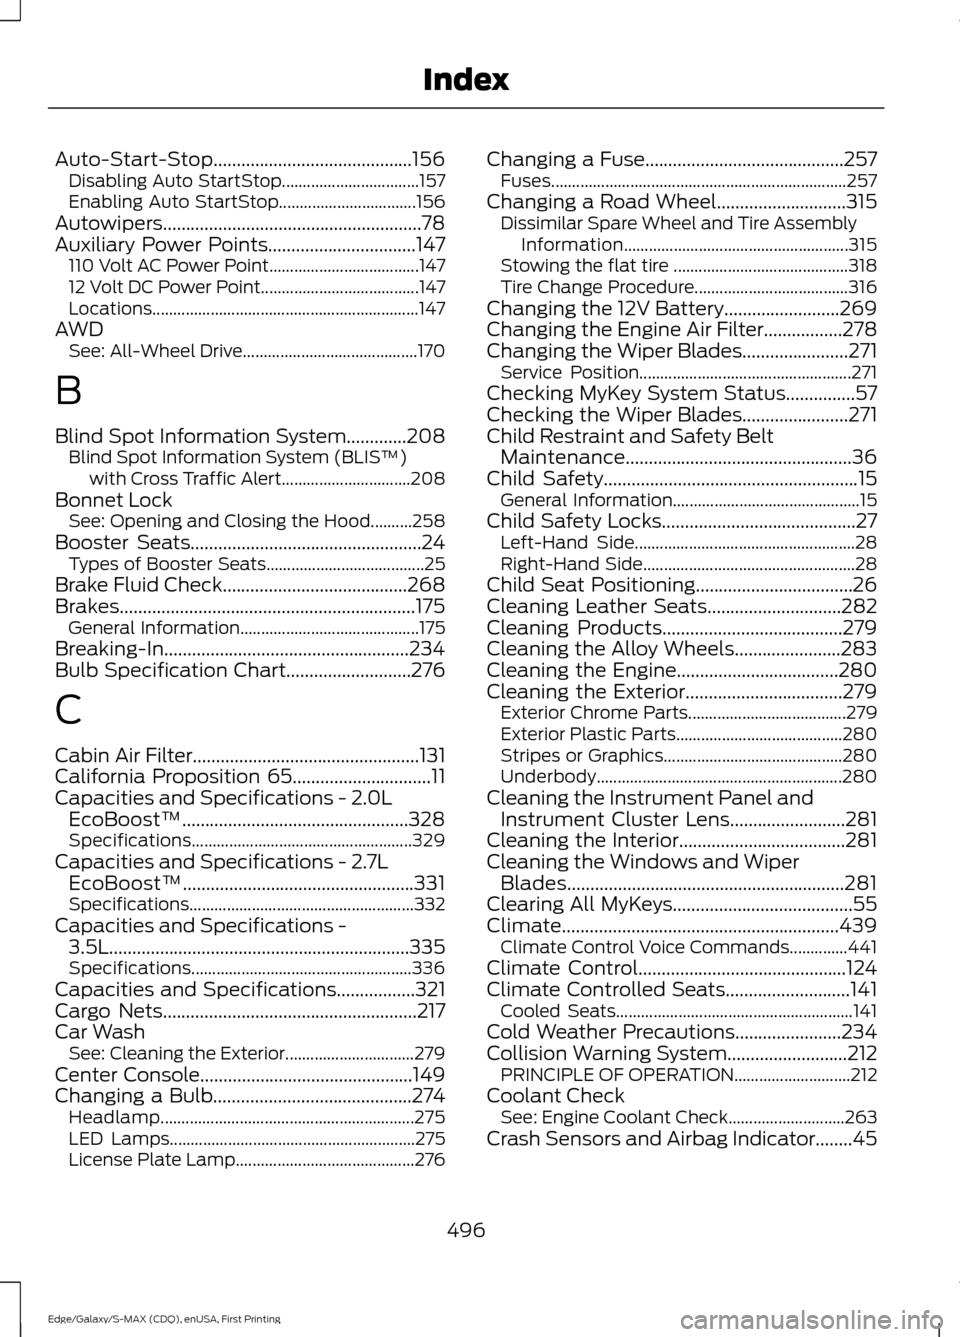
Auto-Start-Stop...........................................156
Disabling Auto StartStop................................. 157
Enabling Auto StartStop................................. 156
Autowipers........................................................78
Auxiliary Power Points................................147 110 Volt AC Power Point.................................... 147
12 Volt DC Power Point...................................... 147
Locations................................................................ 147
AWD See: All-Wheel Drive.......................................... 170
B
Blind Spot Information System.............208 Blind Spot Information System (BLIS ™)
with Cross Traffic Alert............................... 208
Bonnet Lock See: Opening and Closing the Hood..........258
Booster Seats..................................................24 Types of Booster Seats...................................... 25
Brake Fluid Check........................................268
Brakes................................................................175 General Information........................................... 175
Breaking-In.....................................................234
Bulb Specification Chart...........................276
C
Cabin Air Filter.................................................131
California Proposition 65..............................11
Capacities and Specifications - 2.0L EcoBoost™.................................................328
Specifications..................................................... 329
Capacities and Specifications - 2.7L EcoBoost™..................................................331
Specifications...................................................... 332
Capacities and Specifications - 3.5L.................................................................335
Specifications..................................................... 336
Capacities and Specifications.................321
Cargo Nets.......................................................217
Car Wash See: Cleaning the Exterior............................... 279
Center Console
..............................................149
Changing a Bulb...........................................274
Headlamp............................................................. 275
LED Lamps........................................................... 275
License Plate Lamp........................................... 276Changing a Fuse...........................................257
Fuses....................................................................... 257
Changing a Road Wheel............................315 Dissimilar Spare Wheel and Tire Assembly
Information...................................................... 315
Stowing the flat tire .......................................... 318
Tire Change Procedure..................................... 316
Changing the 12V Battery.........................269
Changing the Engine Air Filter.................278
Changing the Wiper Blades.......................271 Service Position................................................... 271
Checking MyKey System Status
...............57
Checking the Wiper Blades.......................271
Child Restraint and Safety Belt Maintenance
.................................................36
Child Safety.......................................................15
General Information............................................. 15
Child Safety Locks..........................................27 Left-Hand Side..................................................... 28
Right-Hand Side................................................... 28
Child Seat Positioning..................................26
Cleaning Leather Seats.............................282
Cleaning Products
.......................................279
Cleaning the Alloy Wheels.......................283
Cleaning the Engine...................................280
Cleaning the Exterior
..................................279
Exterior Chrome Parts...................................... 279
Exterior Plastic Parts........................................ 280
Stripes or Graphics........................................... 280
Underbody........................................................... 280
Cleaning the Instrument Panel and Instrument Cluster Lens.........................281
Cleaning the Interior....................................281
Cleaning the Windows and Wiper Blades............................................................281
Clearing All MyKeys.......................................55
Climate
............................................................439
Climate Control Voice Commands..............441
Climate Control
.............................................124
Climate Controlled Seats...........................141 Cooled Seats......................................................... 141
Cold Weather Precautions.......................234
Collision Warning System..........................212 PRINCIPLE OF OPERATION............................ 212
Coolant Check See: Engine Coolant Check............................ 263
Crash Sensors and Airbag Indicator
........45
496
Edge/Galaxy/S-MAX (CDQ), enUSA, First Printing Index
Page 500 of 508
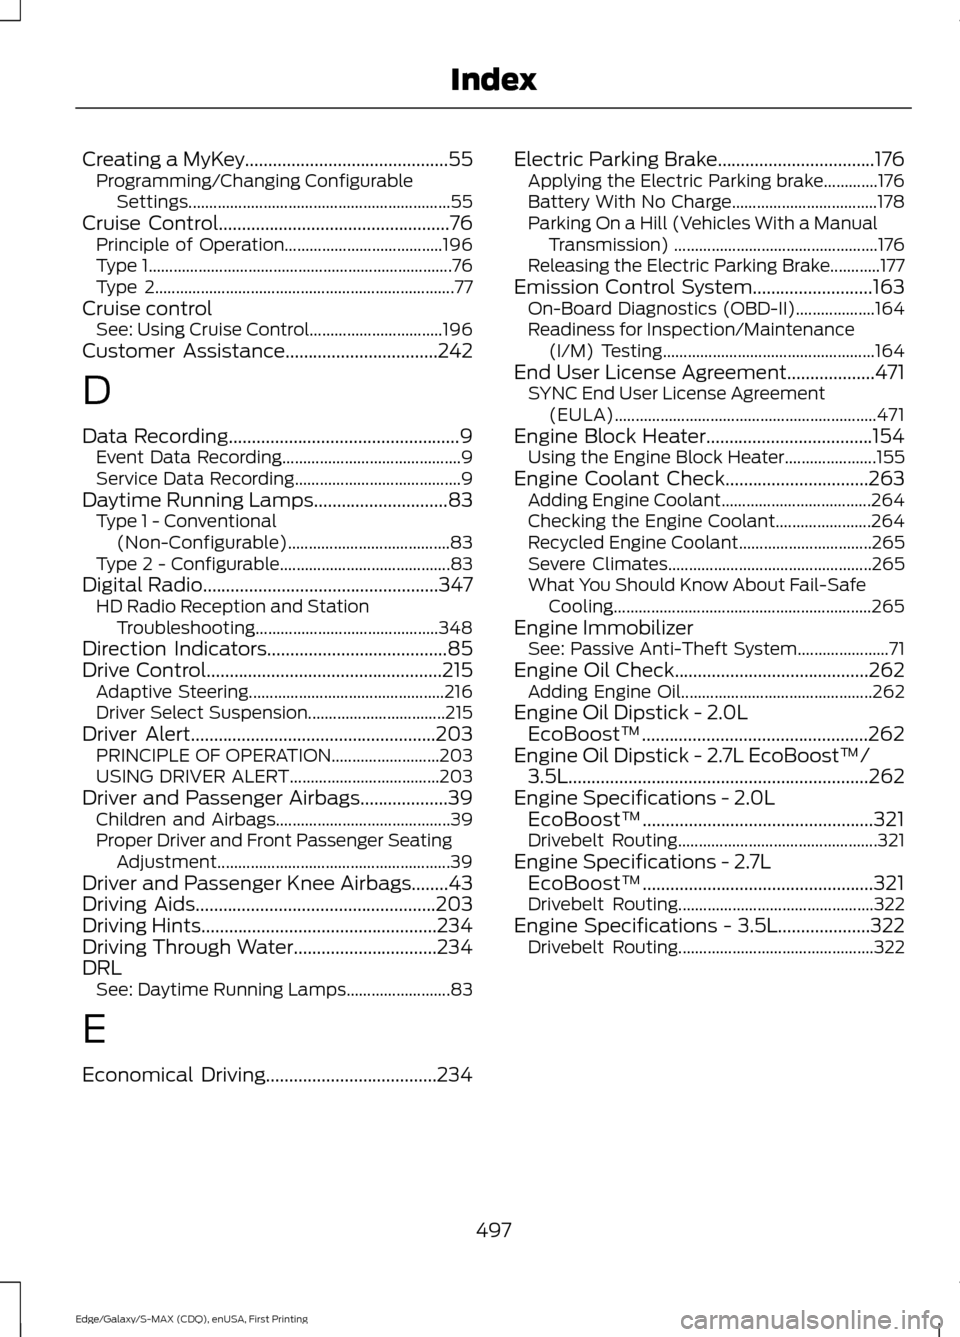
Creating a MyKey............................................55
Programming/Changing Configurable
Settings............................................................... 55
Cruise Control
..................................................76
Principle of Operation...................................... 196
Type 1........................................................................\
. 76
Type 2........................................................................\
77
Cruise control See: Using Cruise Control................................ 196
Customer Assistance.................................242
D
Data Recording
..................................................9
Event Data Recording........................................... 9
Service Data Recording........................................ 9
Daytime Running Lamps
.............................83
Type 1 - Conventional
(Non-Configurable)....................................... 83
Type 2 - Configurable......................................... 83
Digital Radio
...................................................347
HD Radio Reception and Station
Troubleshooting............................................ 348
Direction Indicators
.......................................85
Drive Control...................................................215
Adaptive Steering............................................... 216
Driver Select Suspension................................. 215
Driver Alert.....................................................203 PRINCIPLE OF OPERATION.......................... 203
USING DRIVER ALERT.................................... 203
Driver and Passenger Airbags...................39 Children and Airbags.......................................... 39
Proper Driver and Front Passenger Seating Adjustment........................................................ 39
Driver and Passenger Knee Airbags........43
Driving Aids
....................................................203
Driving Hints...................................................234
Driving Through Water...............................234
DRL See: Daytime Running Lamps......................... 83
E
Economical Driving.....................................234 Electric Parking Brake
..................................176
Applying the Electric Parking brake.............176
Battery With No Charge................................... 178
Parking On a Hill (Vehicles With a Manual Transmission) ................................................. 176
Releasing the Electric Parking Brake............177
Emission Control System..........................163 On-Board Diagnostics (OBD-II)................... 164
Readiness for Inspection/Maintenance (I/M) Testing................................................... 164
End User License Agreement...................471 SYNC End User License Agreement
(EULA)............................................................... 471
Engine Block Heater....................................154 Using the Engine Block Heater...................... 155
Engine Coolant Check
...............................263
Adding Engine Coolant.................................... 264
Checking the Engine Coolant....................... 264
Recycled Engine Coolant................................ 265
Severe Climates................................................. 265
What You Should Know About Fail-Safe Cooling.............................................................. 265
Engine Immobilizer See: Passive Anti-Theft System...................... 71
Engine Oil Check..........................................262 Adding Engine Oil.............................................. 262
Engine Oil Dipstick - 2.0L EcoBoost™.................................................262
Engine Oil Dipstick - 2.7L EcoBoost™/ 3.5L
.................................................................262
Engine Specifications - 2.0L EcoBoost™..................................................321
Drivebelt Routing................................................ 321
Engine Specifications - 2.7L EcoBoost™..................................................321
Drivebelt Routing............................................... 322
Engine Specifications - 3.5L....................322 Drivebelt Routing............................................... 322
497
Edge/Galaxy/S-MAX (CDQ), enUSA, First Printing Index