Controls FORD EDGE 2017 2.G Owner's Manual
[x] Cancel search | Manufacturer: FORD, Model Year: 2017, Model line: EDGE, Model: FORD EDGE 2017 2.GPages: 544, PDF Size: 25.27 MB
Page 113 of 544
Trip 1 & 2
You can access the menu using the
information display control.
Note:
Some options may appear slightly
different or not at all if the items are
optional. Trip 1 & 2
All Values
All Values — shows all trip values (Trip Timer, Odometer and Average Fuel).
• Trip Odometer — Shows your accumulated trip distance.
• Average Fuel — Shows your average fuel economy for a given trip.
• Trip Timer — The timer stops when you turn your vehicle off and restarts when you
restart your vehicle.
Note: You can reset your trip information by pressing and holding the OK button on the left
hand steering wheel controls.
Fuel Economy
Use the left and right arrow buttons to
choose the desired fuel economy display. Fuel Economy
Instant Fuel Economy - Hold OK to Reset
Auto StartStop
• Inst Fuel Economy - shows a visual graph of your instantaneous fuel economy, average
fuel economy and distance to empty.
• Auto StartStop - available Auto Start-Stop messaging will provide details about what
is happening with your system. See
Information Messages (page 113).
Note: You can reset your average fuel economy by pressing and holding the
OK button on
the left hand steering wheel controls.
Driver Assist
In this mode, you can configure different
driver setting choices. Note:
Some items are optional and may
not appear.
110
Edge (CDQ) Canada/United States of America, enUSA, Edition date: 201608, First Printing Information Displays
Page 117 of 544
Press the OK button to acknowledge and
remove some messages from the
information display. The information
display will automatically remove other
messages after a short time.
You need to confirm certain messages
before you can access the menus.
Active Park Action
Message
The system requires service due to a malfunction. Contact an authorized dealer.
Active Park Fault
Adaptive Cruise Control Action
Message
A radar malfunction is preventing the adaptive cruise controlfrom engaging. See Using Adaptive Cruise Control (page
203).
Adaptive Cruise
Malfunction
A condition exists such that the adaptive cruise cannot func-tion properly. See
Using Adaptive Cruise Control (page
203).
Adaptive Cruise Not
Available
You have a blocked sensor due to bad weather, ice, mud or
water in front of the radar sensor. You can typically clean the
sensor to resolve. See Using Adaptive Cruise Control (page 203
).
Adaptive Cruise Not
Available Sensor
Blocked See Manual
The system has disabled the automatic braking.
Normal Cruise Active
Automatic Braking Turned Off
A radar malfunction is preventing the adaptive cruise control from engaging.
Front Sensor Not Aligned
The adaptive cruise has reinstated controls to the driver.
Adaptive Cruise - Driver
Resume Control
Your vehicle speed is too slow to activate the adaptive cruise.
Adaptive Cruise Speed
Too Low to Activate
The adaptive cruise is automatically adjusting the gap
distance and the driver needs to shift the transmission into a lower gear.
Adaptive Cruise Shift
Down
114
Edge (CDQ) Canada/United States of America, enUSA, Edition date: 201608, First Printing Information Displays
Page 131 of 544
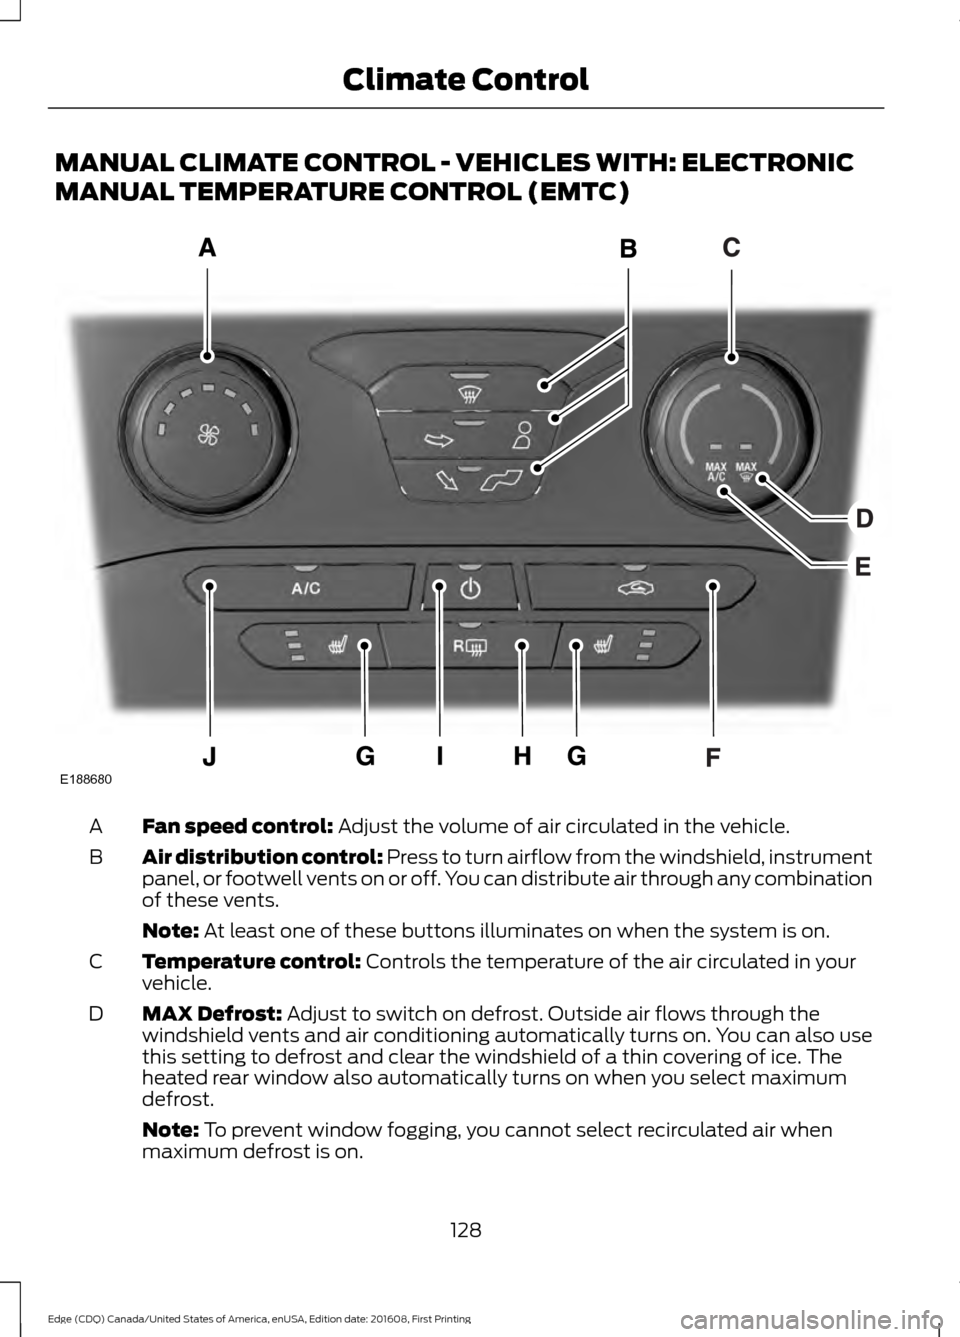
MANUAL CLIMATE CONTROL - VEHICLES WITH: ELECTRONIC
MANUAL TEMPERATURE CONTROL (EMTC)
Fan speed control: Adjust the volume of air circulated in the vehicle.
A
Air distribution control:
Press to turn airflow from the windshield, instrument
panel, or footwell vents on or off. You can distribute air through any combination
of these vents.
B
Note:
At least one of these buttons illuminates on when the system is on.
Temperature control:
Controls the temperature of the air circulated in your
vehicle.
C
MAX Defrost:
Adjust to switch on defrost. Outside air flows through the
windshield vents and air conditioning automatically turns on. You can also use
this setting to defrost and clear the windshield of a thin covering of ice. The
heated rear window also automatically turns on when you select maximum
defrost.
D
Note:
To prevent window fogging, you cannot select recirculated air when
maximum defrost is on.
128
Edge (CDQ) Canada/United States of America, enUSA, Edition date: 201608, First Printing Climate ControlE188680
Page 144 of 544
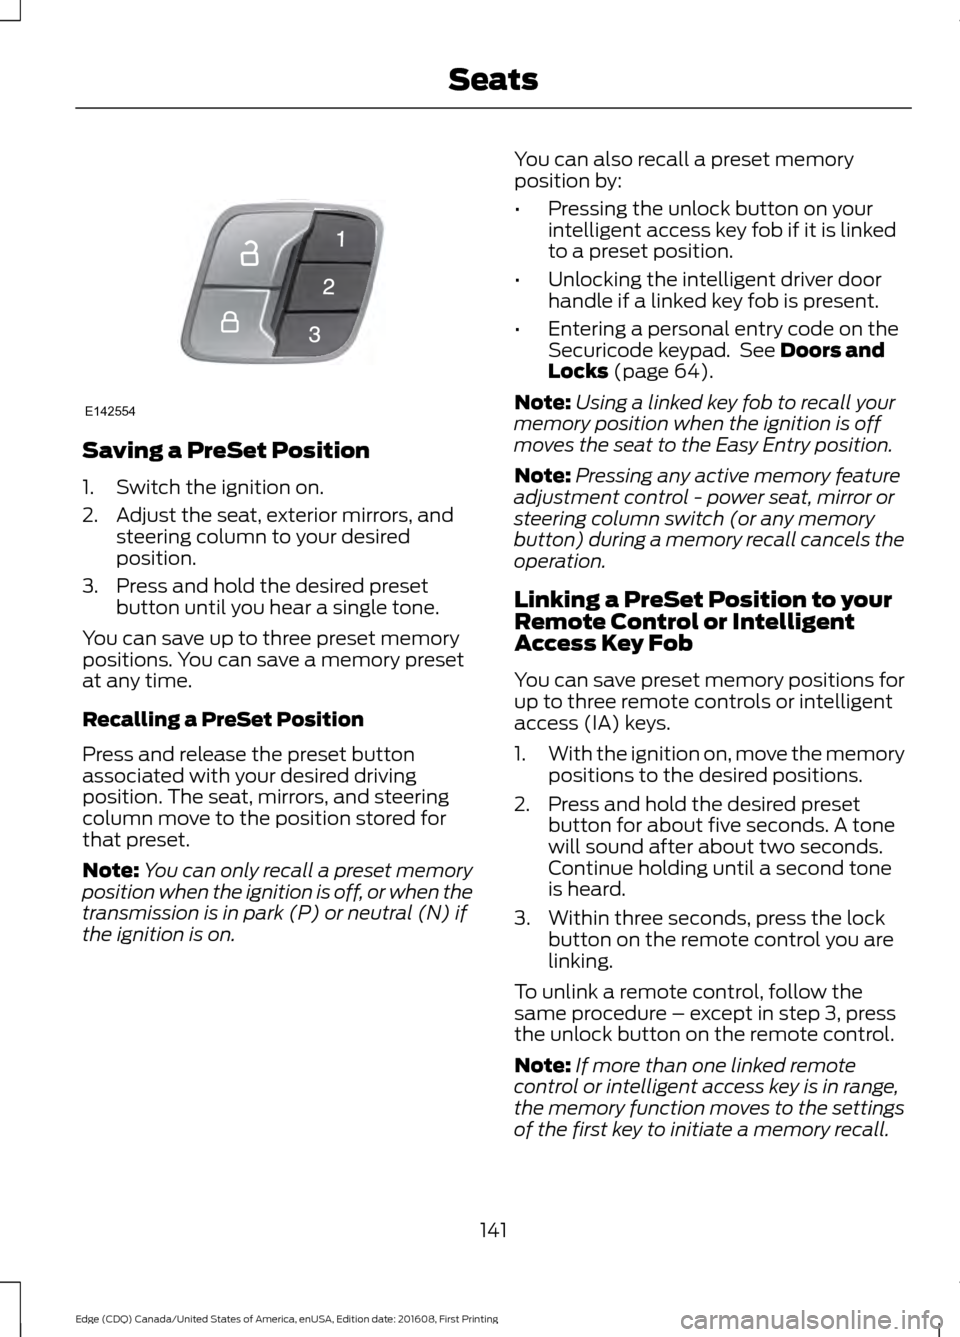
Saving a PreSet Position
1. Switch the ignition on.
2. Adjust the seat, exterior mirrors, and
steering column to your desired
position.
3. Press and hold the desired preset button until you hear a single tone.
You can save up to three preset memory
positions. You can save a memory preset
at any time.
Recalling a PreSet Position
Press and release the preset button
associated with your desired driving
position. The seat, mirrors, and steering
column move to the position stored for
that preset.
Note: You can only recall a preset memory
position when the ignition is off, or when the
transmission is in park (P) or neutral (N) if
the ignition is on. You can also recall a preset memory
position by:
•
Pressing the unlock button on your
intelligent access key fob if it is linked
to a preset position.
• Unlocking the intelligent driver door
handle if a linked key fob is present.
• Entering a personal entry code on the
Securicode keypad. See Doors and
Locks (page 64).
Note: Using a linked key fob to recall your
memory position when the ignition is off
moves the seat to the Easy Entry position.
Note: Pressing any active memory feature
adjustment control - power seat, mirror or
steering column switch (or any memory
button) during a memory recall cancels the
operation.
Linking a PreSet Position to your
Remote Control or Intelligent
Access Key Fob
You can save preset memory positions for
up to three remote controls or intelligent
access (IA) keys.
1. With the ignition on, move the memory
positions to the desired positions.
2. Press and hold the desired preset button for about five seconds. A tone
will sound after about two seconds.
Continue holding until a second tone
is heard.
3. Within three seconds, press the lock button on the remote control you are
linking.
To unlink a remote control, follow the
same procedure – except in step 3, press
the unlock button on the remote control.
Note: If more than one linked remote
control or intelligent access key is in range,
the memory function moves to the settings
of the first key to initiate a memory recall.
141
Edge (CDQ) Canada/United States of America, enUSA, Edition date: 201608, First Printing SeatsE142554
Page 145 of 544
Easy Entry and Exit Feature
If you enable the easy entry and exit
feature, it automatically moves the driver
seat position rearward up to 2 in (5 cm)
when you switch the ignition off.
The driver seat will return to the previous
position when you switch the ignition on.
You can enable or disable this feature in
the information display. See Information
Displays
(page 104).
REAR SEATS
Adjusting the Rear Seats WARNING
To prevent possible damage to the
seat or safety belts, make sure that
the safety belts are not buckled
when folding the seatback. Folding the Seatback
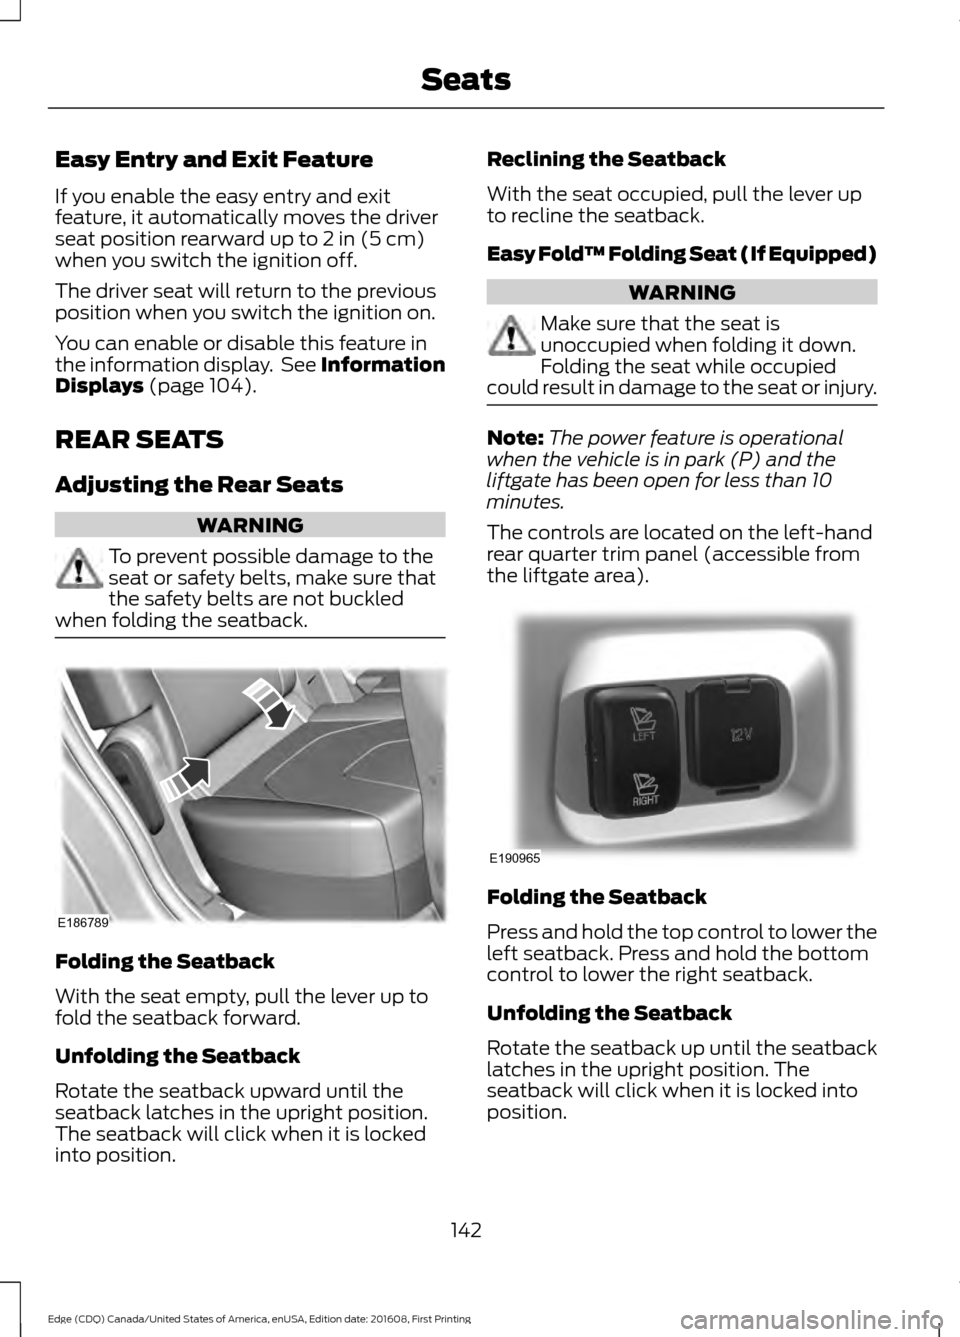
With the seat empty, pull the lever up to
fold the seatback forward.
Unfolding the Seatback
Rotate the seatback upward until the
seatback latches in the upright position.
The seatback will click when it is locked
into position. Reclining the Seatback
With the seat occupied, pull the lever up
to recline the seatback.
Easy Fold™ Folding Seat (If Equipped)
WARNING
Make sure that the seat is
unoccupied when folding it down.
Folding the seat while occupied
could result in damage to the seat or injury. Note:
The power feature is operational
when the vehicle is in park (P) and the
liftgate has been open for less than 10
minutes.
The controls are located on the left-hand
rear quarter trim panel (accessible from
the liftgate area). Folding the Seatback
Press and hold the top control to lower the
left seatback. Press and hold the bottom
control to lower the right seatback.
Unfolding the Seatback
Rotate the seatback up until the seatback
latches in the upright position. The
seatback will click when it is locked into
position.
142
Edge (CDQ) Canada/United States of America, enUSA, Edition date: 201608, First Printing SeatsE186789 E190965
Page 146 of 544
HEATED SEATS (If Equipped)
Front Seats WARNING
People who are unable to feel pain
to their skin because of advanced
age, chronic illness, diabetes, spinal
cord injury, medication, alcohol use,
exhaustion or other physical conditions,
must use caution when using the heated
seat. The heated seat may cause burns
even at low temperatures, especially if
used for long periods of time. Do not place
anything on the seat that may block the
heat, such as a blanket or cushion. This can
cause the heated seat to overheat. Do not
puncture the seat with pins, needles or
other pointed objects. This damages the
heating element and can cause the heated
seat to overheat. An overheated seat may
cause serious personal injury. Do not do the following:
•
Place heavy objects on the seat.
• Operate the heated seat if water or any
other liquid spills on the seat. Allow the
seat to dry thoroughly.
Note: The heated seats will only function
when the engine is running. Press the heated seat symbol to cycle
through the various heat settings and off.
More indicator lights indicate warmer
settings. Note:
After 90 minutes of operation, the
heated seats switch off. Press the heated
seat symbol to switch the heated seats on.
Rear Seats WARNING
People who are unable to feel pain
to their skin because of advanced
age, chronic illness, diabetes, spinal
cord injury, medication, alcohol use,
exhaustion or other physical conditions,
must use caution when using the heated
seat. The heated seat may cause burns
even at low temperatures, especially if
used for long periods of time. Do not place
anything on the seat that may block the
heat, such as a blanket or cushion. This can
cause the heated seat to overheat. Do not
puncture the seat with pins, needles or
other pointed objects. This damages the
heating element and can cause the heated
seat to overheat. An overheated seat may
cause serious personal injury. Do not do the following:
•
Place heavy objects on the seat.
• Operate the seat heater if water or any
other liquid is spilled on the seat. Allow
the seat to dry thoroughly.
• Operate the heated seats unless the
engine is running. Doing so can cause
the battery to lose charge.
The rear seat heat controls are on the rear
of the center console. 143
Edge (CDQ) Canada/United States of America, enUSA, Edition date: 201608, First Printing SeatsE146322 E146322
Page 188 of 544
PRINCIPLE OF OPERATION
The traction control system helps avoid
drive wheel spin and loss of traction.
If your vehicle begins to slide, the system
applies the brakes to individual wheels
and, when needed, reduces engine power
at the same time. If the wheels spin when
accelerating on slippery or loose surfaces,
the system reduces engine power in order
to increase traction.
USING TRACTION CONTROL
WARNING
The stability and traction control
light illuminates steadily if the
system detects a failure. Make sure
you did not manually disable the traction
control system using the information
display controls or the switch. If the
stability control and traction control light
is still illuminating steadily, have the
system serviced by an authorized dealer
immediately. Operating your vehicle with
the traction control disabled could lead to
an increased risk of loss of vehicle control,
vehicle rollover, personal injury and death. The system automatically turns on each
time you switch the ignition on.
If your vehicle is stuck in mud or snow,
switching traction control off may be
beneficial as this allows the wheels to spin.
Note:
When you switch traction control off,
stability control remains fully active.
Switching the System Off
When you switch the system off or on, a
message appears in the information
display showing system status.
You can switch the system off by either
using the information display controls or
the switch. Using the Information Display
Controls
You can switch this feature off or on in the
information display. See General
Information (page 104).
Using a Switch
(If Equipped)
Use the traction control switch on the
instrument panel to switch the system off
or on.
System Indicator Lights and
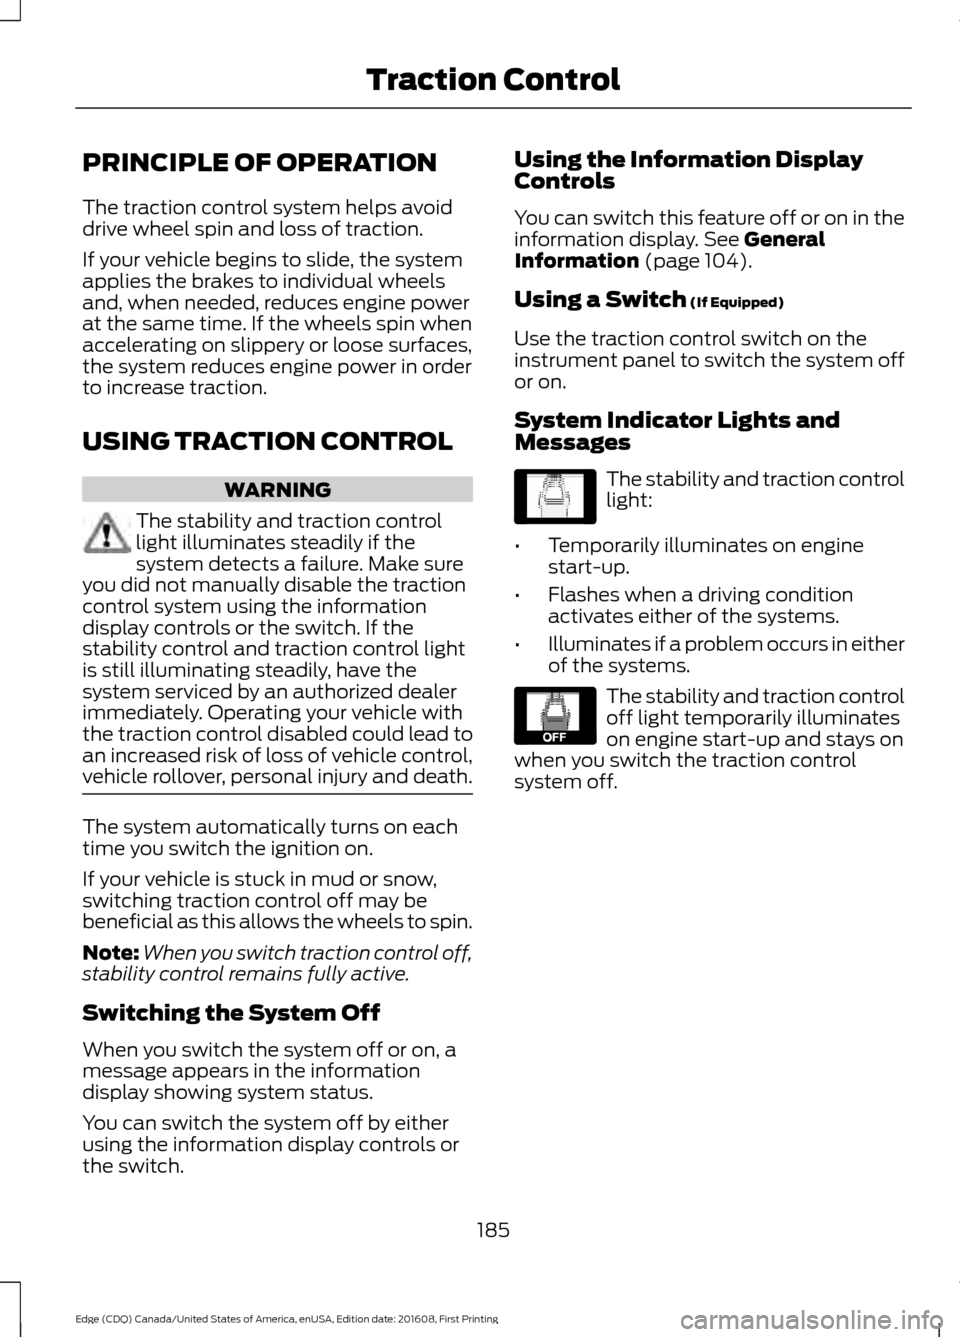
Messages The stability and traction control
light:
• Temporarily illuminates on engine
start-up.
• Flashes when a driving condition
activates either of the systems.
• Illuminates if a problem occurs in either
of the systems. The stability and traction control
off light temporarily illuminates
on engine start-up and stays on
when you switch the traction control
system off.
185
Edge (CDQ) Canada/United States of America, enUSA, Edition date: 201608, First Printing Traction ControlE138639 E130458
Page 205 of 544
PRINCIPLE OF OPERATION
Cruise control lets you maintain a set
speed without keeping your foot on the
accelerator pedal. You can use cruise
control when your vehicle speed is greater
than 20 mph (30 km/h).
USING CRUISE CONTROL WARNINGS
Do not use cruise control on winding
roads, in heavy traffic or when the
road surface is slippery. This could
result in loss of vehicle control, serious
injury or death. When you are going downhill, your
vehicle speed may increase above
the set speed. The system will not
apply the brakes. Failure to follow this
warning could result in serious personal
injury or death. Note:
Cruise control will disengage if the
vehicle speed decreases more than 10 mph
(16 km/h) below the set speed while driving
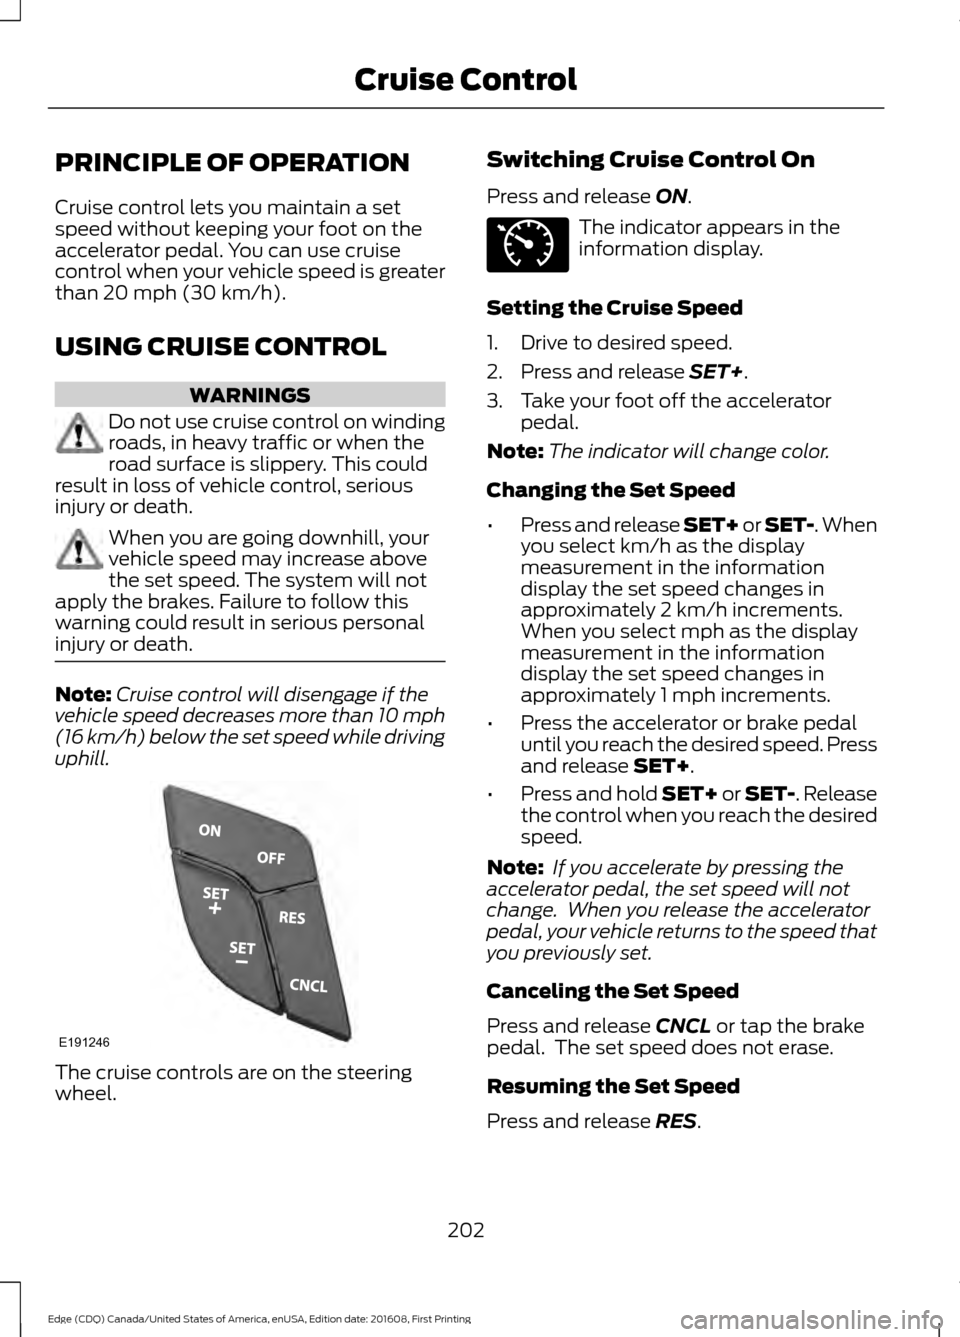
uphill. The cruise controls are on the steering
wheel. Switching Cruise Control On
Press and release
ON. The indicator appears in the
information display.
Setting the Cruise Speed
1. Drive to desired speed.
2. Press and release
SET+.
3. Take your foot off the accelerator pedal.
Note: The indicator will change color.
Changing the Set Speed
• Press and release SET+ or SET-. When
you select km/h as the display
measurement in the information
display the set speed changes in
approximately 2 km/h increments.
When you select mph as the display
measurement in the information
display the set speed changes in
approximately 1 mph increments.
• Press the accelerator or brake pedal
until you reach the desired speed. Press
and release
SET+.
• Press and hold SET+ or SET-. Release
the control when you reach the desired
speed.
Note: If you accelerate by pressing the
accelerator pedal, the set speed will not
change. When you release the accelerator
pedal, your vehicle returns to the speed that
you previously set.
Canceling the Set Speed
Press and release
CNCL or tap the brake
pedal. The set speed does not erase.
Resuming the Set Speed
Press and release
RES.
202
Edge (CDQ) Canada/United States of America, enUSA, Edition date: 201608, First Printing Cruise ControlE191246 E71340
Page 206 of 544
Switching Cruise Control Off
Press and release OFF when the system is
in stand by mode or switch the ignition off.
Note: You erase the set speed when you
switch the system off.
USING ADAPTIVE CRUISE
CONTROL
(If Equipped) WARNINGS
Always pay close attention to
changing road conditions when using
adaptive cruise control. The system
does not replace attentive driving. Failing
to pay attention to the road may result in
a crash, serious injury or death. Adaptive cruise control is not a crash
warning or avoidance system.
Adaptive cruise control may not
detect stationary or slow moving
vehicles below
6 mph (10 km/h).
Do not use adaptive cruise control
when towing a trailer that has trailer
brakes. The auto-brake component
of the adaptive cruise control system does
not operate the trailer brakes. Using
adaptive cruise control when towing a
trailer that has trailer brakes may result in
the loss of vehicle control, which could
result in serious injury. Do not use tire sizes other than those
recommended because this can
affect the normal operation of the
system. Failure to do so may result in a loss
of vehicle control, which could result in
serious injury. Adaptive cruise control does not
detect pedestrians or objects in the
road.
Adaptive cruise control does not
detect oncoming vehicles in the
same lane. WARNINGS
Do not use the system in poor
visibility, for example fog, heavy rain,
spray or snow.
Do not use adaptive cruise control
on winding roads, in heavy traffic or
when the road surface is slippery.
This could result in loss of vehicle control,
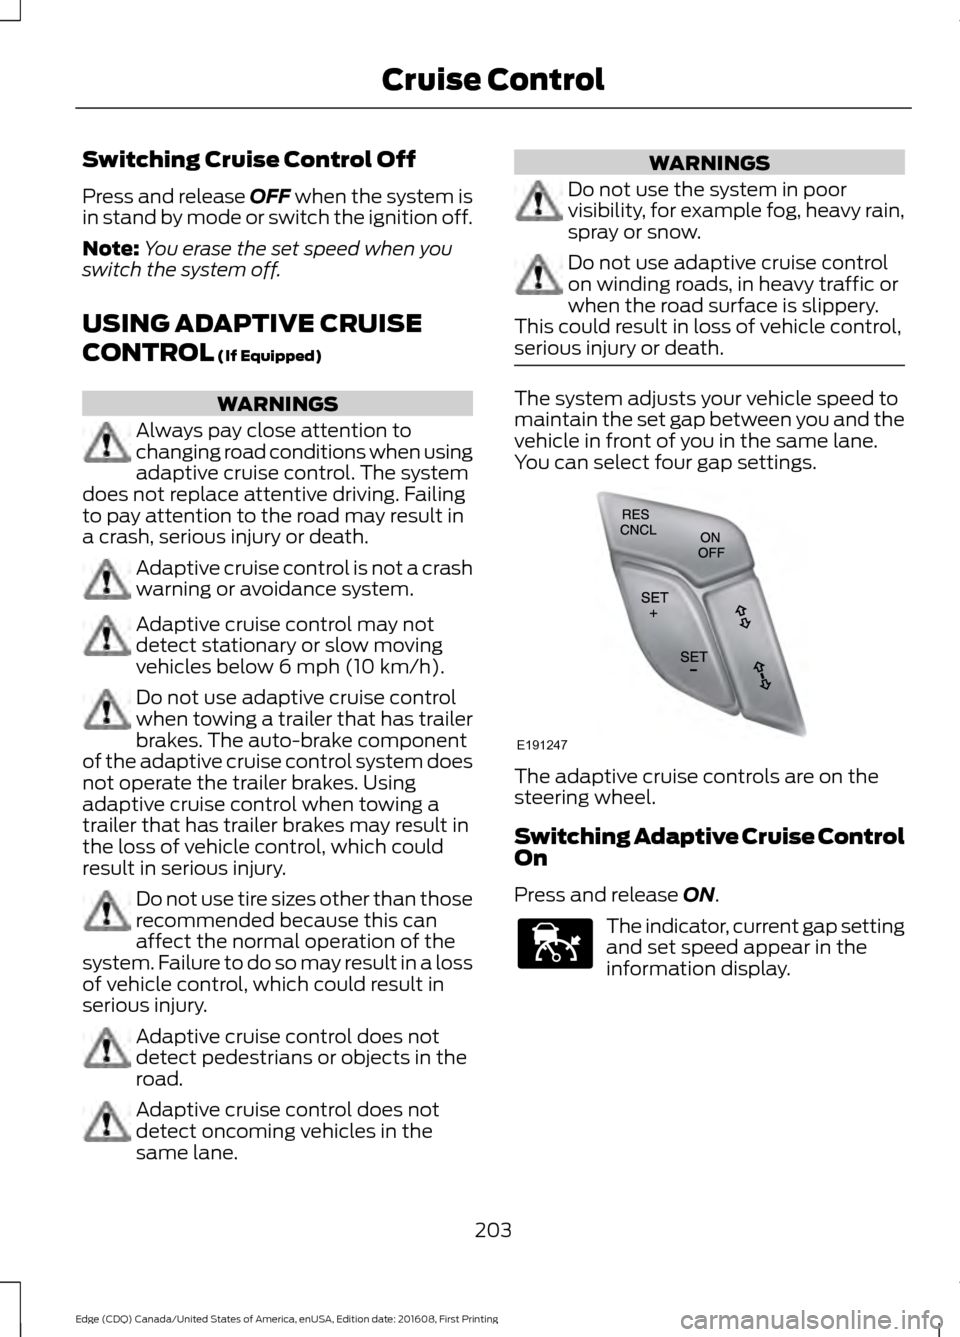
serious injury or death. The system adjusts your vehicle speed to
maintain the set gap between you and the
vehicle in front of you in the same lane.
You can select four gap settings.
The adaptive cruise controls are on the
steering wheel.
Switching Adaptive Cruise Control
On
Press and release
ON.
The indicator, current gap setting
and set speed appear in the
information display.
203
Edge (CDQ) Canada/United States of America, enUSA, Edition date: 201608, First Printing Cruise ControlE191247 E144529
Page 213 of 544
System Display
When active the system will run
automatically in the background and only
issue a warning if required. You can view
the status at any time using the
information display. See General
Information (page 104).
The alertness level is shown by six steps
in a colored bar. The current assessment of your alertness
is within a typical range.
The current assessment of your alertness
indicates that you should rest as soon as
safely possible.
The status bar will travel from left to right
as the calculated alertness level
decreases. As the rest icon is approached
the color turns from green to yellow to red.
The yellow position indicates the first
warning is active and the red position
indicates the second warning is active.
Note:
If you have recently received a
warning; you should consider resting, even
if the current assessment is within the
typical range. Note:
If the camera sensor cannot track the
road lane markings or if your vehicle speed
drops below approximately
40 mph
(64 km/h), the alertness level will change
to grey for a short time and the information
display will inform you that the system is
unavailable.
Resetting the System
You can reset the system by either:
• Switching the ignition off and on.
• Stopping the vehicle and then opening
and closing the driver ’s door.
LANE KEEPING SYSTEM
(If
Equipped) WARNINGS
The system is designed to aid the
driver. It is not intended to replace
your attention and judgment. You are
still responsible to drive with due care and
attention. Always drive with due care and
attention when using and operating
the controls and features on your
vehicle. At all times, you are responsible for
controlling your vehicle, supervising
the system and intervening, if
required. Failure to take care may result in
the loss of control of your vehicle, serious
personal injury or death. In cold and severe weather
conditions the system may not
function. Rain, snow and spray can
all limit sensor performance. The system will not operate if the
sensor cannot track the road lane
markings.
210
Edge (CDQ) Canada/United States of America, enUSA, Edition date: 201608, First Printing Driving AidsE131358 E131359